UNIVERSAL CONTROLLER UR 820 LCD - Universal controller VIVANCO - Free user manual and instructions
Find the device manual for free UNIVERSAL CONTROLLER UR 820 LCD VIVANCO in PDF.

User questions about UNIVERSAL CONTROLLER UR 820 LCD VIVANCO
0 question about this device. Answer the ones you know or ask your own.
Ask a new question about this device
Download the instructions for your Universal controller in PDF format for free! Find your manual UNIVERSAL CONTROLLER UR 820 LCD - VIVANCO and take your electronic device back in hand. On this page are published all the documents necessary for the use of your device. UNIVERSAL CONTROLLER UR 820 LCD by VIVANCO.
USER MANUAL UNIVERSAL CONTROLLER UR 820 LCD VIVANCO

Fig. 4: Placing Remotes

Fig. 5: Delete Learnt/Programmed Keys

Fig. 6: Delete Learnt/Programmed Key Sets For Single Devices

Fig. 7: Delete All Learnt/Programmed Keys

Fig. 8: Clock Setting

Fig. 9: Set Volume Control Priority

Fig. 10: Lock Or Unlock Of Device Codes

Fig. 11: Program Macros

Fig. 12: Delete Macros

Fig. 13: Control Any Device By AUX
(GB) Instructions
VIVANCO UR 820 LCD remote control for almost all TV, audio, video and other infrared-controllable appliances
Inserting the batteries
Open the battery flap on the back of the remote control, press the flap lightly downwards, then insert 2 alkaline AAA batteries. Check that the polarity markings on the batteries and in the
battery compartment are correctly lined up (+=+) , then close the flap carefully. - Always use undamaged batteries.
Adapting to appliances
In order to control your appliances you must adapt or set the remote control to them. There are three ways of doing so: direct control code entry, code search or learn.
UR 820 LCD UNIVERSAL CONTROLLER
Direct control code entry
See also Fig. 1.
Example: setting the remote control for a Philips TV set:
- Switch on your device, e.g. the TV, set to any station.
- To prepare code entry, press the SET button and the required device button, e.g. TV. A brand and a code number appear, see diagram. - You cannot enter a new code if you have activated the code entry lock.
- Select the brand of your device, in this example Philips, with or . The first available code in the device list is displayed.
- Press a few buttons to determine whether you have found a suitable code. When the code corresponds to your device, press OK and the setting for this device is completed.
- If the code you have found does not work at all or not properly, try another code by selecting the next code for the brand using the or button, then test the code as described above under 4. and, if successful, confirm with OK.
-
To set the remote control for other devices, proceed in the same way. Instead of the TV device button, press another button, e.g. DVB (DTT, CBL, SAT) VCR, DVD, CD, TAPE, TUNER, AUX).
-
Before setting a code and performing the subsequent test for recording or playback devices, please insert a medium (tape, CD, cassette, DVD, etc.).- You can interrupt code entry at any time by pressing EXIT.
Code search
See also Fig. 2.
If the brand of your appliance is not in the list or none of the codes given fits, we recommend the automatic code search.
Your remote control finds the correct control settings almost automatically in a few seconds:
- Switch on the device to be controlled. For example, a program number appears in the display of your satellite receiver.
- To start the code search, press and hold the SET button for approx. 3 seconds. CODE SETUP appears in the display. Confirm this function by pressing OK.
- DEV SEARCH then appears in the display. Confirm this function by pressing OK.-If DEV SEARCH does not appear you can set the function with the or button.
- Press the device button of the device to be controlled, e.g. DVD and confirm the function by pressing OK.
-
Then point the remote control at the device to be controlled while the remote control emits a different ON/OFF signal every 2 seconds. The respective code number is shown in the display.
-
When your device reacts, press a few buttons to determine, whether you have found a suitable code. If the code corresponds to your device, press OK. SUCCESS appears in the display, then you press the device button, e.g. DVD, to confirm the entry. The setting for this device is now completed.
- If the code you have found does not work at all or not properly, press EXIT and DEV SEARCH appears again. Then proceed again as described under 3.
Please note: - You can reverse the search direction with the or button if you have reacted too slowly to a response from the device. - The Menu buttons cannot be used for testing. - Before setting a code and performing the subsequent test for recording or playback devices, please insert a medium (tape, CD, cassette, DVD, etc.).- You can interrupt code search at any time by pressing EXIT.
Learning, Programming, of Missing Control Functions
See also Fig. 3 & 4.
The LEARN function is used to supplement the preprogrammed codes. The standard code may provide most of functions needed, but you may miss some key functions. Or you didn't find any functioning preprogrammed code for a device. You can capture upto 100 key funtion codes, max 40 per device. The last captured function will overwrite the previous. learnt.
Please proceed as follows:
- Press the device key of to be controlled device, e.g. TV.
- Press SET for more than 3 seconds and release it, when CODE SETUP is displayed.
- Select LEARNING by pressing or key.
- Press OK, LEARN KEY will be displayed and place the remotes top by top as shown in Fig.. . Distance appr. 30 mm.
-
Press OK, SELECT KEY will be displayed. Then press the target key, e.g. POWER, which you like to reprogram. WAITING will be displayed.
-
Press and hold the to be learnt key, e.g. Power=Stand by, on the original remote until the UR 820 LCD displays SUCCESS for 1 s. Then SELECT KEY is displayed and the next key can be programmed according to step 5 and 6. -If the programming fails, Failed is displayed, then repeat reprogramming from step 5.
- You can stop learning procedure by pressing any device key (TV, DVB etc.), when SELECT KEY is displayed.
Delete Learnt/Programmed Keys
Please proceed as follows, see Fig. 5:
-
Press the device key of to be controlled device, e.g. TV.
-
Press SET for more than 3 seconds and release it, when CODE SETUP is displayed.
- Select LEARNING by pressing or keys.
- Press OK, LEARN KEY will be displayed. Select DELETE KEY by pressing or keys.
- Press OK, SELECT KEY will be displayed. Then press the target key, e.g. POWER, which you like to delete.
- SURE DELET will be displayed. Please confirm by pressing OK. UR 820 LCD displays SUCCESS for 1 s. Then SELECT KEY is displayed and the next key can be deleted according to step 5 and 6. -If the deleting fails, WAITING and Failed are displayed, then repeat deleting from step 5.
- You can stop deletion procedure by pressing any device key (TV, DVB etc.), when SELECT KEY is displayed.
Delete Learnt/Programmed Key Sets For Single Devices
Please proceed as follows, see Fig. 6:
1. Press the device key of to be controlled device, e.g. TV.
2. Press SET for more than 3 seconds and release it, when CODE SETUP is displayed.
3. Select LEARNING by pressing or keys.
4. Press OK, LEARN KEY will be displayed. Select DELETE DEV by pressing or keys.
5. Press OK, SELECT DEV will be displayed. Then press the corresponding device key key, e.g. TV.
6. SURE DELET will be displayed. Please confirm by pressing OK. UR 820 LCD displays SUCCESS for 1 s. Then SELECT DEV is displayed and the next device key set can be deleted according to step 5 and 6. -If the deleting fails, WAITING and Failed are displayed, then repeat deleting from step 5.
7. You can stop deletion procedure by pressing EXIT key several times.
Delete All Learnt/Programmed Keys
Please proceed as follows, see Fig. 7:
- Press SET for more than 3 seconds and release it, when CODE SETUP is displayed.
- Select LEARNING by pressing or keys.
- Press OK, LEARN KEY will be displayed. Select DELETE ALL by pressing or keys.
- Press OK, SURE DELET will be displayed. Please confirm by pressing OK. UR 820 LCD displays SUCCESS for 1 s. Then menu is displayed again.
- You can stop deletion procedure by pressing EXIT key several times.
Other settings
Clock Setting
Please proceed as follows, see Fig. 8:
- Press SET for more than 3 seconds and release it, when CODE SETUP is displayed.
- Select CONFIGURE by pressing or keys.
- Press OK, TIME SETUP will be displayed.
- Press OK, TIME hh:mm xx will be displayed. Please enter time and AM or PM for morning and afternoon. Use numerical and arrow keys for time input.
- When time is displayed correctly press OK. SUCCESS and later TIME SETUP will be displayed.
- You return to main menu by pressing EXIT key several times.
Set volume control priority
With this function you can determine a device exclusively for volume control, e.g. your audio amplifier. Then the buttons VOL +, VOL - and
always control the amplifier, regardless of which device you are controlling.
Please proceed as follows, see Fig. 9:
1 Press and hold SET for 3 seconds, then set CONFIGURE with the or button. Confirm this function by pressing OK
2 TIME SETUP appears in the display. Set VOL LOCK with the or button. Confirm this function by pressing OK.
3 Select the device button, e.g. AUX for the amplifier and set priority = ON using the or button. Confirm this function by pressing OK.
4 Then press EXIT several times to quit the setting mode.
- You can cancel the priority setting using the same procedure. Instead of ON, set OFF for all devices.
Lock Or Unlock Device Codes
1 To prevent settings from being changed accidentally, please proceed as follows, see Fig. 10: Press and hold SET for 3 seconds, then set CONFIGURE with the or button. Confirm this function by pressing OK.
2 TIME SETUP appears in the display. Set DEV LOCK using the or button. Confirm this function by pressing OK.
3 Select the device button, e.g. DVD for the television and set lock=ON using the or button. Confirm this function by pressing OK.
4 Then press EXIT several times to quit the setting mode.
- You can cancel the lock setting using the same procedure. Instead of ON, set OFF for all devices.
Program Macros (Home Cinema Application)
You can program a sequence of upto 10 control commands to be output on pressing one one single key called MACRO-key. Upto 3 MACRO-keys are available.
Please proceed as follows, see Fig. 11:
1 Press and hold SET for 3 seconds, then set MACRO with the or button. Confirm this function by pressing OK.
2 MACRO1 appears in the display. Set MACRO1, 2 or 3 using the or button. Confirm this function by pressing OK.
3 SET UP is displayed. Confirm this function by pressing OK.
4 SELECT KEys is displayed. Then press a sequence of keys, which shall be output later, when you press MACRO and 1 ,2 or 3. E.g. TV, POWER, DVD, POWER, AMP, POWER for all devices power off.
5 Press OK when sequence input is finished and macro shall be stored.
Delete Macros
Please proceed as follows, see Fig. 12:
1 Press and hold SET for 3 seconds, then set MACRO with the or button. Confirm this function by pressing OK.
2 MACRO1 appears in the display. Set MACRO1, 2 or 3 using the or button. Confirm this function by pressing OK.
3 SET UP is displayed. Confirm this function by pressing OK.
4 Select DELETE using the or button.
5 Then press OK and SURE DELET is displayed. Confirm this function by pressing OK. SUCCESS is displayed.
6 Then press EXIT several times to quit the deletion mode.
Control Any Device On AUX
You can use the AUX device key to control any device. E.g. if you want to control a 2^nd VCR by AUX key, please proceed as follows, see Fig. 13:
1 Press and hold SET for 3 seconds, then CODE SETUP is displayed. Confirm this function by pressing OK.
2 DEV SEARCH is displayed. Set CODE SHIFT using the or button. Confirm this function by pressing OK.
3 Any device, e.g. TV 010 is displayed. Press device key, e.g. VCR, OK and enter code number of required to be by AUX controlled device, e.g. VCR. Confirm this function by pressing OK. SUCCESS is displayed.
4 Then press EXIT several times to return to main control menu.
Backlight
To save battery capacity you can switch off the LCD illumination. To do so, proceed as follows:
1 Press and hold SET for 3 seconds, then set CONFIGURE with the or button. Confirm this function by pressing OK.
2 TIME SETUP appears in the display. Set LIGHT using the or button. Confirm this function by pressing OK.
3 Switch the light ON or OFF using the or button. Confirm this function by pressing OK.
4 Then press EXIT several times to quit the setting mode.
Adjusting the contrast
You can adjust the contrast to improve readability:
1 Press and hold SET for 3 seconds, then set CONFIGURE with the or button. Confirm this function by pressing OK.
2 TIME SETUP appears in the display. Adjust the CONTRAST using the or button. Confirm this function by pressing OK.
3 Set the contrast to the desired level using the or button. Confirm this function by pressing OK.
4 Then press EXIT several times to quit the setting mode.
Default settings
You can reset your remote control to its factory default setting, e.g. to correct a malfunction, as follows. This deletes all your settings.
- This function is recommended only in the event of your remote control malfunctioning seriously.
1 Press and hold SET for 3 seconds, then set CONFIGURE with the or button. Confirm this function by pressing OK.
2 TIME SETUP appears in the display. Set CLEAR ALL using the or button. Confirm this function by pressing OK.
3 The display then shows SURE CLEAR?. Confirm this function by pressing OK.
Operation
You operate your appliances basically in exactly the same way as if you were using the original remote controls, except that you must first press a device button (TV, DVD, etc.) to control the required device. As the symbols on the UR 820 LCD could differ from those on the original remote controls you may have to try out all the buttons in order to find the functions.
Scanning of Programs
You can scan the TV or DVB (SAT, CBL, DTT etc.) programs by:
1 Pressing TV or DVB key,
2 Press and hold the SCAN key for about 4 seconds.
3 When SCAN is displayed, release key. Then UR 820 LCD will automatically scan all channels quickly.
4 Press any key to stop scanning.
Use Macros: Control Home Cinema Set Ups With One Touch Only
When you have programmed key code sequences, read above, then you can start output by pressing MACRO and then 1,2 or 3 simultaneously.
Hotline
If you have any questions regarding the UR 850 LCD, please call the Vivanco Hotline: Tel: 01442 246088 Alternatively, send an e-mail to: consumer@vivanco.co.uk
Technical data
Batteries: 2x AAA – The UR 820 LCD indicates that the batteries need replacing by displaying a crossed-out battery symbol.
Range: max. 7 m
Not suitable for 400 kHz devices
2-year works guarantee
Should your UR 820 LCD cease to work within 2 years of purchasing you will receive a free replacement from Vivanco. Exceptions: missing codes, deliberate destruction and normal wear and tear of the housing and buttons.
Ver programas (SCAN)
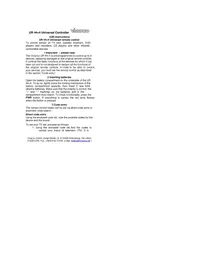
CTnpaTb KONnpoBaHHbIe/BblIyEHHbIe KnaBnHbIe cyHKcnn np6opa
Cm. TaKke pnc. 6.
IocTynpaTb,poKaNyInCTa,CneDyUoUIM o6pa30M:
- HaxmTe KnaBnUy ynpaBnEmoro np6opa, Hanpimep, TV (TeJeBn3Op).
- Haxmnte KnaBnuy SET 6oJee 3 cekyHn OtnyCTnte e e TOrda, KOrda yKa3bIbaeTcR CODE SETUP.
- YctaHOBNTb LEARNING (BblyHTb) KJIaBnShamN ▲ NII▼.
- HaxmTe OK, 3aTem yKa3bIbAeTc8 LEARN KEY (BblyUHTb KJaBnUy). UCTaHOBNTb DELETE DEV (ctpaHne npi6opa) KJIaBnUshaM NII N
- HaxmTe OK, yKa3bIbaeTcra SELECT DEV (Bb6op np6opa). 3aTe m HaxmTe klaBnuy UR 820 LCD toro np6opa,
Vivanco
UR 820 LCD UNIVERSAL CONTROLLER
Функцино КOTOPOROBbIжелаTe CTnpaTb, HAnpIMep,TV(TeJIeBn3Op).
-
Yuka3bIbAeTc SURE DELETE (deiCTBnTeIbHO CTnpaTb). YTBepDnte HaxaTne KJIaBnUg OK. UR 820 LCD yka3bIbAeT SUCCESS (ycnex) B TeueHne 1 cekyHdbI. 3aTeM INdNkauu npeuendT ha SELECT DEV u corlaacno sharam 5 u 6 moKHO CTnpaTb CJeDuOuHyo KJIaBnUHyU oYHKuio. - FAILED (ouu6ka) yka3bIbAemc e mom cnyuae, ecnu npouecc cmupaHua OKa3bIbAemc HeyduaHbIM. B 3mom cnyuae noemopume npouecc cmupaHua, hauhna C waa 5.
-
Пюцecc CTираня MOжeT 6ытбпpeкрашен HeODHOKpaTHbIM HaxkaTNem Kлавиш EXIT (прекрашени).
CTnpaHne BCEx KONnpoBaHHbIX/BblyUeHHbIX KJIaBnUHbIX fynKcni
Cm. TaKke pnc. 7. IocTyNaTb, noKaIyIcTa, cJeDyuUIM o6pa3OM:
- Hαχmnte KλaBnψy SET 6oJee 3 cεKHy n OTnyCTnTe eë TOrda, KOrda yKa3bIbaeTcR CODE SETUP.
- YctaHOBtB LEARNING (BblyHTb) KJIaBnShamn ▲ INI N
- Haxmte KnaBnOy OK, 3aTeM yKa3bIbAeTcR LEARN KEY (Bbluyntb KlaBnOy). YctaHOBnTB DELETE ALL (CTnpaTB BCE) NocpeDCTBOM KlaBnOu ▲ nJIn V.
- Hαχmnte KλaBnùy OK. YΚa3bIbæTcSURE DELETE (ДeɪCTBnteJIbHO CTnpaTb).YΤΒερπιTe HακaTneM KλaBnùn OK. UR 820 LCD yΚa3bIbæT SUCCESS (ycnex) B TeueHne1 cEkyndbl. 3aTeM έнДиКацяп поЕндET Ha rλaBHOme MeHIO.
- Пюцecc CTираня MOжeТ 6ытБпpeкрашен HeODHOKpaTHbIM HaxKaTNemКлавиш EXIT (прекрашени).
HacrpoKa npOuNX yHKnui
HactpoKa BpeMeHH
Cm. TaKke 1 pnc.8. IocTyNaTb, noKaIyIcTa, cJeDyUOuM o6pa3OM:
1 HauKMnte KnaBnuy SET 6oJee 3 cekyHn OTOYCTNTe eToTda, KOrDa yKa3bIbaETcR CODE SETUP.
2 CONFIGURE (HaCTpOHTb) KJIaBnIaMn ▲ JIJN ▼.
3 HaxMMTe KlaBnUy OK. YKa3bIbAeTcR TIME SETUP (HacTpoNka BpeMeH).
4 Haxmte KnaBnUy OK. Yka3bIbaETcR TIME hh:mm xx (hh = yac (00-12), mm = MInHyTbI (00-59), AM = B nepBoN noNoBnHe dHry - PM = BO BtopoN noNoBnHe dHry). BboDntb
BpeMc NOMOuI KnaBnU uNp N BblpaTb KnaBnAmu AM nJn PM.
5 Korda Bpem npabnIbHo yka3bBaetc, TO yTBePdnte 3TO KJaBnWei OK.
Yka3bIbaeTcA SUCCESS, a no3xe TIME SETUP.
6 3aTeM HaxMMTe EXIT, TTo6bl BbIXoNDtB n3 peKIma HaCTpoiKn.
YcTaHOBNTb npHOpHTeT peRyInpoBaHnra rpOMKoCTn
C 3TOI ΦyHKUeIe BBy 3KCKH03NBO MOKeTe ONpeDEINtB pnp6op DnIe peYIpOBAHnrgPOMKOCTn, HApPIMep, ayDIOUCNIteIb. B3TOM Cnyae, KlaBNIu n peYIpOBAHnrgPOMKOCTn VOL +, VOL - n , BCerda ynpabJIaHT ycINTEJem, He3aBNCmO OT TORO, KOtopbIM np6bpom BBy ynpabJIaTe.
CM. TaKKe 个 pnc.9.
IocTynpaTb,poKaanynCTa,cneDyUOuIM 6pa3oM:
1 HaKMnTe KnaBnUy SET 6oJIe 3 cekyni; KJIaBnUaMn A INI N YCTaHOBnTE CONFIGURE (HacTpoIka). HaxKaTneM KJIaBnUu OK yTBepDInTe 3Tu φyHKuIIO.
2 Yka3bIbAeTcR TIME SETUP (HacTroPkaBpeMeHn).KnaBnIaMn ▲ nJN▼ yCTaHOBInTeVOL LOCK (6JIOKNpOBKa rPOMKOCTn).HaxatneM KlaBnIu OK yTBepdnte 3TyФyHKUHO.
3 Bb6paTb KnaBnUy np6opa, HapnpMeP AUX dny ycNInTeJy uCTaHOBnTB npOpntET=ON kNaBnUamn nnn HaxkateM KnaBnUO kYTBepdnte 3Ty yHKUHO.
4 3aTeM HeoDnHOKpaTHO HaxMMTe KJIaBnUg EXIT, YTO6bI BvIXoDnTb n3 peXIMa HAcTPOiKN. -3ToJ Xe npOeDyPoR Bbl MoXeTe CTnpaTb yCTaHOky npInOpuTEta . BmecTo ON yCTaHOBtne DnI BcEx npIn6opOB OFF.
-3ToJxpeDpyoB Bbl MoXeTe CTnpaTb yCTaHOBky 6IokIpOBKn . BmecTO ON yCTaHOBtE nIg BCEx npnbopOB OFF.
Makpo: YCTaHOBnTb aBTOMaTNky NOCJIeIOBaTeJIbHOCTH KNaBnI (приLOXeHne Home Cinema)
Bbl MoKeTe yCTaHOBnTb 3 nocJeIOBaTeIbHOCtN, KaJda Ha MaKc.10 KJIaBnHbIX KOMaHd, MaKpO, KOTopbIe BblDaHTCnHa HaxKaTne KJIaBnShn.
Cm. TaKKe pnc. 11.
IocTynpaTb, noXaanyIcTa, cJeDyUOuM o6pa3oM:
-
Haxmnte KnaBnSy SET 6oJee 3 cekyHn I OTnyCTnte eepn yka3aHnn CODE SETUP.
-
YctaHOBtB MACRO KJIaBnIe NII N7. HaxMITE KJIaBnIy OK, yKa3bIbAeTcR MACRO1. YCTaHOBtE MACRO1, 2 NJI 3 KJIaBnIe NII N
-
HaxMnTe KlaBnUy OK, yKa3bIbAeTcR SET UP (ycTaHOBka). HaxMnTe KlaBnUy OK.
5 Yuka3bIbAeTcRA SELECT KEYS (BblOp KnaBn). 3aTeM HaxMMte do 10 KnaBn, KOtOpbIe DOJXHbI 6bITb BblDaHbI abTomatnueckn, Ha HaxKaTne KnaBn. HanpImep, TV, POWER, DVD, POWER, AMP, POWER, Dnra TOrO, YTO6bI BblKJIOnHTb BCE 3TN npnbOpbl OndHM HaxaTne KnaBn.
6 Haxmnte KnaBnuy OK kOrda 3aBepuINn BBOI COxpaHNTe IocJeIOBaTeJbHOCTb.
CTnpaTb MaKpo
Cm. TaKKe pnc. 12.
IocTynpaTb, noXaIyIcTa, cIeIyUOuIM o6pa3oM:
- Haxmnte KnaBnSy SET 6oJee 3 cekyHn iOnnyctnte eepn yka3aHnn CODE SETUP.
- YctaHOBIne MACRO KnaBWei AJINV
- Haxmte KlaBnUy OK, yKa3bIBaETcRA MACRO1. YctaHOBtE MACRO1, 2 nJIn 3 KlaBnWei A nJIn ▼
- HaxMNTE KlaBnUy OK, yKa3bIbAeTcR SET UP (yCTaHOBka). YCTaHOBnTE DELETE (CTnpaHne) KJIaBnUeI ▲ nJIn▼.
- Haxmnte KnaBnuy OK. Yka3bIbaeTcSURE DELETE (deNCTBnTeJbHO CTnpaTb).YTBepdnte HaxkataHem KnaBnU OK.Yka3bIbaeTcS SUCCESS (ycnex) .
- Дя ВОЗВрашени B Гльнoe MeHIO HeODHOKpaTHO HaxMnte KnaBnUy EXIT.
YnpaBJIbT bIIO6bIM npu6Opom Chepe3 npu6OpHyIO KnaBnUy AUX
Bbl mojkeTe yctaHOBNb KnaBnUy AUX TaK, YTO6bl ynpabJIaTb C eE NOMOuIIOJIObIM npi6opom. Hanpimep, Bbl mojKeTe uepe3 AUX ynpaBnTb 2-M BuJeOMaHHTofoHOM.
IocTynTe, noXaLyncTa, cJeDyUOuM o6pa3oM, cm. TaKke pnc. 13:
1 Haxmnte KnaBnSy SET 6oJee 3 cekyHn n OTnyCTnte e e npu yka3aHnn CODE SETUP. YTBepnTe HaxkTneM KlaBnN OK.
2 Yka3bIbaeTcRA DEV SEARCH. YCTaHOBnTe CODE SHIFT (pepeMeIeHne KoJa) KJIaBnIeJ nII▼. YTBepdnte HaxaTIeM KJIaBnIu OK.
3 Yka3bIbaeTcKaKoJ-Jn60 np6Op, HapnpMep, TV 010. KnaBnSeAUX BBODInTe ynpabJembBnD np6opa, HapnpMep, VCR, OK n KoD corJaNco nepeuHIO, cm. npIoXeHne. YTBepnTe HaxaTne KlaBnO NK. 3aTeM yka3bIbaeTc SuCEss (ycnex).
4 3aTeM HeoHokpaTHo Haxmnte EXIT, YTO6bI BbIXOuNTb N3 peKIMa HaCTpOiKN.
OcBeueHne poha
YTo6bI C3KOHOMnTb EMKoCTb 6aTapeB BblMOKeTe BBIKJIOUHTb OCBeUeHne JKK. JIra3TOrO NOCTyPnITe, NOXaanyIcTa, cJeDyUOuIM0bpa3OM:
1 Haxmnte KnaBnuy SET 6oJIe 3 cekyH, KnaBnwei A nI N yCTaHObnte CONFIGURE (HaCTpOJa). HaxatneM KnaBnU OK yTBePdnte 3Tu cyHKuHIO.
2 Yka3bIbaeTcR TIME SETUP (yCTaHOBka BpemeHn).KlaBnWei nnn V yCTaHOBnte LIGHT (ocBeueHne).HaKaTneM KnaBnO NK OYTBepdnte 3Ty fynKluHo.
3 ПосpeдтВOM Kлавиш >ИПОСБешпЕВКЛЮчаETСА (ON) ИПВыкноуаETСА (OFF).Нжатием КлавишИ OKУТВерДNTe 3TYФУнКЦИн.
4 3aTeM HeoHOKpaTHO HaxMnTe EXIT, YTO6bI BbIXOuNTb N3 peKIMa HaCTpOiKN.
YcTaHOBka KOHTpacta
Ioka3bBaTb nporpaMMbl (SCAN)
Bbl moKeTe noka3bIbAtb BCE nporpaMMbl, TV uJn DVB (SAT, CBL, DTT(DVB-T) nTd.) KOPOTKO dpyr 3a dpyrom:
1 Haxmnte TV- nDVB-Knabu,
2 HaxmTe SCAN-KnabuBv B TeueHne OKOJIo 4 ckyHd.
3 Otnyctnte KnaBnuy npu yka3aHnn SCAN. 3aTeM UR 820 LCD npyr 3a npyom noka3bIbae T BCE TV- n DVB nporpaMMbl.
4ДЯпpekpaueHЯнжMITEIIO6yIO KJIaBnUy.
IcnoJb3ObaHne MaKpo: ynpaBnTbDOMaUSHM KINHO ODHNM HaxaTHEmKlaBnSh!
Ecni Bbl coxpani nocneobateIbHOCTn KJIaBnI, CMOTPi BblIe, To BblBblBaIeTe Ix HaxaTneM KJIaBnIIMAKPO,aOJHObpemehHO C 3TNIM HAXTneM KJIaBnI 1,2IuI3.
Topyaa JINHn
Ecni ecTb Bonpocbl no UR 820 LCD, to 3BOHnTe Ha ropayu loHHIO Vivanco: TeI.: (+007) 495 2325349. Ka aJIbTePHaTnBa, MOXHO NocnAeB TncbMo Ha aDpec 3JIeKTPoHNO nOHTbl: unibat@mail.ru.
TexHnueckne daHHbIe
БатAPEn: 2x мнкроэлем enta, AAA - Пумь ebчepкнуюс cumoona差别peu UR 820 LCD yka3b1Baem Heobxodumocmb 3amehi差别peu.
PdInyc DeIcTBn: Tm. 7 m
He nCnoJb3yetcIJI npi6opob 400 KU.
3aBoDcKa rapaHTnJa 2 roDa
Ecni, B Teuehen 2 Iet nocne nokynki, Baui npibop UR 820 LCD BbIeT n3 cTpo, To BVakom clyuae Bbl noJyUte ot fnpMbivanco becnplatHyO 3aMeHy. NckHoueHn:OTCYTCTByUoUne KObl, yMbIuJeHHoe pa3pyuWeHne HOpMaJIbHbI n3Hoc Kopnyca n KlaBnU.
(GR) Ośnyiecs xphoncs
Tnlexeiipotnpio Vivanco UR 820 LCD yia oukeues Tneopao, hou kai bivteo e xepuo meow utepuow oaw oxedov Tuv KAATAKEUaOTw.
ToTbeTnO uTatapiwv
AvoiTe TO KATIaIK TNS UTOOxNc Tuv MIIATAPIWv OTO TIO WEPoC TNS OUAKEUNs, TIEOTa EALaOmuT EALaPPWc TPOCS TA KATW KAI TOITOTeTEIOTE TIC 2 AkkalIKcS MIKpO-MITATAPIEC (AAA). IPOOEETIG EVDEIEcS DIATAENs TIV NOLwO OTWCS AVayPapovTAl OTIG MIIATAPIECs KAI OTNV UTOOxN TIV WITATAPIW (+=+) ,KAI KLEIOTe TNV ΘKN TPooEKTIKA.-XpnoIOTIOITE TAVTOTE MIIATAPIECS TIOU DEV EXOUV KAVEVA ATOLUTCW ELATTWua.
Euavion Tpoypaumatwv (SCAN)
MTOpeite va eTIaEETe Tn ouvtoun, diaoxikn Emuavion oawv Twv TnAOTIKWV TPoypaumatw, TV n DVB (SAT, CBL, DTT(DVB-T) kT.)