TWINTALKER 6800 - Talkie Walkie TOPCOM - Free user manual and instructions
Find the device manual for free TWINTALKER 6800 TOPCOM in PDF.
| Brand | TOPCOM |
| Model | TWINTALKER 6800 |
| Category | PMR446 two-way radio |
| Number of channels | 8 channels (446.00625 to 446.09375 MHz) |
| CTCSS subcodes | 38 codes (67.0 to 250.3 Hz) |
| Maximum range | Up to 3 km in open terrain |
| Power supply | 4 AAA alkaline or rechargeable NiMH batteries (included) |
| Charger | Built-in fast charger (7.5V DC/200 mA), charging time 7 to 10 h |
| Transmission power | <= 500 mW ERP |
| Modulation | FM - F3E |
| Channel spacing | 12.5 kHz |
| Main functions | VOX (voice activation), Monitor, Dual Channel Monitor, Keypad lock, Call tones (5), Roger beep, Clock/Stopwatch, Channel scan |
| Dimensions (approx.) | 120 x 55 x 30 mm |
| Weight (approx.) | 150 g (with batteries) |
| Warranty | 24 months |
| Cleaning and maintenance | Wipe with a soft, damp cloth; do not use solvents. |
| Safety | Do not touch the antenna while transmitting, keep 15 cm away from a pacemaker, turn off in explosive areas. |
| Recycling | Do not dispose of in household waste, take to a WEEE collection point. |
Frequently Asked Questions - TWINTALKER 6800 TOPCOM
User questions about TWINTALKER 6800 TOPCOM
0 question about this device. Answer the ones you know or ask your own.
Ask a new question about this device
Download the instructions for your Talkie Walkie in PDF format for free! Find your manual TWINTALKER 6800 - TOPCOM and take your electronic device back in hand. On this page are published all the documents necessary for the use of your device. TWINTALKER 6800 by TOPCOM.
USER MANUAL TWINTALKER 6800 TOPCOM
This product is in compliance with the essential requirements and other relevant provisions of the R&TTE directive 1999/5/EC. The Declaration of conformity can be found on :
http://www.topcom.net/support/cedeclarations.php
1 Introduction
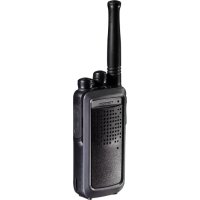
Thank you for purchasing the Topcom Twintalker. It's a short range, low powered radio communication device that has no running costs other than the minimal cost of re-charging the batteries.
The TwinTalker operates on Private Mobile Radio frequencies and can be used in any country where the service is authorised as indicated on the packing box and in this manual.
2 Intended purpose
It can be used for different professional as well as for recreational purposes. For example: to keep in contact during travelling with 2 or more cars, biking, skiing. It can be used to keep in contact with your children when they are playing outside, etc...

Restriction:
Check the local regulations before using it outside the country where it was purchased. The standard may be prohibited in this country.
3 CE Mark and restrictions
The CE symbol on the unit, user guide and giftbox indicates that the unit complies with the essential requirements of the R&TTE directive 1995/5/EC.
The (!) symbol next to the CE mark, indicated that the PMR standard is not allowed in all European countries.
PMR is allowed in the next countries:
Belgium, Holland, Germany, Sweden, Denmark, Norway, Finland, Spain, Italy, Portugal, Greece, Czech, Luxemburg, Hungary, Slovakia, Suisse, France, UK, Ireland, Austria, Poland
4 Safety instructions
4.1 General
Please read carefully through the following information concerning safety and proper use. Make yourself familiar with all functions of the device. Keep this manual on a safe place for future use.
4.2 Burning injuries
- If the cover of the antenna is damaged, do not touch because when an antenna comes in contact with the skin, a minor burn may result when transmitting.
- Batteries can cause property damage such as burns if conductive material such as jewellery, keys or beaded chains touches exposed terminals. The material may complete an electrical circuit (short circuit) and become quite hot. Exercise care in handling any charged battery, particularly when placing it inside a pocket, purse or other container with metal objects.
4.3 Personal safety
- Do not place your device in the area over an air bag or in the air bag deployment area. Air bags inflate with great force. If a communicator is placed in the bag deployment area and the air bag inflates, the communicator may be propelled with great force and cause serious injury to the occupants of the vehicle.
- Keep the radio at least 15 centimetres away from a pacemaker.
- Turn your radio OFF as soon as interference is taking place with medical equipment.
- Do not replace batteries in a potentially explosive atmosphere. Contact sparking may occur while installing or removing batteries and cause an explosion.
- Turn your communicator off when in any area with a potentially explosive atmosphere. Sparks in such areas could cause an explosion or fire resulting in bodily injury or even death.
- Never throw batteries in fire as they may explode.

Areas with potentially explosive atmospheres are often, but not always, clearly marked. They include fuelling areas such as below deck on boats, fuel or chemical transfer or storage facilities; areas where the air contains chemicals or particles, such as grain, dust or metal powders; and any other area where you would normally be advised to turn off your vehicle engine.
4.4 Poisoning danger
- Keep batteries away from small children
4.5 Legal
- In some countries it is prohibited to use your PMR while driving a vehicle. In this case leave the road before using the device.
- Turn your unit OFF when on board an aircraft when instructed to do so. Any use of the unit must be in accordance with airline regulations or crew instructions.
- Turn your unit OFF in any facilities where posted notices instruct you to do so. Hospitals or health care facilities may be using equipment that is sensitive to external RF energy.
- Replacing or modifying the antenna may affect the PMR radio specifications and violate the CE regulations. Unauthorized antennas could also damage the radio.
4.6 Notes
- Do not touch the antenna while transmitting, it could affect the range.
- Remove the battery if the device is not going to be used for a long period.
5 Cleaning and maintenance
- To clean the unit, wipe with a soft cloth dampened with water. Don't use a cleaner or solvents on the unit; they can damage the case and leak inside, causing permanent damage.
- Battery contacts may be wiped with a dry lint-free cloth.
- If the unit gets wet, turn it off and remove the batteries immediately. Dry the battery compartment with a soft cloth to minimize potential water damage. Leave the cover off the battery compartment overnight or until completely dry. Do not use the unit until completely dry.
6 Disposal of the device

At the end of the product lifecycle, you should not throw this product into the normal household garbage but bring the product to a collection point for the recycling of electrical and electronic equipments. The symbol on the product, user guide and/or box indicate this.
Some of the product materials can be re-used if you bring them to a recycling
point. By re-using some parts or raw materials from used products you make an important contribution to the protection of the environment.
Please contact your local authorities in case you need more information on the collection points in your area.
7 Using a PMR device
To communicate between PMR devices they need to be set all on the same channel and within receiving range (up to max. 3km in open field). Since these devices use free frequency bands (channels), all devices in operation share these channels(total 8 channels). Therefore, privacy is not guaranteed. Anybody with a PMR set to your channel can overhear the conversation. If you want to communicate (transmitting a voice signal) you need to press the button.
Once this button pressed, the device will go into transmit mode and you can speak into the microphone. All other PMR devices in range, on the same channel and in standby mode (not transmitting) will hear your message. You need to wait until the other party stops transmitting before you can reply to the message. At the end of each transmission the unit will send a beep. To reply, just press the -button and speak into the microphone.

If 2 or more users press the - button at the same time the receiver will receive only the strongest signal and the other signal (s) will be suppressed. Therefore you should only transmit a signal (press - button) when the channel is free.
8 Getting started
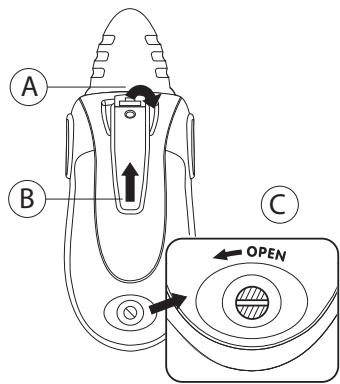
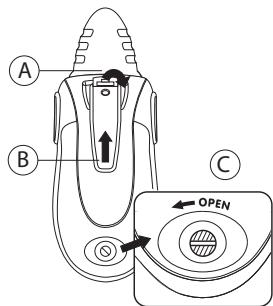
8.1 Removing/Installing the Belt Clip
- To remove the clip from the unit, push the belt clip (B) towards the antenna, while pulling the clip tab (A).
- When re-installing the belt clip, a click indicates the BeltClip is locked into position.
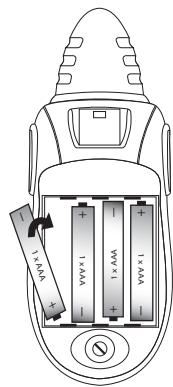
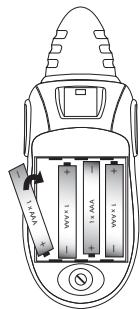
8.2 Battery Installation
- Remove the belt clip (§ 8.1).
- Loosen the screw in a counter clockwise direction using a coin & open the battery compartment. (C)
- Install 4 'AAA' alkaline or rechargeable batteries following the polarity as shown.
- Re-install the Battery Cover and Belt Clip (§ 8.1).
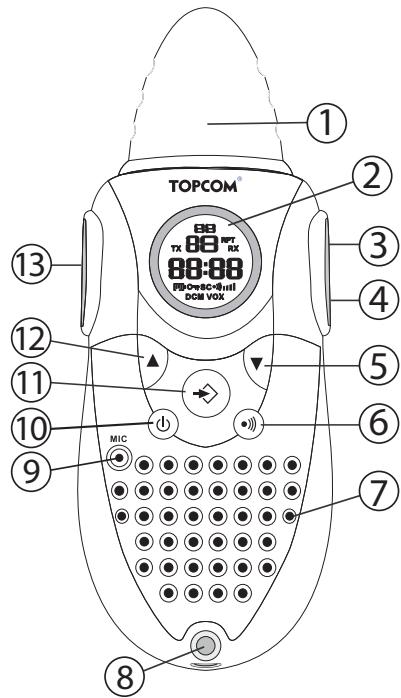
9 Buttons
- ANTENNA
- LCD Display
- EARPIECE Connector
- CHARGER Connector
- DOWN button
Decrease the speaker volume
- Select the previous item in the menu.
- CALL button
Transmit a call tone
- SPEAKER
- LANYARD connection
- MICROPHONE
-
MENU button
-
Enter menu.
-
ON/OFF button ①
- UP button
Increase the speaker volume
- Select the next item in the menu
- PUSH TO TALK button
Press To Talk or release to listen
- Confirm a setting in the menu
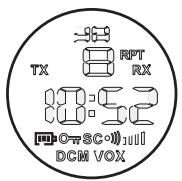
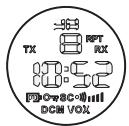
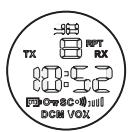
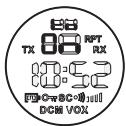
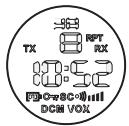
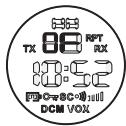
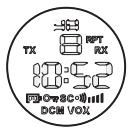
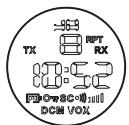
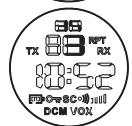
10 LCD Display information
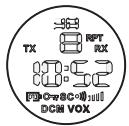
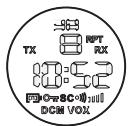
| a. CTCSS code b. Time c. Channel number | |
| TX TX icon - Displayed when transmitting a signal RX RX icon - Displayed when receiving a signal III Speaker volume indicator OT Lock icon - Displayed when the keypad is locked. [IP] Battery charge level indicator VOX VOX icon - Displayed in Voice controlled (Vox) mode SC Scan icon - Displayed when scan mode is active DCM Dual Scan icon - Displayed when dual scan mode is active ● Call icon - Displayed when you are sending out a call tone |
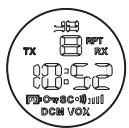
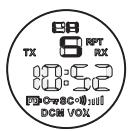
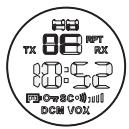
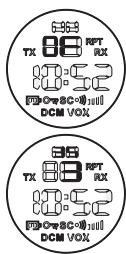
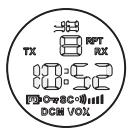
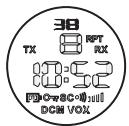
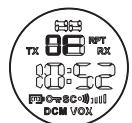
11 Battery Charge Level/Low Battery Indication
The BATTERY CHARGE LEVEL is indicated by the number of squares present inside the BATTERY icon on the LCD Screen.
Battery Full
Battery 2/3 charged
Battery 1/3 charged
Battery empty
When the BATTERY CHARGE LEVEL is low, the BATTERY icon will flash to indicate that the batteries need to be replaced or recharged.

Do not short-circuit & dispose of in fire. Remove the batteries if this device is not going to be used for a long period.
12 RECHARGING batteries
The PMR can be used with 4 alkaline or rechargeable NiMh AAA batteries (included).
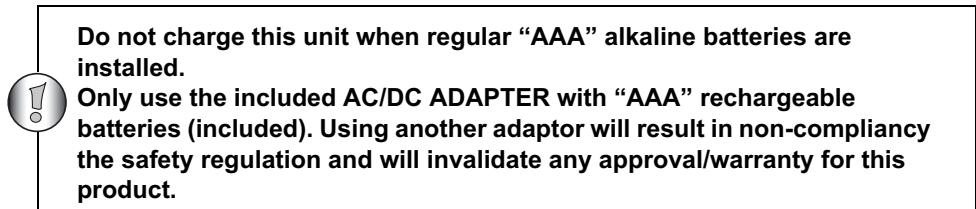
When using rechargeable batteries you can use the enclosed adapter (7,5V DC/200mA) to charge.
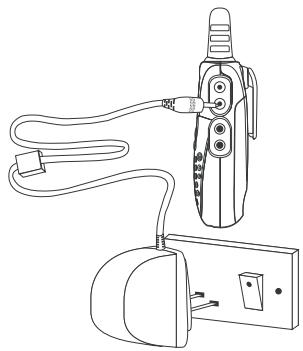
- Insert 4 "AAA" rechargeable batteries.
- Plug the small plug of the adapter into the CHARGER connector (4) and the other end in the electrical socket (230V AC, 50Hz).
- Make sure that the unit is switched off in order to charge the batteries properly.
NOTE: It takes approximately 7 to 10 hours to fully charge the batteries.
13 Using the Twintalker 6800
13.1 Clock functions
When the battery is installed and the unit is OFF, the time is displayed.
13.1.1 Setting the time
In power OFF mode:

- Press and hold for 3 seconds, the hour flashes.
- Press or to change the hour.
- Press to confirm, the minutes flashes.
- Press or to change the minutes.
- Press and hold for 3 seconds to confirm the setting

The time will be reset to 12:00 when the battery is removed.
13.1.2 Stopwatch
- Press and hold for 3 seconds to enter stopwatch mode
- Press to start counting
Press to stop counting - Press to reset the timer
- Press and hold for 3 seconds to exit stopwatch mode
13.2 Turning the Unit ON/OFF
- To activate; press and hold ① . The unit will "beep" and the LCD Screen will display the current channel, CTCSS code and time.
- To switch off; press and hold ① again. The unit will "beep" and only the time is displayed.
13.3 Adjusting Speaker Volume
The Speaker Volume can be adjusted using and . The Speaker Volume level is displayed on the LCD.
13.4 Receiving a Signal
The unit is continuously in the RECEIVE mode when the unit is ON and not transmitting. When you receive a signal on the current channel, the RX icon is displayed.

In order for other people to receive your transmission, they must be set on the same channel and CTCSS code
13.5 Transmitting a Signal
Press and hold PTt to TRANSMIT.
- Hold the unit in a vertical position with the MICROPHONE 10cm from the mouth and speak into the microphone.
- Release PTt when you have finished transmitting.
13.6 Changing Channels
The PMR has 8 available channels.
To change channels:

- Press once, the current channel number flashes on the LCD Screen.
- Press or to change the channel.
- Press PT to confirm your selection and return to the NORMAL mode.
To confirm and shift to the next option, press
NOTE: Any PMR set on the same channel can receive and listen to the conversation, also when the other use a CTCSS code.
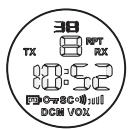
13.7 CTCSS (Continuous Tone Coded Squelch System)
The 2 digit CTCSS code corresponds to a specific tone frequency the radio emits. Two users, with the same channel and CTCSS set can hear one another. They will not be able to hear anyone else on the channel unless the other radios have the same exact CTCSS code enabled.
The PMR has 38 CTCSS codes available.
- Press twice, the CTCSS code will flash
- Press or to select another code.
- Press to confirm your selection and return to the NORMAL mode.
To confirm and shift to the next option, press
NOTE: Any PMR set on the same channel can receive and listen to the conversation, also when the other use a CTCSS code.
13.8 Monitor
You can use the MONITOR feature to check for weaker signals in the current channel.
- Press and simultaneous to activate channel monitoring. Hold these buttons for 3 seconds for continuous monitoring.
Press to stop monitoring
13.9 VOX Selection
The PMR is capable of voice activated (VOX) transmission. In VOX mode, the radio will transmit a signal when it is activated by your voice or other sound around you. VOX operation is not recommended If you plan to use your radio in a noisy or windy environment.
- Press 3 times.
- Press to turn the VOX feature ON and press again to select the VOX sensitivity level which is indicated in the right corner of the display. Press until OF appears on the display, to turn VOX OFF.
- In the VOX mode, the VOX icon will be displayed.
To confirm your selection and return to the NORMAL mode, press PTT
13.10 Channel Scan
CHANNEL SCAN performs searches for active signals in an endless loop from channel 1 to 8.
- Press and hold . Press briefly to start scanning.
- Release the buttons.
- When an active signal (one of 8 channels) is detected, CHANNEL SCAN pauses and you will hear the active signal.
- Press to communicate through the active signal channel. Press to deactivate channel scan.
When an active signal (one of 8 channels) is detected, press or to bypass the current channel and continue to search for another active channel
13.11 Call Tones
A call tone alerts others that you want to talk.
a. Setting the Call Tone
5 different Call Tones can be selected.
- Press 4 times. CA will be displayed.
- Press or to select another call tone or select OF to enable call tones.
- Press to confirm your selection and return to the standby mode.
b. Sending a call Tone
Press briefly. The call tone will be transmitted for 3 seconds on the set channel.
13.12 Roger Beep On/Off
After the PT - button is released, the unit will send out a roger beep to confirm that you have stopped talking.
To set the Roger Beep.
- Press 5 times. 'ro' will be displayed.
- Press to enable (ON) or disable the Roger-Beep (OF).
- Press to confirm your selection and return to the standby mode.
13.13 Key-Tone On/Off
When a button is pressed, the unit will beep briefly.
To set the key-tone.
- Press 6 times. 'to' will be displayed.
- Press to enable (ON) or disable the Roger-beep (OF).
- Press to confirm your selection and return to the standby mode.
13.14 Dual Channel Monitor function
In stand-by, the PMR is set on one set channel with CTCSS code. The PMR will only receive signals transmitted on that channel and CTCSS code.
Dual Channel Monitor allows you to monitor a second channel with CTCSS code.
- Press 7 times, DCM OFF appears on the display.
- Press or to change the channel.
- Press to confirm the channel selection and go to CTCSS SUBCHANNEL SELECTION
- Press or to change the CTCSS.
Press to confirm.
To disable the function select 'OFF' when setting the channel.
When the Dual Channel Monitor function is activated, the PMR will switch sequentially between the standby channel + CTCSS and the Dual Channel + CTCSS.
13.15 Button Lock
- Press and hold for 3 seconds to activate or deactivate the BUTTON LOCK mode. The BUTTON LOCK icon is displayed on the LCD Screen.
- Press and hold again to deactivate BUTTON LOCK
13.16 Headset connection
The Twintalker 6800 can be used with an external microphone and speaker (included) The connector is located under the protective rubber cover on the top of the unit. To attach the external speaker/microphone headsets or earpiece, lift the rubber flap on the top of the unit to expose the connector.
Insert the appropriate plug into the connector.
14 Quick charger
14.1 Caution
- The charger is designed for indoor use. Do not expose to rain, snow or extreme conditions.
- This charger is not intended for use by young children or infirm persons without the supervision to ensure that they do not play with it.
- To reduce risk of injury, charge only Ni-Mh or Ni-Cd type rechargeable batteries. Do not not charge mixed Ni-Mh and Ni-Cd batteries at the same time.
- Do not attempt to charge any non-rechargeable batteries.
- Do not disassemble the charger or batteries.
- Do not short circuit batteries.
- Do not charger batteries in direct sunlight.
- Do not operate the charger if it is damaged.
14.2 Operation Instructions
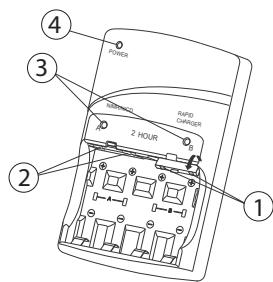
Plug the small plug of the adapter into the CHARGER and the other end in the electrical socket.
The green LED (4) will turn on.
Insert 2 or 4 batteries size AA or AAA into group A (2) and/or B (1). Follow the polarity as indicated in the battery compartment. LED A and/or B (3) will light up to indicate that they are charging.

Batteries must be always charged in identical pairs.
When the batteries are full, the corresponding LED will flash. When all batteries are fully charged, trickle charge will start until the batteries are removed.
15 Technical specifications
| PMR | |
| Channels | 8 |
| CTCSS | 38 |
| Frequency | 446.00625MHz - 446.09375 MHz |
| Range | Up to 3 Km (Open field) |
| Batteries PMR | 3 x AAA Alkaline or NiMh rechargeable |
| Transmission Power | =< 500mW ERP |
| Modulation Type | FM - F3E |
| Channel spacing | 12,5 Khz |
| Quick charger | |
| Input power | DC 12V / 2000 mA |
| Charging voltage | 2,8V / 1200mA x 2 max |
| Trickle charge | Charge 1 seconds of every 10 seconds |
| Maximum charge time | 2 hours |
| Channel Frequency Chart: | CTCSS Code Chart | ||||||||
| Channel | Frequency (MHz) | Code | Frequency (Hz) | Code | Freq. (Hz) | Code | Freq. (Hz) | Code | Freq. (Hz) |
| 1 | 446,00625 | 0 | Disabled | 10 | 94,8 | 20 | 131,8 | 30 | 186,2 |
| 2 | 446,01875 | 1 | 67,0 | 11 | 97,4 | 21 | 136,5 | 31 | 192,8 |
| 3 | 446,03125 | 2 | 71,9 | 12 | 100,0 | 22 | 141,3 | 32 | 203,5 |
| 4 | 446,04375 | 3 | 74,4 | 13 | 103,5 | 23 | 146,2 | 33 | 210,7 |
| 5 | 446,05625 | 4 | 77,0 | 14 | 107,2 | 24 | 151,4 | 34 | 218,1 |
| 6 | 446,06875 | 5 | 79,7 | 15 | 110,9 | 25 | 156,7 | 35 | 225,7 |
| 7 | 446,08125 | 6 | 82,5 | 16 | 114,8 | 26 | 162,2 | 36 | 233,6 |
| 8 | 446,09375 | 7 | 85,4 | 17 | 118,8 | 27 | 167,9 | 37 | 241,8 |
| 8 | 88,5 | 18 | 123,0 | 28 | 173,8 | 38 | 250,3 | ||
| 9 | 91,5 | 19 | 127,3 | 29 | 179,9 | ||||
16 Warranty
16.1 Warranty period
Topcom units have a 24-month warranty period. The warranty period starts on the day the new unit is purchased. Consumables or defects causing a negligible effect on operation or value of the equipment are not covered.
The warranty has to be proven by presentation of a copy of the original purchase receipt, on which the date of purchase and the unit-model are indicated.
16.2 Warranty handling
A faulty unit needs to be returned to an authorized service centre including a valid purchase note. If the unit develops a fault during the warranty period, the service centre will repair any defects caused by material or manufacturing faults free of charge.
The service centre will at its discretion fulfil its warranty obligations by either repairing or exchanging the faulty units or parts of the faulty units. In case of replacement, colour and model can be different from the original purchased unit.
The initial purchase date shall determine the start of the warranty period. The warranty period is not extended if the unit is exchanged or repaired by the appointed service centres.
16.3 Warranty exclusions
Damage or defects caused by incorrect treatment or operation and damage resulting from use of non-original parts or accessories are not covered by the warranty.
The warranty does not cover damage caused by outside factors, such as lightning, water and fire, nor any damage caused during transportation.
No warranty can be claimed if the serial number on the unit has been changed, removed or rendered illegal.
The CE symbol indicates that the unit complies with the essential requirements of the R&TTE directive.
1 Inleiding
13.7 CTCSS (Continuous Tone Coded Squelch System)
15 Technical specifications
| PMR | |
| Kanalen | 8 |
| CTCSS (subkanalen) | 38 |
| Frequentie | 446.00625MHz - 446.09375 MHz |
| Reikwijdte | Tot 3 Km (ideale omstandigheden) |
| Batterijen | 3 x AAA Alkaline of NiMh oplaadbaar |
| Uitgangsvermogen | =< 500mW ERP |
| Modulatie | FM - F3E |
| Kanaalbreedte | 12,5 Khz |
| Snellader | |
| Ingangsvermogen | DC 12V / 2000 mA |
| Laadspanning | 2,8V / 1200mA x 2 max. |
| Compensatielading | Lading gedurende 1 seconde om de 10 seconden |
| Maximum laadtijd | 2.ur |
| Channel Frequency Chart: | CTCSS Code Chart | ||||||||
| Channel | Frequency (MHz) | Code | Frequency (Hz) | Code | Freq. (Hz) | Code | Freq. (Hz) | Code | Freq. (Hz) |
| 1 | 446,00625 | 0 | Disabled | 10 | 94,8 | 20 | 131,8 | 30 | 186,2 |
| 2 | 446,01875 | 1 | 67,0 | 11 | 97,4 | 21 | 136,5 | 31 | 192,8 |
| 3 | 446,03125 | 2 | 71,9 | 12 | 100,0 | 22 | 141,3 | 32 | 203,5 |
| 4 | 446,04375 | 3 | 74,4 | 13 | 103,5 | 23 | 146,2 | 33 | 210,7 |
| 5 | 446,05625 | 4 | 77,0 | 14 | 107,2 | 24 | 151,4 | 34 | 218,1 |
| 6 | 446,06875 | 5 | 79,7 | 15 | 110,9 | 25 | 156,7 | 35 | 225,7 |
| 7 | 446,08125 | 6 | 82,5 | 16 | 114,8 | 26 | 162,2 | 36 | 233,6 |
| 8 | 446,09375 | 7 | 85,4 | 17 | 118,8 | 27 | 167,9 | 37 | 241,8 |
| 8 | 88,5 | 18 | 123,0 | 28 | 173,8 | 38 | 250,3 | ||
| 9 | 91,5 | 19 | 127,3 | 29 | 179,9 | ||||
16 Garantie
Piles charges
Piles 2/3 charges
Piles 1/3 charges
Piles déchargees
13.7 CTCSS (Continuous Tone Coded Squelch System)
13.12 Bip Roger On/Off
15 Specifications technique
13.7 CTCSS (Continuous Tone Coded Squelch System)
15 Technical specifications
4.4 Risk for forgiving
13.7 CTCSS (Continuous Tone Coded Squelch System)
15 Technical specifications
13.7 CTCSS (Continuous Tone Coded Squelch System)
4.4 Fare for forgiving
Hold batteriene unna sma barn
13.7 CTCSS (Continuous Tone Coded Squelch System)
13.7 CTCSS (Continuous Tone Coded Squelch System)
13.14 Dual Channel Monitor function
In stand-by, the PMR is set on one set channel with CTCSS code. The PMR will only receive signals transmitted on that channel and CTCSS code.
Dual Channel Monitor allows you to monitor a second channel with CTCSS code.
This function is interesting when you have purchased a second PMR next to the Babytalker.
- Paina (PTT) -painiketta 7 kertaa, DCM OFF nakyyy näytöllä.
- Press or to change the channel.
- Press to confirm the channel selection and go to CTCSS SUBCHANNEL SELECTION
Press or to change the CTCSS.
Press to confirm.
When the Dual Channel Monitor function is activated, the PMR will switch sequentially between the standby channel + CTCSS and the Dual Channel + CTCSS.
13.15 Nappainlukko
13.7 CTCSS (Continuous Tone Coded Squelch System)
15 Technical specifications
13.7 CTCSS (Continuous Tone Coded Squelch System)
O diynphioc kwokicCTCSS avtoixei oia oukykepiiev n ouxvtnta Tou ktemuie n ouakeun. Au npnoctc me to iio kavali kai kwiko CTCSS exouv duvatotnta etikoivwiaac. D ev exouv tn duvatotnta etikoivwiaic me aalouc oTo kavali, ektoc av oi allec aupatec ouakeuec exouv etialeeakpibwc tov io kwokic CTCSS.
H ouokeu PMR diaotei 38 kwiokuoc CTCSS.
PiEOTe 1o opec 念 , ia va apxioi va avaobnve i KwdiokC TCSs
PiEOTε n γia va επIαξετe áλλo KωδiKó.
PiEOTe PTT yia va eTIiBébetaIwOeTe TnV eTIIOyN oac kai va eTIIOTppeyETe OTN λειToupyia NORMAL.
Tia eTJIeBaiown kai taebaon otynv tioevn etiiloyn, TIOE
13.7 CTCSS (Continuous Tone Coded Squelch System)
4.3 JIyuHa86e3oNaChOCTb
He octabnIte yctpoCTBO B MecTe, npedna3NaueHOM dIynoJ6e3Oanachoctn abTomoBnJI. POnyukn 6e3oNacHOCTn HndyBaOTcC 60nbwo CniloE. Ecnu yctpoCTBO Jeknt B MeTe packpbITn, TO npi HndyBaHNI POyukn 6e3oNacHOCTn, ycTpoCTBO MOKET 6bITb OTb OToB oSeHcOcTBIO nHaHeCTn TpaBMbl naccaxnapm ABtomO6nJIa.
-ДерхитepaДИОΚAKМнИМуВБ15caHTmEtpaxOTэNEKtpokApDIOCTMMyTIpota.
- HemeiHb BbIKIouHte paHIO, ecn 3aMeHbI IomExn B pa6Ote MeiunHckoro o6OpyIOBaHn.
He npOn3BOJInTe 3aMeHy 3IeMeHToB NITaHnB BO B3pbBoOAnachOcpe. Nckpa, KOTopra MOxET BO3HnKHyTb pN KOHTaKTe BO BpEmy yCTaHOBKn IIN N3BNeHeHn IAtoHHKa NITaHnA, MOxET pNBeCTn K B3pbBy.
- HeMeIeHNO BbIKIouHte paIIO B 3OHe NOBbIeHHO B3pbIBOONaCHOCTN. Bo3NIKHOBEHne NcKpbI B TaKnx MeCTax MOKeT PnIBEcTN K B3pbIBy IJI IN BO3rOpAHIO, YTO B CBOIO OuepeDb MOKeT PnIBEcTN K TpaBMam IJI DaJce CMEptN.
- Hikorda He 6pocai Te 3neMeHbI PntaHnB OOrh, TaK KaOH MoYr B3OpBaTbcra.

3OHBI NOBbIeHHoB 3BpbIBOONaCHOCTNo HO He BcERda,OTMeueHb COOTBeTCByUOIMN O6o3NaueHnA M. K TaKOBbIM OTHOcTcR TOJIINBHbIE 3OHBI, TAKNE KaK HIXKHra NaYbHa Ha cydHax, MeCTa NpeeroHNK ININ XpaHeHNA TOJINBa INXmUeCKNX BeSeCTB; 3OHBI, IDe B BO3dyXe PnCcyTCTBYOT XmMnueCKNe BeSeCTBa ININ YacTnCbI, KaK, HAnpIMep, 3epHOBA ININ MetaJIInuCeckKa NblNB; IN6O INHbIe 3OHBI, IDe O6bIyHo nPeDnncaHO 3arLywHT DBrIrataTeNb aBTOMo6nJa.
4.4 Puck OTPaBHeHn
XpaHInTe nCTOuHNIKI NITAHIN BHe DoCraEMOCTn MaJIeHbKIN DeTei.
4.5 IpaBoBaIHHΦopMaun
B pyaTe 3aIpeSeHo nCnOlb3OBAHne paDnOcB83N BO BpeMa ynpabHeHn aBTOMo6bIeM. B TaKnx CnyaJx CNeDyEt CbExaTb C DOpOrn IpeEd NcPOnlb3OBAHneM ycTpoiCTBa.
BbiklouaTe yctpoCTBO Ha 60pTy caMOIeta, KOrda NoctynaeT COOTBeTCTBYIOuee pacnopjXeHne. IIO6oe INcNoJIb3OBAHne yCTpoCTBa DOJIXHO COOTBeTCTBOBaTb npabINam ABnAInHHn IIn6o INHCTpyKUmaM 3KnpaJa.
BbIKIOHauTe yCTpOJIcTBO B MeCtAX, Ie npICyTCTBYOT COOTBeTCTBYUcIe Ta6NIuKIN. BoJIbHIcIbI MEdIzUNHckne yUpeXJdEHn MOrY nCnONb3OBaTb o6OpyIDoBaHne, YyBCTBNTeJIbHOe K BHeIJHM paIIOuOAcTOTam.
3aMeHa IIn6o MoDnΦnKaZnA aHTeHHb MoKet NOBnIaTb Ha xapaKTePncTkn yctpoiCTBa n HapuHtB npaBnla CE. HecOBmecTnMbIe aHTeHHb MOrY T nobpeIITb paIIO.
4.6 Примechanicals
He doTpaunBaItecbdo aHTeHHbl BO BpeMa CeaHc CBa3n, TAK KAK 3TO MOKeT IOBJIurTa Ha daNbHOCTb DeiCTBna.
- ɪЗbvileknte nctouHnK nɪtəHnɪya, eCJIY yCTpoiCTBO He 6yIeT nCNoIb3OBA TbCS dOJIroE BpeM.
5 Ynctka n yxOa
- YtobI NOUcHITb yCTpoiCTBO, npoTpnte erO MArKO, yBnAaJHeHHo B BOte TpIOnHcO. He nCNoJIb3yIte YnCTaIe cpeIcTBA IIN pAcTbOpHTeII, OHI MOrYT NOBpeIHTb KopNyc n IpOHNIKHyTB BHHTb, BBBeJaYCTpoiCTBO n3 CTPOJ.
- KoHTaKTbI 6aTapeiHoro OTcEka CJIeDyET npOTnpaTb cyxOHe BOPCnCToT TKAHbIO.
EcIn yctpoCTBOHAMOKNO,BbIKNIOHTe ero HHeMeJInHHO3BNeKInTe NCTOCHNI nITAHn. BbCyUHTe 6bTapeHbIOTcEKMgKO TKAHbIO BO I36ExKaHne NOTeHuaJIbHBIX NOBpeXJeHn BODoI. OCTaBBte OTcEOKOTKpbITbIM Ha HOy Do IONHO BbICbIXaHn He NCNoJIb3yIte yctpoCTBO Do noJINHO rPOcsBXHaHn.
6 YtniH3aun H3deJnna (3aunTa OkpykaIoUe Cpebl)

B KOHcE cPoka Cnyk6bI N3dJIeIra erO HeJIb3a BbIbpaCbIBaT BMeCTe C O6bIHybIM XO3aIcTBeHHbIM MycOpOM, a CNeIyET OTHeCTN B NyHKT pPiema Ha yTuIN3aUIO 3JIeKTPnueCKOrO n 3JIeKTPoHHoro 06OpyIDOBAHn. Ha 3TO yKa3bIBAeT CNEuAJIbHbI CNMBON, INCHTpKzIg NO 3KcIIpyaTaIiN I/INI MApKnIpOBKa Ha yNaKOBKe.
HekotopbIe n3 MaTePnaJIOB, IcNoJIb3OBAHHbIX npn npOn3BOdCTBe n3DeJIa, MOrY T 6blT nepepa6oTaHbI, ecIn nx DoCTaBHTB pyHKT nepepa6oTKn. BlaIaOpAra NOBTOPHOMy IcNoJIb3OBAHnIO HekOTopbIX DeTaN eNl mATEpNaJIOB, Bbl BHOcITe HemaJIOBaXhB bKJaD B 3aUHTy OkpykaIoSei cpebl.
EcnBam Heo6xOIMa INΦopMaζη O MecTe paCnOJoxeHryHKTOB npIeMa Ha yTUN3aζU, CBXKTECb C opraHAMM MeCTHO BlaCTN.
7 3KcπIyataúna yctpoiCtBa
Дя CBЯЗИ МEXДУ yCTPOIyCTBAMN CNeIeIyET HAcTPOITb INx HA ODNH KAnAH IPN HAXOJDeHIN B paDnUcYE DeIcTBnA (do 3-x KM Ha OTKpbIToM MeCTHOCTn). TAK KAK daHHbIe yCTPOIcTBa IcNoJIb3yIOT CBO6OdHbIe YAcTOTb (KaHaJIb), TO BCE yCTPOIcTBa pa6OtaIOT Ha 3TNX KaHaJax (BCero 8 KaHaJIOB). ПОТOMY KOHФиIeHцuIaNbHOCTb He MoXeT 6blr rapaHTnpoBaHa. JIO60, KTO INCNoJIb3yeT paIIOCTaHcIuHO Ha BaIeI YAcTOTE, MOXeT CblIaTb pa3ROBOp. EcII N Bi JKeJaTe YeCTaHOBInb CBra3b (pepeDaT b rOlOCoBoi CNrHaJI), To Heo6XoDImO hAxatb KHONKy PTT
Ioka KhoNka HaxaTa, yCTpoiCTBO HaxoDntcB peKIMe nepeJaun N Bbl MoKeTe roBOpNTb B MNUKPOΦoH. Ha BCex paAnocTaNxRb 3OHe DeiCTBnA, HAcTPOeHNbIX Ha OOnn KaHaN n HaxoJauNXcB PEXKIMe OXnDaHnA (He nepeJaun), 6yJeT cIbIshO Baue cooBSeHne. IpeEoTBeTOM Ha COoBSeHne, HeoBXoDmO DoxdaTcBcKOnca ceaHCa nepeJaun COBeCeDnHKa. B KOHcKaoJepaun yCTpoiCTBO m3daet CnHan. YTObI OTBeTtB, npocTo HaxMnte KhoNkY iROBOpNTe B MNUKPOΦoH.

Ecnn 2 nnn 60one noJb3ObaTeJI OndHOBpeMeHHo HaxMyT KhoNky (PT), To Ha npYrom KOHue 6ydt npnHrTaHn6one CnIbHbI CNrHaI, a 60one cna6bl 6ydt 3aRnyweH. Po3tOMy CneDyET nepeDaBaTb CnHraJI (HaxAB KhoNky (PT) ) npu CBO6oDHom KaHaJe.
8 Haayano pa6oTbI
8.1 ChyTne/yCTaHOBka 3axnMa dJIpeMHa
- YTo6bI ChrTb 3aXIM, npoTOJIKNHte 3aXIM IJRA pEMHRA (B) NO HApRaBHeHIO K aHTeHHe, OJHOBpeMeHHO IOTAHyB Ha ce6ra J3bUOK 3aMka (A).
- Bo Bpemr noBtopHoi ycTaHOBKn, uIeJIcK 3aMka O3HaHaet, YTO 3aXIM dIpaPeMHy ycTaHOBJIeH npaBnIbHo.
8.2 YctaHObKa 6aTapei
- CHINMITE 3axim dIa peMH8 (S 8.1).
- Испобз汞 монету, освобODиTe BINT (C), поеврHyВ erо npOTичacoBOI CTpeJIKN, И OTKpoIte 6aTapeHbI OTCEK.
- BCTaBbTe 4 5eNoUhBx IJN aKcMyIaTOpHbIx 6aTapei, npIepXnBaIc bIIOJIaPHoCTn, KaK poka3aHo.
- YctaHOBnTe KpbIuKy 6aTapeHOrO OTeKa N 3aXm DJIpeMHra (S 8.1).
9 KhoNkn
- AHTehHa
- XndkokpcntaJIInueckn DnCpIeN
- Pa3bEmДЯHayuHnKOB
- Pa3bEmДЯЗэрДнOrOуСТpoIcTBA
- KhoNka "BnI3"
-ymeHbWntB rPOMKoCTb INHaMnKa
- IpeeTn K npeIbIyUeMy nyHKtY MeHIO
-
KhoNka "3BOHOK"
-
Peredatb cnHan 3BOHka
7.ДИнhamNK
8. Pa3bEmДЯ MmKpOΦoHa
9. MinkpofoH
10. KhoNka"MeHIO
-
BoNTB MeHIO
-
KhoNka "ON" (BkJIIOHHTb) / "OFF"
(BbIKIOHTb) ①
-
KhoIIka "Bbepx"
-
YBeJIInuHTb rPOMKoCTb DnHaMnKa
-
Перейтк следуюшу pyнкту MEHIO
-
KhoIIka "HaxaTb IJy pa3roBopa" (PTI)
Haxatb dny toro, yto6bl roBOpntb nn OTnycTntb dny toro, yto6bl cnywaTa
IoTBePdntb yCTaHOBky BbIbpaHHoB MeHIO ONiUN

Orda BbI BbIHMaTe 6aTapeN, BpeMc6paCbBaetca Ha 12:00.
13.1.2 CekvHdomep
- Haxmte u yedeXnBaTe B TeueHne 3 cekyHd , YTObI BOITN B peXmCekyHdoMepa.
Haxmnte 3Jn3ayncKa ckyHdomepa.
Haxmnte ДяпocтahOBkn cekyHdomepa. - Haxmte 再cspoca.
- Haxmte u yedeXnBaTte B TeueHne 3 ckynd , YTo6bl BbIITn n3 peXnMa ceKHyDoomepa.
13.2 BkJIIOUeHHe/BBI KJIIOUeHHe yCTpoiCtBa
ДлЯТОВ,ЧTOБИВКЛHOUHTb yCTPOnICTBO,нжмITEи удерЖиBaIte ① .Вы yCЛышпTe 3ByKOBoI CnHaIи Ha ДиСПЛeE OTO6pa3ITcЯ TEkyци Канл, кд CTCSSи TEkyUeBpeMЯ.
ДяТOrO,YTO6bI BbIKNIOHTb YcTpoiCTBO,ONaTb HaxMnTe N yDepKINBaITe ① .Bbl YcNbIshnTe 3ByKOBo CnHaN n Ha DiNCJIee OTo6pa3NTc TOnbKO Bpem.
13.3 PerynipoBka rpoMkoCTn dHaMka
ГROMKOCТБ ДИНAMИКА можно OТPERУЛПОВаТБ ИСПОЛБ3УЯ 乌 .УpoBEнБ ГROMKOSTДИНAMИКА OTOБРASTСЕНУ.KIДКOKPNUCTANПИЧECOMДИСПЛEE.
13.4 Ппем сигнана
UcTpoIcTB NOCTOJHNO HaxoJNTcBpeKIMe IPIEMA ("RECEIVE"), KOrJa OHO BkIIOUeHO N He HaxoJNTcBpeKIMe nepeJaU. KorJa Bbl noIyuaete CnIHn IO TeKyuIeMy KaHaJy, Ha DnCJIeE NoRbIaTe 3HaUOK "RX".

IЯ toro,у6bI pyrne noIb3OBeTnNoIyuInI nepeaHHb Bamn cHan,OnHdoJXHb 6bITb HacTpoeHbHa TOT Jce camb KaHn KOD CTCSS, YTO n Bbl.
13.5 Ipepa cunhana

MOnHToPnHr DByx KaHaNoB No3BoJIeT Bam cKaHIpOBaTb BToPoI KaHaN c KoIom CTCSS.
-
Haxmnte 7 pa3. Ha dinpnee oTo6pa3ntcra "DCM OFF".
-
HaximMaITe ANJIN, YTO6bI CMeHHTb KaHaJI.
- Haxmnte 📁я поТьержденья Вьбopa KaHaJa ипөрхда К Вьбору поkaHaJa CTCSS ("CTCSS SUBCHANNEL SELECTION").
- HaximMaIte ʌnɪ ɒv, yTo6bI cMeHntb KoI CTCSS.
HaxmTe PTT nIy IIOITBeKJdHnIa.
UTo6bI OTKnIOuHTb DaHHyIO fynKcHIO, Bbl6epnte BblkIOuHTb ("OFF") Bo BpeMa yCTaHOBKn KaHaJa.
PnAaTbN3InpOBAHHOfYHKcIMMOHITOpIHraDByXKaHaJIOByCTPoICTBO