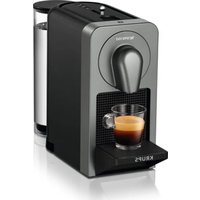
XP2240 10 - Coffee machine KRUPS - Free user manual and instructions
Find the device manual for free XP2240 10 KRUPS in PDF.

User questions about XP2240 10 KRUPS
0 question about this device. Answer the ones you know or ask your own.
Ask a new question about this device
Download the instructions for your Coffee machine in PDF format for free! Find your manual XP2240 10 - KRUPS and take your electronic device back in hand. On this page are published all the documents necessary for the use of your device. XP2240 10 by KRUPS.
USER MANUAL XP2240 10 KRUPS
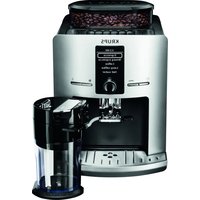
a - Espresso and coffee maker water tank lid
b - Removable espresso water tank
c - Measuring spoon
d - Cup tray
e - Espresso on/off switch
f - Function switch
f1-Coffee position
f2-Off position
f3-Steam reheating position
f4-Steam position
g - Percolation head
h - Filter holder
i - Drip tray grid
j - Drip tray
k - Multidirectional steam nozzle
- Cappuccino accessory
FILTER COFFEE MAKER PART
A - Filter holder cover
B - Lid opening button
C - Coffee maker water tank
D - Filter holder with locking handle
E - Graduated water level in coffee maker water compartment
F - Graduated jug
G - Hotplate
H - Receptacle for "XS1000 Duo Filter" water filter (not supplied)
- Filter coffee maker on/off button
We appreciate your trust in and your loyalty to Krups products. Your machine is equipped with a filter holder which boasts three exclusive systems:
- One for the gradual tamping of the espresso ground coffee as the filter holder is being positioned (KTS "Krups Tamping System").
- Another is for ejecting the used grounds.
- The last is for using E.S.E. (Easy Serving Espresso) or soft pods.
It is also removable, and so can be frequently cleaned to be maintained in perfect working order. For your safety, your filter holder is equipped with a locking system to keep it in place when the pressure rises.
SAFETY INSTRUCTIONS
Before turning your espresso machine on, read these instructions for use carefully.
- Only use an earthed socket to plug the machine in. Check that the power voltage indicated on the nameplate of the appliance corresponds to that of your mains installation.
- Do not remove the filter holder containing the ground coffee while the water is going through, because the appliance is under pressure at that time.
- Do not use the appliance if the drip tray and the grid are not in place.
- Remove the plug if a problem occurs as the coffee is passing through, or before you clean the appliance.
- Do not unplug the appliance by pulling on the cord, and do not run the cord over a sharp edge or the corner of a piece of furniture.
■ Ensure that the cord and your hands do not touch the hot parts of the appliance (filter holder, steam nozzle).
■ Never immerse your appliance in water.
- Keep the appliance out of the reach of children and do not leave the power cord hanging.
Refer to the instructions for descending your appliance.
- Do not turn the appliance on if it is damaged or if the cord is in poor condition.
If the power cable is damaged, it must be replaced by the manufacturer, its after-sales service or any person with similar qualifications, in order to avoid all danger.
■ Make sure the filter holder is tightly fitted before running the coffee through.
This appliance is not intended for use by persons (including children) with reduced physical, sensory or mental capabilities, or lack of experience and knowledge, unless they have been given supervision or instruction concerning use of the appliance by a person responsible for their safety.
Children must be supervised to ensure that they do not play with the appliance.
The accessories and the removable parts of the appliance are not dishwasher safe.
This appliance is intended to be used only in the household.
It is not intended to be used in the following applications, and the guarantee will not apply for:
- Staff kitchen areas in stores, offices and other working environments;
-Farmhouses, - By clients in hotels, motels and other residential type environments,
- Bed and breakfast type environments.
This product has been designed for domestic use only. Any commercial use, inappropriate use or failure to comply with the instructions, the manufacturer accepts no responsibility and the guarantee will not apply.
TECHNICAL CHARACTERISTICS:
Pump: 15 bars
■ KTS: Krups Tamping System, for automatic and optimum tamping of the ground coffee.
Filter holder with grounds ejection system. Compatible with ground coffee and all types of pods, ESE or flexible.
Steam function
Automatic shutoff after 30 minutes (protection of the environment).
■ Removable water compartment (capacity: 1.1 litres)
Power: 2450 W
Voltage: 220-240 V - 50/60Hz
Anti-overheating safety mechanisms
Dimensions: H. 320 mm, L. 345 mm, P. 290 mm

IMPORTANT!
Operating voltage: This appliance is designed to work only at alternating current 220-240 V.
Type of use: Your appliance is EXCLUSIVELY designed FOR USE IN THE HOME.
MAKING AN ESPRESSO
TIPS
■ For an espresso with intense flavour, we recommend using freshly ground special espresso coffee which is ideal for the delicacy of this type of drink, along with cups with a capacity not exceeding 50 ml.
■ Keep the espresso ground coffee in the refrigerator, it retains its flavour longer.
- Do not fill your filter holder to the brim, but use the measuring spoon (1 cup = 1 spoon - 2 cups = 2 spoons).
If you do not use the appliance for more than 5 days, rinse and drain the water tank.
Before removing the water tank to fill or empty it, always turn the appliance off.
Always place the unit on a flat, stable, heat-resistant surface.
To obtain an espresso at exactly the right temperature, we recommend that you preheat your cups.
■ To prolong the life of your appliance, we recommend you always use a Claris Aqua Filter System cartridge (reference: F088) and that you descale the appliance at regular intervals.

IMPORTANT!
Before using for the first time, after a prolonged period of inactivity or after descal- ing, the appliance must be cleaned as described in paragraph 1: "USING FOR THE FIRST TIME".
1. USING FOR THE FIRST TIME
Before using your espresso machine, clean all the accessories in soapy water and dry them. If you do not use the Claris cartridge, refer directly to the section "RINSE YOUR APPLIANCE.
INSTALLATION OF THE CLARIS CARTRIDGE
If you use a Claris cartridge, please apply the following procedure to fill it with water.
Screw the Claris filter into the bottom of the water tank.
Fill it with water (fig. 2).
- Replace the water tank by positioning it firmly, to ensure the water inlet is in place, and close the lid (fig.3)
Turn the appliance on by pressing the "On / Off" button (fig.4).
Turn the switch to the "steam preheating" position. Once the light stops blinking, turn back the switch to the "off" position. Repeat this operation 4 more times.
To make sure the Claris cartridge is full of water, place a container under the percolation head, turn the switch to the "coffee" position and make sure some water is running through. If not, repeat the above procedure.

IMPORTANT:
The Claris cartridge needs to be replaced every 2 months if it is used daily.
RINSING YOUR APPLIANCE
Then rinse the appliance. To do so:
Turn the machine on and fill the water tank
Insert the filter holder (without ground coffee) in the appliance (fig.7).
- Place a container of sufficient volume under the filter holder.
■ As soon as the appliance reaches the required temperature, the "on/off" light stops flashing. Turn the switch to the "coffee" position and let all the water run from the water compartment (fig.8).
■ If necessary, stop the operation by turning the switch to the "off" position (fig. 9) to empty the container and then resume the operation.
- Empty the container and unlock the filter holder: press the "OPEN" button on the filter holder and turn it to the left (fig.10).
2. MAKING AN ESPRESSO
In order to release all the aromas of the coffee and ensure your complete satisfaction, this machine pre-infuses each coffee. The pump works 3 seconds, stops the following 3 seconds and then the cycle continues until the end of the preparation.
PREHEATING THE ACCESSORIES
■ For the best results, we recommend that you preheat the accessories (filter holder and cups) without ground coffee. To do so:
■ Fill the water tank and turn the machine on (fig. 1, 2, 3 and 4).
Put the filter holder in place, place the cups below.
■ As soon as the appliance reaches the required temperature, the light stops flashing.
Turn the switch to the "coffee" position (fig.8).
■ When the cups are filled with hot water, turn the switch to the "off" position (fig.9).
Remove the cups.
■ Unlock the filter holder: press "OPEN" while turning the filter holder to the left and remove it from the machine (fig. 10).
Note: When the appliance is hot, the espresso cups can be preheated on the cup warming plate.
WITH ESPRESSO GROUND COFFEE
The type of coffee you choose will determine the strength and taste of your espresso.
- Fill the water tank and turn the machine on (fig. 1, 2, 3 and 4). During the pre-heating phase, the indicator lamp will flash.
- Using the measuring spoon, place the espresso ground coffee in the filter holder: one spoon (full to the brim) per cup (fig.5).
■ Remove the excess espresso ground coffee from the edge of the filter.

IMPORTANT:
Do not tamp the coffee down in the filter holder. The coffee is automatically tamped using the KTS "Krups Tamping System".
Only use Espresso Ground Coffee. Do not use any other coffee such as instant coffee.
Insert the filter holder in the appliance by turning it to the right as far as it will go, up to the stop (fig.7).
Put one or two cups under the filter holder.
■ As soon as the appliance reaches the required temperature, the light stops flashing.
Turn the switch to the "coffee" position (fig.8).
■ When you have the desired amount of coffee, turn the switch to the "off" position (fig.9)
■ Unlock the filter holder: press "OPEN" while turning the filter holder to the left and remove it from the machine (fig. 10).
Remove the grounds using the ejection system by pressing the "EJECT" button located between the two coffee outlet nozzles (fig.11). Wash the filter under running water, pressing "EJECT" to eliminate the remnants of grounds.
The filter holder now can be filled again to prepare other espressos.
WITH AN "E.S.E." ESPRESSO POD
"ESE" for "Easy Serving Espresso" is a packaged pod (44 mm diameter) of 7g of selected coffee, ground and compacted between two paper filters, specially designed to make Italian style ristretto (small and strong) espressos.
This system allows immediate, simple, clean and comfortable use of your machine.
- Fill the water tank and turn the machine on (fig. 1, 2, 3 and 4). During the pre-heating phase, the indicator light will flash.
- Tear the excess paper off the pod, put the E.S.E. pod in the filter holder with the red writing facing down (fig.6).
Be sure to place all the paper inside the filter holder, otherwise there might be leaks.
If the pod is not placed correctly, the coffee you'll get in the cup will not be satisfactory.
Never use two pods together.
■ Follow the steps in figures 7 to 11 in the preparation of an espresso.
WITH A SOFT POD
Your machine is also compatible with soft pods (usually 60~mm in diameter). Given that this kind of pod is not specifically designed for espresso machines, you will get a less full-bodied espresso than with an E.S.E. pod.
- Fill the water tank and turn the machine on (fig. 1, 2, 3 and 4). During the pre-heating phase, the indicator light will flash.
- Place a soft pod in the filter holder. Never use two pods together. If the pod is not placed correctly, the coffee you'll get in the cup will not be satisfactory.
■ Follow the steps in figures 7 to 11 in the preparation of an espresso.
3. STEAM FUNCTION
The steam is used to foam up milk (for example to make a cappuccino or a cafe latte).
To produce steam, the pump works by emitting an intermittent noise.
■ After using the steam function, the appliance cools automatically by pumping cold water through the heating system. During the pumping cycles, the excess steam in the heating system is released with the hot water into the drip tray.
The steam and noise that accompany this phase are important for cooling the appliance.

NOTE: during and after using the appliance, the metal parts of the steam nozzle can be very hot.
USING THE STEAM NOZZLE TO FROTH MILK
■ Fill the water tank and turn the machine on (fig. 1, 2, 3 and 4).
Turn the switch to the "steam preheating" position. The indicator lamp flashes (fig.12).
Turn the steam nozzle towards the outside of the appliance.
Pour 60 to 100ml of very fresh, very cold milk into a small container of about 1/2 litre and which can go under the steam nozzle. The milk and its container should be quite cold.
We recommend that you use pasteurised or UHT milk and that you avoid untreated milk.
■ As soon as the indicator lamp stops blinking, plunge the steam nozzle into the milk.
Turn the switch to the "steam" position (fig. 13).
■ For good results, hold the nozzle at the bottom of the container for about 25 seconds while the milk heats (without however touching the bottom). Then bring the container down gradually so that the nozzle moves up towards the surface (without ever coming out of the milk) (fig.14).
Once the froth has been formed, turn the switch to the "stop" position (fig.15). The appliance will now automatically cool itself by launching 3 intermittent pumping cycles. Once this is automatic operation is complete, you can make a coffee.

IMPORTANT:
To avoid blocking the holes in the cappuccino accessory, the milk foam should never reach the black plastic ring.
It is important to clean the cappuccino accessory after each use to prevent the milk from drying out on the inside. To do so:
- Place the cappuccino accessory in a container filled with water.
Turn the switch to the "steam preheating" position. - Once the light has stopped blinking, turn the switch to the "steam" position (to remove the remaining milk) and run the steam for 30 seconds.
Turn the switch to the "stop" position.
Clean the cappuccino accessory with a damp cloth.
For thorough cleaning of the cappuccino accessory, see paragraph 4, "Cleaning and Maintenance".

ATTENTION!
The steam nozzle is still hot!
4. CLEANING AND MAINTENANCE OF THE APPLIANCE
Do not wash your espresso machine accessories in the dishwasher.
OF THE APPLIANCE
- Unplug the power supply before cleaning and let the appliance cool down.
- Clean the outside of the appliance from time to time with a damp sponge. After use, the water tank must be emptied.
Rinse the inside of the tank regularly. - When a thin white layer starts to form in the tank, carry out a descaling operation (see paragraph 5 "DESCALING").
OF THE DRIP TRAY
The drip tray must be emptied after each time the appliance is used. Lift up slightly and remove it from the appliance.
If multiple espressos are prepared one after the other, it should be emptied from time to time (every 7 to 8 espressos approximately) (fig.19&20)
The presence of water is normal and is not the sign of a leak.
■ If necessary, clean the drip drawer and its grid with water and a little gentle washing-up liquid, rinse and dry. When reassembling the components, make sure everything is in the right place.
OF THE PERCOLATION HEAD AND FILTER HOLDER
They must be cleaned after each use. Simply wipe a damp cloth over the percolation head (fig. 21) and clean the filter holder under running water and a little gentle washing-up liquid.
- Do not use alcohol or solvent-based cleaning products.
■ For best results, you can activate the "EJECT" button several times during rinsing.
We recommend that you shake the filter holder thoroughly in order to remove all the water.
Rinse and dry.
- When not using your espresso coffee maker, do not leave the filter holder on it, in order to prevent wear to the joint.
For more thorough cleaning, the filter holder can be dismantled:
■ You can remove the black plastic part where the coffee outlets and the "EJECT" button are to be found: turn it to the left and pull sharply (fig. 22).
Clean the various components under running water and a little gentle washing-up liquid.
Rinse and dry.
- Replace the black plastic part in the metal component, turn it to the right until the two arrows on each component line up.
If the percolation head is very clogged, unscrew the grid using a Phillips screwdriver, clean it and reassemble it, screwing tightly (fig.23).
OF THE CAPPUCCINO ACCESSORY
To clean it, unclip it from its articulated arm by pulling the black ring downwards (fig.16).
This accessory is composed of 3 parts: the inner tube, the outer tube and a stainless steel protection.
To clean this accessory, take it apart completely.
To remove the inner tube, unscrew the end of the steam nozzle.
■ You can then remove the stainless steel protection.
- Clean the 3 components under running water and a little gentle washing-up liquid (fig. 17).Rinse and dry.
Once the steam nozzle has been cleaned and reassembled, taking care to tighten it properly, replace it on its articulated arm, ensuring that the mobile black plastic ring is held downwards.
- Then make a circular movement upwards in order to click with the steam nozzle. Then clip the black plastic part by moving it upwards (fig.18).
5.DESCALING
The guarantee does not cover appliances which become faulty because the descaling operations have not been carried out regularly.
Descale your espresso maker regularly with white vinegar or a packet of citric or sulphamic acid which you can buy in hardware stores.
We recommend that you use the Krups descaling accessory, reference F054, available in Krups authorised service centres. In addition to two descaling doses, this accessory includes a water hardness tape tester to assess the required frequency with which your appliance should be descaled, in normal use. The amount of scale depends on the hardness of the water but also the level of use.
The frequency of descending given by the F054 accessory is therefore purely indicative. If in doubt, it is recommended to descale every month.
| DESCALING FREQUENCY | |||
| Ave. number coffees per week | Soft water (<19°th) | Hard water (19-30°th) | Very hard water (>30°th) |
| Less than 7 | Once a year | Every 8 months | Every 6 months |
| From 7 to 20 | Every 4 months | Every 3 months | Every 2 months |
| Over 20 | Every 3 months | Every 2 months | Every month |
DESCALING THE STEAM CIRCUIT AND ESPRESSO
Empty the water compartment and put it back in place.
If your appliance is fitted with our Claris - Aqua Filter System F088 cartridge, please remove the cartridge before the descending operation.
- Fill the tank with a mixture composed of three parts water for one part white vinegar or a mixture of 1 / 2 litre of water and a packet of citric or sulphamic acid available in hardware stores.
Insert the filter holder (without ground coffee) into the appliance and lock it by turning it to the right as far as it will go.
Place a container underneath the steam nozzle.
Press the "on-off" button (fig.4).
- Immediately turn the switch to the "steam" position (without stopping at the "steam preheating" position) (fig.13).
Let the mixture run through the nozzle until steam appears.
Turn the switch back to the "stop" position (fig.15).
- Place a container of sufficient volume under the filter holder.
- Once the light stops blinking, turn the switch to the "coffee" position and let half of the mixture run through (fig.8).
Turn the machine off using the "on off" button and leave the switch on the "coffee" position.
After 15 minutes, turn the machine back on.
Let the rest of the water run through.
Turn the switch to the "stop" position.
RINSING

IMPORTANT!
After descending, perform 2-3 rinsing operations with clear water (without es-
presso ground coffee), as described in paragraph 1 "using for the first time". Remember to rinse the steam circuit by following the instructions below:
Place a container underneath the steam nozzle.
Press the "on-off" button (fig.4).
- Immediately turn the switch to the "steam" position (without stopping at the "steam preheating" position). (fig.13).
Let the water run through the nozzle until steam appears.
Turn the switch back to the "stop" position.
The appliance is descaled and ready to be used again.
6.GUARANTEE
■ Your appliance is covered by guarantee but any connection or handling error or any use of the appliance other than that described in these instructions renders the guarantee invalid.
This product has been designed for domestic use only. Any commercial use, inappropriate use or failure to comply with the instructions, the manufacturer accepts no responsibility and the guarantee will not apply.
■ No repair made because of a lack of descending will be covered by the guarantee.
■ For any after-sales and spare parts problem, consult our Helpline or an authorised service dealer. Helpline:
0845 602 1454 - UK
01 677 4003 - ROI
or consult our web site: www.krups.co.uk
7. PROBLEMS, PROBABLE CAUSES AND CORRECTIVE ACTIONS
| Problems | Possible causes | Solutions |
| The espresso is not hot enough. | The cups and the filter holder are cold. | Preheat the accessories: cups and filter holder (see paragraph 2). |
| The filter holder is blocked | You forgot to unlock the filter. | Press “OPEN” while turning the filter holder to the left. |
| The grounds are not dry after water has run through. | You have not tightened the filter holder properly. | Tighten the filter holder by turning it to the right as far as it will go, up to the stop. |
| The coffee flows too slowly. | You have tightened the filter holder too much. | Loosen it slightly. |
| The ground coffee is too fine, too fatty or floury. | Choose a slightly larger grained ground coffee. | |
| The filter holder is dirty. | Clean your filter holder (see paragraph 4). | |
| The water drip-through grid is clogged. | When the appliance has cooled, clean the percolation head with a damp cloth. (fig.21). | |
| The water does not run through. | No water in the tank. Tank poorly fitted. | Fill the tank. Press firmly on the tank. |
| The filter is clogged. The ground coffee is too fine. | Clean the filter holder (see paragraph 4) and try a less fine grind. | |
| Your appliance is scaled up. | See paragraph 5 | |
| The Claris cartridge has not been primed. | Refer to section 1 "Using for the first time" and "installation of the Claris cartridge". | |
| Water leaks from the filter holder after an espresso has been made. | The switch has not been positioned on the "stop" position. | Turn off your appliance by positioning the switch on the "stop" position. (fig.9). |
| Formation of scale because of especially hard water. | Descale the appliance according to the manual (see paragraph 5). | |
| Coffee grounds in the cup. | The filter holder is clogged. | Clean the filter holder with hot water. Press "EJECT" to eliminate the remnants of the grounds. Shake to drain the water. |
| The grind is too fine. | Choose a slightly larger grind. | |
| The water tank leaks when it is carried. | The valve at the bottom of the tank is dirty or defective. | Wash the water tank and operate the valve at the bottom of the tank with your finger. |
| The valve is blocked by scale. | Descale the appliance (paragraph 5). | |
| Water leaks under the appliance. | Internal leak. | Check the position of the tank. If the fault persists, do not use the appliance, contact an approved service centre. |
| Crackling is heard.... | This is normal. It is the filter holder safety lock. | |
| The pump is unusually noisy. | No water in the tank. | Stop the appliance, fill the water tank and turn the machine back on. |
| Tank poorly fitted. | Press down firmly on the tank. | |
| The cups are not filled equally. | The filter holder is clogged. | See paragraph 4. |
| The machine leaks on the sides of the filter holder. | The filter holder has not been properly positioned. | Put the filter holder in place and lock it (by turning it to the right as far as it will go, up to the stop). |
| The edge of the filter holder is clogged by ground coffee. | Remove excess coffee. | |
| Pod poorly positioned in the filter. | Place all the paper inside the filter holder. | |
| Your espresso tastes bad. | After descending, the rinsing was not performed properly. | Rinse the appliance according to the manual (see paragraph 5). |
| The appliance does not work | The pump was unprimed due to lack of water. | Fill the water tank and reprime the pump (see paragraph 1). Avoid completely emptying the tank. |
| The detachable water tank is not properly clicked in place. | Click the tank into place by pressing firmly. | |
| The steam nozzle does not froth the milk. | The steam nozzle is blocked or scaled up. | Descale the steam nozzle (see paragraph 5) or unblock it with a needle. |
| The milk is too hot. | Use cold milk. | |
| The shape of the container is not appropriate. | Use a small pitcher. | |
| The milk is not fresh enough. | Use very fresh, very cold milk. You may also need to change your brand of milk. |
FILTER COFFEE MAKER PART
Before using for the first time
- Operate the coffee maker for the first time with 1 litre of water, without ground coffee, by filling the water compartment and pressing the on/off button on the filter coffee maker side.

IMPORTANT
The quality of the water you use is crucial to the taste of your coffee. You must make sure that the water has just come out of the tap (so that it has not had time to become stagnant in contact with the air), that it has no smell of chlorine and that it is relatively cold.
We recommend that the water be filtered with a Krups Duo Filter cartridge reference XS 1000 available in stores.
Use filter paper n^4
MAKING COFFEE
- Fill the water compartment using the graduated jug, according to the desired number of cups (fig.24).
- Observe the maximum amount of water in the tank, using the water level.
- Lift the lid by pressing the OPEN button (fig.25).
- Place a paper filter in the filter holder and fill it with ground coffee using the measuring spoon, with one spoon per cup of coffee (fig. 26).
Press the "on/off" button on the filter coffee maker part, the light comes on, the cycle starts.
The filter coffee maker is fitted with an anti-drip appliance which enables you to serve the coffee before it has completely finished running through. If you serve yourself a coffee while the cycle is still running, place the jug back in position quickly to prevent any spillage.
The jug and lid are compatible for reheating in microwave ovens.
■ Never leave your empty jug in the microwave oven.
CLEANING
To remove the coffee grinds, remove the filter holder from the appliance.
Unplug the appliance.
Do not clean when hot.
Clean with a damp cloth or sponge.
■ Never place it in water or under a running tap.
DESCALING THE FILTER COFFEE MAKER
Dscaling
| Number of cycles between 2 descending operations | ||
| Without duo filter | With duo filter | |
| Soft water | 60 | 120 |
| Hard water | 40 | 80 |
To descale your coffee maker, you can use:
- either a sachet of descaler from the stores diluted in 250ml of water
- Or 250 ml of white vinegar available from hardware stores.
Pour the descaler or vinegar in the water compartment and turn the coffee maker on (without filter and without ground coffee).
- Let half of this mixture run through into the jug then turn the appliance off by pressing the "On / Off" button.
Leave for one hour.
Turn the appliance back on by pressing the "On / Off" button and let the rest of the water run through.
■ Rinse the coffee maker by running two jugs of fresh water through.
The guarantee does not cover coffee makers that do not work properly or do not work at all because they have not been descaled.
IN CASE OF PROBLEM:
| Problems | Solutions |
| The coffee maker does not come on: | Check the connection |
| There seems to be a leak: | Make sure the water tank was not filled beyond the limit |
| The water takes too long to run through or the appliance makes excessive noise: | Descale your appliance. |
| Your appliance still does not work? | Contact a Krups approved service centre. |
END OF LIFE ELECTRICAL AND ELECTRONIC PRODUCT
Environmental protection first!
① Your appliance contains valuable materials which can be recovered or recycled.
Leave it at a local civic waste collection point.
If you have any product problems or queries, please contact our Customer Relations Team first for expert help and advice:
Helpline:
0845 602 1454 - UK
(01) 677 4003 - ROI
web site: www.krups.co.uk
BESCHREIBUNG
TEIL ESPRESSOMASCHINE
- PROBLEM, JEJICH PRAVDÉPODOBÉ PRÍCINY A RESENI
TEXHINUeCKNE XAPAKTEPNCI:
Hacoc: 156ap
■ KTS: Krups Tamping System, систema дя abTomatueckoro И ONTIMaJIbHoro ytpam6OBbIbAHnЯ MONOTORO Kofo DepekaTeJIb Фильтас систему уdaileHnЯ Otpa6ToHHoro Kofo. ПохoДТ Дя ИСпОЛьЗОВAHnЯ MONOTORO Kofo И KomnaKTHbIXdo3 ЛбОго ТИна - E.S.E. Или Мяrkx NaKeTOB.
PexkIM «Iap»
■ ABTOOTKJIIOUeHHe nOcNe 30 MmHyT (əHeproc6epeXeHne).
Cbemhbi pe3epByap (o6bem: 1,1Iurpa).
Mouhoctb:2450BT
HannpaxeHne:220-240B-50/60Tc
PpeoxpaHnteHbHbe yctpoCTBa ot peperpeBaHn
「Ta6apntbI: BbICota - 320 MM,ДлИна - 345 MM, ГльбиHa - 290 MM

BAKHAR INHOPMALIY!
Hanpajxehne B cetn: 3TOT npi6op npeHa3HaueH nCKJIIOuHTeIbHO IJpa6Otbl B cetn nepeMeHHoro Toka 220-240 B.
TnncnoJIb3OBAHn: 3TOr npu6Op npedHa3NaueH NCKJIIOUHTeJIbHO IJIa BbITOBOrO NC- IOJIb3OBAHn.
YTo6bI OUnCTnTb BaUy KoΦeBapKy OT HaKINN, Bbl MoXeTe BOCNoJIb3OBAbTcR:
TEXHIYHXAPAKTEPNUCTIKN:
■Помпа:156ap
■ KTS: Krups Tamping System, систema за ватуного та ONТIMальгого песуваши мелен ho KaBn
Tpimau cybpa 3 cnctemoo BndaenH naipcaobaoi KaBOoi ryui. MoKnBicTB BnkOpntaHnmehoi Kabu, a taKx ycix TnivnB nopuiHOi KABN - y Ta6neTkax E.S.E. a6o B rHyKnx kancylnax.
Функця napи
■ ABOTOMATNUHe BiDKnIoueHnY uepe3 30 XBnInN (3 MeToIO 36epExeHnY eJeKTpOeHeprii Ta 3axncty HABKOJIshNbOrO cepeoBnua).
3HIMnI pe3epByap (EMHicTB: 1.1 niTpa)
IotyXHicTb:2450BT
Hanyra: 220-240 B - 50/60 Σ
3anobixkHn npncpii IaI 3axncty BiI neperpby
Ta6apntn:B.320 MM, 345 MM, 290 MM

YBARA!
Hanpyra BnKopncTaHn: cei npilaad npu3NaueHn BnKIOUHO dIy po6OTn BiD Hanpyr 3mInHoro cTpymy 220-240 B.
YMOBN BUKOPUCTaHЯ: ue npnlaad npn3haeHn TIJIbKN IJIa DOMAUHbOro BUKOPNUCTAHNJa.
Y PA3I BUNIKHEHHH HECIPABHOCTE:
2. PREPARAREA UNUI ESPRESSO
TEXHINUeCKN XAPAKTEPNUCTUKN:
■Помna:156apa
■ KTS: Krups Tamping System - 3a abTomatnHOn npeCoBaHe n ONTmAlHOn n3nOJ3BaHe Ha MJIHO To KaΦe
■ФиNTbpeH Hocay CbC CNCTeMa 3a N3XBbPJIHe Ha yTaIKaTa. CbBMeCTM C MJIHO KaΦe I BCaKBr BnOBe KancyI - E.S.E. ИллТьрн NaKeTчETA.
Функцяnapa
■ ABTomatnUHO n3KJIIOUBAHe cIeI n3TNUaHETo Ha 30 MmHyTu (c IeI ONa3BaHe Ha OKoHaTa CpeJa).
■Повиженизервогар (Вмecимост:1,1лИтра)
MoUHocT:2450W
■ HanpexeHne: 220-240 V - 50/60Hz
CnCTema 3a 6e3oNaChOcT cpeu nperepaBaHe
Pa3mepn:B 320 MM,Д 345 MM,山 290 MM

BHIMAHHE!
Pa60THo HAppeKeHne: To3n ypeE e npedBvIeH 3a pa6Ota cMo c npomeHJIb TOK 220-240 V.
Haun Ha n3noJ3BaHe: To3n ypeE npedeBvien EINHCTBEHO 3A DOMAUHA YNOTPE6A.
CNCTEMA 3A ECNIPECO
IPENOPbKN
3a da noluynte ecnpeco cbc cnlen apomat, Bn npenopbubame da n3noI3BaTe cneuaJIHO 3a ecnpeco KaΦe, npaCHO n fHNO CmJHO, NOxOJaIO 3a npuROTBHeTo Ha To3N TnN HAnITKa, KATO qaunTe ca c O6em, HeNaBnabau50 mI.
CbXpaHЯBaIte MJIHOTo KaΦe B XJaIINHnK - TaKa TO 3aNa3Ba NO-ДьЛrO apOMaTa cN.
■ He nbIhHeTe nIITbPnHЯ Hocay do rope, a n3noJ3BaIte MepuTeJHaTa IbXnua (1 yaHa = 1 nbXnua; 2 yau = 2 nbXnua).
■ Ako He u3no13BaTe ypeDa B npoDbIxHne Ha nobuee ot 5 dHi, u3npa3HeTe n u3nlaKHeTe BODnpe3epBoap.
■Преида maxhte pe3epBoapa, за.dc go HanbIHNte Ил ИЗпра3HnTe, BINAHRИЗКЛЮЧВаTeуpeIDA.
■ Binhari nocTaBraIte ypeDa Bbpxy paBHa n cta6nlaHa nobbpxHocT.
3a da 6bnde tempepatypata Ha KafoTo B yaaTa Hn-NOxOJa, BN npenopbVbame npedBapntHo da 3aTOnPInTe YaShInTe.
3a da ydbnKnte kNBOTa Ha ypeDa, BN npenOpbVbAmE BnHaRn Da n3NoI3BaTe fHJTbp
■ Claris Aqua Filter System (HOMep: F088) и рedingовно за поочье от котлен Камък.

BHIMAHHE!
Предунотpe6а сед дьлг поюн Ha Heи3пол3ВаHe Или сед почиствае OT KOTлен KaMbК урededТ trя6ba Да 6ьде почистен, кakTo e onиcaHo B pa3delen 1: „ПьPBO I3ПОЛ3BAHE".
1.PbPBO N3IOJ3BAHE
aioi aiey 1000 Jolalil daiao iouo j5yo gui yoo yoo yoo yoo yoo yoo yoo yoo


a
gjll oal Jaxiwl J
e 10000000000000000000000000000000000000000000
aalil jilj yjgall j
aolo abdo
J 1

X5 1000 Krups Duo Filter
J 1
S_ OBC = S_ COD + S_ BOC - S_ BOC
(1) (2)
LgJyIyIyIyIyIyIyIyIyIyIyIyIyIyIyIyIyIyIy
(10)
J 1
(1)
1 1
1 1
gall jie 1504 1 1 1 1 1 1 1 1 1 1
J 1
L L
a.ii
y
J 1
LisLus Lus Lusie Jgall
a b aiee w g jolos abj jgall abbi
y
jlll lllllllllllllllllllllllll
auiuuiuuiuuiuuiuui
Gg 1d jio gil g bio g all
iio 100g 100g
J 1
| x^ | = | x| .
12 = 12
1 1
julal 1ololol jay
.(YJK)aJgJgJgJgJgJgJgJgJgJgJgJgJgJgJgJgJgJgJgJgJgJgJgJgJgJgJgJgJgJgJgJgJgJgJgJgJgJgJgJgJgJgJgJgJgJgJgJg
+ = 2
(1)
g
(17)
1 1
J 1
1
-
-
-
-
-
-
-
-
-
-
-
-
-
-
-
-
-
-
-
-
-
-
-
-
-
-
-
- 1.
-
-
-
-
-
-
-
-
-
-
-
-
-
-
-
-
-
-
-
-
-
-
-
-
-
-
j 11
g 1 1 1 1 1 1 1 1 1 1 1 1 1 1 1 1 1 1
Jauu Jaa Jauu Jaua Jauu Jauu
(1A)
S OBC = S COD + S_ BOC
a a a a a a a a a a a a a a a a a a a a a a
1
()
Julil yulilcbio Kii i aill Jaa
J 1
aaiiie iie iie iie iie iie iie iie iie iie iie iie iie iie iie iie iie
a
J 1

J 1
()()()()()
(1)
1
- 12345678901234567890123456789012345678901234567890
i 1
aalll lall gai jaoi iia aai gai ai
(14)
(eogg 1s sssjy jy yjy yjy yjy yjy yjy yjy yjy yjy yjy
(12) (13)
a a a a a a a a a a a a a a a a a a a a a a a a a a a
.E.S.E 1
L 1
1g2y1 3yall Jlaeys1.1
Lg 1
J 1
s
Lall aaii iiaii lglbai g liy jss
.
(1)
()
(1) (2)
gogle cieall bdu, joull ne guyall yuoyl Loe. "Steam Preheating" aueyol lcll bdu
= 12, = - 12, = 0
y j 1 1 1 1 1 1 1 1 1 1 1 1 1 1 1 1 1 1 1 1 1
a 15 15
:doLa do do
J 1

j_4 = 1 得: 2( 2 - 1) × 3
aaii iiaaiie aiee ie eae ee eae eae eae
J 1
V K) (1) 1
aIolalolalalalalalalalalalalalalal
a a a a a a a a a a a a a a a a a a a a a a a a a
(1)
aallll lglg 1 (9 k) " g" gallle aaiell
(1. k) 11
gssss
1 1
a aal 1
aalall
P 1
山
(XYJL)
Jg 10000000000000000000000000000000000000000000000000000000000000000000000000000000000000000000
aaiiaaiagall
(duo filter XS1000" Lall
aal jilal" 100
g
11 11
b
JUaIaIaIo-C
julieill juswaa -d
gssyJ 1/2e- e
a1b0y 4
□ 1
Og gill -g-f2
u 1
f4
jz-9
jldlaLb-h
bailliiuoo
buiill 1
Lalzly Jdo
gul
aai iiei ie iie iie iie iie iie iie iie iie iie iie iie iie iie iie iie iie iie iie
(Krups Tamping System "KTS" 1)
jagaball jll jso soalil
(Easy Serving Espresso) E.S.E JIJIJIJIJIJI
Jooaannn aonnnn nnnnnnnnnnnnnnnnnnnnnnnnnnnnnnnnnnnnnnnnnnnnnnnnnnnnnnnnnnnnnnnnnnnnnnnnnnnnnnnnnnnnnnnnnnnnnnnnnnnnnnnnnnnnnnnnnnnnn
biitaii i 15i 15i 15i 15i 15i 15i 15i 15i 15i
aLlJ 1
y
a a a a a a a a a a a a a a a a a a a a a a a a a a a a a a a
Jc baa cai y aiey jn 1111 1111 1111 1111 1111 1111
joo kailg baiil juiu joi jaiil Jaoi
J 1
Lg 15
(1)
c( 1,2) .d( 1,2)
L 1
aikil
1
a 1
1
English 1
Deutsch p. 13
Polski 25
Slovensky 37
Česky . 49
Magyar 61
Pycckn . 73
yKpaIHcbKa 85
Româna 97
Български eзик . . . . . . . . . . . . . . . . . . . . . . . . . . . . . . . . . . . . . . . . . . . . . . . . . . . . . . . . . . . . . . . . . . . . . . . . . . . .
p. 134