
Latt'Espress EA829E - Coffee machine KRUPS - Free user manual and instructions
Find the device manual for free Latt'Espress EA829E KRUPS in PDF.

| Brand | Krups |
| Model | Latt'Espress EA829E |
| Product type | Automatic coffee machine with built-in grinder |
| Dimensions (L x D x H) | Approximately 30 x 25 x 35 cm |
| Weight | Approximately 7 kg |
| Power supply | 220-240 V, 50-60 Hz |
| Power | 1450 W |
| Pump pressure | 15 bar |
| Heating system | Compact Thermoblock System |
| Water tank capacity | 1.5 L |
| Bean hopper capacity | 200 g |
| Grinder type | Metal burr grinder, adjustable with 9 settings |
| Prepared beverages | Espresso, coffee, long coffee, cappuccino, hot water |
| Two-cup function | Yes, for espresso and coffee |
| Display | Graphic display, navigation menus |
| Programs | Automatic shut-off, delayed start, auto rinse, custom settings |
| Milk system | Integrated milk carafe with cappuccino system (frother) |
| Water filter | Compatible with Claris - Aqua Filter System F088 cartridge (optional) |
| Maintenance | Automatic rinse, coffee cleaning program (tablets), cappuccino cleaning, descaling |
| Spare parts | Available from Krups customer service (tablets, cleaning liquid, descaler, filter cartridge) |
| Repairability | Repairability index not provided; parts available through after-sales service |
| General information | Multi-country hotline (FR, BE, CH, DE, AT, UK, etc.); warranty subject to use of Krups accessories |
Frequently Asked Questions - Latt'Espress EA829E KRUPS
User questions about Latt'Espress EA829E KRUPS
0 question about this device. Answer the ones you know or ask your own.
Ask a new question about this device
Download the instructions for your Coffee machine in PDF format for free! Find your manual Latt'Espress EA829E - KRUPS and take your electronic device back in hand. On this page are published all the documents necessary for the use of your device. Latt'Espress EA829E by KRUPS.
USER MANUAL Latt'Espress EA829E KRUPS
1
2
3
4
5
6
7
8
9
10

1
1
13
14
1

1
17
18
1
2
21
22

2
2
25
26
27
28
29
30
31
32

33
34
35
36
37
38
3940
The Ground Truth image displays a single, solid horizontal line. According to Rule 2 (UNDERSCORE & LINE RULES), this is a stylistic or background line, not a placeholder underscore. Therefore, the OCR result must ignore it and output nothing or only meaningful text. The provided OCR content is "____", which consists of four underscores. This is an incorrect interpretation of the line as a placeholder, violating the rule that stylistic lines must be ignored. The OCR has hallucinated underscores where none should exist based on the GT's visual context. Hence, the OCR result is inconsistent with the Ground Truth.
41
42
43
44
45
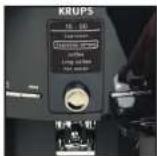
DESCRIPTIF
INFORMATION PRODUITS
INFORMATION PRODUITS
PRODUKTINFORMATIONEN
A Handle/water tank cover
B Water tank
C Used coffee collector
D Coffee outlet, height-adjustable handle
E Magnetic milk nozzle attachment
F Removable drip collector tray and grille
G Coffee bean container
1 H Grinding fineness setting button
I Metal grinding mill
J Cleaning tablet funnel
K Cup rest grille
2 Display screen
L Display screen
M "On/off" button
N Programming button
- Rotate/confirmation button
P Cappuccino button
Q Clean machine button
3 Milk pot
R Cover
S Locking lever
T Clean system/Cappuccino
U Flexible pipe
v Cassette
W Container
X Steam nozzle
ACCESSORIES (SOLD SEPARATELY)
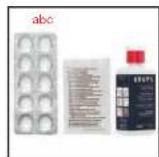
F 088 Claris Cartridge - Aqua Filter System (depending on model).
XS 4000 KRUPS cleaning liquid for Cappuccino system (not included).
F 054 Descaling powder (one sachet included).
XS 3000 Packet of 10 cleaning tablets (2 tablets included).
Note: For the guarantee to be valid, this machine must be used with Krups accessories only.
Dear Customer,
Congratulations! You are now the proud owner of a Krups Espresseria Automatic. You will appreciate both the quality of the result in your cup and its superior ease-of-use.
Espresso or lungo, ristretto or cappuccino; your automatic coffee/espresso machine has been designed so that you can enjoy the same quality at home as in a bistro, whatever the time of the day and throughout the week. With its Compact Thermoblock System, 15 bar pump – and especially because it works exclusively with coffee freshly ground just before extraction – your Espresseria Automatic enables you to obtain a drink with maximum aroma, topped with a wonderful thick golden cream resulting from the natural oils in the coffee beans.
Espresso is not served in a traditional coffee cup, but rather in small porcelain cups.
For an espresso at just the right temperature and cream that sits perfectly poised, we recommend you preheat your cups.
Once you've tried a few times, you will learn how to mix and roast the coffee beans to match your taste. The quality of water used is of course decisive in making sure the result at the end is the best it can be.
Please ensure the water has been freshly poured from the tap (so that it doesn't become stagnant after coming into contact with oxygen), and that there is no smell of chlorine. Make sure too, of course, that it's sufficiently cold.
Espresso coffee is richer in aroma than classic filter coffee. Despite its stronger, longer lasting flavour, espresso actually contains less caffeine than filter coffee (around 60 to 80 mg per cup in comparison with 80 to 100 mg per cup of filter coffee).
This is because it takes less time to percolate. Thanks to an ingenious system whereby the milk container is integrated seamlessly into the machine, your Latt'Espress is the perfect solution for preparing sumptuous cappuccinos...
The simplicity of the controls, the visibility of all tanks and the automatic cleaning and descaling programmes mean your Latt'Espress Automatic is both efficient and easy to use.
BEFORE THE FIRST USE
Measuring the water hardness
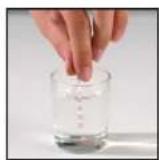
Before using the appliance for the first time, or if you notice a change in the hardness of your water, adjust the appliance to the hardness of the water used. To verify water hardness, use the stick supplied with your appliance or contact your local water authority. The appliance will prompt you to set the hardness of your water before you first use it.
| Degree of hardness | Class 0 Very soft | Class 1 Soft | Class 2 Medium hard | Class 3 Hard | Class 4 Very hard |
| ° dH | < 3° | >4° | >7° | >14° | >21° |
| ° e | < 3.75° | >5° | >8.75° | >17.5° | >26.25° |
| ° f | < 5.4° | >7.2° | >12.6° | >25.2° | >37.8° |
| Appliance setting | 0 | 1 | 2 | 3 | 4 |
Preparing the appliance
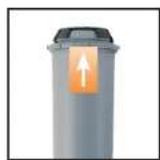
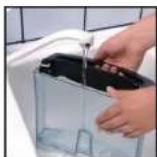
Remove and fill the water tank (7).
Press firmly to replace it and close the lid.
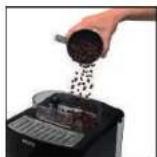
Remove the lid of the coffee container and add coffee beans. Replace the lid (8).
Do not fill the tanks with hot water, milk or any other liquid. If the water tank is missing or not completely full (beneath the "min" level) while the appliance is switched on, the message "Fill tank" will appear and it will be temporarily impossible to make any coffee or espresso.
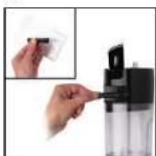
Claris - Aqua Filter System F 088 cartridge (sold separately)
For the best flavours and to make sure your appliance lasts as long as possible, we recommend you only use the Claris - Aqua Filter System cartridge, sold separately.
(3): Mechanism to memorise the month the cartridge was fitted and when it should be changed (after 2 months maximum).
Your appliance will let you know when you should replace your Claris - Aqua Filter System cartridge by displaying a message.
Filter installation (Claris - Aqua Filter System cartridge)
Note: To correctly prime your cartridge, ensure that you follow the installation procedure each time you change the cartridge.
First time use: Choose the "YES" option in the "Filter" function, then follow the on-screen prompts.
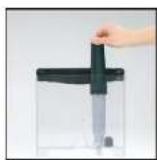
Installing the cartridge in the machine: screw the filter into the base of the water tank, using the handle provided (4).
Insert the steam nozzle (5).
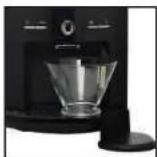
Place a 0.6 L container beneath the steam nozzle (6).
Later installation or when replacing a filter: Select the "Filter" menu by pressing PROG: "Maintenance" - OK - "Filter"- OK - "Insert" (or change) - OK - and follow the on-screen prompts.
Automatic rinsing
When first using your machine, you may choose to activate automatic rinsing. To do this, choose the "YES" option on the "Auto rinse" menu. Rinsing will take place each time you turn on the machine.
To modify this at a later stage, you can select automatic rinsing by pressing PROG – Settings - Auto rinse.
DURING RINSING OPERATIONS. HOT WATER COMES FROM THE NOZZLES. BE CAREFUL NOT TO SCALD YOURSELF.
NEVER PUT GROUND COFFEE IN THE COFFEE CONTAINER
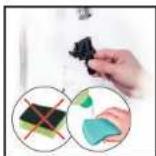
Use of coffee beans that are oily, caramelised or flavoured is not recommended for this machine. This type of bean may damage the machine.
Make sure that no foreign bodies such as small stones among the coffee beans enter the coffee container. Any damage due to foreign bodies having entered the coffee container is not covered by the guarantee. Do not put water in the coffee bean container.
To avoid staining your worktop or scalding yourself with used water, ensure you attach the drip collector tray.
Check the water tank is clean.
First use/setting the machine
The rotating button enables you to select a function or increase/reduce values. Pressing this button confirms your choice.
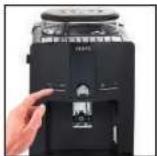
Switch the appliance on by pressing the "On/Off" button (9). Follow the on-screen prompts in the "Language choice" menu.
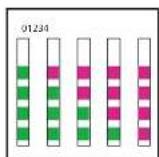
Select a language using the rotating button. The selected language will be highlighted (10-11).
Confirm by pressing the confirmation button (12).
On the first use, the appliance will ask you to set a number of parameters. If you unplug your appliance, you will have to reset some of these parameters.
The appliance will ask you to set:
Language
Volume unit
Date
Clock
Auto-off
Auto-on
Water hardness
Automatic rinsing
Filter
You can select the language of your choice from those presented.
You can set the unit of measurement to ml or oz.
It is up to you to set the date.
You can select the display of a 12 or 24-hour clock.
You can select the length of time after which your appliance will switch off automatically.
You can automatically start pre-heating of your appliance at a selected time.
You must set the hardness of your water between 0 and 4. See the section "Measuring the water hardness".
You can set rinsing to take place each time the machine is switched on.
You must indicate whether or not a filter is present (Claris - Aqua Filter System cartridge).
On the first use, the appliance may ask to be refilled. Simply follow the on-screen prompts.
Circuit rinsing
Coffee circuit rinsing:
You can start rinsing at any time by pressing PROG to display the menus then selecting MAINTENANCE ▶ OK ▶ RINSING ▶ OK.
Steam circuit rinsing:
Install the steam nozzle (5) then place a container beneath the steam nozzle. Select the hot water recipe on the screen and confirm. The cycle will stop automatically after the volume of water indicated on the screen has been flowed through.
It is a good idea to carry out one or more rinses of the two circuits when the appliance has not been used for a number of days.
DURING RINSING OPERATIONS, HOT WATER COMES FROM THE NOZZLES. BE CAREFUL NOT TO SCALD YOURSELF.
Preparing the grinder
You can adjust the strength of your coffee by setting the grinding fineness of the coffee beans.
The finer the coffee is ground, the stronger and creamier the coffee will be.
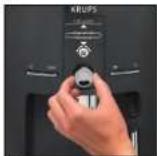
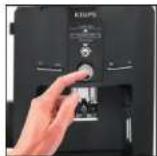
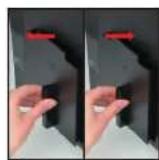
Set the degree of grinding fineness by turning the button "Grinding fineness setting".
Turning towards the left means finer grinding. Turning towards the right means coarser grinding - (13).
YOU MUST ONLY CHANGE THE SETTING DURING GRINDING.
NEVER FORCE THE GRINDING FINENESS SETTING BUTTON.
PREPARATION OF AN ESPRESSO AND A COFFEE
YOUR APPLIANCE HAS BEEN DESIGNED TO WORK EXCLUSIVELY WITH COFFEE BEANS.
When preparing your first coffee, after a long period of absence or following cleaning or descaling, a little steam and hot water will issue from the steam nozzle (self-priming).
Splashing or scalding may occur if the coffee outlet is set too high for the size of your cups.
Preparing an espresso
The quantity of water required for an espresso is between 20 and 70 ml.
Press the Ⓐ button, wait for pre-heating to end and, if you wish, carry out a rinsing operation.
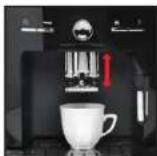
The drinks selection menu appears (14).
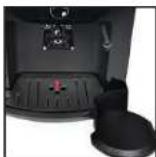
Place a cup under the coffee outlet. You can lower or raise the coffee outlet to suit the size of your cup (15).
Select your drink with the rotating button and confirm by pressing the confirmation button.
You can set the volume of water at any time with the rotating button.
To stop coffee running into the cup, either press a button or reduce the volume with the rotating button.
Preparing a coffee
The quantity of water required for a coffee is between 80 and 160 ml.
Preparing a long coffee
The quantity of water required for a long coffee is between 120 and 240 ml. The appliance automatically carries out a double cycle, so do not remove your cup before preparation is finished.
After grinding, the ground coffee is moistened with a little water. A few moments later, the percolation process begins.
You can adjust the temperature of your coffee.
DO NOT REMOVE THE TANK BEFORE THE END OF THE CYCLE (around 15 seconds after the coffee has finished pouring).
Two-cup function
Your appliance enables you to prepare two coffee or espresso recipes for the following three preparations: espresso/strong espresso/coffee. This function is not available for long coffee drinks. The appliance will automatically run two complete coffee preparation cycles one after the other. You should therefore ensure that you place the second cup beneath the coffee outlet immediately the first cycle has finished.
You have prepared your appliance. The drinks selection menu has appeared (14).
Place a cup under the coffee outlet. You can lower or raise the coffee outlet to suit the size of your cup (15).
Select your drink and confirm by pressing quickly twice on the confirmation button.
A message will indicate that you have requested two cups.
The appliance will automatically run two complete coffee preparation cycles.
Double cup function (using the double espresso accessory)
Your appliance enables you to prepare two cups of coffee or espresso for the following three preparations: espresso/strong espresso/coffee. This function is not available for long coffee drinks.
Make sure you don't take 2 cups after the first cycle.
You have prepared your appliance. The drinks selection menu has appeared.
Place the double cup accessory under the coffee outlet.
Place 2 cups under the accessory's coffee outlets. You can lower or raise the coffee nozzle with the accessory to suit the size of your cup.
Select your drink and confirm by quickly pressing twice on the OK button.
A message will indicate that you have requested 2 cups.
PREPARING HOT WATER
Install the steam nozzle on the machine. Select the hot water recipe from the drinks selection menu. A message invites you to place a container beneath the steam nozzle. You can start hot water production by pressing the confirmation button.
To interrupt the hot water function, simply press any button.
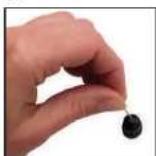
If the nozzle is obstructed, unblock it with the needle provided.
The maximum quantity of water per cycle is limited to 300 ml.
PREPARING A CAPPUCCINO
We recommend that you use very fresh, very cold pasteurised or UHT milk, recently opened. Unpasteurised milk does not produce the best results.
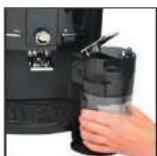
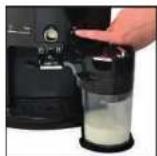
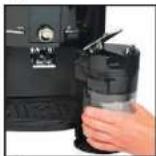
Preparing and installing a milk jug
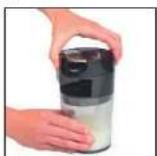
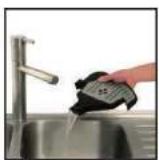
The milk jug is composed of a plastic container, a lid (including a cassette) and a flexible pipe connecting it to the machine's drinks outlet. Before the first use, carefully clean the different elements.
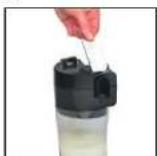
Pour milk into the jug (at least 150 ml) (16). Put the lid on the jug by screwing it down with light pressure (17). Lift the locking lever (18). Install the milk jug on the machine by connecting it to the steam outlet (19), then lowering the locking lever (20). Insert the flexible pipe into the intended opening in the cassette (21) then place the other end beneath the magnetic drink outlet (22). Ensure that the system's lid button is in the cappuccino position (23).
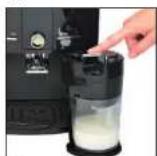
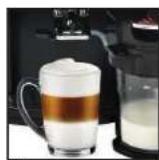
Making a cappuccino
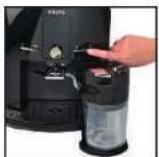
While the screen is displaying the drinks selection menu, give a short press (< 3 seconds) on the machine's cappuccino button (24). A pre-heating phase takes place, then the milk is frothed, and finally the espresso is poured. Your drink is ready (25).
you can interrupt the cycle by pressing OK.
nb the cycle does not stop immediately.
A message appears on the screen telling you to clean the system. We recommend you to carry this out, referring to the paragraphs CAPPUCCINO SYSTEM RINSING and/or MANUAL MAINTENANCE OF THE CAPPUCCINO SYSTEM.
CAPPUCCINO SETTINGS
The machine enables you to set the quantities of milk and coffee according to your desires for a perfectly personalised cappuccino.
You can alter these settings via the Cappuccino Settings menu.
While the screen is displaying the drinks selection menu, give a long press (> 3 seconds) on the machine's cappuccino button.
-
Select Standard for the factory settings
-
Select New to personalise your recipe. The following stages take place:
a. Pre-heating of the machine
b. Milk frothing phase: press OK when the volume of milk required is reached.
c. Coffee phase: press OK when the volume of coffee required is reached.
The machine will indicate that the new volumes have been recorded for the next cappuccinos.
MAINTAINING YOUR APPLIANCE
Warning! To comply with the guarantee conditions, it is essential to carry out the cleaning or descaling cycle when the appliance requests it. Carefully follow the instructions given on the screen. You can continue to use the appliance but it is recommended that you carry it out as soon as possible.
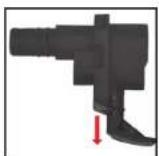
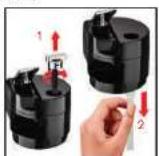
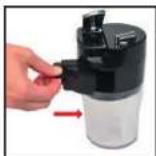
Emptying the used coffee collector and the drip collector tray
Remove the cappuccino system (26).
If the message is displayed, remove, empty and clean the drip collector tray (27).
Remove, empty and clean the used coffee collector (28).
Replace the coffee grounds collector (28), and wipe clean the area where the coffee drawer sits.
The drip collector tray is equipped with floats to indicate when it needs emptying (29).
Once you have removed the used coffee collector, you must empty it completely to avoid any later overflow.
The warning message does not disappear if the coffee drawer area is not cleaned thoroughly and if the used coffee collector is not pushed firmly into place or is incorrectly installed.
While the message is displayed, it is not possible to prepare an espresso or a coffee. The used coffee collector has a capacity of nine coffees.
Circuit rinsing: see page 3
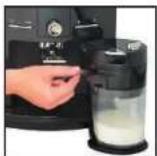
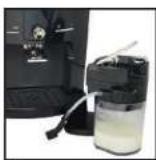
Cappuccino system rinsing
You can rinse the system after producing a cappuccino. This is even possible if there is still milk in the milk jug. It is important to carry out this rinsing cycle after each cappuccino produced.
The milk jug must be in place as described in the paragraph PREPARING A CAPPUCCINO.
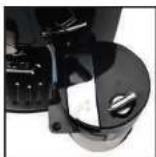
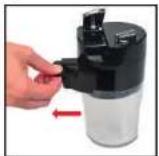
Turn the cappuccino system's lid button to the position CLEAN (30).
While the screen is displaying the drinks selection menu, press the machine's CLEAN button (31). Simply follow the on-screen prompts to start the rinsing cycle. At the end of the cycle, turn the cappuccino system button to the CAPPUCCINO position before starting a new recipe.
IMPORTANT:
It is recommended that you carry out this rinsing operation before returning the milk jug (if it still contains milk) to the refrigerator following preparation of the last cappuccino. After each rinsing operation, it is recommended that you clean the different pieces of the system under running tap water (see paragraph Manual maintenance of milk jug).
Coffee circuit cleaning programme - total duration: around 20 minutes
You should run the cleaning programme at the end of around 360 preparations of espresso or coffee.
The appliance will warn you by periodically displaying a message when it is time to carry out cleaning.
To carry out a cleaning programme, you will require a container with a capacity of at least 0.6 L and a KRUPS XS 3000 cleaning tablet (32a).
If you unplug your machine during the cleaning cycle, or if there is a power failure, the cleaning programme will continue from the current phase when the power is returned. It will not be possible to cancel this operation.
This is essential to ensure that the water circuit has been correctly rinsed. In this case, a new cleaning tablet may be necessary. Ensure that the cleaning programme has been completed to avoid any risk of poisoning.
The cleaning cycle is an intermittent cycle. Do not put your hands beneath the coffee outlets during the cycle.
When the message "Cleaning necessary" is displayed, you can start the automatic cleaning programme by pressing the PROG button.
Carefully follow the instructions given on the screen.
The automatic cleaning programme is divided into three parts: the cleaning cycle itself, then two rinsing cycles. This programme takes approximately 20 minutes. You can start cleaning at any time by pressing PROG to display the menus then selecting MAINTENANCE ▶ OK ▶ COFFEE CLEANING.
Only use KRUPS cleaning tablets (XS 3000). We accept no responsibility for damage caused by the use of tablets of other brands.
You can obtain cleaning tablets from the KRUPS After-Sales Service.
Descaling programme - duration: around 22 minutes
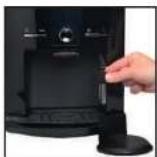
If your product is fitted with our Claris - Aqua Filter System F088 cartridge, please remove this cartridge before the descaling operation.
The amount of limescale collected depends on the hardness of the water used. The appliance will warn you by periodically displaying a message when it is time to carry out descaling.
To carry out a descaling programme, you will require a container with a capacity of at least 0.6 L and a KRUPS F 054 (40 g) descaling sachet (32b).
When the message “Descaling necessary” is displayed, you can start the automatic descaling programme by pressing the PROG button.
Carefully follow the instructions given on the screen, ensuring that the contents of the sachet have dissolved.
The descaling cycle is divided into three parts: the descaling phase itself, followed by two rinsing phases.
Use only KRUPS descaling products. Descaling products are available from KRUPS After-Sales Service centres.
We accept no responsibility for damage caused to the appliance by the use of other products.
If the appliance is dropped while not in its packaging, it is recommended that you take it to an approved repair centre to avoid any risk of fire or electrical problems.
If a power failure takes place or if you unplug your machine, the cycle will continue from the current phase when the power is returned. It will not be possible to cancel this operation.
Ensure that the descaling programme has been completed to avoid any risk of poisoning. The descaling cycle is an intermittent cycle. Do not put your hands beneath the steam nozzle during the cycle.
Ensure that you protect your worktop during descaling cycles, particularly if it is made of marble, stone or wood.
CAPPUCCINO SYSTEM CLEANING
To carry out a cleaning programme, you will require a container with a capacity of at least 0.6 L and KRUPS XS 4000 cleaning liquid (32c).
Turn the cappuccino system's lid button to the position CLEAN (23).
You can start the cleaning cycle by pressing the button PROG ▶ Maintenance ▶ Cappuccino cleaning.
Follow the instructions on the screen.
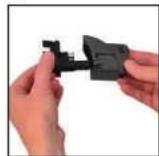
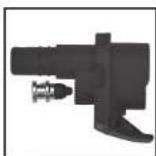
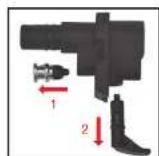
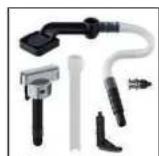
To disassemble the system, follow the following instructions:
Remove the flexible pipe from the jug opening and the drinks outlet (33).
- Unlock the system from the machine (34).
- Remove the accessory cassette (35).
- Remove the black silicone body of the cassette (36).
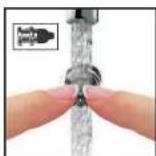
- Remove the air nozzle: this is the piece located above the black silicone body. (37). To clean this part thoroughly, rinse the flexible area while pinching it (38). Leave it to soak in hot water and some washing up liquid, then rinse.
• Also remove the plastic piece (39).
The cappuccino system is now completely disassembled (40).
• Take the disassembly key (41)
- Unscrew the end of the steam nozzle (41)
- If necessary, unblock using the needle provided for this purpose (42)
You can also remove the milk inlet pipe together with the lid setting button (43).
Once the elements have been cleaned with warm water and dried, put them back in place and replace the cassette on the jug (44-46).
General maintenance
Always remove the mains power cord from the electrical socket and allow the appliance to cool before cleaning it.
Do not use utensils or products likely to scratch or corrode the appliance.
Wipe the outside of the appliance with a damp cloth.
Rinse the water tank with clean water.
These parts are not dishwasher safe.
OTHER FUNCTIONS: PROG BUTTON
You access the menu with the appliance's other functions by means of the PROG button from the drinks selection screen. For all settings, the rotating button enables you to navigate through the menus and options and to confirm a choice, while the PROG button enables you to cancel a selection and return to the drinks selection menu.
| PROG | Maintenance | Enables you to access the various maintenance options. |
| Settings | Enables you to access the various settings options. | |
| Product information Enables you to access product information. | ||
| Exit Takes you back to the previous menu. | ||
MAINTENANCE
All of these options enable you to start the selected programmes. You should then follow the on-screen instructions.
| MAINTENANCE | Rinsing Enables you to access the rinsing operations. |
| Coffee cleaning Enables you to access the cleaning operations. | |
| Filter Enables you to access filter mode. | |
| Exit Takes you back to the previous menu. | |
| Cappuccino cleaning Enables you to access the cappuccino system cleaning operations. |
SETTINGS
| SETTINGS | Language You can select the language of your choice from those offered. | |
| Screen contrast You can adjust the screen contrast according to your preferences. | ||
| Date | You must set the date, particularly when you are using an anti-limescale cartridge. | |
| Clock You can select to display a 12 or 24-hour clock. | ||
| Auto-off | You can select the length of time after which your appliance will switch off automatically.From 30 minutes to 4 hours, in 30 minute segments. | |
| Auto-on | You can automatically start pre-heating of the appliance at a selected time. | |
| Automatic rinsing | You can automatically start rinsing of the appliance when it is switched on. | |
| Volume unit You can set the unit of measurement to be ml or oz. | ||
| Water hardness | You must set the hardness of your water between 0 and 4. See the section “Measuring the water hardness”. | |
| Coffee temperature | You can adjust the temperature of your espresso or coffee to one of three levels. | |
| Exit Takes you back to the previous menu. | ||
PRODUCT INFORMATION
| PRODUCT INFORMATION | Coffee cycles Displays the total number of coffees produced by the machine. | |
| Water cycles Displays the total number of hot water cycles carried out by the machine. | ||
| Cappuccino cycles | Displays the total number of cappuccino cycles carried out by the machine. | |
| Rinsing Displays the total number of rinsing operations carried out by the machine. | ||
| Coffee cleaning | Last Displays the number of coffees carried out since the last cleaning operation. | |
| Next Displays the number of coffees that can be produced before the next cleaning operation. | ||
| Clean Starts the cleaning programme. | ||
| Exit Takes you back to the previous menu. | ||
| Cappuccino cleaning | Displays the total number of cappuccino cleaning operations carried out by the machine. | |
| Descaling | Last Displays the total number of hot water or steam cycles made since last scale removal. | |
| Next Displays the number of hot water or steam operations that can be carried out before the next descaling operation. | ||
| Exit Takes you back to the previous menu. | ||
| Filter | Last Displays the date of the last filter change* and the quantity of water used. | |
| Next Displays the date for the next filter change* and the quantity of water to run through. | ||
| Install Starts the filter replacement procedure. | ||
| Exit Takes you back to the previous menu. | ||
*: The first two options in the Filter sub-menu will not be confirmed unless you have correctly installed a filter previously, with the programme accessible via MAINTENANCE ▶ FILTER ▶ INSTALL.
TURNING OFF YOUR APPLIANCE
You can turn off your appliance at any time. When stopped, the machine emits a double beep and "Good-bye" is displayed on the screen. The appliance has registered your request and will stop as soon as possible.
TRANSPORTING THE APPLIANCE
Keep and use the original packaging to transport the appliance.
If the appliance is dropped while not in its packaging, it is recommended that you take it to an approved repair centre to avoid any risk of fire or electrical problems.
END-OF-LIFE ELECTRIC OR ELECTRONIC PRODUCTS

Think of the environment!
Your appliance contains many materials which can be recovered or recycled.
Leave it at a local civic waste collection point.
| problem malfunction corrective actions | |
| The appliance does not switch on when the ON/OFF button is pressed. | Turn off and unplug the machine, remove the filter cartridge, wait for 20 seconds and then restart the machine. Ensure that the plug on the electrical cable is fully inserted into the power socket. |
| Water or steam issue from the steam nozzle. | In the case of repeated uses, a few drops may issue from the steam nozzle. |
| The appliance is working but no liquid is coming out. | Check that the water container is in the correct position and that the cord is not jammed between the appliance itself and the water container. |
| The espresso or coffee is not hot enough. | Change the coffee temperature setting. Heat the cups by rinsing under hot water. |
| The coffee is too lightly coloured or too weak. | Check that the coffee bean container holds coffee and that this is flowing correctly.Avoid using oily, caramelised or flavoured coffee beans.Reduce the volume of coffee using the central button.Turn the grinding fineness button to the left to obtain more finely ground coffee.Carry out your preparation over two cycles by using the two-cup function. |
| The coffee is poured too slowly or not at all. | Turn the grinding fineness button to the right to obtain more coarsely ground coffee (may depend on the type of coffee used).Carry out one or more rinsing cycles.Run a damp sponge beneath the coffee outlet. |
| The coffee is not creamy. | Turn the grinding fineness button to the left to obtain more finely ground coffee (may depend on the type of coffee used).Change the Claris - Aqua Filter System cartridge (follow the installation procedure on page 3).Carry out one or more rinsing cycles. |
| The appliance has not produced coffee. | An incident has been detected during preparation.The appliance has automatically restarted and is ready for a new cycle. |
| You have used ground coffee instead of coffee beans. | Use your vacuum cleaner to remove the pre-ground coffee from the coffee bean container. |
| The coffee grinder makes a strange noise. | There are foreign bodies present in the grinder. Contact the KRUPS Customer Service team. |
| The grinding fineness setting button is difficult to turn. | Only modify the grinding fineness setting when it is in operation. There are foreign bodies present in the grinder: contact the KRUPS Customer Service team. |
| The steam nozzle of your cappuccino system seems partially or completely clogged. | Disassemble the nozzle using the dismantling key. Fig. 44Start the cappuccino system rinsing cycle to remove the remainder of the deposits.Clean the steam nozzle and ensure that the opening of the nozzle is not obstructed by remains of milk or limescale. Use the cleaning needle if necessary. |
| The cappuccino system does not suck the milk.The cappuccino system makes little or no froth. | Check that the appliance is correctly assembled.Ensure that the setting button is in the CAPPUCCINO position.Ensure that the steam nozzle is not blocked.Ensure that the air nozzle is in place and correctly assembled. The air nozzle (Fig. 42) may be blocked; leave it to soak in hot water and some washing up liquid, and then rinse prior to reassembly.Ensure that the flexible pipe is not blocked or twisted and that it is properly inserted into the cassette to avoid any air leak.Ensure the milk suction pipe is fully immersed in the milk.Rinse and clean the system (see corresponding sections).For milk-based preparations: we recommend that you use very fresh, very cold pasteurised or UHT milk, recently opened. Unpasteurised milk does not produce the best results. It is also recommended that you use a cold container. |
| After emptying the coffee grounds collector, the warning message is still displayed on the screen. | Correctly replace the coffee grounds collector and follow the instructions on the screen. Wait at least 6 seconds before replacing them. |
| A power failure occurs during a cycle. | The appliance will automatically restart when the power returns, and will be ready for a new cycle. If the power failure occurs during a cleaning or descaling cycle, the machine will continue the cycle at the current stage. |
| There is water or coffee underneath the appliance. | The drip collector tray has overflowed: empty it and clean the coffee grounds collector and wipe clean the area where the coffee drawer sits. Check the drip collector tray is correctly positioned.Do not remove the tank before the end of the cycle. |
The  is displayed. is displayed. | Unplug the appliance for 20 seconds, remove the Claris Aqua Filter System cartridge if applicable, then restart the machine.If the error continues, contact the KRUPS Customer Service team. |
| The water tank has been filled, but the warning message is still displayed onscreen. | Check the tank is correctly inserted in the appliance. The float at the bottom of the tank should move freely. Check and unblock the float if necessary. |
| The machine does not request descaling. | The descaling cycle is requested once a large number of uses of the steam circuit has been reached. |
| Coffee grains have found their way into the drip tray. | This happens if coffee grains fall outside the percolation tank; this keeps the machine clean. |
Here are some recipes to try with your Espresseria Automatic:
Cappuccino
For an exquisite cappuccino, the ideal measures are as follows: 1/3 hot milk, 1/3 coffee and 1/3 milk froth.
Coffee Cream
Prepare a classic espresso in a large cup.
Add a cloud of cream for the ideal coffee cream.
Caffè corretto\*
Prepare a cup of espresso as usual.
Then flavour to taste with 1/4 to 1/2 a glass of cognac.
- You can also use anisette, grape eau de vie, sambuca, kirsch or Cointreau. There are many other possibilities for making your espresso really special. The sky's the limit!
Liqueur coffee\*
In an empty 0.75 litre bottle, mix three cups of espresso, 250 g of brown rock sugar, 1/2 litre of cognac or kirsch.
Leave the mixture to steep for at least two weeks.
- The result is a delicious liqueur, suited perfectly to coffee lovers!
Iced Italian coffee
Four balls of vanilla ice cream, two cups of cold, sweetened espresso, 1/8 litre of milk, crème fraîche, grated chocolate.
- Mix the cold espresso with the mixture.
- Place a ball of ice cream in each glass, pour the coffee over it and decorate with crème fraîche and grated chocolate.
Frisian coffee\*
Add a little glass of rum to a cup of sweetened espresso.
Decorate with a thick layer of crème fraîche and serve.
Espresso flambé\*
Two cups of espresso, two small glasses of cognac, two teaspoons of brown sugar, crème fraîche.
- Pour the cognac into heat-proof glasses, heat and flambé.
- Add the sugar, mix, pour in the coffee and decorate with crème fraîche.
The Perfect Espresso\*
Two cups of espresso, 6 egg yolks, 200 g sugar, 1/8 litre of sweetened crème fraîche, one small glass of orange liqueur.
- Beat the egg yolks with the sugar until you obtain a thick and frothy mixture.
- Add the cold espresso and the orange liqueur.
- Carefully add the whipped crème fraîche.
- Pour into cups or glasses.
- Put the cups into the freezer.
(*: Alcohol abuse can seriously damage your health.)
BESCHRIJVING
ESPRESSO EN KOFFIE MAKEN
HET APPARAAT IS ONTWORPEN OM UITSLUITEND KOFFIE TE MAKEN MET KOFFIEBONEN.
T Rens cappuccinosystem
U Slange
V Indsats
W Beholder
X Dampdyse
TILBEH∅R (SÆLGES SEPARAT)
T Knapp Clean system/cappuccino
U Mjuk slang
V Insats
W Behållare
X Ångmunstycke