
R1000 - Caméra auto Navitel - Free user manual and instructions
Find the device manual for free R1000 Navitel in PDF.


| Product Type | Dash Cam (DVR) |
| Brand | Navitel |
| Model | R1000 |
| Processor | MSTAR MSC8328 |
| Display | 1.2" TN |
| Video Resolution | Full HD 1080p (1920x1080) at 30 fps |
| Photo Resolution | 2048x1536 |
| Recording Format | MP4 |
| Image Format | JPG |
| Storage | microSD card (up to 64 GB, Class 10 or above) |
| GPS | Built-in (with antenna) |
| Wi-Fi | Yes (Chipset AP6181) |
| Battery | Rechargeable 180 mAh, 3.7V |
| Power Supply | USB 2.0 DC 5V, 1-1.5A |
| Working Current | 700 mA |
| Frequency | 50/60 Hz |
| Microphone | Built-in |
| Speaker | Built-in |
| Functions | Loop recording, G-sensor, Parking monitor, Motion detection, Stamp (date/time/GPS), Lock file |
| Installation | Magnetic mount and windshield bracket |
| App Support | DVR Wi-Fi sharing app for mobile (iOS/Android) |
| Languages | English, French, German, Italian, Spanish, Russian, Chinese, etc. |
| Operating Temperature | 0°C to +35°C |
| Storage Temperature | +5°C to +45°C |
Frequently Asked Questions - R1000 Navitel
User questions about R1000 Navitel
0 question about this device. Answer the ones you know or ask your own.
Ask a new question about this device
Download the instructions for your Caméra auto in PDF format for free! Find your manual R1000 - Navitel and take your electronic device back in hand. On this page are published all the documents necessary for the use of your device. R1000 by Navitel.
USER MANUAL R1000 Navitel
natural_image
Black and white photo of a black remote camera with lens and head (no visible text or symbols)NAVITEL R1000 Portable Video Recorder
Úvod

Vážený zákazníku,
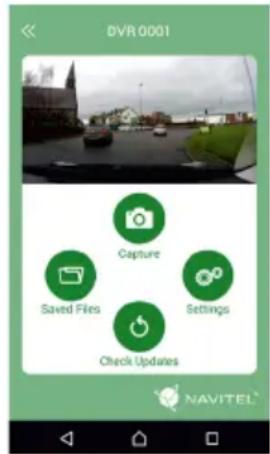
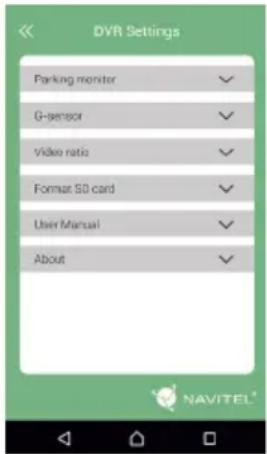
Abb. 4
Sissejuhatus
Lugupeetud klient!
Täname, et ostsite NAVITEL® toote.

NAVITEL*
Nupud

Jo. 4

NAVITEL*
Introduction
Dear Customer!
Thank you for purchasing this NAVITEL® product.
NAVITEL R1000 is a multifunctional high-definition DVR with many functions and features that are described in this User Manual. Please read the manual carefully before using the device and keep it for future reference.

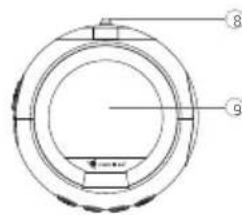
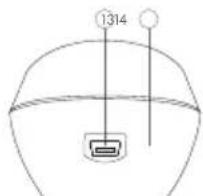
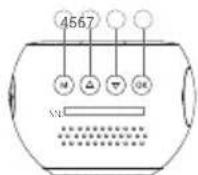
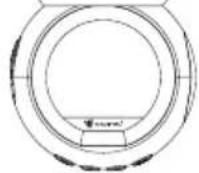
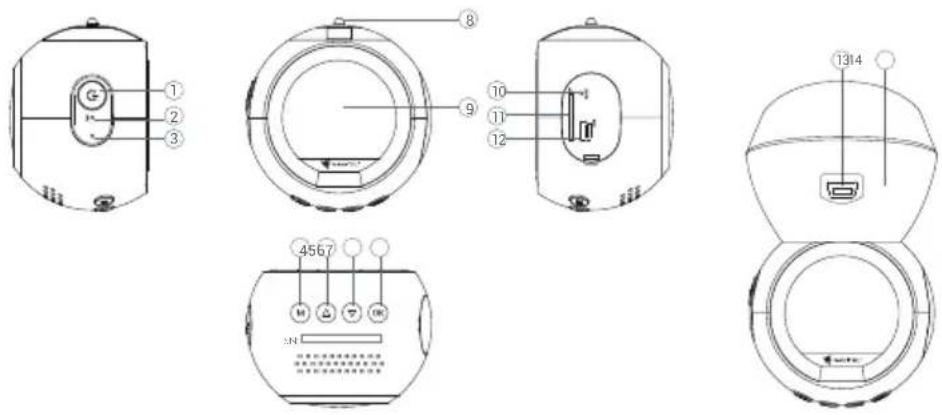
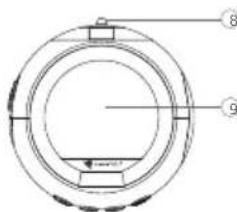
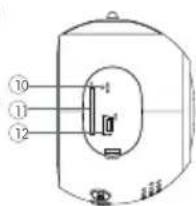
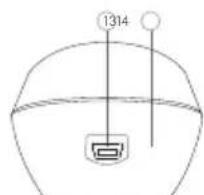
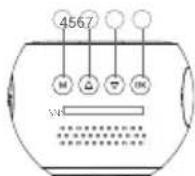
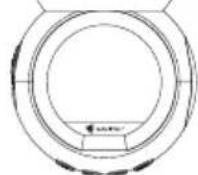
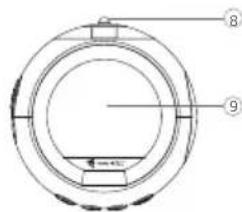
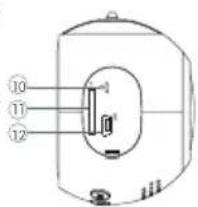
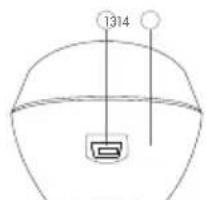
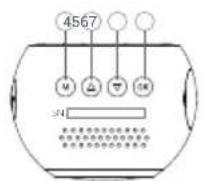
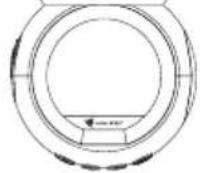
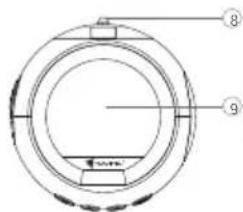
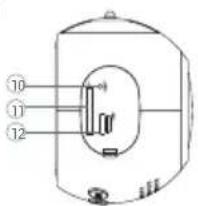
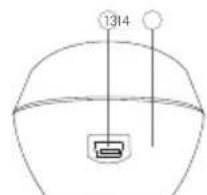
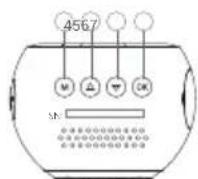
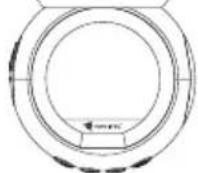
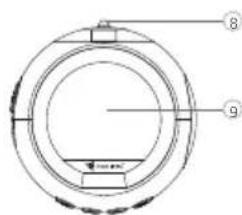
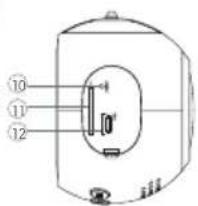
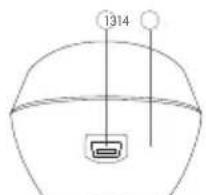
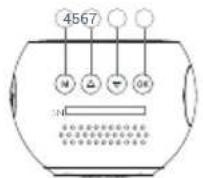
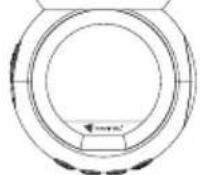
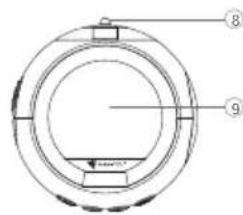
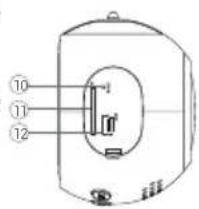
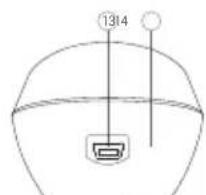
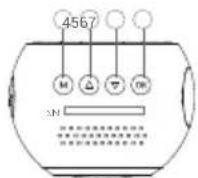
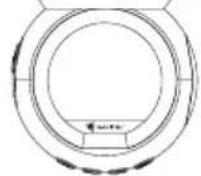
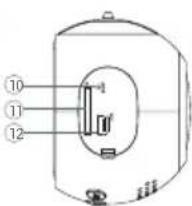
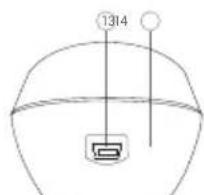
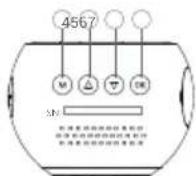
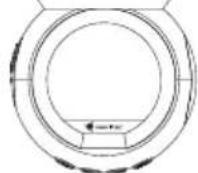
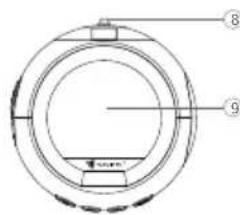
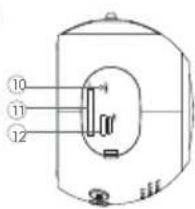
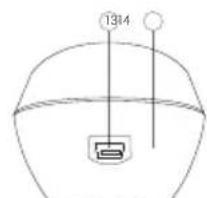
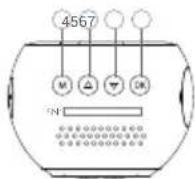
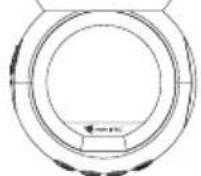
Device layout
-
Power
-
Microphone
-
Indicator
-
Menu
-
Up
-
Down
-
OK
-
Mount connector
-
Monitor
-
Reset
-
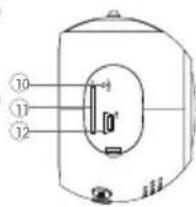
microSD slot
-
Mini-USB port
-
Mini-USB for charging
-
Magnetic mount
Buttons
| Button Functions | |
| Power | Press and hold for 3 seconds to turn the device on/off. Press to switch betweenVideo Record, Capture, andPlayback modes. Press to exit any selected menu.InVideo Recordingmode press to lock the file (locked files cannot be deleted or overwritten). |
| Menu Press to access Mode Settings menu. Press again to access Setup menu. | |
| OK | InVideo Recordmode, press to start recording; press again to stop.InCapturemode, press to take a picture.InPlaybackmode, press to select a file, or pause/unpause a video.In the menu, press to select a menu item or to confirm selected option. |
| Up/Down | In the Main Menu, press to select next/previous menu item or file.InVideo Recordingmode press Down toturn the microphone on/off.InCapturemode, press to zoom in or out. |
| Reset If the device is not responding, press to reset. | |
Note: The built-in battery is designed only for recording an emergency event in parking mode and turning off the device correctly when the power is turned off. For the full operation of the device in any mode, a constant power connection is required.
Specifications
| Processor MSTAR MSC8328 | |
| Display 1.2" TN | |
| Recording format MP4 | |
| Video resolution | 1080 FHD 1920x1080 P /30 fps |
| Image format JPG | |
| Image resolution 2048x1536 | |
| Storage microSD card | |
| microSD card capacity 64 GB max | |
| USB USB 2.0 | |
Note: the specifications may change due to upgrades.
| GPS Supported; built-in antenna | |
| Power USB 2.0 DC | 5 V 1-1.5 A |
| Frequency 50 Hz / 60 Hz | |
| Battery | 180 mAh 3.7VRechargeable battery |
| Working current 700 mA | |
| Microphone/speaker Supported | |
| Wi-Fi | Supported;Chipset AP6181 |
| Language | Chinese simplified, Chinesetraditional, Czech, English,French, German, Italian,Japanese, Korean, Polish,Romanian, Russian, Slovak,Spanish, Ukrainian |
Device functions
Video Connect the device to an external power supply, put the microSD card in and it will start recording automatically (indicated by the flashing blue light). Press the OK button to stop recording (the blue light will become steady). Press OK again to record another video. Each video will be saved automatically.
Photo In Video Record mode, press the Power button to enter Capture mode, press the OK button to take a photo (it will be saved automatically).
Playback Press Power button to enter Playback mode (in Video Record mode press the Mode button twice); press the Up and Down buttons to select a file; press the OK button to play a file. During playback, press OK to pause/unpause; press the Up and Down keys to fast forward/rewind.
Lock file In Video Record mode, press Power to protect the current recording. A key symbol will appear at the bottom of the screen. In Playback mode, select a file, press Menu and select Protect, then Lock Current or Lock All. Protected files cannot be deleted or overwritten. Select Unlock Current/Unlock All to remove protection.
Sound Record Choose this option to record video with or without sound.
Loop recording This setting allows saving the recording in separate files every few minutes. For example, if set to 60 seconds, 10 minutes of footage will be saved as 10 one minute fragments. If the memory card is full, all unprotected files will be overwritten in the order they were created.
G-sensor If the vehicle is hit by something, the DVR will automatically lock the current video.
Stamp This function adds date stamp or device logo to the record. Press OK to select type of stamp or to switch the function off. You can also choose GPS stamp to mark your location.
GPS location Device supports built-in GPS chipset and GPS antenna, it can show longitude, latitude and other information on your current location. Press GPS Status to check GPS dates. Press On in the GPS Stamp menu to add GPS information to your files.
Parking monitor When the device in the standby mode will detect the vibration, it will automatically start recording. If for one minute vibration will not happen again, the device goes into standby mode.
Motion detection Motion detection function is available in the Parking mode (disabled by default). In the Video record mode, select "Motion event REC". When an object is moving the device will automatically start recording. If the object does not move for more than 10 seconds, recording stops.
Battery Red indicator lights up when the device is plugged into an external power supply; as the battery is charging, the red will gradually dim; the red light going out means the battery is full.
Screen saver The device can automatically shut off the screen to reduce power consumption; time interval can be set in the Screen Saver menu.
APP support You can see and share your videos and photos, taken by DVR, in your mobile phone through special app. The app is connecting via Wi-Fi network and should be installed on your mobile phone.

NAVITEL ^
NAVITEL R1000
DVR installation
- Put the miscroSD card into the DVR. Use a high-speed SD card (Class10 or above); capacity should be within 8-64 GB.
- Secure the device on the windshield with the bracket.
- Connect the car charger to the cigarette lighter socket.
- Connect the USB interface to the car charger with the charger extension cord.
- Adjust the camera position.
- Turn the power on; check whether the device is installed correctly.
Note: if the device is installed correctly, the indicator will glow red; the device will start up and begin recording (indicated by flashing blue light.
Precautions
- Use only the original charger adapter. Using another adapter may negatively affect the device's battery.
- Do not use the device in humid or hot environment.
- Keep the lens clean.
- Do not disassemble the device and do not perform repairs by yourself.
- Strictly follow the laws and regulatory acts of the region where the device is used. This device can not be used for illegal purposes.
- Permissible ambient temperature in operating mode: 0 to +35 °C. Storage temperature: +5 to +45 °C. Relative humidity: 5% to 90% without condensation (25 °C).

NAVITEL*
Wi-Fi app installation
- In the Settings menu of your DVR choose App QR Code, scan the code with your mobile phone to download DVRWi-Fi sharing application. Install it after completion of downloading.
- Choose Wifi in Settings menu, press On.
- Connect your mobile phone to the DVR through Wi-Fi connections. If necessary use the password given in the DVR.
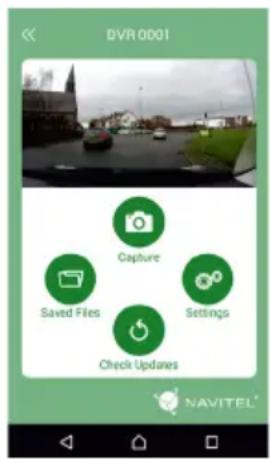
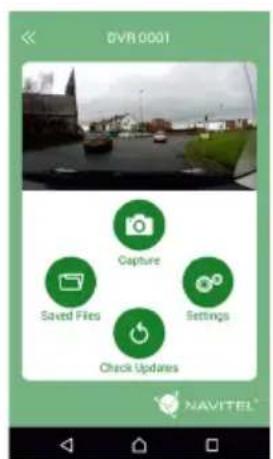
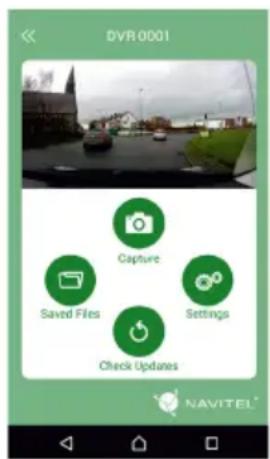
- Run the app, in opened window press Add new device [1].
- Choose your DVR device in the list [2]. Now you can capture video or photo via the app [3]. Note, that DVR's menu is unavailable when the app is on. To switch between photo and video modes, slide the Capture icon left / right.
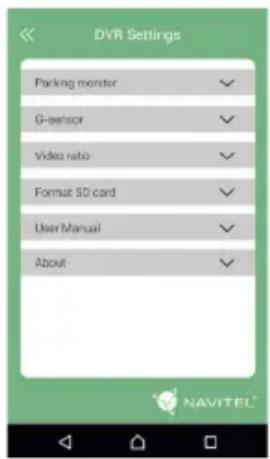
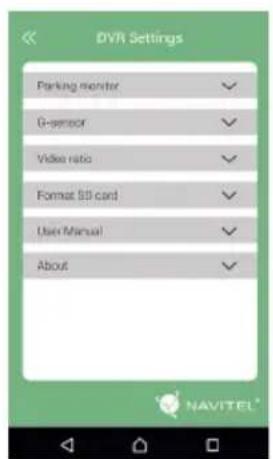
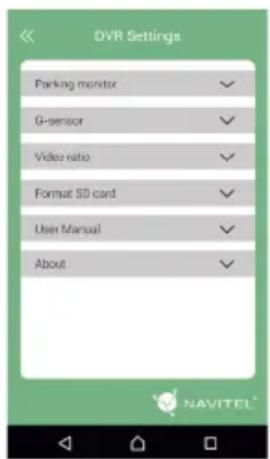
- In the Setting menu you can control DVR functions as well as select video ratio and format your SD card [4].
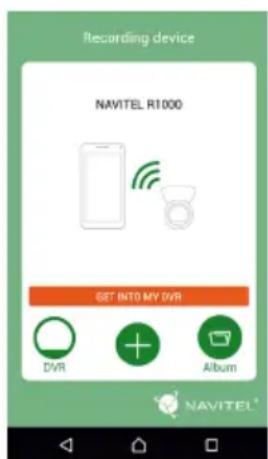
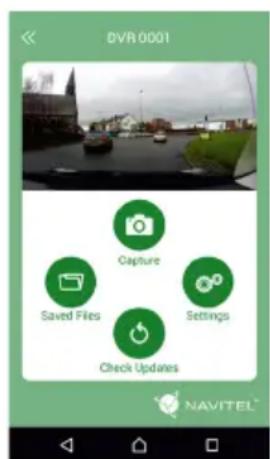
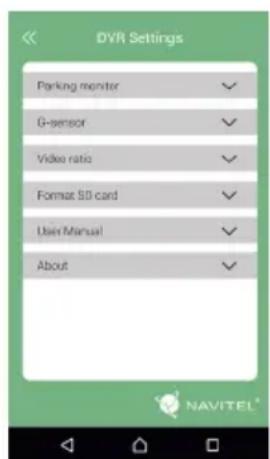
Fig. 4
Bevezető
Tisztelt Ügyfelünk!
Gombok
Pav. 4

NAVITEL
NAVITEL R1000
levads
Cienītais klient!

NAVITEL*
Pogas
Att. 4


NAVITEL*
Wstęp
Drogi Kliencie!
Przyciski

NAVITEL*
Butoane
Кнопки
Tlačidlá
Кнопки
natural_image
Green spherical logo with abstract rings and starburst elements (no text or symbols)NAVITEL®


Brand : Navitel
Model : R1000
Category : Caméra auto