
R260 NV - Caméra auto Navitel - Free user manual and instructions
Find the device manual for free R260 NV Navitel in PDF.


| Product Type | Dashboard Camera (Dash Cam) |
| Brand | Navitel |
| Model | R260 NV |
| Dimensions | Approx. 60 x 40 x 30 mm |
| Weight | Approx. 50 g |
| Power Supply | 5V DC via USB car charger |
| Video Resolution | 1080p Full HD (1920x1080) |
| Lens Angle | Wide angle, approx. 140° |
| Night Vision | Yes, with infrared LEDs |
| G-Sensor | Built-in for impact detection |
| Loop Recording | Supported, overwrites oldest files |
| Parking Mode | Motion detection and time-lapse |
| Memory Card | Supports microSD up to 32 GB (Class 10) |
| Display | 2.0 inch LCD screen |
| Audio Recording | Built-in microphone (enabled/disabled) |
| GPS | Optional external GPS module (sold separately) |
| Mount | Suction cup mount for windshield |
| Battery | Built-in lithium battery (approx. 200 mAh) |
| Maintenance | Clean lens with a soft, dry cloth |
| Safety | Keep away from extreme temperatures; use in car only |
| Spare Parts | USB cable, mount, adhesive pads available separately |
| Repairability | User-replaceable microSD card; other repairs by service center |
Frequently Asked Questions - R260 NV Navitel
User questions about R260 NV Navitel
0 question about this device. Answer the ones you know or ask your own.
Ask a new question about this device
Download the instructions for your Caméra auto in PDF format for free! Find your manual R260 NV - Navitel and take your electronic device back in hand. On this page are published all the documents necessary for the use of your device. R260 NV by Navitel.
USER MANUAL R260 NV Navitel
Uspořádání zařízení
natural_image
Illustration of a lamp emitting light into a device (no text or symbols)2
cz Tlačítka
Tasten
Seadme skeem
Nupud
Thank you for purchasing this NAVITEL® product.
NAVITEL R260 NV is a multifunctional high-definition DVR with many functions and features that are described in this User Manual. Please read the manual carefully before using the device and keep it for future reference.
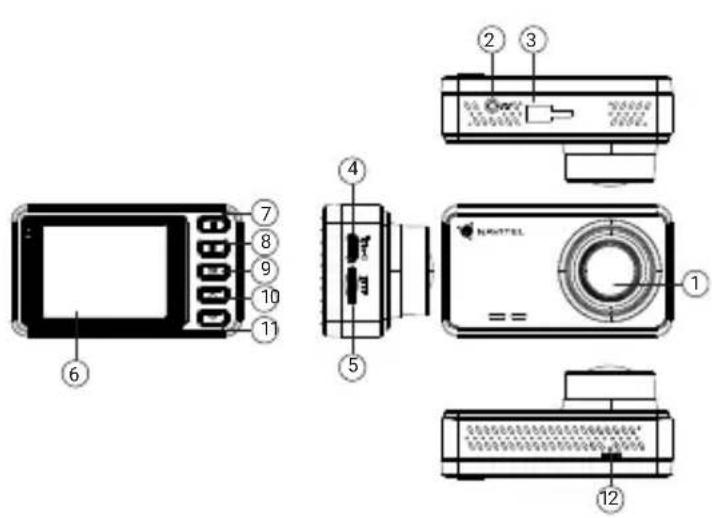
Device layout
- Lens 7. Mode button
- Rearview camera* port 8. Menu button
- Mounting slot 9. OK button
- Power port (USB-C) 10. Up button
- MicroSD card slot 11. Down button
- Display 12. Reset button
Package contents
• DVR NAVITEL R260 NV • Warranty card
- Windshield mount
- Gift voucher
• Car charger 12/24 V • Electrostatic film
- User manual
* Rearview camera is not included in the package. Compatible rearview camera — NAVITEL Full HD.
Specifications
| Model NAVITEL R260 | NV |
| Processor CV1811H | |
| Display 2", 320 × 240, | IPS |
| Camera sensor GC2093 Night Vision | |
| Recording format MOV | |
| Video resolution | 1920 × 1080 (Full HD), 60 FPS* |
| View angle 140° | |
| Lens 4 layers glass | |
| Memory MicroSD card | |
| MicroSD card capacity Max. 256 GB | |
| Battery 3.7V/180 mA·h | |
| Power connector USB-C | |
| Power 5 V, 1.5 A | |
| G-sensor Yes | |
| Rearview camera support | Yes |
| Microphone Yes | |
| Speaker | Yes |
| Language | Czech, English, Estonian German, Hungarian, Latvian, Lithuanian Polish, Romanian, Russian, Slovak, Ukrainian** |
Note. The package, appearance, specifications that do not change the overall functionality of the device may be changed by the manufacturer without prior notice.
* Note. When recording on two cameras at the same time, the front camera captures at 30 FPS.
**Note. The list of voice alert languages may be changed by the manufacturer in future firmware updates.
Installation of the DVR
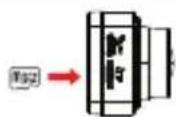
- Put the microSD card into the DVR. Use a high-speed SD card (ClassU3 or above); capacity should be within 8-256 GB.

- To avoid malfunctions of the DVR and/or SD-card, don't insert and remove SD-card during DVR operation.
-
Before using a microSD card, please format it inside the DVR to avoid data errors. To format the SD-card in Menu select Format SD-card and confirm it.
-
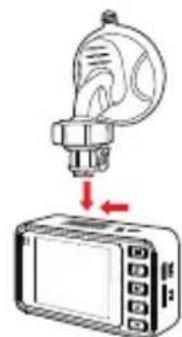
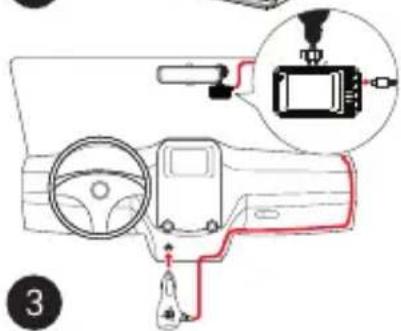
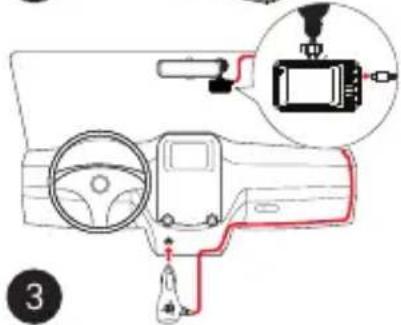
Stick the electrostatic film on the windshield and fix the DVR over it with the mount.
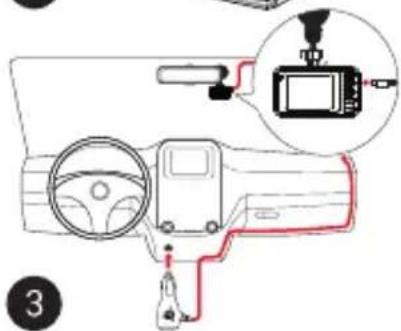
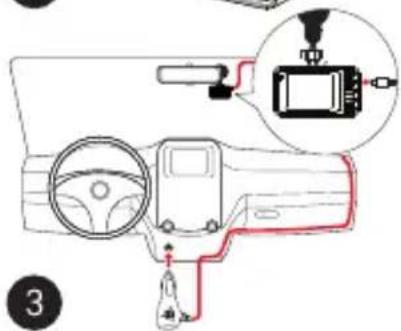
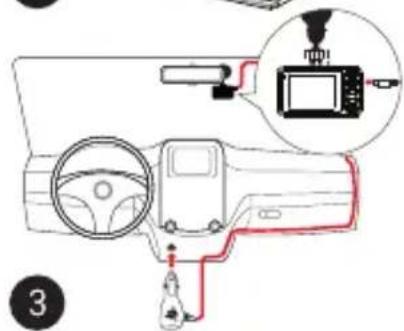
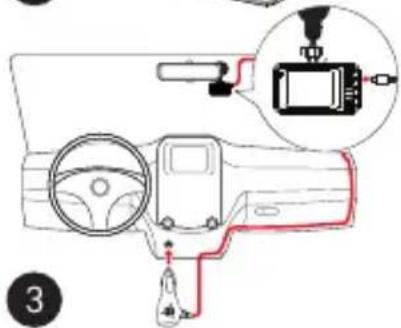
- Connect the car charger to the cigarette lighter socket.
- Connect the car charger to the DVR power port (USB-C).
- Adjust the camera position.
- Turn the power on, check whether the device is installed correctly. If the device is installed correctly, the indicator will glow.
1
natural_image
Illustration of a lamp emitting light into a microwave oven (no text or symbols)2
Buttons
| Button Functions | |
 | In Video Recording mode (STBY), press 📄 select recorded file type. Select file type with , V 📋 mode will open.In View mode, press 📃 display videos or photos captured by the rear view camera. Pressing ag 📄 vill return to Video Recording mode (REC).While viewing a file, press 📃 return to selecting recorded files.In Menu, press 📃 select the next menu item. |
 | In Video Recording mode (STBY), press 📄 enter Menu. Press ag 📄 to exit Menu back to Video Recording mode (REC). |
 | Press and hold 📄 3 seconds to turn the device on/off.In Video Recording mode (STBY), press 📃 start recording (REC).In Video Recording mode (REC), press 📃 stop recording (STBY).In View mode, press 📃 view photo file or pause/resume video file.Press 📃 confirm the action or to select a file/menu item. |
 | In Video Recording mode (STBY/REC), press 📃 switch between full screen mode of the main or rear camera.In Video Recording mode (STBY/REC), press 📃 protect video file (the protected file cannot be deleted or overwritten).In Video Recording mode (REC/STBY), hold 📃 button for 3 seconds to take a picture.In View mode, press [Up], 📃 select previous/next file.In Menu, press [Up], 📃 select previous/next menu item. |
| Reset If the device is not responding, press [Reset]. | |
Device functions
| Memory card formatting | Please format the memory card before using the DVR and in case of a data error. To format the memory card, in Menu select Format SD-card and confirm it. |
| Video recording | Once connected to the power supply, the DVR will start recording video automatically. Press □lto stop video recording. Press □once again to record new video. Every video is saved automatically. |
| Photo capture | In Video Recording mode (REC/STBY), press and hold □for three seconds to take a photo. Every photo is saved automatically. |
| Audio recording | Record video with or without sound. In Menu, turn microphone on/off. |
| Protected recording | In Video Recording mode (REC), press □lto protect the current recording. Protected videos can not be deleted or overwritten. |
| Loop recording | This function allows you to save video as a set of files. If the memory card runs out of space, the un files will be overwritten in the order in which they were created. |
| G-sensor | When the built-in G-sensor reacts to a sudden change in driving speed, emergency braking, impact, etc., the DVR automatically starts recording protected video. The sensitivity of the sensor is adjusted in the Menu. |
| Parking mode | Parking mode is based on the operation of a G-sensor. When the G-sensor is triggered, the DVR starts recording protected video file. |
Precautions
- Use only the original charger adapter. Using another adapter may negatively affect the device's battery. Use accessories only approved by manufacturer.
- Permissible ambient temperature in operating mode: 0 to +35 °C. Storage temperature: +5 to +45 °C. Relative humidity: 5% to 90% without condensation (25 °C).
- Put the device away from fire sources to avoid explosion or fire.
- Do not expose the device to physical impacts.
- Avoid contacting the device with sources of electromagnetic radiation.
- Keep the lens clean. Do not use chemicals or detergents to clean the product; always turn off the device before cleaning.
• Strictly follow the laws and regulatory acts of the region where the device is used. This device can not be used for illegal purposes. - Do not disassemble or repair device by yourself. In case of device failure, contact the service center.
NAVITEL s.r.o. hereby declares that the device NAVITEL R260 NV is compatible with the European directive EMC 2014/30/EU.
The full text of Declaration of conformity is available at the following internet address:
www.navitel.cz/en/declaration_of_conformity
The up-to-date version of the user manual is available on the website https://navitel.com in the section Technical support > Instructions > Documentation.
Bevezetés
Tisztelt Ügyfelünk!
Eszköz elrendezése
natural_image
Illustration of a device with a bulb and sensor, showing a device emitting a red arrow (no text or symbols)2
Mygtukai
lerīces izkārtojums
- Objektiv
- Režims
- Atpakalskata kameras* ports 8. Izvēlne
- Montāžas slots 9. OK
- Barošanas ports (USB-C) 10. Uz augšu
- MicroSD kartes slots 11. Uz leju
- Displejs 12. Atiestatit
Komplektācija
Wygląd zewnętrzny
Przyciski
natural_image
Illustration of a lamp emitting light into a microwave oven (no text or symbols)2
Butoane
Внешний вид
Кнопки
Rozloženie zariadenia
natural_image
Illustration of a lamp emitting light into a microwave oven (no text or symbols)2
Tlačidlá
Зовнішній вигляд
natural_image
Illustration of a lamp emitting light from a device, with no visible text or symbols2
Кнопки


Brand : Navitel
Model : R260 NV
Category : Caméra auto