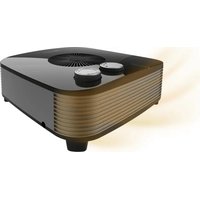
ReadyWarm 2100 Sun - Heating CECOTEC - Free user manual and instructions
Find the device manual for free ReadyWarm 2100 Sun CECOTEC in PDF.

| Product type | Fan heater (space heater) |
| Brand | Cecotec |
| Model | ReadyWarm 2100 Sun |
| Power | 2100 W (max) |
| Voltage/Frequency | 220-240 V ~ 50 Hz |
| Dimensions (H x W x D) | Approx. 70 x 25 x 25 cm |
| Weight | Approx. 3.5 kg |
| Temperature setting | From 15 °C to 35 °C |
| Heat modes | Low power, High power, Eco mode |
| Timer | Programmable up to 24 h (on/off) |
| Oscillation | Yes (on/off) |
| Remote control | Yes, with batteries (not included) |
| Display | Digital LED (temperature, timer) |
| Overheat protection | Yes (shut-off and EE code display) |
| Tip-over protection | Yes (automatic shut-off) |
| Automatic shut-off | After 12 h of inactivity |
| Washable filter | Yes (monthly cleaning recommended) |
| Power memory | Yes (except timer) |
| Heating type | Convection + fan (PTC) |
| Maintenance | Clean filters monthly; wipe surface with dry cloth |
| Material | ABS plastic |
Frequently Asked Questions - ReadyWarm 2100 Sun CECOTEC
User questions about ReadyWarm 2100 Sun CECOTEC
0 question about this device. Answer the ones you know or ask your own.
Ask a new question about this device
Download the instructions for your Heating in PDF format for free! Find your manual ReadyWarm 2100 Sun - CECOTEC and take your electronic device back in hand. On this page are published all the documents necessary for the use of your device. ReadyWarm 2100 Sun by CECOTEC.
USER MANUAL ReadyWarm 2100 Sun CECOTEC
Safety instructions 7
- Parts and components 49
2.Before use 49
3.Installation 50 - Operation 50
- Cleaning and maintenance 52
- Disposal of old electrical and cetelectronic appliances 53
- Copyright 53
- Simplified EU Declaration of Conformity 53
SOMMAIRE
EU01_119136 ReadyWarm 2100 Sun Connected
EN · The coding in this manual is generic and applies to all code variants of the appliance.
E 1JUJU JUJU UUUUUUUUUUUUUUUUUUUUUUUUUUUUUUUUUUUUUUUUUUUUUUUUUUUUUUUUUUUUUUUUUUUUUUUUUUUUUUUUUUUUUUUUUUUUUUUUUUUUUUUUUUUUUUUUUUUUUUUUUUUUUUUUUUUUUUUUUUUUUUUUUUUUUUUUUUUUUUUUUUUUUUUUUUUUUUUUuuuuuuuuuuuuuuuuuuuuuuuuuuuuuuuuuuuuuuuuuuuuuuuuuuuuuuuuuuuuuuuuuuuuuuuuuuuuuuuuuuuuuuuuuuuuuuuuuuuuuuuuuuuuuuuuuuuuuuuuuuuuuuuuuuuuuuuuuuuuuuuuuuuuuuuuuuuuuuuuuuuuuuuuuuuuuuuuuuuuuuuuuuuuuuuuuuuuuuuu uu
Read the following instructions carefully before using the appliance. Keep this instruction manual for future reference or new users.
-
Make sure that the mains voltage matches the voltage specified on the product's rating label and that the plug is earthed.
-
This appliance is intended for domestic use only and is not suitable for use in commercial establishments such as bars, restaurants, farms, hotels, motels, and offices.
- Do not immerse the cord, plug, or any other non-removable part of the appliance in water or any other liquid or expose electrical connections to water. Make sure your hands are dry before handling the plug or switching on the appliance.
- Check the power cord regularly for visible damage. If the cord is damaged, it must be replaced by Cecotec's Official Technical Support Service to avoid any danger.
- Do not place the appliance near heat sources, flammable substances, wet surfaces, or allow it to come into contact with water or other liquids. Do not use outdoors.
- Do not cover the device during operation.
- Warning: To avoid overheating, do not cover the heater. The meaning of the figure in the mark is "DO NOT COVER".
- Do not introduce or allow objects to be introduced in the device, this could cause risk of electrical shock, fire or damage.
- Always turn off and unplug the appliance when not in use and before moving it. To unplug the appliance, pull the plug, not the cord.
- Avoid using extension cords, as they could overheat and cause risk of fire.
- The appliance must not be placed directly under a power socket.
- Do not use the heating appliance in the immediate vicinity of a bath, shower, or swimming pool.
- Do not use this heating appliance if it has been dropped.
-
Do not use if there are visible signs of damage to the heating appliance.
-
Use this heating appliance on a horizontal and stable surface, or fix it to the wall, as applicable.
- WARNING: do not use this heating device in small rooms that are occupied by people who cannot leave the room by themselves, unless permanent supervision is provided.
- WARNING: to reduce the risk of fire, keep textiles, curtains, or other flammable material at least 1 m away from the air outlet.
- CAUTION: some of the product's parts may become very hot and cause burns. Particular attention should be paid when children and/or vulnerable people are present.
- One of the most common causes of overheating is the building up of debris or fluff in the appliance. Be sure to clean these accumulations periodically by vacuuming the vents and grilles.
- Do not place the appliance on carpets, and do not place the cable under carpets. Position the cord in such a way as to avoid obstructing passage and cause tripping hazards.
- Do not store it until it cools down. Store it in a cool, dry place when not in use.
- When using, maintain a minimum distance of 50~cm between the window and the wall.
- Keep the appliance out of the reach of children under 3 years of age unless they are continuously supervised.
-
Children between 3 and 8 years old should only switch the appliance on or off when it has been placed or installed in its normal, intended operating position and if they have been given supervision or instruction concerning the use of the appliance in a safe way and understand the hazards involved. Children between 3 and 8 years old should not plug in, adjust, and clean the appliance and should not carry out maintenance tasks.
-
This appliance can be used by children aged 8 and above and people with reduced physical, sensory, or mental capabilities or lack of experience and knowledge, as long as they have been given supervision or instruction concerning the use of the appliance in a safe way and understand the hazards involved. Children must not play with the appliance. Cleaning and maintenance should not be carried out by children without supervision.
- Supervise children to ensure they do not play with the product. Close supervision is necessary when the appliance is being used by or near children.
INSTRUCTIONS DE SECURITE
- Front housing
- Remote control receiver
- Air outlet grille
- Oscillating support
- Vertical stand
- Base cover
- Counterweight
- Display
- Rear housing
- Rear grille cover
- Power cord
- Remote control
- Power switch
Note:
The graphics in this manual are schematic representations and may not exactly match the product.
2. BEFORE USE
- This appliance comes in a packaging designed to protect it during transport. Remove the appliance from its box. You can keep the original box and other packaging materials in a safe place to prevent damage to the appliance if you need to transport it in the future. If you wish to dispose of the original packaging, make sure all items are recycled properly.
- Check that all parts and components are included and in good condition. If any of them are missing or damaged, please contact Cecotec's Official Technical Support Service immediately.
Box content:
- Product
- Remote control
- Instruction manual
- Do not remove the product's serial number in order to keep proper traceability if technical assistance is required.
ENGLISH
3. INSTALLATION
- Connect the upper part of the fan to the tube using the corresponding button.
- Once connected, insert the tube through the base opening and secure them using the L-shaped screw (Fig. 2).
4. OPERATION
Control panel. (Fig. 3)
- On/Off
- Power settings
- Decrease values
- Temperature settings
- Timer
- Increase values
- Oscillation mode
- ECO mode
PTC smart protection:
The PTC can only be activated when the fan is in operating or start-up state.
When the PTC is operating and the appliance is normally switched off, the PTC will stop immediately, but the fan will delay shutdown by 10 seconds.
On/Off
- When power is supplied, the appliance beeps and enters standby mode. All functions and indicators are off.
- In standby mode, press the On/Off button to switch on, and press again to switch off; default status when switching on:
(1) LED is illuminated;
(2) Low power heating, LED is illuminated;
(3) Default heating temperature is 35^ , LED Illuminated.
Power settings
When switched on, press the power settings button to toggle between low power heating and high power heating.
- Low power heating: the heater operates at low power, LED is illuminated.
- High power heating: the heater operates at high power, LED is illuminated. (When heating changes from low to high power, the LED displays immediately, but the heater requires a 10-second delay before changing).
Temperature settings
When switched on, press the temperature adjustment button to enter the temperature setting function, LED will illuminate:
- Press + or - to adjust the temperature value within the range of 15^ 35^ . The setting is completed if there is no operation within 5 seconds in setting mode.
- The display only shows the default temperature. Only when the timer is set will temperature and timer display alternately, with a 5-second interval.
- When room temperature reaches the set temperature, all functions will switch off (entering shutdown or standby state). When room temperature drops 2^ below the set temperature, functions will restart.
Oscillation mode
When switched on, press the oscillation button to activate and deactivate this function, and LED will illuminate and turn off accordingly.
Timer
Switch-off setting:
When switched on, press the timer button to enter the switch-off programming function, the display flashes and LED H illuminates. Press + or - to adjust the timer value within the range of 0-24H (when set to 0, the switch-off programming function turns off or cancels) with 1H adjustment increments; setting is completed if there is no operation within 5 seconds in setting mode. When the timer is set, the appliance will enter standby mode immediately after countdown without any sound.
Switch-on setting:
In standby mode, press the timer button to enter the switch-on programming function, the display flashes for 0.5 seconds, and LED H illuminates. Press + or - to adjust the timer value within the range of 0-24H (when set to 0, the switch-on programming function turns off or cancels) with 1H adjustment increments; setting is completed if there is no operation within 5 seconds in setting mode. When the timer is set, the display flashes for 0.5 seconds and the appliance will enter operating mode immediately after countdown.
ECO mode
When switched on, press the ECO mode button to activate/deactivate the ECO function.
After entering ECO smart mode, LED illuminates. The appliance automatically adjusts the heating power according to room temperature for greater energy efficiency and environmental friendliness. Operating rules are as follows:
(1) When room temperature is equal to or below 18^ , the heater operates at high power.
(2) When room temperature is above 18^ C and below 25^ C , the heater operates at low power.
(3) When room temperature is equal to or above 25^ , all functions switch off.
ENGLISH
Decrease value button
In temperature and timer setting mode, press the button to decrease the value; hold the button for more than 2 seconds to rapidly change the corresponding function at 0.2-second intervals, and the display will change accordingly. Exit the operation to complete the setting.
Increase value button
In temperature and timer setting mode, press the button to decrease the value; hold the button for more than 2 seconds to rapidly change the corresponding function at 0.2-second intervals, and the display will change accordingly. Exit the operation to complete the setting.
Additional functions
- 12-hour auto-shutdown without operation: When the appliance is normally switched on and no timer is set, it will begin counting from the last button press and automatically switch off after 12 hours of continuous operation, entering standby mode.
- Tip-over protection: If the appliance tips over, it enters shutdown protection mode. When the appliance is restored to its upright position, it enters standby mode.
- After the appliance has been operating continuously for 1 minute without operation, the LED display will dim to prevent LED indicator glare at night. Brightness will restore upon any operation.
- Constant power memory function: If the appliance is switched off but power is not disconnected, the unit will return to its previous operating state upon restart, except for the timer function.
- When overheating occurs, the appliance cannot be switched on and the display shows "EE".
Remote control
It features the same functions as the control panel.
To begin using it, follow these steps:
- Open the battery cover on the bottom of the remote control, as shown in Fig. 4 (press the battery cover clip inward and pull the cover outward).
- Check battery polarity and install it in the battery cover slot (Fig. 5).
- Insert the battery cover back into the bottom of the remote control.
5. CLEANING AND MAINTENANCE
- Before cleaning, repairing and maintaining, please switch off the power and unplug the appliance.
- To clean the surface, use a dry cloth. Do not use petrol, solvents or corrosive detergents. Do not rinse with water.
If excessive foreign matter adheres to the filters, it will affect the air flow, so please clean them at least once a month.
Do not use chemicals for cleaning.
o Remove the filters in sequence (Fig. 6).
Filter cleaning: soak the filters in detergent for a few minutes, then clean and dry them.
o Install the filters in sequence. Ensure correct installation.
- Please pack the appliance when not in use for an extended period.
6. DISPOSAL OF OLD ELECTRICAL AND ELECTRONIC APPLIANCES
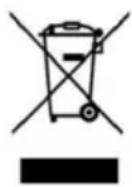
This symbol indicates that, according to the applicable regulations, the product and/or battery must be disposed of separately from household waste. When this product reaches the end of its shelf life, you should dispose of the batteries/ accumulators and take them to a collection point designated by the local authorities.
For detailed information on how to properly dispose of electrical and electronic equipment and/or the corresponding batteries, consumers should contact their local authorities.
Compliance with the above guidelines will help protecting the environment.
7. COPYRIGHT
The intellectual property rights over the texts in this manual belong to CECOTEC INNOVACIONES, S.L. All rights reserved. The content of this publication may not, either in part or in its entirety, be reproduced, stored in a retrieval system, transmitted or distributed by any means (electronic, mechanical, photocopying, recording or similar) without prior authorisation from CECOTEC INNOVACIONES, S.L.
8. SIMPLIFIED EU DECLARATION OF CONFORMITY
CE Cecotec Innovaciones hereby declares that this appliance complies with the essential requirements and other relevant provisions of applicable European Union regulations. This appliance has been designed, manufactured and tested in compliance with required safety and quality standards. The full text of the EU Declaration of Conformity can be found on the following website: https://cecotec.es/es/information/ declaration-of-conformity
FRANÇAIS
1. PIECES ET COMPOSANTS
Img.1
Ovladacipanel (obr.3)
2. INPIN ANO TH XPHSE
Autn n oukeun diatioetai o e oukeuaia oxediouevn va tnv npoataeuei kata tn metapop. Apaipote tn oukeun a to kouti ts. Iowc thnoete va atnohkeuoet to apxiko kouti kai alaa eifn oukeuaiaac o aoppaec mcpos yia va atoopuyte zmuic stn oukeun oe tepittwn Tou xpeiaotei va tn metaapepeote oto meov. Eav etioupeite va atoppipeTe tv apxikn oukeuaia, bbaiwtheite otexte avakukwoei ola ta eion owta.
- Bεβαιωθείτο ὄλι οελαρτήματα και τεξαρτήματa περιλαμβάνονται και βρισκονται σε καλή κατασταη. Eavid λείπουν ἡβρισκονται σε κακή κατασταη, επικοινωνόσε αμέσως με την επίσημη Yπηρεσία Tεχνικής Yποστήρεξης της Cecotec.
περιexóμενα KOUTIó:
- Ppoiov
-Tnλexεipiotnpio
-AutoToEyXeiipioOoyniuv - Mny aipieite tov oepiako apioa oto Tpoiov, wote va eivai duvatn n owtn ixvnlatnon Tou eoianou oc e TepiTTwon Tou xpeiaotite Bothia.
3. EΓΚΑΤΑΣΤΑΣH
a a a a a a a a a a a a a a a a a a a a
2
LED 1
1ai + 1,1bi + 1
LED 0 0 0 0 0 0 0 0 0 0 0 0 0 0 0 0 0 0 0 0 0 0 0 0 0 0 0 0 0 0 0 0 0 0 0 0 0 0 0 0 0 0 0 0
:Jaiy1 Jai
0.5 0 0 0 0 0 0 0 0 0 0 0 0 0 0 0 0 0 0 0 0 0 0 0 0 0 0 0 0 0 0 0 0 0 0 0 0 0 0 0 0 0
ECO
ECO 1/ ECO
Lae aee eae ae eae eae eae eae eae eae eae eae eae eae eae eae eae eae eae eae eae eae eae eae eae eae eae eae eae eae eae eae eae eae eae eae eae eae eae eae eae eae
Ls Jlll aal . 111 111 111 111 111 111
Aa 18 aai jai yaaia aai i aai i aai i aai i aai i aai i aai i aai i aai i aai i aai i aai i aai i aai i aai i aai i aai i aai i aai i aai i aai i aai i aai i aai i aai i aai i aai i aai i aai i aai i aai i aai i aai i aai i
A 25 no 18 no all oJal
125 25 25
2011 2
ylll lll lll lll lll lll lll lll lll lll lll lll lll lll
Jy 0.2
11 24 jjj
yallal ylll l 1y 1y 1y 1y 1y 1y 1y 1y 1y 1y 1y
aal 1 aal alal alal alal alal alal alal alal alal alal alal alal alal alal alal alal alal alal alal
Gall abg elilw y
de = 2
.EE" 5
sill aolil
aaii
1
()