
249420 - Coffee machine PRINCESS - Free user manual and instructions
Find the device manual for free 249420 PRINCESS in PDF.

User questions about 249420 PRINCESS
0 question about this device. Answer the ones you know or ask your own.
Ask a new question about this device
Download the instructions for your Coffee machine in PDF format for free! Find your manual 249420 - PRINCESS and take your electronic device back in hand. On this page are published all the documents necessary for the use of your device. 249420 by PRINCESS.
USER MANUAL 249420 PRINCESS
natural_image
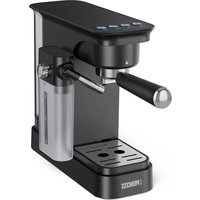
Black PRINCESS coffee maker with a glass cup and coffee mug, no visible text or symbols on the device itself.ESE POD Coffee
Machine 01.249420.01.001
EN User manual 4
NL Gebruiksaanwijzing 9
FR Manuel de l'utilisateur 16
DE Benutzerhandbuch 22
ES Manual del usuario 29
PT Manual do utilizador
35
C

natural_image
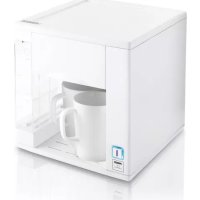
Black electronic device casing with transparent internal panel and labeled parts (no text or symbols visible)B

EN User manual
ESE POD Coffee Machine
FOREWORD
About this document
This user manual contains all the information for correct, safe, and efficient use of the appliance. Ensure you have fully read and understood the instructions in this user manual before you use the appliance.
Always store this user manual in a safe place near the appliance for future reference.
Original instructions
This manual is originally written in English. All other languages are translated documents.
Support
For spare parts and more information about the appliance, please visit www.tristar.eu.
General symbols
| Symbol | Description |
| Applicable in France:The product or packaging can be recycled and components must be disposed of separately. Follow the local regulations. | |
| Applicable in Italy:The product or packaging can be recycled and components must be disposed of separately. Follow the local regulations. | |
| CE | This product complies with conformity requirements of the applicable European regulations or directives. |
| The Green Dot is the registered trademark of Der Grüne Punkt – Duales System Deutschland GmbH and is protected as a trademark worldwide. The logo may only be used by customers of DSD GmbH holding a valid trademark usage contract or by engaged waste management companies within the Federal Republic of Germany. This also applies to reproduction of the logo by third parties in a dictionary, an encyclopaedia or an electronic database containing a reference manual. | |
| The universal recycling symbol, logo, or icon is an internationally recognized symbol used to designate recyclable materials. The recycling symbol is in the public domain and is not a trademark. | |
| This symbol is used for marking materials intended to come into contact with food in the European Union as defined in regulation (EC) No 1935/2004. |
APPLIANCE DESCRIPTION
About this appliance
The Princess 01.249420.01.001 is a capsule coffee machine for only ESE pods.
Intended use
This appliance is intended for indoor use only.
This appliance is intended exclusively for domestic, non-commercial use.
This appliance is intended to be used in household and similar applications such as:
- staff kitchen areas in shops, offices and other working environments;
- farm houses;
- by clients in hotels, motels, and other residential type environments;
- bed and breakfast type environments.
This appliance is not intended for use by persons (including children) with reduced physical, sensory or mental capabilities, or lack of experience and knowledge, unless they have been given supervision or instruction concerning use of the appliance by a person responsible for their safety.
Any use of the appliance other than described in this user manual is regarded as misuse and may cause injury or damage to the appliance and void the warranty.
Technical specifications
| Appliance name ESE POD Coffee Machine | |
| Article number 01.249420.01.001 | |
| Power supply 220 - 240 V~ 50-60Hz | |
| Power 1100W | |
| Capacity 780ml | |
Main parts (see image A)
① Sliding Handle
Control Panel Housing
3 Power/Brew Button
Top Lid
5 Used Pod Container
6 Cup Support Tray
7 Cup Tray Cover
8 Drip Tray Base
9 Capsule Sliding Door
Control panel (see image B)
10 Coffee Spout
11 Left Side Cover
12 Left Side Frame
Adaptors and accessories (see image C)
13 Water Tank Frame
Water Tank Lid
15 Water Tank
SAFETY
WARNING
- Do not open the brew chamber during the brewing process.
- Do not operate the appliance with a damaged cord or plug, or after it malfunctions or has been damaged. Return it to an authorized service facility.
- Only use capsules intended for this appliance. If the capsule does not fit, do not force it.
- Never use the appliance near a bath, shower, or swimming pool.
- Do not use the appliance outdoors.
- Do not place the appliance on or near a hot gas or electric burner, or in a heated oven.
- Never use the appliance if there are visible signs of damage
or defects.
- Do not make unauthorized adjustments to the appliance; this may affect safety and warranty.
- Only use accessory attachments recommended by the manufacturer.
- Do not immerse the appliance, cord, or plug in water or other liquids.
- There is a sharp needle in the capsule adaptor. Do not touch this area after removing the adaptor.
- Scalding may occur if the lid is removed during the brewing cycle.
NOTICE
Risk of damaging the appliance:
- Never use aggressive chemical cleaning agents that can damage the appliance when cleaning the appliance.
- Keep the appliance and cord away from heat, direct sunlight, water, moisture, sharp edges etc.
CAUTION
- Do not operate the machine with an empty water tank C_15 .
- Do not open the sliding handle A _ow whilethemachineis brewing coffee.
- Thoroughly rinse out the water tank C with freshwater before using it for the first time. Clean the appliance using a damp cloth only.
BEFORE FIRST USE
- Take all parts out of the box.
- Check if anything is missing or broken.
- Put the machine on a flat, dry surface near a power socket.
Fill the water tank C15
Option 1 – without removing the tank:
- Open the top lid A4.
- Pour in room temperature drinking water. Do not use hot water, tap water, or other liquids.
- Close the lid.
Option 2 – by removing the tank:
- Remove the water tank CIs from the frame CIs
- Rinse it with clean water.
- Fill it with room temperature drinking water up to the MAX line.
- Put the tank back and make sure it fits firmly.
Flush the machine (First use or after long pause)
- Make sure the water tank C is full and firmly in place.
- Close the sliding handle A 1. (Do not insert a capsule.)
- Place a large cup (at least 250 ml) under the coffee spout B ^10 .
- Plug in the machine.
- Press the power button A3. Wait \~45 seconds until the lights stop blinking.
- Press the brew button A3 to start flushing.
- Wait until the water stops flowing.
- Open the sliding handle A ① and empty the cup.
USE
Use of Water Tank
- Remove the water tank lid C 14
- Remove the water tank C15
- Fill the tank with room temperature drinking water. Do not use hot water, tap water, or other liquids. Do not fill above the MAX line.
- Place the water tank C 15 back into its position.
- Close the water tank lid C14
Preheating
- After filling the water tank, plug in the power cord.
- Press power button A 3 to start heating.
- The two buttons will flash blue while heating (about 1 minute).
- When the buttons stay blue, the machine is ready to brew.
Pod Loading
- Open the sliding door A9.
- Insert the coffee pod into the capsule window (not numbered, but located inside the sliding door).
- Close the sliding door A9. The machine is now ready to brew.
| Menu | |
| Power | |
| Espresso | |
| Lungo | |
Coffee Brewing
- Put a cup under the coffee spout B ^10 .
- Choose your coffee size based on your preference:
• Lungo: -45 seconds, 40–50 ml - Espresso: -25 seconds, 20–30 ml
- This machine does not have a flow meter. The amount of coffee depends on how long the pump runs.
Coffee Volume Setting
Espresso cup setting
- When the machine is ready (buttons are solid blue).
- Press and hold the Espresso button for 5 seconds.
- The light will blink. Keep holding to brew the amount you want.
- Release the button to stop. The machine will remember this amount.
Lungo cup setting
- Press and hold the Lungo button for 5 seconds.
- The light will blink. Keep holding to brew the amount you want.
- Release the button to stop. The machine will remember this amount.
Enter standby mode - Press and hold the Power button for 3 seconds. The machine will enter standby mode (red light).
Reset to default coffee volume - While in standby mode (red light), press both Espresso and Lungo buttons at the same time. The lights will blink 3 times. The coffee volume is now reset to factory settings.
Coffee Temperature Setting
You can adjust the coffee temperature in 7 levels: default, 4 higher, and 2 lower.
This can only be done when the machine is in standby mode (red power light).
Lower the temperature
Press and hold the Espresso button:
- Blinks 2 times = 1 level lower
- Press again: blinks 1 time = 2 levels lower
Raise the temperature
Press and hold the Lungo button:
- Blinks 1 time = 1 level higher
• Press again: blinks 2 times = 2 levels higher
• Press again: blinks 3 times = 3 levels higher
- Press again: blinks 4 times = 4 levels higher
Standby Time Setting
You can choose how long the machine waits before going into standby.
This can only be done when the machine is in standby mode (red power light).
- Press and hold the Power and Espresso buttons together for 3 seconds.
• The Espresso and Lungo lights will blink 3 times. - Press the Espresso button to cycle through options: 1 blink = standby after 25 minutes
• 2 blinks = standby after 4 hours
• 3 blinks = standby after 8 hours
• 4 blinks = no standby
• Press again to return to 1 blink (25 minutes)
Pre-Infusion Setting
Pre-infusion helps improve flavor for some coffee pods.
This can only be done when the machine is in standby mode (red power light).
1. Press and hold the Power and Lungo buttons together for 3 seconds. The machine enters pre-infusion setting mode.
2. Press the Espresso button to turn off pre-infusion.
3. Press the Lungo button to turn on pre-infusion.
4. Press the Power button to save and exit.
CLEANING AND MAINTENANCE
Water Tank 015
- Remove the tank.
- Rinse it with clean water.
- If needed, wipe it with a clean cotton cloth, then rinse again.
Drip Tray A8
- Remove the tray.
- Rinse it with clean water.
- If needed, wipe it with a clean cotton cloth, then rinse again.
Machine Exterior
- Wipe the outside of the machine with a soft, slightly damp cotton cloth.
- Always turn off the power and unplug the machine before cleaning.
TROUBLESHOOTING
| Problem Possible cause Possible solution | ||
| No lights on the machine Power is not connected Check if the plug is properly | ||
| Inserted into the socket | ||
| No coffee comes out Water tank is empty | Fill the water tank C15 with water | |
| Remove the used capsule and insert a new one | ||
| Button is pressed but machine doesn't work | Sliding door A15 is not fully closed | Close the sliding door completely |
| Coffee is not hot enough Cup is cold Run hot water through the machine to warm the cup before brewing | ||
| Sliding door cannot open | Machine is still under pressure | Turn off the machine and wait for the pressure to release, then try again |
| Loud noise during brewing | Water tank is empty or not installed correctly | Make sure the water tank C15 has water and is placed properly |
| Machine turns off by itself | Auto shut-off feature | The machine shuts down automatically after 25 minutes of no use to save energy |
| All lights flash red | System error | Turn off the machine, wait 1 minute, then turn it back on |
DISPOSAL

Do not dispose of electrical appliances as unsorted municipal waste, use separate collection facilities. Contact your local government for information regarding the collection systems available. If electrical appliances are disposed of in landfills or dumps, hazardous substances can leak into the groundwater and get into the food chain, damaging your health and well-being. When replacing old appliances with new ones, the retailer is legally obligated to take back your old appliance for disposals at least free of charge.
BESCHRIJVING APPARAAT
Over dit apparaat
© Princess | Cafetera ESE POD
30
| 01.249420.01.001
SEGURIDAD
ADVERTENCIA
© Princess | Kávovar ESE POD
70
| 01.249420.01.001
| Napájanie | |
| Espresso | |
| Lungo |
Varenie kävy

- ESE POD Coffee
- Machine 01.249420.01.001
- EN User manual
- ESE POD Coffee Machine
- FOREWORD
- Original instructions
- Support
- APPLIANCE DESCRIPTION
- Intended use
- Main parts (see image A)
- Control panel (see image B)
- SAFETY
- WARNING
- NOTICE
- CAUTION
- Fill the water tank C15
- USE
- Coffee Volume Setting
- Coffee Temperature Setting
- Lower the temperature
- Raise the temperature
- Standby Time Setting
- Pre-Infusion Setting
- CLEANING AND MAINTENANCE
- Water Tank 015
- Drip Tray A8
- Machine Exterior
- DISPOSAL
- BESCHRIJVING APPARAAT
- Over dit apparaat
- SEGURIDAD
- ADVERTENCIA
- Varenie kävy
Brand : PRINCESS
Model : 249420
Category : Coffee machine