AD 7974 - Humidifier ADLER - Free user manual and instructions
Find the device manual for free AD 7974 ADLER in PDF.

| Product type | Ultrasonic humidifier |
| Brand | Adler |
| Model | AD 7974 |
| Water tank capacity | 5.5 liters |
| Power | 24 W |
| Power supply | 220-240 V ~ 50-60 Hz |
| Main functions | Timer (2/4/8 h), target humidity setting (30-80%), night mode, plant mode, aromatherapy, humidity level display |
| Control type | Touch with LED screen |
| Indicators | Water level, ambient humidity, humidification intensity |
| Maintenance and cleaning | Empty and clean the tank every 3 days; descale the transducer with a citric acid solution |
| Filter | Removable filter included |
| Safety | Automatic shut-off in case of water shortage, overheat protection, recommended use of a residual current device (30 mA) |
| Materials | Durable plastic, suitable for domestic use |
| Dimensions (approx.) | Approximately 25 x 25 x 35 cm (estimated) |
| Weight (approx.) | Approximately 2 kg (estimated) |
| Included accessories | Aromatherapy adapter, filter, power adapter |
Frequently Asked Questions - AD 7974 ADLER
User questions about AD 7974 ADLER
0 question about this device. Answer the ones you know or ask your own.
Ask a new question about this device
Download the instructions for your Humidifier in PDF format for free! Find your manual AD 7974 - ADLER and take your electronic device back in hand. On this page are published all the documents necessary for the use of your device. AD 7974 by ADLER.
USER MANUAL AD 7974 ADLER
natural_image
White ADLER air conditioner unit with digital display and control buttons (no visible text or symbols on main body)| AD 7974 | |||||
| EN | User Manual 4 | PL | Instrukcja obsługi 117 | ||
| DE | Bedienungsanleitung 10 | IT | Manuale d'uso 125 | ||
| FR | Mode d'emploi 18 | SV | Bruksanvisning 132 | ||
| ES | Manual de usuario 26 | BG | Ръководство за употреба 139 | ||
| PT | Manual de Instruções 33 | DA | Brugsanvisning 147 | ||
| LT | Naudojimo instrukcija 40 | SK | Použivatel'ská príručka 153 | ||
| LV | Lietošanas instrukcija 47 | BS | Korisnički priručnik 160 | ||
| ET | Kasutusjuhend 53 | MK | Упатство за употреба 167 | ||
| HU | Használati útmutató | 60 | HR | Korisnički priručnik 174 | |
| RO | Manual de utilizare | 67 | UK | Керівництво користувача | 181 |
| CS | Návod k použití | 74 | SR | Упутство за употребу 189 | |
| RU | Руководство пользователя | 81 | AR | دليل المستخدم | 196 |
| EL | Еүхеиріdio хрήσης | 89 | AZ | İstifadəçi təlimatı | 202 |
| NL | Gebruikershandleiding | 96 | SQ | Manuali i përdorimit | 208 |
| SL | Navodila za uporabo | 104 | KA | Общег反馈 | 216 |
| FI | Käyttöohje | 111 | |||
1
2
3

4
flowchart
graph TD
    A["Top Setup with Dish"] --> B["Assembly Unit"]
    B --> C["Top Outlet with Drain"]
    C --> D["Bottom Setup with Dish"]
    D --> E["Power Supply Connection"]
    style A fill:#f9f,stroke:#333
    style B fill:#ccf,stroke:#333
    style C fill:#cfc,stroke:#333
    style D fill:#fcc,stroke:#333
    style E fill:#ffc,stroke:#333
| GB | Clean the water tank every 3 days. |
| DE | Reinigen Sie den Wassertank alle 3 Tage. |
| FR | Nettoyez le réservoir d'eau tous les 3 jours. |
| ES | Limpie el tanque de agua cada 3 días. |
| PT | Limpe o reservatório de água a cada 3 dias. |
| LT | Vandens baką valykite kas 3 dienas. |
| LV | Iztīriet ūdens tvertni ik pēc 3 dienām. |
| EST | Puhastage veepaaki iga 3 päeva järel. |
| HU | Tisztítsa meg a víztartályt 3 naponta. |
| BS | Očistite rezervoar za vodu svaka 3 dana. |
| RO | Curățați rezervorul de apă la fiecare 3 zile. |
| CZ | Nádrž na vodu čistěte každé 3 dny. |
| RU | Очищайте резервуар для воды каждые 3 дня. |
| GR | Καθαρίζετε τη δεξαμενή νερού κάθε 3 ημέρες. |
| MK | Чистете го резервоарот за вода на секон 3 дена. |
| NL | Reinig het waterreservoir om de 3 dagen. |
| SL | Rezervoar za vodo očistite vsake 3 dni. |
| FI | Puhdista vesisäiliö 3 päivän välein. |
| PL | Czyść zbiornik na wodę co 3 dni. |
| IT | Pulire il serbatoio dell'acqua ogni 3 giorni. |
| HR | Očistite spremnik za vodu svaka 3 dana. |
| SV | Rengör vattentanken var tredje dag. |
| DK | Rengör vandbeholderen hver 3. dag. |
| UA | Очищайте резервуар для води кожні 3 dnі. |
| SR | Очистите резервоар за воду свака 3 дана. |
| SK | Nádrž na vodu čistite každé 3 dni. |
| AR | نظف خزان المياء كل 3 أيام. |
| BG | Почиствайте резервоара за вода на всеки 3 дни. |
| AZ | Su çənini hər 3 gündə təmizləyin. |
| ALB | Pastroni rezervuarin e ujit çdo 3 ditë. |
| KA | ʃυμμού σʒøο ʒʌʃðɒbɡɒŋ ʊʒɜːŋ 3 ɑːɡɡðo. |
User Manual (EN)
GENERAL SAFETY CONDITIONS
IMPORTANT SAFETY INSTRUCTIONS FOR USE
READ CAREFULLY AND KEEP FOR FUTURE REFERENCE
- Before using the device, read the user manual and follow the instructions contained therein. The manufacturer is not responsible for damage caused by using the device contrary to its intended use or improper operation.
- The device is for home use only. Do not use for other purposes than its intended use.
- The device should be connected only to a 220-240V\~50-60Hz socket. In order to increase the safety of use, do not connect multiple electrical devices to one circuit at the same time.
- To provide additional protection, it is advisable to install a residual current device (RCD) in the electrical circuit with a rated residual current not exceeding 30mA. In this regard, contact a specialist electrician.
- Be especially careful when using the device when children are nearby. Do not allow children to play with the device. Do not allow children or people who are not familiar with the device to use it.
-
WARNING: This equipment may be used by children over 8 years of age and by persons with limited physical, sensory or mental capabilities, or persons who have no experience or knowledge of the equipment, if this is done under the supervision of a person responsible for their safety or if they have been given instructions on how to use the device safely and are aware of the dangers associated with its use. Children should not play with the equipment. Cleaning and maintenance of the device should not be performed by children, unless they are over 8 years of age and these activities are performed under supervision.
-
WARNING: Do not leave the appliance plugged in unattended.
-
WARNING: Keep the device out of the reach of children.
-
WARNING: Improper use of the device may result in injuries such as cuts, abrasions or electric shock.
-
WARNING: Always remove the plug from the power socket after use by holding the socket with your hand. DO NOT pull on the power cord.
-
WARNING: Do not use the device near flammable materials.
-
WARNING: Before cleaning and washing the appliance, unplug the power cord from the socket.
-
WARNING: Before filling the appliance with water, disconnect it from the power supply.
-
WARNING: Always unplug the humidifier if it is left unattended and before assembling, disassembling or cleaning.
-
WARNING: Do not move the device while it is in operation.
-
Do not immerse the cable, plug or the entire device in water or any other liquid. Do not expose the device to weather conditions (rain, sun, etc.) or use in conditions of increased humidity (bathrooms, damp camping houses).
-
Periodically check the condition of the power cord. If the power cord is damaged, it should be replaced by a specialist repair shop in order to avoid a hazard.
-
Do not use the device with a damaged power cord or if it has been dropped or damaged in any other way or does not work properly. Do not repair the device yourself, as this may cause electric shock. Return the damaged device to an appropriate service center for examination or repair. All repairs may only be performed by authorized service centers. Improperly performed repairs may cause serious danger to the user.
-
Place the device on a cool, stable, even surface, away from hot kitchen appliances such as: electric stove, gas burner, etc.
-
Do not use the device near flammable materials.
-
The power cord must not hang over the edge of a table or touch hot surfaces.
-
Do not leave the device or the power supply plugged in while it is switched on unattended.
- Do not allow the motor part of the appliance to get wet.
- It is forbidden to insert fingers or any other objects into the grilles in the device housing.
- Do not cover the outlet opening.
- After use, before storing the device, empty it of water by unscrewing the plug located on the bottom of the base.
- If the device will not be used for a long time, disconnect it from the mains.
- Always replace exhausted batteries in the remote control (if the device is equipped with a remote control transmitter) with new ones.
- Do not move the device when there is water in the internal tank.
- Do not place any objects on the device.
- The device may only be used with properly functioning ventilation.
- Please note that high humidity levels can promote the growth of biological organisms in the environment.
- Do not allow the area around the humidifier to become damp or wet. If moisture does occur, reduce (reduce) the humidifier's output.
- Do not allow absorbent materials such as carpets, curtains, tablecloths to get wet.
- When filling and cleaning, disconnect the appliance from the mains.
- Never leave water in the tank when the appliance is not in use.
- Before storing the device, empty the water tank and clean the humidifier.
- Clean the humidifier and water tank before next use.
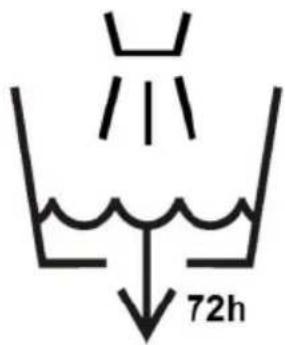
- WARNING: If the water is not changed and the tank is not properly cleaned every 3 days, microorganisms that may be present in the water or in the environment where the device is used or stored may grow in the water tank and be blown into the
environment. This can cause a very serious health risk.
- WARNING: Every three days, empty the water tank and refill with clean water. Before refilling, clean the tank with fresh tap water or detergents. Remove any scale, deposits or film that has formed on the sides of the tank and on the interior surfaces. After washing, wipe all surfaces dry.
The ultrasonic humidifier uses the principle of high-frequency ultrasonic oscillation, the water is atomized into ultrafine particles of 1-5 microns, and then the water mist is dispersed in the air by the pneumatic device, so as to achieve the purpose of evenly humidifying the air, refreshing the air, moisturizing the skin and improving health.
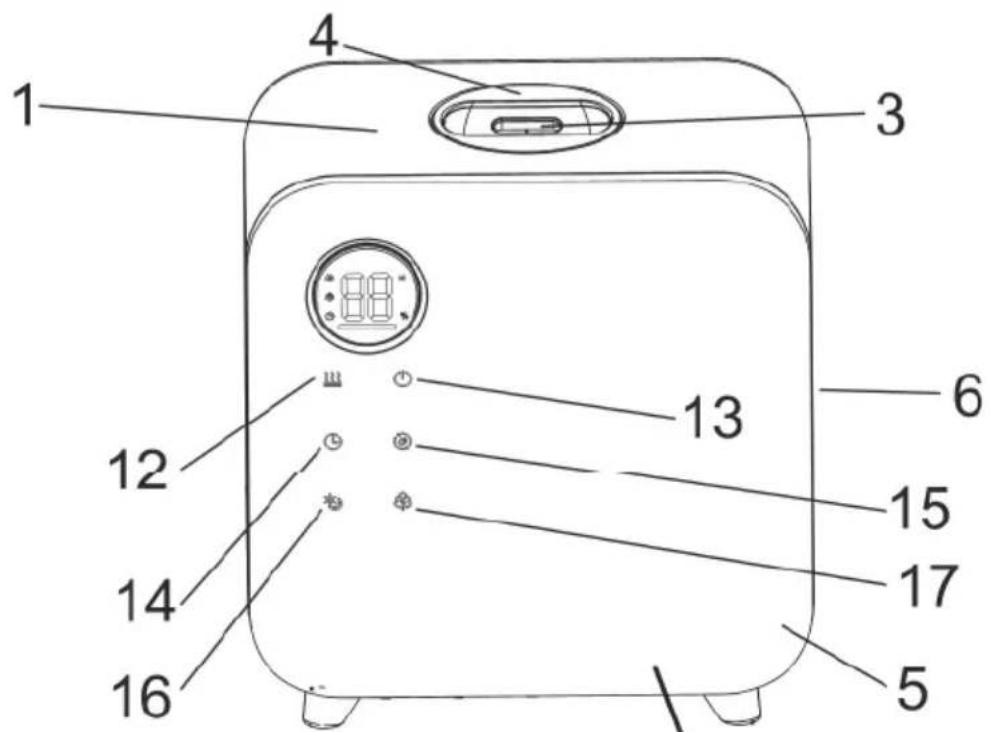
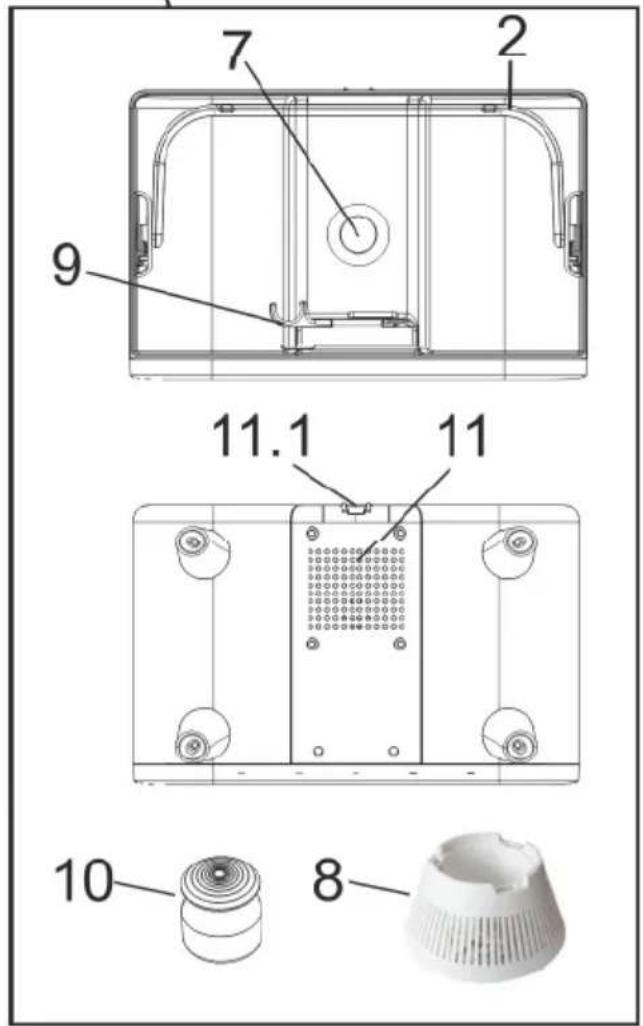
I. Description of the device (Fig. 1): Ultrasonic humidifier
1. Water tank cover 2. Handle
3. Spray nozzle with air channel 4. Handle
5. Water tank 6. Water level indicator
7. Spray transducer 8. Filter
9. Hook for aromatherapy container 10. Aromatherapy adapter
11. Air intake 11.1 DC jack
12. Humidification intensity adjustment button 13. On/Off switch
14. Timer button 15. Target humidity level setting button
16. Night mode button 17. Plant humidification mode
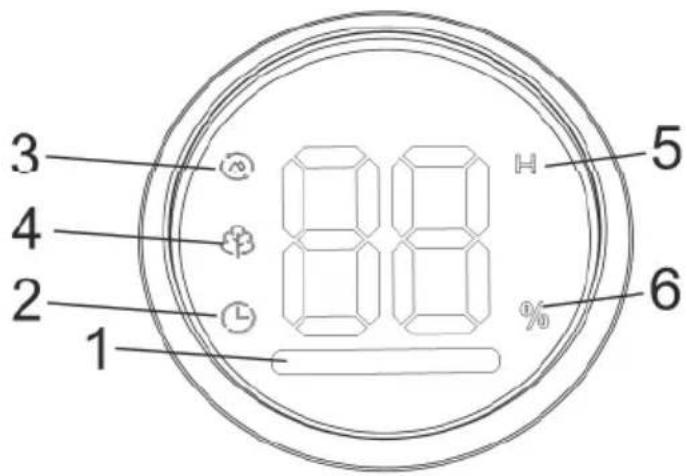
1. Moisturizing intensity 2. Timer icon
3. Target humidity level icon 4. Plant humidification mode icon
5. Unit of time 6. Moisture percentage
1. On/Off switch 2. Moisturizing intensity
3. +/- - increase/decrease timer settings/target humidity level
4. Set your target humidity level 5. Timer Time Settings
6. Night mode button 7. Plant humidification mode
BUTTONS
II DISPLAY / WAKE UP (Fig. 2)
III PILOT (Fig. 3)
BEFORE FIRST USE
- Clean the device according to the CLEANING AND MAINTENANCE section.
- Install the supplied filter (8) into the water tank (5). Remove the water tank cover (1). Place the filter (8) onto the spray nozzle channel (3) so that the wide part is at the bottom.
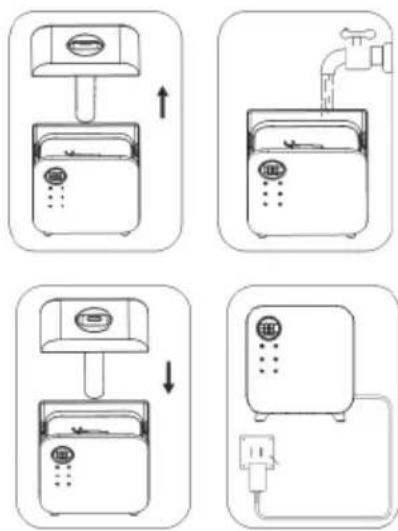
FILLING WITH WATER (Fig. 4)
-
Place the unit on a stable, flat, water-resistant surface. Do not place on carpets. The unit may not operate properly if placed on an uneven surface. Position the humidifier so that the electrical cord and humidifier do not pose a tripping hazard. To ensure adequate ventilation, make sure that all sides, the bottom with the air inlet (11), and the top of the humidifier are at least 30 cm away from walls or other objects.
-
Open the cover (1) of the water tank (5) by pulling the handle upwards (4).
-
Pour cold water into the tank (5). For better results, use distilled or filtered water. Do not pour hot water (over 40^ C) or with chemical additives. Do not pour any liquids other than water. Do not use additives.
Be careful not to exceed the MAX (maximum) water level marked on the inside of the water tank (5).
- Place the cover (1) on the water tank (5).
NOTE: DO NOT add or pour water while the appliance is running. Always turn the appliance off and unplug it from the power source before adding water.
NOTE: DO NOT turn on the appliance when the water tank (5) is empty. The appliance will not start if the water level in the water tank (5) does not exceed the minimum level marked on the wall of the tank.
- The device has a protection against insufficient water in the tank. When the water level drops below the minimum allowable level, the device will sound for 4 seconds and the humidification intensity indicator (1) will flash for 10 seconds. The device will turn off and the fan will stop working after 20 seconds.
Note: The device will not make any sound in night mode.
- Never immerse the housing in liquid or pour liquid into or onto the housing. Do not pour water into the spray nozzle or air channel (3). This may damage the humidifier.
DEVICE OPERATION - device power button (13)
Connect the power supply unit to the DC socket (11.1) on the device and the plug to a power source.
-
To turn on the device, first press the display. The device will wake up. And all buttons will light up.
-
Turn on the device using the switch (13).
-
The device will turn off by pressing the switch (13) once.
NOTE: Dry your hands before pressing the buttons. Otherwise, low control panel sensitivity may occur.
NOTE: Never tilt or move the device during operation when there is water in the tank (5).
SETTING THE HUMIDIFICATION POWER - humidification intensity adjustment button (12):
-
Wake up the device by pressing the display. All buttons will light up.
-
Turn the device on using the switch (13).
-
Press the humidification intensity adjustment button (12). Subsequent presses will adjust the intensity from low to high.
-
Press and hold the humidification intensity adjustment button for 1.5 seconds. The aromatherapy mode will start.
In this mode there is no steam output, only aromatherapy works if the aromatherapy adapter (10) is installed.
AROMATHERAPY ADAPTER INSTALLATION (10)
-
Unscrew the nut.
-
Pour 1-2ml of humidifier oil into the container.
3.Screw on the cap.
- Remove the water tank cover (1). Place the adapter on the hook (9) by inserting the middle part of the adapter between the arms of the hook (9). The adapter nut (10) should face down, towards the water.
NOTE: ONLY water-soluble essential oils are suitable for this device.
DO NOT drip essential oils directly into water.
TIMER SETTING - timer button (14)
-
Wake up the device by pressing the display. All buttons will light up.
-
Turn the device on using the switch (13).
-
Press the timer button (14). Subsequent presses will set the time after which the device will turn off: 2, 4 or 8 hours.
Press the timer button (14) for 1.5 seconds to turn off the timer.
SETTING THE TARGET HUMIDITY LEVEL – Set target humidity level button (15)
-
Wake up the device by pressing the display. All buttons will light up.
-
Turn the device on using the switch (13).
-
Press the target humidity setting button (15). Subsequent presses will set the target humidity: 30%, 40%, 50%, 60%, 70%, 80%.
In this mode, if the humidity exceeds 1% of the set humidity value, the device will stop working and will not produce mist. When the humidity is 1% lower than the set humidity value, the device will start again to maintain the desired
humidity level.
Ambient humidity monitoring - H or L on the display:
The display shows the current ambient humidity, and the humidity symbol remains constantly on, monitoring the ambient humidity.
When the ambient humidity exceeds 85%, the display will show: H, when the ambient humidity drops below 30%, the display will show: L.
NIGHT MODE - Night mode button (16)
- Wake up the device by pressing the display. All buttons will light up.
- Turn the device on using the switch (13).
- Press the night mode button (16). The light around the display will turn off.
- Press the night mode button (16) for 1.5 seconds. The amount of mist produced will decrease, the icon backlight and the display backlight will turn off.
PLANT HUMIDIFICATION MODE – plant humidification mode button (17)
- Wake up the device by pressing the display. All buttons will light up.
- Turn the device on using the switch (13).
- Press the plant humidification mode button (17). The device will set the strongest steam output, which will help keep your plants in good condition.
- Press the plant humidification mode button (17) again to cancel.
- In this mode it is possible to set: target humidity level (15) and timer (14).
- Press the humidification intensity adjustment button (12) to cancel the plant humidification mode (17).
PRECAUTIONS
- If the device will not be used for a long time, pour the water out of the water tank (5) and dry the tank.
- Do not allow water to enter the spray nozzle or the air channel (10).
- If there is water on the housing, wipe the outside of the humidifier with a dry, soft cloth.
- Pour out the water from the tank if the ambient temperature is below 0^ C. Avoid freezing the water in the device.
This may damage the device.
CLEANING AND MAINTENANCE
NOTE: Every three days, empty the water tank and refill with clean water. Before refilling, clean the tank with detergents. Remove any scale, deposits or film that has formed on the sides of the tank and on the interior surfaces.
After washing, wipe all surfaces dry.
Disconnect power before cleaning or servicing the unit.
- If there is some water left in the water tank (5), pour it out by tilting the water tank (5).
NOTE: It is important to correctly position the water tank (5) when pouring water. The correct position is achieved when the air outlet (3) remains dry and the water jet is directed through the opposite edge of the water tank (5). - Wipe the spray nozzle (3) in the cover and the inside of the water tank (5) with a soft cloth dampened with water.
- After using the device for a period of time, scale is easily deposited and the "white powder" phenomenon is formed, it is attached to the surface of the atomizing transducer (7), which affects the humidification efficiency.
Remove the water tank (5). Wipe the atomizing transducer (7) with a cotton swab soaked in citric acid solution or detergent. - The outer surface of the device housing can be cleaned with a damp cloth, and then wiped dry with a clean cloth. Do not use chemical solvents, gasoline, kerosene or polishing powder to wipe the surface.
- Do not allow water to enter the interior of the case when cleaning to avoid internal components malfunctioning.
- Clean the device before each subsequent use.
PROBLEM SOLVING
If the device does not work properly, check the following possible causes before sending it to the service center to solve the problems yourself.
PROBLEM I: the display does not light up.
POSSIBLE CAUSE OF PROBLEM I: The power supply is not connected properly.
PROBLEM SOLUTION I: Connect the power cord and turn on the power.
PROBLEM II: Too little atomization
POSSIBLE CAUSE OF PROBLEM II:
IIa. There is too much white deposit on the atomizing transducer (7)
IIb. The water is too dirty or stored for too long
IIc. The fog volume was set to low
PROBLEM SOLUTION III:
IIIa. clean the white stone on the atomizing transducer (7)
IIIb. Change to clean water
IIIc. Set the fog level to medium or high
PROBLEM III: The peculiar smell of the mist
POSSIBLE CAUSE OF PROBLEM III: The water in the tank is not clean or has been stored for a long time
SOLUTION TO PROBLEM III: Clean the water tank, dry it, then add clean water
TECHNICAL DATA:
Power: 24W
Power supply: 220-240V\~ 50-60Hz
Water tank capacity: 5.5 liters

In the interest of the environment. Information on used electrical and electronic equipment In accordance with art. 13 sec. 1 and sec. 2
of the Act of 11 September 2015 on used electrical and electronic equipment, we inform you about the correct handling of waste electrical and electronic equipment:
-
It is prohibited to place used electrical and electronic equipment together with other waste – this is confirmed by the marking in the form of a "crossed-out bin", which requires selective collection of this type of waste.
-
Electrical and electronic devices may contain hazardous substances, mixtures and components which, when released into the environment, may pose a serious threat to the health and life of humans and living organisms. They may lead to numerous health ailments, such as: vision, hearing and speech disorders, and may also damage the kidneys, liver and heart, and cause skin diseases. Harmful substances may also have an adverse effect on the respiratory and reproductive systems and lead to cancerous changes. Consumption of plants growing in contaminated soils, and products made from them, may pose a risk of the above health effects.
-
Used electrical and electronic equipment should only be delivered to authorised collection points, a list of which should be available on the website of each Municipal Office.
-
The household plays an important role in contributing to the reuse and recovery, including recycling, of used equipment. It also plays a key role in the waste management system for used electrical and electronic equipment due to the possibility of direct transfer to authorized collection points and the elimination of undesirable social habits resulting in leaving waste equipment in places not intended for this purpose.
In addition, Return used electrical and electronic equipment to the place of delivery. The distributor, when delivering equipment intended for households to the purchaser, is obliged to collect used equipment from households free of charge at the place of delivery of such equipment, provided that the used equipment is of the same type and performed the same functions as the equipment delivered.
Cardboard packaging and polyethylene (PE) bags should be disposed of in appropriate containers for selective collection of municipal waste according to their description. If there are batteries in the device, they should be removed and taken to a separate collection and storage point.
Do not throw the device into municipal waste!!
Service If you wish to purchase spare parts or make any complaints, please contact the seller who issued the receipt directly.
PROBLEEMOPLOSSING III:
IIIa. schone witte steen op vernevelingstransducer (7)
IIIb. Stap over op schoon water
30%, 40%, 50%, 60%, 70%, 80%.
natural_image
Abstract geometric star-like symbol enclosed in a circle (no text or labels)

- -middle school school, college, college, college, college, college, college, college, college, college, college, college, college, college, college, college, college, college, college, college, college, college, college, college, college, college, college, college, college, college, college, college, college, college, college, college, college, college, college, college, college, college, college, college, college, college, college, college, college, college, college, high school, high school, high school, high school, high school, high school, high school, high school, high school, high school, high school, high school, high school, high school, high school, high school, high school, high school, high school, high school, high school, high school, high school, high school, high school, high school, high school, high school, high school, high school, high school, high school, high school, high school
36m8m9dou 3sq5f930s III:
7:Average active efficiency
8:Efficiency at low load (10 %)
9:No-load power consumption
DE
1: Modellkennung
2: Eingangsspannung
1: identificator model
natural_image
Exterior view of a modern silver kettle with blue liquid, no visible text or symbolsElectric Kettle AD 1282

natural_image
Close-up of a black and white grainer with powder spilling out, next to a cylindrical container (no text or symbols visible)Burr Coffee Grinder AD 4450
Milk Frother
AD 4491
natural_image
Black rectangular electronic device with a flat lid and side slots (no visible text or symbols)Sandwich Maker AD 3055
natural_image
Modern silver toaster with dual handles and front panel (no visible text or symbols)TOASTER 2 SLICE AD 3222
natural_image
Exterior view of a modern office building (no signage)ELECTRIC GRILL AD 3052

natural_image
Exterior view of a modern glass juice maker with a wooden spoon and orange liquid (no text or symbols visible)CITRUS JUICER AD 4009

natural_image
Product photo of a blender with orange juice and fruit in foreground (no text or symbols visible)PERSONAL BLENDER AD 4081
natural_image
Assorted kitchen appliances including blender, spatula, and keyboard (no visible text or labels)FOOD PROCESSOR AD 4224

natural_image
Hand mixer with whisk, accompanied by a pair of coiled-coiled wires (no text or symbols visible)MIXER AD 4225
natural_image
Black air fryer with control knob and side panel (no visible text or symbols)AIR FRYER AD 6310
natural_image
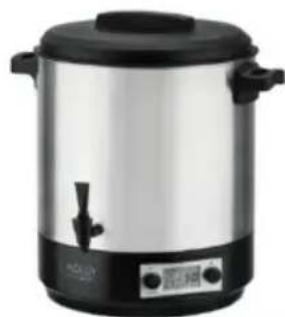
Exterior view of a modern stainless steel coffee pot with black lid and control buttons (no visible text or symbols)PASTEURIZATION POT AD 4496
natural_image
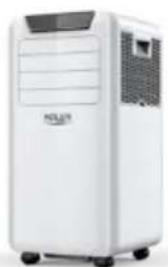
White portable air conditioner unit with visible branding and control panel (no text or symbols on body)AIR CONDITIONER AD 7916
natural_image
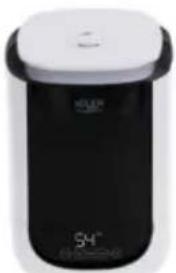
Black and white photo of a modern 54-inch water dispenser (no visible text or symbols)AIR HUMIDIFIER AD 7966
natural_image
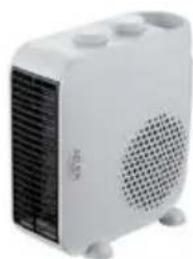
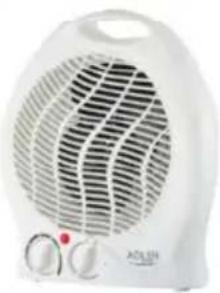
White portable heating unit with ventilation grille and three heat sinks (no visible text or symbols)FAN HEATER AD 7725
natural_image
Top-down view of a stainless steel kitchen pan with digital display (no text or symbols visible)KITCHEN SCALE AD 3166
ADLER
EUROPE
COFFEE GRINDER
AD 4446
natural_image
Exterior view of a modern stainless steel toaster with a digital display (no visible text or symbols)TOASTER 2 SLICE AD 3214
HAND BLENDER
Ad4625

natural_image
Modern kitchen appliance with a large bowl and control knob (no visible text or symbols)MIXER WITH BOWL AD 4222
natural_image
Exterior view of a modern kitchen appliance with digital display (no visible text or symbols)AIR FRYER OVEN AD 6309

natural_image
Front view of a white microwave oven with control knobs and a brand logo (no visible text or symbols on the device body)MICROWAVE OVEN AD 6205
natural_image
Black square electronic device with a handle and control panel (no visible text or symbols)WAFFLE MAKER AD 3049
natural_image
White digital kitchen scale with LCD display showing 328 (no visible text or symbols)KITCHEN SCALE AD 3170

natural_image
Glass coffee kettle with water splash, no visible text or symbolsELECTRIC KETTLE AD 1286
natural_image
Black rectangular device with handle and control panel (no visible text or symbols)SANDWICH MAKER
AD 3043
natural_image
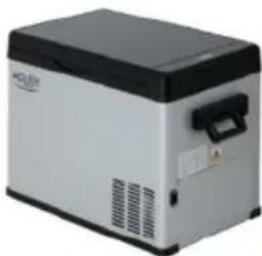
Exterior view of a silver and black industrial device (no visible text or symbols)PORTABLE FRIDGE AD 8077

natural_image
Black countertop oven with two top ovens and a front pane (no visible text or labels)Electric Oven With HOB AD 6020
natural_image
White portable electric heater with visible grille and control knobs (no text or symbols)FAN HEATER AD 7728
natural_image
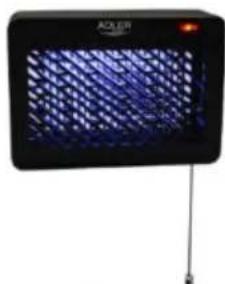
Black electronic device with blue mesh pattern and LED indicator (no visible text or symbols)MOSQUITO LAMP AD 7938

natural_image
Black textured fabric with a white bandage and a small white mark on the side (no text or symbols visible)HEATED PAD AD 7433
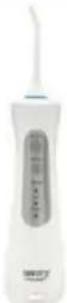
ORAL IRRIGATOR
AD 2176
ADLER
EUROPE
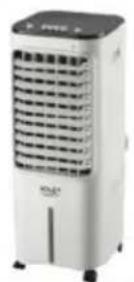
AIR COOLER
AD 7913
natural_image
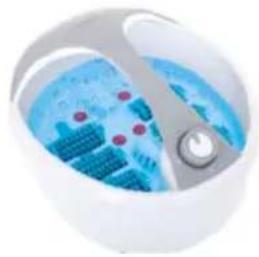
Close-up of a white circular device with blue and purple abstract patterns, no visible text or symbolsFOOT SPA AD 2177
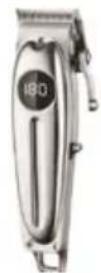
HAIR CLIPPER
AD 2831

natural_image
Green handheld hair dryer with black handle and metallic shaft (no visible text or symbols)HAIR DRYER AD 2265

natural_image
Close-up of a white medical device next to a textured, curled-up cushion (no text or symbols visible)HEATED PAD AD 7412
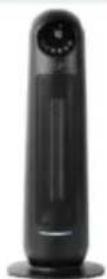
CERAMIC FAN HEATER
AD 7731
natural_image
White industrial oil resistance heater with cooling wheels (no visible text or symbols)OIL-FILLER RADIATOR
AD 7811
natural_image
Digital kitchen digital scale with black casing and floral pattern, displaying temperature reading of 328 degrees (no readable text beyond branding)KITCHEN SCALE AD 3171
natural_image
White industrial water heater with black filter and control knob (no visible text or symbols)CHOCOLATE FOUNTAIN AD 4487

HAND BLENDER
AD 4617
natural_image
Close-up of a white handheld phone with a circular grille and handle (no visible text or symbols)LINT REMOVER AD 9616

natural_image
Close-up of a handheld vacuum cleaner with black handle and pink body (no text or symbols visible)VACUUM CLEANER AD 7044
natural_image
Black and white photo of a kitchen electrician (no visible text or labels)MEAT MINCER AD 4811

natural_image
Exterior view of a modern kitchen blender with red liquid being filled (no text or symbols visible)Blender AD 4078
natural_image
Exterior view of a modern kitchen grater with food cuts and a clear lid (no text or symbols visible)ELECTRIC GRILL AD 6610
natural_image
Glass water heater with blue liquid inside, placed on a stand (no text or symbols visible)ELECTRIC KETTLE AD 1293

AFTER SALE SERVICE NOTICE