FUTAGO AFR-9000 - Deep fryer AIWA - Free user manual and instructions
Find the device manual for free FUTAGO AFR-9000 AIWA in PDF.

| Product type | Air fryer |
| Brand | Aiwa |
| Model | FUTAGO AFR-9000 |
| Number of baskets | 2 |
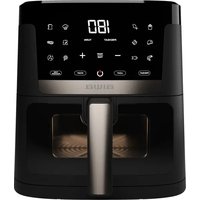
| Control type | Electronic with digital display |
| Cooking functions | Fries, Chicken, Steak, Seafood, Fish, Dehydrate, Defrost |
| Special functions | Dual Cook, Synchronization (Smart Finish), Auto Clean |
| Temperature range | 80 °C to 200 °C |
| Timer | 1 to 60 minutes |
| Power | 1700 W |
| Power supply | 220-240 V ~ 50/60 Hz |
| Weight | 6.5 kg |
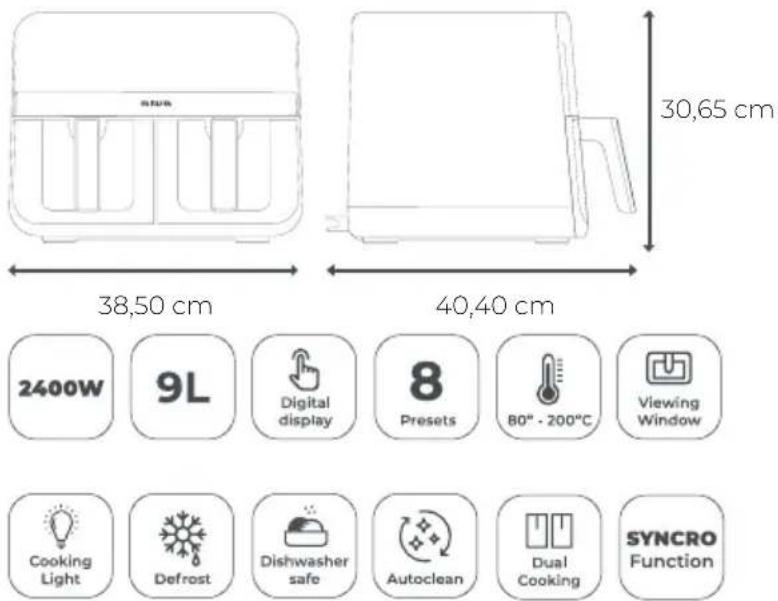
| Dimensions (W x D x H) | 40 x 30 x 35 cm |
| Basket material | Non-stick |
| Viewing window | Yes |
| Interior light | Yes |
| Auto shut-off | Yes |
| Safety | Auto shut-off when basket is opened, cool-touch surface |
| Cleaning | Hand wash recommended, auto clean function |
| Included accessories | 2 baskets, 2 non-stick racks |
| Warranty | 2 years |
| Customer service | Contact local Aiwa service center |
Frequently Asked Questions - FUTAGO AFR-9000 AIWA
User questions about FUTAGO AFR-9000 AIWA
0 question about this device. Answer the ones you know or ask your own.
Ask a new question about this device
Download the instructions for your Deep fryer in PDF format for free! Find your manual FUTAGO AFR-9000 - AIWA and take your electronic device back in hand. On this page are published all the documents necessary for the use of your device. FUTAGO AFR-9000 by AIWA.
USER MANUAL FUTAGO AFR-9000 AIWA
natural_image
Line drawing of a microwave oven with labeled 'aiwa' on the lid (no other text or symbols)FUTAGO AFR-9000
220-240V\~ | 50-60Hz | 2400W | 9L | 60-200°C
(EN) Air fryer - Instruction Manual
| Power | 2400 W |
| Capacity | 9 L |
| Pre-sets | 8 |
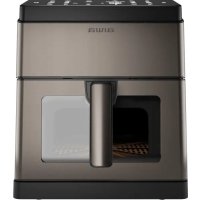
| Body material | Stainless steel |
| Cavity type | Tray |
| Visible window | Yes |
| Auto clean | Yes |
CONTENT
Contenido, Contenuto, Contenu, Inhalt, Conteúdo, Inhoud, Съдържание, Периехóμενο, Zawartość, Obsah, Continut, Tartalom, Садржај, İçerik, Содержание

MESUREMENTS
Medidas, Misure ,Mesures, Maße , Medidas , Afmetingen ,Merki, Μετρήσεις, Wymiary, Merania ,Măsurători, Méretek, Mepe, Ölçümler, Измерения,
GETTING TO KNOW YOUR AIR FRYER
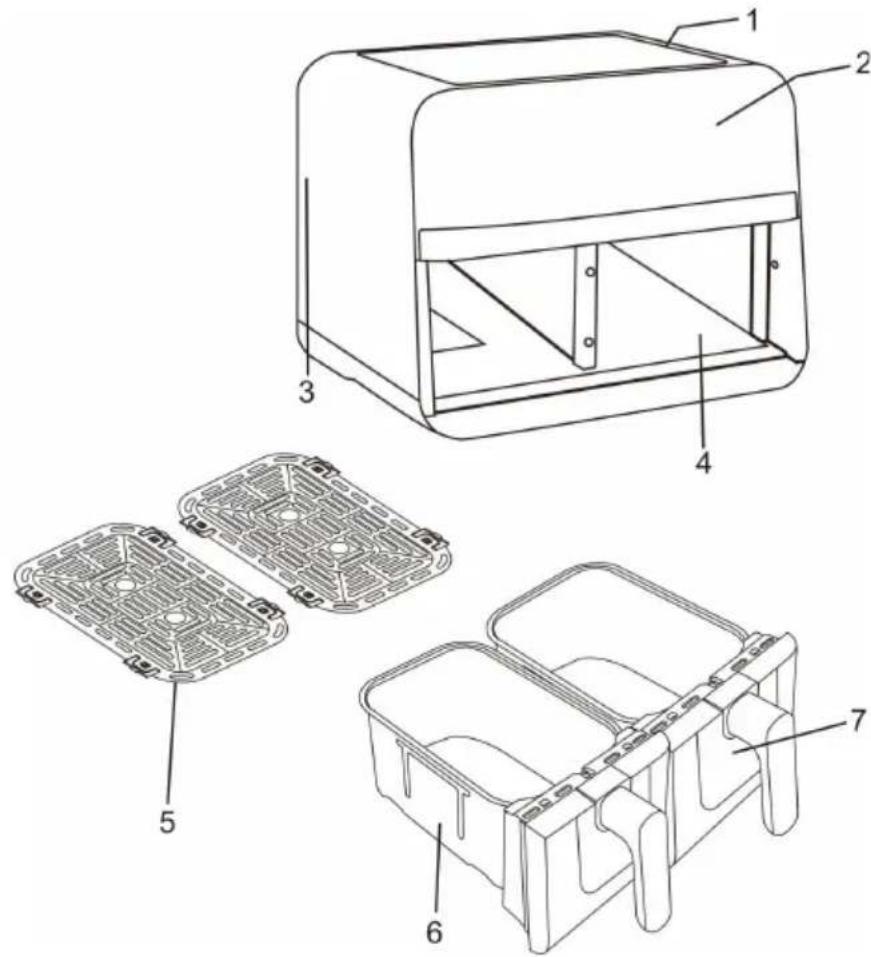
PARTS
(EN) 1. Air Intake Vent 2. Control Panel 3. Air Outlet (Located on back) 4. Main Unit 5. Non-stick grid (One for each zone) 6. Baskets (One for each basket) 7. Visible Window (ES) 1. Ventilación de entrada de aire 2. Panel de control 3. Salida de aire (ubicada en la parte trasera) 4. Unidad principal 5. Rejilla antiadherente 6. Cestas (una para cada cesta) 7. Ventana visible.
- Remove and discard any packaging material, promotional labels, and tape from the unit.
- Remove all accessories from the package and read this manual carefully. Please pay particular attention to operational instructions, warnings, and important safeguards to avoid any injury or property damage.
- Wash the baskets and crisper plates in hot, soapy water, then rinse and dry thoroughly.
- Clean the inside and outside of the product with warm wet cloth, then dry thoroughly.
- The air fryer uses the technology of hot air heating. Never pour oil or fat into the fryer.
- Leave a minimum of 13 cm of space between the back and top of the wall.
FUNCTION BUTTONS
- POWER BUTTON: The ⏻ button turns the unit on and off and stops all cooking functions. Once the Unit is plugged in, the Power Button will light up. Selecting the Power Button once (Press 1 second) will cause the full panel to be illuminated. Press 1 second the Power Button will shut down the Unit.
- START/STOP: After selecting temperature and time, start cooking by pressing the START/STOP button. To pause cooking, first select the zone you would like to pause, then press the START/STOP button(13).
- Temperature Select Icon: Press this button to choose temperature, then press the + button or - button enable you to select exact cooking temperature.
- Indicator Light: When you want to see the cooking process of food ingredients, press this button, the light inside of the unit will light up. You can turn off the light, and press this button again.
• Sake: remind the turn the food to get a better crisper taste. - Dual cooking: Automatically matches zone 2 settings to those of zone 1 to cook a larger amount of the same food, or cook different foods using the same function, temperature, and time.
- SYNC: Smart finish Automatically matches zone 2 settings to those of zone 1 to cook a larger amount of the same food, or cook different foods using the same function, temperature, and time.
- NOTICE: Please remember that these Default Settings offer only a reference. For food ingredients differ in source, size, shape and brand, we can not guarantee to provide the best Settings for your food ingredients. As the fast air change technology can give renewed heating to the air inside the product immediately, so, to pull the basket out of the unit during the operation will hardly affect the process of cooking.
- NOTE: If the dual basket air fryer starts with cold boot, the cooking time should be 3 minutes longer.
USING YOUR AIR FRYER
- Pull the basket handle to remove it from the fryer gently.
- Place food on the inner rack inside the basket.
- Reinsert the basket with the food into the fryer.
Note: The appliance requires the basket to be fully closed for operation. Unwind
the cord before plugging it in.
-
Plug the appliance into the power outlet. A beep will confirm the appliance is on, and the on/off button will light up.
-
Press the on/off button to activate the digital display.
MANUAL MODE
-
Once the ingredients are in the basket and the fryer is plugged in:
-
Adjust the time and temperature using the selector dial (20).
• Use the +/- buttons (3)(9) to increase or decrease the temperature and time. -
Press the start button (13) to start cooking.
-
During cooking:
-
Modify the time and temperature if needed.
• To pause cooking, press the power button (13) or open the basket. -
To stop the appliance completely:
-
Press the power button (17) again.
• The screen will turn off, and the appliance will enter standby mode.
MENU MODE
-
Once ingredients are in the basket and the fryer is on:
-
Select desired menu using the menu selector (15).
-
Adjust temperature and time following manual steps.
• Press start button (13) to begin cooking. -
During cooking:
-
Modify time and temperature if needed.
• To stop the appliance completely: - Press power button (13). Screen turns off, appliance enters standby mode.
COOKING IN YOUR DUAL BASKET AIR FRYER SMART FINISH (SYNC)
To finish cooking at the same time when foods have different cook times, temps, or even functions:
- Place ingredients in the baskets, then insert baskets in unit.
- Press SYNC button, zone 1 will remain illuminated, then press the Menu button for select the desired cooking function.
- Select zone 2, then press the Menu button for select the desired cooking function.
NOTE: You can select a different function for zone 2.
- Then press the START/STOP button to begin cooking in the zone with the longest time. The other zone will display HOLD. The unit will activate the second zone when both zones have the same time remaining.
NOTE: Some food ingredients require overturning during the middle term of cooking. To overturn the food ingredients, hold the handle and pull out the basket from the product, and then make the turning. After that, slip the basket back to the unit. (When you pull out the basket from the product, the screen will show "OPEN".)
NOTICE: When using it for the first time, please adjust the temperature to 200^ C, and let the unit working 30 minutes without food.
-
When cooking is complete, the unit will beep 5 times and "End" will appear on the display, the motor will stop working after 20 seconds.
-
Remove ingredients by dumping them out or using silicone-tipped
tongs/utensils. DO NOT place drawer on top of unit.
DUAL COOK
To cook a larger amount of the same food, or cook different foods using the same function, temperature, and time:
- Place ingredients in the baskets, then insert baskets in unit.
- Press the DUAL COOK button, then press the Menu button to select the desired cooking function.
- Then Press START/STOP to begin cooking in both zones.
NOTE: Some food ingredients require overturning during the middle term of cooking. To overturn the food ingredients, hold the handle and pull out the basket from the product, and then make the turning. After that, slip the basket back to the unit. (When you pull out the basket from the product, the two screens will show "OPEN".)
- When cooking is complete, the unit will beep 5 times and "End" will appear on the display, the motor will stop working after 20 seconds.
- Remove ingredients by dumping them out or using silicone-tipped tongs/utensils.
STARTING BOTH ZONES AT THE SAME TIME, BUT ENDING AT DIFFERENT TIMES
1.1 Select zone 1, then press the Menu button (15) to select the desired cooking function.
1.2 Press the Time Control Button (20), then press the + (9) button or - (3) button enable you to select exact cooking time to the minute.
1.3 Press the Temperature Control Button (20), then press + (9) button or - (3) button enable you to raise or lower cooking temperature.
2.1 Select zone 2, then press the Menu button (15) to select the desired cooking function.
2.2 Press the Time Control Button, then press the + (9) button or - (3) button enable you to select exact cooking time to the minute.
2.3 Press the Temperature Control Button, then press + (9) button or - (3) button to enable you to raise or lower cooking temperature.
3. Press the START/STOP button to begin cooking in both zones.
NOTE: Some food ingredients require overturning during the middle term of cooking. To overturn the food ingredients, hold the handle and pull out the basket from the product, and then make the turning. After that, slip the basket back to the unit. (When you pull out the basket from the product, the two screens will show "OPEN".)
4. When cooking is complete in one zone, the unit will beep 10 times and "End" will appear on the display, the motor will stop working after 20 seconds.
5. Remove ingredients by dumping them out or using silicone-tipped tongs/utensils, then wait for the ingredients in another basket to finish cooking.
PAUSING BOTH ZONES AT THE SAME TIME
- To pause time in the SMART FINISH(SYNC) mode, or to pause both zones in dual zone cooking, press the START/STOP button.
- To resume cooking, press the START/STOP button again.
PAUSING A SINGLE ZONE DURING DUAL ZONE COOKING
- To pause time in a single zone while both zones are running, select the zone you want to pause, then press the START/STOP button.
- To resume cooking, press the START/STOP button again.
CANCEL OPERATION
In any mode, you want to cancel the program which you selected, press the START/STOP button, then press the power button, the unit will beep 5 times and "End" will appear on the display, the motor will stop working after 20 seconds.
CLEANING YOUR AIR FRYER
The unit should be cleaned thoroughly after every use. The inside of the baskets, crisper plates and the product are all covered with non-sticking painted coat. Do not use metal kitchen wares or abrasive cleaning material to do the cleaning, for this will damage the non-sticking painted coat.
- Pull out the plug from the power socket, let the product cool down. (Note: Take out the baskets, thus, to make the fat-free fryer cool down more quickly.)
- Use wet cloth to scrub the outside part of the product.
- Clean the baskets or the bottom of the baskets with hot water, detergent and non-abrasive sponge, please add hot water into the baskets together with some detergent. Put crisper plates into the baskets, and then soak the baskets and the crisper plates for 10 minutes.
- Clean the inside of the product with hot water and non-abrasive sponge.
- Use cleaning brush to clean the heating components, swept away remaining food residual.
- A timely manner with a clean brush to clean the air inlet opening and the air outlet opening, so as not to affect the air inlet and the outlet air flow.
Note: If food residue is stuck on the crisper plates or baskets, place them in a sink filled with warm, soapy water and allow to soak.
AUTO CLEAN FUNCTION
- Fill the air fryer with water up to the edge of the cooking rack.
- Add 5 ml of dishwashing detergent.
- Press the "Auto Clean" button.
- Empty the dirty water and clean any remaining residue.
With these simple steps, your air fryer will be ready for its next us
STORAGE YOUR AIR FRYER
- Make sure the Air Fryer is unplugged and all parts are clean and dry before storing.
- Never store the Air Fryer while it is hot or wet.
- Put clean Crisper Plates into fryer basket and insert fryer basket into the Air Fryer body.
- Store Air Fryer in its box or in a clean, dry place.
GUARANTEE AND SERVICES
If you require services or repairing, or have any doubt, you can communicate with the local Customer Center.
If there is no Customer Center near your location, you can communicate with your local dealer.
This symbol means that in case you wish to dispose of the product once its working life has ended, take it to an authorized waste agent for the selective collection of waste electrical and electronic equipment (WEEE). This appliance complies with Directive 2014/35/EU on Low Voltage, Directive 2014/30/EU on Electromagnetic Compatibility, Directive 2011/65 EU on the restrictions of the use of certain hazardous substances in electrical and electronic equipment and Directive 2009/125/EC on the ecodesign requirements for energy-related products
www.aiwa-industries.com
All Pictures shown are for illustration purpose only.
All Rights Reserved. All other trademarks are property of their respective owners.
All specifications are subject to change without prior notice.
Aiwa Europe S.L., Av. Siglo XXI, 34, ES-08840.
REV. 02/02/2024 V1