USER MANUAL PC-BBA 1282 PROFICOOK
natural_image
PROpane Turkey bread oven with digital display and control buttons (no visible text or symbols on main body)
Brotbackautomat PC-BBA 1282
Programm 5 WHOLE WHEAT
Programm 5 WHOLE WHEAT
Be sure to read the separately enclosed safety instructions first.
Instruction Manual
Thank you for choosing our product. We hope you will enjoy using the appliance.
Read the instruction manual and the separately enclosed safety instructions very carefully before using this appliance. Keep these documents, including the warranty certificate, receipt and, if possible, the box with the inner packaging in a safe place. If you pass the appliance on to a third party, always include all the relevant documents.
Symbols in this Instruction Manual
Important information for your safety is specially marked. It is essential to comply with these instructions in order to avoid accidents and prevent damage to the appliance:
WARNING:
This warns you of dangers to your health and indicates possible injury risks.
△ CAUTION:
This refers to possible hazards to the appliance or other objects.
Content
Overview of the Components....3
Unpacking the Appliance....15
Overview of the Components/Scope of Delivery....16
Warnings for the Use of the Appliance 16
Commissioning the Appliance....16
Explanations of the Control Panel....16
Indication on the Display 16
Buttons on the Control Panel and their Function....16
Programme Table....17
Setting Individual Programmes....17
How the Appliance Works....17
General Information....17
Signal Tones....18
Delayed Programme Start....18
Programme Storage....18
Safety Function....18
Using the Appliance 18
-
Remove the Baking Tin....18
-
Insert the Dough Hook....18
-
Pour in the Ingredients....18
-
Inserting the Baking Tin 18
-
Ingredients Function....18
-
Starting the Programme....18
-
Letting the Dough Rise ....19
-
Baking 19
-
Keep Warm 19
-
Re-bake 19
-
End of the Programme Sequence ...... 19
-
Remove the Dough Hook from the Bread....19
Cleaning....19
Storage....19
Questions about Baking....19
Why Does the Bread Stick to the Baking Tin after Baking? .....19
How Can Holes in the Bread
(Caused by Dough Hooks) be Prevented?....19
Why Does the Dough Run Over the Baking Tin When Rising? ....19
Why Does the Bread Rise but Collapse During Baking? .....20
When Can the Lid of the Bread Maker be
Opened During the Baking Process? 20
What is the Meaning of the Flour Type Numbers? 20
What is Wholemeal Flour? 20
What Are the Things to Bear in Mind When Using Rye Flour? .....20
What is Gluten in Flour? 20
What Different Types of Flour Are There
and How Are They Used? 20
How is Fresh Bread Better Tolerated? 20
In What Proportions Should Leavening Agents be Used? ......20
What Can be Done if the Bread Tastes of Yeast? 20
Why Does Bread from the Oven Taste Different
to Bread from the Bread Maker?......20
Questions about the Bread Maker....20
Errors with the Recipes....21
Correcting the Error Points....22
Notes on the Recipes 22
Ingredients....22
Adjusting the Ingredients....23
Adding and Measuring the Ingredients and Quantities ....23
Bread Weights and Volume....23
Gluten-free Bread (for Allergy Sufferers) 23
Baking Results....23
Recipe Information for the Bread Maker....23
Classic Bread Recipes 23
Classic White Bread....23
Raisin Nut Bread 23
Wholemeal Bread....24
Buttermilk Bread....24
Onion Bread 24
Seven-grain Bread 24
Farmer's White Bread 24
Sunflower Bread....24
Sourdough Bread 24
Dough Preparation 24
French Baguette....24
Pizza....24
Jams 25
Strawberry Jam 25
Orange jam....25
Technical Data....25
Disposal 25
Meaning of the "Dustbin" Symbol....25
Unpacking the Appliance
- Remove the appliance from its packaging.
- Remove all packaging material, such as foils, filling material, cable ties and cardboard packaging.
- Check the scope of delivery for completeness.
- If the contents of the packaging are incomplete or if damage can be detected, do not operate the appliance. Return it to the dealer immediately.
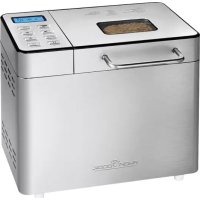
Overview of the Components / Scope of Delivery
1 Mains cable
2 Handle on the lid
3 Lid with viewing window
4 Ingredient dispenser
5 Control panel with display
6 Side ventilation
7 Baking tin
8 Dough hook
9 Housing
Accessories
10 Measuring cup
11 Measuring spoon
12 Hook spike for removing the dough hook
Warnings for the Use of the Appliance
- Always use oven mitts or cooking gloves when touching or removing hot components. Risk of burns!
- Never add more ingredients than specified in the recipe. There is a risk of fire if dough runs out of the baking tin into the housing or onto the heating element!
- Make sure that the weight of the ingredients does not exceed 700 g or 1000 g.
- The maximum amount of flour of 590 g and dry yeast of 7 g (fresh yeast 21 g) must not be exceeded, as the dough could overflow.
- Never cover the appliance with a towel or other materials during operation! Heat and vapour must be able to escape. There is a risk of fire if the appliance is covered with or comes into contact with flammable materials such as curtains.
- During operation, ensure that a minimum distance of 10cm from other objects is maintained around the appliance.
- Only operate the appliance under supervision. When baking with a time delay, always set the time so that the appliance is under supervision during operation.
- Do not place any metal foils or other materials in the baking chamber. There is a risk of fire and short circuits.
- Do not carry or lift the appliance during operation, but switch it off first and then pull out the mains plug. Always carry the appliance with both hands!
- Never remove the baking tin during operation!
- Only use the appliance to prepare food, never use it for any other purpose. If the appliance is not used as intended or is operated incorrectly, no liability can be accepted for any resulting damage!
Commissioning the Appliance
- Clean the appliance as described under "Cleaning".
- Wait until all parts are dry.
- Insert the baking tin into the appliance.
- Location
- Place the appliance on a level surface. Ensure that the power cable and the appliance are not placed on hot surfaces or near heat sources. Lay the power cable so that it does not come into contact with sharp-edged objects.
- Position the appliance so that it cannot slip. The appliance may move when kneading heavy dough. If the surface is smooth, place the appliance on a thin rubber mat.
5. Electrical connection
5.1 Before inserting the mains plug into the socket, check that the mains voltage you wish to use matches that of the appliance. You will find the relevant information on the rating plate.
5.2 Connect the appliance to a correctly installed earthed socket. You will hear a signal tone and the display will show I for the programme and 3 for the time. The appliance is ready for use.
- There is a protective layer on the heating element. To remove this, operate the appliance for approx. 15 minutes with an empty baking tin inserted (without dough hook). Use the programme 8 Bake for this.
- Slight smoke and odours are normal during this process. Ensure sufficient ventilation.
-
Disconnect the mains plug from the socket.
-
⚠️ WARNING: Risk of Burns!
Allow the baking tin to cool down before wiping it out again with a damp cloth.
- You can then start baking.
Explanations of the Control Panel
Indication on the Display
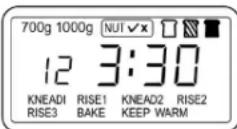
Some symbols are only displayed if the function can be selected. These are marked with an asterisk (*) in the following table.
(Programme Table)
| Symbol Meaning |
| 700 g 1000 g | * Indicates the selected dough weight |
| * Indicates whether the ingredient function has been selected Yes / x = No |
| * Indicates the selected degree of browning of the bread (light, medium, dark) |
| 12 | Indicates the selected programme(Programme 12 in the example) |
| 3:30 | Indicates the remaining time(3 hours and 30 minutes in the example) |
| : | Lights up = standbyFlashing = programme running |
| The programme steps are displayed as follows: |
| KNEAD | Kneading 1 to 2 |
| RISE | Rising 1 to 3 |
| BAKE | Baking |
| KEEP WARM | Keep warm |
Buttons on the Control Panel and their Function
| Button | Function |
| MENU | Press this button to select one of the 13 programmes. |
| GRAM | Selecting the amount of dough (700 g or 1000 g) |
| Button Function |
 NUT/OK NUT/OK | Various programmes offer the option of adding ingredients automatically. The function is selected with this button. |
 PAUSE PAUSE | - Press this button to pause the programme briefly.- Press the button again to continue the programme at the same point. |
 TIME TIME | - Setting the time for the delayed start.- Setting the times for the HOME MADE programme (10-minute increments). |
| Button Function |
 COLOR COLOR | Set the degree of browning (light / medium / dark).The corresponding symbol appears on the display. |
 START/STOP START/STOP | - Start the selected programme with this button.- Press this button for approx. 2 seconds to cancel the programme. |
 CYCLE CYCLE | - Indicates which operating mode the appliance is currently in.- To set the HOME MADE programme. |
- You can find more information on the respective programmes in the programme table.
Programme Table
| Programme Duration | Description | | Dough Quantity max. | Ingredient Function | Set Degree of Browning | Delayed Start |
| 1 BASIC | 3:30 | Standard programme for white and mixed bread. | 700 g/1000 g | Yes | Yes | Yes |
| 2 QUICK | 2:50 | Quick baking function: The bread is usually smaller. | No selection | Yes | Yes | Yes |
| 3 FRENCH | 4:20 | For French-style breads (with a crispy crust and soft dough). | 700 g/1000 g Yes | Yes Yes | | |
| 4 ULTRA FAST | 2:20 | Short baking function:The bread is smaller and has a coarser surface. | No selection | No | Yes | Yes |
| 5 WHOLE WHEAT | 4:10 | For baking wholemeal bread. | 700 g/1000 g | Yes | Yes | Yes |
| 6 CAKE | 3:00 | Baking programme for cake dough. | No selection | No | Yes | Yes |
| 7 DOUGH | 1:30 | Dough is only kneaded and must rise. Suitable for making bread roll or pizza dough. | No selection | No | No | Yes |
| 8 BAKE | 1:10 | Bake only. | No selection | No | No | Yes |
| 9 SANDWICH | 3:30 | Baking programme for sandwich bread. | No selection | Yes | Yes | Yes |
| 10 JAM | 1:20 | For cooking jam and marmalade. | No selection | No | No | No |
| 11 MIX STIR | 0:20 | Kneading programme | No selection | No | No | Yes |
| 12 GLUTEN FREE | 3:05 | Special programme for gluten-free dough. | 700 g/1000 g | No | Yes | Yes |
| 13 HOME MADE | 0:36 | Programmes can be programmed by the user. | No selection | Yes | Yes | Yes |
Setting Individual Programmes
You can set the "Kneading", "Rising", "Baking" and "Keep warm" programme sections individually as follows.
| Programme Section | Indication in the Display | Adjustable Time |
| Kneading 1 | KNEADI | 6–14 minutes |
| Kneading 2 | KNEAD2 | 5–20 minutes |
| Rising 1 | RISE1 | 20–60 minutes |
| Rising 2 | RISE2 | 5–40 minutes |
| Rising 3 | RISE3 | 0–60 minutes |
| Baking | BAKE | 0–90 minutes |
| Keep warm | KEEP WARM | 0–60 minutes |
- Use the button to select the 13 HOME MADE programme
- Press the button 📄. KNEADI now flashes on the display.
- Set the time by pressing button △.
-
To set the minutes faster, press and hold the button.
-
To save the setting, press the button 📋 again. RISE1 now flashes on the display.
- Repeat these steps to set further programme sections.
- Once you have set all the programme steps, start the programme by pressing button ⬆.
How the Appliance Works
- The bread maker offers 12 fixed programmes and an individually adjustable programme with various setting options. There is also a baking programme that allows you to bake gluten-free bread for allergy sufferers.
- You can use the bread maker for time-shifted baking.
The appliance works fully automatically and is extremely user-friendly. Below you will find programme schedules and recipes for
• different types of bread,
- dough that can be used for other purposes,
- jam that the bread maker can cook.
Signal Tones
The appliance generates various signal tones:
| 1 long signal tone - | When the appliance is connected to the mains- When a programme is cancelled manually- At the end of the warming phase |
| 1 short signal tone Acknowledgement of a button press |
| 5 signal tones in succession | - The display shows EE1. The temperature of the appliance is too high to start a new programme.- The display shows EE2. The temperature of the appliance is too low to start a new programme.- The display shows Err. There is an electronic error. |
| 10 signal tones in succession | The programme has ended. |
Delayed Programme Start
Almost all programmes can be started with a delay. However, please note the following:
• The maximum time setting is 13 hours.
- Do not use the time delay for recipes containing fresh ingredients such as milk, eggs, fruit, yoghurt, onions, etc.!
- The time delay is not suitable for gluten-free bread that is prepared with warm or hot water.
- Always stay in the vicinity. Malfunctions may occur that make it necessary to cancel the programme.
Example:
- Select the programme 6 CAKE with the button 📄. The display shows 3:00
- Press the button to set the time delay.
- The programme starts after the set time has elapsed.
- Start your baking programme with the button ▲.
- Press and hold the button to end the programme.
Programme Storage
In the event of a power failure, the appliance automatically resumes the programme when the power is switched back on within a few minutes. If the power supply is interrupted for a longer period, the bread maker must be restarted. This is only practical if the dough was still in the kneading phase when the programme was interrupted. If the bread was already baked, you must start the programme all over again!
Safety Function
After a baking programme has ended, the appliance must cool down before you can start a new baking or kneading programme (exception: programmes 8 BAKE and 10 JAM).
The appliance warns you with 5 beeps and shows the message EE1 on the display if the temperature inside the appliance is still too high.
- Disconnect the mains plug from the socket.
- Remove the baking tin with the help of oven mitts.
- Leave the lid open and wait until the appliance has cooled down. This time varies depending on the previous use.
Using the Appliance
CAUTION: Fire Hazard!
- Observe the quantities of ingredients in the recipes. Never add more ingredients than specified in the recipe.
- Make sure that the weight of the ingredients does not exceed 700 g or 1000 g.
-
Never add ingredients to the baking tin at the start of the baking process if it is still in the appliance.
-
To prevent the dough from collapsing, the lid must always be kept closed during rising and baking.
- The programme can be paused using the button ☐. Press the button again to continue the programme.
- To end a programme, press and hold button ▲ long signal tone confirms the end of the programme.
1. Remove the Baking Tin
Open the lid. Turn the baking tin a little anti-clockwise until it is unlocked. Pull the baking tin out by its handle. Place it on a level work surface.
2. Insert the Dough Hook
2.1 Grease the dough hook. This makes it easier to remove the dough hook from the finished bread.
2.2 Place the semicircular opening of the dough hook over the drive shaft in the baking tin. The dough hook must be flush with the base of the baking tin.
3. Pour in the Ingredients
Make sure that the ingredients are added to the baking tin in the order specified in the recipe.
4. Inserting the Baking Tin
Place the baking tin with the ingredients on the base inside the appliance. Turn the tin clockwise as far as it will go. Then close the lid of the bread maker.
5. Ingredients Function
Depending on the recipe, various ingredients should only be added during the kneading process.
Your bread maker has a special function for this.
There is an ingredient dispenser on the back of the appliance. This is filled before the programme starts and opens automatically to add the ingredients to the dough.
5.1 Press the catch on the handle of the ingredient dispenser.
5.2 Pull out the ingredient dispenser and add your ingredients.
5.3 Push the ingredient dispenser all the way back in so that it is secured by the lock.
5.4 Select the ingredient function with the button 📄 and start the baking programme.
- Not all programmes support the ingredient function.
6. Starting the Programme
6.1 Insert the mains plug into a socket.
6.2 Select the desired programme with the button 📄.
6.3 Select the desired bread weight using button
6.4 Select a light, medium or dark browning of the bread crust with button ☐
6.5 You can set the time using button △
6.6 If you have added ingredients to the ingredient dispenser, use the button ☑ select the ingredient function.
6.7 Press the button ▲The flashing colon indicates the start of the programme.
7. Letting the Dough Rise
After the last kneading process, the bread maker generates the optimum temperature for the dough to rise. It heats up to 25^ C – 30^ C if the room temperature is below this.
8. Baking
The bread maker regulates the baking temperature automatically. If the bread is still too light at the end of the baking programme, you can bake it again in programme 8 Bake.
9. Keep Warm
(Except for programmes 7 DOUGH, 10 JAM and 11 MIX STIR)
When the baking process is complete, a signal tone sounds several times to indicate that the bread can be removed. At the same time, the warming phase of one hour begins. The display shows 0:00 next to the programme number. The colons : are flashing. After one hour, a signal tone sounds. The keep warm phase is complete. The display will show the start screen. Pull the mains plug out of the socket.
10. Re-bake
10.1 If the appliance is still in the "keep warm" phase, press the button 🔊 until you hear a signal tone.
10.2 Start the programme 8 Bake.
10.3 When the desired browning is achieved, end the programme by pressing button
10.4 Pull the mains plug out of the socket.
11. End of the Programme Sequence
Have a rack ready and remove the mains plug from the socket. At the end of the programme, remove the baking tin with oven mitts. Turn the baking tin over and, if the bread does not fall onto the rack immediately, move the dough hook back and forth from below several times until the bread falls out.

CAUTION:
Do not knock the baking tin onto the table or an edge. The baking tin could become deformed.
12. Remove the Dough Hook from the Bread
If the dough hook gets stuck in the bread, use the hook skewer provided as follows.
Insert it into the semicircular opening of the dough hook on the underside of the bread while it is still warm. Tilt the hooked skewer at the bottom edge of the dough hook, preferably at the point where the wing of the dough hook is located. Then carefully pull the dough hook with the hooked skewer upwards. You can see where the wing of the dough hook is located in the bread. You can cut into the bread there slightly and then pull out the dough hook.
Cleaning

WARNING:
• Always disconnect the mains plug from the socket before cleaning and wait until the appliance has cooled down.

WARNING:
- Never immerse the appliance or the baking tin in water for cleaning. Do not fill the baking chamber with water. This could lead to an electric shock or fire.

CAUTION:
- Do not use a wire brush or other abrasive objects.
-
Do not use harsh or abrasive cleaning agents.
-
Remove all ingredients and crumbs from the lid, housing and baking chamber with a damp cloth.
- Wipe the outside of the baking tin with a damp cloth. The inside of the tin can be rinsed out with water and a little washing-up liquid.
- The baking tin is non-stick coated. It is normal for the colour of the coating to change over time, but this does not affect its function.
- Both the dough hook and the drive shaft should be cleaned immediately after use. If the dough hook remains in the mould, it will be difficult to remove later. In this case, pour warm water into the container for approx. 30 minutes. The dough hook can then be removed.
- Wipe all parts dry with a cloth.
Storage
- Before putting the appliance away for storage, make sure that it has completely cooled down, cleaned and dried. Store the appliance with the lid closed.
• We recommend storing the appliance in its original packaging if you do not intend to use it for a longer period of time.
• Always store the appliance out of the reach of children in a well-ventilated and dry place.
Questions about Baking
Why Does the Bread Stick to the Baking Tin after Baking?
Leave the bread to cool in the baking tin for approx. 10 minutes. Turn the baking tin over and move the kneading drive (the shaft) slightly back and forth. Grease the dough hook a little before using it again.
How Can Holes in the Bread
(Caused by Dough Hooks) be Prevented?
You can remove the dough hook with floured fingers before the dough rises for the last time. (Depending on the programme, the display should still show a total running time of approx. 1:30 hours). If you do not wish to do this, use the hook spike after baking. If you are careful, you can avoid a larger hole.
Why Does the Dough Run Over the Baking Tin When Rising?
This happens especially when using wheat flour, which rises better due to its higher gluten content.
Remedy:
a) Reduce the amount of flour and equalise the other ingredients. The finished bread will still have a large volume.
b) Add 1 tablespoon of heated, liquid margarine to the flour.
Why Does the Bread Rise but Collapse During Baking?
a) If a "V"-shaped hollow forms in the centre of the bread, the flour lacks gluten, which is due to the grain containing too little protein (occurs in rainy summers), or the flour is too moist.
Remedy:
Add 1 tablespoon of wheat gluten to the bread dough for every 500 g of flour.
b) If the bread collapses in a funnel shape in the centre, this may be because
- the water temperature was too high,
- too much water was used,
- the flour lacks gluten,
- draughts caused by opening the lid during baking.
When Can the Lid of the Bread Maker be Opened During the Baking Process?
Basically, this is always possible when the kneading process is running. During this time, you can add small amounts of flour or liquid if necessary.
If you want the bread to have a certain appearance after baking, proceed as follows:
- Before the final rise (In the display, depending on the programme, the time must still be approx. 1:30 hrs.), carefully and briefly open the lid and score the forming bread crust with a sharp, preheated knife, for example, or sprinkle grains on top, or coat the bread crust with a starch / water mixture so that it shines after baking. You can open the bread maker for the last time during the specified time period, otherwise the bread will collapse.
What is the Meaning of the Flour Type Numbers?
The lower the type number, the less fibre the flour contains and the lighter it is.
What is Wholemeal Flour?
Wholemeal flour can be made from all types of grain, including wheat. The term “wholemeal” means that the flour is milled from the whole grain and has a correspondingly higher fibre content. Wholemeal wheat flour is therefore slightly darker in colour. However, wholemeal bread does not necessarily result in dark bread, as is usually assumed.
What Are the Things to Bear in Mind When Using Rye Flour?
Rye flour does not contain any gluten and bread made from it therefore hardly rises. Therefore, a “RYE WHOLE GRAIN BREAD” must be made with sourdough to ensure compatibility.
The dough will only rise if at least 14 of the specified amount of rye flour, which does not contain gluten, is replaced with type 550 flour.
What is Gluten in Flour?
The higher the type number, the less gluten the flour contains and the less the dough rises. Flour with the type number 550 contains the highest proportion of gluten.
What Different Types of Flour Are There and How Are They Used?
a) Corn, rice and potato flour is particularly suitable for people with gluten allergies or those who suffer from "sprue" or "coeliac disease".
b) Spelt flour is free from chemicals, as spelt, which grows on very poor soils, does not absorb fertilisers. Spelt flour is therefore particularly suitable for allergy sufferers. All recipes using the flour types 405, 550 or 1050 can be used, as described in the instruction manual.
c) Millet flour is particularly suitable for people with multiple allergies. All recipes using flour types 405, 550 or 1050 can be used as described in the instruction manual.
d) Durum wheat flour (DURUM) is particularly suitable for baguette breads due to its consistency and can be replaced by durum wheat semolina.
How is Fresh Bread Better Tolerated?
If you add one mashed boiled potato to the flour and knead it in, fresh bread is better tolerated.
In What Proportions Should Leavening Agents be Used?
For both yeast and sourdough, which are available to buy in different quantities, you must follow the manufacturer's instructions on the packaging and set the quantity in relation to the amount of flour used.
What Can be Done if the Bread Tastes of Yeast?
a) Reduce the amount of sugar, if sugar has been used. However, the bread will then also be slightly lighter in colour.
b) Add ordinary brandy vinegar to the water. For a small loaf = 1 ½ tablespoons, for a large loaf 2 tablespoons.
c) Replace the water with buttermilk or kefir, which is possible for all recipes and is recommended for the freshness of the bread
Why Does Bread from the Oven Taste Different to Bread from the Bread Maker?
This is due to the difference in moisture: in the oven, the bread is baked much drier due to the larger baking space. Bread from the bread maker is moister.
Questions about the Bread Maker
| Error Cause Remedy | | |
| Smoke is escaping from the baking chamber or the ventilation openings. | Ingredients are sticking to the baking chamber or the outside of the tin. | Pull out the mains plug, allow the appliance to cool down, remove the mould and clean the outside of the mould and baking chamber. |
| Bread has partially collapsed and is moist on the underside. | Bread has remained in the tin too long after baking and keeping warm. | Remove the bread from the tin no later than the end of the keep warm function. |
| Bread is difficult to remove from the mould. | The underside of the bread sticks to the dough hook. | Grease the dough hook a little before baking.Leave the bread to cool in the tin after baking. |
| Clean the dough hook and shaft after each baking process. If necessary, pour warm water into the tin for 30 minutes. The dough hook can then be easily removed and cleaned. |
| Ingredients are not mixed or bread is not baked properly. | Incorrect programme setting Check the selected menu and the other settings again. |
| The programme was ended prematurely by pressing the button [IMAGE]. | Stop using the ingredients and start again. |
| The lid was opened several times during operation. | The lid should only be opened if the time shown on the display is more than 1:30 hrs. Make sure that the lid has been properly closed again after opening. |
| Prolonged power failure during operation Stop using the ingredients and start again. |
| The rotation of the dough hook is blocked. Check whether the dough hook is blocked by grains etc. Remove the baking tin and check whether the driver rotates. If this is not the case, send the appliance to customer service. |
| The appliance will not start. 5 beeps sound.The display shows “EE1”. | The appliance is still too hot from the previous baking process. | Pull the mains plug out of the socket. Remove the baking tin. Allow the appliance to cool down to room temperature. You can then restart the appliance. |
| The appliance cannot be started. You will hear 5 beeps.The display shows “EE2”. | The appliance temperature is too cold. Wait approx. 20 to 30 minutes until the appliance has reached room temperature. |
| The appliance cannot be started.The display shows “Err”. | There is an electronic fault. Pull the mains plug out of the socket. Contact our service centre or a specialist. |
| The appliance has no function. The appliance has no power supply. Check the power socket with another appliance. |
|
|
|
Errors with the Recipes
| Error Cause Remedy | | |
| The bread rises too much. | Too much yeast, too much flour, too little salt, or several of these causes | a/b |
| The bread does not rise or does not rise enough. | No or too little yeast | a/b |
| Old or overaged yeast | e |
| Liquid too hot | c |
| Yeast has come into contact with liquid | d |
| Wrong or old flour | e |
| Too much or too little liquid | a/b/g |
| Too little sugar | a/b |
| The dough rises too much and runs over the baking tin. | Very soft water causes the yeast to ferment more strongly | f/k |
| Too much milk affects the yeast fermentation | c |
| The bread has collapsed. | Bread volume larger than shape, therefore collapsed | a/f |
| Yeast fermentation too early or too fast due to too warm water, warm baking chamber, high humidity. Warm liquids cause the dough to rise too quickly and then collapse before baking. | c/h/i |
| Too little gluten in the flour | l |
| Too much liquid | g/h |
| Heavy, lumpy structure Too much flour or too little | liquid a/b/g | |
| Too little yeast or sugar a/b | |
| Too much fruit, wholemeal or other ingredients b | |
| Old or poor quality flour e | |
| The bread is not baked through in the centre. Too much or too little liquid a/b/g | |
|
|
|
| Open, coarse or holey structure | Too much water | g |
| No salt | b |
| High moisture, water too warm | h/i |
| Liquid too hot | c |
| Mushroom-like, unbaked surface | Bread volume larger than the tin | a/f |
| Too much flour, especially for white bread | f |
| Too much yeast or too little salt | a/b |
| Too much sugar | a/b |
| Sweet ingredients in addition to sugar | b |
| The bread slices are uneven or lumpy in the centre. | Bread has not cooled sufficiently (steam has escaped) | j |
| Flour residue on the bread crust | Flour is not properly worked into the sides when kneading | l/m |
Correcting the Error Points
a) Measure the ingredients correctly.
b) Adjust the amount of ingredients accordingly and check whether an ingredient has been forgotten.
c) Use a different liquid or allow it to cool to room temperature.
d) Add the ingredients in the order listed in the recipe. Make a small hole in the centre and add the crumbled yeast or dry yeast. Avoid direct contact between the yeast and the liquid.
e) Only use fresh and properly stored ingredients.
f) Reduce the total amount of ingredients, never use more than the specified amount of flour. If necessary, reduce all ingredients by ^1/3 .
g) Correct the amount of liquid. If moist ingredients are used, the amount of liquid must be reduced accordingly.
h) In very humid weather, use 1–2 tablespoons less.
i) Do not use the time delay function in warm weather. Use cold liquids.
j) Remove the bread from the tin immediately after baking and leave to cool on a rack for at least 15 minutes before cutting.
k) Reduce the yeast or, if necessary, the total ingredients by 14 of the specified quantities.
I) Add 1 tablespoon of wheat gluten to the dough.
m) Never grease the tin!
Notes on the Recipes
Ingredients
As each ingredient plays a specific role in the success of the bread, measuring is just as important as adding the ingredients in the correct order.
- The most important ingredients, such as liquid, flour, salt, sugar and yeast (both dry and fresh yeast can be used) influence the successful result when preparing dough and bread. Therefore, always use the right quantities in the right proportions.
- Use the ingredients lukewarm if you are preparing the dough immediately. If you want to start the programme after a delay, the
ingredients should be cold so that the yeast does not ferment too early.
- Margarine, butter and milk only affect the flavour of the bread.
- Sugar can be reduced by 20% to make the crust lighter and thinner without affecting the other baking results. If you prefer a softer and lighter crust, you can replace the sugar with honey.
- Gluten, which is produced in the flour during kneading, provides the structure of the bread. The ideal flour mix consists of 40 % wholemeal flour and 60 % white flour.
- If you want to add wholemeal grains, soak them overnight beforehand. Reduce the amount of flour and liquid accordingly (up to 15 less).
- Sourdough is indispensable when using rye flour. It contains lactic and acetic acid bacteria that make the bread fluffy and finely leavened. You can make it yourself, but this takes some time. This is why we use concentrated sourdough powder in the recipes below, which is available to buy in packets of 15 g (for 1 kg of flour). The instructions in the recipes ( 12 , 34 or 1 sachet) must be adhered to. Smaller quantities will cause the bread to crumble.
- If you use sourdough powder in a different concentration (100 g packet for 1 kg of flour), you must reduce the amount of flour by approx. 80 g or adjust it according to the recipe.
- Liquid sourdough, which can be bought in sachets, can also be used. Follow the instructions on the packaging for the quantity. Pour the liquid sourdough into the measuring jug and top up with the amount of liquid specified in the recipe.
- Wheat sourdough, which can also be bought dried, improves the texture, freshness and flavour of the dough. It is milder than rye sourdough.
-
Bake sourdough bread in the BASIC or WHOLE WHEAT programme so that it can rise and bake properly. Baking ferment replaces sourdough and is purely a matter of taste. You can bake very well with it in the bread maker.
-
Add wheat bran to the dough if you want a particularly fibre-rich and fluffy bread. Use 1 tablespoon for 500g of flour and increase the amount of liquid by 12 tablespoon.
- Wheat gluten is a natural helper made from grain protein. It makes the bread looser, has a better volume, collapses less often and is easier to digest. The effect is particularly noticeable in wholemeal baked goods and baked goods made from self-ground flour.
- You can add bread spice to all our mixed breads. The quantity depends on your taste and the manufacturer's instructions.
- Pure lecithin powder is a natural emulsifier that increases the baking volume, makes the crumb more tender and softer, and prolongs the shelf life.
Adjusting the Ingredients
If you increase or decrease the ingredients, please note that the proportions must correspond to the original recipe. To achieve a perfect result, the following basic rules for adjusting the ingredients must be observed:
- Liquids/Flour: The dough should be soft (not too soft), slightly sticky but not stringy. A ball results with light doughs. This is not the case with heavy doughs, such as wholemeal rye or grain bread. Check the dough 5 minutes after the first kneading. If it is still too moist, add flour until the dough has the right consistency. If the dough is too dry, knead in a spoonful of water.
- Replacing liquid: If you are using ingredients in a recipe that contain liquid (e.g. cream cheese, yoghurt, etc.), the amount of liquid must be reduced accordingly. If you are using eggs, beat them into the measuring beaker and top up with the liquid to the prescribed amount.
- If you live at a high altitude (750 metres or more), the dough will rise more quickly. The yeast can be reduced by 14 to 12 teaspoon in these areas to prevent excessive rising. The same applies to areas with particularly soft water.
Adding and Measuring the Ingredients and Quantities
- Always add the liquid first and the yeast last. To prevent the yeast from rising too quickly (especially when using the timer), avoid contact between the yeast and the liquid.
- Always use the same measuring units when measuring, i. e. use either the measuring spoons supplied with the bread maker or the spoons you use in your household to measure out tablespoons and teaspoons.
- You should weigh out the grams to ensure accuracy.
- You can use the measuring cup supplied for the millilitre measurements.
$$
\begin{array}{l} \text { tbs } = \text { tablespoon levelled (or measuring spoon large) } \ \mathrm{tsp} = \text { teaspoon levelled (or measuring spoon small) } \ g = \text { gram } \ \mathrm{ml} = \text { millilitre } \ \begin{array}{l} \text { packet } = \text { packet of dry yeast containing 7 g for 500 g of flour } \ \quad - \text { equivalent to 21 g of fresh yeast } \end{array} \ \end{array}
$$
The abbreviations in the recipes mean:
Bread Weights and Volume
- You will notice that the weights of pure white bread are lower than those of wholemeal bread. This is due to the fact that white flour rises more and therefore has its limits.
- The actual weight of the bread depends very much on the humidity that prevails during preparation.
- All breads with a predominantly wheat content achieve a larger volume and exceed the edge of the baking tin in the highest weight
category after the final rise. However, they do not overflow. The bulge of bread above the edge of the baking tin is therefore slightly less browned than the bread in the baking tin.
Gluten-free Bread (for Allergy Sufferers)
- To ensure that the bread is made from gluten-free flour, do not use the time delay function, even if this is possible in the programme. Gluten-free flours require warm or hot liquid to swell. The programme must therefore be started immediately.
- The crust of gluten-free breads does not brown as much as breads containing gluten. We recommend setting the browning level to dark when baking. You can also mix an egg yolk with sweet or sour cream and spread it on the bread with a remaining programme time of 1:15.
Baking Results
- The baking result depends in particular on the local conditions (soft water – high humidity – high altitude – nature of the ingredients, etc.). For this reason, the recipe details are guidelines that may need to be adapted. You can find more recipes in recipe books or on the Internet. You can also use baking mixes.
- If one or two recipes don't turn out right first time, don't lose heart. Try to find out the cause and try different proportions, for example.
- If the bread is too light after baking, you can bake it again immediately in the programme 8 Bake.
The recipes are designed for different sized loaves. In some programmes, a distinction is made between the weights.
CAUTION:
- Adapt the recipes to the respective weight.
- Make sure that the weight of the ingredients does not exceed 700 g or 1000 g.
Classic Bread Recipes
Classic White Bread
Ingredients:
| Water or milk | 300 ml |
| Margarine/butter | 112 tbs |
| Salt | 1 tsp |
| Sugar | 1 tbs |
| Flour type 500 | 540 g |
| Dry yeast | 1 packet |
Programme 1 BASIC
Raisin Nut Bread
Ingredients:
| Water or milk | 350 ml |
| Margarine/butter | 112 tbs |
| Salt | 1 tsp |
| Sugar | 2 tbs |
| Flour type 405 | 540 g |
| Dry yeast | 1 packet |
| Raisinets | 85 g |
| Chopped walnuts | 3 tbs |
Programme 1 BASIC
Wholemeal Bread
Ingredients:
| Water | 300 ml |
| Margarine/butter | 1 1⁄2 tbs |
| Egg | 1 |
| Salt | 1 tsp |
| Sugar | 2 tbs |
| Flour type 1050 | 360 g |
| Wholemeal wheat flour | 180 g |
| Dry yeast | 1 packet |
Programme 5 WHOLE WHEAT
- If the programme start is delayed, use a little more water instead of the egg.
Buttermilk Bread
Ingredients:
| Buttermilk | 300 ml |
| Margarine/butter | 1 1⁄2 tbs |
| Salt | 1 tsp |
| Sugar | 2 tbs |
| Flour type 405 | 540 g |
| Dry yeast | 1 packet |
Programme 1 BASIC
Onion Bread
Ingredients:
| Water | 250 ml |
| Margarine/butter | 1 tbs |
| Salt | 1 tsp |
| Sugar | 2 tbs |
| Large chopped onion | 1 |
| Flour type 1050 | 540 g |
| Dry yeast | 1 packet |
Programme 1 BASIC or 2 QUICK
Seven-grain Bread
Ingredients:
| Water | 300 ml |
| Margarine/butter | 112 tbs |
| Salt | 1 tsp |
| Sugar | 212 tbs |
| Flour type 1150 | 240 g |
| Wholemeal flour | 240 g |
| 7-grain flakes | 60 g |
| Dry yeast | 1 packet |
Programme 5 WHOLE WHEAT
- If whole grains are used, soak them beforehand.
Farmer's White Bread
Ingredients:
| Milk | 300 ml |
| Margarine/butter | 2 tbs |
| Salt | 112 tsp |
| Sugar | 112 tbs |
| Flour type 1050 | 540 g |
| Dry yeast | 1 packet |
Programme 1BASIC, 2 QUICK or 4 ULTRA FAST
Sunflower Bread
Ingredients:
| Water | 350 ml |
| Butter | 1 tbs |
| Flour type 550 | 540 g |
| Sunflower seeds | 5 tsp |
| Salt | 1 tbs |
| Sugar | 1 tbs |
| Dry yeast | 1 packet |
Programme 1 BASIC
- Pumpkin seeds can also be used instead of sunflower seeds. Roast the seeds once in a pan.
Sourdough Bread
Ingredients:
| Dry sourdough | 50 g |
| Water | 350 ml |
| Margarine/butter | 112 tbs |
| Salt | 3 tsp |
| Sugar | 2 tbs |
| Flour type 1150 | 180 g |
| Flour type 1050 | 360 g |
| Yeast | 12 packet |
Programme 1 BASIC
Dough Preparation
French Baguette
Ingredients:
| Water | 300 ml |
| Honey | 1 tbs |
| Salt | 1 tsp |
| Sugar | 1 tsp |
| Flour type 500 | 540 g |
| Dry yeast | 1 packet |
Programme 7 DOUGH
Divide the dough into 2 – 4 pieces, shape into long loaves and leave to rise for 30 – 40 minutes. Make diagonal cuts on the top and bake in the oven.
Pizza
Ingredients:
| Water | 300 ml |
| Salt | 34 tsp |
| Olive oil | 1 tbs |
| Flour type 500 | 450 g |
| Sugar | 2 tsp |
| Dry yeast | 1 packet |
Programme 7 DOUGH
- Roll out the dough, place in a round tin and leave to rise for 10 minutes. Then prick several times with a fork.
- Spread the dough with pizza sauce and top with the desired toppings.
- Bake the pizza in the oven for 20 minutes.
Jams
Strawberry Jam
Ingredients:
| Fresh strawberries (cleaned and finely chopped or pureed) | 500 g |
| Gelling sugar "2:1" | 250 g |
| Lemon juice | 1 tbs |
Programme 10 JAM
- The following fruits are also suitable for this recipe: blackberries, blueberries or a mixture of these fruits.
- If necessary, stone the fruit beforehand and cut into small pieces.
- Pour the jam into clean jars, seal and place the jar on the lid for approx. 10 minutes (so that the lid is tightly sealed later).
Orange jam
Ingredients:
| Oranges | 400 g |
| Lemons | 100 g |
| Gelling sugar “2:1” | 250 g |
Programme 10 JAM
- Peel the fruit and cut into small cubes or strips.
- Pour the jam into clean jars, seal and place the jar on the lid for approx. 10 minutes (so that the lid is tightly sealed later).
Technical Data
Model: PC-BBA 1282
Power supply: 220–240 V\~, 50 Hz
Power consumption: 550 W
Power consumption in standby mode: 0.7W
Protection class: I
Net weight: approx. 6.3 kg
The right to make technical and design modifications in the course of continuous product development remains reserved.
This appliance has been tested according to all applicable, current CE directives and built according to the latest safety regulations.
Disposal
Meaning of the "Dustbin" Symbol

Protect our environment: do not dispose of electrical equipment in the domestic waste.
Please return any electrical equipment that you will no longer use to the collection points provided for their disposal.
This helps avoid the potential effects of incorrect disposal on the environment and human health.
This will contribute to the recycling and other forms of re-utilisation of electrical and electronic equipment.
Information concerning where the equipment can be disposed of can be obtained from your local authority. Your dealer and contractual partner is also obliged to take back the old appliance free of charge.
BELANGRIJK:
Wat is gluten in meel? 31
Wat is gluten in meel?
Programma 5 WHOLE WHEAT
Programma 5 WHOLE WHEAT
Programme 5 WHOLE WHEAT
Programme 5 WHOLE WHEAT
| 700g 1000g NUT√x |
| 12 3:30 |
| KNEADI RISE1 KNEAD2 RISE2RISE3 BAKE KEEP WARM |
Programa 5 WHOLE WHEAT
Programa 5 WHOLE WHEAT
- Si se utilizan cereales integrales, remójelos previamente.
Pan blanco de payés
Ingredientes:
| Leche | 300 ml |
| Margarina/mantequilla | 2 cda. |
| Sal | 112 cdta. |
| Azúcar | 112 cda. |
| Harina tipo 1050 | 540 g |
| Levadura seca | 1 sobre |
Programa 1 BASIC, 2 QUICK o 4 ULTRA FAST
Pan de girasol
Ingredientes:
Pane a pasta acida....70
Programma 5 WHOLE WHEAT
Programma 5 WHOLE WHEAT
Program 5 WHOLE WHEAT
Program 5 WHOLE WHEAT
CTC Clatronic Sp. z o.o
Ul. Brzeska 1
45-960 Opole
Usuwanie
Program 5 WHOLE WHEAT
Program 5 WHOLE WHEAT
| 700g 1000g NUT√x |
| 12 3:30 |
| KNEADI RISE1 KNEAD2 RISE2 |
| RISE3 BAKE KEEP WARM |