
COC-SS-10246 - Cooker Sogo - Free user manual and instructions
Find the device manual for free COC-SS-10246 Sogo in PDF.

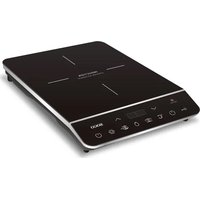
| Product type | Portable induction cooktop |
| Brand | Sogo |
| Model | COC-SS-10246 |
| Power supply | AC 220-240 V, 50-60 Hz |
| Rated power | 2000 W |
| Number of cooking zones | 1 |
| Control type | Microcomputer touch panel |
| Manual cooking functions | Frying, Stewing, Barbecue |
| Automatic cooking functions | Soup, Water, Milk |
| Power levels | 9 (P1 to P9, from 800 W to 2000 W) |
| Temperature range | 60 °C to 240 °C (9 levels) |
| Timer | Up to 4 hours for manual functions, up to 3 hours for automatic ones |
| Automatic shut-off | After 2 hours if no timer is set |
| Child safety | Control panel lock |
| Protections | Overvoltage, undervoltage, overheating, fan operation |
| Surface material | High-hardness ceramic glass |
| Compatible cookware | Iron, stainless steel, cast iron base; diameter 12 to 22 cm |
| Cleaning | Soft cloth and mild detergent; do not immerse |
| Country of origin | China |
| After-sales service | www.sogosat.com / 0034 902 222 161 |
Frequently Asked Questions - COC-SS-10246 Sogo
User questions about COC-SS-10246 Sogo
0 question about this device. Answer the ones you know or ask your own.
Ask a new question about this device
Download the instructions for your Cooker in PDF format for free! Find your manual COC-SS-10246 - Sogo and take your electronic device back in hand. On this page are published all the documents necessary for the use of your device. COC-SS-10246 by Sogo.
USER MANUAL COC-SS-10246 Sogo
Download your manual
ESPAÑOL P. 3
ENGLISH P. 17
FRANÇAIS P. 30
PORTUGUESE P. 43
DEUTSCH P. 57
ITALIANO P. 71
ČEŠTINA P. 84
DANSK P. 96
SLOVENSKI P. 109
HRVATSKI P. 122
POLSKI P. 135
ROMÂNĂ P. 149
УКРАЇНСЬКА P. 162
CATALÀ P. 176
Declaration of conformity, Responsibility of Electronic products disposal, Importers Details and After-sales service on the last pages.

Stainless Steel kettle

Iron pot

Magnetic stainless steel pot

Color iron pot

Magnetic iron kettle

Iron pan
Utensilios de cocina no aplicables:

Heat-resistant glass pot

Ceramic
pot

Bottom not smooth
Bottom with feet
Small diameter of bottom
• Always read the instruction book carefully before using.
- This manual can be downloaded from our web page www.sogo.es
- Keep these instructions for future reference.
2. Safety instructions for the user
GENERAL
PRECAUTIONS
General precautions during the use of electrical
equipment
- Do not use the appliance for any other purpose than described in this manual.
- Do not use or store the appliance outdoors.
• Always place the appliance on to the flat an even surface. - This product is intended for indoor, non-industrial, non-commercial and only for household use. Do not use the item outdoors or for any other purpose. Misuse or improper handling may cause problems in the appliance and cause injury to the user.
- The unit must be used only for the intended purposes. No liability is accepted for damages arising from improper use or wrong handling.
- Ensure that the voltage indicated on the name-plate matches the mains voltage before plugging in the appliance.
- Always remove the plug from the power socket when the appliance is not in use. Do not leave the appliance unattended when switched on.
- Close supervision is necessary when any appliance is being used by or near children.
- Before cleaning or storing your appliance, always unplug the appliance from the power supply and let it cool down.
- The device is not completely disconnected from the power source, even after it has been turned off. To disconnect it completely, disconnect it from the mains plug.
- The appliances are not intended to be operated by means of an external timer or separate remote-control system.
- This appliance is intended to be used in household and similar applications such as:
- Staff kitchen areas in shops, offices and other working environments;
- Farm houses and by clients in hotels, motels and other residential type environments;
-
Bed and breakfast type environments;
-
Catering and similar non-retail applications.
- Avoid spillage on the connector

Restrictions on use to avoid personal injury
- Do not place or operate this appliance near water sources.
- Do not place or operate the appliance and its power cord on or near hot surfaces (e.g., stove plates) or open flames.
- Do not leave the power cord hanging from sharp edges and keep away from hot objects and flames. Do not wind the cord around the appliance and do not bend it.
- Neither immerse the housing, which contains electrical components and the heating elements in water, nor rinse it under the tap.
- Never use accessories that are not recommended by the manufacturer.
- The use of accessories not recommended or sold by the appliance manufacturer may result in fire, electric shock or injury to persons.
- When you want to remove the plug from the wall contact, please do this at the plug itself and not by pulling on the cable or the appliance itself.
- To avoid electric shock, make sure your hands are dry before plugging or unplugging.
- Do not use the device with wet hands, on damp floors or when the atmosphere is humid there is a risk of electric shock.
- While using the appliance, make sure that the power cord must not be caught or crushed.
- Do not let the motor unit, cord or plug get wet to protect against risk of electric shock.
- Be careful, while handling electrical appliances, as the surface of the heating element is subject to residual heat after use. Any misuse may cause potential injury to the user and may damage the appliance.
- Do not touch the outer surface of the appliance as it can get very hot during operation. Instead, use the handle or mitts.
- Never immerse the appliance or the plug-in water or any other liquid. In the event of the appliance falling in water, disconnect immediately from the mains supply and take it to an authorized service agent for repair before reusing.
- Do not use the appliance if it has fallen on the floor, if there are visible signs of damage or if it has a leak.
- Do not use the appliance if the cable or plug is damaged. In
case of the cord be damaged, it must be replaced only by the manufacturer, its service agent or similarly qualified persons in order to avoid Hazard.
- In case of appliance malfunction, or if it has been damaged in any manner, return the appliance to the nearest authorized service facility for examination, repair or adjustment.

Restrictions on use when used with children and rs
- The appliance is not to be used by persons (including children) with reduced physical, sensory or mental capabilities, or lack of experience and knowledge, unless they have been given supervision or instruction.
- This appliance can be used by children aged from 8 years and above and persons with reduced physical, sensory or mental capabilities or lack of experience and knowledge if they have been given supervision or instruction concerning use of the appliance in a safe way and understand the hazards involved.
- Children should be supervised to ensure that they do not play with the appliance.
- Cleaning and user maintenance shall not be made by children unless they are older than 8 and supervised.
- Keep the appliance and its cord out of reach of children less than 8 years.
- Do not allow the children to use the appliance without supervision.

Instructions to follow when using the appliance
- WARNING: If the surface is cracked, switch off the appliance to avoid the possibility of electric shock.
- WARNING: Metallic objects such as knives, forks, spoons and lids should not be placed on the hotplate since they can get hot.
- WARNING: Please don't put paper, towels and other flammable items on the heating surface, as it can cause fire.
- WARNING: Please do not use the appliance, if the cooking surface is broken, take it to the authorized service centre for repair.
-
Every time you finish, the fan keeps working for a while to dissipate the heat. When the fan stops working, you can unplug the power cord.
-
Do not move the induction cooker during cooking or with hot cookware on top of it.
- Do not place any empty containers on the device.
- Do not operate the device on top of any other electric appliances such as ceramic hob or electronic oven etc.
- Do not operate the device on any metallic surface which is too thin and easy to become deformed.
- Do not block the ventilation slots of the device. It may cause overheating. Keep a minimum distance of 5 to 10 cm to walls or other items.
- Do not place the induction cooker next to devices or objects, which react sensitively to magnetic fields (e.g. radios, TVs, cassette recorders, etc.).
- Do not place any magnetic objects like credit cards, cassettes etc. on the glass surface while the device is in operation.
- WARNING: Be careful, while handling electrical appliances, as the surface of the heating element is subject to residual heat after use. Any misuse may cause potential injury to the user and may damage the appliance.
- Do not touch the outer surface of the appliance as it can get very hot during operation. Instead, use the handle or mitts.
- WARNING: Do not touch hot surfaces.
- WARNING: This equipment shall be used with CAUTION as this electrical appliance contains a heating function. Surface of this appliance is also different from other functional surfaces which can produce high temperatures. Since temperatures are differently perceived by different persons. The equipment must be touch only at intended handles and gripping surfaces with the help of heat protectors like gloves or similar type of clothing. Otherwise let it for sufficient time to cool down before touching the hot surfaces.
- To avoid a circuit overload when using this product, do not operate another high-wattage product on the same electrical circuit.
- A short power supply cord is provided with this product. An extension cord is not recommended for use with this product, but if one must be used:
- The marked electrical rating of the cord must be at least as great as that of the product.
- Arrange the extension cord so that it does not hang where it can be tripped over or pulled unintentionally.
CLEANING AND MAINTENANCE
Kindly refer to the cleaning and maintenance section for details on how to clean surfaces which comes in the contact of food.
3. INSTRUCTIONS WHILE USING INDUCTION HOB
 | Do not use this appliance with wall outlet of electrical rating less than 10A, it should always be more (pls use at least 15A if the cooker has two burners and multiple burners). Also, to avoid a circuit overload while using this product, do not operate another high-wattage product on the same electrical circuit. |
 | While using make sure to keep it on smooth and horizontal surface and with distance of 10 cm from wall sides. |
 | Do not use the induction cooker nearby gas cooker and kerosine cooker. |
 | Do no immerse the induction cooker in water directly to clean. Wipe it with the soft and damp cloth. |
 | Please do not insert the wire items to the wind and air outlet, do not cover it with anything, it can cause electric shock. |
 | In order to getting burn or scald from the high temperature, do not place any iron sheet directly on the induction hob. |
 | Do not place the sealed cans with food on the induction surface to warm. To avoid explosion, open the can, re-move the food and warm it with the help of any suitable pot. |
 | Do not use the induction hob on the top of iron surface, or any surface with metal mat underneath. |
 | Do not place the empty pots or pans on the induction hob surface, it can affect the product working performance. |
 | Always keep clean the cooking surface and do not let the grease getting accumulate. |
 | Do not touch the cooking surface with the hands while in use as it gets warm and can cause scald. Let it cool for a while before cleaning or moving. |
 | If the power cord is damaged, do not change it yourself and take it to the authorized service centre or qualified technician to change it. |
 | Do not let the children to use the induction hob. |
 | In case having pacemaker, contact with your doctor be-fore using appliance. |
Product features: this product is heated by the inner coil and through the panel to heat the frying pan.
- Environmentally friendly: non-toxic, non-pollution, no electromagnetic radiation.
- Heat fast: Based on the principle of electromagnetic induction, the bottom of the pot gets warm directly, which is due to a high thermal efficiency and fast speed.
- This product uses the high hardness and high temperature resistant crystal plate, which is not only easy to clean, but durable also.
- Microcomputer control, the fire temperature control at will.
- Safe use, it has many protection functions, like over-voltage, under voltage, over temperature and fan working.
4. TECHNICAL SPECIFICATIONS
| Voltage Frequency Power | |
| AC 220-240V 50-60Hz 2000W |
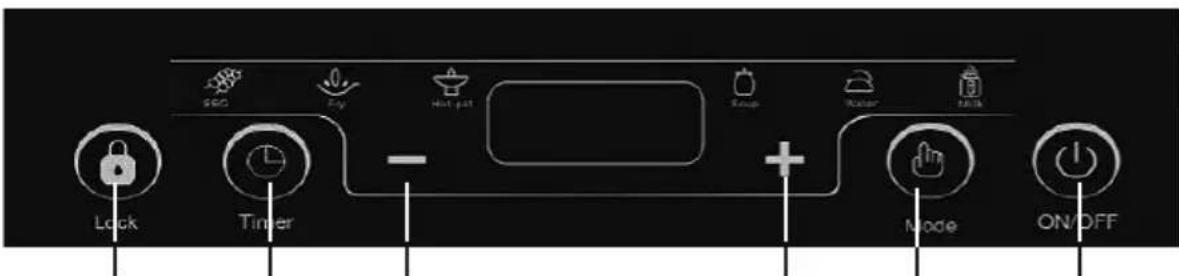
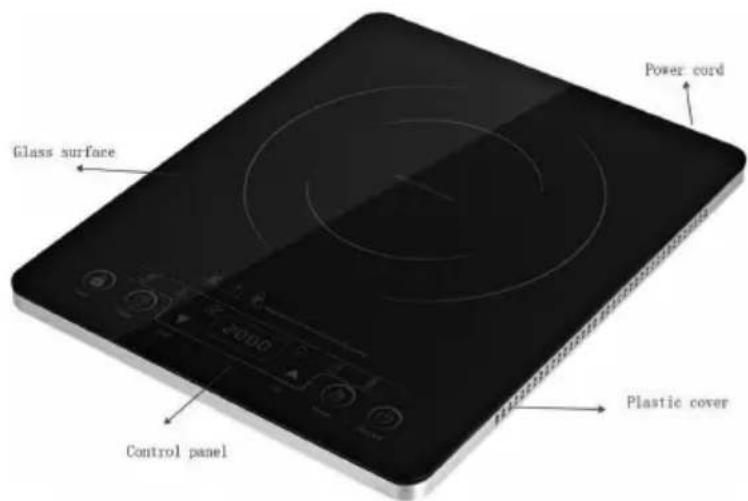
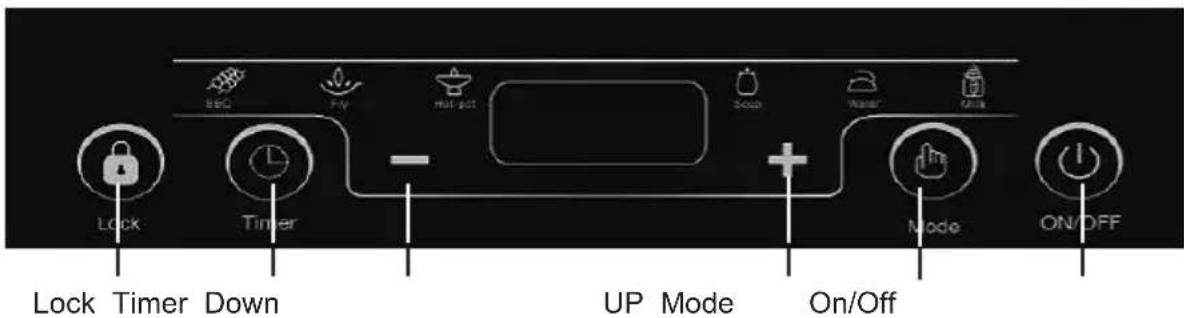
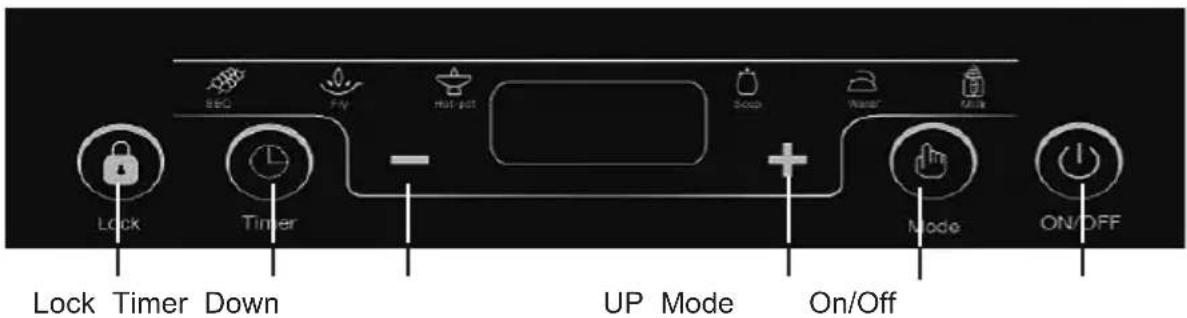
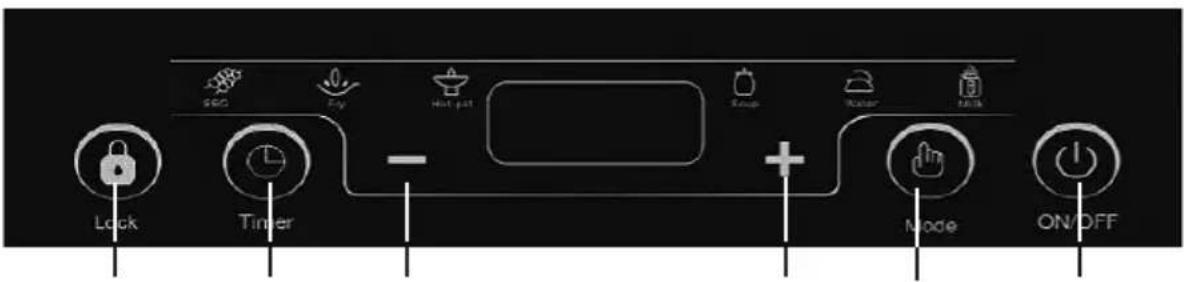
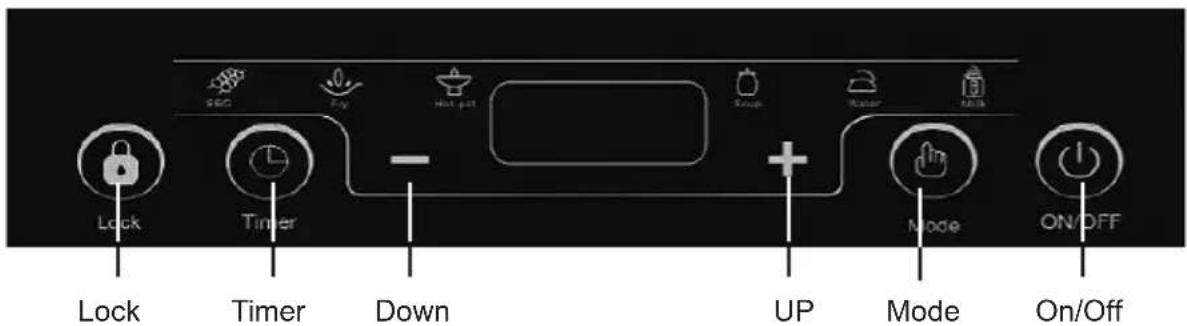
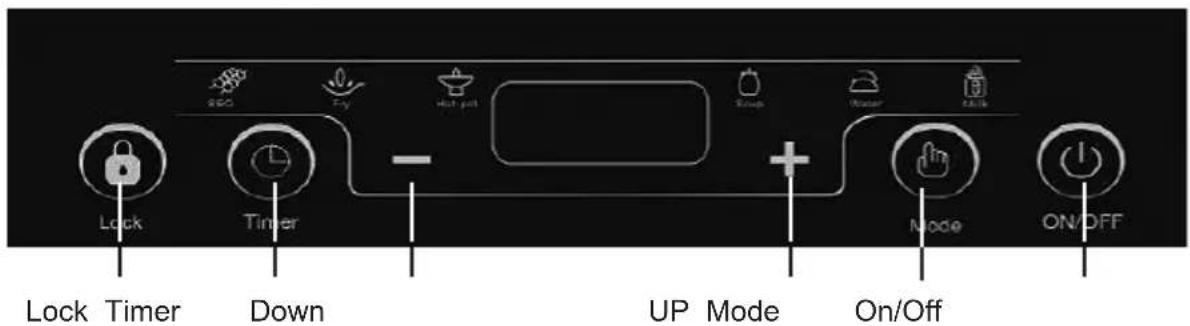
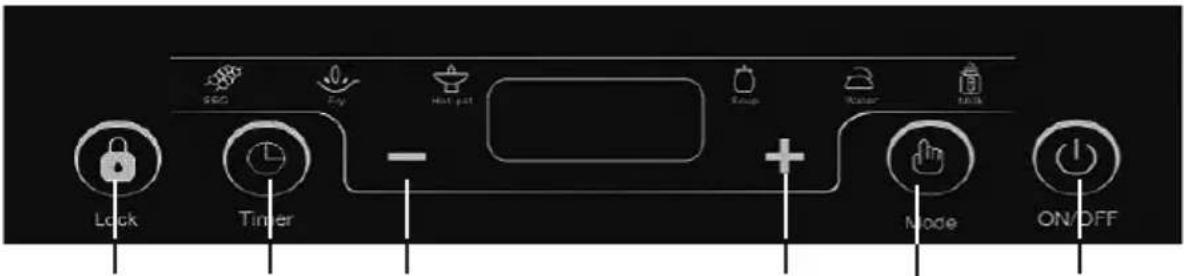
5. PARTS DESCRIPTION
- Glass Surface
- Power Cord
- Plastic Cover
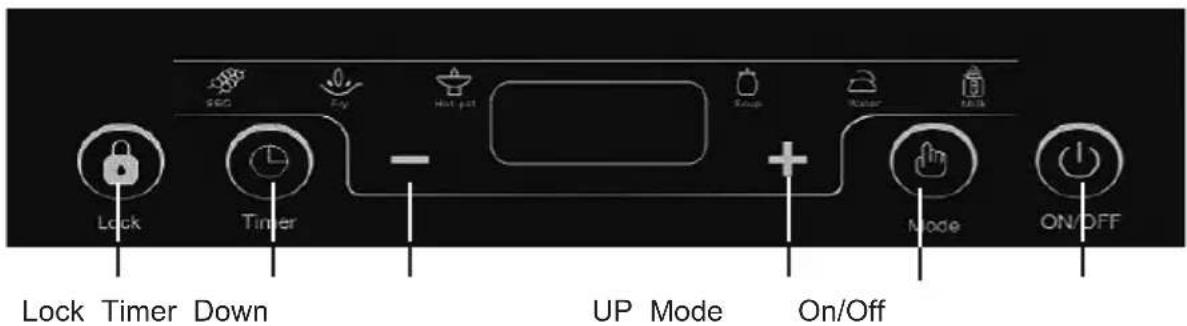
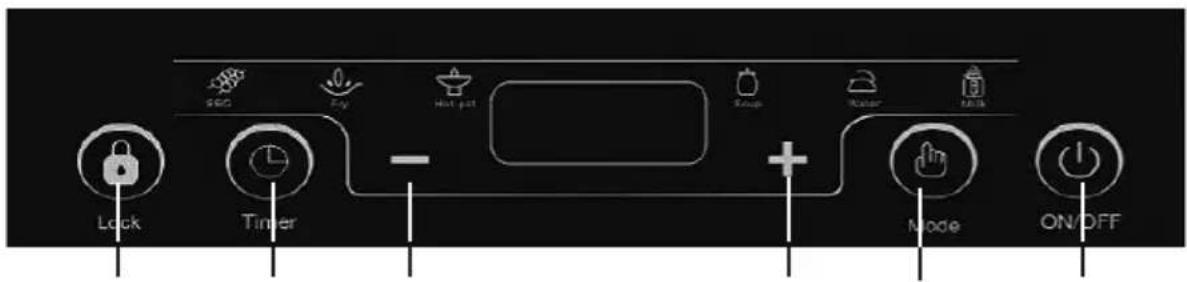
- Control panel
A. Child lock key
B. Timer key
C. Down key (Lowering the power and temperature
D. Up Key (Increasing the power and temperature value)
E. Mode key
F. On/Off key
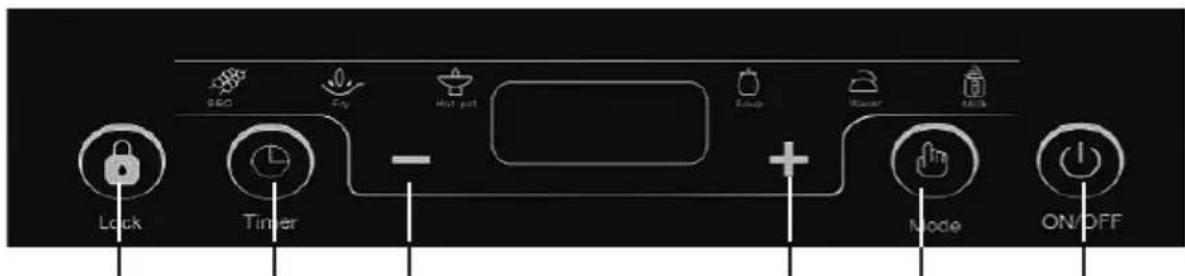
Lock Timer Down UP Mode On/Off
Power and temperature levels
| P1 - P3 P4 P5 P6 | P7 P8 P9 | ||||||
| Power (W) | 800W discontinuous working | 1000 1200 1400 | 1600 1800 2000 |
Remark:
- For P1 – P3, the device is working discontinuously.
- For P4 – P9, the device is working continuously.
Température levels:
| Display 60 90 1 | 20 140 16 | 60 180 20 | 0 220 240 | ||||||
| Temp.(°C) | 60 | 90 | 120 | 140 | 160 | 180 | 200 | 220 | 240 |
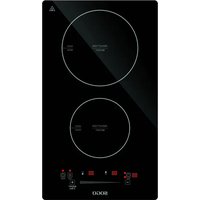
Choosing the right Cookware for induction

Induction
Only use cookware with a base suitable for induction cooking. Look for the induction symbol on the packaging or on the bottom of the pan.
Also, you can check whether your cookware is suitable by carrying out a magnet test. Move a magnet towards the base of the pan. If it is attracted, the pan is suitable for induction.
In case If you do not have a magnet:
- Put some water in the pan.
- Turn on the device for 3 minutes and check if water gets hot.
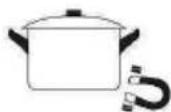
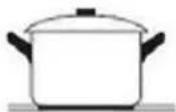
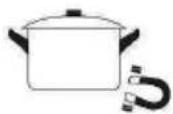
Applicable cookware:
Iron cookware (stainless steel, stainless iron, cast iron), the bottom of the cookware is flat, the diameter of the bottom is between 12cm and 22cm.

Stainless Steel kettle

Iron pot

Magnetic stainless steel pot

Color iron pot

Magnetic iron kettle

Iron pan
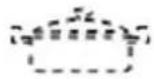
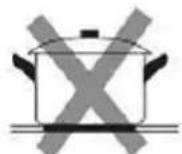
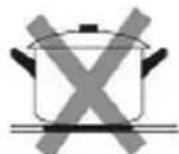
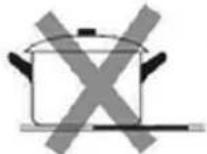
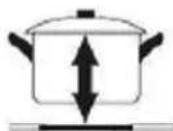
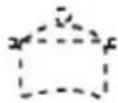
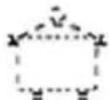
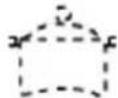
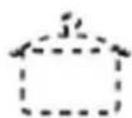
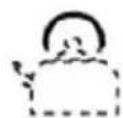
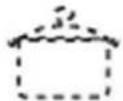
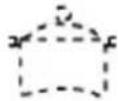
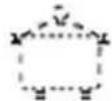
Cookware not applicable:
Pots made of aluminium, copper, glass, ceramic as materials, pots with a bottom diameter of 10cm or greater than 22cm
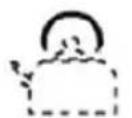
Aluminum kettle
Heat-resistant glass pot
Ceramic
pot
Bottom not smooth
Bottom with feet
Small diameter of bottom
Note: you can use the pots made with any kind of metal (except stainless steel, stainless iron, cast iron) or size, with the help of cast or stainless-steel plate, which need to use as the base. This kind of plate you can buy in any nearby electronic or home cookware store.
How to use the Cast iron Plate: Plug in the appliance and place the cast or stainless-steel plate on the top of induction hob surface. Switch on the induction hob and the cast iron plate will gets warm, on the top of this plate you can place any kind of pot or utensils made with any kind of material and start cooking.
Note: Do not use cookware with jagged edges or a curved base.
Make sure that the base of your pan is smooth and sits flat against the glass surface. Always center your pan on the cooking zone. The diameter should not be less than 12 cm to ensure that the energy field has an effect. Do not use pans with a diameter exceeds 22 cm.


Always lift the pans off the induction cooker – do not slide, or it might may scratch the glass.

Manual cooking functions: This Induction Hob has 3 Manual cooking function, which are Fry, Hot Pot and Barbecue respectively. As the name suggests, the functioning values (Power, Time and Temperature) of these cooking functions can be changed as per need and requirement.
Note: As the manual word itself indicates, that the time, temperature and power can be changed accordingly as per need. This can be changed only in the manual cooking function (Fry, Hot pot and Barbecue).
Automatic Cooking Function: This Inductions hob has 3 Automatic cooking functions, which are Soup, Water and Milk. In these cooking functions the functioning values (Time, Temperature and power) cannot be changed.
Note: As the automatic name itself suggests that the time, Temperature and Power values cannot be changed in these cooking functions (Soup, Water and Milk).
Functions description
Preparation: Place a suitable pot on the heating glass surface, plug in the power cord of the hob into a suitable power socket. The "Bi" sound of the machine indicates that it is powered on. At this time, press the ON/OFF key to start. The display shows "on" after booting, and you can press the corresponding function key to enter into working mode.
| Key Function description | |
| ON/Off | With the help of this button, we can switch on and switch off the unit any time, also the same button can be used to bring the unit in standby mode. By pressing this button LED display lights up for 2 seconds and it displays “ON”, which means unit enters into the power-on mode. this time need to select the pre-set cooking function to run the appliance. In case if within 30 seconds we do not select any cooking function, the unit automatically enters into the standby mode.Note: It is necessary to select any cooking function within 30 seconds after switching on the appliance, to avoid unit enters into standby mode. |
| Mode | As it has been suggested previously that there are 3 manual functions, which are (Fry, Hot pot; and Barbecue) and 3 automatic functions which are (Soup, Water and Milk). You can use this key to select any one of these pre-set cooking functions mentioned above. To select any pre-set cooking function, press the function button and Hotpot function indicator light starts blinking as default cooking function and digital display shows the default time and temperature, which can be changed with the help of Timer and UP/Down buttons. To change with any other cooking function keep pressing Mode button until desired functions indicator light starts blinking. |
| UP (+) and Down (-) | Use for power, temperature and time adjustment: With the help of this button power and time can be changed accordingly.To change the Power: For the Manual cooking functions power can be changed from 200 to 2000W with 9 different power ranges.Note: can be changed in Hot pot and Fry cooking function.To change the temperature: The temperature can be changed from 60 to 240°C, with 9 different temperature ranges.Note: can be changed in Barbecue function.To change the Temperature: When the device is in standby mode, press the “Power/Temp” key twice. The Temperature indicator lights up and LED display shows “160°C”, which means the device is working with 160°C temp. The temperature can be adjusted by pressing” -” or “+” key.Note: Power can’t be change in automatic cooking functions.To change the time: Time can be changed with the help of this button as mentioned in Timer function. |
| Timer | Timer: With the help of this button, you can change the cooking time of Fry, Hot pot and BBQ cooking function.To change the cooking time of any function mentioned above, select the function, induction hob starts working and digital display shows the Power/ Temperature, to change to the time press the timer button and digital display starts showing the 0:00. With the help of Up and down buttons can change the time in the range of 1 minute to 3Hrs. |
| Lock | This appliance has a special function of “Lock”, which helps you to lock any cooking function to avoid that your children can change the cooking settings. How to use lock function: In the working state, press for 3s to lock or unlock the function. Once locked, the display will show LOC. In the child lock state, all other buttons are invalid except “Lock” and “ON/OFF”. |
Note: For safety reasons, the device will automatically shutoff after 2 hours, if the timer
Timer:
When the machine is working, press the timer key to enter the time setting state of the timer shutdown. The display flashes the timer shutdown time "0:00". At this time, you can press the Up or Down button to set the time, 5 seconds later the time is set. The machine will automatically confirm the time, the time enters the countdown state, and automatically shuts down when the time is up. This applies for functions: Fry, Hotpot and Barbecue.
Function Description
| Function Working | process |
| Fry function | Press the Power function button in the standby state (digital display show “ON”). Then press mode button and unit enters into Hot-Pot function, to select fry function press mode button again and unit enters into the fry function. Digital display shows the temperature as 1800W. This function has 9 adjustable power levels from 200 – 2000W. You can press + or - keys to select the appropriate power range. You can press the timer key to set the shutdown time. The setting range is "0:01 - 4:00". |
| Hot Pot function | Press the Power function button in the standby state (digital display show “ON”). Then press mode button and unit enters into Hot-Pot function, to select fry function press mode button again and unit enters into the fry function. The Led display shows the power level 1200W. This function has 9 levels of adjustable power levels from 200W to 2000W. You can press + or – key to select the appropriate power level. You can press the timer key to set the shutdown time. The setting range is "0:01 - 4:00". |
| Barbecue function | Press the Power function button in the standby state (digital display show “ON”). Then press mode button and unit enters into Hot-Pot function, to select fry function press mode button until unit enters into the fry function. The display shows the temperature as 160°C. This function has 9 levels of adjustable temperature from 60°C to 240°C. You can press + or – keys to select the appropriate temperature range. You can press the timer key to set the shutdown time. The setting range is "0:01 - 4:00". |
| Soup function | Press the Power function button in the standby state (digital display show “ON”). Then press mode button and unit enters into Hot-Pot function, to select fry function press mode button until unit enters into the Soup function. Led display shows the time “2:00” This function is an automatic function, the machine will automatically complete the cooking process, it starts on 1600W for 120 minutes. After the program is completed, it will automatically shut down. The default working time is 120 minutes. The power level cannot be adjusted during work. Press the timer button to set the Switch-on time, the setting range is "0:01-3:00". |
| Water function | Press the Power function button in the standby state (digital display show “ON”). Then press mode button and unit enters into Hot-Pot function, to select fry function press mode button until unit enters into the Soup function. The default power is 2000W for water boiling, and the default timer is 30 minutes for automatic shutdown. Power cannot be changed, press the timer button to set the Switch-on time, the setting range is "0:01-3:00". |
| Milk function | Press the Power function button in the standby state (digital display show “ON”). Then press mode button and unit enters into Hot-Pot function, to select fry function press mode button until unit enters into the Soup function. The default power is 800W for milk boiling, and the default timer is 20 minutes for automatic shutdown. Power cannot be changed, Press the timer button to set the Switch-on time, the setting range is "0:01-3:00". |
| Residual heat indicator | After working, when the temperature of the surface is high, then high temperature indicator light turn on to remind the user, that the surface is hot. As soon as surface temperature goes down, the high temperature indicator light goes out. |
Note: In any manual cooking function default cooking time it 2 Hrs. In case if no time has been set then the hob will work for 2 hours and turn off.
Menu functions details
| Functions | Default power / Temp. | Default time | Power/ Temp. Range | Timer range |
| Fry 1800W - 200 | 0-2000W 0:01 - 4:00 | Hrs | ||
| Hot Pot 1200W | - 200-2000W 0:01 - 4:00 | Hrs | ||
| Barbecue 160°C | - 60°C - 240°C 0:01 | - 4:00 Hrs | ||
| Soup 1600W 120 minutes - 0:01 - 3:00 | Hrs | |||
| Water | 2000W | 30 minutes | - | 0:01 - 3:00 Hrs |
| Milk | 800W | 20 minutes | - 0:01 - 3:00 | Hrs |
Cleaning and Maintenance
- Turn the appliance off by pressing "On/Off" and wait until the light turns off. Once off, unplug the power cord.
- Wait for some time and let the appliance cool down
- You can use mild detergent or dishwashing liquid with a soft cloth to remove dirt.
- Do not use any petrol products to avoid damaging the plastic parts, the casing or the operating panel.
- Do not clean it with running water or immerse it in water as water will get inside and damage the appliance.
- Always make sure that the top plate and the pan/pot is clean before cooking as the dirt from the pan/pot will stick to the plate and plate will get discoloured.
- You may clean the air vent by vacuum cleaner to suck up the dirt or you can use cotton if the dirt is with oil.
- Toothbrush with little soap can also be used to clean the surface as long as you use it gently on the appliance.
- Do not use abrasives or strong detergents as it may get chemical reaction.
- After dirt has been removed, use a dry, soft cloth to wipe dry the appliance.
Troubleshooting
| Problems Possible causes Solutions | ||
| The device doesn't turn on. No power. | power. | Check the plug if connected properly.Check the power cord if it is intact.Check the power supply.Check the voltage if too low. If you've checked everything and the problem still exists, call the service center. |
| The function keys are unresponsive. | The control panel is locked. | Unlock the control panel by lock key. |
| The device makes clicking noises. | This may be caused by the construction of your cookware (layers of different metal vibrates differently). | This is normal and harmless. |
| A slight humming noise can be heard when operating at high power. | This can be caused by induction technology. | This is normal, but the noise decreases or disappears completely by reducing the power level. |
| Fan noise. | A cooling fan integrated in the device prevents the unit from overheating. If necessary, it continues to run even after the hob is switched off. | This is normal and necessary for error-free operation. Do not disconnect the appliance from the power supply while the fan is running. |
| The cookware doesn't heat | The cookware is not suitable for induction or is not detected. | Use induction-suitable cookware in a suitable size for the desired cooking zone and position it correctly. See cookware chapter. |
Error codes
| Error code | Meaning What to do | |
| E0 | No suitable cookware was identified | Place suitable cookware in the middle of the corresponding cooking zone (see cookware chapter) |
| E1 | The voltage is too low (less than 85 V) | Check the power supply. If it is normal, turn the hob back on. |
| E2 | The voltage is too high (higher than 285 V) | Check the power supply. If it is normal, turn the hob back on. |
| E3 | Error message of the cooktop sensor / short circuit | Póngase en contacto con el servicio de atención al cliente o con un electricista cualificado. |
| E4 | Error message of the IGBT sensor / short circuit | Contact the customer service or a qualified electrician. |
| E5 Overheating of the hob | · Ensure that the ventilation paths are not blocked and that the ambient temperature is not too high. · Make sure that the cookware does not protrude over the cooking zone markings in the direction of the control panel to prevent it from overheating. · Ensure that the fan is running. | |
| E6 Overheating of IGBT | · Ensure that the ventilation paths are not blocked and that the ambient temperature is not too high. · Make sure that the cookware does not protrude over the cooking zone markings in the direction of the control panel to prevent it from overheating. · Ensure that the fan is running. | |
| E7 | Malfunction of the cooktop sensor | Contact the customer service or a qualified electrician. |
| CE | Communication failure between display and mainboard | Contact the customer service or a qualified electrician. |

PORTANT:

Lock Timer Down UP Mode On/Off

Stainless Steel kettle

Iron pot

Magnetic stainless steel pot

Color iron pot

Magnetic iron kettle

Iron pan
Heat-resistant glass pot
Ceramic
pot
Bottom not smooth

Bottom with feet

Small diameter of bottom

Stainless Steel kettle

Iron pot

Magnetic stainless steel pot

Color iron pot

Magnetic iron kettle

Iron pan

Heat-resistant glass pot

Ceramic
pot

Bottom not smooth

Bottom with feet

Small diameter of bottom
Lock Timer Down UP Mode On/Off

Stainless Steel kettle

Iron pot

Magnetic stainless steel pot
Color iron pot

Magnetic iron kettle

Iron pan

Heat-resistant glass pot

Ceramic pot
Bottom not smooth

Bottom with feet

Small diameter of bottom

Stainless Steel kettle

Iron pot
Magnetic stainless steel pot
Color iron pot

Magnetic iron kettle

Iron pan

Heat-resistant glass pot

Ceramic pot
Bottom not smooth
Bottom with feet
Small diameter of bottom


Stainless Steel kettle

Iron pot

Magnetic stainless steel pot

Color iron pot

Magnetic iron kettle

Iron pan
natural_image
Three identical cooking pots with crossed X marks on their bases, no text or symbols presentnatural_image
Four identical cooking pots with crossed-out X marks, no text or symbols present
Lock Timer Down UP Mode On/Off

Stainless Steel kettle

Iron pot

Magnetic stainless steel pot

Color iron pot

Magnetic iron kettle

Iron pan
Køkkengrej ikke relevant:

Heat-resistant glass pot

Ceramic
pot
Bottom not smooth
Bottom with feet

Small diameter of bottom
Stopnje moči in temperature
| P1 - P3 P4 P5 P6 | P7 P8 P9 | ||||||
| Moč (W) | 800W neprekinjeno delovanje | 1000 1200 1400 | 1600 1800 2000 | ||||
Opomba:
- Pri P1 - P3 naprava deluje neprekinjeno.
- Pri P4 - P9 naprava deluje neprekinjeno.
Ravni temperature:
| Prikaz 60 90 120 | 140 | 160 | 180 | 200 | 220 | 240 | |||||
| Temp.(°C) | 60 | 90 | 120 | 140 | 160 | 180 | 200 | 220 | 240 |

Stainless Steel kettle

Iron pot

Magnetic stainless steel pot

Color iron pot

Magnetic iron kettle

Iron pan
Heat-resistant glass pot
Ceramic pot

Bottom not smooth

Bottom with feet

Small diameter of bottom
Lock Timer Down UP Mode On/Off
Razine snage i temperature
| P1 - P3 P4 P5 P6 | P7 P8 P9 | ||||||
| Snaga (W) | 800 W diskontinuiran radeći | 1000 1200 1400 | 1600 1800 | 2000 godine |
Napomena :
- Za P1 – P3, the uređaj je radeći diskontinuirano.
- Za P4 – P9, the uređaj je radi kontinuirano.
Temperatura razine :
| Prikaz 60 90 120 | 140 160 | 180 200 | 220 240 | ||||||
| Temp (°C) | 60 90 | 120 140 | 160 180 | 200 220 | 240 |
Biranje the pravo Posuđe za kuhanje za indukcija

Induction
Samo koristiti posuđe za kuhanje s baza prikladan za indukcijsko kuhanje. Potražite simbol indukcije na pakiranju ili na dno posude.

Stainless Steel kettle

Iron pot
Magnetic stainless steel pot

Color iron pot

Magnetic iron kettle

Iron pan
Posuđe za kuhanje nije primjenjivo:
Posude od aluminija, bakra, stakla, keramike kao materijala, posude s promjerom dna od 10cm ili većim od 22cm
Aluminum kettle

Heat-resistant glass pot
Ceramic
pot
Bottom not smooth
Bottom with feet

Small diameter of bottom

Stainless Steel kettle
Iron pot

Magnetic stainless steel pot

Color iron pot

Magnetic iron kettle

Iron pan
natural_image
Three identical cooking pots with crossed-out X marks, no text or symbols presentnatural_image
Four identical cooking pots with crossed-out X marks, no text or symbols present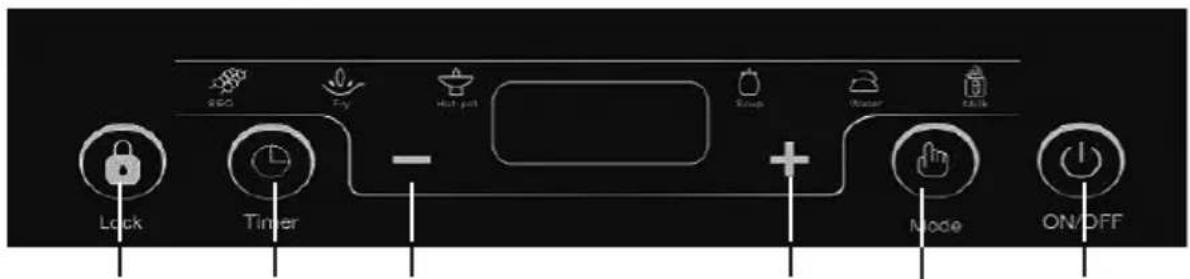
Lock Timer Down
UP Mode
On/Off

Stainless Steel kettle

Iron pot
Magnetic stainless steel pot

Color iron pot
Magnetic iron kettle

Iron pan

Heat-resistant glass pot
Ceramic pot
Bottom not smooth
Bottom with feet
Small diameter of bottom

Stainless Steel kettle
Iron pot
Magnetic stainless steel pot
Color iron pot

Magnetic iron kettle

Iron pan
Heat-resistant glass pot
Ceramic pot
Bottom not smooth
Bottom with feet
Small diameter of bottom
Bloqueig Temporizador Abaix Amunt Mode Encesa/Apagar

Stainless Steel kettle

Iron pot

Magnetic stainless steel pot

Color iron pot

Magnetic iron kettle

Iron pan
Utensilis de cuina no aplicables:
natural_image
Three identical cooking pots with crossed-out X marks, no text or symbols presentnatural_image
Four identical cooking pots with crossed-out X marks, no text or symbols presentDÉCLARATION DE CONFORMITÉ
DECLARATION OF CONFORMITY
This device complies with EU Low Voltage Directive 2014/35/EC.
Electromagnetic Compatibility Directive 2014/30/EU. Directive 2015/863/EU on the restriction of the use of certain hazardous substances in electrical.
Directive 2009/125/EC on the eco-design requirements applicable to energy-related products.

This symbol on the product or on the packaging indicates that this product can't be disposed as normal rubbish or household waste. All the electrical, electronic equipment's and battery-operated units must recycle in proper manner and according to the local municipal laws. You can recycle them by taking them to government authorized disposal centres or specialized bins which you can find in any nearby big super markets, electronics or electro domestics products stores or malls who have these types of facilities available.
Designed by: SOGO based on European quality standards Imported by: Sanysan Appliances S.L, NIF: B98753056, C/ Barcas 2, 2, 46002 Valencia, Spain Product manufactured in CHINA. After-sales service: www.sogosat.com sogosat@sogosat.com / 0034 902 222 161
- Utensilios de cocina no aplicables:
- Safety instructions for the user
- General precautions during the use of electrical
- equipment
- Restrictions on use to avoid personal injury
- Restrictions on use when used with children and rs
- Instructions to follow when using the appliance
- CLEANING AND MAINTENANCE
- INSTRUCTIONS WHILE USING INDUCTION HOB
- TECHNICAL SPECIFICATIONS
- PARTS DESCRIPTION
- Power and temperature levels
- Remark:
- Température levels:
- Choosing the right Cookware for induction
- Applicable cookware:
- Cookware not applicable:
- Functions description
- Timer:
- PORTANT:
- Køkkengrej ikke relevant:
- Stopnje moči in temperature
- Opomba:
- Ravni temperature:
- Razine snage i temperature
- Napomena :
- Temperatura razine :
- Biranje the pravo Posuđe za kuhanje za indukcija
- Posuđe za kuhanje nije primjenjivo:
- Utensilis de cuina no aplicables:
- DÉCLARATION DE CONFORMITÉ
- DECLARATION OF CONFORMITY
Brand : Sogo
Model : COC-SS-10246
Category : Cooker