
COC-SS-24015 - Cooker Sogo - Free user manual and instructions
Find the device manual for free COC-SS-24015 Sogo in PDF.

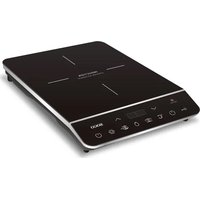
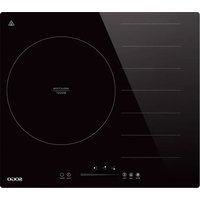
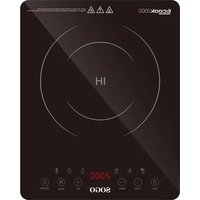
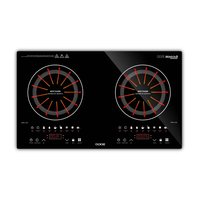
| Product Type | Induction Cooktop |
| Brand | Sogo |
| Model | COC-SS-24015 |
| Power Supply | 220-240 V ~ 50/60 Hz |
| Total Power | 7200 W (standard) / 8800 W (Boost) |
| Number of Cooking Zones | 4 induction zones |
| Zone Power | Front left zone: 2000 W (Boost 2400 W) Rear left zone: 1600 W (Boost 2000 W) Rear right zone: 2000 W (Boost 2400 W) Front right zone: 1600 W (Boost 2000 W) |
| Boost Function | Yes, for each zone, temporary power increase |
| Timer | 0 to 99 minutes, automatic zone shut-off |
| Control Lock | Yes, lock key |
| Automatic Safety Shut-off | Yes, after 120 minutes without operation |
| Overheat Protection | Yes, temperature sensor |
| Surface Material | Ceramic glass |
| Plate Dimensions (W x D x H) | Approx. 590 x 520 x 60 mm |
| Cutout Dimensions | Approx. 560 x 490 mm (refer to manual) |
| Ventilation | Built-in fan, ventilation openings |
| Cleaning | Induction cleaner, scraper for residue, avoid abrasives |
| Child Safety | Key lock |
| Compatible Cookware | Ferromagnetic bottom (steel, cast iron, compatible stainless steel) |
| Power Cable | Type Y, with grounding plug |
| Spare Parts and Repairability | Contact authorized service (sogosat@servicruz.es) |
| General Information | Household use only; installation by a professional |
Frequently Asked Questions - COC-SS-24015 Sogo
User questions about COC-SS-24015 Sogo
0 question about this device. Answer the ones you know or ask your own.
Ask a new question about this device
Download the instructions for your Cooker in PDF format for free! Find your manual COC-SS-24015 - Sogo and take your electronic device back in hand. On this page are published all the documents necessary for the use of your device. COC-SS-24015 by Sogo.
USER MANUAL COC-SS-24015 Sogo

Descarga tu manual
Download your manual
ESPAÑOL P. 3
ENGLISH P. 23
FRANÇAIS P. 43
PORTUGUESE P. 63
DEUTSCH P. 83
ITALIANO P. 103
ČEŠTINA P. 123
DANSK P. 143
SLOVENSKI P. 163
HRVATSKI P. 183
POLSKI P. 203
ROMÂNĂ P. 223
УКРАЇНСЬКА P. 243
CATALÀ P. 263
Declaration of conformity, Responsibility of Electronic products disposal, Importers Details and After-sales service on the last pages.
natural_image
Four cooking pots with crossed-out X marks, one with a curved tube (no text or symbols)natural_image
Two cooking pots with crossed arrows indicating opposing pressure, one with cross symbol and the other with double-headed arrow (no text or labels)| Modelo L(mm) | Ancho (mm) | H(mm) | D(mm) | A(mm) | B(mm) | X(mm) | ||
| SS-24015 | 590 | 520 | 58 | 54 | 565 | 495 | 50min | |
• Always read the instruction book carefully before using.
- This manual can be downloaded from our web page www.sogo.es
- Keep these instructions for future reference.
2. Symbols and Description:


1- Important information and useful hinds on use
2- Warning against dangerous situations in terms of life and property
3- Warning against hot surfaces
Important Notes:
- Read these instructions carefully before installing or using this appliance.
- No combustible material or products should be placed on this appliance at any time.
- Please make this information available to the person responsible for installing the appliance as it could reduce your installation costs.
- In order to avoid a hazard, this appliance must be installed according to these instructions for installation.
- This appliance is to be properly installed and earthed only by a suitably qualified person.
- This appliance should be connected to a circuit which incorporates an isolating switch providing full disconnection from the power supply.
- Failure to install the appliance correctly could invalidate any warranty or liability claims.
3. Safety instructions for the user

General precautions during the use of electrical equipment
- Do not use the appliance for any other purpose than described in this manual.
- Do not use or store the appliance outdoors.
- This product is intended for indoor, non-industrial, non-commercial and only for household use. Do not use the item outdoors or for any other purpose. Misuse or improper handling may cause problems in the
appliance and cause injury to the user.
- The unit must be used only for the intended purposes. No liability is accepted for damages arising from improper use or wrong handling.
- Ensure that the voltage indicated on the nameplate matches the mains voltage before plugging in the appliance.
- Always remove the plug from the power socket when the appliance is not in use. Do not leave the appliance unattended when switched on.
- Close supervision is necessary when any appliance is being used by or children.
- The appliances are not intended to be operated by means of an external timer or separate remote-control system.

Restrictions on use to avoid personal injury
- Do not let the appliance operate unattended.
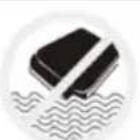
- Do not place or operate this appliance near water sources.
- Do not place or operate the appliance and its power cord on or near hot surfaces (e.g., stove plates) or open flames.
- Do not leave the power cord hanging from sharp edges and keep away from hot objects and flames. Do not wind the cord around the appliance and do not bend it.
- Never use accessories that are not recommended by the manufacturer.
- The use of accessories not recommended or sold by the appliance manufacturer may result in fire, electric shock or injury to persons.
- To avoid electric shock, make sure your hands are dry before plugging or unplugging.
- Do not use the device with wet hands, on damp floors or when the atmosphere is humid, there is a risk of electric shock.
- Never immerse the appliance or the plug-in water or any other liquid. In the event of the appliance falling in water, disconnect immediately from the mains supply and take it to an authorized service agent for repair before reusing.
- Do not use the appliance if it has fallen on the floor, if there are visible signs of damage or if it has a leak.
- Do not use the appliance if the cable or plug is damaged. In case of the cord be damaged, it must be replaced only by the manufacturer, its service agent or similarly qualified persons in order to avoid Hazard.
- In case of appliance malfunction, or if it has been damaged in any manner, return the appliance to the nearest authorized service facility for examination, repair or adjustment.

Restrictions on use when used with children and elders
- The appliance is not to be used by persons (including children) with reduced physical, sensory or mental capabilities, or lack of experience and knowledge, unless they have been given supervi-
sion or instruction.
- Children should be supervised to ensure that they do not play with the appliance.
- Appliances can be used by persons with reduced physical, sensory or mental capabilities or lack of experience and knowledge if they have been given supervision or instructions concerning use of the appliance in a safe way and understand the hazards.
- This appliance can be used by children aged from 8 years and above and persons with reduced physical, sensory or mental capabilities or lack of experience and knowledge if they have been given supervision or instruction concerning use of the appliance in a safe way and understand the hazards involved.
- Cleaning and user maintenance shall not be made by children unless they are older than 8 and supervised.
- Keep the appliance and its cord out of reach of children less than 8 years.
- Do not allow the children to use the appliance without supervision.
- Do not put objects that children may reach on the appliance.
- The packaging materials are dangerous for children. Keep packaging materials away from the reach of children.

Instructions to follow while using the appliance
- Never leave the appliance unattended when in use. Boil over causes smoking and greasy spillovers that may ignite.
- Never use your appliance as a work or storage surface.
- Never leave any objects or utensils on the appliance.
- Do not place or leave magnetizable objects (eg credit cards, memory cards) or electronic devices (eg computers, MP3 players) near the device, as they may be affected by its electromagnetic field.
- Never use your appliance for warming or heating the room.
- After use, always turn off the cooking zones and the cooktop as described in this manual (i.e. by using the touch buttons). Do not rely on the non-induction cookware detection feature to turn off the cooking zones when you remove the pans.
- Do not repair or replace any part of the appliance unless specifically recommended in the manual. All other servicing should be done by a qualified technician.
- Do not use a steam cleaner to clean the cooktop.
- Do not place or drop heavy objects on the cooktop.
- Do not stand on the cooktop.
- Do not use pans with jagged edges or drag pans across the ceramic glass surface as this can scratch the glass.
- Do not use scourers or any other harsh abrasive cleaning agents to clean the cooktop, as these can scratch the ceramic glass.
- Care should be taken to avoid touching heating elements.
- CAUTION: The cooking process must be supervised. The short-term cooking process must be continuously monitored.
- WARNING: To prevent the plate from moving, the safety anchors must be installed. See installation instructions.
- WARNING: Use only kitchen protectors designed by the cooking appliance manufacturer or indicated by the appliance manufacturer in the appropriate instructions for use or kitchen protectors incorporated into the appliance. The use of unsuitable protectors can cause accidents.
- This appliance incorporates a ground connection for functional purposes only.
- Remove any protective film that may be on the induction hob. Keep the ventilation channels open.
- Do not heat closed cans and glass jars. The pressure may lead jars to explode.
- Do not use the product in states like medicated and/or under influence of alcohol which may affect your ability of judgement.
• After each use, check if the unit is turned off.
- Be careful when using alcohol in your foods. Alcohol will evaporate at high temperatures and may catch fire to cause a fire if it comes in contact with hot surfaces.
- If the appliance is faulty or has a visible damage, do not operate the appliance.
- Installation and repair should always be performed by “AUTHO-RIZED SERVICE”. Manufacturer shall not be held responsible for operations performed by unauthorized persons.
WARNING:
Electric Shock Hazard
- Do not cook on a broken or cracked cooktop. If the cooktop surface is broken or cracked, turn the appliance off immediately at the mains power supply (wall switch) and contact a qualified technician.
- Please do not use the appliance, if the cooking surface is broken, take it to the authorized service centre for repair.
- Turn the cooktop off before cleaning or maintenance.
- Failure to follow this advice may result in electrical shock or death.
- Never wash the appliance by spraying or pouring water on it. There is a risk of electrocution.
- Warning: If the surface is cracked, switch off the appliance to avoid the possibility of electric shock, for cooker surfaces of glass-ceramic or similar material which protect live parts.
- WARNING: If the surface is cracked, turn off the appliance to avoid the possibility of electric shock and do not touch it to avoid cutting the ceramic glass.

Health Hazard
- This appliance complies with electromagnetic safety standards.
- However, people with pacemakers or other electrical implants (such as insulin pumps) should consult their physician or the implant manufacturer before using this device to ensure that their implants are not affected by the electromagnetic field.
- Failure to follow this advice can result in death or significant damage to your health.
- WARNING: As the induction surfaces generate a magnetic field, it may cause harmful effects for people using medical devices such as pacemakers or insulin pumps.
- WARNING: When induction furnaces are operated at high power or based on the material of the pan base, it may emit certain noises. This is normal.

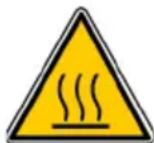
Hot Surface Hazard
- WARNING: The appliance and its accessible parts become hot during use.
- During use, accessible parts of this appliance will become hot enough to cause burns.
- Do not let your body, clothing or any item other than suitable coo-kware contact the ceramic glass until the surface is cool.
- Metallic objects such as knives, forks, spoons and lids should not be placed on the cooktop surface since they can get Hot.
- Every time you finish, the fan keeps working for a while to dissipate the heat. When the fan stops working, you can unplug the power cord.
- Be careful, while handling electrical appliances, as the surface of the heating element is subject to residual heat after use. Any misuse may cause potential injury to the user and may damage the appliance.
- Do not touch the outer surface of the appliance as it can get very hot during operation. Instead, use the handle or mitts.
- Keep children away.
- Handles of saucepans may be hot to touch. Check saucepan handles do not overhang other cooking zones they are on. Keep handles out of reach of children.
- Failure to follow this advice could result in burns and scalds.
- Touching the heating elements should be avoided.

Cut Hazard
- The razor-sharp blade of a cooktop scraper is exposed when the safety cover is retracted. Use with extreme care and always store
safely and out of reach of children.
- Failure to use caution could result in injury or cuts.

Fire Hazard
- Please don't put paper, towels and other flammable items on the heating surface, as it can cause fire.
- WARNING: Fire hazard; do not store the materials on the coo-king surface.
- NEVER try to put out the fire with water. Only shut down the device circuit then cover the flame with a cover or a fire blanket.
- Put curtains, tulles, paper or any flammable (ignitable) material away from the appliance before starting to use the appliance. Do not put ignitable or flammable materials on or in the appliance.
- WARNING: Unattended cooking on a cooker with fat or oil can be dangerous and may result in fire. NEVER try to extinguish a fire with water, but switch off the appliance and then cover flame e.g. with a lid or a fire blanket.
- WARNING: Danger of fire: do not store items on the cooking surfaces.
4. Electrical Safety
- Have an authorized electrician set grounding equipment. Our company shall not be responsible for the damages that shall be incurred due to using the product without grounding according to local regulations.
- Cable fixing point shall be protected.
- Do not use cut or damaged cords or extension cords other than the original cord.
- An omni polar switch capable to disconnect power supply is required for installation. Disconnection from power supply shall be provided with a switch or an integrated fuse installed on fixed power supply according to building code.
- The power supply cord shall not contact the hot parts of the appliance.
- Appliance is equipped with a type "Y" cord cable.
- The circuit breaker switches of the cooker shall be placed so that end user can reach them when the cooker is installed.
- Fixed connections shall be connected to a power supply enabling omnipolar disconnection. For appliances with over voltage category below III, disconnection device shall be connected to fixed power supply according to wiring code.
- Do not remove ignition switches from the appliance. Otherwise, live electric cables can be accessed. It may cause an electric shock.
- Cooker supply can be disconnected during any construction work at
home. After completing the work, re-connecting the cooker shall be done by authorized service.
- To prevent overheating, the appliance should not be installed behind of a decorative cover.
- Turn off the appliance before removing the safeguards. After cleaning, install the safeguards according to instructions.
- User should not handle the cooker by himself.
- If heavier loads are places on the cooker, these loads can trip over. It may cause personal injuries.
5. Electrical Connection
- ⚠️ WARNING: This hob shall be correctly installed and connected by the authorized service and according to the manufacturer's instructions. Manufacturer shall not be held responsible for implicitly and explicitly losses due to improper installation and maintenance works.
- ⚠️ WARNING: Manufacturer shall not be held responsible for any losses (such as electric shock) due to a missing or defective protective cable. Insulated parts should be inspected after installation.
- The appliance is designed for electric supply of AC 220-240 V / AC 50/60 Hz. If your power network does not provide these specifications, contact an electrician or an authorized service.
- not allow the power cord of your appliance to contact hot parts of the appliance. Keep it away from sharp edges and corners.
Circuit Breakers
Power supply should be disconnected from the mains using an all-poles breaker. (Contact gap should be at least 3 mm). This breaker protects against over-current.
Disconnecting from mains
To disconnect mains power to the appliance;
- Fuse elements
Remove the fuse completely from the base. Or:
- Automated fuses
Press (red) control button to release middle button. Or:
- Embedded automated fuses
Turn it to 0 (OFF) position from 1 (ON) position.
(Line breaker should be at least B or C type) Or:
- FI-circuit breaket (False Induction breaker)
Turn it to 0 (OFF) position from 1 (ON) position or press inspection button.
WARNING: Take safety precautions against turning on power unintentionally.
6. Electrical Connection Scheme
Connect the cables as specified below.
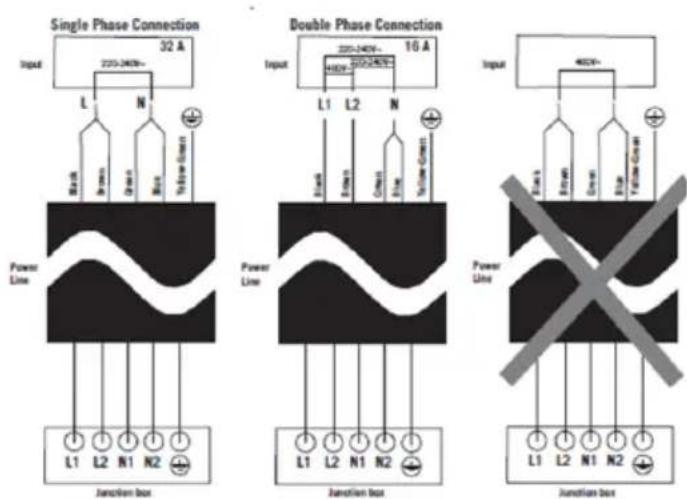
WARNING: 220-240V 50/60 Hz. power supply is suitable for single phase connection, and 380-415V 50/60 Hz. power supply is suitable for double phase connection.
CLEANING AND MAINTENANCE
Kindly refer to the cleaning and maintenance section for details on how to clean surfaces which comes in the contact of food.
7. TECHNICAL SPECIFICATIONS
| Voltage Frequency Power Booster Cooking Zones | ||||
| AC 220-240V 50 | -60Hz 7200 8800 4 | |||
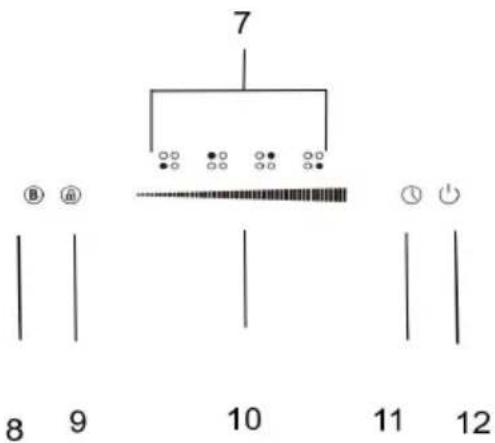
8. PARTS DESCRIPTION
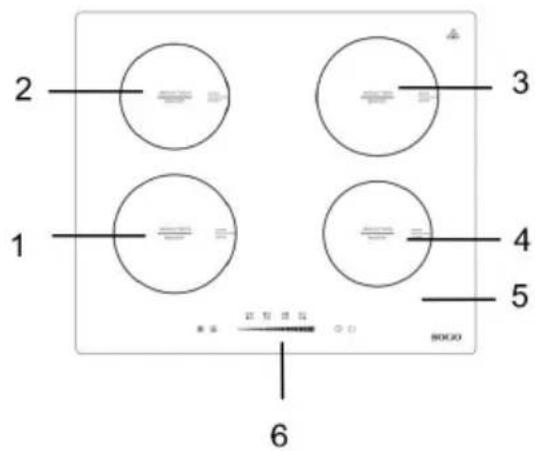
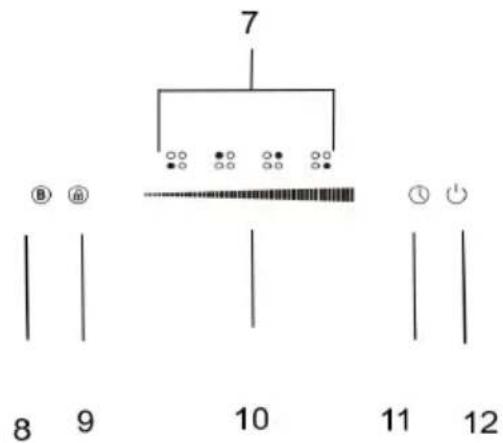
- Induction zone: 2000W boost 2400W
- Induction zone: 1600W boost 2000W
- Induction zone: 2000W boost 2400W
- Induction zone: 1600W boost 2000W
- Glass plate
-
Control panel
-
Heating zone selection button
- Boost button
- Lock button
- Power selection slider
- Timer button
- On/Off button
9. INSTRUCTIONS WHILE USING INDUCTION HOB
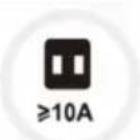 | Do not use this appliance with wall outlet of electrical rating less than 10A, it should always be more (pls use at least 15A if the cooker has two burners and multiple burners). Also, to avoid a circuit overload while using this product, do not operate another high-wattage product on the same electrical circuit. | |
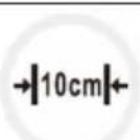 | While using make sure to keep it on smooth and horizon-tal surface and on the distance of 10 cm from wall sides. | |
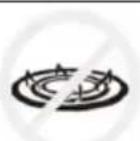 | Do not use the induction cooker nearby gas cooker and kerosine cooker. | |
 | Do no immerse the induction cooker in water directly to clean, wipe it with the soft and damp cloth. | |
 | Please do not insert the wire items to the wind and air outlet, do not cover it with anything, it can cause electric shock. |
 | In order to getting burn or scald from the high tempera-ture, do not place any iron sheet directly on the induction hob. |
 | Do not place the sealed cans with food on the induction surface to warm. To avoid explosion, open the can, re-move the food and warm it with the help of any suitable pot. |
 | Do not use the induction hob on the top of iron surface, or any surface with metal mat underneath. |
 | Do not place the empty pots or pans on the induction hob surface, it can affect the product working performance. |
 | Always keep clean the cooking surface and do not let the grease getting accumulate. |
 | Do not touch the cooking surface with the hands while in use as it gets warm and can cause scald. Let it cool for a while before cleaning or moving. |
 | If the power cord is damaged, do not change it yourself and take it to the authorized service centre or qualified technician to change it. |
 | Do not let the children to use the induction hob |
 | In case having pacemaker, contact with your doctor be-fore using appliance. |
Advantages of induction cooking
Induction cooking is a radical change in the traditional way of cooking food, the heat is generated directly in the container by eliminating the loss of heat between the different elements (container, glass ceramic plates, etc.). Different the advantages of using induction cooker are as follows:
- Reduce cooking time: the pan heats up faster.
- Energy saver: by reducing the time to cook and / or fry. When the pan is removed from the cooking zone, it automatically stops supplying heat.
- Easy cleaning: Since the surface is not so hot, food that spills does not burn as quickly.
- Environment friendly: non-toxic, non- pollution, no electromagnetic radiation.
- Heat fast: Based on the principle of electromagnetic induction, the bottom of the pot gets warm directly, which is due to a high thermal efficiency and fast speed.
-
This product uses the high hardness and high temperature resistant crystal plate, which is not only easy to clean, but durable also.
-
Microcomputer control, the fire temperature control at will.
- Safe use, it has many protection functions, like over-voltage, under voltage, over temperature and fan delay working.
Before using your New Induction Hob
- Read this guide, taking special note on the "Safety Warnings" section.
- Remove any protective film that may still be on your Induction Cooker.
Using the Touch Buttons
- The controls respond to touch, so you don't need to apply any pressure.
- You will hear a beep each time a touch is registered.
- Make sure the touch buttons are always clean, dry, and that there is no object (e.g. a utensil or a cloth) covering them. Even a thin film of water may make the touch buttons difficult to operate.
Cookware suitable for induction
Ferromagnetic vessels
- The suitable containers for induction cooking are those that are made of ferromagnetic material. They can be made of enameled steel, cast iron or special stainless steel induction dishes.
- To find out if a container is suitable for induction cooking, check that they are attracted by a magnet.
- There are other types of containers whose base is not entirely ferromagnetic.
- Before using them, check the diameter of the base and that these pans are detected by the induction hob.
Choosing the right cookware
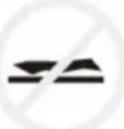
Do not use cookware with jagged edges or a curved base.

natural_image
Four identical cooking pots with crossed-out X marks, one with a curved handle, shown in a row (no text or symbols)Make sure the base of the pan is smooth, lies flat against the glass, and is the same size as the cooking zone. Use cookware whose diameter is as large as the graphic for the selected zone. When using a canister, slightly more energy will be used at its maximum efficiency. If you use a smaller pot, the efficiency may be lower than expected. Always centre the pan on the cooking zone. The base of a cookware can influences the distribution of heat and therefore the cooking result. Choosing a cookware with a higher quality base (for example, a sandwich type) will save us cooking time and energy.
Protect the glass surface
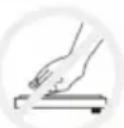
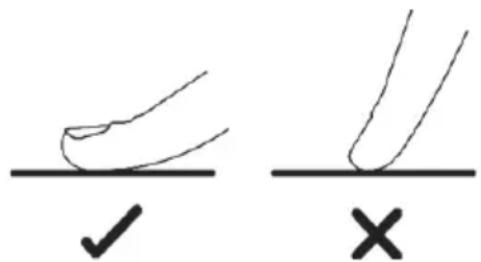
Always lift the cookware off the induction hob, do not slide it, as this could scratch the glass.
natural_image
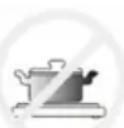
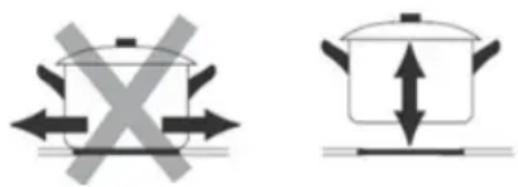
Two cooking pots with crossed arrows indicating opposing pressure, one with cross symbol and the other with double-headed arrow (no text or labels)Cookware empty or with a very thin base
Never place an empty cookware on the hob and turn it on, as this can cause the cookware to overheat (due to excess heat) and damage the ceramic glass or the hob itself. If the base of the cookware is very thin, it can also become overheated, refrain from using this type of cookware.
Cookware detection
The hob has a minimum detection limit of the cooking zone that varies for each cooking zone. For this reason, you should refrain from using cookware whose base is less than the specified diameter. If you turn on the hob without any cookware or with a cookware with a lower base than specified or with a cooktop not suitable for induction, the cooktop will not work, the display will show.

Cookware dimensions
The cooking zones have a minimum and maximum operating diameter, and are automatically adapted to the diameter of the pan. However, the bottom of the pan must have a minimum diameter according to the corresponding cooking zone. To get the best efficiency from your induction hob, place the base of the pan in the centre of the cooking zone.
Using your Inudction Hob
To start cooking
| Touch the “ON/OFF” button.When the hob is turned on, an acoustic warning will sound and the displays will show the indications “0” and “- -”, warning that the hob is on and in the standby or standby state. | 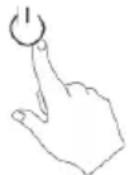 | |
| Place a suitable pan on the cooking zone that you wish to use.Make sure the bottom of the pan and the surface of the cooking zone are clean and dry. |  | |
| Touch the heating zone selection button and an indicator 0 up to the button will flash. | 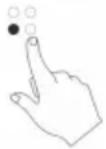 | |
| Slide the slider to adjust the cooking power. | 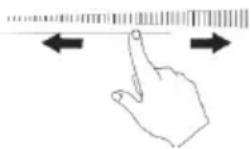 | |
| The power level of a cooking zone can be varied at any time during cooking.To do this, select the desired cooking zone or and when the power indicator digits begin to flash, adjust the power using the power level selector. | ||
If the display flashes the indication

it means that..
- You have not placed a pan on the correct cooking zone;
- The cookware you are using is not suitable for induction cooking;
- The pan has a too small base or is not centered correctly on the cooking zone.
Therefore...
• Heating is not carried out unless there is a suitable container in the cooking zone.
- The screen will turn off automatically after 2 minutes if a suitable container is not placed on it.
When you have finished cooking
| Touch the heating zone selection button that you wish to turn off. | 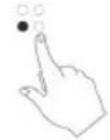 |
| Turn the cooking zone off by sliding the slider and scrolling down to “0”.Make sure the power display shows “0”, then shows “H”. | 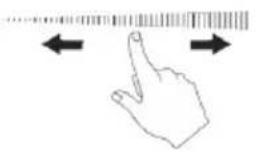 |
| Turn the whole cooktop off by touching the “ON/OFF(1)” button. | 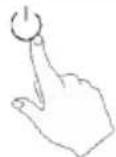 |
| 1Beware of hot surfaces “H” (surface TEMP>60°) will show which cooking zone is hot to touch. It will disappear when the surface has cooled down to a safe temperature. It can also be used as an energy saving function if you want to heat further pans, use the hotplate that is still hot. |  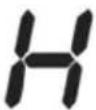 |
Locking the buttons
- You can lock the buttons to prevent unintended use (for example children accidentally turning the cooking zones on).
- When the control panel is locked, all the buttons except the "ON/OFF" button.
To lock the buttons
Touch the keylock button "⑧"
To unlock the buttons
- Make sure the induction cooker is on.
- Touch and hold the keylock button "①" for 3 seconds.
- You can now start using your cooker.
When the cooker is the lock mode, all the buttons are disable except the "ON/OFF", you can always turn the induction cooker off with the "ON/OFF" button in an emergency, but you shall unlock the cooker first in the next operation.
BOOST FUNCTION
The BOOST function is used to temporarily increase the power of the chosen cooking zone, and thus to be able to obtain a more powerful and faster cooking in a short period of time. We recommend that you use the BOOST function with caution and only temporarily as excess power can burn or overheat food.
Using the BOOST function
| Touch the heating zone selection button. |  |
| Touch the button “B to select the power level “B” which is BOOST mode. |  |
| To cancel the BOOST function, touch the cooking zone selector button corresponding to the cooking zone that is under BOOST mode and select the desired power level by sliding the slider. | 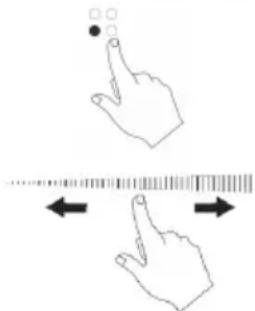 |
Note: The BOOST function increases the power considerably, so we recommend that you use it with caution as cooking times can vary and excess temperature can burn the food.
Over-Temperature Protection
A temperature sensor equipped can monitor the temperature inside the induction cooker. When an excessive temperature is monitored, the induction cooker will stop operating automatically.
Automatic Safety Shutdown
It is a protection system that incorporates the induction hob, which automatically turns off after 120 minutes if you forget to turn it off and do not touch any button. When the pan is removed, the induction hob stops heating immediately.

People with a pacemaker should consult their physician before using this unit.
FANS
At the base of the hob there is a fan whose objective is to maintain a stable temperature inside the induction hob. Every time the hob is turned on and the power or temperature is adjusted, the fans will also run. When the hob is turned off, the fans will stay on and automatically turn off when the hob is cool enough.
If you use the induction hob on the table top, NEVER place kitchen towels, cloths or other objects that could obstruct the fan holes, as this would prevent adequate ventilation and cause the circuits to overheat, thus causing the security protections.
Note:
Remember that the fan will run long enough to cool down the cooker after turning it off. This is normal and does not indicate a malfunction.
Using the Timer
- You can set it to turn one cooking zone off after the set time is up.
- You can set the timer up to 99 minutes.
Setting the timer to turn one cooking zone off
| Touch the heating zone selection button. |  |
| Touch the timer button, the timer indicator shows “30 |  |
| Slide the slider to select the timer.Or touch the timer button, the timer indicator shows “30”. The tens is flashing, setting the tens timer by sliding the slider.After the tens timer has been set, it flashes 3 seconds, and then it stops flashing and the ones flashes. Slide the slider to set the ones timer. | 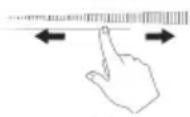 or or 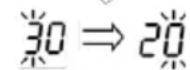 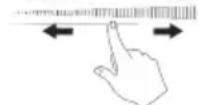 |
| Hint: If the setting time exceeds 99 minutes, the timer will automatically return to 0 minute. | |
| Touch the heating zone selection button, and then touch the button “Timer”, the timer is cancelled, and the “--” will show in the timer display. | 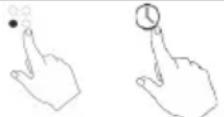 |
| When the time is set, countdown starts and the display start showing the remaining time. |  |
| Note: the red dot next to power level indicator will illuminate indicating that zone is selected. |  |
Setting the timer to turn more than one cooking zone off
| If more than one heating zone use this function, the timer indicator will show the lowest time.(e.g. zone 3# setting time of 3 minutes, zone 1# setting time of 6 minutes, the timer indicator shows “3”.)NOTE: The red dot next to power level indicator will flash. | (Set to 6 minutes)(Set to 3 minutes) |
| When cooking timer expires, the corresponding coo-king zone will be turned off automatically. | |
| NOTE: If you want to change the time after the timer is set, you can have to restart from step 1. |
Cooking Guidelines

Be careful when frying, as oil and fat heat up very quickly, especially if you are using the Booster function. At extremely high temperatures, oil and grease ignite spontaneously and this presents a serious fire hazard.
Energy saving
- When the food comes to a boil, reduce the power.
• Using a lid will reduce cooking times and save energy by retaining heat. - Minimize the amount of liquid or fat to reduce cooking times.
- Start cooking on a high power level and then reduce the power level when the food has heated up.
Simmer
- Simmering occurs below the boiling point, around 85^ , when bubbles occasionally rise to the surface of the cooking liquid. It's the key to delicious tender soups and stews because flavors develop without overheating the food. You should also cook thickened egg and flour based sauces below the boiling point.
- Some tasks, including cooking rice by the absorption method, may require a setting higher than lower to ensure that food cooks properly in the recommended time.
Care and Cleaning
| What? How? Important! | ||
| Daily soiling on the glass surface (fingerprints, marks, food stains or unsweetened spills) | Disconnect the power from the board using the switch or differential enabled for this.Use an induction hob cleaner while the surface is warm (but not hot!)Rinse and dry the plate with a clean cloth or paper towel.Reconnect the board to power | When turning off the power to the hob, there will be no indication of a hot surface, but the cooking zone still be hot!Use special scouring pads for induction hobs. Do not use harsh, corrosive or abrasive cleaners that can damage the plate. Always read the label to see if your cleanser or scourer is suitable. Never leave residue on the surface, the glass can stain. |
| Spills from sugary foods | Remove them immediately using a scraper suitable for induction hobs, but be careful with hot surfaces in the cooking zone:1. Disconnect the power from the board using the switch or differential enabled for this.2. Hold the scraper at a 30° angle and scrape dirt to a cool area of the plate.3. Wipe up dirt or spills with a kitchen towel or paper towel. | Remove stains from melting and sugary foods or spills as soon as possible. If allowed to cool on the glass, it can be difficult to clean or even permanently damage the surface of the hob.Cut Hazard - When the safety cover is retracted, the blade on a scraper becomes sharp. Use it with great care and always store safely and out of the reach of children. |
| Dirt and spill sta-ins on the control panel | 1. Disconnect the power from the board using the switch or differential enabled for this.2. Clean the control panel area with a clean, damp sponge or cloth.3. Completely dry the control panel area4. Reconnect the board to power. | Liquid spillage in the area of the control panel may cause the induction hob to malfunction, the touch buttons may not work properly. Be sure to thoroughly clean and dry the control panel area before reconnecting the board to power. |
Trouble Shooting
| Problem Possible causes Solution | ||
| The hob cannot be turned on. | No Power. Make sure the hob is | connected to the power supply and that it is turned on. Check whether there is a power outage in your home or area. If you've checked everything and the problem persists, call a qualified technician. |
| The touch buttons are unresponsive. | The buttons are locked. Unlock the buttons. See section "Using your induction hob" for instructions. | |
| Touch buttons are not working properly | There may be a small film of water or liquid on the buttons or you may be using the tip of your finger when touching the buttons. | Make sure the control panel area is clean and dry. Use the pad of your finger when touching the controls. |
| The glass is being scratched. | Rough-edge cookware. Unsuitable, abrasive scourer or cleaning products were used. | Use cookware with flat and smooth bases. See "Choosing the right cookware". See "Care and cleaning". |
| Some pans make crackling or clicking noises. | This may be caused by the construction of your cookware (layers of different metals vibrating differently). | This is normal for cookware and does not indicate a fault. |
| The induction hob makes a low humming noise when used on a high heating setting. | This is caused by the technology of induction cooking. | This is normal, but the noise should quie- ten down or disappear completely when you decrease the heating setting. |
| The cookwares do not heat up and the display shows “_” | The cookware is not suitable for induction, the base of the cooker is too small or it is not centered on the cooking zone. | Use suitable cookware for induction, with a base large enough to be get detected and center it in the cooking zone |
| Fan noise comes from the induction hob. | A cooling fan built into your induction hob has come on to prevent the electronics from overheating. It may continue to run even after you've turned the induction hob off. | This is normal and needs no action. Do not turn off the induction hob while the fan is running. |
ERROR MESSAGES
If an abnormality arises, the induction hob will enter the protection state automatically and display the corresponding error codes:
| INDUCTION HOB | ||
| Error Possible Cause Solution | ||
| E 1 / E 2 | Protection against under voltage (<85 V) or over voltage (>285 V) | If the voltage at the mains outlet is lower or higher than specified, consult a qualified electrician. |
| E 3 The sensor is short circuits or open circuits. | Contact the Technical Service. | |
| E 4 The IGBT is short circuits or open circuits. Contact the Technical Service. | ||
| E 5 High temperature (>280 °C) of the induction coil temperature sensor. | Turn off the induction hob and wait for it to cool down. | |
| E 6 High temperature at IGBT sensor Check that the ventilation is correct and the fans are not obstructed. | ||
| Er Internal fault of the control circuits. Contact the Technical Service. | ||
| Et There is excess liquid on the buttons on the control panel | Clean and dry the control panel | |
| U There is no pot or the pot is not suitable for induction. | Change the pot. | |
Installation
Selection of installation equipment
Cut out the work surface according to the sizes shown in the drawing.
For the purpose of installation and use, a minimum of 5 cm space shall be preserved around the hole.
Be sure the thickness of the work surface is at least 30mm. Please select heat-resistant work surface material to avoid larger deformation caused by the heat radiation from the hotplate. As shown below:
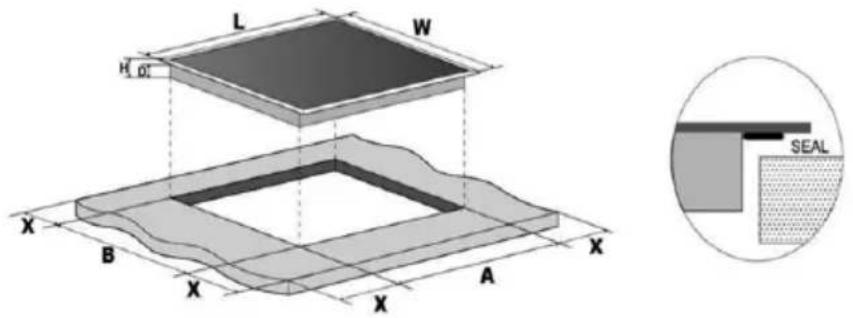
| Model | L(mm) | W(mm) | H(mm) | D(mm) | A(mm) | B(mm) | X(mm) |
| SS-24015 | 590 | 520 | 58 | 54 | 565 | 495 | 50min |
Under any circumstances, make sure the induction hob is well ventilated and the air inlet and outlet are not blocked. Ensure the induction hob is in good work state. As shown below

Note: The safety distance between the hotplate and the cupboard above the hotplate should be at least 760mm.
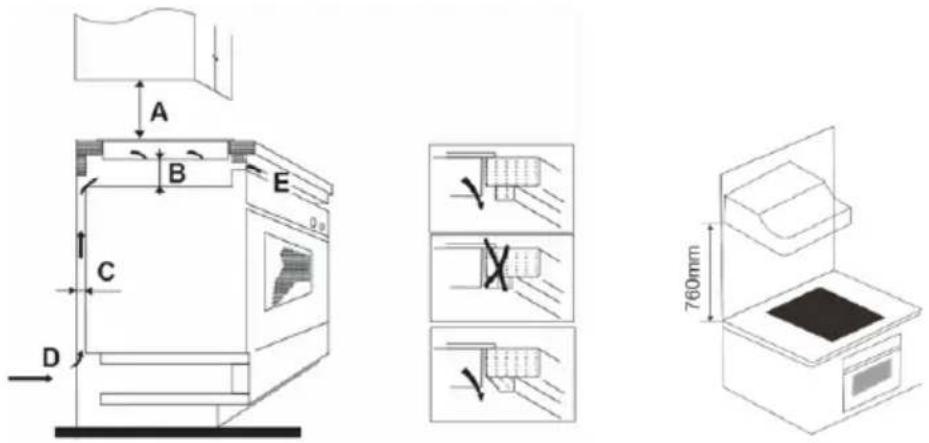
| A(mm) B(mm) C(mm) D E | |||
| 760 50 min 30 min Air intake Air exit 10mm |
Before you install the hob, make sure that:
- The work surface is square and level, and no structural members interfere with space requirements.
• The work surface is made of a heat-resistant material - If the hob is installed above an oven, the oven has a built-in cooking fan.
- The installation will comply with all clearance requirements and applicable standards and regulations
- A suitable isolating switch providing full disconnection from the mains power supply is incorporated in the permanent wiring, mounted and positioned to comply with the local wiring rules and regulations.
- The isolating switch must be of an approved type and provide a 3 mm air gap contact a separation in all poles (or in all active conductors if the local wiring rules allow for this variation of the requirements).
• The isolating switch will be easily accessible to the customer with the cooker installed - You consult local building authorities and by-laws if in doubt regarding installation
- You use heat-resistant and easy-to-clean finishes (such as induction tiles) for the wall surfaces surrounding the hob.
When you have installed the hob, make sure that
• The power supply cable is not accessible through cupboard doors or drawers
- There is adequate flow of fresh air from outside the cabinetry to the base of the hob.
- If the hob is installed above a drawer or cupboard space, a thermal protection barrier is installed below the base of the hob.
• The isolating switch is easily accessible by the customer
Cautions
- The induction hob must be installed by qualified personnel or technicians.
We have professionals at your service. Please never conduct the operation by yourself. - The hob will not be installed directly above a dishwasher, fridge, freezer, washing machine or clothes driver, as the humidity may damage the hob electronics.
- The induction hob e shall be installed such that better heat radiation can be ensured to enhance its reliability.
- The wall and induced heating zone above the table surface shall withstand heat.
- To avoid any damage, the sandwich layer and adhesive must be resistant to heat.
CONNECTION OF THE INDUCTION HÓB TO THE ELECTRICITY SOCKET.
Before connecting the induction hob to the mains, check that:
- The electrical installation where the induction hob is to be connected must be suitable for the power consumed by the induction hob.
- The voltage must correspond to the nominal value specified in the characteristics described in this manual.
To connect the induction hob to the mains socket, you must not use adapters, reducers or branches, as these devices can become hot and cause a fire.
The power cable of the induction hob must not touch any part or area where it acquires high temperatures and must be positioned so that the temperature will not exceed 75^ C at any point. Check with a licensed and qualified electrician for proper electrical installation.
Any modification to the electrical installation must only be carried out by a licensed electrician. The electrical connection of the induction hob must be carried out in accordance with current regulations and protected by a single-pole magnetothermic or automatic switch.
If the cable is damaged, to be substituted or replaced, the operation must be carried out by Technical Service.
- The authorized installer must ensure that the correct electrical connection has been made and that it complies with safety regulations.
- The cable must not be bent or compressed.
- The cable should be checked regularly and replaced only by authorized technicians.
- The manufacturer is not responsible for any accident resulting from the use of an appliance that is not grounded or from faulty grounding continuity.
- If the device has an electrical outlet, it must be installed so that the electrical outlet is accessible.

PORTANT:
natural_image
Four cooking pots with crossed X marks, one with a curved handle, shown in sequence (no text or symbols)natural_image
Two identical line drawings of a cooking pot with crossed arrows indicating pressure or movement, no text or symbols present.| Modèle L(mm) | L(mm) | H(mm) | D(mm) | A(mm) | B(mm) | X(mm) | ||
| SS-24015 | 590 | 520 | 58 | 54 | 565 | 495 | 50min |
natural_image
Four cooking pots with crossed-out X marks, one with a curved handle, shown in sequence (no text or symbols)natural_image
Two cooking pots with crossed arrows indicating opposing pressure, one with a cross symbol and the other with bidirectional arrows (no text or labels)| Modelo L(mm) | L(mm) | H(mm) | D(mm) | A(mm) | B(mm) | X(mm) | ||
| SS-24015 | 590 | 520 | 58 | 54 | 565 | 495 | 50min |
natural_image
Four cooking pots with crossed-out X marks, one with a curved tube (no text or symbols)natural_image
Two identical diagrams showing a cooking pot with crossed arrows indicating pressure or flow direction, no text or symbols present.| Modell L(mm) B(mm) | H(mm) D(mm) A(mm) B(mm) X(mm) | ||||||
| SS-24015 | 590 | 520 | 58 | 54 | 565 | 495 | 50min |
natural_image
Four cooking pots with crossed-out X marks, one with a curved handle, shown in sequence (no text or symbols)natural_image
Two identical cooking pots with crossed arrows indicating heating or cooling conditions (no text or symbols)| Modello | L(mm) | L(mm) | H(mm) | D(mm) | A(mm) | B(mm) | X(mm) |
| SS-24015 | 590 | 520 | 58 | 54 | 565 | 495 | 50min |
natural_image
Four cooking pots with crossed-out X marks, one with a plug and label (no text or symbols on pots)natural_image
Two cooking pots with crossed arrows indicating opposing pressure, one with cross symbol and the other with double-headed arrow (no text or labels)| Model | L(mm) | Š(mm) | H(mm) | D(mm) | A(mm) | B(mm) | X(mm) |
| SS-24015 | 590 | 520 | 58 | 54 | 565 | 495 | 50min |
ADVARSEL: 220-240V 50/60 Hz. strømforsyning er egnet til enfaset tilslutning, og 380-415V 50/60 Hz. strømforsyning er egnet til dobbelt-faset tilslutning.
VEDLIGEHOLDELSE OG VEDLIGEHOLDELSE
natural_image
Four cooking pots with crossed-out X marks, one with a coiled cord (no text or symbols)natural_image
Two cooking pots with crossed arrows indicating opposing pressure, one with cross symbol and the other with double-headed arrow (no text or labels)| Model L(mm) B(mm) H(mm) | D(mm) A(mm) B(mm) X(mm) | ||||||
| SS-24015 | 590 | 520 | 58 | 54 | 565 | 495 | 50min |
natural_image
Four cooking pots with crossed X marks and a battery plug symbol (no text or labels)natural_image
Two cooking pots with crossed arrows indicating opposing pressure, one with cross symbol and the other with double-headed arrow (no text or labels)Kuhinjska posoda je prazna ali ima zelo tanko dno
| Model | L(mm) | Š(mm) | H(mm) | D(mm) | A(mm) | B(mm) | X(mm) |
| SS-24015 | 590 | 520 | 58 | 54 | 565 | 495 | 50min |
UPOZORENJE: Napajanje 220-240V 50/60 Hz prikladno je za spajan-je monofazni, a napajanje 380-415V 50/60 Hz pogodno za priključak dvofazni.
ČIŠĆENJE I ODRŽAVANJE
natural_image
Simple line drawing of a shoe and a fork on a horizontal line, with checkmark and cross symbols (no text or labels)natural_image
Four cooking pots with crossed-out X marks, one with a curved tube (no text or symbols)Uvjerite se da je dno lonca glatko, da leži ravno na staklu i da je iste veličine kao zona za kuhanje. Koristite posuđe kuhinja čiji je promjer velik kao grafikon odabrane zone. Ako koristite lonac, maksimalno će se koristiti nešto više energije
natural_image
Two cooking pots with crossed arrows indicating opposing pressure, one with a cross symbol and the other with a double-headed arrow (no text or symbols)| Model L(mm) | široka (mm) | H(mm) D(mm) A(mm) B(mm) X(mm) | |||
| SS-24015 | 590 520 58 54 565 495 | 50min |
natural_image
Four identical cooking pots with crossed X marks, one with a curved handle, shown in sequence (no text or symbols)natural_image
Two cooking pots with crossed arrows indicating opposing pressure, one with cross symbol and the other with double-headed arrow (no text or labels)| Model L(mm) W(mm) | H(mm) D(mm) A(mm) B(mm) X(mm) | ||||||
| SS-24015 | 590 | 520 | 58 | 54 | 565 | 495 | 50min |
natural_image
Four cooking pots with crossed-out X marks, one with a curved tube (no text or symbols)natural_image
Two cooking pots with crossed arrows indicating opposing pressure, one with cross symbol and the other with double-headed arrow (no text or labels)| Model L(mm) | L(mm) | H(mm) | D(mm) | A(mm) | B(mm) | X(mm) | |||
| SS-24015 | 590 | 520 | 58 | 54 | 565 | 495 | 50min |
natural_image
Four cooking pots with crossed-out X marks, one with a curved handle (no text or symbols)natural_image
Two cooking pots with crossed arrows indicating heating or cooling (no text or symbols)| Modelo L (mm) W (mm) H(mm) D (mm) A(mm) B(mm) X(mm) | |||||||
| SS-24015 | 590 | 520 | 58 | 54 | 565 | 495 | 50min |
natural_image
Four cooking pots with crossed-out X marks, one with a curved handle (no text or symbols)natural_image
Two cooking pots with crossed arrows indicating opposing pressure, one with cross symbol and the other with double-headed arrow (no text or labels)| Modelo L(mm) | Ample (mm) | H(mm) | D(mm) | A(mm) | B(mm) | X(mm) | ||
| SS-24015 | 590 | 520 | 58 | 54 | 565 | 495 | 50min | |
DÉCLARATION DE CONFORMITÉ
DECLARATION OF CONFORMITY
This device complies with EU Low Voltage Directive 2014/35/EC. Electromagnetic Compatibility Directive 2014/30/EU. Directive 2015/863/EU on the restriction of the use of certain hazardous substances in electrical. Directive 2009/125/EC on the eco-design requirements applicable to energy-related products.

This symbol on the product or on the packaging indicates that this product can't be disposed as normal rubbish or household waste. All the electrical, electronic equipment's and battery-operated units must recycle in proper manner and according to the local municipal laws. You can recycle them by taking them to government authorized disposal centres or specialized bins which you can find in any nearby big super markets, electronics or electro domestics products stores or malls who have these types of facilities available.
Designed by: SOGO based on European quality standards Imported by: Sanysan Appliances S.L, NIF: B98753056, C/ Barcas 2, 2, 46002 Valencia, Spain Product manufactured in CHINA. After-sales service: sogosat@servicruz.es / 0034 911 084 833
- Symbols and Description:
- Important Notes:
- Safety instructions for the user
- General precautions during the use of electrical equipment
- Restrictions on use to avoid personal injury
- Restrictions on use when used with children and elders
- Instructions to follow while using the appliance
- WARNING:
- Electric Shock Hazard
- Health Hazard
- Hot Surface Hazard
- Cut Hazard
- Fire Hazard
- Electrical Safety
- Electrical Connection
- Circuit Breakers
- Disconnecting from mains
- - Fuse elements
- - Automated fuses
- - Embedded automated fuses
- - FI-circuit breaket (False Induction breaker)
- Electrical Connection Scheme
- CLEANING AND MAINTENANCE
- TECHNICAL SPECIFICATIONS
- PARTS DESCRIPTION
- INSTRUCTIONS WHILE USING INDUCTION HOB
- Advantages of induction cooking
- Before using your New Induction Hob
- Using the Touch Buttons
- Cookware suitable for induction
- Ferromagnetic vessels
- Choosing the right cookware
- Protect the glass surface
- Cookware empty or with a very thin base
- Cookware detection
- Cookware dimensions
- Using your Inudction Hob
- To start cooking
- If the display flashes the indication
- When you have finished cooking
- Locking the buttons
- To lock the buttons
- To unlock the buttons
- BOOST FUNCTION
- Using the BOOST function
- Over-Temperature Protection
- Automatic Safety Shutdown
- FANS
- Note:
- Using the Timer
- Cooking Guidelines
- Energy saving
- Simmer
- ERROR MESSAGES
- Installation
- Selection of installation equipment
- Before you install the hob, make sure that:
- When you have installed the hob, make sure that
- Cautions
- CONNECTION OF THE INDUCTION HÓB TO THE ELECTRICITY SOCKET.
- PORTANT:
- VEDLIGEHOLDELSE OG VEDLIGEHOLDELSE
- Kuhinjska posoda je prazna ali ima zelo tanko dno
- ČIŠĆENJE I ODRŽAVANJE
- DÉCLARATION DE CONFORMITÉ
- DECLARATION OF CONFORMITY
Brand : Sogo
Model : COC-SS-24015
Category : Cooker