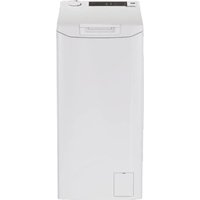
USER MANUAL THOSQ275D3-S HOOVER
EN Washing machine Top loader
Before using the device, carefully read the safety instructions. Before using the washing machine, it is absolutely necessary to remove the screws and transport lock spacers. For detailed instructions on the removal procedure, see the Installation Instructions.
1. Installation
Download the hOn App

1.1 - Transportation bolts removal
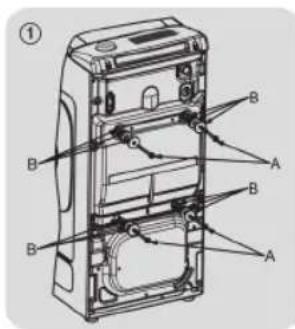
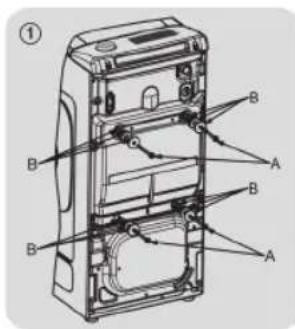
- Remove the 2 or 4 transportation screws (A) on the back and remove the 2 or 4 flat washers, rubber bungs and plastic spacer tubes (B) as illustrated in figure 1.
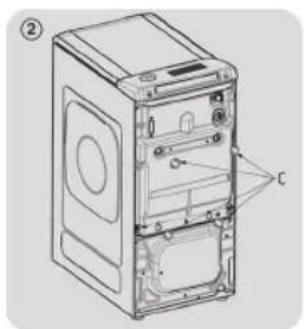
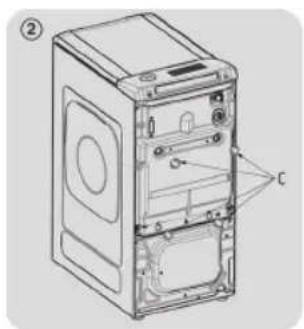
- Fit the trims provided "C" (fig. 2).
1.3 - Aligning the appliance
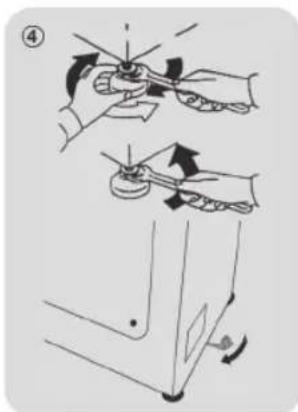
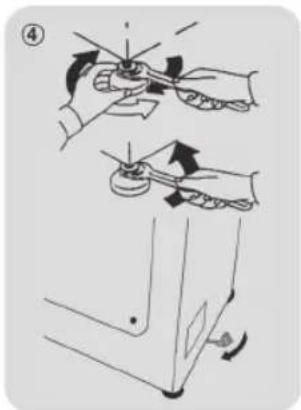
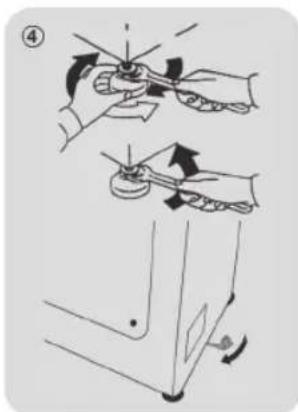
- Level the machine by adjusting the front feet (fig. 4).
a) Turn the nut clockwise to release the screw on the foot. b) Raise or lower the foot by rotating it until it stands firmly on the floor. c) Lock the foot in position by turning the nut anticlockwise until it comes up against the bottom of the washing machine.
- Check that the appliance is properly levelled.
- Check that the washing machine does not rock by trying to move two diagonally opposite top corners at the same time. If you move the washing machine from one place to another, you must level the feet again afterwards.
1.4 - Hydraulic connections
- The washing machine should be connected to the water mains via the new tube supplied with the appliance (inside the drum). Do not use the old tube for this purpose.
- Connect one end of the water inlet pipe with the elbow bend to the electrovalve (top rear part of the machine) and the other end to a tap or a plumbed-in 3/4" gas threaded connection.
- Place the washing machine close to the wall, ensuring that there are no bends or kinks anywhere in the tube.
- Hook the outlet pipe to the edge of the sink or preferably to a fixed drainage outlet of a diameter greater than that of the outlet pipe and at a height of min. 50 cm and a maximum of 75 cm from the floor (fig. 5).
- If necessary, use the curved* accessory to attach and support the outlet pipe more securely.
* Accessory sold separately.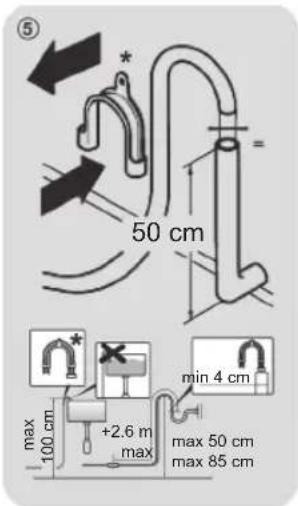
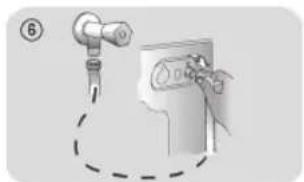
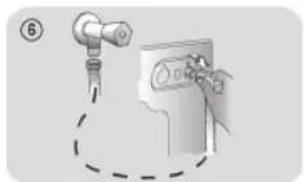
- Connect the water hose to the water supply tap (fig. 6) only using the hose supplied with the appliance (do not reuse old hose-sets).
- Some models may include one or more of the following features:
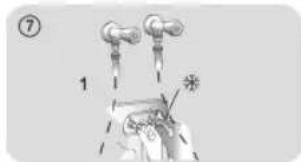
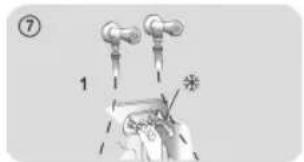
- HOT&COLD (fig. 7): water mains connection settings with hot and cold water for higher energy savings. Connect the grey tube to the cold water faucet and the red one to the hot water faucet. The machine can be connected to the cold water faucet only: in this case, some programs may start a few minutes later.
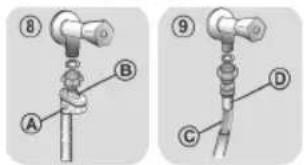
- AQUASTOP (fig. 8): a device located on the supply tube that stops water flow if the tube deteriorates; in this case, a red mark will appear in the window "A" and the tube must be replaced. To unscrew the nut, press the one-way lock device "B".
- AQUAPROTECT - SUPPLY TUBE WITH GUARD (fig. 9): should water leak from the primary internal tube "C", the transparent containment sheath "D" will contain water to permit the washing cycle to complete. At the end of the cycle, contact the Customer Service Centre to replace the supply tube.

2. Control panel
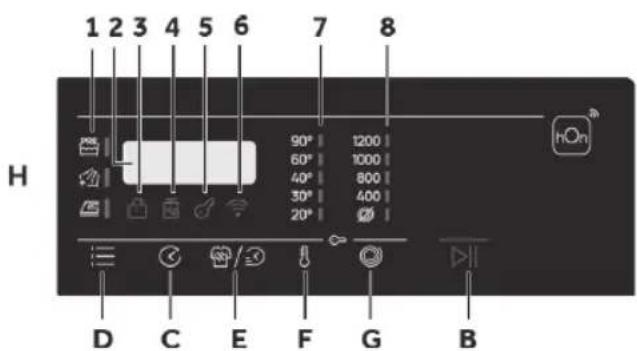
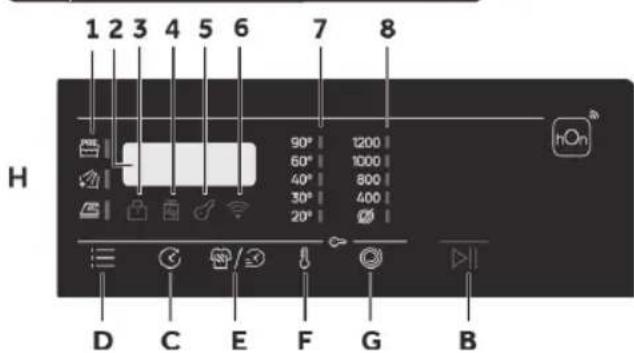
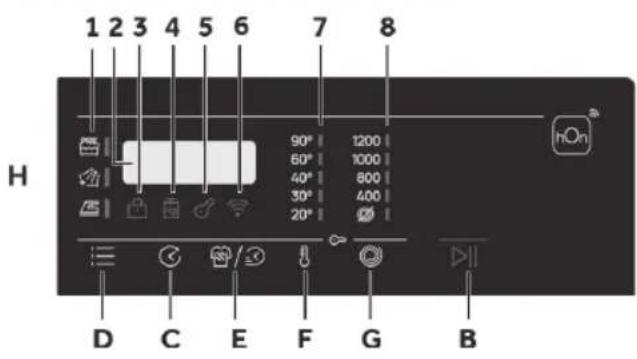
A Programme selector with OFF position B START/PAUSE button C DELAY START button D OPTIONS button E STAIN LEVEL/RAPID button F TEMPERATURE SELECTION button G SPIN SPEED button F+G CHILD LOCK H Digital display
Icons
1 OPTIONS indicator lights 2. CYCLE DURATION 3 DOOR LOCKED indicator light
4 KG MODE PLUS indicator
light (active only on certain programmes)
5 KEY LOCK indicator light
6 Wi-Fi indicator light 7 WASH TEMPERATURE indicator lights 8 SPIN SPEED indicator lights

Close the door BEFORE selecting the button PLAY/PAUSE. To start the selected cycle with the preset parameters, press PLAY/PAUSE. When the programme is running, the display will show the time to elapse.

This button allows you to change the temperature of the wash cycles. It is not possible to raise the temperature over the maximum allowed for the programme, in order to protect the fabrics. If you want to carry out a cold wash all the indicators must be off.

By pressing this button, it is possible to reduce the maximum speed, and if you wish, the spin cycle can be cancelled.

This button allows you to pre-programme the wash cycle to delay the start of the cycle for up to 24 hours.

This button allows you to choose between different options (depending on the selected programme):

Prewash (D) - This option allows you to make a prewash and it is particularly useful for heavily soiled loads (can be used only on some programmes). When activated, the indicator icon (E) lights up.

Extra rinse (D) - This option allows you to add one rinse at the end of the washing cycle and is useful for people with delicate and sensitive skin. When activated, the indicator icon (F) lights up.

Anti-crease (D) - This function allows you to minimize creases as much as possible, eliminating the intermediate spins or reducing the intensity of the last one.


This button allows you to choose between different options (depending on the selected programme):

Stain level (E) - This option allows you to choose between 3 levels of wash intensity modifying the length of the programme, depending on how much the fabrics are soiled (can only be used on some programmes as shown in the table of programmes).

Rapid (E) - The button becomes active when you select the RAPID (14'/30'/44') programme on the knob and allows you to select one of three durations indicated, depending on the type of fabric.

- Pressing simultaneously the buttons "TEMPERATURE SELECTION" and "SPIN SPEED" for about 3 seconds, the machine allows you to lock the keys. In this way, you can avoid making accidental or unwanted changes if a button on the display is pressed accidentally during a cycle.
- The key lock can be simply cancelled by pressing the two buttons simultaneously again or turning off the appliance.

APPLIANCE PAIRING (ON APP)
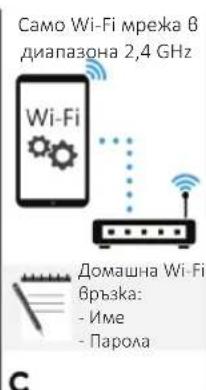
NOTE: The frequency of the home Wi-Fi network has to be set on the 2.4 GHz band. (5 GHz band not allowed).
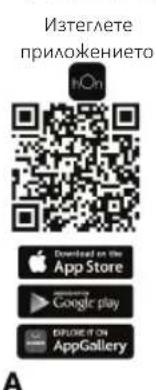
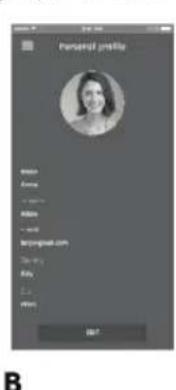
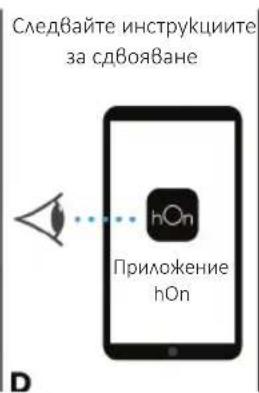
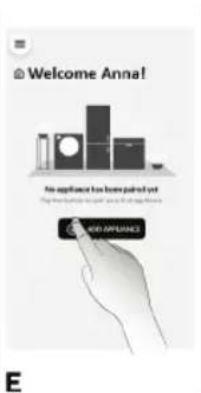
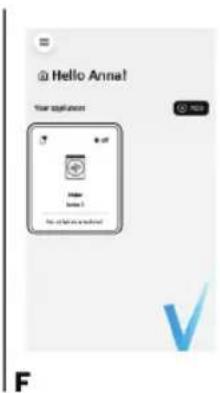
Download the hOn App on your device by framing the following QR code or by the link: go.haier-europe.com/ download-app Create the user profile (or log-in) and pairing the appliance following the instructions on the device display.
Download the
HOn App
A
Downloaded on the App Store
Google play
EPISODE OF ON AppGallery
B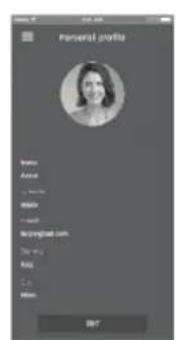
2.4 GHz band only Home Wi-Fi: - Name - Password C Follow pairing instructions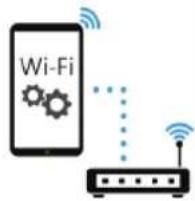
D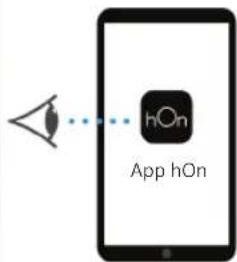
E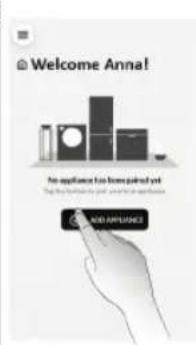
F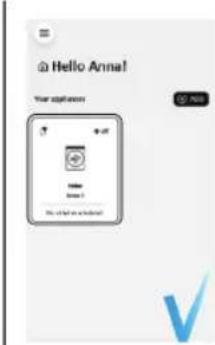
TO ENABLE REMOTE CONTROL
- Close the door and turn the knob to the REMOTE CONTROL (Wi-Fi) position. You can now manage your product from the app.
TO DISABLE REMOTE CONTROL
- Turn the knob to any position other than REMOTE CONTROL (Wi-Fi), without going through the OFF. If there is a cycle underway, it will continue. From the app it is possible to view the status of the product but not to control it.
2.2-Icons

Company
+OPHONS indicator lights (1)
The indicator lights show the options that can be selected by the relevant button.
CYCLE DURATION (2)
When a programme is selected the display automatically shows the cycle duration, which can vary, depending on the options selected.

DOOR LOCK indicator light (3)
For safety reasons the door is locked partially during the washing cycle. It is only possible to open the door at the end of the program or after the program was cancelled correctly. In case of high water level, high water temperature and during spinning it is not possible to open the door.

KG MODE PLUS indicator light (4): (active only on certain programmes).
Through every wash phase "Kg Mode Plus" allows to monitor information on the wash load in the drum and in the first minutes of the wash it:
- adjusts the amount of water required;
- determines the length of the wash cycle;
- controls rinsing according to the type of fabric selected to be washed it;
- adjusts the rhythm of drum rotation for the type of fabric being washed;
- recognises the presence of too much soap suds, and if necessary, adjust the amount of rinse water.
- adjusts the spin speed according to the load, thus avoiding any imbalance.

KEY LOCK indicator light (5): The indicator light shows that the keys are locked.

Wi-Fi indicator light (6): On models equipped with Wi-Fi, it indicates the status of the connection. It could be:

Wash temperature indicator light (7)
This shows the washing temperature of the selected programme that can be changed (where allowed) by the relevant button. If you want to carry out a cold wash, all the indicators must be off.

Spin speed indicator light (8)
This shows the spin speed of the selected programme; you can reduce or omit it by the relevant button.
3. Programmes
Yes
Yes, by pressing the button
Options
No
(A)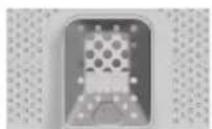
Detergent compartment for:

Detergent

Softener or care product

Prewash
| PROGRAMME | MAX.(MAX.) (see control panel) | DETERGENT | PRE WASH | EXTRA RINSE | ANTICRASE | STAIN LEVEL | DELAY START | |
| 5kg | 5.5kg | 6kg | 6.5kg | 7kg | 7.5kg | 8kg | 8.5kg | (MAX.) | 1 or 2 | | |
| COTTONS | 55.566.577.588.590° | | ● | ● | (●) | ○ | ○ | / | | |
| ECO40-60 | ECO 40-60 | 55.566.577.588.560° | | ● | ● | // / | ○ | ○ | | | |
| WOOL & HANDWASH | 1111112230° | | ● | ● | / ○ | ○ | / ○ | | | |
| 20°C | 20°C | 55.566.577.588.520° | | ● | ● | ○ | ○ | ○ | | | |
| SYNTHETIC ANDCOLOURED | 2.52.533.53.54460° | | ● | ● | (●) | ○ | ○ | ○ | | |
| DRAIN & SPIN | - | - | - | - | - | - | - | - | - | | | // / / / | ○ | | | | |
| RINSE | - | - | - | - | - | - | - | - | △ | ● | // / / | ○ | | | | | |
| FITNESS CARE | 22222.52.52.52.540° | | ● | ● | / ○ | ○ | / ○ | | | |
| SOFT CARE | 22222.52.52.52.540° | | ● | ● | // / / | ○ | | | | |
| STEAM CARE | 55.566.577.588.540° | | ● | ● | / ○ | // / | ○ | | | |
| ALLERGY CARE 60° | 2.52.533.53.54460° | | ● | ● | / ○ | // / | ○ | | | |
| RAPID CARE 14' | 1111111.51.540° | | ● | ● | / ○ | // / | ○ | | | |
| 11.5222.52.52.52.540° | | ● | ● | / ○ | // / | ○ | | | |
| 33333.53.53.53.540° | | ● | ● | / ○ | // / | ○ | | | |
| ALL IN ONE 59' | 55.566.577.588.540° | | ● | ● | / ○ | // / | ○ | | | |
| + | EXTRA CARE | 2.52.533.53.54430° | | ● | ● | / ○ | // / | ○ | | | |
| REMOTE CONTROL (Wi-Fi)Position that you have to select when you want to enable remote control through the App (via Wi-Fi). | | |
3.1 - Program descriptions
| COTTONS | This programme is suitable for washing coloured cotton garments at 40°C or for ensuring the highest degree of cleanliness for cotton resistant laundry washing at 60°C or 90°C. The final spin is at maximum speed that ensures excellent water removal. |
| ECO
40-60 | ECO 40-60 | The ECO 40-60 programme is able to clean normally soiled cotton laundry declared to be washable at 40C or 60C, together in the same cycle. This programme is used to assess the compliance with the EU Ecodesign legislation (environmentally friendly products design). |
| WOOL & HAND WASH | This programme performs a wash cycle dedicated to the wool fabrics that can be washed in a washing machine, the articles to be washed by hand or laundry items made from silk or specified as "Wash as Silk" on the fabric label. |
| 20°C | 20°C | This innovative programme, allows you to wash different fabrics and colours together, such as cottoms, synthetics and mixed fabrics at only 20°C and provides an excellent cleaning performance. Consumption on this program is about 40% of a conventional 40°C cottoms wash. |
| SYNTHETIC AND COLOURED | This programme allows you to wash different type's fabrics and different colours all together. The rotation movement of the drum and the water levels are optimized, both during the washing the rinsing phase. The accurate spin action, ensures a reduced formation of creases in the fabrics. |
| DRAIN & SPIN | The program completes the drain and a maximum spin. It is possible to delete or reduce the spin through the SPIN SELECTION button. |
| RINSE | This program performs 3 rinses with an intermediate spin (which can be reduced or excluded by using the appropriate button). It is used for rinsing any type of fabric, for example after a wash carried out by hand. |
| 7 | FITNESS CARE | The perfect combination of time and performance. Created to eliminate dirt from athletic garments and sportswear. A low temperature wash recommended for small loads of synthetic items. |
| SOFT CARE | Developed to take good care of delicate items, this programme washes at a low temperature in 59 minutes. An extended, in-depth rinse nourishes fabric fibres. |
| STEAM CARE | This programme uses a steam treatment to relax creases and achieve the ideal degree of humidity for easier ironing. Three different intensity levels can be selected via the button, designed for dry or wet garments and depending on the type of fabric. |
| ALLERGY CARE
60° | This programme offers thorough cleaning of all cotton items, sanitising and eliminating bacteria. It is an efficient high temperature washing cycle. Recommended for small loads. |
| RAPID CARE
14' - 30' - 44' | Saving without compromising! This new programme may be used to obtain excellent results while saving water, energy, detergent and time. This option washes at a medium temperature suitable for any kind of fabric. Recommended for small loads and lightly soiled items. |
| ALL IN ONE 59' | This programme allows you to wash different fabrics together such as cottoms, synthetics and mixed fabrics in only 59 minutes, using the full load of the washing machine, at 40°C (or less) temperature. This programme is particularly suited to slightly dirty fabrics. |
| EXTRA CARE | This new programme may be used to wash laundry of different colourfast colours and fabrics together without altering their original look and feel. Through a perfect emulsion of water and detergent, the best possible care of your clothes is guaranteed, with optimal washing performance at a temperature of 30°C. |
4. Daily use
- Connect the washing machine to a power supply and water connection (see installation chapter in the user manual).
- Prepare the laundry: Sort clothes according to fabric (cotton, synthetics, wool, or silk, etc.) and how dirty they are. Check the labels on your garments. Separate white clothes from colored ones. Empty pockets of objects like keys, coins, etc., and remove harder decorative objects.
- Put in the laundry piece by piece, avoiding overloads (check the different maximum load capacity according to the program). Close the door carefully. Make sure no pieces of laundry are pinched.
- Select the detergent and softener (when needed) and pour it into the correct compartments of the dispenser.
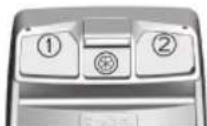
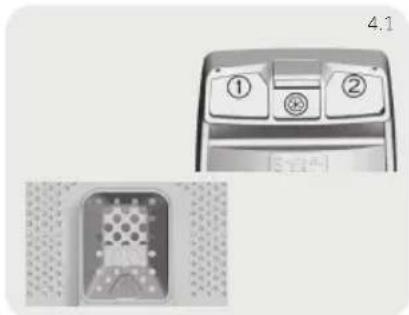
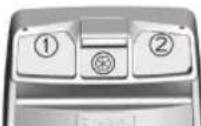
Open the dispenser drawer; the following components can be seen (Fig. 4.1):
- Compartment 1 is for powder detergent.
- Compartment 2 is for liquid detergent.
- The compartment is for fabric conditioners, scenting agents, and special additives such as starch, bluing, etc.
The recommendation on the type of detergents is suitable for the various washing temperatures; please refer to the detergent manual (see ).
- Select a program by turning the knob, choosing the one that fits the most according to the loaded garments. The display will show the program name, the main options, and the duration estimate.
- Add or remove options and change the parameters according to your specific needs.
- Press the Start/Pause button to start the program.
- When the cycle is finished, "END" is shown on the display. Switch off the washing machine by turning the selector to OFF. Remove your laundry as soon as possible in order to prevent wrinkles, bad odors and bacteria from proliferating.
5. Care and maintenance
5.1 - General machine cleaning
- Unplug the machine during cleaning and maintenance.
- Use a soft cloth with soap liquid to clean the machine case and rubber components.
- Do not use organic chemicals or corrosive solvents.
5.2 - Pump filter cleaning
It is recommended to clean the pump filter once a month.
Turn off and unplug the machine and open the cover on the bottom of the appliance. Prepare a flat container to catch leach water.
- Pull the drain hose out and hold its end above the container and open it. After complete drainage, close the drain hose and push it back into the machine.
- Unscrew and remove counter-clockwise the pump filter and clean it carefully.
- Put the filter back in the machine and close it carefully.
5.3 - Cleaning the detergent dispenser and its compartments
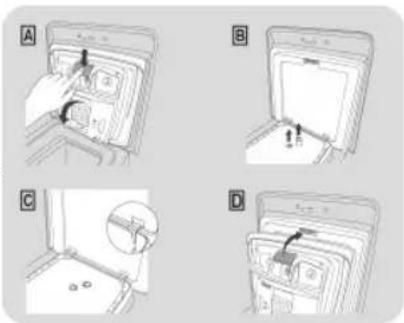
Always take care there are no detergent residues. Clean the drawer regularly:
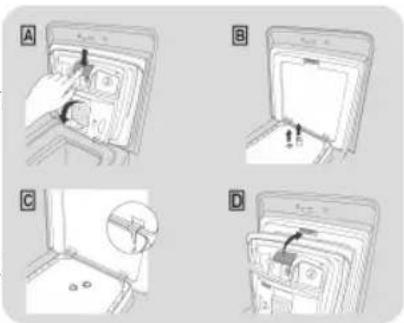
- Press button (A).
- Hold down the button and turn the detergent dispenser outwards.
- Remove the dispenser and clean it. It is recommended to remove any remaining detergent in the compartments to avoid any build up that could cause blockages and restrict the water flow from the dispenser to drum. Pulling out and extract the trap/traps (B) that are located in the back part of the dispenser and clean them carefully.
- Remove any solid residue which could block the holes in the compartments.
5.4 - Cleaning the drum
- Remove accidentally washed items, especially metal parts such as pins, coins, etc. from the drum and the groove of the door gasket (rubber ring) because they cause rust stains and damage.
- Use a non-chloride cleaner for removing rust stains. Observe the warning hints of the cleaning agent manufacturer.
- Do not use any hard objects or steel wool for cleaning. After the procedure, open the door, use a towel to clean the stains and foam around the gasket, and keep the inside and outside of the gasket clean.
Download and read the complete User Manual online for more details on Care&Maintenance


DELAY START button (C)
Detergent compartment for:

2 Detergent

APPLIANCE PAIRING (IN THE APP)
APPLIANCE PAIRING (IN THE APP)
Before starting the appliance, read the safety instructions carefully.

Before using the appliance, read the safety instructions carefully.
The primer is extremely important for removing the screws and locking caps during transport.
For detailed instructions on the priming procedure, see the "Installation Instructions".
1. Installation
Remove the supplied plug

1.1 - Removing the transport bolts
Remove the two transport bolts (A) from the rear and the two plastic spacers (B), as shown in Figure 1. - Install the supplied caps (Fig. 2).
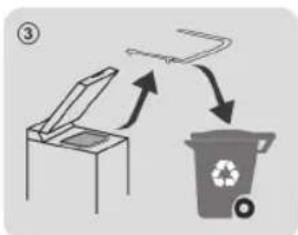
1.2 - Carefully remove the protective profile placed under the washing machine door (as shown in Figure 3).
1.3 - Leveling
Level the machine by adjusting the front feet (Fig. 4).
a) Turn the nut in the direction of the arrow to loosen the foot screw. b) Raise or lower the foot by turning it until it is stable on the floor. c) Lock the foot by turning the nut back against the arrow until it is tight against the machine body.
- Check that the machine is level.
- Check that the machine is stable by pushing it diagonally in opposite directions alternately.
- If you move the machine from one place to another, you must re-level the feet.
1.4 - Water connections
- The washing machine must be connected to the water supply with a new hose, supplied in the drum. Do not reuse the old hose. Connect one end of the hose to the water inlet valve (top rear of the machine), and the other end to the water supply tap with a 3/4" gas thread.
- Do not place the appliance close to walls, make sure it is not tilted or overturned. The exhaust hose must be directed towards the sink or for connection to the exhaust flange with a diameter larger than the exhaust hose or at a height of min. 50 cm, max. 75 cm from the floor (Fig. 5). If necessary, use the accessory kit to attach the exhaust hose more securely.
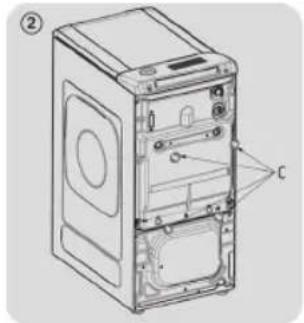
*The accessory kit is sold separately.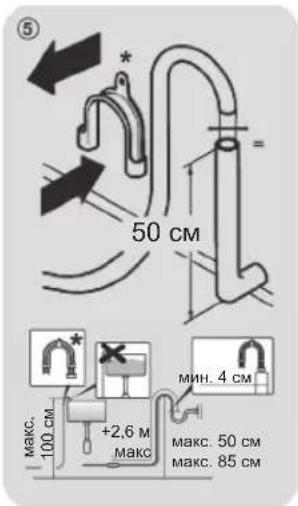
Connect the water inlet hose to the water tap (Fig. 6) only using the supplied hose (do not reuse old hoses). Depending on the model, one or more of the following options are included:
- HOT&COLD (Fig. 7): Connection to both hot and cold water supply for energy savings. Connect the blue hose to the cold water tap and the red hose to the hot water tap. The machine can also be connected only to the cold water tap: in this case, some programs may start with a slight delay. AQUASTOP (Fig. 8): A device that monitors the inlet hose and stops the water flow if the hose becomes blocked; in this case, the "A" indicator will show a red light, indicating that the hose needs to be replaced. To reset the device, press the reset button "B". AQUAPROTECT - inlet hose with protection (Fig. 9): If the main inlet hose "C" is damaged, the protective sleeve "D" will stop the water, ensuring safe operation of the program. After each program, the hose must be checked by a qualified technician for replacement of the inlet hose.


2. Control panel
Buttons
A Program selector with position indicator.
B Start/Pause button with delayed start button D Option button E Delay start button
F Temperature selection button G Spin speed button F+G Program end and digital display
Indicators
1 Light indicator for wash cycle phase 2 Light indicator for door locked
4 Light indicator for
RINSE HOLD
PROGRAMS (active only for certain programs)
5 Light indicator
3a AKJIIOUBAHE HA
KJABILLIITE
6 CBeTINHeHnDnKaTOp 3aWi-Fi 7 CBeTINHHN INHnKaTOPn3a
TEMNEPATYPAHAPNAHE
8 CBeTINHHN INHnKaTopn
3a CKOPOCT HA
LIHTPOΦYΓPAHE
2.1 - ByToHn

Bytoh 3a CTAPT/IIAY3A (B)
3aTbOpTe BpaTaTAPNEIINda n36epTe 6yToHa 3a TPhH/NAY3A.3a da cTapTnapeN36paHna CnpBnC npEdbapnteJIHO HAcTpoEHnTe npaMeTpni, HATNCHeTPbΓH/NAY3A. Korato nporpaMaTa Teue, Ha DnCnner Uc ce NOKaKe BpeMeTO, KOEt OCTBa.

ByToH 3a H3BOP HA TEMNEPATyPA (F)
To3n 6ytoh no3BOJRA npomraHa Ha TemnepaTpyata 3a uKJIte Ha npane. He e Bb3MOxHO da ce NOBUN TeMnepaTpyata Ha d MaKcMaIHO DOnyCTmAta 3a nporpaMaTa, 3a da ce 3ana3r TbkAHITE. Ako nCKaTe da nepete CbC CTyeHa BOda, BCNUKN HNDkATOpn Tp8Ba Da ca N3KIOUHeH.

ByToH 3a OOBOPOT HA LECTHTPOyTATA (G)
KaTo HaTnCHHeTe To3n 6yToH, MoXeTe Da HaMaJIte MaKcIMaJIHInTe oBOpOTn, aKO XeJAETe, MoXe Da OTMeHInTe UKNbIbT Ha CEHTpOphiYrata.

ByToH 3a OTIOXHECHCTAPT (C)
This button allows you to program a delayed start for the washing cycle up to 24 hours.

Option button (D)
This button allows you to select between different options (depending on the selected program):

Preliminary wash (D) - This option allows the execution of a preliminary wash and is especially useful for heavily soiled laundry (can be used only with certain programs). When activated, the indicator light (E) lights up.

Extra rinse (D) - This option allows you to add an extra rinse to the washing cycle and is useful for clothes with delicate and sensitive fabrics. When activated, the indicator light (F) lights up.

Anti-crease (D) - This function allows the creasing to be reduced to a minimum, by interrupting the spin cycle before the final spin.


Button for level of soiling with delicate/gentle (E)
This button allows you to select between different options (depending on the selected program):

Soiling level (E) - This option allows you to select between 3 levels of washing intensity, by changing the program duration depending on how soiled the fabrics are (can be used only with certain programs, as shown in the program table).

Gentle (E) - The button becomes active when you select GENTLE (14'/30'/44') from the settings menu and allows you to select one of the three gentle durations depending on the type of fabric.

START/PAUSE (F+G)
Simultaneously pressing the "TEMPERATURE" and "SPIN SPEED" buttons for about 3 seconds allows the locking of the buttons. This way you can avoid unwanted changes if a button is accidentally pressed during the cycle. The locking of the buttons can simply be cancelled by pressing the two buttons again simultaneously or by switching off the appliance.

CONNECTING THE APPLIANCE (IN THE APPENDIX)
NOTE: The frequency of your home Wi-Fi network must be set to the 2.4 GHz band. (The 5 GHz band is not supported).
- Download the app on your device by scanning the QR code or via the link: go.haier-europe.com/download-app. Create a user account (or log in) on your device, following the instructions on the device's display.
3A DA AKTINBIPATE INCTAHUOHHOTO YPABJIEHNE
Close the gate and press the button on the remote control (Wi-Fi). You can also control your product from the app.
3AДАDEAKTNBUPATEДИСТАНЦИОННОГОУПРАВЛЕНИЯ
Press the button on the position, different from the remote control (Wi-Fi), without going through the cycle. If the indicator lights up, the cycle will continue. The app is possible to check the status of the product, but not to control it.
2.2-Buttons

Indicator lights for options (1)
The indicator lights show the options that can be selected with the corresponding button.
Cycle duration (2)
When a program is selected, the display automatically shows the cycle duration, which can vary depending on the selected options.

Indicator light for door lock (3)
The safety display shows that the door is partially locked during the cycle. It is possible to open the door at the end of the program or if the program was cancelled correctly. It is not possible to open the door during the cycle, even at high water temperature.

Indicator light for intensive program mode (4): (active only for certain programs).
Through the "Intensive program" mode, you can follow the information about the heating in the drum, as during the first minutes of the cycle the mode:
- regulates the amount of necessary water; - determines the duration of the cycle;
- controls the rinsing depending on the selected washing programs;
- Press the button to start the drum for the type of fabric, which is being washed; the machine recognizes the load of solid heavily soiled laundry and, if necessary, adjusts the amount of water for rinsing. Adjust the spin speed according to the load, so as to avoid imbalance.

The indicator light for closing the door (5): The indicator light shows that
the door is closed.

The indicator light for Wi-Fi (6): On models equipped with Wi-Fi, it shows the status of the connection.
It can show.

The indicator light for washing temperature (7)
It shows the washing temperature for the selected program, which can be changed (where allowed) using the corresponding button. If you want to wash with cold water, all indicator lights must be off.

The indicator light for spin speed (8)
This shows the spin speed of the selected program, which you can adjust or skip using the corresponding button.
3. Programs

Press the button
O
Desired
No
A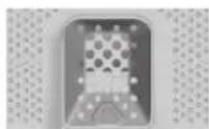
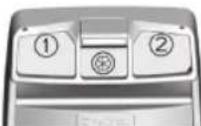
OTdJIeHHe 3a nepiINH npenapatn 3a:

Iepunen npenapat

OmeKOTteIuI npOdyKT 3a rpnka

Ppeepane
BnHaBn BnHmBaIe Ta Hma OCTaTbU NT npenapat. NocntBaIte peoOBHO YekMeJeKeTo:
- HATNCHETe 6yToHa (A). 3aApbKTe 6yToHa HaTnCHa T 3aBbPTeTe Do3aTopa 3a nepuIneH npenapat HABh.
- I3BaTe Do3aTopaIroNoHCTe.
- PnpopbHTeHoe da npemaxHeTe cIeHte OT nepuHn npenapat B OToJeHnra, 3a da n36erHeTe HaTpynBaHe, KOEt MOKe da npuHn 3aNyBaHnHa Da ORpaHnHn NotOKa Ha BODatao DT Do3aTopa KbM 6apa6aHa.
- N3dbpnaTe n 3BaIeTe fHITbpa/fHITPte (B), KOHTo/KOTo ce HAMnpa/T B3aHaTt HaO3aTopa, ITO/INIOUHCTe TBHMATEJHO. OTCTpaHete BCNUKIN TBbpDNI OCTaTBU, KOUTO 6NXa MOrJn da 6IOKIPAOTBOPNTBOTDeJIeHnRA.
5.4 -Почистван ha 6apa6аha
- OtctpaHTe cIyauHIO u3npaHIne TpeMEnu,OCo6eHO MeTaHn YacTn KaTo KApfN,MOHeTn Dp.,OT 6apa6aHa HxleBa Ha yIbTHHeHneTO Ha BpaTaTa (rMyeh npbCTe),3aIoTO pnuHHaBt NeTHa OT pJka NcEtN.
- N3noJ3BaIte NoCTBaIe npenapat 6e3 xIopnI 3a npemaxBaHe Ha netHa ot pbkda. Cna3BaIte npedynpeiTeJIHInTe CbBETn Ha npoN3BOIDTEJIe Ha noCTBaIe npenapat. He n3no3BaIte HnKaKBn TBbpDn PpeMeTn Nn CTomaHea BbHa 3a noCHCTBaHe. CneI npoueypata OTBopete BpaTata, n3noJ3BaTe Kbpna, 3a da noocntte neHaTa n HnHaTa OKoNo yNtHeHnTo I NOdBpkaTe BbTpewHocCTTa N BbHnHaTa CtpaHa HaynbTheHneto uCTn.
N3TeTne Hnpoetete NpHOTOpBkoBOCTBO 3a nOTpe6nteONHaH 3a NOBueye noDpo6HOCTn OTHOCHO rPkKaTa HnOdApbKkKaTa

HR Perilica rubljasgornjim punjenjem
Pije upotrebe uredaja pazljivo procitajte sigurnosne upte. Pije upotrebe perilice rublja, nuzno je ukloniti vijke i odstojnike transportne brave. Detaljne upute o postupku uklanjanja potražite u odjeljku Upute za ugradnju
1. Installation
Download the hOn app

1.1 - Removing transport screws
- Remove the 2 or 4 transport screws (A) from the rear side and remove the 2 or 4 flat washers, rubber plugs, and plastic spacer tubes (B) as shown in figure 1. Install the supplied pads "C" (figure 2).
1.2 - Carefully remove and dispose of the protective profile located under the washing machine door (as shown in figure 3).
1.3 - Leveling the appliance
Level the machine by adjusting the front feet (figure 4).
a) Turn the nut to the right to release the screw on the foot. b) Raise or lower the foot by turning it until it firmly touches the floor. c) Lock the foot in position by turning the nut to the left until it reaches the bottom of the washing machine.
Connect the inlet hose to the water tap (fig. 6) using the hose supplied with the appliance (do not reuse old hoses). Depending on the model, connect to hot and/or cold water according to the following functions: - HOT&COLD (fig. 7): Connect to both hot and cold water for energy savings. Connect the cold water hose to the cold water tap first, then to the hot water tap. The machine can also be connected only to the cold water tap: in this case, some programs may take a few minutes longer. AQUASTOP (fig. 8): device located on the inlet hose. If the hose leaks, the valve closes and a red indicator appears, and the hose must be replaced. To release the lock, press the one-way valve device. AQUAPROTECT - SAFETY HOSE WITH SHEATH (fig. 9): If water starts leaking from the inner hose "C", the transparent outer hose "D" will contain the water until the end of the wash cycle. Then contact the after-sales service to replace the inner hose.

2. Control panel
hOn
A Program selector with OFF position B Start/Pause button C Delayed start button D Function button E Soil level/Spin speed button F Temperature selection button G Spin speed button F+G Child lock H Display
Programs
1 Function indicators 2 Cycle duration 3 Door lock indicator
4 Indicator KG MODE PLUS (PEKG KG PIOC) (aKTHBnIN NIIe B NeBHnx IporpaMax)
5 Indicator BIOKVAHHKHOIOK
6 Wi-Fi indicator 7 Temperature indicators 8 Liquid level indicators
2.1-Buttons

Start/Pause button (B)
To start, press the Start/Pause button. To start the selected cycle with the previously set parameters, press Start/Pause. During the program execution, the remaining time is displayed on the display.

Temperature selection button (F)
The button allows you to change the temperature of the washing cycles. To protect the fabric, it is necessary to not exceed the maximum temperature allowed by the program. If you want to perform a cold water wash, all indicators must be off.

Spin speed button (G)
By pressing the button, you can change the maximum spin speed, and also, if desired, cancel it.

Delayed start button (C)
The button allows you to program the washing cycle to start at a later time, up to 24 hours.

Function button (D)
The button allows you to choose between different functions (depending on the selected program):

Prewash (D) - the function allows you to perform a prewash, especially suitable for heavily soiled items with stubborn stains (applies only in certain programs). To deactivate the function, press the indicator button (E)

Drying function (D) - allows you to dry items that are not intended for drying in a tumble dryer, or to dry items that are very delicate. To activate this function, press the indicator button (F).

Protection against creasing (D) - the function allows you to reduce the formation of creases, eliminating or reducing their intensity.


Button for selecting the drying level (E)
This function allows you to select additional functions (depending on the selected program):

Drying level (E) - the function allows you to select one of the drying intensity levels, which adjusts the program settings according to the drying level of the laundry (used in some programs, as indicated in the program table).

Button (E) - the button becomes active when you select a program with a cycle time (14'/30'/44') using the knob, and allows you to select one of the three specified durations, depending on the type of fabric.

Child lock (F+G)
Simultaneously pressing the buttons for temperature and drying level locks the controls for approximately 3 seconds. In this way, you can prevent accidental changes during the drying cycle. - The lock can be deactivated by pressing the same two buttons again or by turning off the machine.

CONNECTION TO THE APPLICATION (APPENDIX)
NOTE. For your home Wi-Fi network, you should set it to the 2.4 GHz frequency band (the 5 GHz band is not allowed).
Download the app on your device by scanning the QR code inside the frame or by following the link: go.haier-europe.com/download-app. Create a user profile (or log in to the system) and follow the instructions displayed on the device screen.
A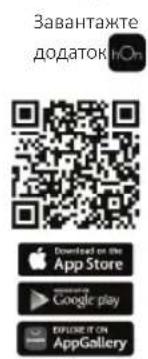
B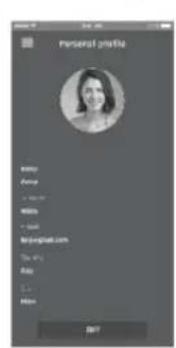
C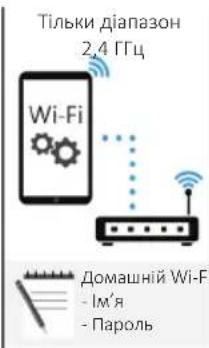
D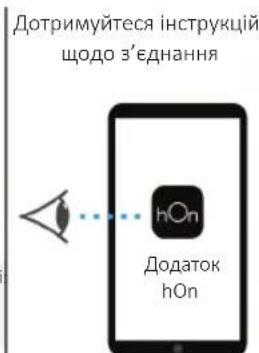
E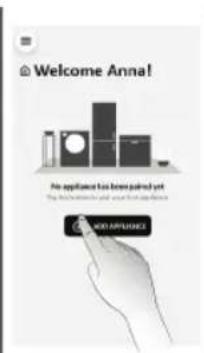
F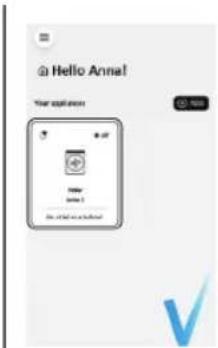
REMOTE CONTROL OPERATION
Close the door and return to the remote control position (Wi-Fi). Now you can control your device from the app.
TO EXIT REMOTE CONTROL
Turn the knob to any position except remote control (Wi-Fi), not passing through the off position. If the connection is lost, it will continue. The app can transmit the device status, but not control it.
2.2 - Program

+H
The indicators show the functions that can be selected according to each one.
CYCLE DURATION (2)
After selecting a program, the cycle duration is automatically set, which may vary depending on the selected functions.

DOOR LOCK INDICATOR (3)
For safety reasons, the door locks during operation. The door can only be opened at the start of the program or after a correct cancellation. At high water levels, high water temperatures, and during drying, opening the door is impossible.

KG MODE PLUS INDICATOR (4): (active only in certain programs).
During each washing phase, the "Kg Mode Plus" allows displaying information about the load in the drum and in the first phase:
- Depending on the need, the rinse water volume can be adjusted.
- Regular rinsing according to the type of program selected;
- Regular drum rotation according to the type of program, as indicated;
- Dispensing a large amount of detergent, if necessary, by adjusting the water volume for rinsing;
- Regular spin speed according to the load, ensuring proper rinsing.

Key lock indicator (5): The indicator shows that the keys are locked.

Wi-Fi indicator (6): On models equipped with Wi-Fi, it shows the connection status. It can be turned off.

Temperature indicator
Shows the temperature of the selected program, which can be changed using the corresponding key (if applicable). If you want to run the program in cold water, all indicators must be off.

Spin speed indicator (8)
Shows the spin speed of the selected program, which can be changed or canceled using the corresponding key.
3. Programs
Yes

Yes, by pressing the key
Optional
Hi
A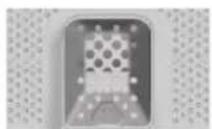
Distribution of washing agents:

Detergent compartment

Container or device for dosing

Preliminary wash
| ПОТРамA | (МАКС.) (ДИВ. панель керуваима) | (МАКС.) | MЛЮЧМ 3ACБ | (BH) HANESK
BHHHANESK
BHHHANESK
BHHHANESK
BHHHANESK
BHHHANESK
BHHHANESK
BHHHANESK
BHHHANESK
BHHHANESK
BHHHANESK
BHHHANESK
BHHHANESK
BHHHANESK
BHHHANESK
BHHHANISK
BHHHANISK
BHHHANISK
BHHHANISK
BHHHANISK
BHHHANISK
BHHHANISK
BHHHANISK
BHHHANISK
BHHHANISK
BHHHANISK
BHHHANISK
BHHHANISK
BHHHANISK
BHHHANISK | 1
a6o
2 | | |
| 5
KT | 6
KT | 7
KT | 7,5
KT | 8
KT | 8,5
KT | | | |
| BABOBHA | 55,566,577,588,590° | | ● | ● | (●) | ○ | ○ | / | | |
| ECO
40-60 | EKO 40-60 | 55,566,577,588,560° | | ● | ● | // | ○ | ○ | | | |
| BOBHA & PUYHE
ПРАнья | 11111122 | 30° | | ● | ● | / | ○ | / | | | |
| 20°C | 20°C | 55,566,577,588,520° | | ● | ● | | ○ | ○ | | | |
| СИNTETИKA T A
КОЛьОРОВI | 2,52,533,3,53,544 | 60° | | ● | ● | (●) | ○ | ○ | ○ | | |
| Злив ТА ВIDЖIM | - | - | - | - | - | - | - | | | | // | | | | |
| ПОLOOCKAHНЯ | - | - | - | - | - | - | - | △ | ● | // | | | | | |
| ФITHEС | 22222,52,52,52,540° | | ● | ● | / | ○ | / | | | |
| ДЕЛКATHП
ДОГЛД | 22222,52,52,52,540° | | ● | ● | // | | | | | |
| ДОГЛДЗА
ПAPОю | 55,566,577,588,540° | | ● | ● | / | // | | | | |
| ДОГЛДДДА
АLEPRПКIB 60° | 2,52,533,3,53,544 | 60° | | ● | ● | / | // | | | | |
| 14
LIIВИДКИ
ДОГЛД | 1111111,51,540° | | ● | ● | / | / | ○ | | | |
| 11,5222,52,52,52,540° | | ● | ● | / | / | ○ | | | |
| 33333,53,53,53,540° | | ● | ● | / | / | ○ | | | |
| ALL IN ONE 59' | 55,566,577,588,540° | | ● | ● | / | // | | | | |
| + | ДОДАТКOBИ
ДОГЛД | 2,52,533,3,53,544 | 30° | | ● | ● | / | // | | | | |
| Дистанційе керуваима (Wi-Fi)
Положенna, яке сід вибраши, якшо ви чочete дистанційно керуваши ріпіладом з дідатку (чereda-Wi-Fi). | | |
3.1 - Program description
| 6ABOBHA | LZ nporpama πiδxodntb dIy npaHnK KOblopoboro 6abOBHORO OJyary 3a Tempeatpyr 40°C
a6o dIy 3a6e3neueHH NaBUNTOO CTynepnH CYCTOTN Dny IpnAHN 6abOBHHOI CTIKOI 6IIIN3H 3a
Tempeatpyr 60°C a60 90°C. OctaHHe BIDKIMAHN BID6yBaETBC HA MaKCHMaJIbHI 5UINKOCTI,
LIO 3a6e3neueY eBIDMINHE BIDANLEHNN BOIN. |
| ECO
40-60 | EKO 40-60 | Pnporpama EKO 40-60 Hadae MOKJIbVICTb npaHnH HOPMaJIbHO 3a6pUdHEnHX 6abOBHARH
peey, iki MOKHa npaTn 3a Tempeatpyr 40°C a60 60°C paoBm 0DHNOMU 2kNI. Lz nporpama
BVKOPNCOTBOVcBcIg DaIg OIiHK BIDNOBIDHOCTI ZAKOHODABCTBY CC 3 ekOdu3aHy (npoeKtyBaHH
eKOLIGHIOI npOduKuII). |
| BOBH& PUYHE IPIAHN | LZ nporpama BIKOHUC LzIKI npaHnH, PO3p6bENH INI DIA BOHARH XTKAHIN, Aki MOKHa npaTn y
npaBnH MaUHIn, BIVo6IB 3 WOBKY ab6 3 No3HauKIO «IpaTn JIK WOBK» Ha eTiketci TKAHNH YI
peey, npia3NaHIX dIy pyuHOro npaHnH. |
| 20°C | 20°C | LZ HHOBaIiHa nporpama Do3BOVJe npaTn pa30 npi3Ht KAnHH N KObOp, HapnKlnd, 6abOBHARH, CNTETNUH I Ta 3MIaHAI TKAHNH, 3a Tempeatpyr 20°C i 3a6e3neueCv BIDMHN
pe3yIbTaTI. CnoKbAHH N pecypcBic 16cIpo nporpamoo CTANOBHT npin6LI3HO 40% BID 3BUnHORO
npaHnH BABOBHARH BIVo6IB 3a Tempeatpyr 40°C. |
| CNHTETNKA TA KOLbOPOBI | LZ nporpama Do3BOVJe npaTn OJNouchO TKAHNH PIaHIN TINIP BILOPi. PoTaIiH N pyx
6apabaha Ta piBn I BoN OnTNIM3yOTBC JIK NID cac faz p3 npaHn, Ta i niD cac noLOCKAHN.
OBepejXHe BIDKIMAHN 3a6e3neueYcMeHSeHH N yTBOPEHN RCKLADOK HA TKAHNHAX. |
| 3LNB TA BIDKIM | Pnporpama BIKOHUC 3IIN B iDfKIMAHN HA MAcCMaJIbH N BIuDIOKCTI. CkAsCyBat N BIDKIMAHN A b6
3MeHUnTI NIOU WIBIKICTB MOKHa 3a DOONOMOIO KHNK BIVIP BIDKIMAHN. |
| PONOCKAHN | LZ nporpama BIKOHYE 3 NOLOCKAHN 3 npomixHH M BIDKIMAHNAM (Rke MOKHa yNobIHNTN A b6
ckacyBatN 3a DOONOMOIO BIDNOBIDHOI KHNK). BIKOPNCOTBOVcBcIg Dny ONOLICKYBAHNN TKAHNH
6ydb-AKOTO TINy, HApNKlnd, nicra pyuHOrO npaHnH. |
| 7 | ΦITHEC | IdeaBbKMOBuaJy casy u pe3yJbTAqTNBHOCTI. CTBOPeHa Dny OChUeHH N cnpTINBHXpeey.
PekomeNDoBaHepnH 3 N3bKOIO TEMpePAToPOI i HebeLIMKIM 3aBaHTaKeHH N Dny peey i3
CINTEINH XTKAHN. |
| DELIKATHN I DONTIA | Poz3p6bNeHa dIy BIDMINHO DORIy 3a DeIiKaTHMnpeyAMN, ce nporpama npaHn H 3N3bKOIO
TEMpePAToPOI i TrpBaJIcTIO LNiUe 59 XBIINH. DodaTKOBe rIbboke NolockHH NOKPAUe CTAN
BOLOKOH TKAHNH. |
| DOPTLA 3A IAPOIO | U zui nporpama npaoba OBOPACBIA BIKOPNCOTBOVcBcIg Dny NOM'KShenHH CkLADOK i DOCSHENH
ideaBHO rPBH BOLDROCTI Dny IerWTO npacvBaHNN. 3a DOONOMOIO KHNK MoKHa BIBPATN
Tpi p3HbipBbH IIHTCINBHOCTI, npia3NaHEnI Dny cyux xaboBONHXpeey, 3aekxhoBVDINy TINy
TKAHNHN. |
| DOPTLA DIA
AJLEPRIKIB 60° | LZ nporpama 3a6e3neueY ePaHnH BCIX 6abOBHARH Npeey 3 de3iHfpeKUeTo T 3HsUeHHM
6aKtepi. Lce efektivniz nIpaHnH 3 BICOKOO TEMpePAToPOI. PeKomeNDoBaH O HebeLINIke
3aBaHTaKeHH. |
| LWBIDKN I DONTIA
14'-30'-44' | EkoHOMIE 6e3 kOMnpomiciB lI HoBa nporpama 3a0uAdKyE BVOny, eEleKtpoeheprIO, MIOchN 3acIb
i cac, Do3BOJIAOHy OTPMATN BIDMINH ppaHnH. PpaHnB VIKOHy TcBcIg 3cepehNBO
TEMpePAToPOI, kIa NIDcoNtB Dny BCIX TINB TKAHNH. PeKomeNDoBaH O nla TMPEPAToP 40°C
3aBaHTaKeHHpeey i3 He3NaHUMN 3a6pUdHennHMM. |
| ALL IN ONE 59' | LZ nporpama Do3BOJAE npaTn p3Hni TKAHNH pao3OM, HapnKlnd, 6abOBHARH, CNTETNUH T A 3MIaHAI
TKAHNHN LiIe 3a 59 XBIINH 3 NobHM 3aBaHTaKeHH N ppaBHOI MAUHNI I 3a TEMpePAToP 40°C
(a60 meHue). Lz nporpama Ooc6bINO BIDXOHTB dny 3JIeKg 3a6pUdHennH TKAHN. |
| DOATKOBH I DONTIA | LZ HOY nporpama MoKHa BIKOPNCOTBOVAtn Dny 6e3neueHOr O o6eKHO rnpaHnpey
3 p3HINX TKAHNH i PI3HORO KObOpy, kIe He NINHOITb. 3a,b,d,e,IdeALNH KOMbHaJIbOBoI BDOIN IIIac6by
dny npaHnR rapaHTyEbCBy haiKpaUH moKJIbH N DOrgIaD 3a BAUIMM peayAm 3a Tempeatpyr 30°C 3ontmalmbHIM pe3yIbTAOM. |
VALINNAT button (D)
APPARATPARING (PA APP)
NOTE: The frequency of the home Wi-Fi network must be in the 2.4 GHz band. (The 5 GHz band is not allowed).