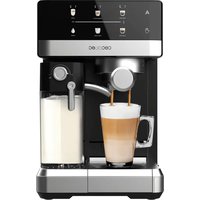
Power Espresso 20 Steel Pro Latte - Coffee machine CECOTEC - Free user manual and instructions
Find the device manual for free Power Espresso 20 Steel Pro Latte CECOTEC in PDF.


User questions about Power Espresso 20 Steel Pro Latte CECOTEC
0 question about this device. Answer the ones you know or ask your own.
Ask a new question about this device
Download the instructions for your Coffee machine in PDF format for free! Find your manual Power Espresso 20 Steel Pro Latte - CECOTEC and take your electronic device back in hand. On this page are published all the documents necessary for the use of your device. Power Espresso 20 Steel Pro Latte by CECOTEC.
USER MANUAL Power Espresso 20 Steel Pro Latte CECOTEC
Cafeteria Semiautomática/Semi-automatic coffee maker
1.Parts and components 42
2. Before use
3. Operation 43
4. Cleaning and maintenance
5 Troubleshooting
6. Technical specifications 52
7. Disposal of old electrica
and electronic appliances
8. Technical support and warranty
9. Copyright
SOMMAIRE
Read these instructions thoroughly before using the device. Keep this instruction manual for future reference or new users.
- All safety instructions must be closely followed when using the appliance.
- This symbol means "Caution, Hot Surface". Accessible surfaces are likely to heat up during use. Be careful not to burn yourself.
- This device is designed for domestic use only and is not intended for bars, restaurants, farmhouses, hotels, motels, and offices.
- The appliance must not be used by children. Keep this appliance and its power cord out of their reach.
- This appliance can be used by persons with reduced physical, sensory, or mental capabilities or lack of experience and knowledge if they have been given supervision or instruction concerning the use of the appliance in a safe way and understand the hazards involved.
- Children must not play with the appliance. Cleaning and user maintenance should not be carried out by unsupervised children.
- WARNING: the filling opening or the water tank must not be opened during operation.
- WARNING: take precautions to avoid spillage of liquids on the cable.
- WARNING: incorrect or improper use can be dangerous for the user and damage the appliance. Use the appliance only for the purposes described in this manual. The surface of the heating element is subject to residual heat after use.
-
Ensure that the mains voltage matches the voltage specified on the appliance rating label and that the plug is earthed.
-
Do not immerse the cable, plug, or any other non-removable part of the device in water or any other liquid or expose electrical connections to water. Make sure your hands are dry before handling the plug or switching on the device.
- Warning: if the device falls accidentally in water, unplug it immediately. Do not touch the water!
- Check the power cable regularly for visible damage. If the cable is damaged, it must be replaced by the official Technical Support Service of Cecotec
- in order to avoid any type of danger.
- WARNING: do not use the appliance if its cable, plug, or housing are damaged, nor after it malfunctions or has been dropped or damaged in any way.
- Do not twist, bend, pull, or damage the power cable. Protect it from sharp edges and heat sources. Do not allow the cable to touch hot surfaces. Do not let the cable hang over the edge of the working surface or worktop.
- This appliance is not intended to be operated by means of an external timer or separate remote-control system.
- Turn off and unplug the appliance from the mains supply when not in use and before cleaning it. Pull from the plug, not the cable, to disconnect it from the outlet.
- Supervise children to prevent them from playing with the appliance. Close supervision is necessary when the appliance is being used by or near children.
- Place the appliance on a dry, stable, flat, heat-resistant surface.
- Do not use the appliance under the following circumstances:
- On or near a gas or electric hob, in heated ovens, or near open flames.
-
On soft surfaces (such as carpets) or where it may tip over during use.
-
Outdoors or in areas with high humidity levels.
- Do not cover the appliance during operation.
- Never leave the device unattended during use. Unplug it from the mains supply when you finish using it or when you leave the room.
- Do not try to repair the device by yourself. Contact the official Cecotec Technical Support Service for advice.
- Cleaning and maintenance must be carried out according to this instruction manual to make sure the appliance functions properly. Turn off and unplug the appliance before moving and cleaning it.
- Do not wash the appliance in dishwashers.
- No liability is accepted for any eventual damage or personal injuries derived from misuse or non-compliance with this instruction manual.
INSTRUCTIONS DE SECURITE
- Cup heating zone
- Pressure indicator
- Control panel
- Filter holder bracket
5.Metal grille - Drip tray
- Inner drip tray
- 1-cup filter
9.2-cup filter - Filter holder
- Water tank
- Milk tank cover
- Milk outlet knob
- Milk tank locking switch
- Milk tank pipe
- Milk tank connector
- Milk spout
18.Milk tank
19.Milk tank base - Pressing powder spoon
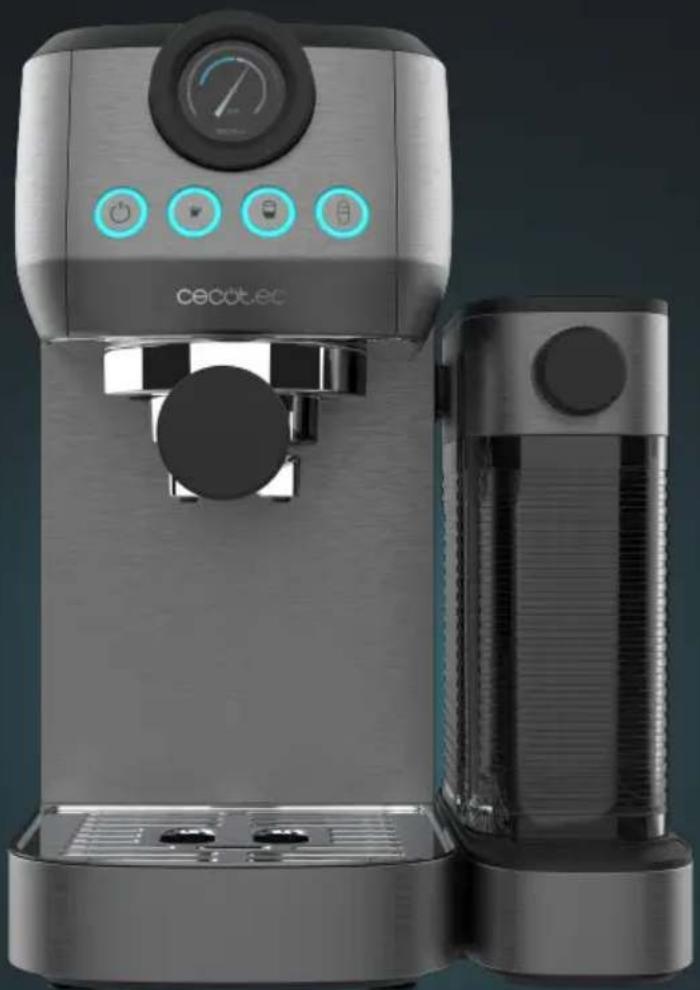
Control panel
Figure 2
A. Power button
B. Espresso button
C. Cappuccino button
D. Latte button
E. Pressure gauge
NOTE:
the graphics in this manual are schematic representations and may not exactly match the device.
2. BEFORE USE
This appliance is packaged in a way as to protect it during transport. Take the device out of its box and remove all packaging materials. You can keep the original box and other packaging elements in a safe place. This will help you prevent damage to the device when transporting it in the future. In case the original packaging is disposed of, make sure all packaging materials are recycled accordingly.
- Make sure all parts and components are included and in good conditions. If there is any piece missing or in bad conditions, contact the official Cecotec Technical Support Service immediately.
- Wash the water tank with its cover, the milk tank with its cover, the pressing powder spoon and filter as well as the filter holder with lukewarm water and a little neutral dishwashing detergent. After that, rinse with clean water and dry.
- Also, clean the housing of the espresso machine and the drip tray with its grille with a soft damp cloth and dry all parts.
Box content
- Power Espresso 20 Steel Pro Latte Espresso Machine
Filter holder
-1-cup filter:
-2-cup filter - Pressing powder spoon
Milk tank
-Instruction manual
3. OPERATION
- Fill the water and the milk tank with cold water up to the MAX mark on the tank.
- Connect the plug to a socket that has a suitable voltage.
- Press the power button. Next, the indicator light will turn on and the espresso machine will automatically start to preheat. Once the preheating process is completed, all buttons will light up steadily. The preheating process takes about 2 minutes.
- Place a cup under the coffee spout, turn the milk spout and press and hold the Latte button for three seconds. Let the hot water run out for about 8 seconds and press the Latte button again to stop the water flow. This process allows the water to pass through to the pump the first time it is used, and it also cleans the pipes.
ATTENTION: the first time you use the espresso machine it may make a loud noise or vibrate. This is normal for a 20-bar pressure pump. When you use it again, it will make less noise.
ENGLISHENGLISH
- Put the filter in the filter holder.
ATTENTION: you may find it a little difficult to remove the filter from the filter holder when you want to change it. You can use another filter for leverage.
- Insert the filter holder without ground coffee into the upper part of the espresso machine by making a 45^ movement to the left and turn it back to the right until it clicks into position. The filter holder must be perpendicular to the machine or slightly inclined to the right.
- Put an empty cup under the filter holder and press any button mode to start preparing coffee.
B. Once the preparation process is complete, empty the water from the tank. The espresso machine is now ready for use.
Espresso preparation
- Remove the filter holder and fill the filter with ground coffee using the pressing powder spoon supplied with the espresso machine.
RECOMMENDATION: 7-9 g for a single cup and 13-15 g for a double cup. The amount may vary depending on your preferences and the type of coffee you have used.
- Compress the coffee with the pressing powder spoon. The ground coffee must be pressed evenly to obtain a well levelled and smooth surface. Clean any coffee residue from the edge of the filter holder.
- Insert the filter holder into the upper part of the espresso machine by making a 45^ movement to the left and turn it back to the right until it clicks into position. The filter holder must be perpendicular to the machine or slightly inclined to the right.
- Place the preheated cup(s) under the filter holder.
- Press the Espresso button once for a short coffee size. While coffee is being dispensed, the button will illuminate blue.
- Press the Espresso button twice to obtain a longer result if desired. While coffee is being dispensed, the button will illuminate green.
- The machine will dispense coffee according to your selection and automatically turn off the buttons indicating that the cycle is finished.
The taste of the coffee will depend on different factors, such as the type of coffee bean, the degree of roast, the freshness, the coarseness or fineness of the grind, the amount of ground coffee and the tamping pressure. Try adjusting those factors one at a time until you get the taste you want.
Coffee pressure gauge
The needle of the pressure gauge indicates the extraction pressure
Ideal pressure zone for espresso
When it is positioned anywhere in the espresso zone during extraction, it means that the espresso has been extracted at the ideal pressure.
Low pressure zone
- When the pressure gauge needle is below the espoo range during extraction, this indicates that the esso has been extracted with insufficient pressure.
This can occur when water passes through the ground coffee too quickly, resulting in espresso that is under-extracted, watery, earthy, and lacking increa and flavour. - Possible causes of insufficient extraction include too coarse grind, insufficient coffee in the filter, insufficient tamping or a combination of all these factors.
High pressure zone
- When the pressure gauge needle is above the espesso range during extraction, this indicates that the espesso has been extracted with too much pressure.
This can occur when the water passes through the ground coffee too slowly, resulting in an over-extracted, very dark, and bitter espresso with a mottled and uneven crema. - Possible causes of over-extraction are too fine grind, too much ground coffee in the filter, excessive tamping, or a combination of all of these.
Cappuccino preparation
- Place the milk tank in position by fitting the spout into the hole on the right-hand side of the machine and press the locking switch. When you do so, the Cappuccino and Latte button lights will illuminate indicating that these two options are now available.
ATTENTION: if the switch is not in the locking position, the machine will not allow you to use the Cappuccino and Latte functions.
ATTENTION: fill the tank with cold water (between 5 and 10^ ).
- Follow the steps indicated in 'Espresso preparation' to place the coffee in the filter holder and attach it to the machine.
- Place a cup under the coffee pouring zone and make sure that the milk spout points towards the inside of your cup.
- Press the Cappuccino button once for a short coffee size. While coffee is being dispensed, the button will illuminate blue.
- Press the Cappuccino button twice to obtain a longer result: if desired. White coffee is being dispensed, the button will illuminate green.
ENGLISHENGLISH
- The machine will dispense coffee according to your selection and automatically turn off the buttons indicating that the cycle is finished.
NOTE: for a short result, use the 1-cup filter. For a long result, use the 2-cup filter. Be sure to clean the milk spout after each use to prevent the milk from drying out and causing future odours. Please refer to the cleaning instructions section.
Latte coffee preparation
- Follow the same first three steps as specified in the Cappuccino preparation section.
- Press the Latte button once for a short coffee size. While coffee is being dispensed, the button will illuminate blue.
- Press the Latte button twice to obtain a longer result if desired. While coffee is being dispensed, the button will illuminate green.
- The machine will dispense coffee according to your selection and automatically turn off the buttons indicating that the cycle is finished.
NOTE: for a short result, use the 1-cup filter. For a long result, use the 2-cup filter. Be sure to clean the milk spout after each use to prevent the milk from drying out and causing future odours. Please refer to the cleaning instructions section.
How to adjust the coffee size for Espresso, Cappuccino, and Latte
The machine allows you to customise the size of the different modes.
Adjusting the Espresso size
- Press and hold the Espresso button for 3 seconds. The light will start flashing green, indicating that the machine is ready to reconfigure the quantities.
- Press the Espresso button once again (twice if you intend to reset the long mode) and coffee will start to come out.
- Press the Espresso button again when you have drawn off the desired amount of espresso. The machine will beep three times to indicate that the settings have been successfully saved.
NOTE: the possible size of coffee that can be stored is between 20 and 200 mL
Adjusting the Cappuccino size
- Press and hold the Espresso button for 3 seconds. The light will start flashing green, indicating that the machine is ready to reconfigure the quantities.
- Press the Cappuccino button once (twice if you intend to reset the long mode) and milk will start to come out.
- When you have extracted the desired amount of milk, press the Cappuccino button again.
The machine will start to dispense coffee.
4. Press the Cappuccino button again when you have drawn off the desired amount of coffee. The machine will beep three times to indicate that the settings have been successfully saved.
Adjusting the Latte size
- Press and hold the Espresso button for 3 seconds. The light will start flashing green, indicating that the machine is ready to reconfigure the quantities.
- Press the Latte button once (twice if you intend to reset the long mode) and milk will start to come out.
- When you have extracted the desired amount of milk, press the Latte button again. The machine will start to dispense coffee.
- Press the Latte button again when you have drawn off the desired amount of coffee. The machine will beep three times to indicate that the settings have been successfully saved.
NOTE: the possible size of coffee that can be stored is between 20 and 200 mL The milk dispensing time varies in the range of 6 to 60 seconds.
Reset the default amount
To reset the amount in any mode, press and hold the Espresso and Cappuccino buttons for 5 seconds. The machine will return to its original default settings.
Warning for lack of water
For low water warning, the Espresso, Cappuccino, and Latte buttons will flash green simultaneously. Once the water shortage warning is activated, proceed as follows:
- Refill the water tank with water at room temperature.
- Place an empty cup under the brewing head and point the milk spout into the cup.
- Press one of the Espresso, Cappuccino, or Latte buttons. The machine will start dispensing hot water.
- Once the hot water has finished flowing out, it means that the internal pipes of the coffee machine are full and clean. The buttons will light up again and the machine will be ready for use again.
WARNING: never press any of the buttons after the low water warning has been triggered without refilling the water tank.
Standby mode
The machine will enter standby mode after 15 minutes of non-use. All buttons will turn off. In case you want to use it again, press the power button and proceed as desired.
ENGLISHENGLISH
4. CLEANING AND MAINTENANCE
Regular cleaning and maintenance guarantee that the coffee machine works properly and ensure that the coffee taste is optimal, that there is a constant flow of coffee and that the milk froth is excellent for a long time.
Cleaning the milk tank and its spout
Once you have finished preparing your coffee with milk, you can either store the milk tank with milk directly in the refrigerator or completely clean it together with the milk spout. It is highly important to clean the milk frothing system immediately after preparing cappuccino or latte. Milk residues can block the system and cause problems, which negatively influences the taste of the coffee or creates a disgusting odour.
To clean the milk spout, follow the instructions below:
- Place a large empty cup under the milk spout and make sure there is water in the water tank.
- Point the milk spout into the cup.
- Press and hold the Latte button for 3 seconds. The machine will start producing hot water from the milk spout.
- This cleaning cycle will last for 35 seconds and then will automatically stop.
- You can repeat steps 1 to 4 to make sure milk residues are completely removed.
- The milk spout is now clean, and the milk tank can be stored in the refrigerator.
If you also intend to clean the milk tank, follow the instructions below:
- Place a large empty cup under the milk spout and make sure there is water in the water tank.
- Remove the milk tank from the machine and get rid of the remaining milk. Fill the milk tank with clean water.
- Point the milk spout into the empty cup.
- Press and hold the Latte button for 3 seconds. The machine will start producing hot water from the milk spout. This cleaning cycle will last for 35 seconds and then will automatically stop.
- Press and hold the Cappuccino button for 3 seconds. The machine will start producing steam. This process will last for 2 minutes and then will automatically stop.
- You can repeat steps 1 to 5 to make sure milk residues are completely removed.
- Rinse and wash all parts of the milk tank and cover thoroughly with soap and warm water. Do not use abrasive cleaners or scouring pads as they will scratch the finish.
NOTE: the milk tank and its cover are dishwasher safe.
Cleaning the filter holder and filters
Keep the filter holder and filters clean to ensure optimal results.
WARNING: to avoid burns, remove the filter only when the filter holder has cooled down completely.
- Remove the filter from the holder and wash it with warm water.
- If you notice any faults when brewing coffee, immerse the filter in boiling water for 10 minutes and then rinse it with top water.
Cleaning of the head where the filter holder is placed
Regularly remove ground coffee residue from the coffee head with a brush and wash it with hot water following the steps below.
- Insert the filter holder into the machine upper part without ground coffee.
- Place an empty cup under the brewer head.
- Press the espresso button twice and fill the cup with water.
- Remove the filter holder from the brewer head and clean it with a dry cloth.
WARNING: do not attempt to disassemble the brewer head. It will damage the head and may cause Leakage.
Descending
To ensure that your coffee machine works properly and that the taste of your coffee is preserved, it is necessary to descale, clean and check the machine periodically. In addition, after 500 times of preparation cycle, a descending warning will appear. The power button will flash 5 times to indicate that the machine needs to be descaled. The descending warning will appear every time you switch on the machine if you do not run the cycle. Please, follow the next 4 steps to descale the machine.
1. Fill the water tank with coffee machine descaler (4 ports water to 1 part descaler) up to the MAX mark.
ATTENTION: please also refer to the instructions of the descaler product. Use a commercial household descaler or use citric acid instead. In this case, use 100 parts of water to three parts of citric acid.
- Place a cup or any other suitable container on the metal tray and press and hold the Cappuccino and the Latte button at the same time for 5 seconds. The machine will start the descending process, which will last 6 minutes and stop automatically.
- Repeat the above steps until all the water with the descending product is used up.
- Then, repeat the process two more times using only CLEAN TAP WATER without descaler.
CAUTION: the parts of the espresso machine and accessories are not dishwasher safe.
ENGLISH ENGLISH
5.TROUBLESHOOTING
| Problem Cause Solution | s | |
| The machine does not work | The machine is not switched on or the power plug is not plugged in. | Make sure that the power plug is plugged in. that the power button has been pressed and the buttons light up blue. |
| The socket has no power. Check the electrical installation to which it is connected. | ||
| Coffee does not come out of the filter holder | The water tank is empty. Fill in the water tank. | |
| The water tank is not correctly installed | Remove the water tank and install it correctly. | |
| The machine cannot pump water | Press and hold the Latte button for 3 seconds to perform the cleaning cycle. This process will help the machine to pump water. | |
| The filter is clogged. Clean the hole in the filters with a pin. | ||
| Coffee comes out very slowly from the filter holder | The coffee is very finely ground | Ensure an adequate degree of grinding. |
| There is too much coffee in the filter. | Ensure the right quantity. | |
| The ground coffee is pressed too hard. | Press the ground coffee with less force. | |
| The filter is clogged. Clean the hole in the filters with a pin. | ||
| Coffee comes out fast The machine has not been preheated. | The coffee has been ground too coarseely. | Ensure an adequate degree of grinding. |
| There is too little coffee in the filter. | Add a little more coffee to the filter. | |
| The ground coffee is not pressed hard enough. | Tamp coffee a bit harder. | |
| Coffee is cold The machine has not been preheated. | Let hot water run through the machine with the filter holder inserted (with filter but without coffee grounds) before you draw off the first coffee to heat up the machine. | |
| Coffee is too weak You are using the 1-cup filter. | For a stronger result, use the 2-cup filter. |
| The amount of ground coffee is low. | Increase the amount of coffee. |
| The ground coffee is too coarse. | Use a finer grind. |
| Water accumulates under the coffee machine | Remove the water tank and install it correctly. |
| The drip tray is filled with water. | Empty and clean the drip tray. |
| Coffee is dripping from the edge of the filter holder | Make sure you use the right amount of coffee. |
| The ground coffee sticks to the sealing gasket of the brewing head. | Turn the machine over, wait until it has cooled down and then clean the filter, filter holder and brew head so that there is no coffee residue on the sealing gasket. |
| The filter holder is not completely closed. | Insert the filter holder and turn the handle clockwise until you feel some resistance. |
| The cappuccino and latte buttons do not light up and these modes are not available | Insert the milk tank in the device. |
| The locking switch has not been activated. | Operate the locking switch. |
| The Espresso, Cappuccino, and Latte buttons flash green | the water tank is empty. |
ENGLISH ENGLISH
| The milk is not frothy after foaming or does not come out of the frothing tube | The milk is not cold enough. | Chill the milk and jug before making cappuccino or latte. |
| The foam dispenser tube is blocked. | Follow the instructions to clean the milk tank and the foam dispensing tube. | |
| The size of cappuccino or latte that comes out is different every time | The foam dispenser tube is blocked. | Follow the instructions to clean the milk tank and the foam dispensing tube. |
| The milk spout smells | There is solidified or residual milk in the ducts through which the milk circulates. | Follow the instructions to clean the milk tank and the milk spout. |
6. TECHNICAL SPECIFICATIONS
Product reference: 01985
Product: Power Espresso 20 Steel Pro Latte Espresso Machine
Voltage:220-240V
Frequency:50-60Hz
Power:1350W
Technical specifications may change without prior notification to improve product quality.
Made in China Designed in Spain
7. DISPOSAL OF OLD ELECTRICAL AND ELECTRONIC APPLIANCES

This symbol indicates that, according to the applicable regulations, the product and/or batteries must be disposed of separately from household waste. When this product reaches the end of its shelf life, you should dispose of the cells/batteries/accumulators and take them to a collection point designated by the local authorities.
Consumers must contact their local authorities or retailer for information
concerning the correct disposal of old appliances and/or their batteries.
Compliance with the above guidelines will help protecting the environment.
FRANÇAISFRANÇAIS
1. PIECES ET COMPOSANTS
Ideale Druckzone fur Espresso
Productreference:01985
Product: Espressomachine Power Espresso 20 Steel Pro Latte
Voltage:220-240V
Frequenlc:50-60Hz
Vermogen: 1350 W