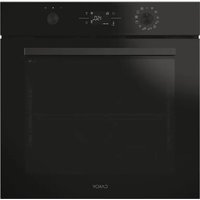
CA6 NP5B3EHTB - Oven CANDY - Free user manual and instructions
Find the device manual for free CA6 NP5B3EHTB CANDY in PDF.


| Product type | Electric built-in oven |
| Brand | Candy |
| Model | CA6 NP5B3EHTB |
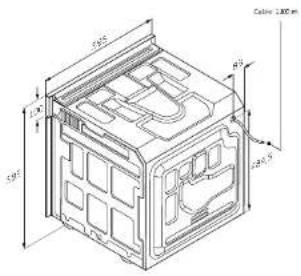
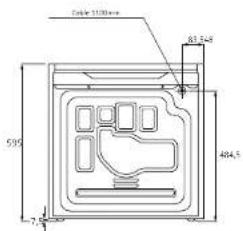
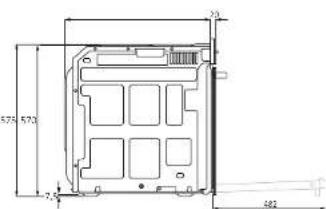
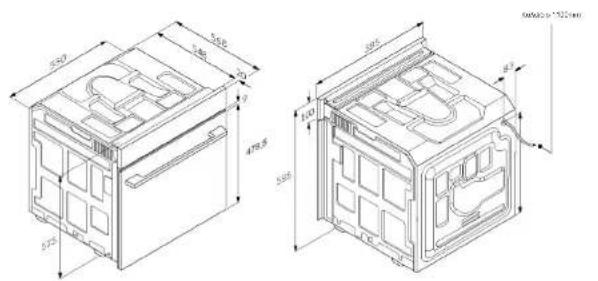
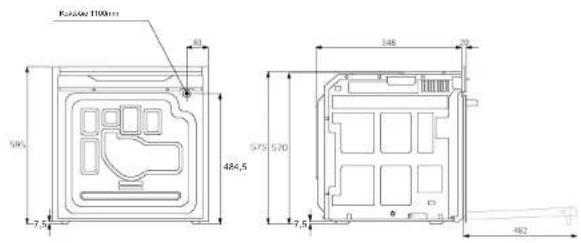
| Dimensions (W x H x D) | 595 x 595 x 550 mm (standard estimate) |
| Net weight | Approximately 35 kg |
| Power supply | 220-240 V ~ 50/60 Hz |
| Maximum power | 3000 W (16 A) or 2500 W (13 A) adjustable |
| Capacity | Approximately 70 liters (standard oven estimate) |
| Number of cooking functions | 10 (ECO, Natural convection, Multi-level, Supergrill, Gratin, Air fry, All-in-one baking, Pizza, Everyday Cooking, and special functions) |
| Main functions | Traditional cooking, fan-assisted, grill, pizza, air fry, keep warm, defrost, dough proofing, delayed cooking, timer, alarm |
| Connectivity | Wi-Fi (IEEE 802.11 b/g/n) and Bluetooth 4.2, compatible with hOn app |
| Remote control | Yes, via hOn app (except Gratin and Supergrill programs) |
| Cleaning type | Pyrolysis, Aquactiva (steam cleaning), catalytic panels |
| Interior lighting | Halogen bulb (efficiency class G), user-replaceable |
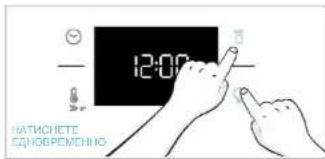
| Child safety | Screen lock (simultaneous press of Remote control and Light buttons) |
| Included accessories | Metal grid, baking tray, deep tray, dripping pan, smart tray (steam and barbecue), rotisserie, telescopic rails (depending on model) |
| Repairability index | 7.5/10 (estimate based on parts availability and documentation) |
| Energy class | A+ (estimate, compliant with standard EN 60350-1) |
| Network standby consumption | 2.0 W |
| Warranty | 2 years (manufacturer standard) |
Frequently Asked Questions - CA6 NP5B3EHTB CANDY
User questions about CA6 NP5B3EHTB CANDY
0 question about this device. Answer the ones you know or ask your own.
Ask a new question about this device
Download the instructions for your Oven in PDF format for free! Find your manual CA6 NP5B3EHTB - CANDY and take your electronic device back in hand. On this page are published all the documents necessary for the use of your device. CA6 NP5B3EHTB by CANDY.
USER MANUAL CA6 NP5B3EHTB CANDY
Thank you for choosing our product. To ensure your safety and get the best results, please read this manual carefully, including the safety instructions, and keep it for future reference.
Before installing the oven note the serial number, which you might need for repairs. Check for any damage during transportation and consult a technician if you're unsure before using it. Keep packaging materials away from children.
NOTE: Please note that the oven's features and accessories may vary depending on the model you purchased.
SUMMARY
1. SAFETY INFORMATION
2.PRODUCT INTRODUCTION
2.1. Overview of the product
2.2. Accessories
2.3. Control panel
2.4. Connectivity
3. BEFORE STARTING
3.1. Information to start
3.2. First usage
3.3. Preliminary cleaning
4. OPERATION OF PRODUCT
4.1. How the product works
4.2.Cooking functions
4.2.1.Standard functions
4.2.2.Special functions
5. COOKING GUIDELINES
5.1. General Cooking tables
5.2. Everyday Cooking tables
6. CARE & CLEANING
6.1. General recommendations
6.2. Cleaning the over
6.2.1. Inside the oven: cleaning functions
6.2.2. Outside the oven: removal and cleaning the glass door
6.3. Cleaning of accessories
6.4. Maintenance
7. TROUBLESHOOTING
8. ENVIRONMENTAL PROTECTION & DISPOSAL
8.1. Appliance disposal
8.2. Saving and respecting the environment
9. INSTALLATION
1.SAFETY INFORMATION
GENERALWARNINGS
- Do not use a steam cleaner for cleaning operations.
- CAUTION: in order to avoid a hazard due to inadvertent re- se ing of the thermal cut-out, this appliance must not be supplied through an external switching device, such as a timer, or connect- ed to a circuit that is regularly switched on and o by the utility
- During use the appliance become hot. Care should be taken to avoid touching heating elements inside the oven.
Use in accordance with a endend use
- Only use the oven for its intended purpose, that is only for the cooking of foods: any other use, for example as a heat source, is considered improper and therefore dangerous. The manufacturer cannot be held responsible for any damage resulting from improper, incorrect or unreasonable usage.
Use limitations
- The appliance can be used by children aged from 8 years and above and persons with reduced physical, sensory or mental capabilities or lack of experience and knowledge if they have been given supervision or instruction concerning use of the appliance in a safe way and understand the hazards involved. Children shall not play with the appliance. Cleaning and maintenance shall not be made by children without supervision.
- This appliance is not intended to be used by persons (including children) with reduced physical, sensory or mental capabilities, or lack of experience and knowledge, unless they have been given supervision or instruction concerning use of the appliance by a person responsible for their safety.
- Children should be supervised to ensure that they do not play with the appliance.
WARNING: the appliance and its accessible parts become hot during use. Care should be taken to avoid touching heating elements Children less than 8 years of age shall be kept at away unless continuously supervised.
EN5

WARNING: Accessible parts may become hot during use. Young children should be kept away.
INSTALLATIONWARNINGS
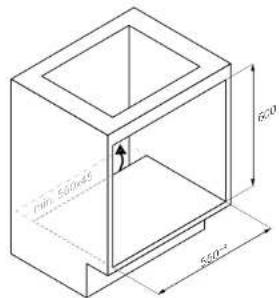
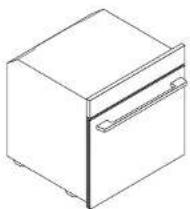
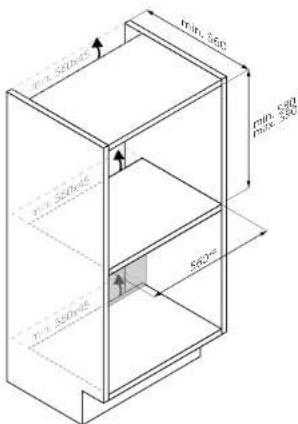
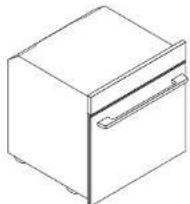
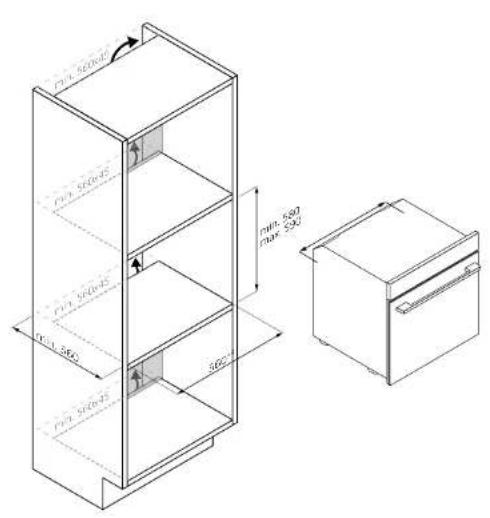
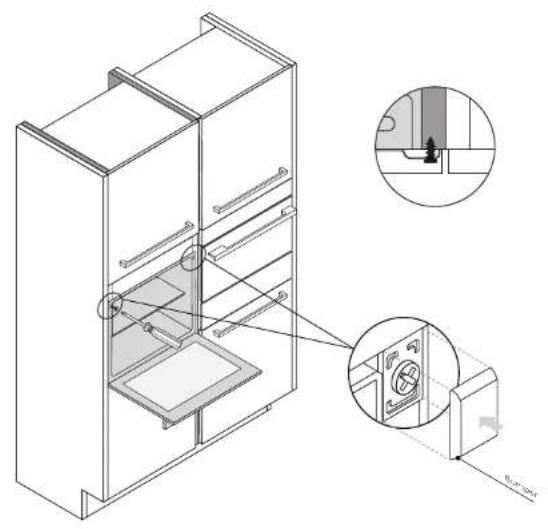
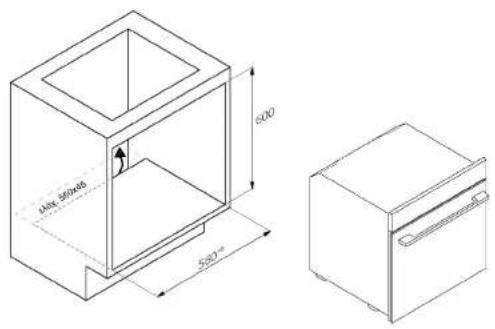
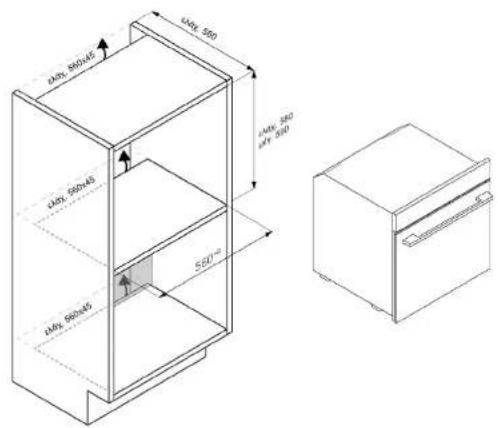
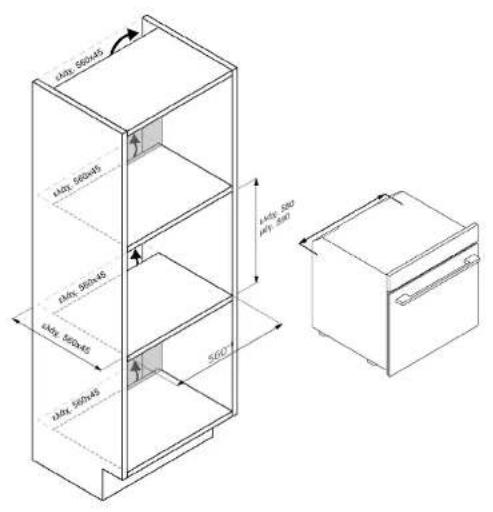
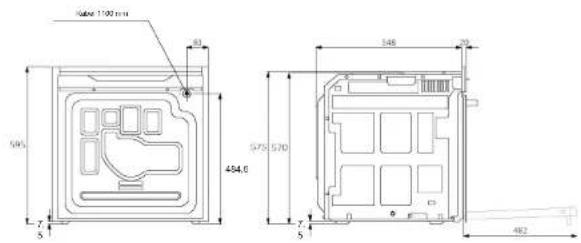
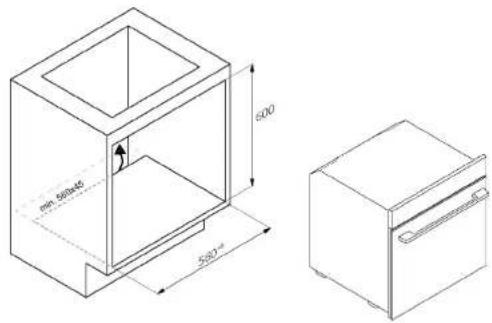
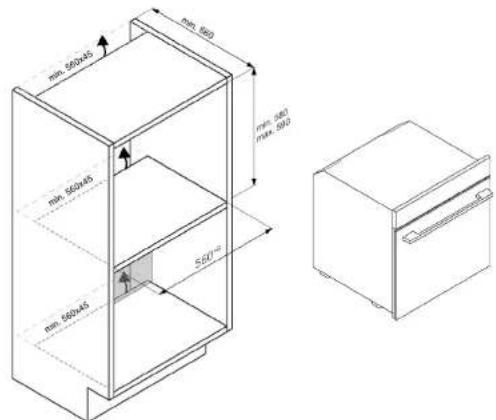
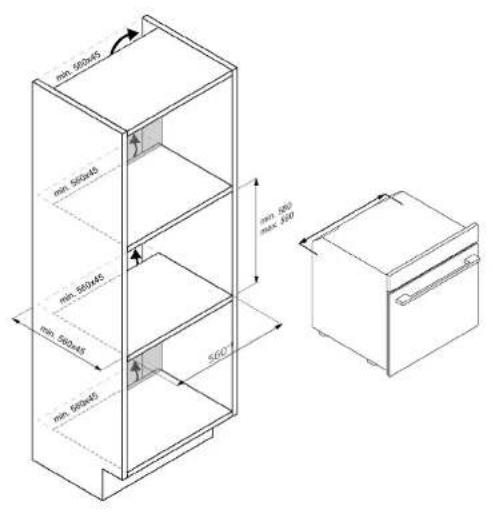
- The oven can be located high in a column or under a worktop.
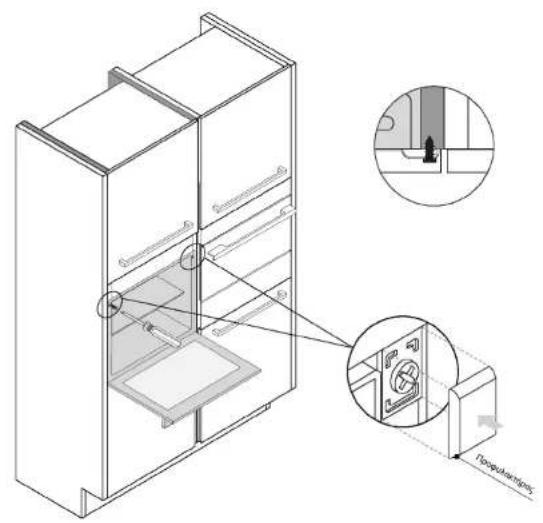
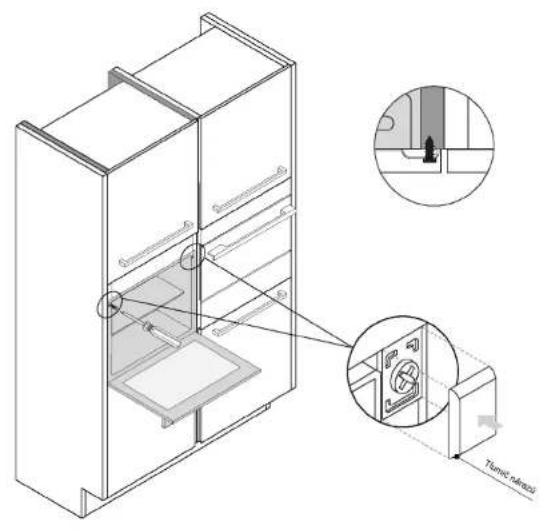
- Before fixing, you must ensure good ventilation in the oven space to allow proper circulation of the fresh air required for cooling and protecting the internal parts. Make the openings specified on the illustrations according to the type of fitting. Always fix the oven to the furniture with screws provided with the appliance.
- No additional operation/se ing is required in order to operate the appliance at the rated frequencies.
- The appliance must not be installed behind a decorative door in order to avoid overheating.
- During installation the oven should be disconnected from the mains to avoid overheating.
- If the assistance of the manufacturer is required to rectify faults arising from incorrect installation, this assistance is not covered by the guarantee. The installation instructions for professionally qualified personnel must be followed.
- Incorrect installation may cause harm or injury to people, animals or belongings. The manufacturer cannot be held responsible for such harm or injury.
- Installation must be carried on by a qualified technician who must know and respect the laws in force in the country of installation and the manufacturer's instruction.
- After unboxing the appliance, always check it is not damaged, in case of issue contact the customer service before installing and do not connect to the power supply.
- Remove the packaging material before operating the appliance.
- During installation do not use the oven door's handle to lift and move the oven.
- The installation furniture and the adjacent ones must with stand temperatures of 95^ .
- It is recommended to wear protective gloves during installation to avoid cut injuries.
- Do not install the product in open environments exposed to at-
mospheric agents.
- This appliance is designed to be used at altitude lower than 2000m.
ELECTRICALWARNINGS
- The socket must be suitable for the load indicated on the tag and must have ground contact connected and in operation. The earth conductor is yellow-green in colour. This operation should be carried out by a suitably qualified professional.
- Connection to the power source can be made by plug or by fixed wiring placing an omnipolar breaker, with contact separation compliant to the requirements for overvoltage category III, between the appliance and the power source that can bear the maximum connected load and that is in line with current legislation.
- In case of incompatibility between the socket and the appliance plug, ask a qualified electrician to substitute the socket with another suitable type. The plug and the socket must be conformed to the current norms of the installation country.
- The yellow-green earth cable should not be interrupted by the breaker. The socket or omnipolar breaker used for the connection should be easily accessible when the appliance is installed.
- If the supply cord is damaged, it must be replaced by the manufacturer, its service agent or similarly qualified persons in order to avoid a hazard. For any repairs, refer only to the Customer Care Department and request the use of original spare parts.
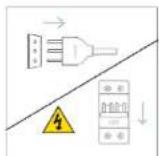
- Disconnect the appliance from the mains electricity supply before carrying out any work or maintenance on it.
WARNING: ensure that the appliance is switched o before replacing the bulb, to avoid the possibility of electric shocks. - The oven must be switched o before removing the removable parts. After cleaning, reassemble them according the instructions.
-
The use of any electrical appliance implies the observance of some fundamental rules:
-
do not pull on the power cable to disconnect the appliance from the power source;
- do not touch the appliance with wet or damp hands or feet;
- in general the use of adaptors, multiple sockets and extension
cables is not recommended;
- in case of malfunction and/or poor operation, switch o the appliance and do not tamper with it.
NOTE: as the oven could require maintenance work, it is advisable to keep another wall socket available so that the oven can be connected to this if it is removed from the space in which it is installed.
- Any repair, installation and maintenance not carried out correctly can seriously endanger the user.
- The manufacturing company hereby states that it does not assume any responsibility for direct or indirect damages caused by incorrect installation, maintenance, or repair work. Furthermore, it is not liable for damages caused by the absence or interruption of the grounding system (e.g., electric shock).
- CAUTION: in order to avoid a hazard due to inadvertent re- se ing of the thermal cut-out, this appliance must not be supplier through an external switching device, such as a timer, or connect- ed to a circuit that is regularly switched on and o by the utility.
- The appliance is not designed to be activated by an external timer or separate remote control system.
USE & MANTEINANCE
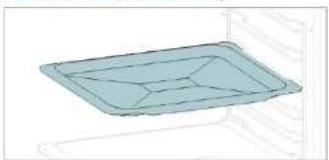
- The dripping pan collects the residues that drip during cooking.
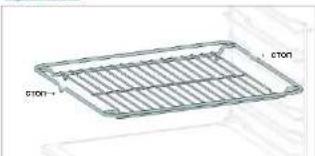
- When you place the grid on the side racks, make sure that the shorter section of the side (between the stop and the extremity) is directed towards the interior of the oven. If the grid has a decorative metal bar, pay attention to position it on the exterior of the oven so that the brand logo can be visible and readable. For the correct positioning refer also to the image in the Accessories section of this user manual.
- Do not use harsh abrasive cleaners or sharp metal scrapers to clean the oven door glasses, since they can scratch the surface, which may result in shattering of the glass.
- Only use the temperature probe recommended for this oven.
- During cooking, moisture may condense inside the oven cavity or on the glass of the door. This is a normal condition. To reduce this effect, wait 10-15 minutes after turning on the power before
pu ing food inside the oven. In any case, the condensation disappears when the oven reaches the cooking temperature.
- Cook the vegetables in a container with a lid instead of an open tray.
- Avoid leaving food inside the oven after cooking for more than 15/20 minutes.
- A long power supply failure during an occurring cooking phase may cause a malfunction of the monitor. In this case contact customer service.
- A WARNING: Do not line the oven walls with aluminium foil or single-use protection available from stores. Aluminium foil or any other protection, in direct contact with the hot enamel, risk melting and deteriorating the enamel of the insides.
WARNING: Never remove the oven door seal.
CAUTION: Do not refill the cavity bo om with water during cooking or when the oven is hot. - For a correct use of the oven it is advisable not to put the food in direct contact with the racks and trays, but to use oven papers and/or special containers.
WARNING (*FOR PYROOVENS)
- Excess spillage must be removed before cleaning.
- WARNING: before initiating the automatic cleaning cycle:
Clean the oven door;
- Remove large or coarse food residues from the inside of the oven using a damp sponge. Do not use detergents;
- Remove all accessories and the sliding rack kit (where present);
Do not place tea towels.
- In ovens with meat probe it is necessary, before making the cleaning cycle, close the hole with the nut provided. Always close the hole with the nut when the meat probe is not used.
- During the pyrolytic cleaning process (if available), the surfaces may get hot than usual and children should be kept away.
- If a hob has been fired above the oven, never use the hob while the Pyrolizer is working, this will prevent the hob from overheating.
2.PRODUCT INTRODUCTION
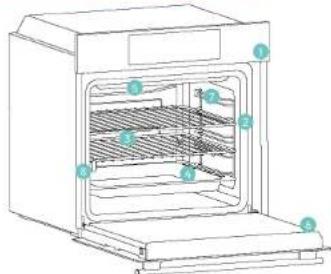
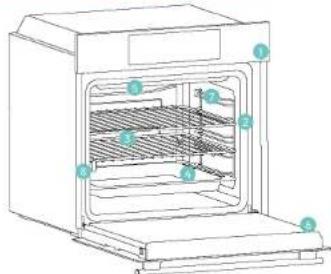
2.1.OVERVIEW OF THE PRODUCT
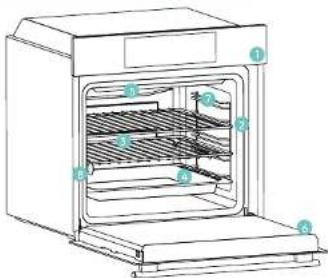
2.2 ACCESSORIES
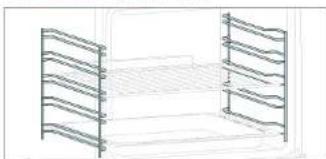
Lateral wire grids (only if present*)
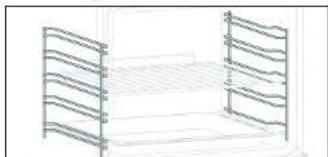
Located on both sides of the oven cavity, the side rocks are designed for placing baking tray and grids during the cooking.
NOTE: 6 or 7 levels depending on the model.
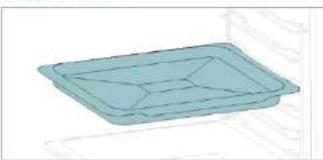
Baking tray (only if present*)
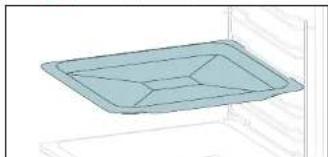
A baking tray is ideal for achieving even both browning, making it perfect for cookies and pastries due to its shallow, flat design. Additionally, placing it under a cooking grid can help collect drips and prevent messes in the oven.
-
Control panel
-
Shelf positions numbers
-
Grids
-
Trays
-
Fan cover
6.Oven door
- Lateral wire grids (if present: only)
for flat cavity)
- Serial number & QRcode

Write your name in number for Autoreference
Metal grid
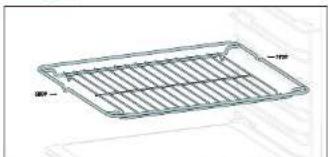
A metal grid in an oven is a removable, adjustable shelf that supports cookware, ensuring ever cooking, and makes cleaning easy. It can be used to hold plates and pans at different heights for various cooking needs.
Deeper Tray
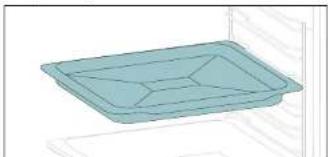
The deeper tray is ideal for recipes with added liquids or layers, such as casseroles or roasts. Its depth is specifically designed to ensure the desired consistency of the food prepared in it.
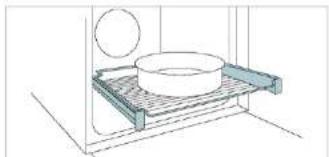
Telescopic Guides (only if present*)
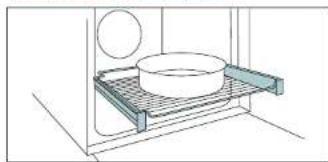
Telescopic oven rails are shelves that can be extended, making it easier to place or remove items, without the need to reach deep inside a hot oven. They improve safety, stability, and can be adjusted at different level positions.
Smart Tray - STEAM mode (only if present*)
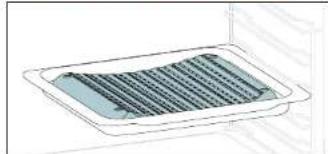
The concave shape allows a correct circulation of humidity generated in cooking, keeping the food humidity rate high. According to the quantity of water inserted in the tray, a drier or more "wet" cooking will be obtained.
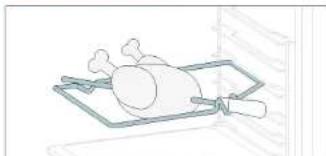
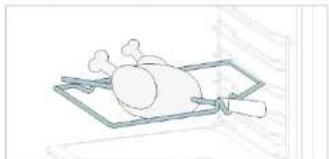
Turnspit (only if present*)
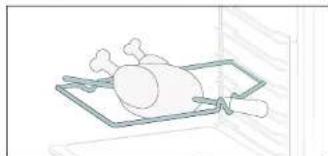
The turnspit works together with the top healing element, by rotating the food can be cooked. omogenously. It is best used for medium-sized food. Ideal for rediscovering the taste of traditional roast.
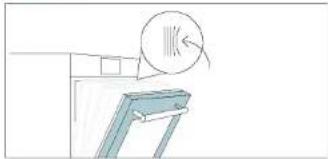
Softclose/Soft open hinges (only if present*)
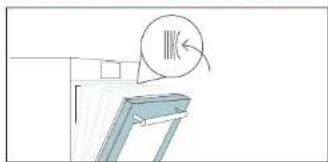
Soft close and open hinges control the door's motion, ensuring smooth movement and preventing slamming.
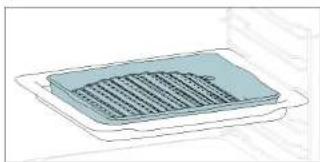
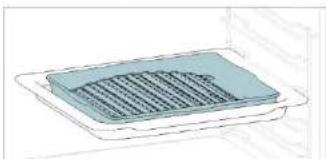
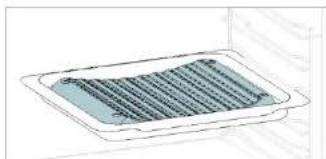
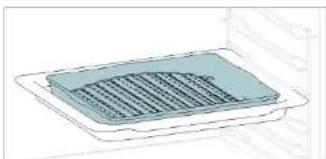
Smart Tray - BBQ mode (only if present*)
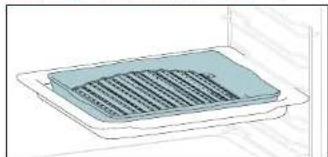
The convex shape is suitable for grilling in the oven at high temperature (220^) allowing a BBQ result even at home with Ilie smoke thanks to the drainage action of the fats on the boom of the tray.
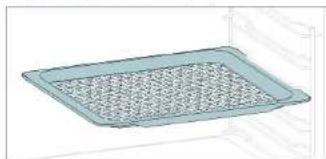
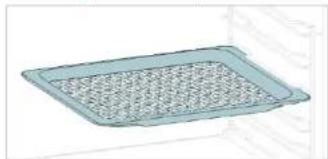
Air fry tray (only if present*)
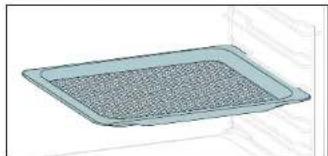
The airy fry tray ensures that hot air reaches the food evenly and tridimensionally, resulting in a crispier exterior while maintaining tenderness inside. To collect juices and breading, place it on top of the baking tray.


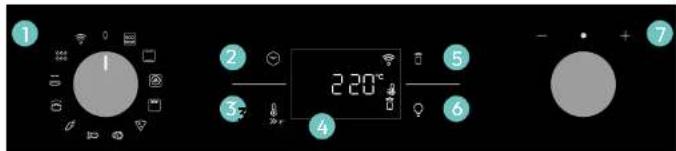
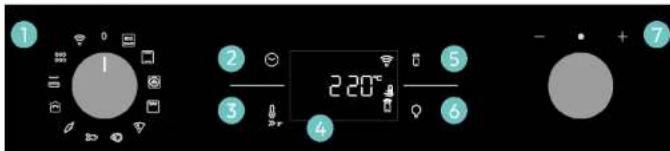
2.3 CONTROL PANEL
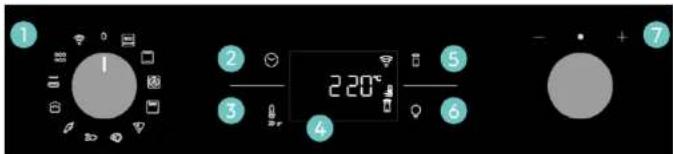
Functions and function ranking can be changed depending on the model.
- Function selector knob
- Time
3.Temperature - LED display
- Remote control
- Lamp
- Dial control
MAIN FUNCTIONS
The display has 4 main functions:
| Symbol Function Description | ||
| Time | Press once for cooking duration, twice for the minute minder (available in standby mode), three times for the time of day, and four times for delay start. In standby mode, only the kitchen timer is accessible. | |
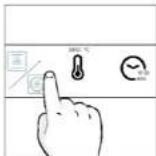
| 3" | Temperature | Press once to check the cavity temperature, press and hold for 3 seconds to activate the fast-heating option (only available during the oven's preheat phase). When the preheat is active, the releated icon will be shown on the display. |
| Remote Control on/off | Press the buon to activate remote control, after pairing the oven with the hOn app (through the application). | |
| Light Press to turn on/o the oven cavity light. | ||
2.4 CONNECTIVITY
Wireless parameters
| Technology Wi-Fi Bluetooth | ||
| Standard IEEE 802.11 b/g/n Bluetooth v4.2, BR/EDR, BLE | ||
| Frequency Band(s) [MHz] | 240Ω=24832402=2480 | |
| Maximum Power [mW] | 100 | 10 |
Product Information for networked equipment
Power consumption of the product in networked standby if all wired network ports are connected and all wireless network ports are activated;
2.0W.
How to activate wireless network port
WIFI module switches on as soon as the function knob is set to a position di erent to zero.
How to deactivate wireless network port:
WIFI module is always o when the function knob is set to zero position.
If the knob is set to di erent position, go to WIFl menu and select o to deactivate the WIFl.
Hereby, Candy Heaver Group Srl declares that the radio equipment is in compliance with Direc
five 2014/53/EU and with the relevant statutory requirements for the UK market
The full text of the declaration of conformity is available at the following internet
address: www.candy-group.com


HOW TO INTERACT WITH THE APP
Your appliance may be connected to your home wireless network and operated remotely using the app. Connect your appliance to ensure it stays up to date with the latest software and features.
NOTE
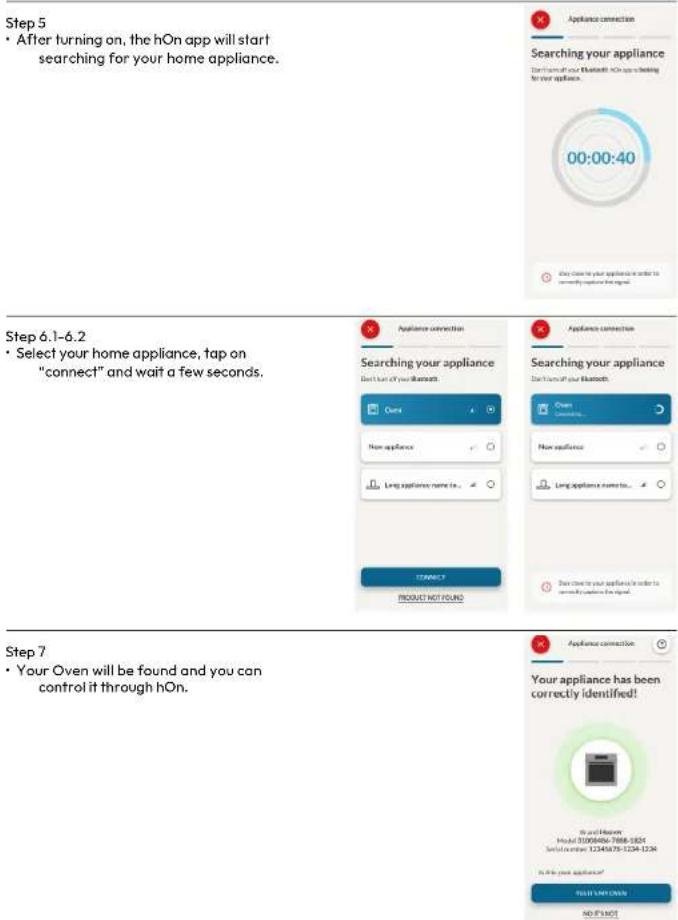
- Once the oven is turned on, the WIFI icons blinks for 30 minutes. During this period it's possible to enroll the product.
- Ensure your home Wi-Fi network is turned on.
- You will be given step by step guidance on both your appliance and mobile device.
- It may take up to 10 minutes to connect your oven.
For further guidance and troubleshooting, please refer to the app.
Download on your smartphone.


AppStore

GET ON Google Play
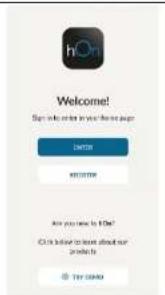
NEW USER REGISTRATION
- Click on "Register"
- You can register through social accounts or sign up with your personal email
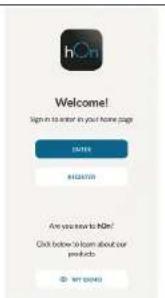

QUICK PAIR ENROLLMENT
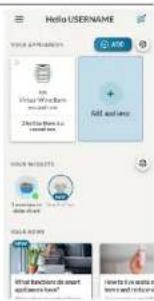
Step 1 Select "Add appliance".
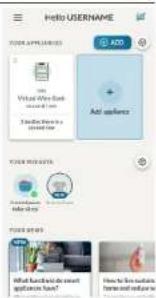

EN14 EN15
Step 2
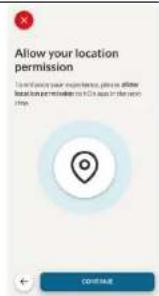
- Allow your location permission.
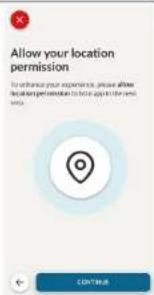
Step 3
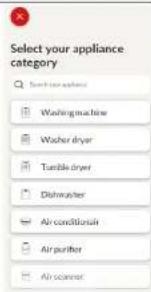
- Select oven from the appliance category.
Step 4
- Turn on your appliance; if it is already on, turn it off and on again.


HOW TO CHANGE WIFI SETTINGS
Once the appliance is enrolled, the user can change the WIFI settings between: - WIFI ON: It is only possible to monitor the oven status by App.
- WIFI OFF: The oven is not connected but still enrolled with network credentials saved.
WIFI RESET: The connection is reset and a new enrollment is possible.
- Turn the function knob on WIFI menu.
- On display appears "On".
- Rotate the dial control until "O" or the reset seeing "rSt" will be showed.

DREMOTECONTROL
The Remote Control offers numerous advantages for users, enhancing convenience, efficiency, and the overall cooking experience, by giving the capability to control the product directly from both the appliance and hOn App
This function allows, through your device, to enjoy various features, such as: instant or scheduled start of recipes or cooking programs already available in the app; real-time monitoring of the progress of your recipes; adjustment of the cooking parameters in use.
Furthermore, it is possible to receive notifications once programs or recipes are completed.
The Remote Control can be activated exclusively when the product is enrolled.
NOTE: It is available for all cooking functions on the product, except for Gratin and Supergrill programs.
How to activate Remote Control:
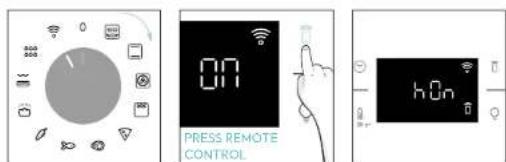
- Turn the function knob on WIFI menu.
- Press
- On display appears "hOn", Both WIFI and Remote Control icons will be shown.
- Access to the App, select a program and let the cooking starts. During the process is possible to control and change the program parameters from both product and App.


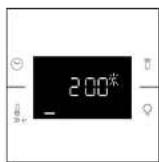
It's also possible to activate Remote Control during cooking process by pressing related buon.
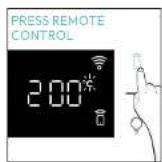
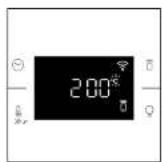
How to stop Remote Control:
While the cooking program is in progress, it can be stopped directly from the product itself by rotating the function knob to a different position. These actions interrupt the cooking process. Another way is by pressing the corresponding button of Remote Control that came with your appliance. These actions interrupt the cooking process.
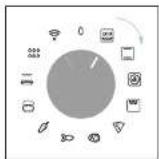
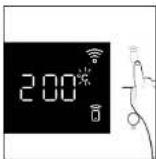
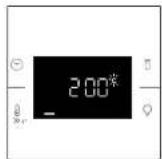
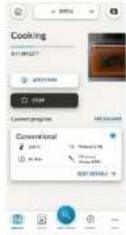
You can also stop the cooking program remotely using the app by clicking the 'STOP' Bu on an display device. The oven will automatically stop the cooking.
NOTE: If the user stops the cooking in progress from the oven, simultaneously the stopped cooking will be seen in the App.
3. BEFORE STARTING
3.1 INFORMATION TO START
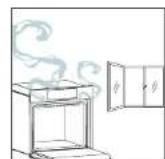
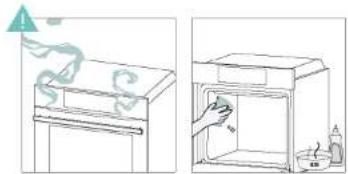
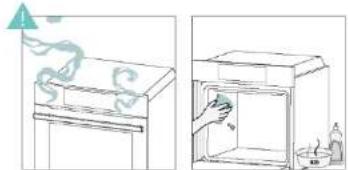
When you first turn on the oven, you might notice some smoke. Don't worry, just wait for the smoke to clear before using the oven.
How door works
For functions that use the grill, thanks to the door switch technology the oven will automatically pause the heating elements when you open the door and continue cooking once you close it. This feature is available only on specific oven configurations. All the pyro models have it. During the pyrolytic cleaning process, the oven door remains locked at all times. If it's not locked, the oven will display error code 24 and pause the cleaning function.
How Illumination works
The oven cavity is illuminated by one or more light bulbs, typically activated each time a cooking function begins.
For ovens equipped with a door switch (see below), the light automatically turns on when the door is opened.
For ovens equipped with lamp bu on, it can also be used to activate the lighting. If the oven door remains open for more than 10 minutes, the lights will automatically turn on. During pyrolytic cleaning process light remains o.
How cooling fan works
The cooling fan is responsible for dissipating the heat, keeping the oven and its surroundings from
geing too hot, as well as protecting kitchen appliances from the ects of high temperatures. For
this reason, the cooling fan remains audible for a period of time even after the oven is turned o.
It operates during and after cooking cycle in relation to the internal temperature of the oven.
When the cooling fan is operational, it usually generates a gentle humming or whirring noise. You may
also notice a warm airflow emanating from the gap between the oven door and the control panel.
During pyrolytic cleaning and when door is locked, cooling fan is switched on. During ECO function the light will remain o.
\*only for pyro ovens
How status bar works
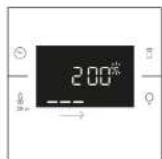
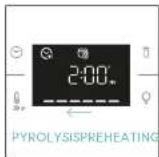
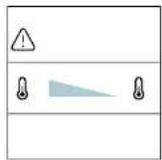
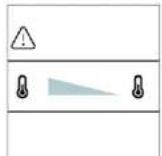
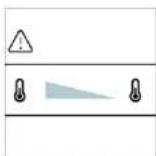
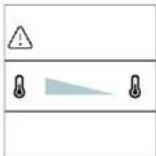
The status bar, based on the set programs, simplifies monitoring of temperature and time. Specifically, for functions involving preheating, it displays the temperature increase during this phase. In cooking programs and the pyrolytic cleaning function, it shows the countdown of cooking time and the cleaning cycle, respectively.


3.2. FIRST USAGE
When the appliance is switched On for the first time, the initial step is to set time of day, choose between 13 ampere or 16 ampere, select brightness and sound level.
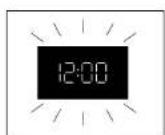
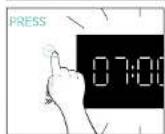
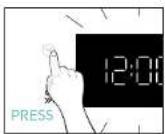
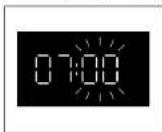
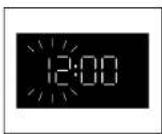
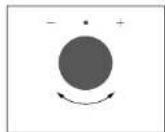
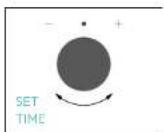
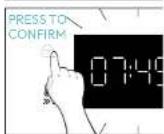
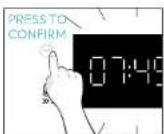
SET THE TIME: The display will show the blinking preset time '12:00'. To modify it, press and use the right knob to adjust the current hour. Press again and follow the same procedure to set the minutes. To confirm, press once more.
AMPERAGE: By default, the oven is set to work with higher power suitable for households with more than 3 kW (16 A). If your home has lower power, you can change this setting to 13 A. This setting acts how quickly the oven heats up. Choosing the higher option (16A) means it heats up faster (because the power absorption is increased). On the display, you'll see two choices: 13A and 16A. Just turn the right knob to pick the one you want, then press to confirm.
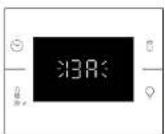
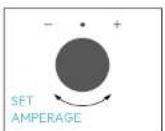
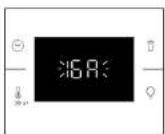
NOTE: The option to set the amperage is only available during the initial installation. To modify the set amperage, please refer to the post-installation instructions.

BRIGHTNESS: The display shows the symbol "br". The numbers represent the level of brightness intensity, edifiable turning the right knob. To confirm press
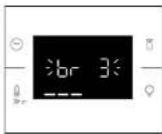
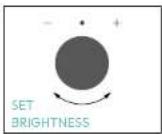
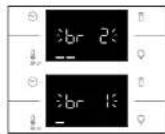
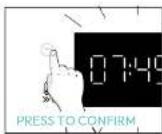
SOUND: The display shows the symbol "Sn". The numbers represent the level of sound intensity, editable turning the right knob. To confirm press
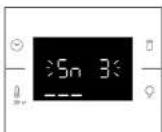
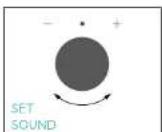
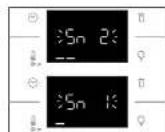
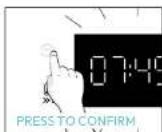
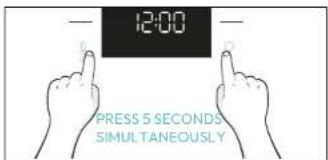
When oven is in stand-by mode, it is possible to go back to initial settings by pressing simultaneously. Temperature and Lamp buttons for 5 sec.
3.2.PRELIMINARY CLEANING
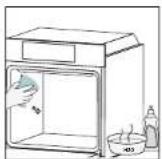
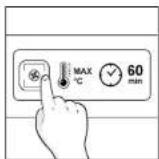
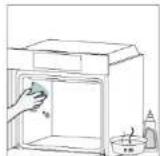
Clean the oven before using for the first time. Wipe over external surfaces with a damp soft cloth. Wash all accessories and wipe inside the oven with a solution of hot water and washing up liquid. Set the empty oven to the maximum temperature and leave on for about 1 hour, this will remove any lingering smells of newness.
4. OPERATION OF PRODUCT
4.1. HOW THE PRODUCT WORKS
SWITCHING ON/OFF THE OVEN
To turn ON the oven rotate the function knob (clockwise/counterclockwise) and select a cooking program. To turn it OFF, set the function knob to the '0' position.
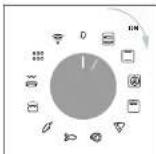
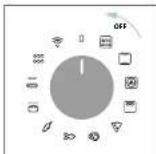
SET COOKING PROGRAM
Turn the function knob and select the desired program. On display will appear a default temperature that can be edit in every moment turning the right knob (clockwise to increase and counterclockwise to decrease the temperature).
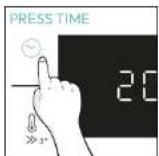
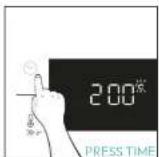
TIME MENU
Access the Time menu by pressing To navigate into top s many times as is needed to enter in the following settings:
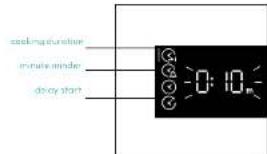
NOTE: several parameters cannot be set at the same time, therefore only the last set remains in the memory while the previous one is deleted.

BOOKING DURATION
Allows to preset the cooking time required for the recipe chosen.
ACTIVATION: press to enter in the Time menu. Tap many times as you need to select "Cooking duration" function. Then use the dial control to regulate the value.
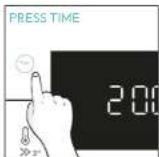
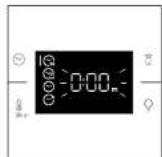
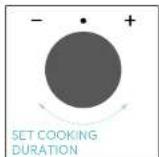
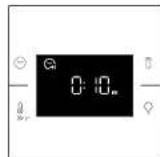
The countdown starts at the end of preheating (if present). During cooking phase is possible to change the duration value by turning the right knob. When duration is elapsed the cooking stops.
MINUTE MINDER
Allows to use the oven as alarm clock.
ACTIVATION: press to enter in the Time menu. Tap many times as you need to select "Minute minder" function. Then use the dial control to regulate the value.
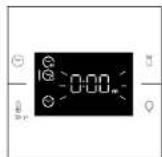
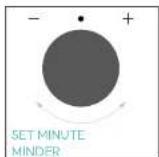
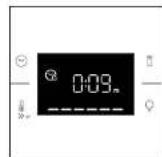
When the function is set, the primary information showed on display is always the time. To edit the temperature, press to enter dedicated edit mode. When duration is elapsed, the cooking continues until the left knob is turned in 0 position.
This function can be set also when the oven is in stand by mode by pressing. When activated, the minute miner operates independently of the oven's cooking functions.
DELAY START
Allows to choose the cooking start time.
ACTIVATION: press to enter in the Time menu. Tap as many times as you need to select "Delay start" function. Then use the dial control to set the start time of cooking.
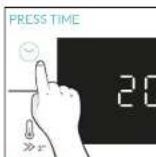
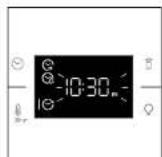
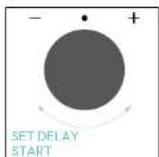
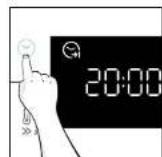
NOTE: Delay start is activable only after setting Cooking Duration and it is not available with grill's functions.

ADDITIONAL FUNCTIONS CHILD LOCK
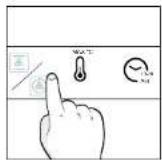
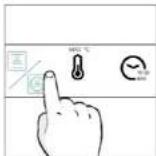
This function allows you to lock the screen to prevent any unwanted use by minors. To activate the screen lock, press and hold down the Remote Control and Lamp bu ons simultaneously. Repeat the same action to deactivate the lock.
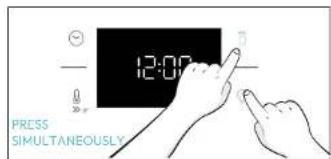
4.2.COOKING FUNCTIONS
FAST PREHEATING OPTION
In order to accelerate preheating phase, the fast-preheating option can be selected by pressing the temperature icon for 3s after having selected cooking program and temperature. This option will activate a combination of fan and heating elements regardless of the chosen cooking function.
To save energy, when fast preheating is activated the cavity fan will be turned OFF until the oven reaches the desired temperature.
4.2.1.STANDARD FUNCTIONS
NOTE: for functions that require preheating, ensure all accessories are removed during this phase.
| Symbol | Function | T°C default T°C range | Suggested shelf position | Preheat | Suggestions |
| ECO | *ECO | 190 °C 150-220 °C | L3/L4 NO | IDEAL FOR: cooking meat, fish or vegetablesThis function allows to save energy during cooking keeping the food moist and tender. Cavity lamp is switched o | |
| *Conventional | 30-250°C L2/L3 | Yes/Fast preheat | IDEAL FOR: cakes, breads, biscuits, quiches on one level using both upper and lower heating.Can be used with Heat Feel Sensor. | ||
| Multi-Level | 160°C 50-250°C | L4 (one tray) L2+L5 (two trays) L2+L4+L6 (three trays) | Yes/Fast preheat | IDEAL FOR: cakes, biscuits and pizzas on one or more levels. Ideal to cook di erent foods.Can be used with Heat Feel Sensor. | |
| **Supergrill | 05 01-05 | L6 NO | IDEAL FOR: big quantities of sausages, steaks and toast bread.The entire area below the grill element becomes hot.Use with the door closed.Turn food two thirds of the way through cooking (If necessary). | ||
| **Gratin(***) | 200°C 150-250°C | L4/L5 | Yes/Fast preheat | IDEAL FOR: whole pieces of meat (roasts) or gratinated foods. Use with the door closed. Slide the drip tray under the shelf to collect juices. Turn food over half-way through cooking if needed. | |
| Air fry(***) | 200°C 150-250°C | L3/L4 NO | IDEAL FOR: preparing frozen foods or breaded par-cooked foods which are usually fried. Thanks to the dedicated tray, the hot air can flow evenly over the foods. | ||
| Bakery all-in 200°C | L2 | NO | IDEAL FOR: foods that require automatic leaven-ing and baking. | ||
*Tested in accordance with the EN 60350-1 for the purpose of energy consumption declaration and energy class. **Use with the door close ***Depending on the oven man
4.2.2. SPECIAL FUNCTIONS
| Symbol | Function | T°C default T°C range | Suggested shelf position | Preheat | Suggestions |
| Pizza | 300°C 200-300°C | 2/3 NO | IDEAL FOR: all kind of pizzas without preheating the oven. Use lower temperatures for frozen items and 300°C for home-made recipes | ||
- COOKING GUIDELINES 5.1. GENERAL COOKING TABLE
| Category Sector | NAT code | Cooking program | TFC | Amount | Cooking accessory | Shelf position | Cooking time after preparing (min) | |
| Sweet bakery | Small intestines /Muffin | 1 | Stirie / Multilevel | 170°C 180°C | Baking tray Baking tray | L3 L4 | 20-3050-60 | |
| 2 MultiLevel 180°C Y | Baking + Doapar trays | L2+L3-50 | 40 | |||||
| 3 | Multilevel | 140°C | Baking trays | L2+L4-L6 | 40-50 | |||
| Supermarket cakes (20 oz/8) | 1 | Stirie | 170°C | Maltgrids + Cake tin | L2 | 30-40 | ||
| Multilevel 150°C | Y | Maltgrids + Cake tin | L4 | 40-50 | ||||
| 2 MultiLevel 150°C | Maltgrids + Cake tin | L1+L4-50 | 40 | |||||
| Healthy Shortbread | 1 | Stirie / Multilevel | 150°C 150°C | Baking tray Baking tray | L3 L4 | 25-3050-40 | ||
| 2 MultiLevel 140°C Y | Baking + Doapar trays | L2+L3-50 | 40 | |||||
| 3 | Multilevel | 140°C | Baking trays | L2+L4-L6 | 35-40 | |||
| Cheesecake | 1 | Stirie | 190°C | Baking tray | Baking tray | L4 | 25-35 | |
| 2 MultiLevel 170°C | Baking tray | L3 | 25-35 | |||||
| Yorkshire pudding | 1 | Stirie | 200°C | Y | Baking tray | L3 | 20-30 | |
| Muffins | 1 | Multilevel | 90°C | Y | Baking tray | 90-180 | ||
| Macaroni | 1 | Stiric | 90°C | Y | Baking tray | L3 | 15-20 | |
| Apple pie | 1 | Stiric | 90°C | Y | Maltgrids + Cake tin | L2 | 60-70 | |
| 1 | Multilevel 170°C | Maltgrids + Cake tin | L4-66-76 | |||||
| Tortoatlin | 1 | Static | 170°C Y | Maltgrids + Cake tin | L2 | 40-60 | ||
| Chocolate sundaft | 1 | Stiric | 200°C | Y | Baking tray - cake tin | L3 | 10-15 | |
| Cheesecake1 | Static 150°C | Y | Maltgrids + Cake tin | L2 | 50-65 | |||
| Frozen crocstoes | 1 | Static | 180°C | Y | Baking tray | L3-20-25 | ||
| 2 | Static | 180°C | Baking trays L2+ L2-25-35 | |||||
| 3 | Multilevel | 160°C | Baking trays | L2+L4-L6 | 30-40 | |||
| Strawat, frozen | 1 | Static | 210°C | Y | Baking tray | L3 | 50-65 | |
| Dishes and Frittadood | Toest bread | 1 | Supragril | 5 | N | Malt grids | L6 | 4-6 |
| Foccoca | 1 | Static | 200°C | Y | Baking tray | L2 or L3 | 25-35 | |
| Brood with | 1 | Static | 200°C | Y | Baking tray | L3 | 35-50 | |
| PENE | 150°C | 250°C | 300°C | 400°C | 500°C | 600°C | 700°C | 800°C | 900°C | 1000°C | 1100°C | 1200°C | 1300°C | 1400°C | 1500°C | 1600°C | 1700°C | 1800°C | 1900°C | 2000°C | |
| Reacted | 150°C | 250°C | 300°C | 400°C | 500°C | 600°C | 700°C | 800°C | 900°C | 1000°C | 1100°C | 1200°C | 1300°C | 1400°C | 1500°C | 1600°C | 1700°C | 1800°C | |||
| Reacted | 150°C | 250°C | 300°C | 400°C | 500°C | 600°C | 700°C | 800°C | 900°C | 1000°C | 1100°C | 1200°C | 1300°C | 1400°C | 1500°C | 1600°C | 1700°C | 2000°C | |||
| Reacted | 150°C | 250°C | 300°C | 400°C | 500°C | 600°C | 700°C | 800°C | 900°C | 1000°C | 1100°C | 1200°C | 1300°C | 1400°C | 1500°C | 1600°C | 1800°C | 2000°C | |||
| Reacted | 150°C | 250°C | 300°C | 400°C | 500°C | 600°C | 700°C | 800°C | 900°C | 1000°C | 1100°C | 1200°C | 1300°C | 1400°C | 1500°C | 1500°C | 1600°C | 2000°C | |||
| Reacted | 150°C | 250°C | 300°C | 400°C | 500°C | 600°C | 700°C | 800°C | 900°C | 1000°C | 1100°C | 1200°C | 1300°C | 1400°C | 1500°C | 1700°C | 2000°C | ||||
| Reacted | 150°C | 250°C | 300°C | 400°C | 500°C | 600°C | 700°C | 800°C | 900°C | 1000°C | 1100°C | 1200°C | 1300°C | 1400°C | 1500°C | 1600°C | 1700°C | ||||
| Reacted | 150°C | 250°C | 300°C | 400°C | 500°C | 600°C | 700°C | 800°C | 900°C | 1000°C | 1100°C | 1200°C | 1300°C | 1400°C | 1500°C | 1600°C | 170O°C | ||||
| Reacted | 150°C | 250°C | 300°C | 400°C | 500°C | 600°C | 700°C | 800°C | 900°C | 1000°C | 1100°C | 1200°C | 1300°C | 1400°C | 1500°C | 1600°C | 17O°C | ||||
| Reacted | 150°C | 250°C | 300°C | 400°C | 500°C | 600°C | 700°C | 800°C | 900°C | 1000°C | 1100°C | 1200°C | 1300°C | 1400°C | 1500°C | 1600°C | 1800°C | ||||
| Reacted | 150°C | 250°C | 300°C | 400°C | 500°C | 600°C | 700°C | 800°C | 900°C | 1000°C | 1100°C | 1200°C | 1300°C | 1400°C | 1500°C | 1600°C | |||||
| Reacted | 150°C | 250°C | 300°C | 400°C | 500°C | 600°C | 700°C | 800°C | 900°C | 1000°C | 1100°C | 1200°C | 1300°C | 1400°C | 1500°C | 1600°C | |||||
| Reacted | 150°C | 250°C | 300°C | 400°C | 500°C | 600°C | 700°C | 800°C | 900°C | 1000°C | 1100°C | 1200°C | 1300°C | 1400°C | 1500°C | 1600°C | 1800°C |
| 50.00 | V1 | A46,4800 | A | 2,000 | 2,400 | L | 1 | 2000 (purchased) |
| 57.5 | V1 | A46,4800 + 10000 | A | 2,000 | 2,400 | L | 1 | 2000 (purchased) |
| 57.5 | V1 | A46,4800 + 10000 | N | 2,000 | 2,400 | L | 1 | 2000 (purchased) |
| 66.00 | V1 | A46,4800 + 10000 | N | 2,000 | 2,400 | L | 1 | 2000 (purchased) |
| 66.00 | V1 | A46,4800 + 10000 | N | 2,000 | 2,400 | L | 1 | 2000 (purchased |
| 66.00 | V1 | A46,4800 + 10000 | N | 2,000 | 2,400 | L | 1 | 2000 (purchased) |
| 66.00 | V1 | A46,4800 + 10000 | N | 2,000 | 2,400 | L | 1 | |
| 66.00 | V1 | A46,4800 + 10000 | N | 2,000 | 2,400 | L | 1 | |
| 66.00 | V1 | A46,4800 + 10000 | N | 2,000 | 2,400 | L | 1 | |
| 66.0 | V1 | A46,4800 + 10000 | N | 2,000 | 2,400 | L | 1 | |
| 66.0 | V1 | A46,4800 + 10000 | N | 2,000 | 2,400 | L | 1 | |
| 66.0 | V1 | A46,3800 + 10000 | N | 2,000 | 2,400 | L | 1 | |
| 66.0 | V1 | A46,3800 + 10000 | N | 2,000 | 2,400 | L | 1 | |
| 66.0 | V1 | A46,3800 + 1000 | N | 2,000 | 2,400 | L | 1 | |
| 66.0 | V1 | A46,3800 + 10000 | N | 2,000 | 2,400 | L | 1 | |
| 66.0 | V1 | A46,3800 + 10000 | N | 2,020 | 2,400 | L | 1 | |
| 66.0 | V1 | A46,3800 + 10000 | N | 2,020 | 2,400 | L | 1 | |
| 66.0 | V1 | A46,3800 + 10000 | N | 2,020 | 2,400 | L | ||
| 66.0 | V1 | A46,3800 + 10000 | N | 2,020 | 2,400 | L | ||
| 66.0 | V1 | A46,3800 + 10000 | N | 2,020 | 2,400 | L | ||
| 66.0 | V1 |
Cooking times may vary according to consumer's recipe and ingredients.
if preheating required
*Depending on the oven model.
NOTE: For cooking cakes, quiches and other recipes that require a mold or a container on 2 levels, place the staggered: the upper tray on the left side and the lower tray on the right side.
5.2.EVERYDAY COOKING TABLE
Food category menu allows to cook a variety of recipes without preheating the oven, thanks to dedicated cooking programs tailored to each category needs.
After selecting the cooking program, the default time will be shown and can be edited by turning the right knob; cooking temperature can be changed by pressing the dedicated icon. Both parameters can be set within a limited range as shown in the table below.
Meat
NO
2-3-4
180-200
20-80
55-85°C
For beef, veal and pork roasts poultry and cut of meat.
Fish
NO
3-4
160-180
15-45
55-65°C
For whole fish
Vegetables
NO
3-4 18
200 30
70-90°C
For roasted vegetables and potatoes
NOTE: if, after turning o the oven, there is a need to continue cooking, it's recommended avoiding th use of everyday cooking programs and instead opting for standard functions.
| Beef/treat | 500-800g | Meat | 100°C | Metal grid | L3 | 30-40 |
| Beef fillet | 200g | Meat | Metal grid | L3 | ||
| Muskloaf | 1000-1500g | Meat | 150°C | Metal grid | L3 | 40-50 |
| Beef wellington | 500g | Meat | 200°C | Metal grid | L3 | 50-60 |
| Portloost | 800-1000g | Meat | 200°C | Metal grid | L3 | 40-70 |
| Porriklas | 1000-1200g | Meat | 200°C | Metal grid | L3 | 60-100 |
| Lambresk | 800-1000g | Meat | 200°C | Metal grid | L3 | 60-80 |
| Lambleg | 1500-2000g | Meat | 150°C | Metal grid | L3 | 80-100 |
| Salmon fillets | 200-500g | Fish | 150°C | Baking tray | L3 | 20-35 |
| Tuna sticks | 600g (app. 4 pcs) | Fish | 150°C | Metal grid | L3 | 10-20 |
| Swanfish stocks | 700g (app. 4 pcs) | Fish | 200°C | Baking tray | L3 | 15-20 |
| Cod fillet | 600g (app. 4 pcs) | Fish | 150°C | Baking tray | L3 | 10-20 |
| Sardream, whole | 1 | Fish | 150°C | Baking tray | L3 | 35-45 |
| Sardream, fillet | 600g (app. 4 pcs) | Fish | 150°C | Baking tray | L3 | 10-20 |
| Scabous fillet | 600g (app. 4 pcs) | Fish | 150°C | Baking tray | L3 | 10-20 |
| Salted baked fish | 1 | Fish | 220°C | Baking tray | L3 | 30-40 |
| Fish skewers | 8 pieces | Fish | 150°C | Metal grid | L3 | 20-30 |
| Sea salad | 4 pieces | Fish | 150°C | Baking tray | L3 | 25-40 |
| Whole broad | 1 | Bakery | 200°C | Metal grid | L3 | 35-50 |
| Rybarbroad | 1 | Bakery | 150°C | Metal grid | L3 | 35-50 |
| Sandwich loaf | 1 | Bakery | 200°C | Metal grid | L3 | 35-50 |
| Frozen bague as | 1 | Bakery | 200°C | Metal grid | L3 | 15-25 |
| Fresh frozen poultry snacks | 1 | Bakery | 150°C | Metal grid | L3 | 20-30 |
| Pounds | 1 tray | Vegetables | 200°C | Metal grid | L3 | 30-40 |
| Rettig Sandoine | Cooking programm | Cooking accuracy | Shelf position | Cooking time (smin) | ||
| Mixed vegetables | 1 tray Vegetables 100°C Metal grid L3 | 40-45 | ||||
| Cookware | 1 tray Vegetables 100°C Metal grid L3-40-50 | |||||
| Pumpkins salad | 1 tray Vegetables 200°C Metal grid L3 | 30-40 | ||||
| Sliced peppers | 1 tray Vegetables 100°C Metal grid L3 | 70-80 | ||||
| Sliced sausabi | 1 tray Vegetables 100°C Metal grid L3-50-45 | |||||
| Carrot sticks | 1 tray Vegetables 100°C Baking Tray L3-35-40 | |||||
| Broccoli | 1 tray Vegetables 100°C Baking Tray L3-30-40 | |||||
| Radish | 1 tray Vegetables 100°C Metal grid L3-40-45 | |||||
| Vegetable flap | 6 ramikeln vegetables 100°C | Baking Tray + masks | L3-25-35 |
6.CARE & CLEANING
6.1.GENERAL RECOMMENDATIONS
Regular cleaning can extend the lifecycle of your appliance. Wait for the oven to cool before carrying out manual cleaning.
- After each use of the oven, a minimum of cleaning will help keep the oven perfectly clean.
- Do not line the oven walls with aluminum foil or single-use protection available from stores.
- Aluminum foil or any other protection, in direct contact with the hot enamel, risks melting and deteriorating the enamel of the insides.
In order to prevent excessive dirt of your oven and the resulting strong smokey smells, we recommend not using the oven at very high temperature. It is better to extend the cooking time and lower the temperature a little. - In addition to the accessories supplied with the oven, we advise you only use dishes and baking molds resistant to very high temperatures.
6.2.CLEANING THE OVEN
6.2.1.INSIDE THE OVEN: cleaning functions
Pyrolytic cleaning (*depending on the oven model)
This process relies on the chemical process bearing the same name, which involves the decomposition of complex substances through the application of heat treatment.
Once initiated, it automatically locks the oven door and swiftly elevates the temperature to a
searing 410^
At the end of the cleaning cycle, all that remains within the cavity is a minimal deposit of dust, easily wiped away with a damp cloth.
How does it work:
- Remove any accessories from the oven, such as grids, side racks and side racks screw (^*)
- Turn function knob on . Turn the dial control to set the Pyrolytic program; Allow the function to operate for the preset time. During this process and the following cooling phase, the oven door will remain locked.
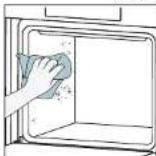
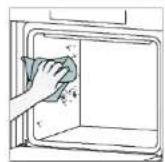
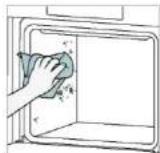
- When the appliance is cool, clean the inner surfaces of the oven with a cloth.
WARNING: Make sure that the appliance is cool before you touch it. Care must be taken with all hot surfaces as there is a risk of burns. Use distilled or drinkable water.
(1) only for models with 7 levels



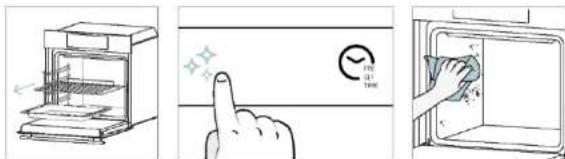
Aquaactiva
The Aquaciva function is designed to effortlessly tackle light dirt and provide a quick and eco-friendly solution for cleaning your oven cavity using the power of steam.
How does it work:
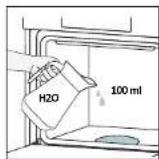
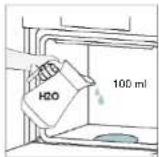
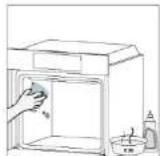
- Pour 100 ml of water into the bottom embossment of the oven.
- Turn the knob on _总^总 . If necessary, turn the dial control to set the Hydro clean program. Allow the function to operate for the preset time.
- At the end of the cleaning process, allow the oven to cool down.
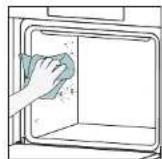
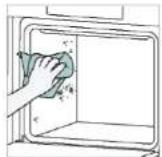
- When the appliance is cool, clean the inner surfaces of the oven with a cloth.
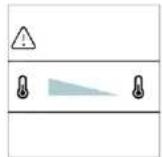
- Warning: Make sure that the appliance is cool before you touch it. Care must be taken with all hot surfaces as there is a risk of burns. Use distilled or drinkable water.
Catalytic cleaning
The Catalytic panels line the oven cavity and grant you the luxury of never having to contend with a dirty oven.
The panels are coated with a specialized enamel that boasts a microporous structure, adept at absorbing absorbs grease from splashes.
Through a catalytic chemical reaction, they efficiently convert the absorbed grease into gaseous elements when exposed to high temperatures.
Recommendation: Consider replacing the catalytic panels after approximately three years of use, especially if you use your oven for two to three cooking cycles per week. This ensures optimal performance and cleanliness.
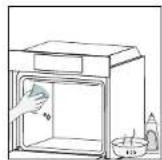

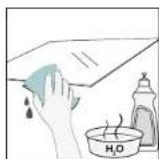
6.2.2. OUTSIDE THE OVEN:
removal and cleaning the glass door
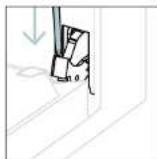
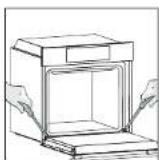
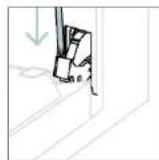
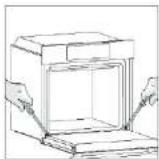
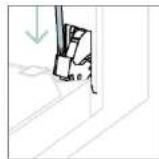
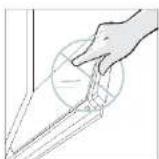
- Position the door at 90^ . Rotate the hinge locking tabs outward from the oven.
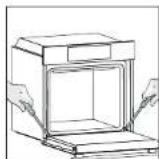
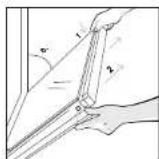
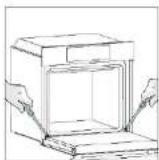
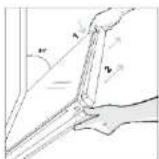
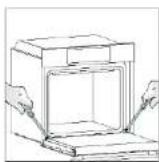
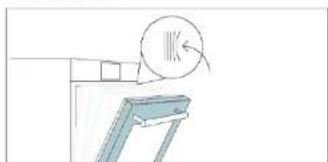
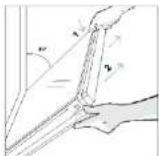
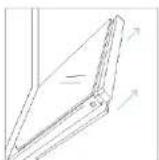
- Position the door at 45^ . Simultaneously press the two buttons on both the sides of the door's lateral shoulders and pull towards yourself to remove the upper glasses' door cover.
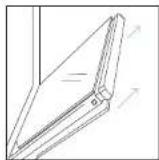
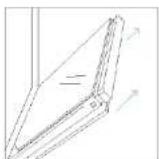
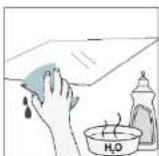
- Very carefully remove the oven glass, starting with the inner one. During the procedure, firmly hold the glass with both hands and place them on a cushioned flat surface (e.g., on a fabric).
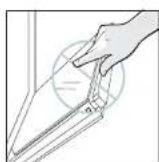
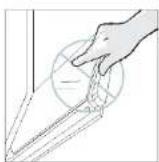
- WARNING: The outer glass is not removable.

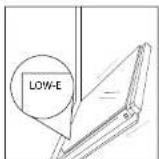
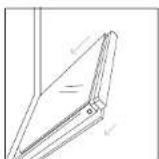
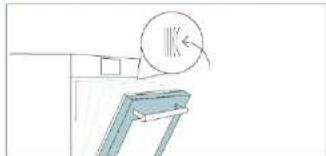
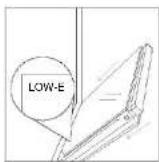
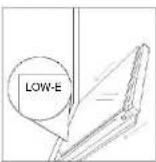
- Insert the glass panels, making sure that the "Low-E" label is correctly readable and positioned on the lower left side of the door, near the left-side hinge. This way, the printed label on the first glass will remain on the inside of the door.
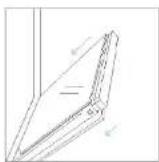
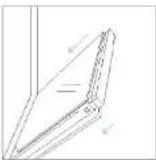
- Rea ach the upper glasses'door cover by pushing it inwards until you hear a click from the two side bu ons.
- Then, bring the door back to 90^ and rotate the hinge locking tabs inward towards the inside of the oven.
6.3 CLEANING OF ACCESSORIES
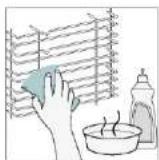
Ensure that you clean the accessories thoroughly after every use and dry them using a towel. For persistent residues, consider soaking the accessories in a mixture of water and soap for approximately 30 minutes before giving them a second wash.
CLEANING OF SIDE RACKS:
6 levels model
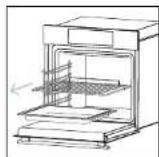
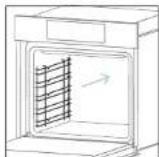
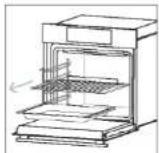
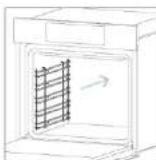
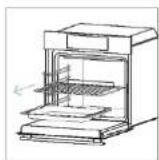
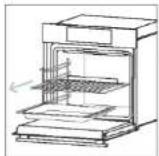
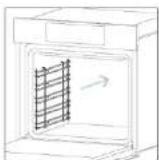
- Remove the side racks by pulling them in the direction of the arrows.
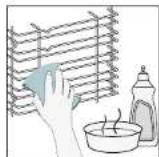
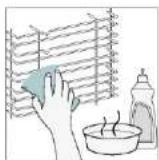
- To clean the side racks either put them in the dishwasher or use a wet sponge, ensuring that they are dried afterwards.
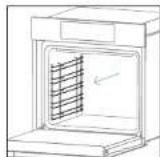
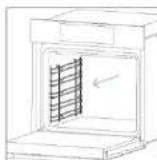
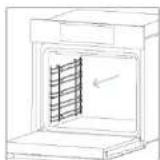
- After the cleaning process install the side racks in reverse order.
6.4 MAINTENANCE
COMPONENTS REPLACEMENT
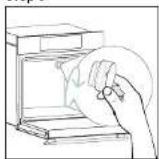
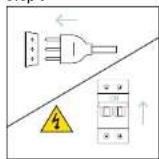
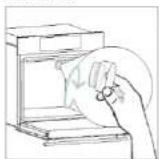
Changing the bulb on top
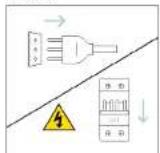
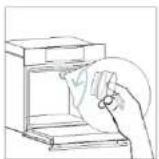
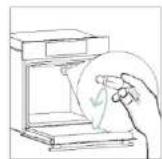
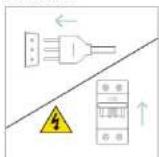
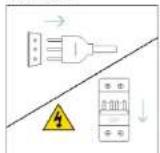
1. Disconnect the oven from mains supply.
2. Remove the lamp's glass cover.
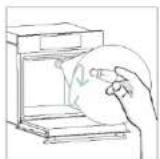
3. Disassemble the bulb
4. Replace the bulb with a new one of the same type.
5. Relocate the lamp's glass cover.
6. Reconnect the oven from mains supply
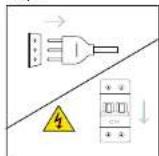
Step1
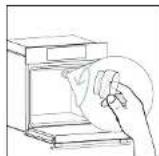
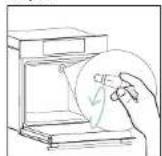
Step 3
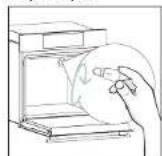
Step 4 Step 2
Step 5
Step 6
This product contains one or more light sources of energy efficiency class G (Lamp)
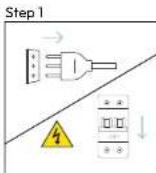
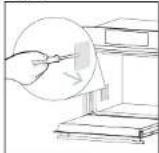
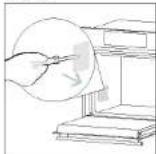
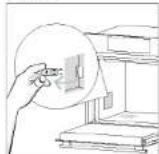
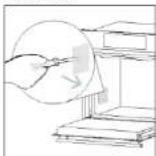
Changing the lateral bulb:
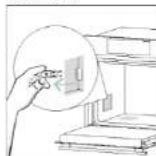
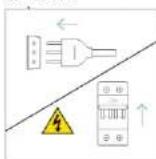
- Disconnect the oven from mains supply.
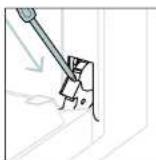
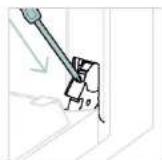
- Use a flat-head screwdriver by positioning it to the side of the protective glass and gently apply pressure to remove it.
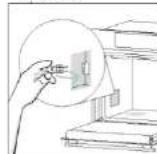
- Carefully grasp the bulb from its base.
- Insert the new one.
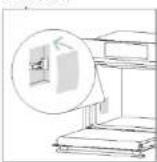
- Reinstall the protective glass by pressing it gently until it's locked into position.
- Reconnect the oven from mains supply.
Step 2
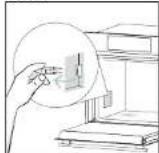
Step 3
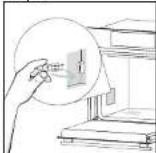
Step 4
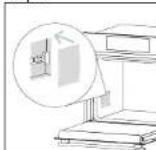
Step 5
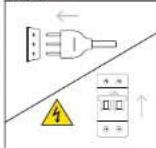
Step 6
This product contains one or more light sources of energy efficiency class G (Lamol)
7. TROUBLESHOOTING
if, during oven use, an error occurs, the display will show the code "ER" followed by two digits, which will identify the error.
Proceed by turn o the oven and un-plug it, wait for a few minutes, and then reconnect it.
If the error disappears, you can resume using the oven. If it doesn't, call customer service and commu
nicate the code (ERXX) you see on the display.
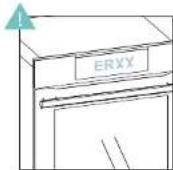
Error

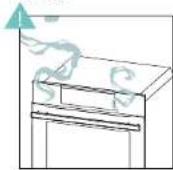
Smoke
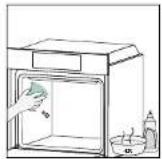
8. ENVIRONMENTAL PROTECTION & DISPOSAL
8.1.APPLIANCE DISPOSAL

This appliance is labelled in accordance with European Directive 2012/19/EU regarding electric and electronic appliances (WEEE). The WEEE contain both polluting substances (that can have a negative effect on the environment) and base elements (that can be reused). It is important that the WEEE undergo specific treatments to correctly remove and dispose of the pollutants and recover all the materials.
Individuals can play an important role in ensuring that the WEEE do not become an environmental problem; it is essential to follow a few basic rules:
the WEEE should not be treated as domestic waste;
- the WEEE should be taken to dedicated collection areas managed by the town council or a registered company.
In many countries, domestic collections may be available for large WEEES. When you buy a new appliance, the old one can be returned to the vendor who must accept it free of charge as a one- o ,as long as the appliance is of an equivalent type and has the same functions as the purchased appliance.
8.2.SAVING AND RESPECTING THE ENVIRONMENT
Where possible, avoid pre-heating the oven and always try to fill it.
Open the oven door as infrequently as possible, because heat from the cavity disperses every time it is opened. For a significant energy saving, switch on the oven between 5 and 10 minutes before the planned end of the cooking time, and use the residual heat that the oven continues to generate.
Keep the seals clean and in order, to avoid any heat dispersal outside of the cavity. If you have an electric contract with an hourly tari , the "delayed cooking" programme makes energy saving simpler, moving the cooking process to start at the reduced tari time slot.
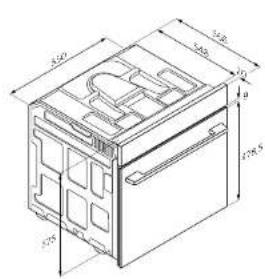
mm
mm
Vita penta fora Vita anale
CANDY
KOMPLETTES BENUTZERHANDBUCH
(DE) Kurzanleitung I (FR) Guide rapide (IT) Guida veloc
www.candy-home.com
CANDY HOOVER GROUP Via Comolli 16 Brugherio - Italien
WILLKOMMEN
2. PRESENTATION DU PRODUIT
2.1.VUE D'ENSEMBLE DU PRODUIT
2.2 ACCESSORIES
Grilles laterales (si presentes*)
Tournebroche (si present)
COMMENT INTERAGIR AVEC L'APPLICATION
Telechargez smartphone.
I'application
sur valeur


INSSCRIPTION D'UN NOUVEL UTILISATEUR
MISE EN MARCHE/ARRET DU FOUR
MeVTeAeEgSoftclose/Soft open (Moov atu unapxouv)
Onevteodas atao kxaijatoc kavolayatos ekyouivnkiinnpnsop,eaqaiicovicaqaikinranai oiaotovirac to xunmua nts.
Eutymo Taei-Aeitoupyia BBQo av utapexei
To kuro dyqya eva katana yaa yu uo aon ot dyqa, kaou odoyoo ayu uynm Bepkoopa (220) emipotovos vya anoiocba BAOK ouk KaO tio 010 m. Myo Kanyo, aooy aniy anopopaynki Dpoan wuy Amouv noi taia rau Taqou.
Taqi Airfy (pova av unapx)
Taqai aairily eaoaepalci o 10 ctoe oec apveo 10 Tpapia opoiopoeqa Ka tripoedotra. Oxytoc w otaleocua pia troyayan eotepkni emedvca dokmovc ta tpupepa sto eutepkek. Ia m uukoyi qauuow kui youwauw. rotebeintote to maiv anr to Taqai npipiatar.
EL 11

2.3. INAKAEAEAFXOY
Oi Aetoupyie Kai 6iaBepn Tuv Aetoupyuov npoov va aaiagouov avokova pe tapovte.
- Diakottnn emohny hienoupyia
- Dpa
- Eepokpua
4.08ovnLED - TnExepigouc
6.△cuip - Emoyeoc eeyyou
KYPIEE AEITOYPIE
HobovnEx4KupiesKeinoupyies
Aahayn ng Taeupkns Aapmci
1.Aouofoe to oupvo ana nV npox npuataoc
2. XpnojioiOHTe EVA katoaBidi e imTeHn KeaAIO ToTbEHTuAsTo aOny Tneupeo Tou TPOATETUOK UAAIoo K AAKNTe EApOg TIEON yia va toapaeite.
3. PaoTnpoaeknTnAupnAnTo nBaoTnC
4. TOnToBertnoTe Nv Kaivoupyia.
5. EnavarantoOeHnToTPOoAteunikO tapi meovrOcToaHaAupxpvaaepaloeiOntQon Tou
6. Etnavaovbete rov poupvo nny npoxn peuaro
Bnua 1
Bnμα2
Bnua 3
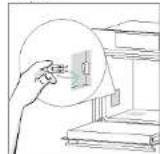
Bnμa4
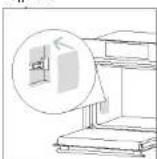
Bnpa5
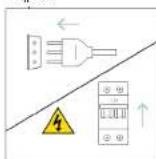
Bnua 6
Auro to npodv npieyipia npiopooepntye pntc knnwpac evpeynoc otooog G (aaptnpa)
7.ANTIMETQNIIEHIPPOBAHMATON
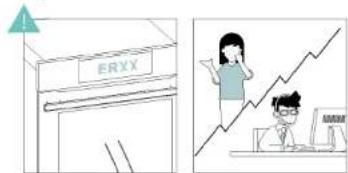
Eav, kata n diapkeia tnc xpnoi ng tou poupvou, napouaataei katio opala, ony obovn 8e npawotl o kwikoc "ER" akolouoouveoc ato duo ynpia, ta otria 8o tropodiopou v to opala. Ppoxwpntoe ornvotac vto poupv kai aotouovdeovtac vto anypi, nepiive AiyA eTTA KAI ouv uevauovdteogre.
Edu to opalua eapoviatet, utopoeite vauuydoet th xpon tou ooupou. Edv dev eepaviatet, kaleote nty umpoia eutnpentnoe neatuvkai kovtonote tv kwko (ERX) toun bntte stny 0ooyn.
Aoo
Kamvo
8. IPOEIA TOY INPEIBANONTO KAI IAEGEH
8.1.AIOEESHZYEKEYH
Autn oukeun eepi emuauov an ooupuva myu Eupuaaik Oyniia 2012/11EE oxetekk me ts naktpkec kai naKpovikoe ouokuec (AHHE). Ta AHHE (AtoBnnta HAKPkioukai KAAKPOVIKO EOpiao) npieXuyoTO put oyoe ouatec (Tou mtopoiu va exou apvntike cttintwoeic otne piaalov)doo ka baoika dojikac roxieia (Tou mtopoiu va tnaevapoxipoiotouboiv).Eiva onaynvto k AHAH (AtoBnnta HAKPIKoiKA TAPKOVIOEgOpiAOVA urobaalovtae duykckpvnteepcpia via tvu aoutat otnapakuvon kai atnpopuTu putuoy kai avakrtan aoovuTuukov. OI xptctc nKpovikui Ka naktpovikuiu uawkeuv mtpoov v diaepapataouo onayvko polo an diaoxpaian to an AHVE dev aouvoT ovipaaovt KivsoEvo anyvko Tu npovtai opiaqevoi Baoikov
- ta AHHE 6ev npemr va avriuerrwnicovrta wocikak anoppipmuata.
TA AHPE TIPETI va TApeopTAVe aBIOUC paOauoouaONaTOnppiAtu wUTo n BiaXepriT WvBjWvN bIKUV mIoTAnPauVuv TEAPuiv.
Ee 10aLc xupe, evdxetai va umapoxou biadaoiuyxuyoi oualoynvi meyauoc 6youc AHHE (AmoBTHw AHeKpIKou KA HApKovopKou Eclmou). Otav ayopace cie vae uOakun, nTnAiau mopoie va emtpoapei oovlntn o otolnc opoei la vyn atoae xeiupxepwn, apke i ouokun v eivai oioobuvau o toun kai va eek tic Ioeic leoutypcie me tn ouokun toun aoyacctte.
8.2.IPOZTAIA KAI ZEBAEMO TOY IEPIBAAONTOE
OTou elvai duvatov, aotopoyete tv npoepmuon Tou oopvou KAI TPOOITAOHATA va Toy ekele.
Na oaiyote Tny mpta Tou poupou 0o 10 tavaivetai, yni n Bepnnta am Tny koiotna
Baaokopmtetai Kae pap Tou (n npotra) aovaiei. I gaonavikn Eekovon enpeyiaoc, ojntote to
poupv Mte45 K 10 aeTnv Tnp aio npoypaunatievo teao Tou xpvov ouapeipiatoc kai
xpnaiomontre Tny utolaeimoev Bepnnta Tou vexkyi va napayoi o poupvoc.
Diapneite n TnouxKabape Kai yia ato aotopyetre tuxov diaonopbaeepomntac eew an toyn kaiota. Av exete uolaoia naekiprikev eveyiaac meupia xieuan, to npoypmaa (KaBuaepnpveu maeyiuea) kavei nekovounen vyeivnytioan, mertakivvntac n iadikkaia mayepataric yia va Eeknoi on poxirokpipeioeivncxpeowng.
- EΓΚΑΤΑΣΑΗ
0
1
EL 42
EL43
CANDY
VOLLEDIGE GEBRUIKERSHANDLEIDING
(NL) Snelle naslaggids I (FR) Guide rapide (IT) Guida veloce
www.candy-home.com
CANDY HOOVER GROUP Via Comolli 16 Brugherio - Italiè
English
Deutsch
Français
Italiano
Espanol
EAAVikα
Nederlandsls
Portugues
Slovencina
Slovenskina
日日日日
Polski
Cestina
Dansk
Suomi
Norsk
Svenska
日日日日日
日日日日日日
日日日日日日
Hrvatski
Romana
Türkce
园园园园园
Magyar
日日日日日
Lietuviu
Eesti
Latviesu
WELKOM
ALGEMENE WAARSCHUWINGEN
INSTALLLATIEWAARSCHUWINGEN
2.PRODUCTINTRODUCTIE
2.1. OVERZICHT VAN HET PRODUCT
2.2. ACCESSORIES
4. WERKING VAN HET PRODUCT
4.1.HOE HET PRODUCT WERKT
DEOVEN AAN/-UITZETTEN
UTILIZACAO E MANUTENCAO
adre:www.cantio-group.com
AKO KOMUNIKOVAT S APLIKÁCIOU
Váš spoletřićMozillabytropojenyk domacežbezdrolovcei sisti a da sa vodlat na diafki pomocou aplokacije. Pripoje svoj spoletřić, aby stabe zebapčeliactualizu kajnovši solvěkă fucné.
POZNAMKA
Po zapnut rury budu ikony WIFI bilkat 30 minut. Pochas tohto odobia je mozné produktzaregistrovat.
Uistite sa, ze je sieit Wi-Fi v domacrosti zapnuta
- PodrobnéPokyny sa budu zobrazovat na spotrebicj aj na mobilnom zariadeni.
Pripojenie rury moze trval a2 10 minut
Dalsie pouny a riesenie problemov najdete v applkacii.
Stiahnite si do smartfou.


REGISTRACIA NOVEHOPOUZIVATELA
Kliknite na, Zaregistrova's
Mozete sa zaregistrovata prostrednictvom sociynych uctov alebo svho soobneho e-mailu

RYCHLE PAROVANIE
Krok 1
Vyberte moznost, Pridal'spotrebic
Krok 2
Povolte pavolenie polohy.
JAK KORZYSTAC Z APLIKACJI
Vyberte, Pridat spotfeic

Pooled variance
P#
1
CS42
CS43

CS44
CS45

CANDY
MANUAL DE UTILIZARE COMPLET
(RO) Ghid rapid I (FR) Guide rapide (IT) Guida veloc
www.candy-home.com
CANDY HOOVER GROUP Via Comolli 16 Brugherio - Italia
English
Deutsch
Français
Italiano
Espanol
日日日日日
Nederlands
Portugues
Slovencina
Slovenscina
日日日日
Polski
Cestina
Dansk
Suomi
Norsk
Svenska
四四四四四四
Hrvatski
Roman
Türkce
日日日日日
日日
Magyar
Lietuviu
Eesti
Latviešu
BUN VENIT
Vã multumim ca ati ales produsul nostru. Pentru a va garanta siguranta sia obtine cele mai bune rezultate, cititi cu atentie aesst manual, inclusiv instruciunile privind siguranta, si pstraientru consultari viitoare.
AZ ALKALMAZASSAL VALO INTERAKCIO MODJA
Soft Close/Soft Open viruses (tikai, jairr)
Viegli aizveramas un alvaras enges konrolte durju kustbu, nodrosin tiwenmigu kustbu un novarst oizanfors.
Vieda plate - TVAIAKA rezims (ukal, ja Ir*)
Izhiekla forma ir piemera gratilaanei cepiskrae aigastu temperature (220^) ,panakot barbekji cienigu resutatu majas bez leikiam dmiom, k no dcrosina tauku notecinaan funckija plates apaksia.
Plate cepsanai ar karsto gaisu (likai, ja ir')
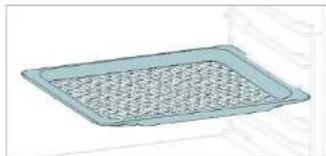
Plate ecpansai ar karsto gaisu nodroflina, ka karstai gaiss partikai pieklost viemeneri fris dimensijas, tape arcipreir kruukskigaka, het lekspse ediens to sulfs. Lai uzverteu skidurmu un panejumu, novietojet to virs cepansai plakes.

2.3.VADIBAS PANELIS
Funkijas un fungciju rangu var mainit atkaribna no modela.
- Funkciju selektora poga
- Laiks
- Temperature
- LED displays
5.Tahvadaiba - Lampa
- Gicarrinas yadha
GALVENAS FUNKCIJAS
5.2.EVERYDAY COOKING TABULA
Edienu kategorjlu izveje iau pagavot dažadas receptze becepekrasns epireksekjas uzildifanas, pateicotles pašam gatavoşanas programmákmaz peiagotas kalras kategorjvas vajadzibam. Pec gatavoşanas programmas Izvejes liks paradts noklusejuma laiks un to var rediget, pagriezot labc pagu; gatavoşanas temperatu var mainit, nospiezot paaso ilkonu. Abus parametrus var lestatti erobezot diapazonă, ka paradits tabula zemak.
| Symbols | Apraksts | Uzseldi-sana | Piatukta pozicija | Tempe-raluţa diapazons (℃) | Lalika diapaz-zons (min) | Heat Feel sensora temperatura (la pleiejama) | Apraksts |
| Gaia | NE | 2-3-4 | 180-200 | 20-80 | 55-85 °C | Liellopu galas, tela galas un cükgalas cèpésiem,majupnu galai un galas izcärniem. | |
| 80 | Zivis | NE | 3-4 | 160-180 | 15-45 | 55-65 °C | Veselam zivim un filejām. |
| 85 | Därzeni | NE | 3-4 | 180-200 | 30-80 | 70-90 °C | Grauzdetem därzeniem un karupailem |
PIEZIME Ja péc copéoskrasns izlsogsanis ir nepiocieams turpinat gataovansu, ieteicams Izvairties no Everyday Cooking programmu Izmantoanas an tu vieta izveleties standarta funckjas.
| Recepte | Porcellia lichlums | Edenia gatavolanasprogramma | T°C | Edenia gatavolanas piederumis | Plauksta pacificja | Gatavolana latka (min) |
| Leliopa galas cepelis | 500-800 g | Geja | 190 °C | Mešilaa restitdes | L3 | 30-40 |
| Loliptë tlljëa | 200 g | Geja | Mešilaa restitdes | L3 | ||
| Villotais zajës | 1000-1500 g | Geja | 180 °C | Mešilaa restitdes | L3 | 40-50 |
| Vallingona cepelis | 500 g | Geja | 220 °C | Mešilaa restitdes | L3 | 50-60 |
| Cukgeljas cepelis | 500-1000 g | Geja | 200 °C | Mešilaa restitdes | L3 | 40-70 |
| Cukgeljas ribripes | 1000-1200 g | Geja | 220 °C | Mešilaa restitdes | L3 | 85-100 |
| Jera gajë | 800-1000 g | Geja | 200 °C | Mešilaa restitdes | L3 | 60-80 |
| Jera kajë | 1500-2000 g | Geja | 190 °C | Mešilaa restitdes | L3 | 60-100 |
| Laë filiëa | 200-600 g | Zvis | 170 °C | Ceplanass plate | L3 | 20-35 |
| Tunca steiki | 600g (apm. 4 ges.) | Zvis | 180 °C | Mešilaa restitdes | L3 | 10-20 |
| Zobonzivs steiki | 700g (apm. 4 ges.) | Zvis | 220 °C | Ceplanass plate | L3 | 15-20 |
| Mencas fioja | 600g (apm. 4 ges.) | Zvis | 150 °C | Ceplanass plate | L3 | 10-20 |
| Jūras plaudis, visola | 1 | Zvis | 170 °C | Ceplanass plate | L3 | 35-45 |
| Jūras plaudis, filiëa | 500g (apm. 4 ges.) | Zvis | 150 °C | Ceplanass plate | L3 | 10-20 |
| Jūras asara filiëa | 600g (apm. 4 ges.) | Zvis | 150 °C | Ceplanass plate | L3 | 10-20 |
| Sift cepta ziva | 1 | Zvis | 220 °C | Ceplanass plate | L3 | 30-40 |
| Ziju jessmijë | 8 gabali | Zvis | 150 °C | Mešilaa restitdes | L3 | 20-30 |
| Pildit kalmani | 4 gabali | Zvis | 180 °C | Ceplanass plate | L3 | 25-40 |
| Pingraodu maizao | 1 | Kondtoreja | 200 °C | Mešilaa restitdes | L3 | 35-50 |
| Rudzu maizë | 1 | Kondtoreja | 190 °C | Mešilaa restitdes | L3 | 35-50 |
| Sviestmaizu klaips | 1 | Kondtoreja | 200 °C | Mešilaa restitdes | L3 | 35-50 |
| Saïdres bagelates | 1 | Kondtoreja | 220 °C | Mešilaa restitdes | L3 | 15-25 |
| Saïdres kataliës mikiës uzkadas | 1 | Kondtoreja | 190 °C | Mešilaa restitdes | L3 | 20-30 |
| Fornolë | 1 plata | Darzeji | 200 °C | Mešilaa restitdes | L3 | 30-40 |
| Recepie | Porcelles liheuma | Edema gatavolanas programma | T°C | Edema gatavolanas piederum | Plaukta pezicja | Gatavolanas latis (min) |
| Därzeru maisijumi | 1 plate | Darzeji | 190 °C | Mešilna nestles | L3 | 40-45 |
| Ziedkappoi | 1 plate | Darzeji | 190 °C | Mešilna nestles | L3 | 40-50 |
| Kirbj, kubovla | 1 plate | Darzeji | 200 °C | Mešilna nestles | L3 | 30-40 |
| Pitfli pipari | 1 plate | Darzeji | 180 °C | Mešilna nestles | L3 | 70-80 |
| Pitfli cukini | 1 plate | Darzeji | 190 °C | Mešilna nestles | L3 | 35-45 |
| Burčhnu nijljas | 1 plate | Darzeji | 160 °C | Cepšanas plate | L3 | 35-40 |
| Brokoji | 1 plate | Darzeji | 190 °C | Cepšanas plate | L3 | 30-40 |
| Rataujs | 1 plate | Darzeji | 190 °C | Mešilna nestles | L3 | 40-45 |
| Därzeru piñäge | 6 ramekni | Darzeji | 180 °C | Cepšanas paplate + včidnoos | L3 | 25-35 |
6. APKOPE UN TIRISANA
6.1.VISPARIGIIETEIKUMI
Regulara tiriñana var paildizinat ierfces kalposanas laiku. Pirms manuilas tirisanas veiksanas uzgaidie lidz cpeşkraisns atzdizte.
- Péc katras cepeskrás lietosanas reizes pietiek ar minimău firísanu, lui zutřečtu cepeskrásni nevainojni firu.
Neizlajiet cepeskrans sianas ar aliminja foliju vai vienrezihtojamiam aizsargfdzekliem, kas pieejami veikalos. Aluminija folija vai citi aizsargfdzekli, niklustot tiesa saskare ar karsto emalu, var izkust un deformetiksejo emalu.
Lai novrste cepskrans parnfigu piesarnosanu an tas Izraistspo sccgo dmurdu, ieicams neizmantot cepskransi ar parak augstu temperatur. Efektivak ir paidzinat gatavoanas laiku un nedaudz samazinat temperatur. - Papidus cepeskrans complektacija lekjautajemi piederumiomi ioteicams Izmrotat tkal pret jot augstu temperaturi noturigus traukus un cspasiane veins.
6.2 CEPEKRAINS TIRISANA
6.2.1.CEPEKRSNSIEKSPUSE:firisanasfunkcjas
Pilotiska tirisana (atkaribno krasns modela)
Sis process balstas uz ktmisko procesu ar tadu pa'snosakumu, kas letiver sare2gTu vile sadaifanc imzamloti terismko apstradi.
Péz activizéñanas las automàtišek blokérásne durvis un atria paaugstina temperaturú fidz 410 °C. Tríñanas cikla beigas viss, kas paieik cepeskrns telpa, ir minimáls puteklu nosedums, ko vii noslauct ar mitru dránu.
Ka tas darbojas?
- Iznemiet no krasns visus piederumus, plemaram, rezgus, sanu stativus un sanu stativu skrves (^*)
- lesledzlet funcklju pogu 念 . Pagneziet cisparrips vadikias elementu, la lestatttu pirolittsko programme;
Laujiet fungcjlii darloties iepiek's leistatija laika. Si procesa un nakamas dzeseisanas fazes laika cepeskradsn durvis palkis aizeltaga. - Kad ierice ir atidusisim, nofret cpekskrns ieksjias virmas ar drui. BRIDINAUMI Pirms pieskarstanie ieriice parricinities, ka tir atidusisim. Jabut uzmanigiem ar visam karstajam virsmam, jo pastav apdegumu risks. Izmantojet destileu vai dzeramo üdeni.
(*) tikai modelem ar / fimenjlem.
Aquaactiva
Auscidziy funckjia Iz strzadra, lai巳 plespe neometo nnelius netrufmus un nodrosnatu atru un vc daudzigru risinajmu cepeskrasnelas telpas tfrtnanal, izmantojoit tvaika jaudu.
Ka tās darbojas?
- Cepeskrasns apaksej reljefielejet 100 ml udens.
- lesiedziet poug; Ja nepieciclesams, pagziezret cijarpiras vidikias ierici, la iestafu programmu "Hydro clean" (Hidroattiriana), Laujet funkcij darbotes ieprieks iestafiia laika.
- Tirisanas procesa beigas laujiet cepekrasnij atdzist.
- Kad ierice ir atdzisusi, notinet cepeskrasns ieksjjas virsmas ar dranu.
- BRIDINJUMS! Pims pleskarstans iertecil parlecinlities, ka ta iratzisui. Jabot uzmanjgim er visam karstajm vismarn, jo pastav apedugum risks. Iztmonjot destilev ut al zderano edeni.

Katalitiska tirisana
Katalitsiek paneji niklaj cepeskras nelpu un nodrosina, ka nekad nav jacinas ar netiru cepeskrasn. Paneji ir parklari specializetu emaluj, kas lepojas ar mikroporainu strukturu, kas no jakatam absorb-taukus.
Kataliftskas kirmiskas rekaljcas rezultata tie efektiv pärvör absorbēt smervieli gázevida elementos, ja ti ekk paktlaut ausgalt temperaturä.
leiteikums. Apservieri kataflisko paneju nomainu pec aptuveni tris gadu lietosanas, it ipasi, ja cepeskrasni izmantoj daviem lidz trim gatavoosanas cikllem nedeja. Tas nodrosina optimalu vektspjt un tribu.

6.2.2.CEPESKRASNS ARPUSE:
stikla durvyu nonemsana un tirisana
- Novietojet durvis 90^ lenki, Pagriezielet engu fiksacijas izcilnus uz azru no krasn.
- Novietojet durvis 45^ lenki.Vienlaicigisnospieiedt abas pogas abas durvu sanu plecu puses un pavelciet pret sevi, lai nonemtu augsejo stklu durju parsegu.
- Lotuzmanigi nonemiet krasn stiklu, sakot arieksejo.Proceduras laika stingri turiel glazi ar abam rokum an novietojet to uz polsteretas plakanas virmas (piemeram, uz auduma).
- BRIDINJUMs! Arejais stiks na\nnonemams.
-
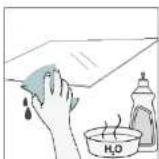
Notriel stikur ar mikstu drun un piemotiom tiranas lidzekliem.
-
levietojlet stilka panelus, partlecinoties, ka uztime "Low-E" ir parezil nolasama un novotota durvu apaksjke kreisajpe sute, netalu no kreisas puses enges. Tada veida drukata etikete uz pima stilka paliks durvu ikspuse.
- Piestipriniet augsjo stiku durvu vaku, spižot zu izekspusi, fidz dzirat klikskj no abam sanu pogami.
- Pec tam novietojet durvis atpakaj 90 lenk't un pagrieziet engu fiksacijlas izcilus uz ekspusi krasns ieksxpuses virziana.
6.3.PIEDERUMTIRISANA
Pec kataris ltoosanas reizes rupgl notrilet plederumus un nosusinl tos ar dvlei. Noturigu attleku gadjum apsveriet plederumu lemcrceisan udens un ziepu maisijuma apemeram 30 minutes pims to ortlreizjas masqasanas.
SANU STATIVU TIRISANA
- 6 lmenu modelli
-
- Nonemiet sa
-
Lai notifru sana stativus, iieiiclot ts trauku mazgajamaja mašina vai izmantojeit mitru suki; pèt tamstifvi ir jánozāve.
- Pec tirisanas procesa uzstadiet sanu stativus, veicot daribas apgrieztacseciba
6.4.APKOPE
KOMPONENTU NOMAINA
Spuldzes nomaina virspuse
1. atvienojiet krasni no elektrotikla;
2. nonemiet lampas stikla parsequ:
3. nonemiet spuldzi
4. nomainiet spuldzi pret jaunu tada paşa veida spuldzi;
5. parvietoiet lampas stikla parsequ
6. atkartoti pievlenojlet krasni elektrotiklam.
1. darbiba
2. darbiba
3. darbiba
4. darbība
5. darbiba
6. darbiba
Sajdsrodktairvismaz viens gaismas avots. kuna energoeefktivbtes Kase Ir G (Jampa).
Sanu spuldzes maina:
- atvienojiet krasn no elektroftkla;
- imzantootjel plakanu skrvglezi, novletojet to alzsargstikla sanos un viegli piespieledt, la to nonemtu.
- uzmanqi satveriet spuldzi tās pamatne:
- ievietojiet jauno;
- uzstadiet aizsargstiklu, viegli piespiezot to, lidz tas ir nofiksels vieta:
- atkartoti pievienojiet krasni elektrotklam
1. dariba
2. darbiba
3. darbha
4. darbiba
5. darbiba
6. darbiba
Sajts produktir vemaz viens gaismas avots, kura eneryoeftektivates Kase ir C lampst.
7.PROBLEM NOVERSAN
Ja kraans lietoşanas laika rodas kūda, displejā paradisies kods "ER", kam seko divi cipari, kas identifics kūdu.
Pec tam izledziet cepeskrasni un atvienojlot no konktaktgzdas, pagaidlet dazas minutes un pec tan atkul piovienojlot.
Ja kJda Izzd, varat atskt cepeskrns loTeSana. Ja ta nenotiek, zvaniet kIentu apkalosanas dieneastam a punazojet dispiejre redzamo kodo (ERXX).
Klunda
Dumi
8. VIDEAIZSARDZIBA UN UTILIZACJA
8.1 IERICES UTILIZACJA

S1 erikeir marketa saskanaar Eiropas Direktvu 2012/19/ES par elektrisko an elektronisko 1erfcu atkritumemi (EEIA). EEIA sutan gip sarnjoos vias (kas var negativ ietekneti vidi),gan pamplemententus (ko var lietol aktartoli).Ir svarigi veikt tipasu EEIA apstradi, lai parezii nonemtu un likvidedu visus piesamojumus un atgutu visus materiulus. Fiziskam personam var bult svariga lomata jala,lee EEIA nekUTu par vides aizsardzib problemu; ir bortiski ieverot dausz pamatnotekimukus:
JABETEKA:6HIM7/HM8B3B3BACMOCTOTMQDA.
Taba 3a neyehe (cmo 8KO NMA)
Tabata 3a chehe e iHaAeAa 3a noctAeHae H a pABHOmeP 3aIHNHae H aNtHto, KnoTo n PnAn H aMeAa 3a BokMnKn H cnKnpAei npn Hnnn Hnnpn Hnnpn Hnnpn Hnnpn Hnnpn Hnnpn Hnnpn Hnnpn Hnnpn Hnnpn Hnnpn Hnnpn Hnnpn Hnnpn Hnnpn Hnnpn Hnnpn Hnnpn Hnnpn Hnnpn Hnnpn Hnnpn Hnnpn Hnnpn Hnnpn Hnppnn Hnppnn Hnppnn Hnppnn Hnppnn Hnppnn Hnppnn Hnppnn Hnppnn Hnppnn Hnppnn Hnppnn Hnppnn Hnppnn Hnppnn Hnppnn Hnppnn Hnppnn Hnppnn Hnppnn Hnppnn Hnppnn Hnppnn Hnppnn Hnppnn Hnpp
- KONTPOEN nahen
- Lichopolsu Inzhukatopara na chonnaitre na pachrotae
- Peewet
- Taen
- Kanak ha beHTaTcDp
5.BpataHaФyphata - CtrapanHHH peTet (aK aCckKHeH: cM3a 30 NcN KEMeH)
- CepHemHomep HOR

T
Cyx Metan
Metanatra puenca hba yphata no ndohkyne, perynnypam padr koto noynkpi kchosere 3a0TBeHko, kato ochnyphba panbomnoq roBoHn yNCHoHnOncnBHeHO. MoKa de caKoIcIbA 3aNoCTABHHe HauHHn NTHAHn Ha paJINHHn BNCNNH 3aPaJIHHnTOBAPKnHyHKn.
No-dnboka Taba
No-bnboxata Taa e Xaepha Ns apeuents cpoaebae Hteocht nnn ocebe, Kato hnpimep nooebeeta ne neheo. DboXcHtata i e cneuaHno npoeKtupha daOchrym Xekahata KOHNCTEHJMa Hxaohata, pnpotroBHe B He.
TeneckonnHnn pench (cAmO aKo HMa)
TeneKOnHHHepe pOeA cyPhyBa ca paPtoae. KOHO MOrat da ce yIbTHaBcBa, KOTo yEnChRaB noCTABHETo KINn HsKaDaHcHToHo h npEMeTe, C63 da e HeoKoHMoD Da BpOcHete Dn60k o 8epua dyPhy.Te nOp6pRsar BeonachocHTa, cTaBnHocTTa H MoRat da ce peryHnat Ha panAnHH HIna.
INTENRENTHNA TABA - peKIM 3a 6ap6eKO (cAMO 8KD IMMA)
BngbIeHATA pofma 03nOJIaR naPbAINu HpKynlAIA HA bIaTtA, TerepehApA nprTOBeA, KATO noDyBPA HA BcOKA cTeENHa bIaHIOCT HA xpaHATA. B a3aMCHOCOT OTOKHeBCTO BOda, NAtHO B TaBtA, ue ce NoYiuy nO-cxOy kINoNoBAnxo'TOBHeBO.
Wu (cama axo nma*)
KuTbPABTOAEBHIOCROPHARBESAEENEMENT, KATOepehXepheXePAHATAOMeNae 3a ce pnoTHPOPAHOMEOHO.To e HAI-NKOxOAn3a xpaHa cHo cpedEHNpMnE.10eaneH3 apeoTXPmBaHe h BryCa H TaIADNHOHO TNEHO.
ПангТЯМЕКТSATБAPРЕМEКО OTБAPRЯ经(CBMO BKO HMA)
PAnHTe 3a MeKo 3aTbAPHe N OaTbAPHe KOtPrONIPAT
DnBKeKeHToHa Bpata, TkoOcNpyrABat PnBaHO
DnBKeHHe H npeOtTpBnATBaT 3aTbPb/BAhe.
INTENRENTHA TABA - pexim 3a npaa (cama 8KIO HA)
MnBbHANATAO DOPMa e NOxOuDIA a3 neeHbE bB cyphurnpin BmCoxA TmmeparpTa (220°), KOto daba 83MOHOCT a3 noctHrane Ha bap6beo Eeffect doPn y doma c manko dm, bnaorapdene HA daNe3kHOTO DEACTHE MaaHHINHTA HbDIOHa Taata.
Taga Airfly (cmo ako mta*)
Tabata Airfly rapaHnO,pe roepuHHT bXyIO nOCTMA do xpaHATA pahOMePHo H TpIMMeHO, KOETO npOeTNOx-pYnKHe BHHIOCT, KATO sanaasa cspueHHATA kPexKa.3a cSpEpane Ha cokope nNanipoxo, no nocantere bPxpy TaTa 3a peye.


2.3.KOHTPOJIeH PAHEI
ФИКИNTE N KIACAPAHETO H A FYHKNHTE MORAT DA CE POMEHAT B 3AENCHMOCT OT MOpEna.
1.Cenektop3aphiHua
2.BoeMe
- Temnepatypa
4.LEDU
-
MTCTAHUMOHHO xppnpeHMe
-
Namai
-
Kontrponen prn
OCHOBHnΦYHKUHM
Dnncnner 4 OCHOBH H
HHTECHEAepc:ww.cany-group.com
KAKDA B3AMMOECHTBATEC PNIIOXEHNETO
BauHHT ypeD oMeK de Ba6e Cb3p3aH KbM BauaTa DmaUaHa 6e3K4H MaPeKa H da Ce ynpaaRaB AICTAHOHc n OmoTAt Ha npInoHKeHo. CbPkeTe BauHn ypeD, 3a Da cTe cmHyPHN, Ye a EkyAINmepA HnHOHBe codTpEpynФyHKIM.
3ABENEKKA
Cnepa KTOF pHypata E kNIOHVA, HOKOTA WIFMI a npObIbXKeHMe HA 30 MHNyTm. Ipe3 ToBA apeme e bMbMOxDA per nEHTCPnate npOyKTa.
- YEpOTeCe, YoDMaHHTaBn WIFMpeKa e BKNIOHeHa. -Ie BN bDpat dAedeH HAcOKn CTbNk No CTbNk KAKTO HA TAKa N HA MOBNOH YCPOITcBO.
Cbbp3BaHeTo Ha cyphatha MoKe Da OTHEme Do 10 MmHyTN.
3a donbHHTeHNH HAcOKN IOTcPaHRABaHe HA HeuAnpabBHOCTM,MOr, BuKTe npnIOKeHMeTO.
Wsternete Ha Bauu CmaptfoH


PENCTPAUN HA HOB NOTPEBNTEN
- UpaKHeTe BbpyPcna
Mokete da ce perntcnpate Ype3 akayHT oCounanHMe MPKn Hn da ce perntcnpate C nnnn CH mnn
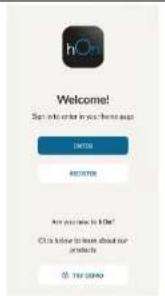

3ANUCBAHE 3A BbP3O CDBORBAHE
Cbrnka1
3ABENEKKA:OtKNOXHTCTAPeKINBcHAMCnEaZdAabeHbIPObJNkHTeNHOCTHaTOBHe HneHbANHEHKBFMQHNKNTHEKPN
BG23

DONBHHTENH HNKUH
3AKIOHOBAHE CPEUY DELA
TANyDfHnMnBnIIOBIOJIbBA Da 3aKIOHOTe EKPbA,3a DnpeDjTOpTInTe HekEnJHO KINON3BaHe OT HeNbTHIOHN,3a Da kTNbMpate TaKIOHHTe HO EKPbA,HATNCHEt N 3aDpKBe TEOHOBEMHO ByOHTOMHe HA DCTAHIOHNOHTo YpTaPAnHEHe N mAMnTa.
NoBTope CbUoTo DeHCTBHe, 3a Da DeAKTHBnPaTe 3aKnOuBaHeto.
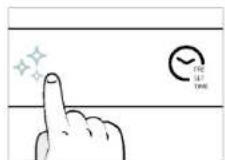
4.2.ФYHKLIN3A TOTBEHE
ONU8BbP30 NPEBAPNTENHO 3AFTRAHE
3a da ce cyopkn pfzata ha no prpbae, ouonnla 3a sbpno no prpbae moe 6a 6b de hspbahe 4pe3 HNTKACHE HA KOHATA 3a Tempepatya 3a 3c Keydnu, cnd Ke TAO cTe hspan nporpama 3a rotBEHe n Tempepatya. Taes Onlpaue kAe KTHINPA KOMBVAIACAQT OBTNATOP N HAPBATENH ENEMINI, NEHABNNO MT hspDAHATA FVKNH3 aTBePbe
3a Da chene ttehepner, koro 8b spono nnoepnbae e aekmbnau BOHTINATOPtHa KAMpepa ige 6be M3KIOHIEH, DOKATO yphHATA DOCTHIK XeHNAPATA TEMEPATyPA.
4.2.1.CTAHAPTHNФYHKUIN
3AEBENKKA: 3a KNYKNI, KOIIO NIKCAIBN ONGRAPBHe, YBEpeTe CE, YE BCHKN PPNHADNEXHOCTCn APemxHHTN NO BPEMe HA TAn Faa.
PnpoHHTNHO NOHCTBAHE (B3aBNCMOCTOTMOneHaHaPhpHata)
Tosn npoece ce OOBaba HxMMHNNHPOne, cOeoc. bcIooTO IMe, KOIO BTKHOVA pArpaKaDAHTC hAo CNOXHBEaeeCTBaEy nPrnAaA aTo TOnNIIHa oBapOZK.
BdHbK CTAPnHaO,TO AROMTHIOHO 3aKIOHOBa PATATA Na CyPhHTA N 6bP0 NOBHIABA TEmneppatypa Do nIIRAParWIT410°C.
B KpaH NcMbHa HNOCHTBAE CNOKo KTOE OCTABA BAMEPATA, E MNNHMAIHO OTJIAHAHE HA pax, KOETO IeCHO e 136bpcba cIIbXkA KbPnA.
KanpaBOTn:
- OCTPAPHTE BCNNKn PPMHADPNEXHOCTN OT FyPHATA, KATO PEWETKN, CTPAHNHA PEWETKN IN BNT HKTPAHNHNTPEWETKN(“);
- 3abPteTe dyHKIOHANO KOINHe HA,3abbpTeKHTpONHIA INCK,3a Da 3aAdeTe PnpOHTNVA HPOpMA;
Octabete hykunmta da abotn 3a npebaprrnno hdo zadohe o bempo. No bepe ha tosn npoeuc cnndeaataa cha ha oxnaedae bpatatah na hyphnatue octe octane 3akno-eha.
- Korato ypebte co xnaHn noHCTe BtpeuHHTe NOBbpxHOCTn Ha pypHATA c Kpbna. A PEPDYNPPEKDEHME: Yepete ce, yepedt e oxanaHn, npdi da ro doKOCHETe. Tp6ba da ce BHMMA CACHN ROPEUIN NOBbXHOCTn, TBk kato mMa pckO tN3rapHe. HsnoaBaan deCINNAHn NnN nneHa BOda.
()CMAO38MOENBc7HBA.
Aquaactiva
ΦYHKHNTA Aquactla e IpOeKTHPnA da ce cPiabra Iecho C IeNk 3MbPCBAnH N OCMYPBa 6bp30 n EOKONHHo peWHe Hs noHCTBaHe Ha BbTepuHocTt Ha BaWAta CyPha C nOMoHTA HcNnata Hapata.
KanpaBorH
HaneIte 100 mN BOa B DOONHpapeHa Hpyhata.
2. 3aBpTeTe KOHTeHa Ako e Heo6xOIMNo, 3abTpTe TE KOTPONHn DaCk, 3a da 3apaTe nporpamata Hydro clean. OctaeTe FyHKunTa da paobTo 3a npedapInTeHo 3aadEHOto apeme.
3. B kpa ha npoueca Ha nouHCTBaHe octaBeTe dpyHaTa da ce oxnaDn.
4. Korato ypeBbT ce oxnana, noHCTeTe BbTpewHHTe NOBbpxHocTH Ha cypHata c Kbpna.
5 PEPDYNPPEKDEHNE:YBpeTeCe,Ye ypeTBe OXnAeH,peDnJaToKOcKHeTe. TpaBaDa Ce BHHMABa C BnHmRopeUINOBpHXOCTN, TbKATO HMA pckOT N3rapHE.N3non3BAIteNecttnnPAHn INNNTeHbOCA.

KataunTuHNO nouchTaHe
KATNIHTNHITE NaHEIN NOKPBAH KAMEPATA HyPHATA H BN OCHYPTBAT NYKA HNKORA DA He c Hana Hare c c CnapBCTC mPbCHa yPhyA.
PAneHnIeCa nKnPITH CtC hcnAeHnE mHaN, KOTo Ce otIINuBa C MmKpOnpoeCTa cTpyKtypa, cNoCho6Ba dA aocbpaMa3AHnHtne O np3kNtke.
4Ue3sKATINTHHcXMmHeckaPeKtIeTeFekTHIOIbpeBbAaOcBocBipAHATA M3HNHBA 18Ca3063aENHEEMTJI, KOTAO C8J3IOXeHHa BIAOCIKI TEMNEPATy.
Pnpopbka: Pnmcnre 3a CmHa K aKanunHnHnne naen Hn cne npwnntnne Hn Tp nrodnnnyohtpe6a,ocobo kno hnsBnate pHyhata Ch da Da no Tp ukbna Ha rotbe Hn ceDMTORa npahtnpa OTIMMANA pnoN3DnENTHNOCTNTOA.

6.2.2 IN3BbH DYPHATA:
PnpeMaXBaHE m NOoMCTBaHe
H3CTbKHeHaTbPdTa
- Noctabe Bpata Ha 90°. 3abptete 3aikovbaunite nactnHa nantne B NOcOKA HABHt Ofpyhnte
- Noctabete Bpatata Ha 45",HaTINCHETe ENOBPEMENHO DABTA 6yTONA OT DaBTE CTPAHNA TcPANHNHTe PAMENA HA BpatATA NdpbInHete KbM C6E Cm, 3a Da npemaxhete Kanaka Ha ropHOTo CTbNkHo apatata.
- MHORO BHMATENHO OTCTPAHETe CTbKOHTo HaCyPhaT, KATO 3aONHETe OBTBTPUHNTO.No BpMeHa NPOUeIpyata XbAHETe 3apABo CTbKNOTo CDBPbJIeNTO NOCTABete BbPxMyKa NPOCKA NOBbPXHOCT (HnPbBpXnnt).
-
PnOCTETe CTNKFIO C MOKA KnPNA nNOXDOAUII NNOCTAAUIN npENAPATN.
-
Noctabe TcBkneHnTe nahen, KATO CE YEbEPTE, Ye ETKHeTb .Low-E" e npabINHOeTHm N OMOHIOHPa n DOnHATA NaBCTPAH a BpataT a 0130 Do IaBATA nAHTa. No To3n HauHH OTNepaTAHIT EtIKET Ha NpBTO T cBKnO 1E OCTAE OT BbTpeHATA CTPaHa HA BpataT.
- NoctabeTe OTHBOKANAKA HbpaTATA HA TOPHOTo CTbKOH BA BpTaTA, KATO TO HATINCHETe HABtpe, DOKATO YETe 1PAkBaHeOT DBaTaCTpAHmHnHyBtoHa
8.CnToBbBpHTe BpaTATA6paTHo HA 90^ n3aBpTe 3AIOUbaUHTe NAACTINNA HANHTE HABTpe KMB AteHIOCTTA HApHNTA.

6.3. NOUICTBAHE HA IPIHADIEXKHOCTN
YbpeTe CE, YcNIOCTBATE PnHADJXHOCTTE CTAPATEHNO CNEB BCKA YOTPBe6a H NIOQCYUABATe C Kpbna.3aYcTOHNHBOCTaBbNOMCITE 3a HACBCBAHE NaPiHADJXHOCTTE BCMEC OT BOda nCATy 3aPi6bIKIHTENO 30MNHYTN, IPeDA Da IIN M3MMETE NOBTOPO.
NOHCTBAHE HA CTPAHHNCKAPN:
Moden Ha 6 HnBa
- OtrtpaheTe ctpaanHHTe ckapn, kato m n3bpnate no nocoka Ha ctpenKeT
- 3a da noycttne kapre, n noctabete B CDMHn Ma HIN ANNONANIe MOKPA kha, KATO ce yebpirte, ye CA hscxHnir cno Tgaa
- Cnei npoueca Ha nooHCTBaHe MOHTnpaTe TeneHrTe cKApu B o6paTeH peI.
6.4.NOIDPbKKA
IIOIMRAHA HA KOMNHOHTM
CMHHa Ha kpyukata otlope
- 3KnIOCTe cyphHATA OT rNABHOTo 3axpaHbAHO
- OTCTPAHETe CTbKNEHNAK HA naMaTa
- PasBbPTeTe KpyuKATA.
- CmeHete Kpykata C HOBA OT Cbunr TnN
- Bbphete CTbkneHn Kanak Ha namnata
- CbpxeTe OTHOBO pHaTa c eNkPmecKaT Mpeka
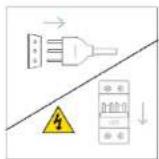
Ctbnka 1
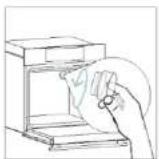
Cbrnka2
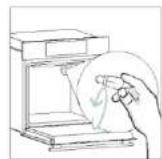
Cbrka 3
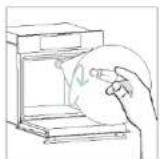
Cbrnka 4
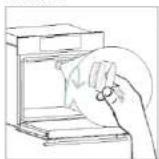
Cbrka5
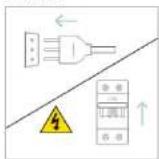
Ctbnka6
ToK npOyIK CTbEpbKa eHIN NIOBHe HSTHOHN HA cEBTNHa cKnOa eHepnHa epeKTHBOoHOT G (naNs)
CMRAHa Ha CtpaHnHata KpyuKa:
- ⅢKJIQUyTe ΦyPhATo OT IaBHOTo 3axpaHbAHe.
- ⅢAN308AteOTBEPKcI cN0CKa IBA, KATO NO3HIOHNIPATE OTCpAH HA 3aunHTO CTO BkFO INKEO HATNCHETE, 3B DA OTCPAnHe.
- BHMMATEJHO OTCTPAHETe Kpykata ot OCHOBATA.
- Noctapete HOBATA
- 10ctabeTe OTHOBa3aunHtOTo CbKJIO, KATO To HATNCHETe IeKo, DOKATO DoCTNRHe KpAHOTOn CN ONOKHOKe.
- Cbpxte OTHOBO cyphata c enektpnueckata Mpeka.
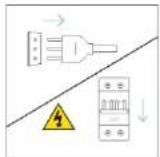
Ctbnka1
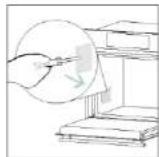
Ctbnka2
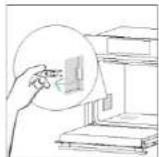
Ctbnka 3

Ctbnka4
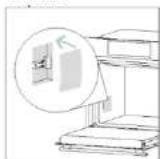
Ctbnka 5
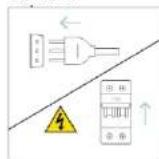
Cbrnka 6
Toa npodkyt cbaepkaedn Hn Toehe hnoTHoHmHa h CBeTmHa eEeptnHa eEeKTHHeHooT G (nMa)
7. OTCTPAHBAHE HA IPOBJIEMN
XAO no bpme HA nIIOJI3BaHne AHyFHPaBbIe BzIIHHke rpeuKa, dncnneT ne OOKAKe KOKA .ER" NoocBaeHOn DBe cKpBr, KOTU eNoTHNfMnCpuR pRkuaK.
N3KIOHETe FyPHATA H N3KIOHETe OT KOHTAKTA, N3VAKAJIte HRAKOIKO MHNUTI N CIETO BA BcBxKTEGOTHOBO.
Ako rpekata hne3e, mokeet da npodbkyta de a hnoonbae fepyhata. Ako he ctaee, obadete ce ha otdaa 3e okybnaea ke na khtnnti n bocooste koa (ERXX), koitbo kndate ha dmclnnr.
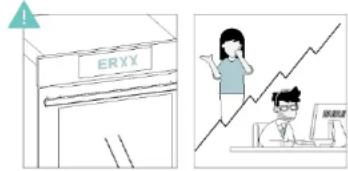
Tpeuka
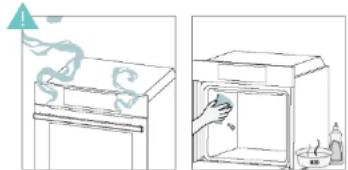
H
8. ONA3BAHE HA OKOJIHATA CPEDA N 1XXBbPJIaHE
8.1.M3XBbPJIaHE HA YPEDA

To3n ypeH cnoH eTKeT 3a cBoTeBCTeHne C Ebponecka dmpektnBa 2012/19/EC oTHOCHO To3nabTuOte O nEeKTPMeKHO nEeKPOHNO O6bpyAbe (OOE).OOE cIb5pKaT KAK 3aMcPcBAuHa BueCtEA (KOHTo MOrAT Da oXkArAT OtpUaTeH enEeF bYko NKOnHATA cpeda). Taka n OCHOBHn eEnEMHeN (KOHTo MOrAT da ce kNtONbaT noBtOpHo). Baxho e OEOE DA npmHATn CNEuPHnna O6bO4Ta 3a npaBnHOTo oTOCPaRhae nIXxhPbPrHe Ha aMaBpcntIne Ta 3a B3ctAtoBBHBe H aBCNKn MaTePhHn.
OTdHnHTpepaDnMORaDAHMRPAATBaxhnaPOMaKATO rapaHTpap,VEOEEOHMA daCeIpebphatBipnoEIM3aOKOIHTaCpeda;BAHXoEdaCEcNEDbAT HKNO OCHOBNIPABINla
-
OEEO He Tpr6Ba Da ce TpeTnpa KaTo BnTOBn OTnaDbu;
-
OEEO Tp86Ba da ce npedaat B obektn 3a cneunnnaHpaHo cbbpapHe, ynpabBbAHN
OT OSHHCKHTBnACTN NIN DEHCTPDpHaHO DPVKeCTBO.
B MHOO CTAPHMO KJe da cpePnAraT yCynrTa 3a BImAHoe To Doma 3a roNemM OEOE. KOATO kynBaTe HOB ypeD, CTAPR MOKe Da ce BbPe Ha TbProBaCe, KaIO To TpBaDa b o r pImeMe 6beNAtHO dHOKPAHO, CTHRA ypeDyTA E o e EKBMAnENT HIN n Da IMA cbUte TpyHKmI KATO 3aQkyHeNHa.
8.2. OIIA3BAHE I 3AUHTAHE HA OKOIHATA CPEDA
A0E b3MxHO, 468BaIte PpeBaapTeHTo 3aPpBaHe Ha FpyHata N HnHAr ce OnrTaBte 3a a3bNaBe.
OTBpaRbIe bpaTATAH aHyPhrta KOrkTOMo MOKe no-POkIO, Tko KATO TOTNIIaO tKMApeTATA cePac3aHaa pNcBOAOTa OTBPAH. 3a 3NaHTENHO CnCTAEHa NE Heprrn IKNIOuAAITE eHyPhrta MEXyD 5 u 10 MNTHy nPeI nnPiuHpaIRa KpA HA BpMeTe Oa rTOBeHe INIOJITBaAte OCTaBHcHATA TOnTHHa, KORTo CyPhrTa HReHepHa.
IodlbpkaTe yIbTHeHrMa TcHn H B d6oPc bCtOhrHne, 3a Da Ia6BeHrTe pa3ceBaHe Ha ToIINHa
IaBbMkApTa HA cyPhHn.AKO IMATE pAaHHN NOACOBn TaHnEeHnA 3a ENeKToPnTOpeHnEHO,
IOpPamAOTNoTKeHO TOBHe" npABn NO-NeCHO NcTeHToHn A eEHPrnA, KATO IaMcETBa HauNaTO
Ha nPoJcCa, Taka He TOBHeTo D a aaoHHe B hAcOBe C no-Hkca TaHnpAHa eneKTopeHnrTA.

BG40
BG41

- MOHTUPAHE
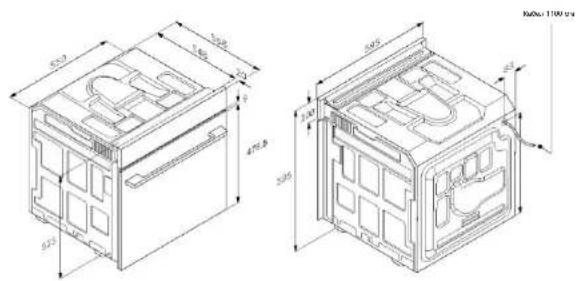
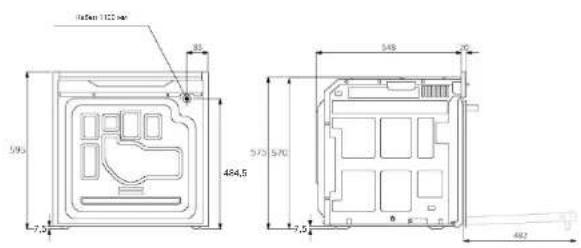
TINN
4
BG42
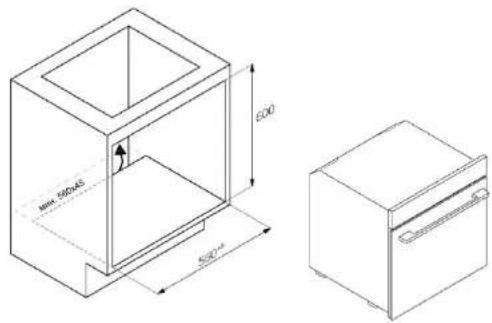
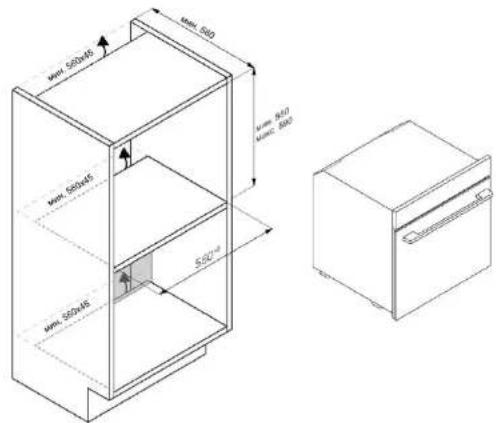
BG43
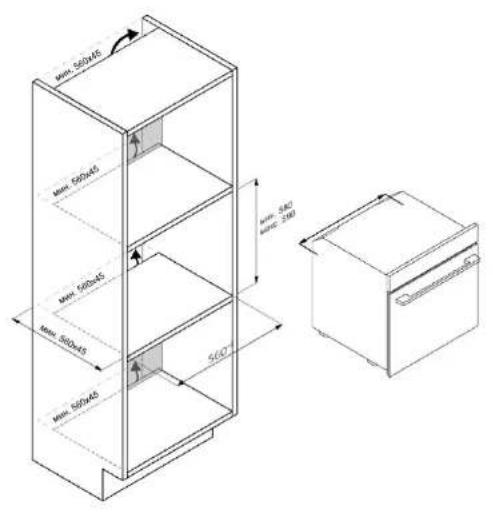
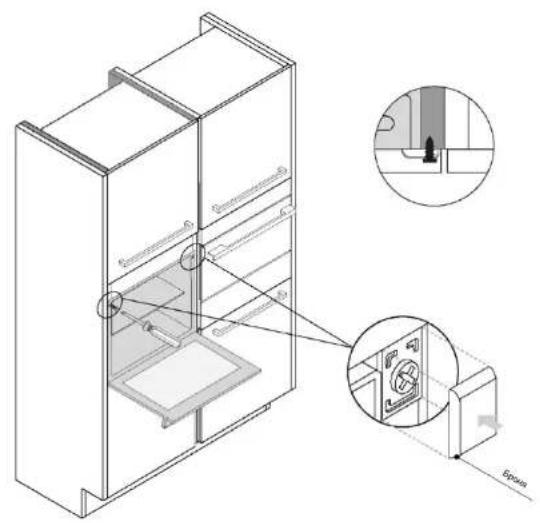
CANDY
POTPUNI KORISNIČKI PRIRUČNIK
(HR) Brzi vodič I (FR) Guide rapide (IT) Guida veloce
www.candy-home.com
CANDY HOOVER GROUP Via Comolli 16 Brugherio - Italija
Hrvatski
DOBRO DOSLI
Hvala sto ste odabrali naš proizvod. Radi svoje sigurnosti i njaboljih rezultata pažljivo pročitajte ovaj priručnik, uključujuci upute u ve sigurnosti i sačuvajte ga za buduću upotrebu.
6.2.2.VANJSKE POVRsINE
PECNICE: ukanlanje icisocenje staklenih rputa
- Postavite vrata na 90^ Zakrenite jezicke za zakljucavanje sarka tako da sa okrenuti od pecnica.
- Postavite vrata na 45^ Istodobno prilisnite dva gumba s obje strane bochni kutova vrata i povucite ih prema sebl kako blste ukonll Poklopac gornjeg stakla.
- Vrlo pažijvo uklonite stałka pecnice, pocevi od unutarnjeg. Tijekom postupka cvrsto drzite stałko objema rukama i stavite i na ravnu meku povrsinu (npr. na tkaninu).
- A UPOZORENJE: Vanjsko staklo ne moze se ukonitii.
- Ocisilte slakte mekom kropom i odgovarajudim sredstvima za ciscene.
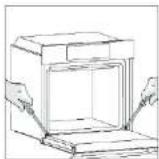
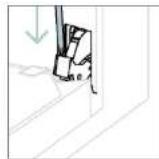
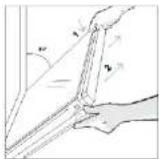
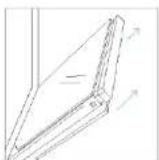
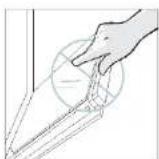
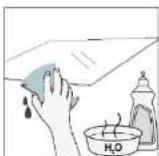
4.1.KAIP GAMINYS VEIKIA
ORKAITÉSJUNGIMAS/ISJUNGIMAS
Noredami jungosi korteake, pasukite fungkine rankenele (pagal / pries laikrodzio rydky) ir pasirini maisto ruosog programa. Noredami ja ISJUNGTI, nustafykite fungkine rankenele j padeti.0
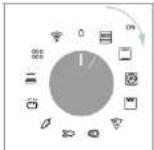
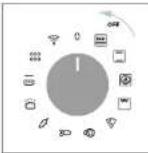
KAIP NUSTATYIMAISTO RUOSOS PROGRAMA
Pasukite fungcine rankenèle ir pasirinkle norimaj programa. Ekrane bus rodoma numatolyj temperatur kuriqa galima reduqutoi akimrka sukant de sinlaja rankenèle (pagal laikrodzio rodykje, jei norite padidinti, ir pries laikrodzio rodykje - sumazini).
LAIKOMENU
2.PRODUKTPRAESENTATION
2.1.OVERSIGT OVER PRODUKTET
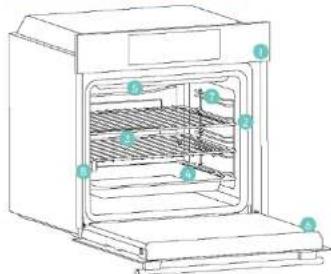
2.2.TILBEHOR
Vocadrosso: www.candy-group.com
SADAN BETJENER DU APPEN
6.3.RENGORING AF TILBEHOR
LISATOIMINNOT
LAPSILUKKO
4.2.RUOANVALMISTUSTOIMINNOT
NOPEA ESILAMMITYSVAIHTOEHTO
4.2.2.ERIKOISTOMINNOT
5.2.EVERYDAY COOKING-TAULUKKO
2.PRODUKTINTRODUKSSJON
2.1.OVERSIKT OVER PRODUKTET
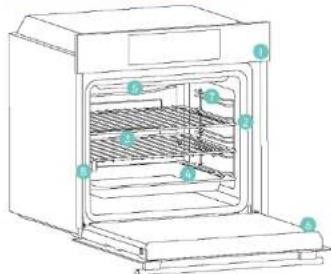
2.2.TILBEHOR
Tradgitter pa siden (bare hvis de linnes)
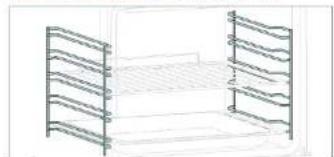
Plassert pâ bege sider av ovsrommet, er sidestativene designet for à plasse stekebrett og rister under tihederdingen.
- SKOTSEL OCH RENGORING
6.1. ALLMÄNNRA REKOMMENDATIONER
2.PRODUKTINTRODUKTION
2.1. OVERSIKT OVER PRODUKTEN
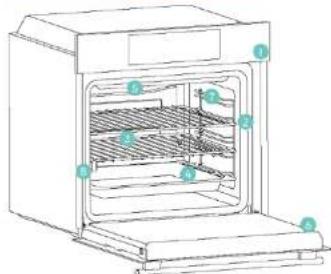
2.2. TILLBEHOR
Sidogaller (om det flinn sādana*)
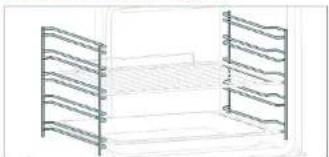
| Kontipati | Recall | Avalent | Tilgugang | T | Ferroferrum | Melting temperature | Ferroferrum | Tilgugang | Melting temperature | Ferroferrum |
| Salt water | Salt water | 1 | Stefan | 200 °C | Y | Melting point + N1-4H | N1-4H | 50-70 | ||
| Salt water | Salt water | 2 | Parviva | 160 °C | Y | Melting point + N1-4H | N1-4H | 50-70 | ||
| Salt water | Salt water | 3 | Parviva | 200 °C | Y | Melting point + N1-4H | N1-4H | 50-70 | ||
| Salt water | Salt water | 4 | Parviva | 200 °C | Y | Melting point + N1-4H | N1-4H | 50-70 | ||
| Salt water | Salt water | 5 | Parviva | 200 °C | Y | Melting point + N1-4H | N1-4H | 50-70 | ||
| Salt water | Salt water | 6 | Parviva | 200 °C | Y | Melting point + N1-4H | N1-4H | 50-70 | ||
| Salt water | Salt water | 7 | Parviva | 200 °C | Y | Melting point + N1-4H | N1-4H | 50-70 | ||
| Salt water | Salt water | 8 | Parviva | 200 °C | Y | Melting point + N1-4H | N1-4H | 50-70 | ||
| Salt water | Salt water | 9 | Parviva | 200 °C | Y | Melting point + N1-4H | N1-4H | 50-70 | ||
| Salt water | Salt water | 10 | Parviva | 200 °C | Y | Melting point + N1-4H | N1-4H | 50-70 | ||
| Salt water | Salt water | 11 | Parviva | 200 °C | Y | Melting point + N1-4H | N1-4H | 50-70 | ||
| Salt water | Salt water | 12 | Parviva | 200 °C | Y | Melting point + N1-4H | N1-4H | 50-70 | ||
| Salt water | Salt water | 13 | Parviva | 200 °C | Y | Melting point + N1-4H | N1-4H | 50-70 | ||
| Salt water | Salt water | 14 | Parviva | 200 °C | Y | Melting point + N1-4H | N1-4H | 50-70 | ||
| Salt water | Salt water | 15 | Parviva | 200 °C | Y | Melting point + N1-4H | N1-4H | 50-70 | ||
| Salt water | Salt water | 16 | Parviva | 200 °C | Y | Melting point + N1-4H | N1-4H | 50-70 | ||
| Salt water | Salt water | 17 | Parviva | 200 °C | Y | Melting point + N1-4H | N1-4H | 50-70 | ||
| Salt water | Salt water | 18 | Parviva | 200 °C | Y | Melting point + N1-4H | N1-4H | 50-70 | ||
| Salt water | Salt water | 19 | Parviva | 200 °C | Y | Melting point + N1-4H | N1-4H | 50-70 | ||
| Salt water | Salt water | 20 | Parviva | 200 °C | Y | Melting point + N1-4H | N1-4H | 50-70 | ||
| Salt water | Salt water | 21 | Parviva | 200 °C | Y | Melting point + N1-4H | N1-4H | 50-70 | ||
| Salt water | Salt water | 22 | Parviva | 200 °C | Y | Melting point + N1-4H | N1-4H | 50-70 | ||
| Salt water | Salt water | 23 | Parviva | 200 °C | Y | Melting point + N1-4H | N1-4H | 50-70 | ||
| Salt water | Salt water | 24 | Parviva | 200 °C | Y | Melting point + N1-4H | N1-4H | 50-70 | ||
| Salt water | Salt water | 25 | Parviva | 200 °C | Y | Melting point + N1-4H | N1-4H | 50-70 | ||
| Salt water | Salt water | 26 | Parviva | 200 °C | Y | Melting point + N1-4H | N1-4H | 50-70 | ||
| Salt water | Salt water | 27 | Parviva | 200 °C | Y | Melting point + N1-4H | N1-4H | 50-70 | ||
| Salt water | Salt water | 28 | Parviva | 200 °C | Y | Melting point + N1-4H | N1-4H | 50-70 | ||
| Salt water | Salt water | 29 | Parviva | 200 °C | Y | Melting point + N1-4H | N1-4H | 50-70 | ||
| Salt water | Salt water | 30 | Parviva | 200 °C | Y | Melting point + N1-4H | N1-4H | 50-70 | ||
| Salt water | Salt water | 31 | Parviva | 200 °C | Y | Melting point + N1-4H | N1-4H | 50-70 | ||
| Salt water | Salt water | 32 | Parviva | 200 °C | Y | Melting point + N1-4H | N1-4H | 50-70 | ||
| Salt water | Salt water | 33 | Parviva | 200 °C | Y | Melting point + N1-4H | N1-4H | 50-70 | ||
| Salt water | Salt water | 34 | Parviva | 200 °C | Y | Melting point + N1-4H | N1-4H | 50-70 | ||
| Salt water | Salt water | 35 | Parviva | 200 °C | Y | Melting point + N1-4H | N1-4H | 50-70 | ||
| Salt water | Salt water | 36 | Parviva | 200 °C | Y | Melting point + N1-4H | N1-4H | 50-70 | ||
| Salt water | Salt water | 37 | Parviva | 200 °C | Y | Melting point + N1-4H | N1-4H | 50-70 | ||
| Salt water | Salt water | 38 | Parviva | 200 °C | Y | Melting point + N1-4H | N1-4H | 50-70 | ||
| Salt water | Salt water | 39 | Parviva | 200 °C | Y | Melting point + N1-4H | N1-4H | 50-70 | ||
| Salt water | Salt water | 40 | Parviva | 200 °C | Y | Melting point + N1-4H | N1-4H | 50-70 |
| Table 1. | ||||||||||
| Subunit | Tano | 1 | Olefring | 220°C | Y | Metabolite+ | Metabolite- | M4 | 20-40 | 20-40 |
| 1 | Starch-albumin | 1 | Grazing | 200°C | Y | Metabolite+ | N3 | 50-60 | ||
| 2 | Resveratrol-poll | 1 | Stirak | 200°C | Y | Metabolite+ | N3 | 60-100 | ||
| 3 | Ketoglucol | Korke | 1 | Sugiyam | A | Y | Metabolite | N3 | 40-50 | |
| 4 | 1,100:1,500 g/l | 1 | Garlic-cooking* | 60°C | N | Metabolite+ | N3 | 60-90 | ||
| 5 | Rutin (500 g/l) | 1 | Grazing | 220°C | Y | Benzalact | N3 | 20-40 | ||
| 6 | Kaempferol* | 1 | Stirak | 180°C | Y | Benzalact | N3 | 40-50 | ||
| 7 | Luteolin (500 g/l) | 1 | Grazing | 200°C | Y | Daphtobast | N4 | 45-60 | ||
| 8 | Unknown extract | 1 | Grazing | 200°C | Y | Daphtobast | N4 | 45-60 | ||
| 9 | Glucose-salivary | 1 | Sugiyam | A | N | Metabolite | N5 | 15-30 | ||
| 10 | Folic acid | 1 | Alkyl** | 200°C | N | Alkyl** | N4 | 20-25 | ||
| 11 | Pretaxin (naringenin) | 1 | Alkyl** | 200°C | N | Alkyl** | N3 | 40-50 | ||
| 12 | Ursiabasidic acid | 1 | ECC | 200°C | N | Metabolite+ | N3 | 10-25 | ||
| 13 | Ginkganside | 1 | ECC | 200°C | N | Metabolite+ | N3 | 80-90 | ||
| 14 | Phytase (corneoside) | 1 | Alkyl** | 220°C | N | Alkyl** | N4 | 10-25 | ||
| 15 | Prostaglandin | 1 | Grazing | 200°C | Y | Metabolite+ | N4 | 15-25 | ||
| 16 | Protocatechuate | 1 | Stirak | 200°C | Y | Benzalact | N4 | 30-50 | ||
6. SKOTSEL OCH RENGORING
6.1. ALLMÄNNA REKOMMENDATIONER
Regelbunden rendongi kan forlaga din ugns livslngd. Vanta tilis ugenen svainat innan du utfor manuell rendongi.
BodHO-acyl hopr 63pOBoM MepeXl akRbCaHO
2.061
KAKTNByBnnoT 6e3pOToBOI Mepexi:
Modynb Wi-Fi Bmkaactbca, ak tibk nepemekau cyhui octahoBneHO bnonoeHHa. dminHe hyra.
Iopraok deakTBAuif npTy 6e3poTOBoI Mepexi:
Modynb Wi-Fi 3abxdn BnMKHeHO, konn nepemikau cyHicui BctaHOaneHo B HynbObe nOnoxKeHHA.
FIOI nepeMnHx dyHIOJI octAHOBENHO H HUE nonOKHNE, nepeAIOy Mio Hi B6epBt BIMK, 105 BIMNHTW FI.
LHM Komahya Candy Hoover Group Srl 3a8b7e. IIO oBshHnHa Pediab3y BldioBae Hopam 1000002014/5/3/9 3000002000000000000000000000
D03B0n8c Bn6paTu Yac noaTky npuroTybaHH.
AKTBAJIH: HATNCHTb, 06B yinB M MeHO Time (HaC). HATNCKAITE CINbM pa3Ia, cKInbIK noTIpioHo, 06B BnPaTH pHyNIO "BlKnJaENH Npyc." NotIM CKOpHCTAIECR DnCKOBMM peryTApOM, 06B ECTAHOBHIT YAC NoOHATy PNOYrBOHH.
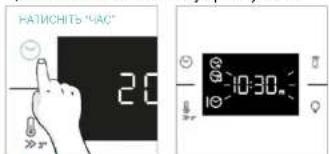
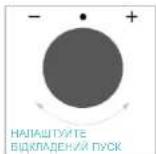
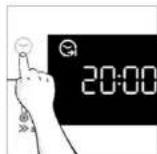
PIMMITKA.Bidkanemnyn kncaybtebn niue nciB octaHOBENHTRPAOONOTIPTNPOYTBAH,IBHNIEHOCTYNBNJDAFyHKNJTPRIN.
UA 23

DODATKOBIФИHKUJI
EIOKOBAHBIBIDITEI
LHyKUd30B1H36A50KBYATbEPAH,IO6 3AIO6Tb6yIb-KOMy HE6AKHOMy BIKOPCTAHNO HHOANOHITMM. IO6 AKTMByaTb6NkOyBAHHc EPAHa, OIOHACHO HATNCHTb I yTPMMye KONI DNTAHNIHQopeBaAHnTa TAMIN.
Noatopitb ty x dio, 0oB BmKHyTH 6nokyBaHH.
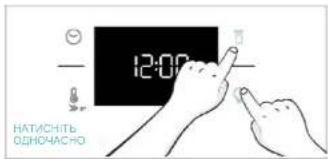
4.2YHKUIIIPNIROTYBAHH
ONU WBNKORO NONEPEDHBoROPO3IPIBAHH
06 npKoPnT paoynepeBho opoiPbAHH, moXHa B6pTa onlqo WbIXko oonepDbo 003ipBaHAA, HATCHyBnNtKorpaY nIortpamy PTOPTAROM 3 cekHynCnBnB6py npOpamn nproTByAHNA T a Ttemepatyn. LOn qoiA kHTyBE KOMHIO AEHTNRTOPa Ta HArpBaTHHX enementHieanEnoB iioobapHOfynkui npOriTyBaHH.
06 aoaunu hneepno, konu yaimHeHO uWbE poisirhaHH, BHTMnTROP KAMOp Byde BIMKHEHO,dox dXooa wdae Hoocarne notPiHoi Temepatypyr.
4.2.1.CTAHDAPTHIΦYHKUJI
PIMPTKIA.DaIyckui,kiBIMARAObTO nonepedhoro oporipribAHn,pekoHaiTcE,IO BCE npimadaa hntePiNacuOtoT
| Симбон | Ф�ишия | T°C з samолу- нabим Ддамош T°C | Рекометоргichte побъедин поглuti | Посадус ростр- вану | Рекометоргichte |
| ECO | "ECO | 190 °C 150-220 °C | L3/L4 | H | IIDEАЛьно ПИДХОДNTь ДД пrelуотуваим M'ха, рыз abo obчын LdФуншим дсалочь Зашашисту венерю пrelуotуваим chергю пid уч пrelуotуваим, зеврихсях Балитогу ою Нарочь. Памma камеру винckени |
| "Трашишия" | 30-250°C | L2/L3 | Так Шarkхе побъедин posirp- вану | IIDEАЛьно ВAPIAZHД ДД пrelуotуваим рориги, xinfa, nevima, kiiiv (нд одому рійз) пrelхим i Нжим HARTIPANHIM). Можна винокустуberгат разом Is terpoшуну'me Hea Feel. | |
| Вагatoriptаевий реким | 160°C 50-250°C | L4 (оdninnotok) L2+L5 (дуnotik) L2+L4+L6 (tpinotik) | Так Шarkхе побъardin posirp- вану | IIDEАЛьно ВAPIAZHД ДД пrelуotуваим рориги, чьпьä пд (иочаймение на одому рійи). Лe оtmаленье рійзewsда рд пrelуotуваим рійзх осы. Можна винокустуberгат разом Is terpoшуну'me Hea Feel. | |
| "Supergirl | 05 01-05 | L6 | H | IIDEАЛьно ВAPIAZHД ДД пrelуotуваим велник Кьлков; konbaac, crekkin i tocris. Harpiraьскь сбг зона пid чимentom tryp. Вухорctоустуite istazimanовим Даерцама.У рazi посту пrelуotуваим. Дд Тетшичу Саву 3 постуки II пrelуotуваим. | |
| 200°C 150-250°C | L4/L6 | Tak/Italx e nonepedhe posirpmbahn y | IDEA/THO PIIXODNTB DIA UHIX UHMATDA MCA (c6bmcaybaaH) abo 3aeneHHN NPODKTB. BukovcctOByte Ia aHHHemHH deaprrama. Postaunyto notok dria kpaaribb. pia PONIMHO DIA ABiRanHH COBA, ua BHTIKABOT. NpeBeeKPTB ctpaby, KOIN MInne NIOBHNH #acy II pIprOCTYBAHNN, 3a noptpebi. | ||
| AeipodpHtiohOpHmua (***) 200°C 150-250°C | L3/L4 | H | IDEA/THO PIIXODNTB DIA PpIroTQYBaHH NAMPOPOBXHIX npOdKTB ABO NHIRPOAHIX CMAKEXH NPODKTB. 3aIaM CneJIaJIbHOMU Deko rapae nooiR moKe piHBMHPO HPOIOTAKI NOI. | ||
| PekapnH "ace b OJHOMY" | L2 | H | IDEA/THO PIIXODNTB DIA ctpar, SKI SImarAaHbT AOTOMATTHNO TzckBaUyBaHHN ta BHHHANH. |
BunpooybaHO aIgHO ai taHaprom EN 60350-1 nra Buaaehn nookhki knaeyeproocnoeaHaH.
Bukpctcyte in a 4nnnnn nn paaatam.
3aennno Bm Moden dyxobol aon
4.2.2.CNEUIAIbHIΦYHKU
| Симпсь | Фиондуо | T°C sa samo- чыгелд Длбдд T°C | Реком endoreн monoxe� monid | Погорож posi- beria | Реком endu |
| Пида | 300°C 200-300°C | 2/3 | HI | Idea/Hb HO ПIDXOДЛь ДИЯ bIX bYdIN nIIH BeZ nonepreHbKOrO posirigabnH duXOBcI shAHy. BdKorHCTOByr HmHJI TemnoPapurpyra IYR daamopokhenix proadykii 1300°C prJDA mDauuHx penerms |
- PEKOMEHDAU3IPINFOYBAHH
5.1.3AΓAβbHA TABIINIPIPOPTPAM PIPNITOTYBAHH
(EN) Thanks to the "Over The Air" technology, you can effortlessly keep your oven up-to-date with the latest features.
If available, once the oven is connected, when the knob is turned on "Wi-Fi" or a cooking program has just ended, the update will automatically initiate. "OtA" will appear on the display, the Wi-Fi icon will blink, and all product commands will be temporarily unavailable. This process may take a few minutes, so please do not disconnect or unplug the oven during this time. Once the update is complete, "12:00" will blink on the display. Simply reset the time and start cooking!