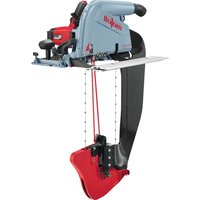
DSS 300 CC - Saw Mafell - Free user manual and instructions
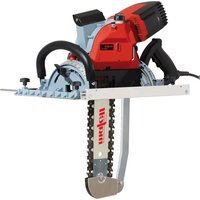
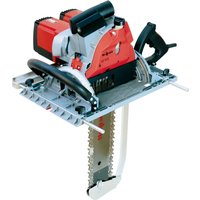
Find the device manual for free DSS 300 CC Mafell in PDF.


| Product Type | Cable saw for insulating materials |
| Brand | Mafell |
| Model | DSS 300 CC |
| Dimensions (L x W x H) | 390 x 524 x 753 mm |
| Base plate dimensions | 406 x 329 mm |
| Maximum cutting width | 300 mm |
| Cutting depth at 0° | 306 mm |
| Cutting depth at 60° | 140 mm |
| Weight (without cable or support) | 8.25 kg |
| Voltage / Frequency | 230 V~ / 50 Hz or 110 V~ / 50 Hz |
| Power consumption | 1800 W (230 V) / 1500 W (110 V) |
| No-load speed | 4700 min⁻¹ |
| Cutting speed under load | 45.7 m/s |
| Pivoting range | 0° to 60° |
| Rear tilt of the trim | 0° to 45° |
| Cutting width | 6.0 mm |
| Maximum material density | 180 kg/m³ |
| Maximum material thickness | 300 mm |
| Sound pressure level | 93 dB(A) |
| Sound power level | 101 dB(A) |
| Protection class | II (double insulation) |
| Safety devices | Protective cover, brake, riving knife, switch with lock, large base plate, additional support |
| Standard equipment | 2 saw cables, 1 additional support, 1 double toothed belt, 2 cable clamps, service tool, manual, safety booklet, transport case |
| Optional accessories | Saw table ST 1700 Vario, guide rail, vacuum cleaner S 200, machine stand, etc. |
Frequently Asked Questions - DSS 300 CC Mafell
User questions about DSS 300 CC Mafell
0 question about this device. Answer the ones you know or ask your own.
Ask a new question about this device
Download the instructions for your Saw in PDF format for free! Find your manual DSS 300 CC - Mafell and take your electronic device back in hand. On this page are published all the documents necessary for the use of your device. DSS 300 CC by Mafell.
USER MANUAL DSS 300 CC Mafell
natural_image
Technical illustration of a mechanical device with no visible text or symbolsMAF02129/a
WARNUNG
Please read all safety instructions and directions. Failure to comply with the safety instructions and directions can cause electric shock, fire and/or serious injuries. Please retain all safety instructions and directions for future reference.
AVERTISSEMENT
GB - EC Declaration of Conformity
We herewith confirm that the machine DSS 300 cc complies with the EU directives quoted. The standards listed were used for design and construction. Empowered person for the configuration of the technical documents: Mafell AG
$$ L _ {W A} = 1 0 1 \mathrm{dB(A)} $$
Unsicherheit K
$$ _ {W A} = 3, 0 \mathrm{dB(A)} $$
| 1 | Signs and symbols | 19 |
| 2 | Product information | 19 |
| 2.1 | Manufacturer's data | 19 |
| 2.2 | Machine identification | 19 |
| 2.3 | Technical data | 20 |
| 2.4 | Emissions | 20 |
| 2.5 | Scope of supply | 21 |
| 2.6 | Safety devices | 21 |
| 2.7 | Use according to intended purpose | 21 |
| 2.8 | Residual risks | 22 |
| 3 | Safety instructions | 22 |
| 4 | Setting / Adjustment | 23 |
| 4.1 | Mains connection | 23 |
| 4.2 | Chip extraction | 23 |
| 4.3 | Installation of double-toothed belt | 23 |
| 4.4 | Change of saw wire | 24 |
| 4.5 | Change of drive wheel and guide wheel | 24 |
| 4.6 | Change of scraper | 25 |
| 4.7 | Setting for bevel cuts | 25 |
| 4.8 | Tilting back the wire set | 25 |
| 4.9 | Supplementary support plate and glider | 26 |
| 5 | Operation | 26 |
| 5.1 | Initial operation | 26 |
| 5.2 | Switching on and off | 26 |
| 5.3 | Light | 26 |
| 5.4 | Work instructions | 27 |
| 5.5 | Sawing according to tracings | 27 |
| 5.6 | Sawing on the guide rail | 27 |
| 5.7 | Free form cutting | 27 |
| 6 | Service and maintenance | 27 |
| 6.1 | Machine | 28 |
| 6.2 | Drive and guide wheel | 28 |
| 6.3 | Reamer | 28 |
| 6.4 | Storage | 28 |
| 7 | Troubleshooting | 28 |
| 8 | Optional accessories | 29 |
| 9 | Exploded drawing and spare parts list | 29 |
1 Signs and symbols

This symbol is found in all places where you will find information for your safety.
Non-compliance with these instructions may result in very serious injuries.
This symbol indicates a potentially hazardous situation.
If this situation is not avoided, the product or objects in its vicinity may get damaged.

This symbol indicates tips for the user and other useful information.
2 Product information
in respect of machines with item No. 919601, 919620, 919621, 919622, or 919625
2.1 Manufacturer's data
MAFELL AG, Beffendorfer Straße 4, D-78727 Oberndorf / Neckar, Phone +49 (0)7423/812-0, Fax +49 (0)7423/812-218, e-mail: mafell@mafell.de
2.2 Machine identification
All details required for machine identification are available on the attached rating plate.

Protection class II

CE symbol to document compliance with the basic safety and health requirements according to Appendix I of the Machinery Directive.
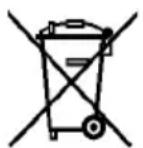
For EU countries only
Do not dispose of electric tools together with household waste material!
In accordance with the European directive 2002/96/EC on waste electrical and electronic equipment and transposition into national law, obsolete electrical tools must be collected separately and recycled in an environmentally-compatible manner.

To reduce the risk of injury, please read the operating instructions.
2.3 Technical data
| Operating voltage | 230 V AC | 110 V AC |
| Mains frequency | 50 Hz | 50 Hz |
| Input power continuous 1800 W 1500 W operation | ||
| Power consumption continuous operation | 8.0 A | 14.0 A |
| Speed during idling | 4700 rpm | 4700 rpm |
| Cutting width | 6.0 mm (0.236 in.) | |
| Cutting speed at normal load | 45.7 m/s | |
| Swivel range | 60° | |
| Wire set can be tilted back by 45° | ||
| Cutting depth | ||
| at 0° | 306 mm (12.047 in.) | |
| at 15° | 294 mm (11.574 in.) | |
| at 30° | 260 mm (10.236 in.) | |
| at 45° | 210 mm (8.267 in.) | |
| at 60° | 140 mm (5.511 in.) | |
| Machine dimensions | ||
| Width x length x height | 390 x 524 x 753 mm(15.354 x 20.629 x29.645 in.) | |
| Base plate | 406 x 329 mm (15.984x 12.952 in.) | |
| Width without limit stop | 300 mm (11.811 in.) | |
| Weight without power cord and supplementary support plate | 8.25 kg (18.18 lbs) |
2.4 Emissions
The declared noise emission values have been measured in accordance with DIN EN 62841-1 and may be used for comparing the tool with another and also in a preliminary assessment of exposure.

Danger
The noise emissions during actual use of the power tool can differ from the declared values depending on the ways in which the tool is used especially what kind of workpiece is processed.
Always wear hearing protection, even when the power tool is running idle in addition to the trigger time!
2.4.1 Noise emission specifications
Noise emission values determined according to EN 62841:
Sound pressure level L _PA = 93 dB (A)
Uncertainty K PA = 3,0 dB (A)
Sound power level L_WA = 101 dB (A)
Uncertainty K _WA = 3,0 dB (A)
2.4.2 Vibration specifications
The typically assessed acceleration is < 2.5 ^2 .
2.5 Scope of supply
Wire saw for insulation material DSS 300 cc complete with:
2 saw wires
1 supplementary support plate with glider
1 double-toothed belt
2 cable ties
1 service tool in bracket on the machine
1 operating manual
1 folder "Safety instructions"
1 transport case
2.6 Safety devices

Danger
These devices are required for the machine's safe operation and may not be removed or rendered inoperative.
Before operating the machine, check the safety devices for function and possible damage. Do not use the machine with missing or ineffective safety devices.
The machine is equipped with the following safety devices:
- Protective equipment above the base plate
- Lower deflection with saw guard and brake
- Special design of the saw wire
- Riving knife/splitter
- Large base plate and supplementary support plate
- Handles
- Index mechanism with lock and brake
- Hose connector
2.7 Use according to intended purpose
The wire saw for insulation material is exclusively suitable for cross and lengthwise cutting of insulation material up to a max. thickness of 300 mm and a density of max. 180 kg/m ^3 , for which purpose only the special saw wire provided by MAFELL may be used (insulation material containing minerals, flax, hemp and materials with glued on sheathing are expressly excluded from the intended use). The machine base plate 3 (Fig. 1) must rest on the workpiece during cutting. The machine may be operated by one person only. At the same time, the machine must be held and guided by its two handles 1 and 2 provided for that purpose.
Any other use than described above is not permissible. The manufacturer cannot be held liable for any damage arising from such other use.
So as to use the machine as intended, comply with the operating, maintenance and repair instructions specified by Mafell.
2.8 Residual risks

Danger
Even if used in accordance with its intended purpose and despite conforming with the safety instructions, residual risks caused by the intended use that can lead to health consequences will always remain.
- Contact with the running saw wire below the base plate.
- Contact with the cutting members of the standing saw wire below the base plate.
- Machine backlash if the blade gets stuck in the workpiece.
- Rupture of the saw wire.
- Touching live parts with the housing open and the mains plug not removed.
- Hearing can be impaired when working for long periods without ear protectors.
- Emission of hazardous dusts during longer lasting operation without extraction.
3 Safety instructions

Danger
Always observe the following safety instructions and the safety regulations applicable in the respective country of use!
Also read the safety instructions in the enclosed booklet "Safety instructions".
General instructions:
- Children and adolescents must not operate this machine. This rule does not apply to young persons receiving training and being supervised by an expert.
- Never work without the protection devices prescribed for the respective operating sequence and do not make any changes to the machine that could impair safety.
- When operating the machine outdoors, use of an earth-leakage circuit-breaker is recommended.
-
Do not carry the machine by its cable and do not use the cable to pull the plug out of the socket outlet.
-
Pay attention that the cable is protected against oil and heat and is not pulled across sharp edges.
- Damaged cables or plugs must be immediately replaced. Replacement may only be carried out by Mafell or an authorised MAFELL service workshop in order to avoid safety hazards.
- Avoid sharp bends in the cable. Especially when transporting and storing the machine, do not wind the cable around the machine.
- Never work close to open flames. Generated dust can ignite.
- Always check before beginning work, whether the protection and work equipment is safely attached and not damaged. Damaged protection devices and parts must be repaired or replaced appropriately.
- Consider environmental influences. Do not expose the machine to rain and avoid working in a damp or wet environment as well as near to combustible liquids or gases.
- Store the device in a dry, locked place outside the reach of children.
Instructions on the use of personal protective equipment:
- Always wear ear protectors during work.
- Always wear protective goggles during work.
- Always where a dust mark during work.
- Always wear closely fitting work clothes (no shorts) and take off rings, wristbands, and watches.
Instructions on operation:
- Hold the power tool by insulated gripping surfaces, when performing an operation where the cutting tool may contact hidden wiring or its own cord. Contact with a "live" wire will also make exposed metal parts of the power tool "live" and could give the operator an electric shock.
- Use clamps or another practical way to secure and support the workpiece to a stable platform. Holding the workpiece by your hand or against the body leaves it unstable and may lead to loss of control.
- Provide for an unobstructed and slip-proof location with adequate lighting.
-
The power plug must be pulled before replacing tools, making adjustments and repairing malfunctions (this also comprises removing chips and dust).
-
Do not work on workpieces which are too small or too large for the capability of the machine.
- Do not reach with your hands into the sawing area and do not touch the saw wire. With your other hand, support the supplementary handle or the motor casing.
- Never support the workpiece in your hand or over your leg.
- Only use original MAFELL saw wires. After every wire change, check the correct wire tension.
- The saw guard for the lower wire deflection 4 (Fig. 6) may not be removed.
- The machine is a one-man tool and may only be used for work during which the base plate 3 (Fig. 1) serves as workplate.
- Keep a firm hold on the machine already before switching it on and support it. At the same time, the saw wire must be unobstructed. Start cutting the workpiece only once the wire has reached its full speed. Pay attention to a secure footing.
- The switch may not be wedged in ON position.
- Never reach below the base plate or into the chip ejector during sawing.
- Never transport the machine with running saw wire and pay attention that, except for the workpiece, the running saw wire does not come in contact with any adjacent objects.
- Never remove the cover 5 (Fig. 2) that covers the drive wheel while the machine is running; only remove the cover for a tool change and refit it immediately afterwards.
- The machine must be guided so that the pressure exercised during cutting does not cause the speed to drop.
- If possible, use a limit stop or a straight edge guide for cutting.
- Examine the workpiece for foreign objects. Never attempt to cut into metal objects (e.g. nails) or adhering sand.
- Always lead the connecting cable away from the machine to the rear while sawing.
- Immediately pull the power plug in case of damaged or severed connecting cables.
- Match the feed speed during sawing to the material thickness. Pushing forward too quickly leads to
motor overload, irregular saw cuts and quick dulling of the saw wire.
- Remove the machine from the workpiece only after the saw wire has come to a standstill. Thanks to the built-in brake, this happens very quickly.
Instructions on service and maintenance:
- Regular cleaning of the machine, in particular the setting mechanisms for swivelling the guides for the supplementary support plate and the enclosure of the top and bottom wire deflection, constitutes an important safety factor. Pull the plug before starting this work.
- Only original MAFELL spare parts and accessories may be used. Otherwise, the manufacturer will not accept any warranty claims and cannot be held liable.
4 Setting / Adjustment
4.1 Mains connection
Prior to commissioning make sure that the mains voltage complies with the operating voltage stated on the machine's rating plate.
4.2 Chip extraction

Danger
Substances that are harmful to health must be taken up with an M-suction device.
Connect the machine to a suitable external dust extractor during all work generating a considerable amount of dust. The high volume vacuum cleaner S 200 M (see chapter optional accessories) is optimally suited for this. The air velocity must be at least 20 m/s (65.6 ft/sec.).
The inside diameter of the hose connector 6 (Fig. 2) is 35 mm (1.377 in.).
4.3 Installation of double-toothed belt

Danger
Pull the machine's power plug before installing the double-toothed belt.
The double-toothed belt should be fitted when working with insulation material of a density > 160 kg/m ^3 .
- Hook the double-toothed belt with the fine serration into the pinion 7 (Fig. 3).
- Pull up the clamping lever 8 (Fig. 4) from its parking position and turn it by 90^ inwards. Hook the double-toothed belt into the deflection roller 30 (Fig. 6) and slowly slide the clamping lever down.
The double-toothed belt is tensioned by spring force. Proceed in reverse order to dismantle the double-toothed belt.
4.4 Change of saw wire

Danger
Always pull the power plug before changing the saw wire!
Risk of injury even if the saw wire is standing still.
Proceed as follows to replace the saw wire:
- Where necessary, remove the double-toothed belt and move the clamping lever to park position (see chapter 4.3 Installation of double-toothed belt, page 23)
- Unfasten the cylinder head bolt 11 (Fig. 4) with the Allen key 10 enclosed in the supply, fasten it on the rear tilting segment 9 (Fig. 1) and fold down the cover.
- Use the Allen key to turn the rotation axis 12 (Fig. 2) clockwise until the cam engages. The saw wire is now slackened.
- Unfasten the cylinder head bolt 13 (Fig. 2) in the front saw guard with the Allen key 10 (Fig. 1) and remove the guard.

Caution: Risk of injury at the blades.
• The saw wire can now be removed.
- Every time you change the wire, also check the scrapers 31 (Fig. 3) and 32 (Fig. 4) for damage and
wear and replace them as well (see chapter 4.6 Change of scraper, page 25)
- Place a new saw wire onto the drive wheel and deflection wheel. Pay attention that the blades point in running direction and gear into the gaps of the wheels.
- Use the Allen key to turn the rotation axis anticlockwise until the saw wire is tensioned by spring force.
- Fold up the cover and tighten it with the screw.
- Put on the front saw guard and tighten it with the cylinder head bolt. Fasten the Allen key in the rear tilting segment.
- Pull the saw wire 2-3 times through by hand to check its correct seat on the wheels.
The saw wire is tensioned by spring force and does not need to be retensioned.
4.5 Change of drive wheel and guide wheel

Danger
Pull the power plug during all service work.
The strain on the wheels is particularly high. They must be replaced if they exhibit visible grooves.
4.5.1 Change of drive wheel
Proceed as follows to replace the drive wheel:
- Remove the saw wire from the drive wheel (see chapter 4.4 Change of saw wire, page 24).
- Unfasten the fillister head screw 14 (Fig. 3) and remove the scraper.
- Press the push-button 15 (Fig. 1) and pull the locking lever 16 upwards. Now the saw shaft is locked in position and the shift lever locked.
- Using the Allen key 10 (Fig. 1), release the flange screw 17 (Fig. 3) counter clockwise. Now remove both the screw and the front clamping flange 18.
- You can now remove the drive wheel.
- The clamping flanges must be free of adhering parts. Now put a new drive wheel onto the rear flange.
-
Afterwards, mount the clamping flange, attach the flange screw and tighten it by clockwise turning.
-
Put the scraper onto the bracket and fasten it with the fillister head screw.
- Align the scraper with the drive wheel so that the scraper tongue just touches the groove base of the drive wheel. Tighten the fillister head screw.
- Now put the saw wire onto the drive wheel (see chapter 4.4 Change of saw wire, page 24).
4.5.2 Change of guide wheel
Proceed as follows to replace the deflection wheel:
- Remove the saw wire from the deflection wheel (see chapter 4.4 Change of saw wire, page 24).
- Unfasten the countersunk screw 19 (Fig. 4) and remove the cover 20 with the lower scraper.
- Release the hexagon nut 21 (Fig. 4) counter clockwise. To do so, keep a hold on the axle at the fitted hexagon with an open-end wrench AF 10. Now remove the hexagon nut from the axle. You can now pull the deflection wheel from the axle.
- Put a new deflection wheel onto the axle.
- Afterwards, mount the hexagon nut and tighten it by clockwise turning.
- Place the saw guard 20 with the lower scraper onto the ram and tighten it with the countersunk screw 19.
- Open the fillister head screw 22 (Fig. 4) and align the lower scraper with the deflection wheel so that the scraper tongue just touches the groove base of the deflection wheel. Tighten the fillister head screw.
- Now put the saw wire onto the deflection wheel (see chapter 4.4 Change of saw wire, page 24).
4.6 Change of scraper

Danger
Pull the power plug during all service work.
The scrapers keep the groove base of the drive and deflection wheel clean. They must be replaced if they are worn or defective.
4.6.1 Change of top scraper
Proceed as follows to replace the scraper:
- Remove the saw wire from the drive wheel (see chapter 4.4 Change of saw wire, page 24).
- Unfasten the fillister head screw 14 (Fig. 3) and remove the scraper 31 (Fig. 3) from the bracket.
- Put a new scraper onto the bracket and fasten it with the fillister head screw.
- Align the scraper with the drive wheel so that the scraper tongue just touches the groove base of the drive wheel. Tighten the fillister head screw.
- Now put the saw wire onto the drive wheel (see chapter 4.4 Change of saw wire, page 24).
4.6.2 Change of bottom scraper
Proceed as follows to replace the lower scraper:
- Remove the saw wire from the deflection wheel (see chapter 4.4 Change of saw wire, page 24).
- Unfasten the fillister head screw 22 (Fig. 4) and remove the scraper 32 (Fig. 4) from the cover.
• Install a new scraper in the cover and fasten it with the fillister head screw. - Align the scraper with the deflection wheel so that the scraper tongue just touches the groove base of the deflection wheel. Tighten the fillister head screw.
- Now put the saw wire onto the deflection wheel (see chapter 4.4 Change of saw wire, page 24).
4.7 Setting for bevel cuts
For bevel cuts, the machine can be set to any angle between 0^ and 60^ .
- In order to incline it, bring the machine into home position and support it such that it is possible to tilt the saw unit.
- Release the two wing screws 23 (Fig. 1).
- Adjust the angle according to the scale on the gear case.
• Afterwards, tighten the wing screws 23.
4.8 Tilting back the wire set
Caution: Risk of injury at the blades. Sawing with the wire set tilted to the rear requires you to work with increased attentiveness!
The wire set can be tilted backwards to any angle between 0^ and 45^ .
- Release the clamping lever 24 (Fig. 1).
- Adjust the angle according to the scale on the riving knife/splitter.
- Then re-tighten the clamping lever.
4.9 Supplementary support plate and glider
4.9.1 Supplementary support plate
You can mount the supplementary support plate 25 (Fig. 2) on the machine to increase the working surface and to thus improve guidance of the wire saw for insulation material.
- Place the two brackets of the supplementary support plate onto the tilting segments 26 (Fig. 3) and press the supplementary support plate against the machine until the brackets engage.
- Simultaneously press the two latching buttons 27 (Fig. 2) and pull off the supplementary support plate to remove it.

Place the machine's supplementary support plate onto a guide rail if you want to cut small, bevelled sections. Depending on the cutting angle, the distance between tracing edge and saw wire can be determined from the table on the supplementary support plate.

For cross cuts, the front face of the supplementary support plate can be used together with the base plate as stop on a guide rail, slat or similar.
4.9.2 Glider
When a guide rail 33 (Fig. 5) is used, the glider is used as height compensation 34. It can be fitted both underneath the supplementary support plate and underneath the base plate.
- Place the glider into the supplementary support plate or base plate from below and allow it to engage.
• To remove the glider, disengage it and take it off.
If the glider is not required, it can be stored in its park position 35 above the supplementary support plate.
5 Operation
5.1 Initial operation
Personnel entrusted to work with the machine must be made aware of the operating instructions, calling particular attention to the chapter "Safety instructions".
5.2 Switching on and off

Danger
Make sure there is no contact between workpiece and saw wire before you switch on the machine. The workspace underneath the workpiece must be free of obstacles. Lead the connecting cable away to the rear. Hold the machine with both hands by the handles provided for that purpose.
- Switching on: Press the switch-on lock 28 (Fig. 1) forward to unlock it. Then, with the switch-on lock depressed, press the shift lever 29.
As this is a switch without locking device, the machine will only run for as long as this shift lever is pressed.
The built-in electronic system provides for jerk-free acceleration when the machine is switched on and under load readjusts the speed to the fixed setting.
- Switching off: To switch off, release the shift lever 29. The switch-on lock automatically takes effect again and secures the wire saw for insulation material against accidental switch-on.
On switching off the machine, the automatic brake takes effect simultaneously. This shortens the slowing time of the saw wire to approx. 3 second.
5.3 Light
The power tool is equipped with a light module 36 (Fig. 3).
The light module is permanently supplied with power as soon as the connecting cord is plugged in, and is then ready for operation.
When the machine is ready for operation, the light module automatically switches the light on when the machine is moved or switches it off when the machine is standing still for longer periods.
5.4 Work instructions
Handling and layout of the wire saw for insulation material DSS 300 correspond to a portable circular saw. The riving knife/splitter 4 prevents the saw wire from jamming and the safeguard of the bottom wire deflection prevents the machine from turning up. Particularly convenient and low-dust working is possible with the cutting table ST 1700 Vario, the high-volume vacuum cleaner S 200 M and the machine holder S 200-MH, all available as optional accessories.
Nails or adhering sand will damage the saw wire. They must be removed from the cut surface.
5.5 Sawing according to tracings
The gear case is equipped with a tracing edge for 0^ to 60^ . This tracing edge corresponds to the saw wire's inside. For bevel cuts, the tracing can be viewed through the opening on the left-hand side of the rear saw guard.
- Hold the machine by its handles and place the front part of its base plate onto the workpiece.
- Switch on the wire saw for insulation material (see Chapter 5.2 Switching on and off, page 26) and slide the machine evenly forward in cutting direction.
- When the cut is completed, switch off the saw by releasing the switch trigger 29 (Fig. 1).
5.6 Sawing on the guide rail

The use of a guide rail achieves a clearly higher cut quality.
- Fasten the guide rail in the desired position on the workpiece (for this the clamping device F-FIX is very useful - see chapter 8 Optional accessories, page 29).
• Install the supplementary support plate and the glider where required (see chapter 4.9 Supplementary support plate and glider, page 26). - Hold the machine by its handles and place the front part of its base plate into the guide rail.
- Switch on the wire saw for insulation material (see Chapter 5.2 Switching on and off, page 26) and
slide the machine evenly forward in cutting direction.
- When the cut is completed, switch off the saw by releasing the switch trigger 29 (Fig. 1).
The double-toothed belt should be fitted when working with insulation material of a density > 160 kg/m ^3 (see chapter 4.3 Installation of double-toothed belt, page 23).
The riving knife/splitter should be shifted to the rear by 15^ when working with insulation material of a density > 160 kg/m ^3 (see chapter 4.7 Setting for bevel cuts, page 25).
5.7 Free form cutting
The double-toothed bolt must be dismantled during free form cutting (see 4.3 Installation of double-toothed belt, page 23)
The round shape of the blades makes it possible to cut the workpiece in any direction. This makes it very easy to produce cutouts for rafters or openings.
- Hold the machine by its handles and place the front part of its base plate onto the workpiece.
- Switch on the wire saw for insulation material (see Chapter 5.2 Switching on and off, page 26) and slide the machine evenly forward in cutting direction.
- when the cut is completed, switch off the saw by releasing the switch trigger 29 (Fig. 1).

Free form cuts can also be carried out with the wire set tilted to the rear.

Caution: Sawing with the wire set tilted to the rear requires you to work with increased attentiveness!
6 Service and maintenance

Danger
Pull the power plug during all service work.
MAFELL machines are designed to be low in maintenance.
The ball bearings used are greased for life. When the machine has been in operation for a longer period of time, we recommend to hand the machine in at an authorised MAFELL customer service shop for inspection.
6.1 Machine
The machine must be regularly cleaned off deposited dust. When doing so, you should clean the ventilation openings on the motor with a vacuum cleaner.
Only use our special grease, order No. 049040 (1 kg tin) for all greasing points.
The saw wires used on the machine must be regularly checked as sharp tools improve the cutting quality. Replace worn or blunt saw wires. Resharpening the saw wire is not possible.
6.2 Drive and guide wheel
The strain on the wheels is particularly high. They must be replaced if they exhibit visible grooves (see chapter 4.5 Change of drive wheel and guide wheel, page 24).
6.3 Reamer
The scrapers keep the groove base of the drive and deflection wheel clean. They must be checked on a regular basis. They must be replaced if they are worn or defective (see chapter 4.6 Change of scraper, page 25).
6.4 Storage
Clean the machine thoroughly if the machine is not used for a longer period of time. Spray blank metal parts with a rust-proofing agent.
7 Troubleshooting

Danger
Determining the causes for existing defects and eliminating these always requires increased attention and caution. Pull the mains plug beforehand!
Some of the most frequent defects and their causes are listed in the following chart. In case of other defects, contact your dealer or the MAFELL customer service.
| Defect | Cause | Elimination |
| Machine cannot be switched on | No mains voltage | Check power supply |
| Mains fuse defective | Replace fuse | |
| Carbon brushes worn | Take the machine to a MAFELL customer service shop | |
| Machine switches off automatically during idling or stops during cutting | Mains failure | Check pre-fuse |
| Machine overloaded | Reduce feed speed | |
| Saw wire jams when the machine is advanced. | Feed rate too fast | Reduce feed speed |
| Blunt saw wire | Release the switch immediately.Remove the machine from the workpiece and replace the saw wire | |
| Riving knife/splitter seized in the workpiece | Secure the workpiece on a sturdy support | |
| Saw wire is running out or increased effort necessary during advancing | Blunt saw wire | Release the switch immediately.Remove the machine from the workpiece and replace the saw wire |
| Feed rate too fast Reduce feed speed | ||
| Chip ejection blocked | No extraction system connected | |
| Saw chain is coasting a long time after it has been switched off | Automatic brake defective | Take the machine to a MAFELL customer service shop |
8 Optional accessories
| - Saw table ST 1700 Vario | Order No. 91A 601 |
| - Guide unit ST-FE 200 incl. guide rail, mounting bracket and auxiliary rest | Order No. 207 277 |
| - High volume vacuum cleaner S 200 | Order No. 206 869 |
| - Chip bag S 200 (2 pieces) | Order No. 093 791 |
| - Machine holder S 200-MH | Order No. 207 164 |
| - Clamping device F-FIX | Order No. 206 760 |
| - Saw wire + scraper DSS-SR | Order No. 206 370 |
| - Double-toothed belt DSS-DZ | Order No. 206 371 |
| - Guide rail F80, 800 mm (31.496 in.) long | Order No. 204 380 |
| - Guide rail F110, 1100 mm (43.307 in.) long Order No. 204 381 | |
| - Guide rail F160, 1600 mm (62.992 in.) long | Order No. 204 365 |
| - Guide rail F210, 2100 mm (82.677 in.) long | Order No. 204 382 |
| - Guide rail F310, 3100 mm (122.047 in.) long | Order No. 204 383 |
| - Sliding bevel F-WA | Order No. 205 357 |
| - Accessories for guide rail: | |
| - Screw clamp F-SZ180MM (2 pieces) | Order No. 207 770 |
| - Connecting piece F-VS | Order No. 204 363 |
| - Rail bag F160 | Order No. 204 626 |
| - End caps F-EK (2 pieces) | Order No. 205 400 |
| - Rail bag kit F80/160 with sliding bevel consisting of: F80 + F160 + connecting piece + sliding bevel + 2 screw clamps + rail bag | Order No. 204 749 |
| - Rail bag kit F160/160 consisting of: 2 x F160 + connecting piece + 2 screw clamps + rail bag | Order No. 204 805 |
| - Adhesive profile F-HP 6.8M | Order No. 204 376 |
| - Splinter guard F-SS 3.4M | Order No. 204 375 |
| - Cable cover K-Fix (2 pieces) | Order No. 206 369 |
| - Roller edge guide UA | Order No. 205 166 |
| - Parallel stop | Order No. 205 323 |
| - End caps packed F-EK | Order No. 205400 |
| - Adhesive profile packed F-HP 6.8M | Order No. 204376 |
| - Splinter guard packed F-SS 3.4M | Order No. 204375 |
9 Exploded drawing and spare parts list
The corresponding information in respect of spare parts can be found on our homepage: www.mafell.com
Français
Sommaire
Incertitude K _PA = 3,0 dB (A)
$$ _ {P A} = 3, 0 \mathrm{dB(A)} $$
$$ _ {W A} = 3, 0 \mathrm{dB(A)} $$
$$ _ {P A} = 3, 0 \mathrm{dB(A)} $$
$$ _ {W A} = 3, 0 \mathrm{dB(A)} $$
$$ K _ {W A} = 3, 0 \mathrm{dB(A)} $$
2.4.2 Informationer vedr. vibrationer
$$ _ {P A} = 3, 0 \mathrm{dB(A)} $$
text_image
mafell creating excellenceMAFELL AG
Beffendorfer Straße 4, D-78727 Oberndorf / Neckar
Telefon +49 (0)7423/812-0
Internet:
E-Mail:
Fax +49 (0)7423/812-218
www.mafell.de
mafell@mafell.de