IEM 750 - Cultivator IKRA - Free user manual and instructions
Find the device manual for free IEM 750 IKRA in PDF.

User questions about IEM 750 IKRA
0 question about this device. Answer the ones you know or ask your own.
Ask a new question about this device
Download the instructions for your Cultivator in PDF format for free! Find your manual IEM 750 - IKRA and take your electronic device back in hand. On this page are published all the documents necessary for the use of your device. IEM 750 by IKRA.
USER MANUAL IEM 750 IKRA
GB Operating Instructions
Read operating instructions before use!
1 Read the instructions for use!
2 Caution! Rotating electrical too! Tool carries on running after being switched off!
3 Keep third parties out of the area of risk
4 Do not leave this electrical tool in the rain If the cable is damaged, disconnect from the mains immediately and replace cable!
5 Disconnect mains plug before carrying out any repairs!
6 Warning! Keep your hands and feet well clear of the blades
7 Attention: Environmental Protection! This device may not be disposed of with general/household waste. Dispose of only at a designated collection point.
FR
Technical specifications
| Model EM 700 | ||
| Rated Voltage: V~ 230 | ||
| Nominal Frequency: Hz 50 | ||
| Nominal Consumption: W 700 | ||
| Idle speed: min -1 430 | ||
| Working width: mm 280 | ||
| Working depth max.: mm 200 | ||
| Weight: kg 7,3 | ||
| Sound Pressure Level according to 2000/14/EC dB (A) 70 | ||
| Vibration Level according to EN 60335-1 m/s 2 <2,5 |
Protection class: II; Protection system IPX4
Technical and visual changes can be made during the course of the further development and without prior notice. All information given in these instructions for use are therefore given without guarantee. Legal claims, which are based on the instructions for use can therefore not be made.
Safety instructions
Read the operating instructions carefully and act accordingly. Keep it for general use and later reference.
Comply with the safety information and warning signs on the tool.
Before operation
- The tool must be assembled correctly before use.
- The tool should be checked carefully before use. You should only work with a tool that is in good condition. If you notice any defect on the tool that may cause a hazard to the operator, do not operate the tool until such defects have been rectified.
- Replace worn or damaged parts for reasons of safety. Use only original spare parts. Parts not produced by the original manufacturer may have a poor fit and possibly cause injury.
- Before use, all foreign bodies must be removed from the working area, also pay attention to foreign bodies during operation.
- Only work in daylight or sufficiently good artificial light.
- Wear eye protection and face or dust mask if operating in dusty conditions.
-
Dress properly. When operating the tool, pay attention to the following notes concerning your working clothes:
-
The use of protective gloves and rugged footwear is recommended.
-
Wear a proper hat or other headgear to contain long hair.
-
Avoid wearing loose clothing or jewellery that might get caught in the rotating tines.
Proper use
The user is responsible for third parties while working with the tool.
- People not acquainted with the operating instructions, children, juveniles who have not yet reached the minimum age for using this tool, and people under the influence of alcohol, drugs or medication are not allowed to use the tool.
- Only use the tool for its intended purposes.
- Keep children and pets away. All onlookers should be kept at a safe distance from the tool when it is operated.
- Make sure that all protective devices are fitted and in good condition.
- Do not operate the tool near underground electric cables, telephone lines, pipes or hoses.
- Before inserting the plug in the mains socket, make sure that the socket ratings are correct and correspond to those indicated on the rating label on the tool.
- The use of the tool is only permitted if the safety distance provided by the guide bar is complied with.
- Do not operate the tool on a slope that is too steep for safe operation. When working on slopes, slow down your working speed and make sure you have good footing.
- Before starting the tool, make sure that the tines are not touching any foreign objects and are completely free to move.
-
Grip guide bar firmly with both hands. Never operate the tool with only one hand.
-
Be aware that the tool may unexpectedly bounce upward or jump forward if the tines should strike extremely hard, packed soil, frozen ground, or buried obstacles such as large stones, roots or stumps.
- Keep your hands, feet or any other part of your body or clothing away from the rotating tines.
Caution! Danger of injury!
- Only guide the tool at walking pace. Do not overreach. Keep proper footing and balance at all times.
- Be aware of the position of the extension cord during operation. Be careful not to trip over the cord. Make sure to guide the cord away from the tines at all times.
- If the tool strikes a foreign body, examine the tool for signs of damage and carry out any necessary repairs before restarting and continuing to work.
- If the tool should start to vibrate abnormally, switch off the motor and check for the cause, immediately. Vibration is usually a warning sign for trouble.
- Hold the guide bar (carrying handle) and lift the tool to move it from one place to another.
- Always switch off the tool, disconnect the plug and wait until the application stops before carrying out maintenance or cleaning work. Attention! Tines do not stop immediately after switching off.
- Use caution when cleaning or performing maintenance work on the tool. DANGER! Watch your fingers! Wear protective gloves!
- It is forbidden to move or modify any of the electrical or mechanical safety devices.
Electrical safety
- The mains voltage must correspond to the one marked on the tool's rating label (230V ~50Hz). Do not use other sources of power.
- For the power supply line, the use of a protective switch (circuit-breaker) with a nominal breaking current in the range of 10 to 30mA is recommended. Consult a qualified electrician.
- Never pass the running tool over the extension cable to which it is connected, as this could cut the cable. Mark sure that you always know where the cable is.
- Use the special cable holder (strain relief) for the connection of the extension cable.
- Never use the tool when it is raining. Try to prevent it from getting wet or being exposed to humidity. Do not leave it outside overnight.
- The power supply cable should be checked regularly and before each time it is used; make sure that the cable is not damaged or worn out. If the cable is not in good condition, do not use the tool; take it to an authorized service centre instead.
- Only use extension cables that are suitable for outdoor use. Keep it away from the cutting area, from damp, wet or oily surfaces or surfaces with sharp edges and also from heat and fuels.
- The mobile socket of the extension cable should be splash proof in compliance with the requirements of DIN 57282 and VDE 0282; the cross-section of the wire (max. length: 75m ) should be at least 1.5mm^2 . Use H07RN-F harmonized cable.
Before starting up
Intended use
This tool is only intended as an electric tiller for use in domestic and hobby gardens.
It is not designed for use in public areas, parks, sports facilities, or in agriculture and forestry. Using the tool for any other purpose is considered improper and therefore not approved. The manufacturer is not liable for any damage or injury resulting from such improper or not approved use. The user is fully liable for any risks associated with such use.
Double insulation
The electric tiller has double insulation. This means that all external metal parts are insulated from the electric power supply. This is achieved by introducing an insulation layer between the electrical and mechanical parts. The double insulation guarantees you the greatest possible safety.
Overheat protection
If the tool is blocked by a foreign object or if the motor is overloaded, the motor will be automatically switched off by the protection device. Release the trigger level and wait until the motor has cooled down (approx. 15 minutes), then start the tool again.
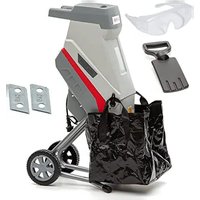
Assembly (Fig. 2-6)
Mounting the carrying handle
Insert the carrying handle (1) into the guide bar, lower section (2) and fix it with two of the supplied screws and nuts.
Guide bar, upper section
Slide the cable relief (3) onto the upper guide bar. Connect the guide bar, upper section to the guide bar, lower section using the supplied bolts (4) and swing nuts (5) on both sides.
To adjust the overall height of the guide bar you can also assemble the guide bar, upper section to the lower holes on the guide bar, lower section.
Install the 2-handsafety switch as shown in Fig. 3-6.
Use the two supplied cable clips (6) to fix the cable along the guide bar.
Operating the electric tiller
Connection to the mains supply (Fig. 7)
Plug the tool's connection cable into the safety switch/ plug combination and secure it with the cable relief. The loop of the mains cable must be long enough for the cable relief to slide from one side of the guide bar to the other.
Switching the tool on (Fig. 8)
-
Press the safety lock button A of the switch/plug combination and then pull the trigger level B against the bar. The motor will start and the tines will begin to rotate.
-
Hold the trigger lever in this position and release the safety lock button.
- To stop the tool release the trigger lever; the lever automatically returns to its initial position.
Use the electric tiller for breaking sod, preparing seedbeds, and for cultivating gardens and flowerbeds. The electric tiller may also be used to dig small holes for planting saplings or potted plants.
Tips
- Move the application to the intended working area prior to starting the motor.
- Hold the application firmly while switching it on.
- The tines will pull the tiller forward during operation; press the guide bar to lower the tines slowly into the ground.
- By pulling the tiller back towards yourself, the tines will dig deeper and more aggressively.
- For breaking sod or deep tilling, allow the tines to pull the tiller forward to the end of your arm's reach, then firmly pull the tiller back towards you. By repeatedly allowing the tiller to move forward and then pulling it back to you, the tiller will be most effective.
- If the tiller digs so deep that it remains in one spot, gently rock the tiller side to side to get it move forward again.
- For preparing seed beds, we recommend to apply one of the tilling patterns shown in Fig. 9.
- Tilling Pattern A - Make two passes over the area to be tilled, the second at a right angle to the first.
Tilling Pattern B - Make two passes over the area to be tilled, the second overlapping the first.
- To prevent tripping take particular care when moving backwards and when pulling the tiller.
- Always let the tines rotate at top speed; do not work in such a manner as to overload the tool.
- Never pass the tiller over the extension cord; make sure the cord is always in a safe position behind your back.
- When working on inclines, always stand diagonally to the incline in a sturdy, safe position. Do not work on extremely steep slopes.
Transport
Attention! Before transporting the tool, switch off the motor.
The tines and the tool as such may be damaged even if you move the tool with the motor switched off, e.g., over solid ground. Prevent the tines from touching the ground by carrying the tool by the carrying handle at the guide bar.
Clearing tines of foreign objects
During operation, a stone or root may become lodged in the tines, or tall grass or weeds may wrap around the tine shaft.
To clear the tines, release the trigger lever. Unplug the tiller, and dislodge or remove any obstacles from the tines or tine shaft.
To ease the removal of tall grass or weeds that are wrapped around the tine shaft, you may remove one
or more of the tines from the tine shaft. See the Tines Removal and Installation section in the manual.
Maintenance and storage
Before carrying out any maintenance operations, cut off the electric power supply by disconnecting the plug from the extension cable.
Prior to each time the tool is used
- Check the connecting cable for signs of damage or ageing (wear and tear). Replace the cable if it is cracked, split or otherwise damaged.
- Check the condition of the cutting cylinder, and ensure that all threaded connections are securely tightened.
- If the tines are blunt, take it to a specialist workshop for repair, if necessary.
Once per season
- Lubricate the tines and shaft.
- At the end of the season, have the tool checked and serviced in a specialist workshop.
Cleaning
Attention! Clean the tool after each use. Failure to carry out proper cleaning may result in damage to the tool or cause it to malfunction.
Warning! Injury may occur when working on the tines. Wear protective gloves!
Whenever possible, clean the tool right after you have finished working with it.
- Clean the underside of the housing around the tines and the protective shield and fender with a scrubbing brush, and a brush or soft cloth dampened with a mild soap and water mixture. Never splash the tool with water!
- To remove soil and debris from the tines and transmission, use a stiff brush or dampened cloth.
- Clean the air vents; remove any remaining grass or dirt.
- Once cleaned, wipe the tine and shaft dry and apply a light coat of oil.
Tines Removal and Installation (Fig. 10)
Worn tines lead to poor performance and may overload the motor.
Check the tines' condition before each use. Sharpen or replace tines when necessary. It is recommended to have this done by a specialist.
Attention! Disconnect the mains supply and wear protective gloves.
To remove all tines from the shaft:
- Remove the lock pin at the end of the shaft.
- Take the outer tire set off the shaft.
- Remove the lock pin and take the inner tine set off the tine shaft.
- Carry out the above steps in reverse order to install tines.
To remove and install tines from/to the tine bracket:
If one or two pieces of a tine are broken, it is necessary
to change the damaged tine; it is not necessary to replace the complete tine set.
- Loosen the screws on one side while holding the lock nuts from the other side.
Take off the damaged tire and replace it by a new one.
Maintenance of the transmission (Fig. 11)
- The transmission lubricant (grease) should be checked and/or filled up about every 15 hours of operation or at least once a year.
- The inlet screw plug (1) for the transmission lubricant is located on the right side of the transmission housing.
Note: As the transmission heats up during operation, the grease used to lubricate the transmission assembly may liquefy to oil. - Put the tiller down on its left side and clean the transmission housing before removing the drain screw to prevent dirt and debris from getting into the transmission.
- Use an Allan key (hexagon socket screw key) to loosen the screw.
- Fill in as much grease (directly from the tube or using a grease gun) until it comes out of the outlet bore.
- Use commercially available transmission lubricant (gear grease) of the type Mobil EPO or similar.
If necessary, disassemble tines. - Screw the inlet screw plug back in.
Storage
The tool should be stored in a dry and clean place and out of the reach of children.
During extended periods of storage as, for example, during the winter, ensure that the tool is protected against corrosion and frost.
At the end of the season, or if the tool is not to be used for longer than a month:
Clean the tool.
- Wipe all metal surfaces with an oil-impregnated cloth to protect them from corrosion (resin-free oil), or apply a fine coat of spray oil.
- Fold the guide bar down, and store the tool in a suitable place.
Repair Service
Repairs to electrical tools may only be carried out by skilled electricians.
If you send the machine to us for repair, please describe the fault.
Attention! Electrical repairs may only be carried out by a skilled electrician or a customer service workshop!
Waste disposal and environmental protection
If your device should become useless somewhere in the future or you do not need it any longer, do not dispose of the device together with your domestic refuse, but dispose of it in an environmentally friendly manner. Please dispose of the device itself at an according
collecting/recycling point. By doing so, plastic and metal parts can be separated and recycled. Information concerning the disposal of materials and devices are available from your local administration..
Troubleshooting
| Fault Possible cause | Rectification | |
| The motor cannot be No started. Cable damaged if required, replace the repaired by a qualified Safety switch/plug combination damaged workshop. | power Check mains supply. | |
| Check cable, pull the plug and insert a cable or have it electrician | gain, | |
| nation Have the tool repaired by a specialist | ||
| Overheating protection is less2. Tines are blocked, remove blocking3. Soil is too hard, ada- pt working depth accordingly repeatedly moving forward and backward over Let the motor cool down before you resume your work. | activated 1. Wremove blocking. | orking depth too deep, continue work with working depth |
| reduced working depth accordingly | ||
| and backward over the same place. | ||
| Let the motor cool down for about 15 minutes | ||
| before you resume your work. | ||
| Unusual Tines are blocked sounds workshop.Screws, nuts or other fasic elements are loose | Switch the tool stops. | off, wait until the motor fully |
| Lubricating agent is leaking | Have the tool repaired by a specialist | |
| ening Fasten all elements; if the contacts a specialist workshop. | the sounds remain shop. | |
| Unusually strong vibrationWorking depth too deep. | Tines are damaged or worn out specialist workshop. | Replace the tines or have them checked by a |
| Adjust working depth to a suitable depth. | ||
| Bad tilling resultWorn-out/blunt tines-specialist workshop. | Working depth too low. | Adjust working depth to a suitable depth. |
| Replace the tines or have them checked by a |
Données techniques
Clasei de protecţie II; Protection system IPX4
Technical and visual changes can be made during the course of the further development and without prior notice. All information given in these instructions for use are therefore given without guarantee. Legal claims, which are based on the instructions for use can therefore not be made.
EC Declaration of Conformity
according to EU Guideline of Machines 98/37/EC

We, Mogatec Moderne Gartentechnik GmbH, Im Grund 1c, Gewerbegebiet Grießbach, D-09435 Venusberg/OT Grießbach, declare under our sole responsibility that the product EM 700, to which this declaration relates correspond to the relevant basic safety and health requirements of Directives 98/37/EC (Guideline of Machines) 89/336/EEC (EMV-Guideline), 2006/95/EEC (Low Voltage Guideline) and 2000/14/EC (noise directive) incl. modifications. For the relevant implementation of the safety and health requirements mentioned in the Directives, the following standards and/or technical specification(s) have been respected: EN 60335-1:1994+A1+A2+A11-A16, 98/37 EC-Annex I, DIN VDE 0730 Teil 2ZP/07.80, EN 709:1997+A1, EN 50366, EN 55014-1:2000+A1+A2, EN 55014-2:1997+A1, EN 61000-3-2:2000+A2, EN 61000-3-3:1995+A1.
measured acoustic capacity level 90 dB (A) guaranteed acoustic capacity level 93 dB (A)
Conformity assessment method to annexe V / Directive 2000/14/EC
Munster, 30.04.2007

Gerhard Knorr, Technical Management Ikra GmbH
CE Conformity Officer Mogatec GmbH
Maintenance of technical documentation: Gerhard Knorr, Kärcherstraße 57, DE-64839 Münster
FR
For this electric tool, the company provides the end user - independently from the retailer's obligations resulting from the purchasing contract - with the following warranties:
The warranty period is 24 months beginning from the hand-over of the device which has to be proved by the original purchasing document. For commercial use and use for rent, the warranty period is reduced to 12 months. Wearing parts and defects caused by the use of not fitting accessories, repair with parts that are no original parts of the manufacturer, use of force, strokes and breaking as well as mischievous overloading of the motor are excluded from this warranty. Warranty replacement does only include defective parts, not complete devices. Warranty repair shall exclusively be carried out by authorized service partners or by the company's customer service. In the case of any intervention of not authorized personnel, the warranty will be held void.
All postage or delivery costs as well as any other subsequent expenses will be borne by the customer.
FR
Conditions de garantie
Unit E, Clayton Works Business Centre, Midland Road, Leeds, LS10 2RJ Tel.: +44 (0)113 385 1100
Fax:+4401133851115
GR Panos Vrontanis & Co.
3 Mola Street, GR - 13671 Aharnes
HU Ikra Service Hungary,
(Pannónia u. / Katona József u. corner, entrance from Katona József u.)
Pannónia u. 9., H - 1136 Budapest
Tel.: +36 06-1-999-0790
Fax: +36 06-1-283-6550
IN Proactive Overseas Pvt. Ltd.
101, Shapuri Tirath Singh Tower, G-58 Community Centre Janak Puri
Tel.: +91-11-25501239
Fax: +91-11-45567375
NEW DELHI-110058 (India)
IR J&M Distribution Systems Ltd
Unit E, Clayton Works Business Centre, Midland Road, Leeds, LS10 2RJ Tel.: +353 - 1890 8823 74
ETREUROTRADE,