
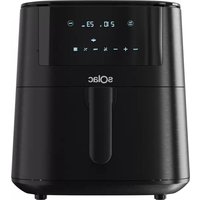
Double FA1520 - Deep fryer SOLAC - Free user manual and instructions
Find the device manual for free Double FA1520 SOLAC in PDF.
| Product type | Dual-basket air fryer |
| Brand | Solac |
| Model | Double FA1520 |
| Number of baskets | 2 |
| Capacity per basket | 400 g |
| Power | Not specified (estimated 1500-1800 W) |
| Adjustable temperature | 160 °C to 200 °C |
| Timer | Up to 35 minutes |
| Display | Digital |
| Cooking functions | Manual and menu (10 modes: potatoes, fish, shrimp, meat, steak, pizza, pies, chicken wings, chicken, vegetables) |
| Independent basket control | Yes |
| Auto shutdown | Yes (after 3 minutes of inactivity) |
| Pause function | Yes |
| Recommended shaking | Yes for even cooking |
| Cleaning | Baskets not dishwasher safe; clean with a damp cloth |
| Coating | Non-stick |
| Safety | The fryer only operates if baskets are properly inserted |
| Included accessories | 2 baskets, 2 inner racks |
| After-sales service | Contact Solac authorized technical service (http://solac.com) |
Frequently Asked Questions - Double FA1520 SOLAC
User questions about Double FA1520 SOLAC
0 question about this device. Answer the ones you know or ask your own.
Ask a new question about this device
Download the instructions for your Deep fryer in PDF format for free! Find your manual Double FA1520 - SOLAC and take your electronic device back in hand. On this page are published all the documents necessary for the use of your device. Double FA1520 by SOLAC.
USER MANUAL Double FA1520 SOLAC
If your appliance model does not have the accessories described above, they can also be purchased separately from Technical Assistance Services.
USE AND CARE
Before each use, fully extend the power cord of the appliance.
- Do not use the appliance if its accessories are not properly attached.
- Do not use the appliance if the accessories attached to it are defective. Replace them immediately.
- Do not use the appliance empty and without the basket.
- The air fryer operates only with hot air. Never fill the basket with oil or other grease.
- Do not add paper, cardboard, plastic or similar materials inside the fryer. Aluminum foil or vegetable paper may be used.
- Do not move or shift the appliance while it is in operation.
- To keep the non-stick coating in good condition, do not use metallic or sharp utensils.
- Respect the MAX level.
- Unplug the appliance from the mains when not in use and before any cleaning operation.
- Keep this appliance out of the reach of children and/or persons with reduced physical, sensory or mental capacities or lack of experience and knowledge.
- Do not store or transport the appliance if it is still hot.
- Never leave the appliance switched on and unattended. This will also save energy and prolong the life of the appliance.
- Use only utensils suitable for high temperatures.
Instructions for use
BEFORE USE
Make sure that you have removed all packaging material from the product.
Before using the product for the first time, clean the parts in contact with food as described in the Cleaning section.
During the first use it is normal for the appliance to give off a slight plastic odor. This does not affect the operation of the appliance.
- Leave a minimum of 35 cm of space around the appliance when it is to be used.
- Place the appliance on a stable horizontal surface. Do not place the appliance on surfaces that do not withstand heat.
USE
- Grasp the handle of the baskets and carefully remove them from the fryer by pushing them outwards.
Put the food inside the baskets, on top of the inner grid. - Replace the baskets with the food inside the fryer.
Note: The appliance will not operate until the baskets are completely closed inside the fryer.
Unwind the appliance cable completely before plugging in. - Plug the appliance into the mains.
- As soon as the appliance is plugged in, 1 beep sounds, indicating that the appliance is switched on and the on/off button (12) lights up.
- To activate the digital display, press the on/off button.
- When the on/off button is pressed, a long beep sounds and the digital display lights up.
MANUAL MODE
-
Once the ingredients are inside the baskets and the fryer is plugged in, select basket 1 or 2 (by pressing the buttons (20) or (11) respectively), to set the time and temperature.
-
When basket 1 is selected, buttons (20), (13) and (17) will flash.
- Press the button (18) to select the temperature and time of basket 1.
- Using the +/- buttons, set the temperature and time.
- Once basket 1 has been set, select basket 2 and repeat the same operation.
- Press the start/pause button to start cooking.
- During cooking you can change the time and temperature. Simply select basket 1 or 2 and then change the time or temperature.
- If you wish to stop one of the baskets during cooking, press and hold the button (11) or (20) for 2 seconds. The selected basket will stop but the other one will continue cooking.
- To pause both baskets at the same time, press button (13).
MENUS MODE
- Once the ingredients are inside the baskets and the fryer is plugged in, select basket 1 or 2 (by pressing buttons (20) or (11) respectively).
- When basket 1 is selected, buttons (20), (13) and (17) will flash.
- Press the menu selector (19) to select the desired menu. Keep pressing this button to change menus.
- You can change the temperature and time of the menus. Simply follow the steps explained in the manual mode.
- Once the menu for basket 1 has been selected, follow the same steps for basket 2.
- Press the start/pause button to start cooking. Only the selected menus will appear on the display.
- During cooking you can change the time and temperature. Simply select basket 1 or 2 and then change the time or temperature.
If you wish to stop one of the baskets during cooking, press and hold the button (11) or (20) for 2 seconds. The selected basket will stop but the other one will continue cooking.
- To pause both baskets at the same time, press button (13).
NOTES
- If, when pausing the baskets, you press the on/off button for 3 seconds, the appliance will enter standby mode.
- If you press the on/off button again for 3 seconds, the appliance will switch off.
- At the end of cooking, the appliance beeps 5 times and the display shows "OFF". The appliance goes into standby mode.
- When the fryer stops, remove the baskets and the food inside. Place the baskets on a heat-resistant surface.
- To increase/decrease the temperature or time quickly, press and hold the +/- buttons.
- During the cooking time, the digital display will show the discount of the set minutes and the set temperature. When there is 1 minute left, the digital display will show the discounted seconds.
- For a crispier result add a little oil to the recipe.
- The fryer can be used to reheat food. To reheat food, set the temperature to 150^ for a maximum of 10 minutes.
- IMPORTANT: Do not turn the baskets upside down as any remaining oil on the bottom may drip out.
SHAKING
During cooking, remove the baskets from the fryer and stir or shake the food for better cooking.
Note: You can remove the baskets in the middle of cooking without any problem. The fryer stops automatically and the display turns off. When the baskets are replaced, the fryer restarts and continues its program.
- Avoid shaking or stirring the food for more than 30 seconds so that the fryer does not cool down.
Which foods to shake or stir?
- Small foods such as potato chips, cut vegetables or nuggets usually need to be shaken for optimal cooking.
- Without shaking or stirring, foods may not be crisp or cooked properly.
AUTOMATIC SHUTOFF
- The fryer will automatically turn off after 3 minutes if no cooking program is active.
ONCE YOU HAVE FINISHED USING THE APPLIANCE:
- Unplug the appliance from the mains.
- Clean the appliance as described in the cleaning section.
Cleaning
- Unplug the appliance from the mains and let it cool down before starting any cleaning operation.
- Clean the unit with a damp cloth soaked in a few drops of detergent and then wipe it dry.
- Do not use solvents, or products with an acid or basic pH factor such as bleach, or abrasive products to clean the appliance.
- Do not immerse the device in water or any other liquid, nor put it under the tap.
It is recommended to clean the appliance regularly and remove all food residues. - If the appliance is not kept in a good state of cleanliness, its surface may degrade and inexorably affect the lifetime of the appliance and lead to a dangerous situation.
- Do not store the fryer when it is hot or wet.
- The baskets are NOT dishwasher safe.
Table of recommendations
| Menu | Grams | Time | Temperature | Tips |
| Pizza | 100 - 400 | 20 min | 200°C | |
| Frozen potatoes | 100 - 400 | 20 min | 200°C | Shake |
| Chicken wings | 100 - 400 | 20 min | 200°C | |
| Fish | 100 - 400 | 18 min | 200°C | |
| Shrimp | 100 - 400 | 20 min | 180°C | |
| Vegetables | 100 - 400 | 18 min | 160°C | Shake |
| Meat | 100 - 400 | 25 min | 180°C | |
| Chicken | 100 - 400 | 35 min | 200°C | |
| Cakes | 100 - 400 | 30 min | 160°C | |
| Steak | 100 - 400 | 20 min | 180°C |
NOTE: Add 3 minutes to all menus if the appliance is cold at the start of cooking.
Troubleshooting
| Problem | Cause | Solution |
| The appliance does not work. | The appliance is not plugged into the mains. | Plug in the appliance. |
| Ingredients are not sufficiently cooked. | There is too much food in the basket. | Put less food in the basket so that it cooks more evenly. |
| The temperature is too low. | Adjust the temperature. | |
| The preparation time is too short. | Set the timer. | |
| The ingredients are fried unevenly. | Certain types of ingredients need to be shaken in the middle of the cooking time. | Ingredients that are on top or crossed over (e.g. chips) should be shaken halfway through the cooking time. |
| I cannot slide the basket into the appliance properly. | There are too many ingredients in the basket. | Do not fill the basket above the MAX symbol. |
| The basket is not positioned correctly. | Push the basket in until you hear a click. | |
| White smoke comes out of the appliance. | You are preparing fatty ingredients. | When cooking fatty ingredients, a large amount of oil will seep into the basket. The oil produces white smoke but does not affect the appliance or the final result. |
| The basket contains grease residues from previous use. | The white smoke is due to the fat heating up. Make sure to clean the basket properly after each use. | |
| Black smoke comes out of the appliance. | Food may be burning. | Unplug the fryer immediately. Wait until it cools down before removing the basket and cleaning. |
Description
META THN IIP'OTH XP'HsH THZ SYKEYH:
OtctpaHЯBaHe Ha Hen3npaBHOCTN
| ПюбLEM | Пючина | Реценье |
| Уреьт He paBOTи. | Уреьт He e ВКЛЮЧЕн КБМ елекtrпескata Мреса. | ВКЛЮЧЕТУFEДАВ КоNTAKТa. |
| СъставкITE He ca dОстатун Добpe сгOTBEи. | В кошницatura Има ТВьрдe MHOrO XpaHa. | Сложete по-МалкохраHAВ Кошницatura, за сдсгOTВИ по-разномерно. |
| Temпегатурatura e ТВьрдe HиСka. | Perулираite Temпегатурatura. | |
| Времeto 3a поготовka e ТВьрдe кратko. | Настойе таймера. | |
| СъставкITE ca иЗпьржени Неравномерно. | Няков ВИДОве сьставки Травьда се разклaitВ срета на Времeto 3a �ТveHe. | СъставкITE, КОЛTO ce намират OTROPE Или са пresецени (нарр. чinc), Травьда се разклaitT no срета на Времeto 3a �ТveHe. |
| He мога дa вkapam правилно кошницatura В урeded. | В кошницatura Има TВьрдe MHOrO Сьставки. | He пьлне ТКошницatura над символа MAX. |
| Кошницatura He e разпосложенияправилно. | Варайе Кошницatura, ДOKATO ChYETU OZPAKBAHe. | |
| От урeded ИЗлииза Бая ДIM. | Приноговные мостни Сьставки. | При ГOTВeHe Na Ma3Hn Сьставки в Кошницatura се пrosсмухва ГOLЯМО Кошпес硐 OLOINO. МаслоTo образува Бая DM, НО He Влие на урeded Или Na Крайня рezуltat. |
| Кошницatura сьдьржа Остаты се МAZHIнa OT правина уnotpe6a. | Белая Дим се дьлжи Na НагbraВанeto Na Ma3HinHATA. He збравяпte Да поочьВATE правилно Кошницatura сдд Вся Ka уnotpe6a. | |
| От урeded ИЗлииза чeredem. | Вьзможно e xpanataда гори. | НебаВно ИЗКЛЮчete фpritsordnika ot еLEKTрческatura мржа. Изчakайтдa ИЗстиHe, предида ИЗВадиTe Кошницatura ИдаЯ почистпe. |
BG
J 1 J 1 J 1 J 1 J 1 J 1 J 1 J 1 J 1 J 1 J 1 J 1 J 1 J 1 J 1 J 1 J 1 J 1 J 1 J 1 J 1 J 1 J 1 J 1 J 1 J 1 J 1 J 1 J 1 J 1 J 1 J 1 J 1 J 1 J
. 13)
中
JLslll CgolglglaI 13
Jg3dAL / Jgswll jgc bals
Jdsewgsjg jghjdswq
OgJgwl Jgswll jgc bgs 13
Jgswglgipsswq. jg3 dal
j 5 jgeJg .j g Jg Jg Jg Jg Jg Jg Jg Jg Jg Jg Jg Jg Jg Jg Jg Jg Jg Jg Jg Jg Jg Jg Jg Jg Jg Jg Jg Jg Jg Jg Jg Jg Jg Jg Jg Jg Jg Jg Jg Jg Jg Jg Jg Jg Jg Jg Jg Jg Jg Jg J g J g
. 1000000000000000000000000000000000000000000000000000000000000
Gg 18) jll 1 aI
.1 aI I
.2 aI I
.1 aI I
gbll /sll j lgl b
.ogj g j 1 1
2 gl 1 aal j 1
.0g w 1 1
.0g 1
.0g 1
.0g 1
.0g 1
.0g 1
.0g 1
.0g 1
.0g 1
.0g 1
.0g 1
.0g 1
.0g 1
.0g 1
.0g 1
.0g 1
.0g 1
.0g 1
.(13) jll bc
aollg
Jg jlll lglkall g g Jj 2 1 alll .allo. (11) (20) g (20) jj 1 aI I J 1 (17) g (13)
aall 19) aall joo le bol . aall jll ldo le bol . aalboll lo. algal ogg oj rds k s gall . aogall oogall ogblg
j 1 aJll Jd j 2 aJll
gabll /gl/ jbc bdoi
b09 0oall goll awl lcl ygbw
.ogal agg cagl kssy gbl slj
p2 gl 1 alll jgs w lc lo
.ogal agg
- jslll slgll b69 Jaoa a slgll oxoall
Jg j 1 ggl Jyjll Ll
g 1
aJxall J31 aaglssolgo gI
Jaaaalllgglgglglaal
aaii i 1g jgl a
0
.0111 g i j 2
y
a a
a. a. a. a. a. a. a. a. a. a. a. a. a. a. a. a. a. a. a. a. a. a. a. a. a. a. a. a. a. a. a. a. a.
/9Jab81Jgluo jcIyjgeJIi
aalaae aee aeae eaeae
aJgAeIgAeIgAeIgAeIg
.
8.15wJjxJgIgJgJgJgJg
aogjoll lalolll 13! jlgai
glll pellldwol gwrwl.aaoo
aJg jg jg jgs
This product enjoys the recognition and protection of the legal guarantee in accordance with current legislation. To enforce your rights or interests you must go to any of our official technical assistance services.
You can find the closest one by accessing the following web link: http://solac.com
You can also request related information by contacting us by phone.
You can download this instruction manual and its updates at http://solac.com
FR) GARANTIE ET ASSISTANCE TECHNIQUE
Unit 25 & 26, San Croy Office Park, Die Agora Road,
Croydon,Kempton Park,1619
Johannesburg
(+27)0113925652
sOlac
www.solac.com


- USE AND CARE
- Instructions for use
- BEFORE USE
- USE
- MANUAL MODE
- MENUS MODE
- NOTES
- SHAKING
- Which foods to shake or stir?
- AUTOMATIC SHUTOFF
- ONCE YOU HAVE FINISHED USING THE APPLIANCE:
- Cleaning
- Troubleshooting
- Description
- META THN IIP'OTH XP'HsH THZ SYKEYH:
- OtctpaHЯBaHe Ha Hen3npaBHOCTN
- BG
- FR) GARANTIE ET ASSISTANCE TECHNIQUE
- sOlac
Brand : SOLAC
Model : Double FA1520
Category : Deep fryer