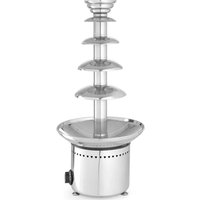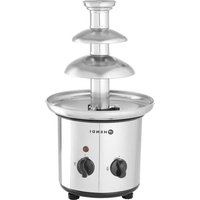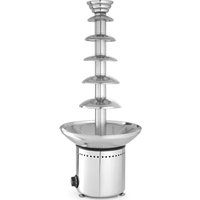
274163 - Chocolate fountain Hendi - Free user manual and instructions
Find the device manual for free 274163 Hendi in PDF.



User questions about 274163 Hendi
0 question about this device. Answer the ones you know or ask your own.
Ask a new question about this device
Download the instructions for your Chocolate fountain in PDF format for free! Find your manual 274163 - Hendi and take your electronic device back in hand. On this page are published all the documents necessary for the use of your device. 274163 by Hendi.
USER MANUAL 274163 Hendi
text_image
READ MANUALGB: Read user manual and keep this with the appliance.
GB: For indoor use only.
natural_image
Simple line drawing of a wine glass with a fork (no text or symbols)
text_image
CE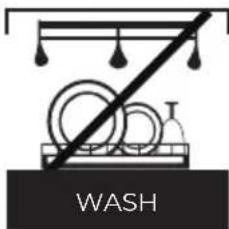
text_image
WASHGB: NOTE: This manual is translated from original English manual using AI and machine translations.
text_image
Labeled diagram of an electrical insulator assembly with numbered parts for identification2
text_image
FUSE3
natural_image
Two-panel black-and-white photo showing a hand operating a mechanical component on a circular base, with no visible text or symbols.4
natural_image
Close-up of a mechanical ring component with a circular end, no visible text or symbols5
natural_image
Close-up of hands holding a metallic cylindrical component on a reflective surface (no visible text or symbols)6
natural_image
Close-up of a hand pressing a cylindrical component on a circular mechanical component (no visible text or symbols)GB: Technical specifications / DE: Technische Angaben / NL: Technische gegevens / PL: Dane techniczne / FR: Données techniques / IT: Parametri di base / RO: Parametrii de bază / GR: Baoukéç paráµetpoi / HR: Tehnički podaci / CZ: Technická specifikace / HU: Múszaki adatok / UA: Texníční характеристики / EE: Tehnilised andmed / LV: Tehniskās specifikacijas / LT: Techninės specifikacijos / PT: Especificações técnicas / ES: Especificaciones técnicas / SK: Technické špecifikácie / DK: Technical specifications / FI: Tekniset tiedot / NO: Tekniske spesifikasjoner / SI: Tehnične specifikacije / SE: Tekniska specifikationer / BG: Texнически спецификации / RU: Texнические данные
| A 274156 274163 | |
| B 230V~ 50 / 60 Hz / 230B~ 50 / 60 Гц | |
| C 265W / Вт 300W / Вт | |
| D | I |
| E 0°C ~ 100°C 0°C ~ 150°C | |
| F 6000 g / г 8000 g / г | |
| G ∅330x(H)700 mm / мм ∅370x(H)840 mm / мм | |
| H 6 kg / кг | 6.8 kg / кг |
A: GB: Item no. / DE: Art.-Nr. / NL: Artikelnr. / PL: Nr pozycji / FR: N° d'article / IT: N. articolo / RO: Nr. articolului/ GR: Ap. εἰδους / HR: Broj stavke / CZ: Položka č. / HU: Cikkszám / UA: Homer elementa / EE: Artikli nr / LV: Vienums Nr. / LT: Prekės Nr. / PT: Item n.o / ES: N.o de artículo / SK: Č. položky / DK: Varenr. / Fl: Kohteen nro / NO: Varenr. / SI: Št. izdelka / SE: Art.nr / BG: Homer na element / RU: Homer posiции
B: GB: Rated voltage and frequency / DE: Nennspannung und Frequenz / NL: Nominale spanning en frequentie / PL: Znamionowe napięcie i częstotliwość / FR: Tension et fréquence nominales / IT: Tensione e frequenza nominali / RO: Tensiune nominală și frecvență / GR: Ovojaotikn tăon kai ouxvótnta / HR: Nazivni napon i frekvencija / CZ: Jmenovité napětí a frekvence / HU: Névleges feszültség és frekvencia / UA: Номінальна напруга та частота / EE: Nimipinge ja -sagedus / LV: Nominālais spriegums un frekvence / LT: Vardinė jtampa ir dažnis / PT: Tensão e frequência nominais / ES: Tensión y frecuencia nominales / SK: Menovité napätie a frekvencia / DK: Nominel spænding og frekvens / FI: Nimellisjännite ja -taajuus / NO: Nominell spenning og frekvens / SI: Nazivna napetost in frekvenca / SE: Märkspänning och frekvens / BG: Номинално напрежение и честота / RU: Номинальное напряжение и частота
C: GB: Rated input power / DE: Nenneingangsleistung / NL: Nominaal ingangsvermogen / PL: Znamionowa moc wejściowa / FR: Puissance d'entrée nominale / IT: Potenza nominale in ingresso / RO: Putere nominală de intrare / GR: Ovojaotikh 10xúç εισόδου / HR: Nazivna ulazna snaga / CZ: Jmenovitý vstupní výkon / HU: Névleges bemeneti teljesítmény / UA: Номінальна вхідна потужність / EE: Nimisisendvõimsus / LV: Nominālā ieejas jauda / LT: Vardinė jejimo galia / PT: Potência de entrada nominal / ES: Potencia de entrada nominal / SK: Menovitý vstupný výkon / DK: Nominel indgangseffekt / Fl: Nimellistuloteho / NO: Nominell inngangseffekt / SI: Nazivna vhodna moč / SE: Märkineffekt / BG: Номинална входяща мощност / RU: Номинальная входная мощность
D: GB: Protection class (Class) / DE: Schutzklasse (Klasse) / NL: Beschermingsklasse (klasse) / PL: Klasa ochrony (klasa) / FR: Classe de protection (classe) / IT: Classe di protezione (classe) / RO: Clasă de protectie (clasă) / GR: Klăon prostaoidac (katnyopia) / HR: Klasa zaštite (klasa) / CZ: Trída ochrany (trída) / HU: Védelmi osztály (osztály) / UA: Klas zaohisty (klac) / EE: Kaitseklass (klass) / LV: Aizsardzības klase (klase) / LT: Apsaugos klasè (klasè) / PT: Classe de proteção (classe) / ES: Clase de protección (clase) / SK: Trieda ochrany (trieda) / DK: Beskyttelsesklasse (klasse) / FI: Suojausluokka (luokka) / NO: Beskyttelsesklasse (klasse) / SI: Razred zaščite (razred) / SE: Skyddsklass (klass) / BG: Klas na защитa (Klac) / RU: Klacc защиты (klacc)
E: GB: Temperature settings / DE: Temperatur-Einstellungen / NL: Temperatuur instellingen / PL: Ustawienia temperatury / FR: Réglages de température / IT: Impostazioni della temperatura / RO: Setări de temperatură / GR: Рудрієєє Therмокраціає / HR: Postavke temperature / CZ: Nastavení teploty / HU: Hőmérséklet-beállítások / UA: Налаштування температури / EE: Temperatuurisätted / LV: Temperatūras iestatījumi / LT: Temperatūros nuostatos / PT: Definições de temperatura / ES: Ajustes de temperatura / SK: Nastavenie teploty / DK: Temperaturindstillinger / FI: Lämpötila-asetukset / NO: Temperaturinnstillinger / SI: Nastavitve temperature / SE: Temperaturinställningar / BG: Настройки на температурата / RU: Настройки температуры
F: GB: Maximum quantity of chocolate / DE: Maximale Menge Schokolade / NL: Maximale hoeveelheid chocolade / PL: Maksymalna ilość czekolady / FR: Quantité maximale de chocolat / IT: Quantità massima di cioccolato / RO: Cantitatea maximă de ciocolată / GR: Méyiotn pośótnta okokolátaç / HR: Najveća količina čokolade / CZ: Maximální množství čokolády / HU: A csokoládé maximális mennyisége / UA: Максимальна кількість шоколаду / EE: Maksimaalne šokolaadi kogus / LV: Maksimālais šokolādes daudzums / LT: Didžiausias šokolado kiekis / PT: Quantidade máxima de chocolate / ES: Cantidad máxima de chocolate / SK: Maximálne množstvo čokolády / DK: Maksimal mængde chokolade / FI: Suklaan enimmäismäärä / NO: Maksimal mengde sjokolade / SI: Največja količina čokolade / SE: Maximal mängd choklad / BG: Максimalно количество шоколад / RU: Максимальное количество шоколада
G: GB: Dimensions / DE: Abmessungen / NL: Afmetingen / PL: Wymiary / FR: Dimensions / IT: Dimensioni / RO: Dimensiuni / GR: Διαστάσεις / HR: Dimenzije / CZ: Rozměry / HU: Méretek / UA: Rozmípi / EE: Möötmed / LV: Izměri / LT: Matmenys / PT: Dimensões / ES: Dimensiones / SK: Rozmery / DK: Mål / Fl: Mitat / NO: Mål / Sl: Mere / SE: Mått / BG: Размерi / RU: Размерý
H: GB: Net weight / DE: Nettogewicht / NL: Nettogewicht / PL: Waga netto / FR: Poids net / IT: Peso netto / RO: Greutate netă / GR: Kaθαρὸ Báρος / HR: Neto težina / CZ: Čistá hmotnost / HU: Nettó tömeg / UA: Bara нетто / EE: Netokaal / LV: Neto svars / LT: Grynasis svoris / PT: Peso líquido / ES: Peso neto / SK: Čistá hmotnosť / DK: Nettovægt / FI: Nettopaino / NO: Nettovekt / SI: Neto teža / SE: Nettovikt / BG: Нетно тегло / RU: Вес нетто
GB: Remark: Technical specification is subjected to change without prior notification.
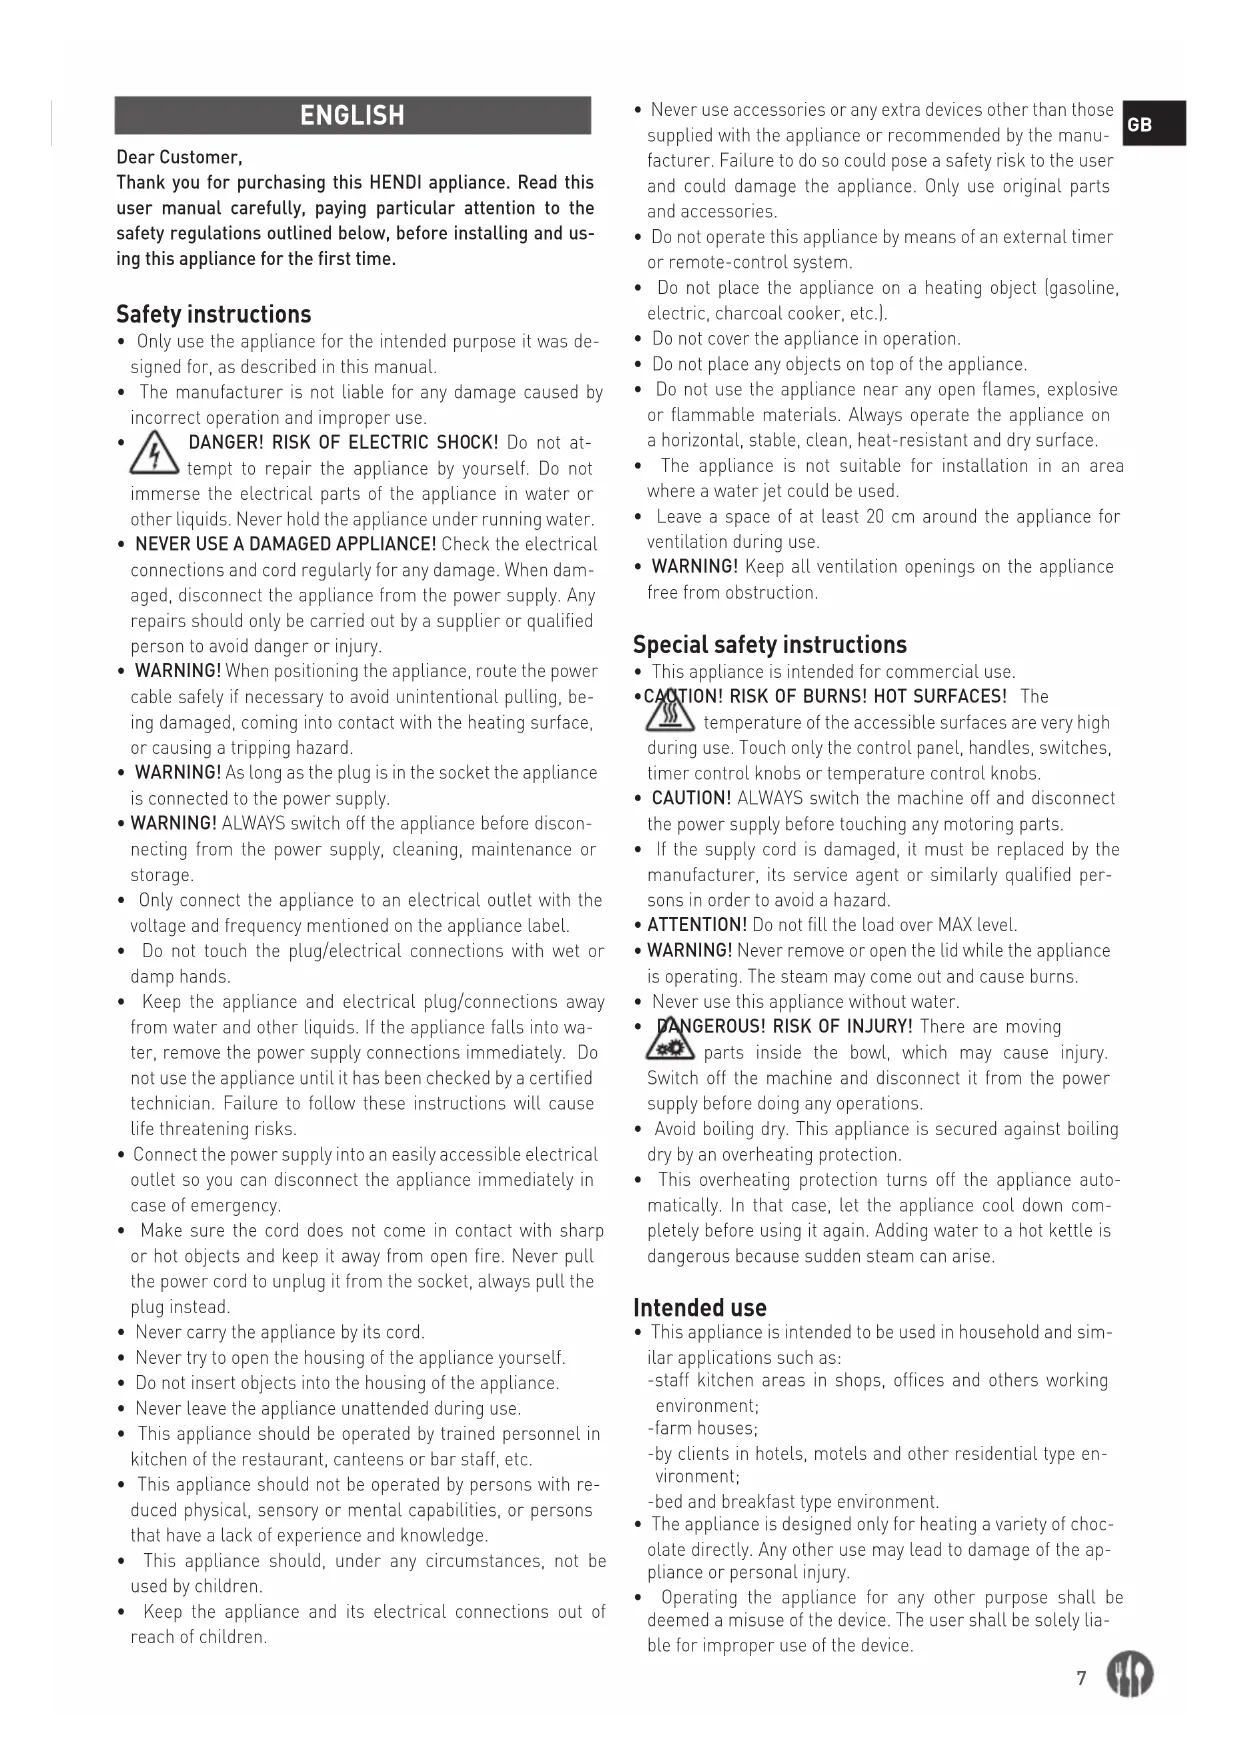
Thank you for purchasing this HENDI appliance. Read this user manual carefully, paying particular attention to the safety regulations outlined below, before installing and using this appliance for the first time.
Safety instructions
- Only use the appliance for the intended purpose it was designed for, as described in this manual.
- The manufacturer is not liable for any damage caused by incorrect operation and improper use.
- DANGER! RISK OF ELECTRIC SHOCK! Do not attempt to repair the appliance by yourself. Do not immerse the electrical parts of the appliance in water or other liquids. Never hold the appliance under running water.
- NEVER USE A DAMAGED APPLIANCE! Check the electrical connections and cord regularly for any damage. When damaged, disconnect the appliance from the power supply. Any repairs should only be carried out by a supplier or qualified person to avoid danger or injury.
- WARNING! When positioning the appliance, route the power cable safely if necessary to avoid unintentional pulling, being damaged, coming into contact with the heating surface, or causing a tripping hazard.
- WARNING! As long as the plug is in the socket the appliance is connected to the power supply.
- WARNING! ALWAYS switch off the appliance before disconnecting from the power supply, cleaning, maintenance or storage.
- Only connect the appliance to an electrical outlet with the voltage and frequency mentioned on the appliance label.
- Do not touch the plug/electrical connections with wet or damp hands.
- Keep the appliance and electrical plug/connections away from water and other liquids. If the appliance falls into water, remove the power supply connections immediately. Do not use the appliance until it has been checked by a certified technician. Failure to follow these instructions will cause life threatening risks.
- Connect the power supply into an easily accessible electrical outlet so you can disconnect the appliance immediately in case of emergency.
- Make sure the cord does not come in contact with sharp or hot objects and keep it away from open fire. Never pull the power cord to unplug it from the socket, always pull the plug instead.
- Never carry the appliance by its cord.
- Never try to open the housing of the appliance yourself.
- Do not insert objects into the housing of the appliance.
- Never leave the appliance unattended during use.
- This appliance should be operated by trained personnel in kitchen of the restaurant, canteens or bar staff, etc.
- This appliance should not be operated by persons with reduced physical, sensory or mental capabilities, or persons that have a lack of experience and knowledge.
- This appliance should, under any circumstances, not be used by children.
- Keep the appliance and its electrical connections out of reach of children.
- Never use accessories or any extra devices other than those supplied with the appliance or recommended by the manufacturer. Failure to do so could pose a safety risk to the user and could damage the appliance. Only use original parts and accessories.
- Do not operate this appliance by means of an external timer or remote-control system.
- Do not place the appliance on a heating object (gasoline, electric, charcoal cooker, etc.).
- Do not cover the appliance in operation.
- Do not place any objects on top of the appliance.
- Do not use the appliance near any open flames, explosive or flammable materials. Always operate the appliance on a horizontal, stable, clean, heat-resistant and dry surface.
- The appliance is not suitable for installation in an area where a water jet could be used.
- Leave a space of at least 20 cm around the appliance for ventilation during use.
- WARNING! Keep all ventilation openings on the appliance free from obstruction.
Special safety instructions
• This appliance is intended for commercial use.
- CAUTION! RISK OF BURNS! HOT SURFACES! The

temperature of the accessible surfaces are very high use. Touch only the control panel, handles, switches, control knobs or temperature control knobs.
- CAUTION! ALWAYS switch the machine off and disconnect the power supply before touching any motoring parts.
- If the supply cord is damaged, it must be replaced by the manufacturer, its service agent or similarly qualified persons in order to avoid a hazard.
- ATTENTION! Do not fill the load over MAX level.
- WARNING! Never remove or open the lid while the appliance is operating. The steam may come out and cause burns.
- Never use this appliance without water.
- DANGEROUS! RISK OF INJURY! There are moving parts inside the bowl, which may cause injury. Switch off the machine and disconnect it from the power supply before doing any operations.
- Avoid boiling dry. This appliance is secured against boiling dry by an overheating protection.
- This overheating protection turns off the appliance automatically. In that case, let the appliance cool down completely before using it again. Adding water to a hot kettle is dangerous because sudden steam can arise.
Intended use
- This appliance is intended to be used in household and similar applications such as:
-staff kitchen areas in shops, offices and others working environment;
-farm houses;
-by clients in hotels, motels and other residential type environment;
-bed and breakfast type environment. - The appliance is designed only for heating a variety of chocolate directly. Any other use may lead to damage of the appliance or personal injury.
- Operating the appliance for any other purpose shall be deemed a misuse of the device. The user shall be solely liable for improper use of the device.
Grounding installation
This appliance is classified as protection class I and must be connected to a protective ground. Grounding reduces the risk of electric shock by providing an escape wire for the electric current.
This appliance is fitted with a power cord with grounding plug or electrical connections with grounding wire. The connections must be properly installed and grounded.
Main parts of the product
(Fig.1 on page 3)
- Pipe holder
- Fountain pipe
- Auger
- Silica gel ring (∅ 24mm)
- Air-proof ring (∅ 20mm)
- Base unit
- FUSE housing
- Motor / Heater switch
- Power connector
- Temperature adjuster
- Heat dissipation hole
- Motor axle
- Seal ring (∅ 220mm)
- Chocolate pool
Remark: The content of this manual applies for all listed items unless specified otherwise. The appearance may vary from the shown illustrations.
Preparation before use
- Remove all protective packaging and wrapping.
- Check that the device is in good condition and with all accessories. In case of incomplete or damaged delivery, please contact the supplier immediately. In this case, do not use the device.
- Clean the accessories and the appliance before use (See ==> Cleaning & Maintenance).
• Make sure the appliance is completely dry. - Place the appliance on a horizontal, stable and heat resistant surface that is safe against water splashes.
- Keep the packaging if you intend to store your appliance in the future.
- Keep the user manual for future reference.
NOTE! Due to manufacturing residues, the appliance may emit a light odor during the first few uses. This is normal and does not indicate any defect or hazard. Make sure the appliance is well ventilated.
Installation / Assembly & Disassembly
- Place the seal ring on the top of round edge of the base unit.
- Screw in the chocolate pool on the base unit by clockwise.
- Place the auger on the motor axle of the base unit.
- Place the fountain pipe over and cover the auger and screw in the fountain pipe on the base unit by anti-clockwise.
- Place the pipe holder on the top of fountain pipe and line up the center hole with the top of auger.
- The chocolate fountain is now ready for use.
REPLACE the thermal cut-out
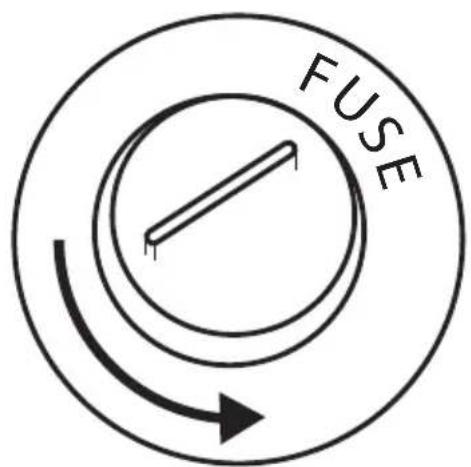
- Please note that a FUSE housing, which covered with a protective cap, is located on the right side of heater / motor switch of the appliance(Fig.2 on page 3).
• Unplug the appliance from the electrical outlet first. - Allow the appliance to completely cool down.
- Unscrew the black protective cap of the FUSE housing by anti-clockwise.
- Press and screw back the protective cap of FUSE housing by clockwise after thermal cut-out(included) is replaced.
Operating instructions
- Switch position: Left is for the heater, Right is for the motor.
- Turn on the heating element and switch to 80°C to preheat the chocolate fountain around 3 - 5mins.
• Prepare 6000 grams (274156) / 8000 grams [274163] of chocolate as follows:
- Put the chocolate in a heat-resistant bowl.
- Put the bowl in a pot with warm water (60°C). NOTE! Don't let the water boil.
- Stir the chocolate until is has melted completely. Do not add water to or spill water into the chocolate.
- The chocolate has to be fluid (like yoghurt). If that is not the case, add some tasteless vegetable oil (sun flower) to it.
- Turn on the motor and pour the chocolate into the lower bowl.
• The auger moves the chocolate up.
- You can start now.
- Only use fruit that is sufficiently cooled and has a dry surface. The low temperature of the fruit helps the chocolate to solidify and the dry surface helps the chocolate to attach easier to the fruit. Too much moist/water will deteriorate the consistency of the chocolate.
NOTE! Air bubbles in the fountain pipe disrupt the evenly flow of chocolate. In which case you must turn off the motor and wait for the air bubbles to escape from the fountain pipe (this may take a few minutes). It is normal for air to escape at the bottom of the fountain pipe during this procedure. Switch the motor on again if the fountain pipe is free of air bubbles.
NOTE! Be careful of temperature adjuster. Too high temperature will be turning chocolate into bad quality quickly.
Cleaning & maintenance
- ATTENTION! Always disconnect the appliance from the power supply and cool down before storage, cleaning & maintenance.
- Do not use water jet or steam cleaner for cleaning and do not push the appliance under the water as the parts will get wet and electric shock might be resulted.
- If the appliance is not kept in a good state of cleanliness, this can adversely affect the life of the appliance and result in a dangerous situation.
- Food residues should be regularly cleaned and removed from the appliance. If the appliance is not cleaned properly, it will reduce its lifespan and may result in a dangerous condition during use.
Cleaning
- Clean the cooled exterior surface with a cloth or sponge slightly dampened with a mild soap solution.
- For reasons of hygiene, the appliance should be cleaned before and after use.
- Avoid water contacting the electrical components.
- Clean the inside of container with a non-abrasive detergent and rinse with clean water.
- Never immerse the appliance in water or other liquids.
- Never use aggressive cleaning agents, abrasive sponges, or cleaning agents containing chlorine. Do not use steel wool, metallic utensils, or any sharp or pointed objects for cleaning. Do not use petrol or solvents!
- No parts are dishwasher safe.
Maintenance
- Check the operation of the appliance regularly to prevent serious accidents.
- If you see that the appliance is not working properly or that there is a problem, stop using it, switch it off and contact the supplier.
- All maintenance, installation and repair work must be carried out by specialised and authorised technicians, or recommended by the manufacturer.
Transportation and Storage
- Before storage, always make sure that the appliance has been disconnected from the power supply and completely cooled down.
- Store the appliance in a cool, clean and dry place.
- Never place heavy objects on the appliance as this could damage it.
- Do not move the appliance while it is under operation. Disconnect the appliance from power supply when moving and hold it at the bottom.
Replacement of silica gel ring & air-proof ring
- When the silica gel ring or air-proof ring was broken. Please follow below procedures to replace. They shall be replaced every sixth months if the product is operating for 12h per day.
1) Screw out chocolate pool from the base unit.
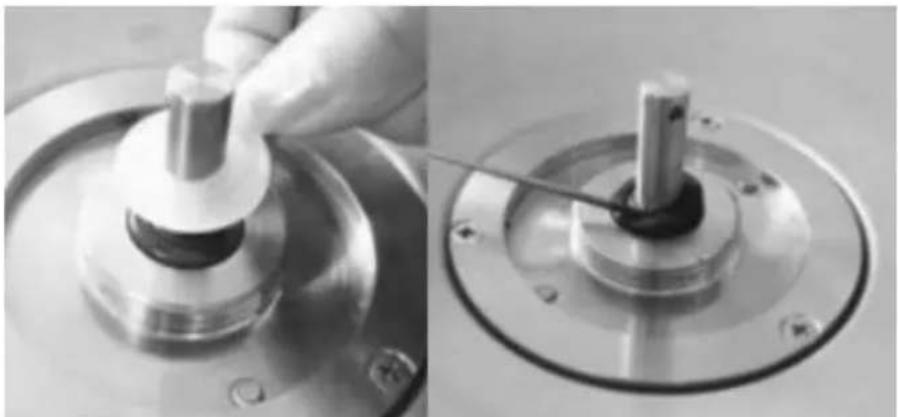
2) Take out and discard the used silica gel ring and air-proof ring from the motor axle (Fig.3 on page 4).
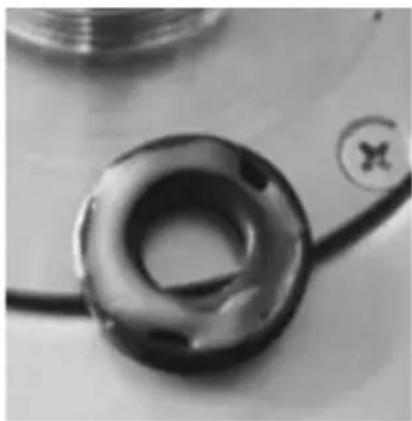
3) Take out the new air-proof ring and add lubrication oil(high temperature resistance) into the concave area(Fig.4 on page 4).
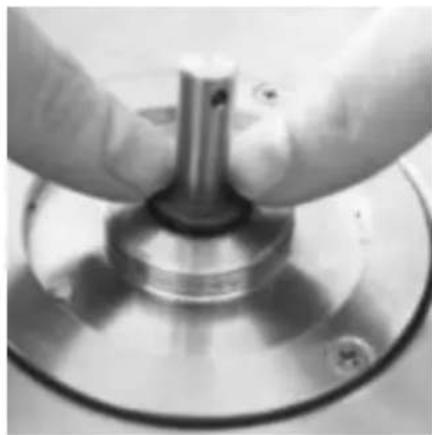
4) Insert the new air-proof ring (lubrication oil face down) back to the motor axle [Make sure it is fully inserted] (Fig.5 on page 4).
5) Clean the remaining lubrication oil with a damp cloth and detergent.
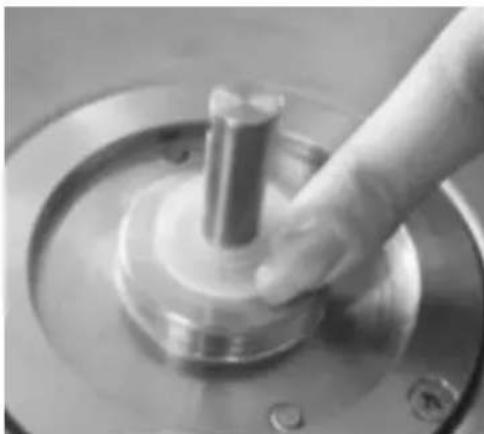
6) Insert the new silica gel ring back to the motor axle and fix it firmly(Fig.6 on page 4).
7) Screw in chocolate pool back to the base unit.
NOTE! DON'T SCRATCH THE MOTOR AXLE WHEN TAKE OUT THE AIR-PROOF RING.
Troubleshooting
If the appliance does not function properly, please check the below table for the solution. If you are still unable to solve the problem, please contact the supplier/service provider.
| Problem Possible cause Possible solution | ||
| Chocolate drips and doesn't flow evenly down the fountain pipe. | The chocolate is too thick. | Add some vegetable oil to the chocolate. Do not mix water into the chocolate! |
| The appliance is not level, but is slanted. | Adjust the level of the appliance with the adjustable feet of the motor unit. | |
| Not enough chocolate. | Add some melted chocolate. | |
| The flow of chocolate is obstructed by pieces of food. | Turn off the appliance and remove the pieces of fruit. | |
| The flow of chocolate is inter-rupted. | Blockages in the flow of chocolate might be caused by pieces of food. | Turn off the motor and clear the block-age.Check if the motor is switched on and running.Check the level of chocolate, add melted chocolate if necessary. |
| The flow of chocolate is slow and doesn't reach the top of the fountain pipe. | There is air in the column, as a result of which the chocolate cannot flow constantly. | Turn off the appliance and wait for a few minutes, until all the chocolate in the basin flows back. You will see bubbles escaping from beneath the fountain pipe.Check chocolate level and add melted chocolate if necessary. |
Warranty
Any defect affecting the functionality of the appliance which becomes apparent within one year after purchase will be repaired by free repair or replacement provided the appliance has been used and maintained in accordance with the instructions and has not been abused or misused in any way. Your statutory rights are not affected. If the appliance is claimed under warranty, state where and when it was purchased and include proof of purchase (e.g. receipt).
In line with our policy of continuous product development we reserve the right to change the product, packaging and documentation specifications without notice.
Discarding & Environment

When decommissioning the appliance, the product must not be disposed of with other household waste. Instead, it is your responsibility to dispose to your waste equipment by handling it over to a designated collection point. Failure to follow this rule may be penalized in accordance with applicable regulations on waste disposal. The separate collection and recycling of your waste equipment at the time of disposal will help conserve natural resources and ensure that it is recycled in a manner that protects human health and the environment.
For more information about where you can drop off your waste
for recycling, please contact your local waste collection company. The manufacturers and importers do not take responsibility for recycling, treatment and ecological disposal, either directly or through a public system.
DEUTSCH
39100 Bolzano (BZ), Italy
Tel: +39 800 727 438
Email: office.italy@hendi.eu
HENDI GmbH
Ehring 15
1208, 12/F Exchange Tower
33 Wang Chiu Road, Kowloon Bay, Hong Kong
Tel: +852 2154 2618
Email: info-hk@hendi.eu
HENDI Romania S.R.L.
https://www.linkedin.com/company/hendi-tools-for-chefs/
www.youtube.com/HendiEquipment
GB: Changes, printing and typesetting errors reserved.
DE: Änderungen und Druckfehler vorbehalten.
NL: Wijzigingen en drukfouten voorbehouden.
PL: Producent zastrzega sobie prawo do zmian oraz błędów drukarskich w instrukcji.
FR: Variations et fautes d'impression réservés.
IT: Errori di cambiamenti, di stampa e di impaginazione riservati.
RO: Drepturi rezervate cu privire la modificări și greșeli de imprimare.
GR: Με επιφύλαξη αλλαγών, λαθών εκτύπωσης και στοιχειοθεσίας.
HR: Pridržane promjene, ispis i pogreške u pisanju.
CZ: Změny, chyby tisku a sazby vyhrazeny.
HU: Változások, nyomtatási és beállítási hibák fenntartva.
UA: Помилки в друку та друку збережено.
EE: Muudatused, primimine ja kirjavead reserveeritud.
LV: Izmainas, drukāšana un tipu iestatīšanas klūdas rezervētas.
LT: Pakeitimai, spausdinimo ir spausdinimo klaidos yra rezervuotos.
PT: Alterações, impressão e erros de digitação reservados.
ES: Cambios, errores de impresión y de tipo reservados.
SK: Zmeny, tlač a chyby preprúdenia sú vyhradené.
DK: Ændringer, udskrivning og typeindstillingsfejl reserveret.
Fl: Muutokset, tulostus- ja kirjoitusvirheet pidätetään.
NO: Feil ved endringer, utskrift og typeinnstiling reservert.
Sl: Spremembe, tiskanje in napake pri nastavljanju vtipkanja so rezervirane.
SE: Ändringar, utskrift och inställningsfel reserverade.
BG: Запазени са промени, печат и типови грешки.
RU: Изменения, печати и верстки ошибки защищены.