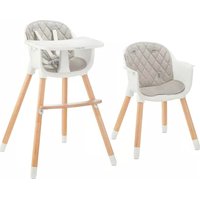
Enock - High chair Kinderkraft - Free user manual and instructions
Find the device manual for free Enock Kinderkraft in PDF.
User questions about Enock Kinderkraft
0 question about this device. Answer the ones you know or ask your own.
Ask a new question about this device
Download the instructions for your High chair in PDF format for free! Find your manual Enock - Kinderkraft and take your electronic device back in hand. On this page are published all the documents necessary for the use of your device. Enock by Kinderkraft.
USER MANUAL Enock Kinderkraft
natural_image
Line drawing of a baby boom chair with seat and backrest (no text or symbols)
kinderkraft.com

/kinderkraftofficial

kinderkraft

@kinderkraftofficial
(AR) كرسی عالي
(CZ) STOLIČKA NA KRMENÍ
(DE) KINDERSTUHL
(EN) HIGH CHAIR
(ES) TRONA PARA COMER
(FR) CHAISE HAUTE POUR BÉBÉ
(HU) ETETŐSZÉK
(IT) SEGGIOLINO DA TAVOLO
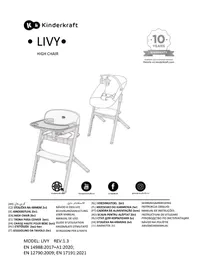
MODEL: ENOCK
EN 14988:2017+A1:2020
EN 17191:2021
الاستخدام دليل
NÁVOD K OBSLUZE
(RO) SCAUN PENTRU ALĂPTAT
MANUAL DE INSTRUÇÕES
INSTRUCTIUNI DE UTILIZARE
text_image
Technical diagram of a device with numbered components, likely part of a smartwatch or display system.X
natural_image
Line drawing of a baby's height seat with a backrest, showing the seat and armrest (no text or symbols)XI
natural_image
Line drawing of a mechanical belt or harness assembly (no text or symbols)XII
natural_image
Simple line drawing of a hand holding a pen above a curved surface (no text or symbols)XIII

text_image
20 19 XIV*AR
العميل! عزيزي
text_image
Prohibition sign with pictograms showing a child and adult walking, indicating no movement or behavior in the depicted scenario.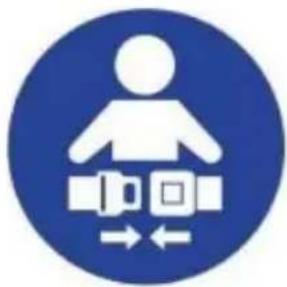
natural_image
Blue circular icon with a white human figure and belt switch symbols (no text)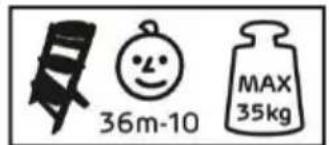
text_image
36m-10 MAX 35kg
text_image
X X OK 4 10 1natural_image
Two side-by-side line drawings of a person sitting on a chair, showing different postures of posture (no text or symbols present)text_image
Prohibition sign with pictograms of a child and adult walking, indicating no intervention or absence of intervention.
natural_image
Blue circular icon with a white human figure and belt switch symbols (no text)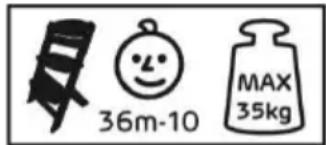
text_image
36m-10 MAX 35kg
text_image
X X OK 5-10 1natural_image
Two side-by-side line drawings of a person sitting on a chair, showing different postures of posture (no text or symbols)text_image
Prohibition sign with pictograms of a child and adult walking, indicating no movement or avoidance
natural_image
Blue circular icon with a white human figure and belt switch symbol (no text)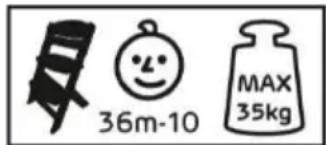
text_image
36m-10 MAX 35kgtext_image
X X OK 4-10 1natural_image
Two side-by-side line drawings of a person sitting on a chair, showing different postures of posture (no text or symbols present)Thank you for choosing a product by Kinderkraft.
Our designs are child-oriented – safety and quality always comes first, stay comfortable knowing that you have made the best choice.
IMPORTANT! READ CAREFULLY AND KEEP FOR FUTURE REFERENCE.
A. Safety and care notes!
WARNING!
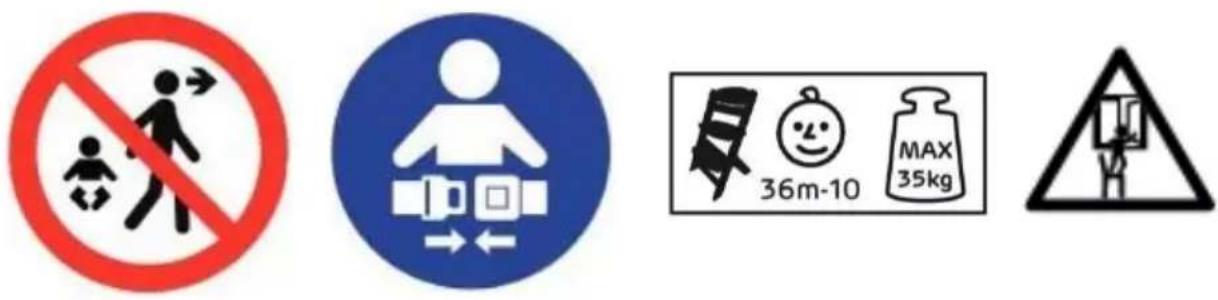
- Never leave the child unattended.
• High chairs: Always use the restraint system. - Falling hazard: Prevent your child from climbing on the product.
- Do not use the product unless all components are correctly fitted and adjusted
- Be aware of the risk of open fires and other sources of strong heat in the vicinity of the product.
- Be aware of the risk of tilting when your child can push its feet against a table or any other structure.
- Always check the security and the stability of product before use.
- Make sure that any harness is correctly fitted.
- Do not move or lift the product while the child is inside.
- Do not use the product until the child can sit up unaided.
- Keep children away when assembling and disassembling the product to avoid injury.
- High chair is intended for children able to sit up unaided and up to 3 years or a maximum weight of 15 kg.
- Don't use the product if any part is broken, torn or missing.
- Product located under a window could be used as a step by the child and cause the child to fall out of the window.
- Accessories or replacement parts other than those approved by the manufacturer must not be used.
SEATING FOR CHILDREN
WARNING!
- DO NOT place this product near a window as it can be used as a step by the child and cause the child to fall out of the window.
- Be aware of the risk of open fires and other sources of strong heat in the vicinity of the product.
- DO NOT place this product near a window where cords from blinds or curtains could strangle a child.
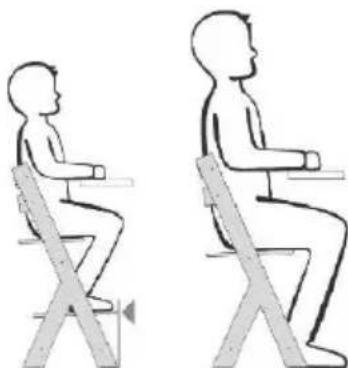
- Child seat mode: The chair can be used from 36 months to 10 years, max 35 kg. All assembly fittings should always be tightened properly.
- Do not to use the seating if any part is broken, torn or missing.
- Use only spare parts approved by the manufacturer.
- The restraint system shall be removed/hidden/covered when the product is used as a seating
B. Part list (figures 1-20)
| 1 | Right leg | 11 | Cylinder nut (M6x12) x4 |
| 2 | Left leg | 12 | Allen wrench |
| 3 | Bar | 13 | Bolt (M6x50) x4 |
| 4 | Cross-bar x2 | 14 | Narrow backrest board |
| 5 | Backrest | 15 | Nut (M5) x4 |
| 6 | Small board | 16 | Tray |
| 7 | Large board | 17 | Tray fitting x2 |
| 8 | Bow-shaped handle with safety belts | 18 | Bolt (M6x14) x4 |
| 9 | Bolt (M5x45) x4 | 19* | Seat cushion |
| 10 | Bolt (M6x30) x2 | 20* | Backrest cushion |
*- items available only in set that include chair and cushions
C. Position selection for the baby highchair and the chair for older children:
Baby highchair:
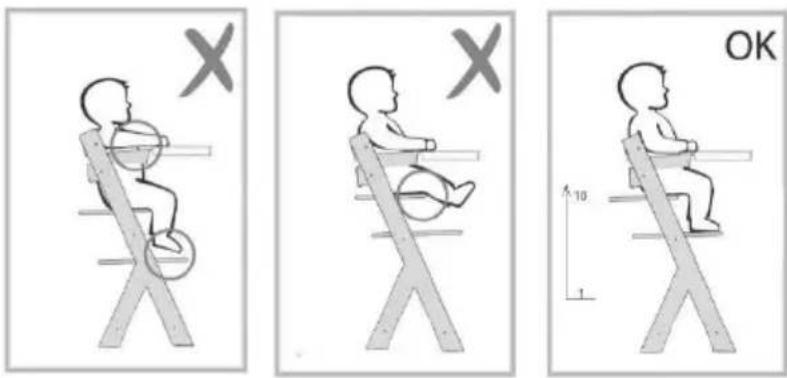
In this position the small board is used as a seat and can be set only at the highest position, i.e. 555 mm over the floor at the position 10. The large board serves as a leg rest and can be set in the positions 3-4-5, depending on a baby foot position. Use the tray and the bow-shaped handle with safety belts. The highest
position is 10, while the lowest one is 1.
text_image
X X OK 10 1Chair for older children:
In this position the large board is used a seat and can be set in the positions 6-7-8-9-10. The small board serves as a leg rest and can be set in the positions 1-2-3-4, depending on a child foot position, or disassembled. Do not use the tray and the bow-shaped handle with safety belts in this position.
natural_image
Two side-by-side line drawings of a person sitting on a chair, showing different postures of movement (no text or symbols present)D. Assembly of the baby highchair
You will need the Allen wrench (12). Perform assembly on soft surface that will not damage surface of elements.
Start from assembling the leg (1) with the cross-bar (4). Notice that there are protruding pins in the cross-bar. Gently adjust the protruding element with the first orifice from the bottom. Look at the figure I and adjust the cross-bar in the way enabling you to insert the cylinder nut (11) into the orifice on the side element surface. Insert the bolt (13) into the orifice in the leg and tighten it through the cross-bar into the nut. Pay attention that the bolt must match the nut. Then use the Allen wrench (12) to tighten the bolt.
Repeat the aforesaid steps with the next cross-bar (4) by fixing it to the same leg (1). Tighten another leg (2) to the structure consisting of two cross-bars and one leg. At this and subsequent stages we suggest to leave the leg 2 slightly loosened in order to enable assembly of next elements inside the chair. The emerging structure must look as shown at the figure II.
Tighten the oblong bar (3) with the bolts (10) to the emerging structure from both sides at leg half-height. The structure shall be as shown as the figure IV.
Then gently insert the backrest (5) into the sockets located at the very top of the legs from their inside. Vertically insert the rectangular nut (from the right side/ leg 1) (15) to the already inserted backrest. Insert the bolt (9) into the orifice in the leg and then tighten through the backrest into the nut (figure V). Pay attention that the bolt must match the nut. Repeat this step at another side of the backrest, however remember not to tighten the bolt to leave play for assembly of other elements. The figure VI shows the backrest fixed to the structure.
Gently insert the narrow backrest board (14) into the sockets located beneath the backrest at the legs from inside. Insert the vertically rectangular nut (from the right side/ leg 1) (15) to the already inserted narrow board. Insert the bolt (9) into the orifice in the leg and then tighten through the board into the nut (figure VII). Pay attention that the bolt must match the nut. Repeat this step at another side of the narrow board, however remember not to tighten the bolt to leave play for assembly of other elements. The figure VIII shows the assembled elements.
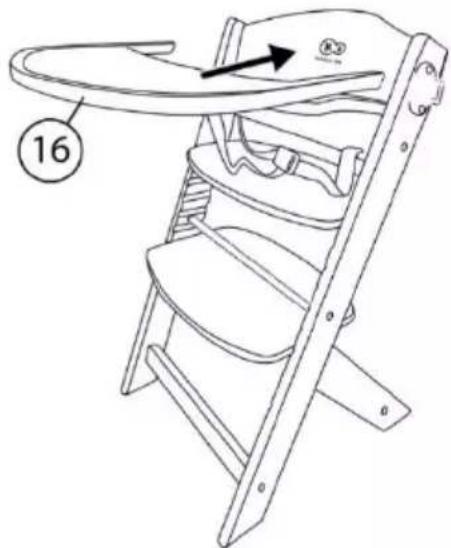
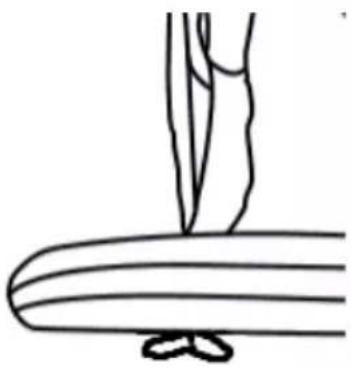
Place the bow-shaped handle with safety belts (8) in the sockets at the legs from inside. Then fix the small board (6) at the highest position and the large board (7) at the position 3/4/5 (figures IX and IXa). Tighten firmly all bolts in the chair. Insert belts into the narrow orifices in the small board (6) and the narrow backrest board (14). After sliding the belt through the orifice straighten the stitching in the way arranging the belt and the stitching perpendicularly to each other (figure XIII). Make sure the belts are not twisted at any point (figure XII).
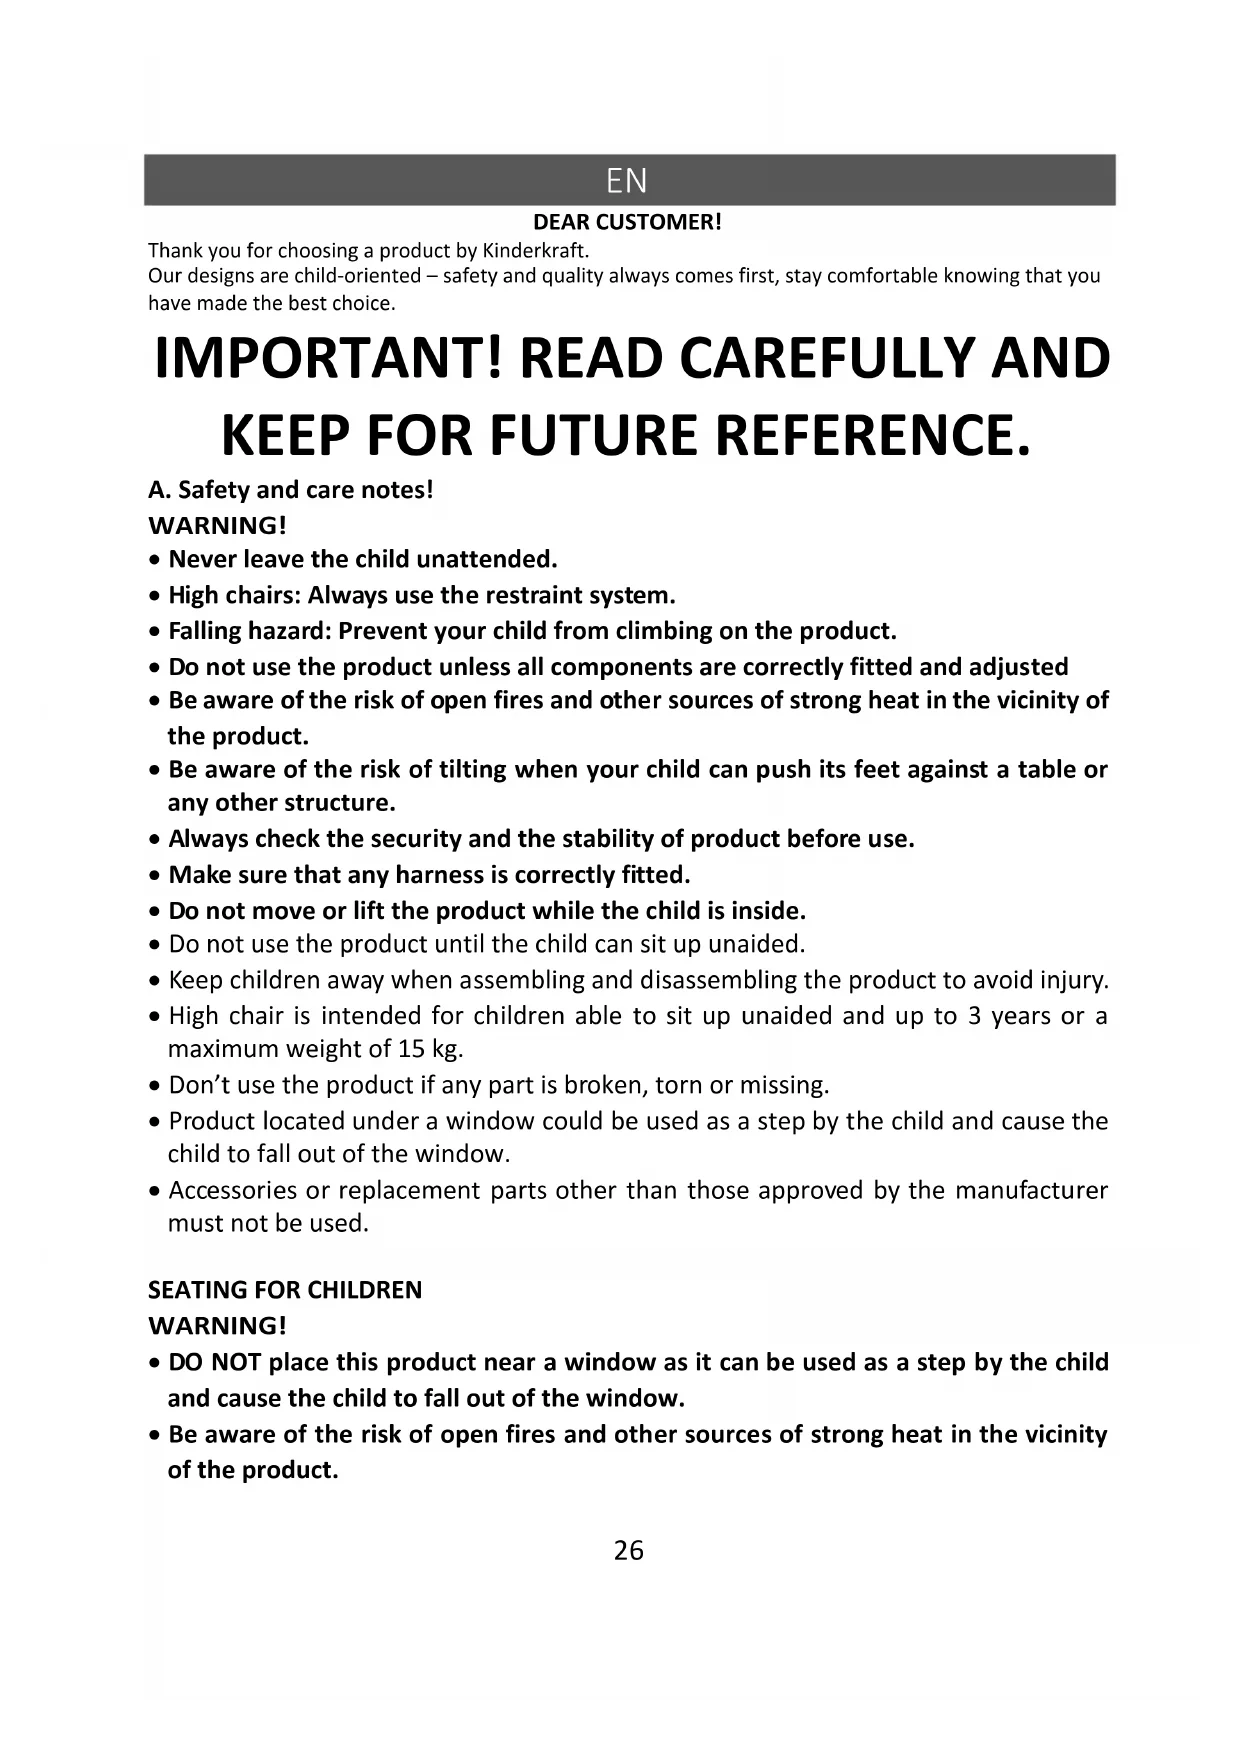
Then attach the fitting (17) to the two remaining orifices located at the legs from outside. Tighten the fitting to the chair with the bolts (18) using the Allen wrench (12) (figure X).
After pressing side red buttons insert the tray (16) into the fittings (figure XI). The tray is mounted correctly, if, after being removed, you will hear the characteristic sound of the buttons going forward.
After reassuring yourself all elements are mounted within the structure and there is nothing left, firmly tighten all bolts in the chair.
Cushion assembly\*:
You will find two cushions in the set. The cushion with a hole is intended for the seat (19), while the second cushion is intended for the backrest (20). To attach the cushion to the seat, slide the crotch strap through the hole in the cushion, disconnect the straps on the cushion and then slide it through the chair. Reconnect the belts under the seat with Velcro straps. To attach the cushion to the backrest, disconnect the straps on the cushion and then slide them through the chair element. Reconnect the straps with Velcro (Figure XIV*).
E. Belt adjustment
The belts are adjusted by means of plastic clamps. Adjust belt length to baby's size. Attention! The belts protect a baby against falling from the chair, must stabilize baby position, however they must not be too tight and uncomfortable.
F. Assembly of the chair for older children:
You will need the Allen wrench (12). Perform assembly on soft surface that will not damage surface of elements.
Start from assembling the leg (1) with the cross-bar (4). Notice that there are protruding pins in the cross-bar. Gently adjust the protruding element with the first orifice from the bottom. Look at the figure I and adjust the cross-bar in the way enabling you to insert the cylinder nut (11) into the orifice on the side
element surface. Insert the bolt (13) into the orifice in the leg and tighten it through the cross-bar into the nut. Pay attention that the bolt must match the nut. Then use the Allen wrench (12) to tighten the bolt.
Repeat the aforesaid steps with the next cross-bar (4) by fixing it to the same leg (1). Tighten another leg (2) to the structure consisting of two cross-bars and one leg. At this and subsequent stages we suggest to leave the leg 2 slightly loosened in order to enable assembly of next elements inside the chair. The emerging structure must look as shown at the figure II.
Tighten the oblong bar (3) with the bolts (10) to the emerging structure from both sides at leg half-height. The structure shall be as shown as the figure IV.
Then gently insert the backrest (5) into the sockets located at the very top of the legs from their inside. Vertically insert the rectangular nut (from the right side/ leg 1) (15) to the already inserted backrest. Insert the bolt (9) into the orifice in the leg and then tighten through the backrest into the nut (figure V). Pay attention that the bolt must match the nut. Repeat this step at another side of the backrest, however remember not to tighten the bolt to leave play for assembly of other elements. The figure VI shows the backrest fixed to the structure.
Gently insert the narrow backrest board (14) into the sockets located beneath the backrest at the legs from inside. Insert the vertically rectangular nut (from the right side/ leg 1) (15) to the already inserted narrow board. Insert the bolt (9) into the orifice in the leg and then tighten through the board into the nut (figure VII). Pay attention that the bolt must match the nut. Repeat this step at another side of the narrow board, however remember not to tighten the bolt to leave play for assembly of other elements. The figure VIII shows the assembled elements.
If child's feet do not reach the floor yet, fix the small board (6) at the position 1/2/3/4 to serve as a leg rest and the large board (7) at the position 10/9/8/7/6 to serve as a seat (see: fig. C).
If your child can sit at a table properly and their feet reach the floor, fix the large board (7) at the position 10/9/8/7/6 to serve as a seat. Do not use the small board (6) (see: fig. C).
Firmly tighten all bolts in the chair.
G. Transforming a baby highchair into a chair for older children
In order to transform a highchair into a chair for older children you need to disassemble several elements. Start from removing the tray (16) and its fittings (17) completely. Use the Allen wrench (12) to loosen the bolts (18) to be able to remove them from chair's legs. Then loosen the bolts (9) in the chair to make the structure become a bit disassembled. Remove the belts from narrow orifices in the small board (6) and the narrow backrest board (14). Then remove the handle and the safety belts from the structure. Adjust and align the seat board and the leg rest to child's size as specified in the section C. Position selection for the baby highchair and the chair for older children.
Firmly tighten all bolts in the chair.
H. Cleaning
The chair should be cleaned with a clean and dry cloth. In case of more serious stains you can use a slightly damp, though not soaking, clean cloth.
*Do not wash the cushions.
Warranty
- All Kinderkraft products are covered by a 24-month warranty. The warranty period starts from the date the product is handed over to the Buyer.
- The warranty is only valid in the member states of the European Union, excluding overseas territories (as currently defined, including in particular: Azores, Madeira, Canary Islands, French Overseas Departments, Åland Islands, Athos, Ceuta, Melilla, Helgoland, Büsingen am Hochrhein, Campione d'Italia and Livigno) and the territory of the United Kingdom of Great Britain and Northern Ireland excluding the British Overseas Territories (e.g. Bermuda, Cayman Islands, Falkland Islands).
- The manufacturer's warranty does not apply to countries not listed above. The conditions of the additional warranty may be determined by the Seller.
- In some countries, it is possible to extend the warranty to a limited period of 120 months (10 years). The complete terms and conditions and the warranty extension registration form are available at WWW.KINDERKRAFT.COM
- The warranty is valid only in the territory indicated in paragraph 2.
- Claims must be made by completing the form available at WWW.RMA.KINDERKRAFT.COM
- The warranty does not cover:
A. Cosmetic damage, including but not limited to: scratches, dents and cracks in plastic, unless the failure is due to a material or manufacturing defect;
B. Damage resulting from misuse or poor maintenance - including but not limited to: mechanical damage to products caused by misuse or poor maintenance;
• Refer to the instructions for use and installation of the product contained in the user manual;
C. Damage caused by improper assembly, installation or disassembly of products and/or accessories;
• Refer to the instructions for use and installation of the product contained in the user manual;
D. Damage caused by corrosion, mould or rust, resulting from improper maintenance, care and storage;
E. Damage caused by normal wear and tear or otherwise resulting from the normal passage of time;
• This includes: tears or punctures in inner tubes; tyre damage; tyre tread damage; fading of fabrics resulting from mechanical use (e.g. on joints and covering of moving parts);
F. Damage or erosion caused by sun, perspiration, detergents, storage conditions or frequent washing, etc;
G. Damage caused by accident, abuse, misuse, fire, contact with liquid, earthquake or other external causes;
H. Products that have been modified to change functionality without 4Kraft's written consent;
I. Products from which the serial number or lot number has been removed or tampered with in any way;
J. Damage caused by the use of third party components or products - including but not limited to: cup holders, umbrellas, reflectors, bells;
K. Damage caused by transport or by ground handling service providers.
- The warranty period for accessories included with the product is 6 months from the date of sale, excluding the faults described above.
- These warranty conditions are complementary to the Customer's statutory rights with respect to 4KRAFT sp. z o.o. The warranty does not exclude, limit or suspend the Customer's rights under warranty for defects in goods sold.
- The full text of the Terms and Conditions of the Warranty is available on the website WWW.KINDERKRAFT.COM
All rights to this data are entirely reserved to 4Kraft Sp. z o.o. Any unauthorized use or misuse, including usufruct, copying, duplication and sharing, wholly or partially, without consent of 4Kraft Sp. z o.o. may result in legal consequences.
ES
Estimado cliente!
text_image
Prohibition sign with pictograms of a child and adult walking, indicating no movement or death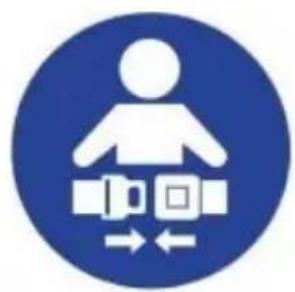
natural_image
Blue circular icon with a white human figure and belt switch symbols (no text)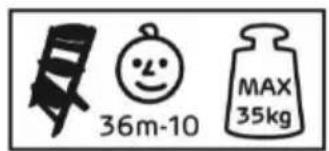
text_image
36m-10 MAX 35kg
B. Lista de componentes (Figuras 1-20)
text_image
X X OK 10 1natural_image
Two side-by-side line drawings of a person sitting on a chair, showing different posture positions (no text or symbols)text_image
Prohibition sign with pictograms of a child and adult walking, indicating no movement or death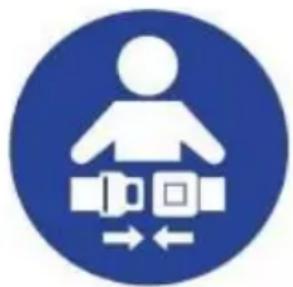
natural_image
Blue circular icon with a white human figure and two belt stop symbols (no text or numbers)
text_image
36m-10 MAX 35kg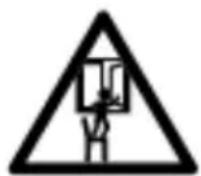
text_image
X X OK 10 1natural_image
Two side-by-side line drawings of a person sitting on a chair, showing different postures of posture (no text or symbols present)text_image
Prohibition sign with pictograms of a child and adult walking, indicating no intervention or absence of such behavior.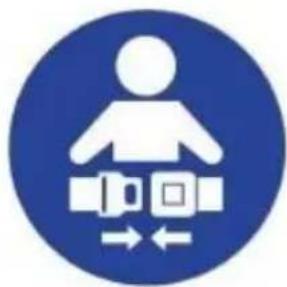
natural_image
Blue circular icon with a white human figure and belt switch symbol (no text)
text_image
36m-10 MAX 35kg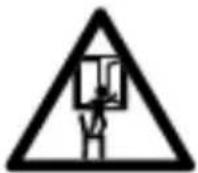
natural_image
Illustration of a person sitting on a wooden bench with a cross symbol (no text or labels)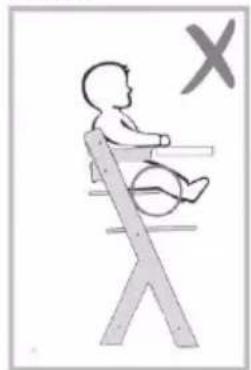
natural_image
Illustration of a child sitting on a seesaw with a cross symbol (no text or labels)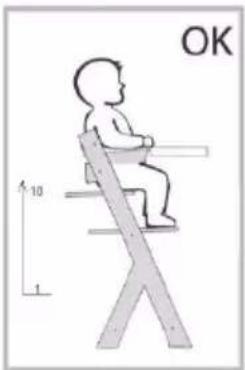
text_image
OK 10 1natural_image
Two side-by-side line drawings of a person sitting on a chair, viewed from the side (no text or symbols)text_image
Prohibition sign with pictograms of a child and adult walking, indicating no smoking or childbirth in the population.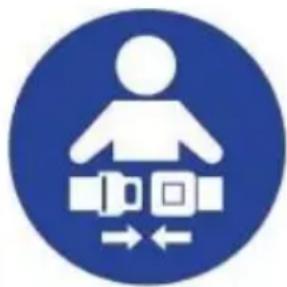
natural_image
Blue circular icon with a white human figure and belt switch symbols (no text)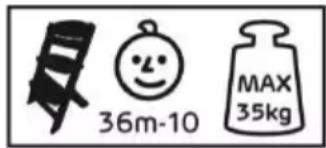
text_image
36m-10 MAX 35kg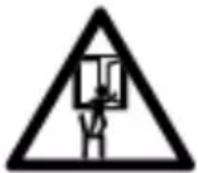
text_image
X X OK 10 1natural_image
Two side-by-side line drawings of a person sitting on a chair, showing posture changes (no text or symbols)text_image
Prohibition sign with pictograms of a child and adult walking, indicating no movement or death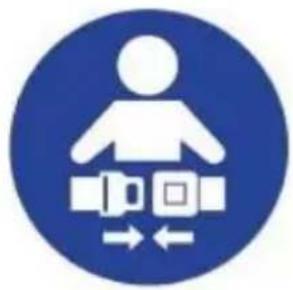
natural_image
Blue circular icon with white human figure and belt switch symbol (no text)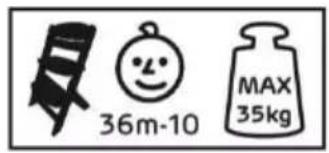
text_image
36m-10 MAX 35kg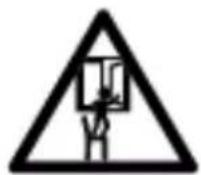
natural_image
Illustration of a person performing a sit-up exercise with a cross symbol (no text or labels)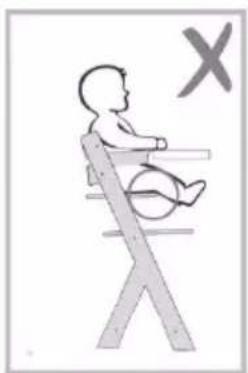
natural_image
Illustration of a child sitting on a seesaw with a cross symbol (no text or labels)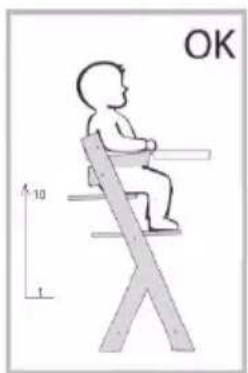
text_image
OK A 10 1natural_image
Two sequential illustrations of a person sitting on a chair, showing posture changes (no text or symbols)text_image
Prohibition sign with pictograms of a child and adult walking, indicating no movement or death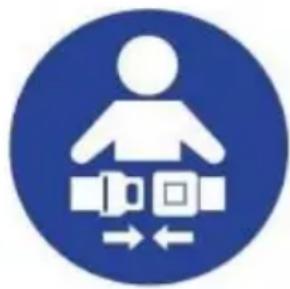
natural_image
Blue circular icon with a white human figure and belt switch symbols (no text)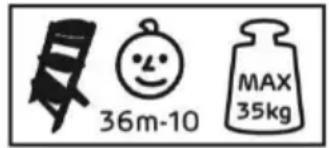
text_image
36m-10 MAX 35kg
text_image
X X OK 10 1natural_image
Two side-by-side line drawings of a person sitting on a chair, showing different postures of posture (no text or symbols present)text_image
Prohibition sign with pictograms of a child and adult walking, indicating no movement or death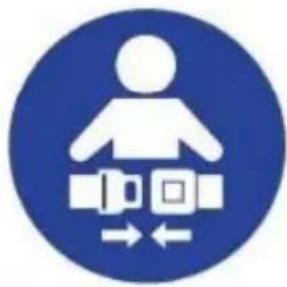
natural_image
Blue circular icon with a white human figure and belt switch symbols (no text)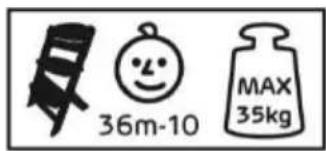
text_image
36m-10 MAX 35kg
B. Lista de elementos (figura 1-20)
| 1 | Perna direita | 11 | Porca cilíndrica (M6x12) x4 |
| 2 | Perna esquerda | 12 | Chave sextavada |
| 3 | Haste | 13 | Parafuso (M6x50) x4 |
| 4 | Barra transversal x2 | 14 | Tábua estreita de encosto |
| 5 | Encosto | 15 | Porca (M5) x4 |
| 6 | Tábua pequena | 16 | Bandeja |
| 7 | Tábua grande | 17 | Encaixe para bandeja x2 |
| 8 | Barra com cintos de segurança | 18 | Parafuso (M6x14) x4 |
| 9 | Parafuso (M5x45) x4 | 19* | Almofada do assento |
| 10 | Parafuso (M6x30) x2 | 20* | Almofada do encosto |
text_image
X X OK 10 1natural_image
Two sequential illustrations of a person sitting on chairs, showing posture changes (no text or symbols)text_image
Prohibition sign with pictograms of a child and adult walking, indicating no movement or death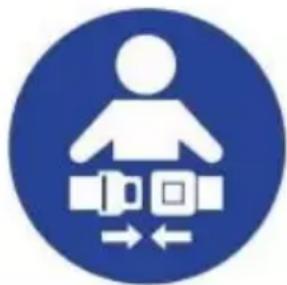
natural_image
Blue circular icon with a white human figure and belt switch symbol (no text)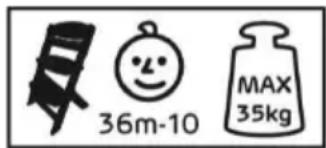
text_image
36m-10 MAX 35kg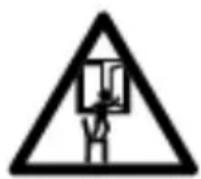
text_image
X X OK 10 1natural_image
Two sequential illustrations of a person sitting on a chair, showing posture changes (no text or symbols)text_image
Prohibition sign with pictograms of a child and adult walking, indicating no smoking or alcohol use
natural_image
Blue circular icon with a white human figure and belt switch symbol (no text)
text_image
36m-10 MAX 35kgnatural_image
Two sequential illustrations of a person sitting on a chair, showing posture changes (no text or symbols)text_image
Prohibition sign with pictograms of a child and adult walking, indicating no movement or death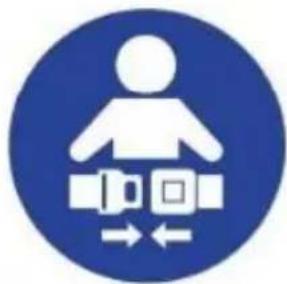
natural_image
Blue circular icon with a white human figure and belt switch symbol (no text)
text_image
36m-10 MAX 35kg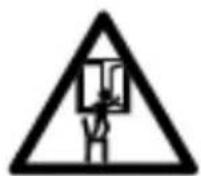
text_image
X X OK 10 1natural_image
Two side-by-side line drawings of a person sitting on a chair, showing different postures of posture (no text or symbols present)text_image
Prohibition sign with pictograms of a child and adult walking, indicating no intervention or absence of such behavior.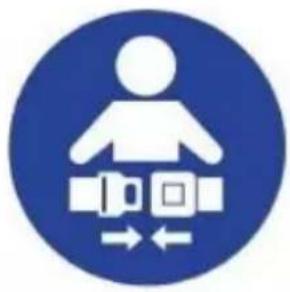
natural_image
Blue circular icon with a white human figure and belt switch symbols (no text)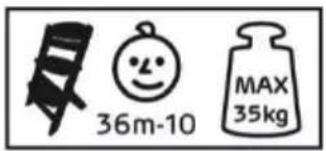
text_image
36m-10 MAX 35kg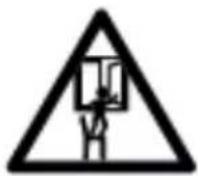
B. Dellista (Figur 1-20)