
FOLDEE - High chair Kinderkraft - Free user manual and instructions
Find the device manual for free FOLDEE Kinderkraft in PDF.

| Product type | Folding high chair |
| Brand | Kinderkraft |
| Model | FOLDEE |
| Recommended age | From the ability to sit unaided up to 36 months |
| Maximum supported weight | 15 kg |
| Seat materials | Plastic and metal |
| Basket material | Mesh fabric |
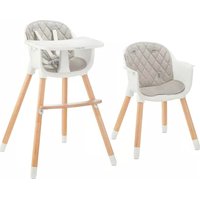
| Backrest adjustment | 3 positions |
| Footrest adjustment | 2 positions |
| Tray adjustment | 3 positions |
| Restraint system | 5-point harness height adjustable (2 positions) |
| Folding | Yes, with tray storage |
| Storage basket | Removable, max load 3 kg |
| Seat maintenance | Damp cloth and mild soap |
| Harness maintenance | Damp cloth and mild soap |
| Basket maintenance | Hand wash |
| Safety | Never leave child unattended |
| Use | Indoor use only |
| Assembly | Requires adult, locking clips |
| Included accessories | Seat, legs, tray, footrest, basket |
| Storage | Keep folded out of reach of children |
Frequently Asked Questions - FOLDEE Kinderkraft
User questions about FOLDEE Kinderkraft
0 question about this device. Answer the ones you know or ask your own.
Ask a new question about this device
Download the instructions for your High chair in PDF format for free! Find your manual FOLDEE - Kinderkraft and take your electronic device back in hand. On this page are published all the documents necessary for the use of your device. FOLDEE by Kinderkraft.
USER MANUAL FOLDEE Kinderkraft
All rights to this data are entirely reserved to 4Kraft Sp. z o.o. Any unauthorized use or misuse, including usufruct, copying, duplication and sharing, wholly or partially, without consent of 4Kraft Sp. z o.o. may result in legal consequences.
AR 7
CS 10
DE 13
EN 17
ES 20
FR 23
HU. 26
IT 29
NL 32
PL 36
PT 39
RO 42
RU 45
SK 49
SV 52
Jkss sas jn a nnnn. / Ilustrace jsou pouze orienta n a npredstavu j pne zobraeni produkt./Die gezeigten Bilder dienen nur als Referenz, das tatsächliche Produkt kann von der Abbildung abweichen./The illustrations are for illustration only and do not represent the product./Las ilustraciones son meramente orientatas y no constituyen una representation completa del producto./Les illustrations sont donnees a titre indicat et ne constituent pas une representation complete du produit./Az illusztraciokCsak tajekoztatoljelugukeselthernetekavalostermektol./Le immagini sono insere a scopo dimostrativo e non rispecchiano appieno le caratteristiche del prodotto./De afbeeldingen dienen uitsluitend ter illustratie en geven geen volledig beeld van het product./Ilustracej maja charakter pogladowy i nie stanowia peInego odwzorowania produkt./As ilustracoes tem uma funcao informativa e nao são uma representacao fiel do produits./ Ilustratiile sunt doar pentru referinta si nu reprezinta produsul complet./IinnoctpauinnpnbedeHbTobkoIgcnpaBnHe npedctablanotBce npodkyt./Obrazysluzia len na ilustraciua nie su uplnym predstavenim produkt./Illustrationer ar endast for referens och representar ar inte hela produkten
1

2
3
4

5
A
B
C
D
E

F
G

H

1
J
K
L
M
N
AR
Thank you for choosing a product by Kinderkraft. Our designs are child-oriented - safety and quality always comes first, stay comfortable knowing that you have made the best choice.
IMPORTANT! READ
CAREFULLY AND KEEP FOR
FUTURE REFERENCE
SAFETY INSTRUCTIONS AND PRECAUTIONS WARNING!
- Never leave the child unattended.
- Always use the restraint system.
- Falling hazard: Prevent your child from climbing on the product.
- Do not use the product unless all components are correctly fitted and adjusted
- Be aware of the risk of open fires and other sources of strong heat in the vicinity of the product.
- Be aware of the risk of tilting when your child can push its feet against a table or any other structure.
- Do not use the product until the child can sit up unaided.
- Don't use the product if any part is broken, torn or missing.
- High chair is intended for children able to sit up unaided and up to 36 months or a maximum weight of 15kg .
- Always check the security and the stability of product before use.
- Make sure that any harness is correctly fitted.
- Do not move or lift the product while the child is inside.
- Accessories or replacement parts other than those approved by the manufacturer must not be used.

- Keep children away when unfolding and folding the product to avoid injury.
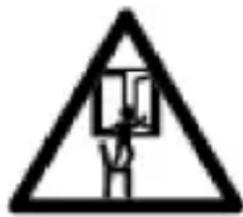
- Product located under a window could be used as a step by the child and cause the child to fall out of the window.
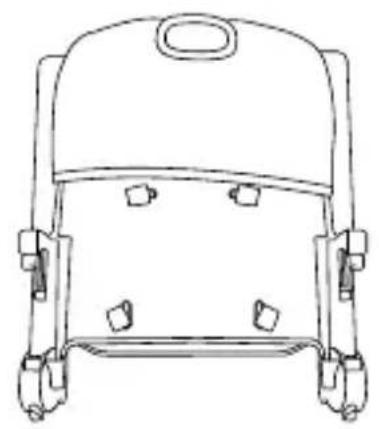
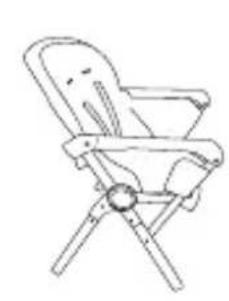
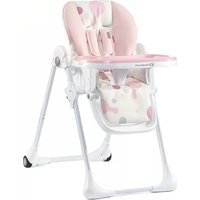
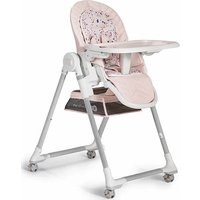
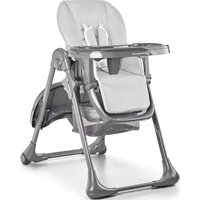
1. Parts:
- Seat
- Front and back legs
- Double tray
- Footrest
- Fabric basket
2. Assembly and adjustment:
Legs
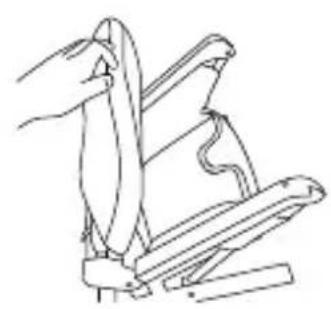
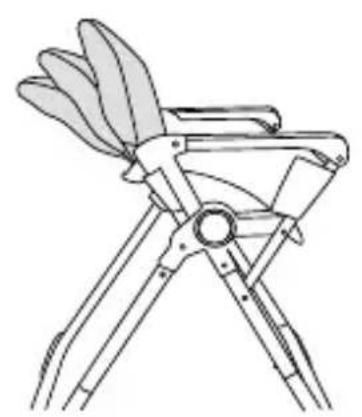
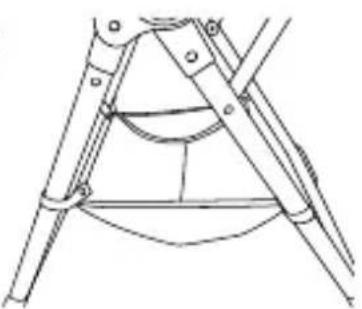
Remove the foam pads from the tube ends before assembly. To unfold the seat (1), pull the backrest (fig. A). Pull the backrest towards you until you hear a characteristic 'click' (fig. B). Mount the legs (2) to the seat (1). To do this, turn the seat upside down. Insert the legs (2) into the tubes so that the pins are in the holes of the legs (1) (fig. C). A characteristic 'click' indicates correct assembly. Repeat for the back legs (2). Stand the chair on its legs.
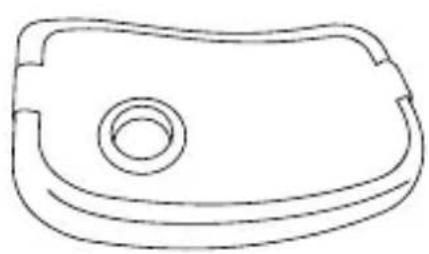
Tray
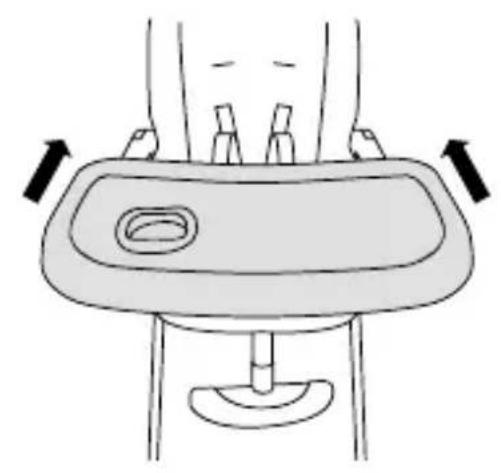
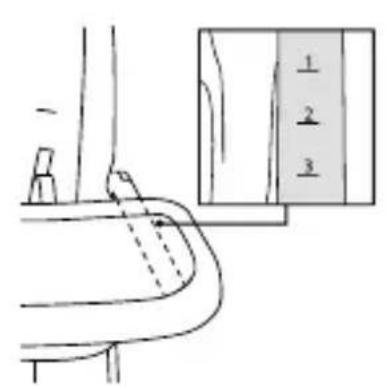
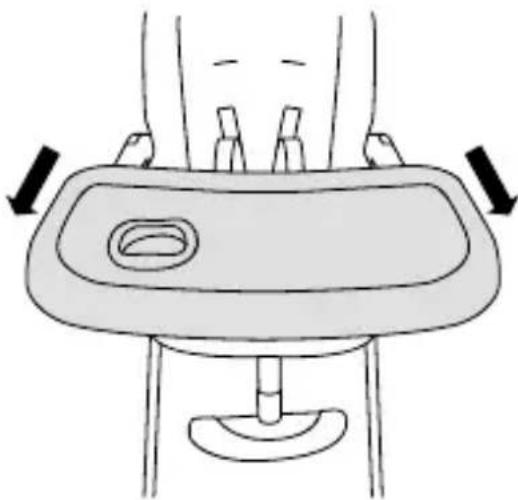
Attach the plastic tray (3) to the chair using the snap mechanism. Press the two buttons under the tray, and slide the tray into the guides on both armrests (fig. D).
The tray (3) can be set in one of three positions - the marking is on the armrests (fig. E). When a certain position is reached, you will hear a characteristic click.
In addition, check that the tray is correctly secured on both sides.
The top layer of the tray can be removed to wash it.
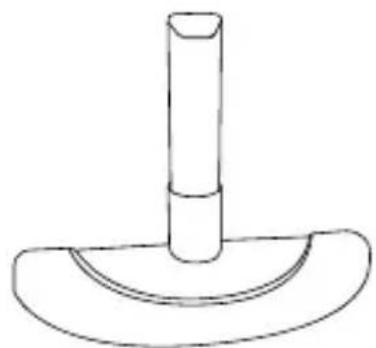
Footrest
Then mount the footrest (4). As with the leg assembly, insert the tube with the pin into the designated hole (Fig. F). A characteristic 'click' indicates correct assembly. The footrest can be set in two different positions by pushing in the pin and adjusting the appropriate level.
WARNING! Do not stand on the footrest.
Backrest adjustment:
The backrest of the chair can be set in three positions (fig. G). To adjust the angle of the backrest, lift the lever at the back, tilt the backrest and put it in the desired position, then release the lever. The backrest will lock automatically and a locking sound will be heard.
Safety harness:
WARNING: The use of a safety harness is essential to ensure the safety of the child. Using the tray alone does not provide proper support for the child. Always use the safety harness.
The safety harnesses are adjustable and can be fitted in two positions depending on the height of the child.
Fastening the safety harness:
Connect the shoulder, lap and crotch harness in the buckle. The correct fastening of the harnesses is shown in figure H. Adjust the length of the harnesses to suit the child.
Removing the safety harnesses:
Press the button in the middle of the buckle to release the safety harness.
Assembly of fabric basket
The fabric basket (5) should be attached to the chair using straps, which are passed through the tubes, located under the seat, and then fastened with press studs (fig. 1). Maximum load of the basket is 3kg .
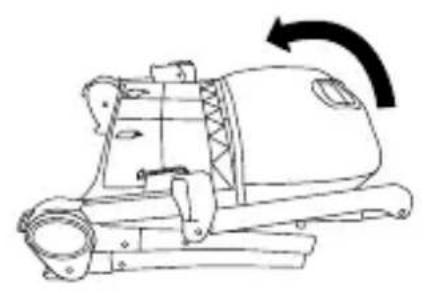
3. Disassembly
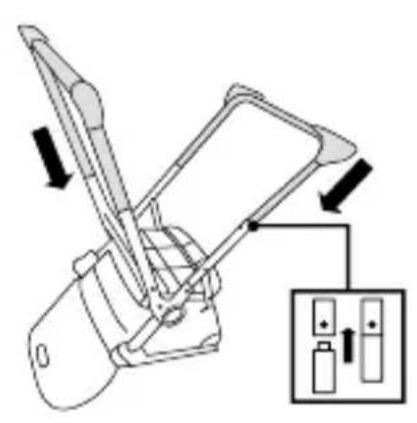
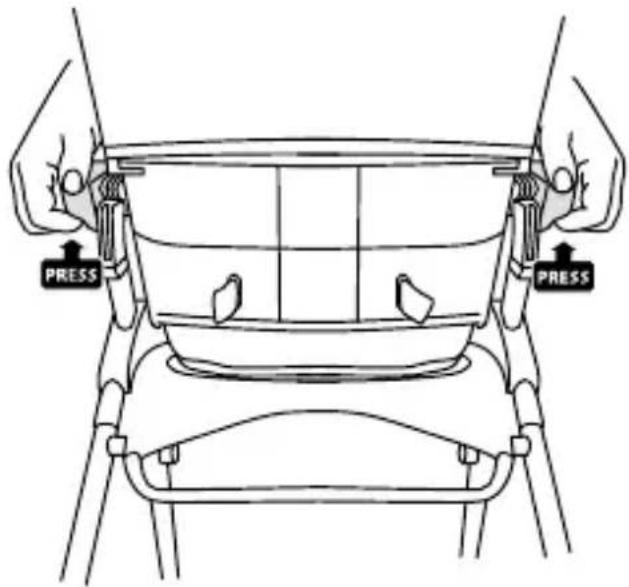
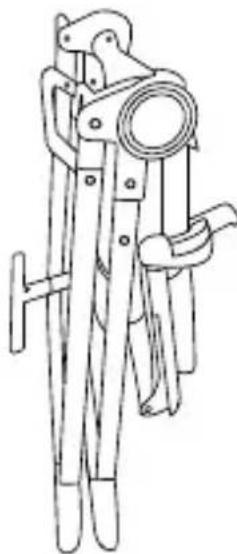
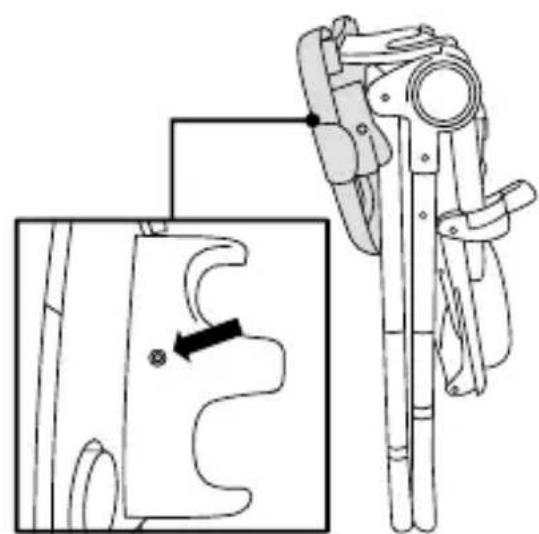
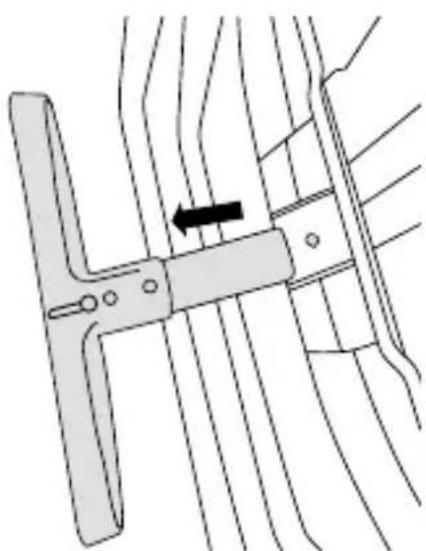
To fold the chair pull down the tray (3). Press both buttons under the tray and slide the tray towards you (fig. J). Then press the two buttons on the armrests (fig. K) and fold the backrest downwards as shown in fig. L. The completely dismantled tray can be hung on the metal tube running between the legs (fig. M). To remove the footrest (4) press the pin and slide the footrest towards you (fig. N).
4. Cleaning:
Chair: Clean with a clean and damp cloth and mild soap. Do not bleach. Do not tumble dry. Do not iron. Do not dry clean.
Harness: Fasten harnesses together. Clean with a clean and damp cloth, and mild soap. Do not bleach. Do not tumble dry. Do not iron. Do not dry clean.
Wash the mesh toy basket by hand. Do not bleach. Do not tumble dry. Do not iron. Do not dry clean.
Explanation of maintenance symbols:
| Hand wash. | 30° | Wash at max. 30°C, gentle process. |
| Do not wash | Do not bleach | |
| Do not dry in a tumble dryer | Do not iron | |
| Do not dry clean | ||
STORAGE
Store the product folded and out of the reach of children.
jEstimado Cliente!
IMPORTANT! CITIĆI CUX
ATENTIE Şİ PÜRATICI
ACEST DOCUMENT
PENTRU CONSULTARE
ULTERIOARÄ.
OBSERVATIILE PRIVIND SIGURANTA Şİ MÁSURI DE PRECAUTIE
AVERTISMENT!
Ctylbuk: IpoTnpaTb uHcToB BlaXHoI TkaHbIO C MArKIM MbIOM. He OTeJIbBaTb. He cyuNTb B 6apabHHbIX cyuNkax. He rnaIITb. He uNCTnTb XmMueckn.
Pemn: 3aKpeHntb pemn BmecTe. IpotnpaTb uHcToB BlaXHoN TKaHbO C MraKm MbIOM. He ot6eINBaTb. He cyuHTb B 6apabahhbx CyuNkax. He rlaAdnTb. He qncTnTb XmMueckn.
MbITb ceTuAtyIO KOp3nHy Ira nIpyWeK BpyHyIO. He ot6eJIiBaTb. He cyuNTb B 6apa6aHbIX cyuNkax. He rlaIHTb. He uIcTtB xImnueckn.
06bXcheHHe cHMBOJOB KOHcEpBaUH:
- AR
- IMPORTANT! READ
- CAREFULLY AND KEEP FOR
- FUTURE REFERENCE
- SAFETY INSTRUCTIONS AND PRECAUTIONS WARNING!
- Parts:
- Assembly and adjustment:
- Legs
- Tray
- Footrest
- Backrest adjustment:
- Safety harness:
- Assembly of fabric basket
- Disassembly
- Cleaning:
- STORAGE
- jEstimado Cliente!
- IMPORTANT! CITIĆI CUX
- ATENTIE Şİ PÜRATICI
- ACEST DOCUMENT
- PENTRU CONSULTARE
- ULTERIOARÄ.
- OBSERVATIILE PRIVIND SIGURANTA Şİ MÁSURI DE PRECAUTIE
- AVERTISMENT!
Brand : Kinderkraft
Model : FOLDEE
Category : High chair