Yummy - High chair Kinderkraft - Free user manual and instructions
Find the device manual for free Yummy Kinderkraft in PDF.
| Product type | High chair for children |
| Brand | Kinderkraft |
| Model | Yummy |
| Recommended age | From 6 months to 36 months (child able to sit independently) |
| Maximum weight capacity | 15 kg |
| Adjustable height | 7 positions |
| Backrest recline | 3 positions |
| Adjustable footrest | 3 positions (plus extra footrest) |
| Adjustable tray | 3 positions |
| Safety harness | Adjustable 5-point harness (3 positions) |
| Cover | Removable, hand washable |
| Frame | Plastic and metal |
| Wheels | Yes, on rear legs |
| Folding | Yes, leg folding system |
| Cleaning | Damp cloth and mild soap |
| Warranty | 24 months (extendable to 120 months) |
| Included accessories | Two-piece tray, extra footrest |
Frequently Asked Questions - Yummy Kinderkraft
User questions about Yummy Kinderkraft
0 question about this device. Answer the ones you know or ask your own.
Ask a new question about this device
Download the instructions for your High chair in PDF format for free! Find your manual Yummy - Kinderkraft and take your electronic device back in hand. On this page are published all the documents necessary for the use of your device. Yummy by Kinderkraft.
USER MANUAL Yummy Kinderkraft
natural_image
Black and white play button icon inside a circle (no text or symbols)Watch manual
VIDEO!

youtube.com/kinderkraftofficial

kinderkraft.com
YUMMY
CZ STOLIČKA NA KRMENÍ
DE KINDERSTUHL
EN HIGH CHAIR
ES TRONA PARA COMER
FR CHAISE HAUTE POUR BÉBÉ
HU ETETÓSZÉK
IT SEGGIOLINO DA TAVOLO
NL VOEDINGSSTOELTJE
PL KRZESEŁKO DO KARMIENIA
text_image
Technical diagram showing eight labeled mechanical components with numbered annotations and directional arrows.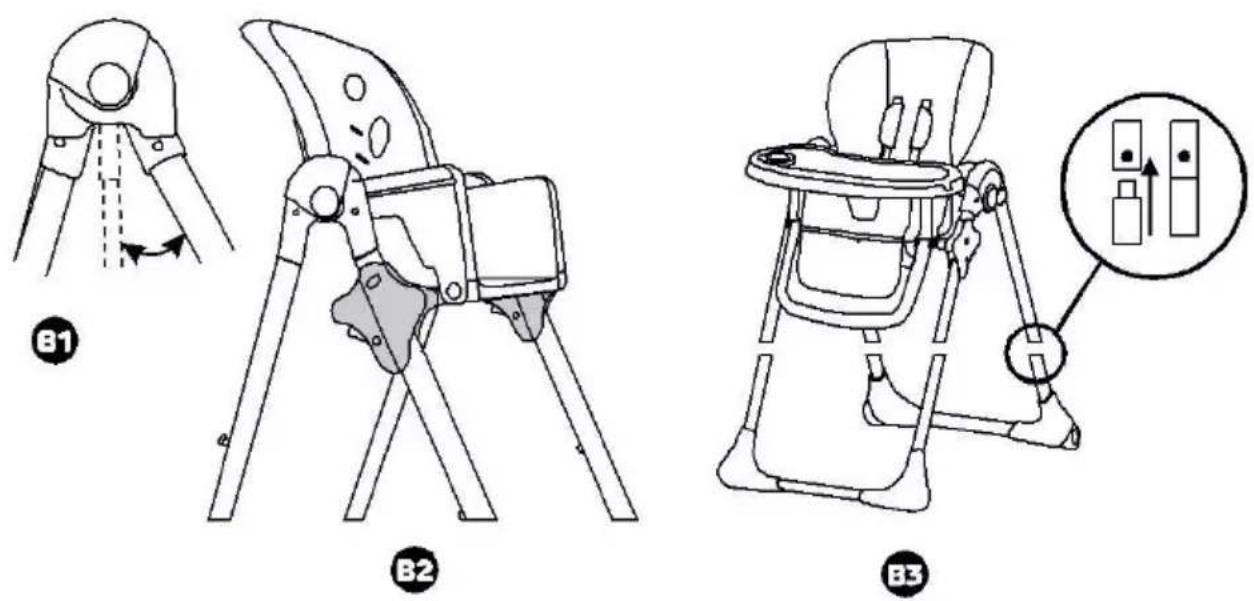
text_image
B1 B2 B3
natural_image
Technical line drawing of a mechanical device with three views: top view, side view showing internal components, and bottom view showing a pinwheel assembly (no text or symbols present)C

natural_image
Pure mechanical diagram of a V-shaped connector with mounting brackets and directional arrows (no text or symbols)D1
natural_image
Diagram of a mechanical device with multiple ports and directional arrows, no text or symbols presentD2

natural_image
Line drawing of a cartoon spider-like character with limbs and facial features, no text or symbols presentD3

natural_image
Diagram of a V-shaped mechanical or electrical component with two vertical connectors and directional arrows indicating flow or movement (no text or symbols)D4

natural_image
Line drawing of a folding chair with seatbelt and handle (no text or symbols)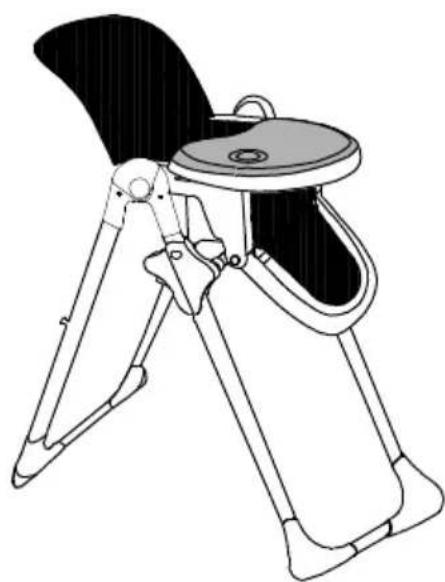
natural_image
Line drawing of a folding chair with propeller and seat (no text or symbols)E1
natural_image
Diagram showing a coiled tube with two circular inset views of the tube (no text or labels)E2

natural_image
Line drawing of a mechanical assembly with rotating components and motion arrows (no text or symbols)F

natural_image
Line drawing of a baby seat with a magnified inset showing the interior details (no text or symbols)G1
natural_image
Line drawing of a mechanical component with an arrow indicating rotation (no text or symbols)G2

text_image
Technical line drawing of a baby boom chair with Chinese annotation indicating the seat or seat number.H1
natural_image
Line drawing of a baby boom seat with adjustable armrest and seat tray (no text or symbols)H2
VÁŽENÝ ZÁKAZNÍKU!
text_image
Prohibition sign with pictograms showing a child and adult walking, indicating no movement or avoidance.text_image
Prohibition sign with pictograms of a child and adult walking, indicating no movement or behavior in the depicted scenario.Thank you for purchasing a Kinderkraft product.
Our products are designed to help your child – we always care about safety and quality, thus ensuring the comfort of the best choice.
IMPORTANT! READ CAREFULLY AND KEEP FOR FUTURE REFERENCE.
Safety instructions and precautions
WARNING!
- Never leave the child unattended.
• Always use the restraint system. - Falling hazard: Prevent your child from climbing on the product.
- Do not use the product unless all components are correctly fitted and adjusted
- Be aware of the risk of open fires and other sources of strong heat in the

text_image
Prohibition sign with pictograms showing a child and adult walking, indicating no intervention or absence of intervention.vicinity of the product.
- Be aware of the risk of tilting when your child can push its feet against a table or any other structure.
• Always check the security and the stability of product before use. - Make sure that any harness is correctly fitted.
Do not move or lift the product while the child is inside.
Do not use the product until the child can sit up unaided. Keep children away when assembling and disassembling the product to avoid injury. High chair is intended for children able to sit
up unaided and up to 3 years or a maximum weight of 15 kg.
Don't use the product if any part is broken, torn or missing.
Product located under a window could be used as a step by the child and cause the child to fall out of the window.
Accessories or replacement parts other than those approved by the manufacturer must not be used.

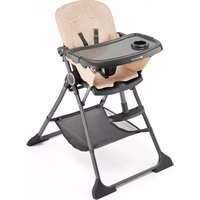
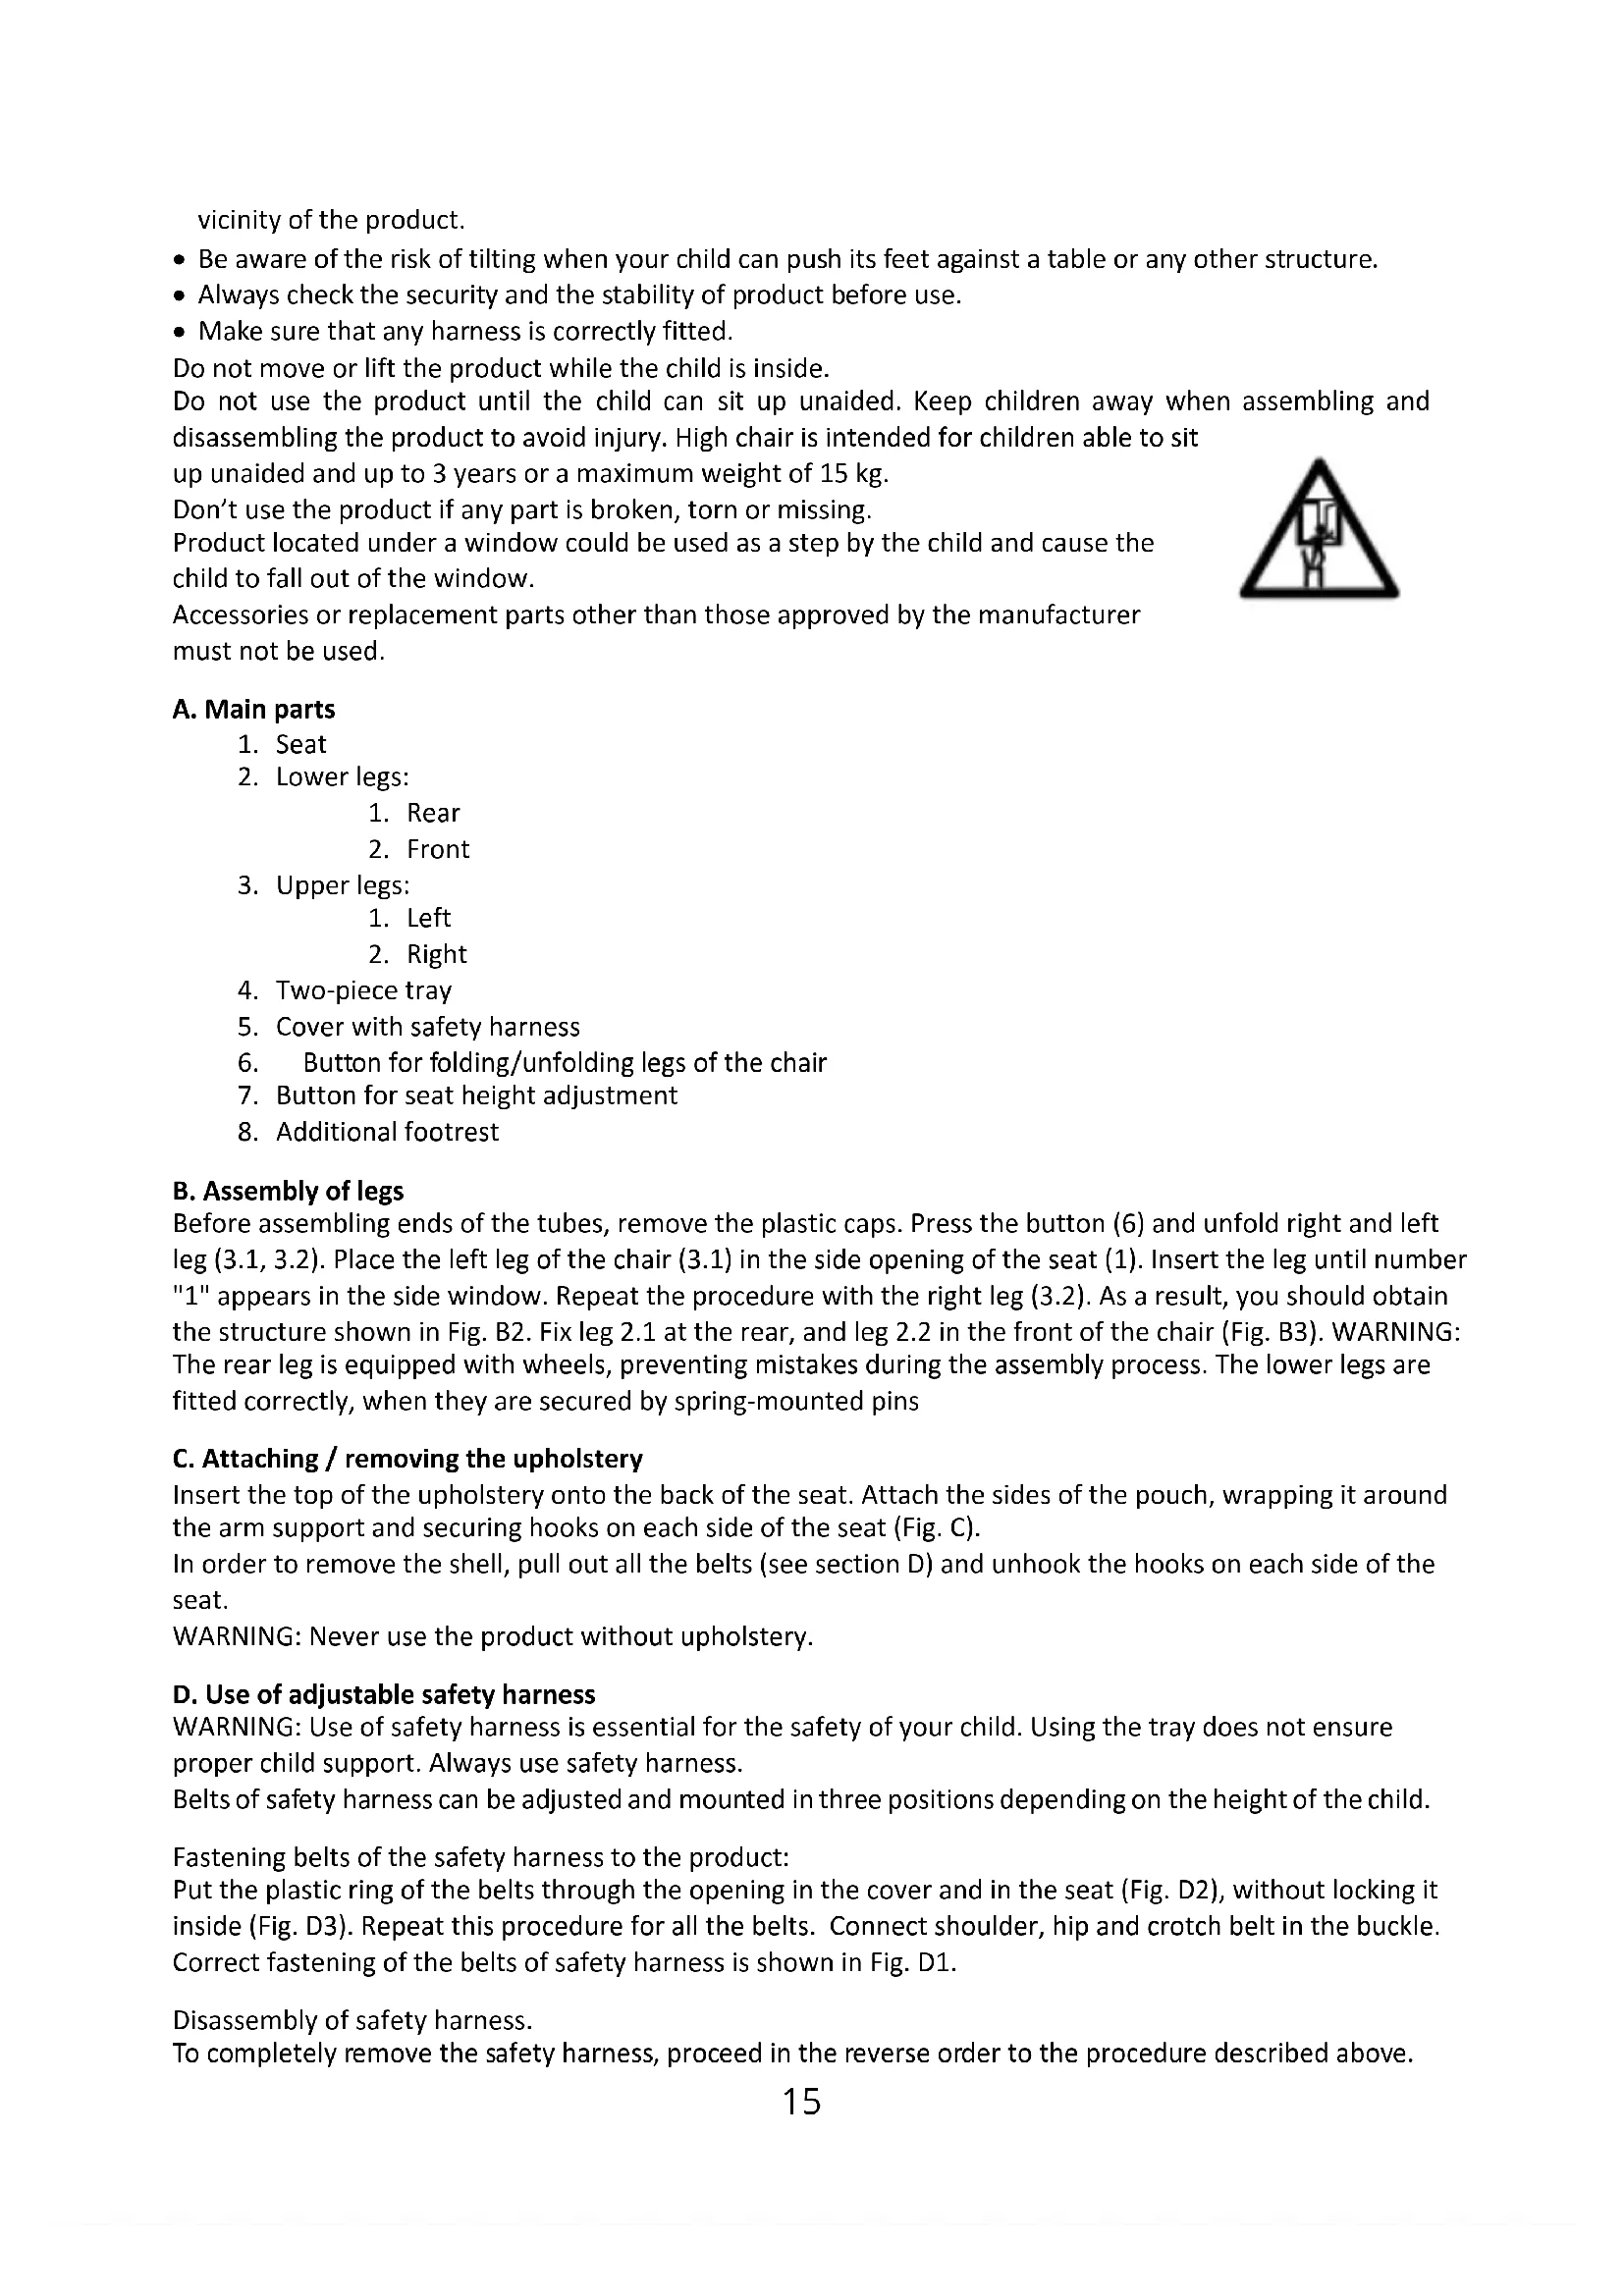
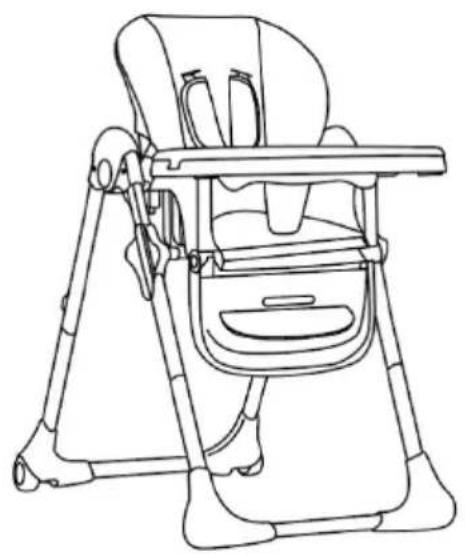
A. Main parts
- Seat
- Lower legs:
- Rear
-
Front
-
Upper legs:
-
Left
-
Right
-
Two-piece tray
-
Cover with safety harness
-
Button for folding/unfolding legs of the chair
-
Button for seat height adjustment
-
Additional footrest
B. Assembly of legs
Before assembling ends of the tubes, remove the plastic caps. Press the button (6) and unfold right and left leg (3.1, 3.2). Place the left leg of the chair (3.1) in the side opening of the seat (1). Insert the leg until number "1" appears in the side window. Repeat the procedure with the right leg (3.2). As a result, you should obtain the structure shown in Fig. B2. Fix leg 2.1 at the rear, and leg 2.2 in the front of the chair (Fig. B3). WARNING: The rear leg is equipped with wheels, preventing mistakes during the assembly process. The lower legs are fitted correctly, when they are secured by spring-mounted pins
C. Attaching / removing the upholstery
Insert the top of the upholstery onto the back of the seat. Attach the sides of the pouch, wrapping it around the arm support and securing hooks on each side of the seat (Fig. C).
In order to remove the shell, pull out all the belts (see section D) and unhook the hooks on each side of the seat.
WARNING: Never use the product without upholstery.
D. Use of adjustable safety harness
WARNING: Use of safety harness is essential for the safety of your child. Using the tray does not ensure proper child support. Always use safety harness.
Belts of safety harness can be adjusted and mounted in three positions depending on the height of the child.
Fastening belts of the safety harness to the product:
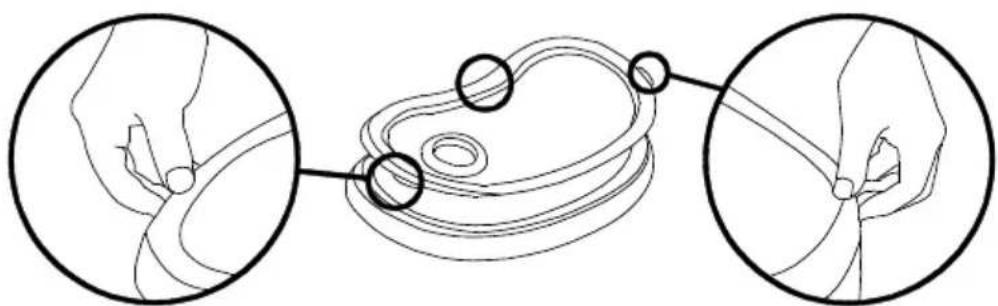
Put the plastic ring of the belts through the opening in the cover and in the seat (Fig. D2), without locking it inside (Fig. D3). Repeat this procedure for all the belts. Connect shoulder, hip and crotch belt in the buckle.
Correct fastening of the belts of safety harness is shown in Fig. D1.
Disassembly of safety harness.
To completely remove the safety harness, proceed in the reverse order to the procedure described above.
To disconnect the belts of the safety harness, press the button in the middle of the buckle (Fig. D4).
E. Assembly and adjustment of the plastic tray
Attach the plastic tray to the chair by means of the clamping mechanism.
The tray can be set in one of three positions - marking is located on the armrest.
After inserting the tray, make sure that it is securely mounted.
In order to wash the tray, you can remove its top after releasing two catches (Fig. E2).
Completely dismantled tray may be attached to the leg, at the back of the chair.
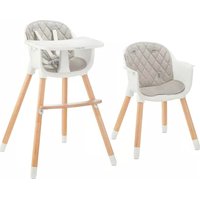
F. Footrest adjustment
The footrest can be set in three different positions by pressing the two side buttons (Fig. F)
The YUMMY chair can be fitted with an additional footrest. To do this, insert the hook into one of the three holes as shown in figure H1, H2.
WARNING! Do not stand on the footrest.
G. Adjusting the height of the chair and the backrest inclination
The chair can be set at 7 different heights.
To lift/lower the seat: simultaneously press the button to adjust the height of the seat on both sides and set to the selected position (Fig. G1). WARNING: Do not do this when the baby is sitting in the chair.
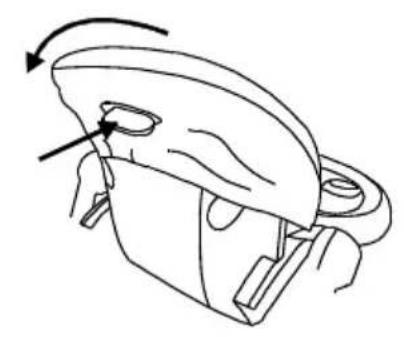
The backrest of the chair can be set in three positions. To adjust the backrest, lift the lever located at back (Fig. G2), tilt the backrest and place it in the desired position, then release the lever. The backrest is locked automatically and you will hear a locking sound.
When selecting the lowest seat position, make sure that the indicator on the side indicates 7.
H. Cleaning
Chair: Clean with a clean and damp cloth using mild soap. Safety harness: Fasten belts together. Handwash.
Do not bleach. Do not dry in a tumble dryer. Do not iron. Do not dry clean.
Warranty
- All Kinderkraft products are covered by a 24-month warranty. The warranty period starts from the date the product is handed over to the Buyer.
- The warranty is only valid in the member states of the European Union, excluding overseas territories (as currently defined, including in particular: Azores, Madeira, Canary Islands, French Overseas Departments, Åland Islands, Athos, Ceuta, Melilla, Helgoland, Büsingen am Hochrhein, Campione d'Italia and Livigno) and the territory of the United Kingdom of Great Britain and Northern Ireland excluding the British Overseas Territories (e.g. Bermuda, Cayman Islands, Falkland Islands).
- The manufacturer's warranty does not apply to countries not listed above. The conditions of the additional warranty may be determined by the Seller.
- In some countries, it is possible to extend the warranty to a limited period of 120 months (10 years). The complete terms and conditions and the warranty extension registration form are available at WWW.KINDERKRAFT.COM
- The warranty is valid only in the territory indicated in paragraph 2.
- Claims must be made by completing the form available at WWW.RMA.KINDERKRAFT.COM
- The warranty does not cover:
A. Cosmetic damage, including but not limited to: scratches, dents and cracks in plastic, unless the failure is due to a material or manufacturing defect;
B. Damage resulting from misuse or poor maintenance - including but not limited to: mechanical damage to products caused by misuse or poor maintenance;
• Refer to the instructions for use and installation of the product contained in the user manual;
C. Damage caused by improper assembly, installation or disassembly of products and/or accessories;
• Refer to the instructions for use and installation of the product contained in the user manual;
D. Damage caused by corrosion, mould or rust, resulting from improper maintenance, care and storage;
E. Damage caused by normal wear and tear or otherwise resulting from the normal passage of time;
- This includes: tears or punctures in inner tubes; tyre damage; tyre tread damage; fading of fabrics resulting from mechanical use (e.g. on joints and covering of moving parts);
F. Damage or erosion caused by sun, perspiration, detergents, storage conditions or frequent washing, etc;
G. Damage caused by accident, abuse, misuse, fire, contact with liquid, earthquake or other external causes;
H. Products that have been modified to change functionality without 4Kraft's written consent;
I. Products from which the serial number or lot number has been removed or tampered with in any way;
J. Damage caused by the use of third party components or products - including but not limited to: cup holders, umbrellas, reflectors, bells;
K. Damage caused by transport or by ground handling service providers.
-
The warranty period for accessories included with the product is 6 months from the date of sale, excluding the faults described above.
-
These warranty conditions are complementary to the Customer's statutory rights with respect to 4KRAFT sp. z o.o. The warranty does not exclude, limit or suspend the Customer's rights under warranty for defects in goods sold.
-
The full text of the Terms and Conditions of the Warranty is available on the website WWW.KINDERKRAFT.COM
All rights to this data are entirely reserved to 4Kraft Sp. z o.o. Any unauthorized use or misuse, including usufruct, copying, duplication and sharing, wholly or partially, without consent of 4Kraft Sp. z o.o. may result in legal consequences.
ES
¡ESTIMADO CLIENTE!
text_image
Prohibition sign with pictograms showing a child and adult walking, indicating no intervention or absence of intervention.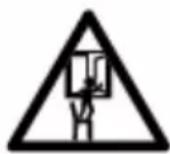
text_image
Prohibition sign with pictograms of a child and adult walking, indicating no smoking or alcohol usetext_image
Prohibition sign with pictograms of a child and adult walking, indicating no religious or social restrictions.text_image
Prohibition sign with pictograms and Chinese text, indicating no smoking or child smokingtext_image
Prohibition sign with pictograms of a child and adult walking, indicating no movement or avoidancetext_image
Prohibition sign with pictograms of a child and adult walking, indicating no movement or avoidancetext_image
Prohibition sign with pictograms of a child and adult walking, indicating no movement or avoidancetext_image
Prohibition sign with pictograms showing a child and adult walking, indicating no smoking or alcohol usetext_image
Prohibition sign with pictograms showing a child and adult walking, indicating no movement or avoidance.In the interests of our Clients - we are at your disposal! If you have a problem with the product you received, contact us in the most convenient way for you!