
Cilindro - Coffee grinder LA PAVONI - Free user manual and instructions
Find the device manual for free Cilindro LA PAVONI in PDF.
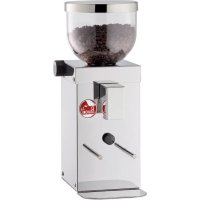
| Product type | Electric coffee grinder |
| Brand | LA PAVONI |
| Model | Cilindro (LPGGRI01) |
| Dimensions (H x W x D) | 410 x 154 x 230 mm |
| Net weight | 5.3 kg |
| Power supply | 220-240 V ~ 50-60 Hz |
| Power consumption | 310 W |
| Bean hopper capacity | 500 g |
| Productivity (espresso) | 1.2 - 1.6 g/s |
| Productivity (filter) | 1.7 - 2.3 g/s |
| Rotation speed (50 Hz) | 1350 rpm |
| Rotation speed (60 Hz) | 1630 rpm |
| Grind adjustment | Rotary knob (fine to coarse) |
| Screen type | Touch screen with time display |
| Dispensing functions | Single dose, double, continuous (max 60 s) |
| Dose counting | Yes (single, double, continuous) |
| Portafilter fork | Height adjustable, adaptable to all portafilters |
| Safety | Automatic stop after 60 s of continuous dispensing; protection against foreign objects |
| Burr maintenance | Check every 250 kg of coffee; cleaning by brushing or compressed air |
| Hopper cleaning | Weekly with a damp cloth and mild soap |
| Intended use | Household only |
| Warranty | Authorized after-sales service |
Frequently Asked Questions - Cilindro LA PAVONI
User questions about Cilindro LA PAVONI
0 question about this device. Answer the ones you know or ask your own.
Ask a new question about this device
Download the instructions for your Coffee grinder in PDF format for free! Find your manual Cilindro - LA PAVONI and take your electronic device back in hand. On this page are published all the documents necessary for the use of your device. Cilindro by LA PAVONI.
USER MANUAL Cilindro LA PAVONI
natural_image
Line drawing of a portable oven with handle and spout (no text or symbols)


natural_image
Mechanical assembly diagram showing a cylindrical component being inserted into a container with a downward arrow indicating force (no text or symbols present)A
natural_image
Mechanical diagram showing a screwdriver inserted into a component with rotational arrows indicating motion (no text or symbols)B

natural_image
Illustration of a hand holding a small electronic device with an arrow indicating rotation (no text or symbols present)C
natural_image
Illustration of a hand holding a small object with a rotating arrow above it, no text or symbols presentD

natural_image
Diagram showing a door lock mechanism with a handle and lock, alongside a plastic clamp (no text or symbols present)E

natural_image
Diagram of a kitchen handle mechanism with directional arrows indicating movement (no text or symbols)

natural_image
Illustration of a hand pouring liquid into a kitchen grater with an arrow indicating flow direction (no text or symbols)F

4-2. ACCENSIONE MACCHINA 7
4-2. ACCENSIONE MACCHINA

PROBLEMA CAUSA SOLUZIONE
Operating instructions
MODEL LPGGRI01

Dear Customer,
Thank you for having purchased one of our products, which has been manufactured using the latest technological innovations. By carefully following some simple instructions regarding the correct use of our product in compliance with the essential safety instructions indicated in this manual, you will be able to obtain the best performance and enjoy the remarkable reliability of this product over the years. In case of faults, please contact one of our Service Centres that are at your disposal from now on.
SYMBOLS USED IN THIS MANUAL
Important information is indicated by these symbols. It is imperative that you comply with these instructions.

Please read the instructions manual carefully before using the appliance.

Caution! Particularly important and / or dangerous operations.

Information (useful for using the appliance).

Advice.

Operations that can be carried out by the user.

Operations that should only be carried out by a qualified technician.
The LPGGRI01 coffee grinder was designed and built with care to ensure quality, safety and reliability over time.
In order to ensure that the LPGGRI01 grinder provides long lasting performance, we recommend that you follow the instructions in this booklet carefully.
CONTENTS
1. INTRODUCTION TO THE MANUAL 14
1-1. INTRODUCTION 14
2. INSTRUCTIONS 14
2-1. SAFETY INSTRUCTIONS 14
2-2. INTENDED USE OF THE MACHINE 16
2-3. DISPOSAL 16
3. DESCRIPTION 16
3-1. PRODUCT DESCRIPTION 16
3-2. SECURING THE CONTAINER 17
4. USE 17
4-1. STARTING THE APPLIANCE 17
4-2. SWITCHING ON THE MACHINE 17
4-3. DISPLAY OPERATION 18
4-4. GRINDING ADJUSTMENT 18
4-5. ADJUSTING THE FILTER HOLDER CLIP 19
5. CLEANING AND MAINTENANCE 19
5-1. CLEANING 19
5-2. CLEANING THE HOPPER 19
5-3. CLEANING THE GRINDING SYSTEM 19
5-4. CLEANING THE OUTSIDE OF THE MACHINE 19
5-5. MAINTENANCE 19
6. TROUBLESHOOTING 21
1. INTRODUCTION TO THE MANUAL
1-1. INTRODUCTION
This instructions manual is an integral part of the appliance. It should be read carefully and kept readily available for reference for the entire service life of the appliance.
If the manual is lost or damaged, you can request a replacement from an authorised SERVICE CENTRE.
The manual contains information regarding the proper use of the coffee grinder, its cleaning and maintenance. It also provides information about operations to be carried out that require particular attention and possible residual risks.
The manual reflects the technological innovations at the time it was drafted. The manufacturer reserves the right to make any necessary technical modifications to its products and to update the manuals with no obligation to revise previous versions.
LA PAVONI S.p.A. declines any liability for damage or injury that may be caused directly or indirectly to people or property due to:
•the failure to comply with all the requirements of current safety regulations
- incorrect installation
• defective power supply
- improper or incorrect use of the coffee grinder
- uses other than those specified in this manual
- lack of or incorrect maintenance
- unauthorised modifications or repairs to the appliance
•the use of non-original or non model-specific spare parts
•complete or partial failure to follow the
instructions
- exceptional events
2. INSTRUCTIONS
2-1. SAFETY INSTRUCTIONS
Because the appliance operates on electricity, the following safety recommendations should be followed:
- Do not touch the plug with wet hands.
- Make sure that the power outlet is always easily accessible so that the appliance can be unplugged whenever necessary.
- If you want to remove the plug from the socket, grasp the plug directly. Never pull the cable as it could become damaged.
- In the event faults, do not attempt to repair the appliance. Switch off the appliance, remove the plug from the power outlet and contact an authorised service centre.
- If the plug or power cable becomes damaged, have them replaced only by an authorised service centre in order to avoid risks.
- Do not immerse the appliance in water.
- Warning: disconnect the plug before cleaning.
- Do not allow the power cable to hang over the edge of a table or any other surface and do not allow it to come into contact with hot surfaces.
- Keep the packaging materials (plastic bags, expanded polystyrene) out of the reach of children.
- Do not place the appliance on or close to electric or gas cookers, or in a heated oven.
- Make sure there are no foreign objects inside the appliance.
- Switch off the appliance and unplug it from the mains before changing the
accessories or when close to moving parts.
- Make sure that the mains voltage and the frequency corresponds to those indicated on the data plate on the appliance.
- Make sure that the electricity supply is the same as that indicated on the data plate.
- If the plug of the appliance is not compatible with the power socket, have the socket replaced with one of a suitable type by qualified personnel.
- This appliance must not be used by children.
- Keep the appliance out of the reach of children.
- Children must never play with the appliance.
- The appliance may be used by people with reduced physical, sensory or mental capabilities or who lack experience and knowledge if they are supervised or instructed on the safe use of the appliance by someone who is responsible for their safety and if they understand the hazards involved.
- Disconnect the appliance from the power socket before assembly, disassembly and cleaning.
- The user must comply with the safety regulations in force in the country where the appliance is used, in addition to using common sense and the instructions provided in this manual.
- To ensure that appliance works correctly and provides a long service, we recommend that you make sure that the environmental conditions are correct (room temperature should be between 5^ and 35^ ). Avoid using the appliance in places where jets of water are used or in outdoor environments that are exposed to the weather (sun, rain etc.).
•After removing the appliance from its packaging, make sure that it is intact and has not been damaged.
- Put the appliance in a safe position on a solid surface, away from heat sources and out of the reach of children.
- It is prohibited to remove the guards and/or safety devices on the appliance.
- Do not use the appliance if it is not working properly or if the power cable or plug are damaged; we recommend that you replace the power cable or to have the appliance inspected by an authorised SERVICE CENTRE.
- To avoid damaging the machine, only use accessories or replacement parts approved by the manufacturer.
- Do not use the appliance outdoors.
- Do not use the appliance for uses other than the one for which it was designed.
- The appliance must be earthed and the electrical system must comply with the current regulations in the country of installation.
- The use of power strips and/or extension cables is not recommended.
- Do not use the appliance with bare feet.
- Do not leave the appliance turned on when not in use. Unplug the appliance when not in use.
- Do not obstruct ventilation or heat dissipation openings and/or slots and do not allow water or any other liquids to enter them.
- Never insert spoons, forks or other utensils into the outlet or the coffee bean container for any reason while the appliance is in operation.
- It is the responsibility of the owner to make sure that the machine is installed in room conditions that will not cause a health or safety hazard to those who use the machine.
- If you no longer wish to use this type of appliance, after removing the plug from the mains outlet, we recommend that you cut off the power cable to make it unusable.
2-2. INTENDED USE OF THE MACHIN
This appliance is intended for household use.
Moreover, it cannot be used:
• in kitchen areas provided for employees in shops, offices and other working environments;
•in farms/farm stay facilities
• by guests in hotels, motels and residential environments;
•in bed and breakfasts.
Any improper use of the machine will void the warranty and relieve the manufacturer of all liability for damage to property and/or injury to persons.
Improper use includes:
- any use other than the one specified in the instructions manual
- any intervention carried out on the appliance that does not comply with the instructions given in this manual, using the appliance following unauthorized modifications to components or safety devices
•use of the appliance outdoors.
The manufacturer declines any liability for damage to property or injury to people or animals, due to interventions on the appliance by unqualified or unauthorized persons.
2-3. DISPOSAL
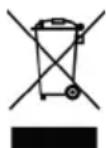
Electrical appliances must not be disposed of together with household waste. Devices marked with this symbol are subject to European Directive
2012/19/EU All waste electrical and electronic appliances must be disposed
of separately from domestic waste and taken to authorised waste disposal facilities. Disposing of the used appliance correctly, will help to safeguard the environment and human health. For further
NEformation regarding the disposal of used appliances, please contact your local authority waste disposal department or the shop where the appliance was purchased.
3. DESCRIPTION
3-1. PRODUCT DESCRIPTION
- Container lid
- Coffee bean container
- Grinding adjustment knob
- Touchscreen display
- Dispensing outlet
- Front mounted start grinding button
- Adjustable filter holder clip
- Opening / closing lever for coffee bean container
- Coffee bean container fixing screw
- ON/OFF switch
- Dispensing time / dose count display
- Continuous delivery enabled
- Decrease button
- Increase button
- Single dose button
- Double dose button
| DESCRIPTION | MODEL |
| LPGGRI01 | |
| Voltage (V) | 220/240 220 |
| Frequency (Hz) | 50-60 60 |
| Power consumption (W) | 310 |
| RPM* | 1350 (50 Hz)1630 (60 Hz) |
| Output (g/s) | 1.2 - 1.6 (Espresso)1.7 - 2.3 (Brew) |
| Empty weight (Kg) | 5.3 |
| Hopper capacity (g) | 500 |
| Height (mm) | 410 |
| Width (mm) | 154 |
| Depth (mm) | 230 |
Ton: 60 s
Toff: 600 s
3-2. SECURING THE CONTAINER
Before starting, mount the coffee bean container (2).
Insert the container (2) into its seat (Fig. A), positioning it so that the hole is aligned with the screw on the back of the appliance.
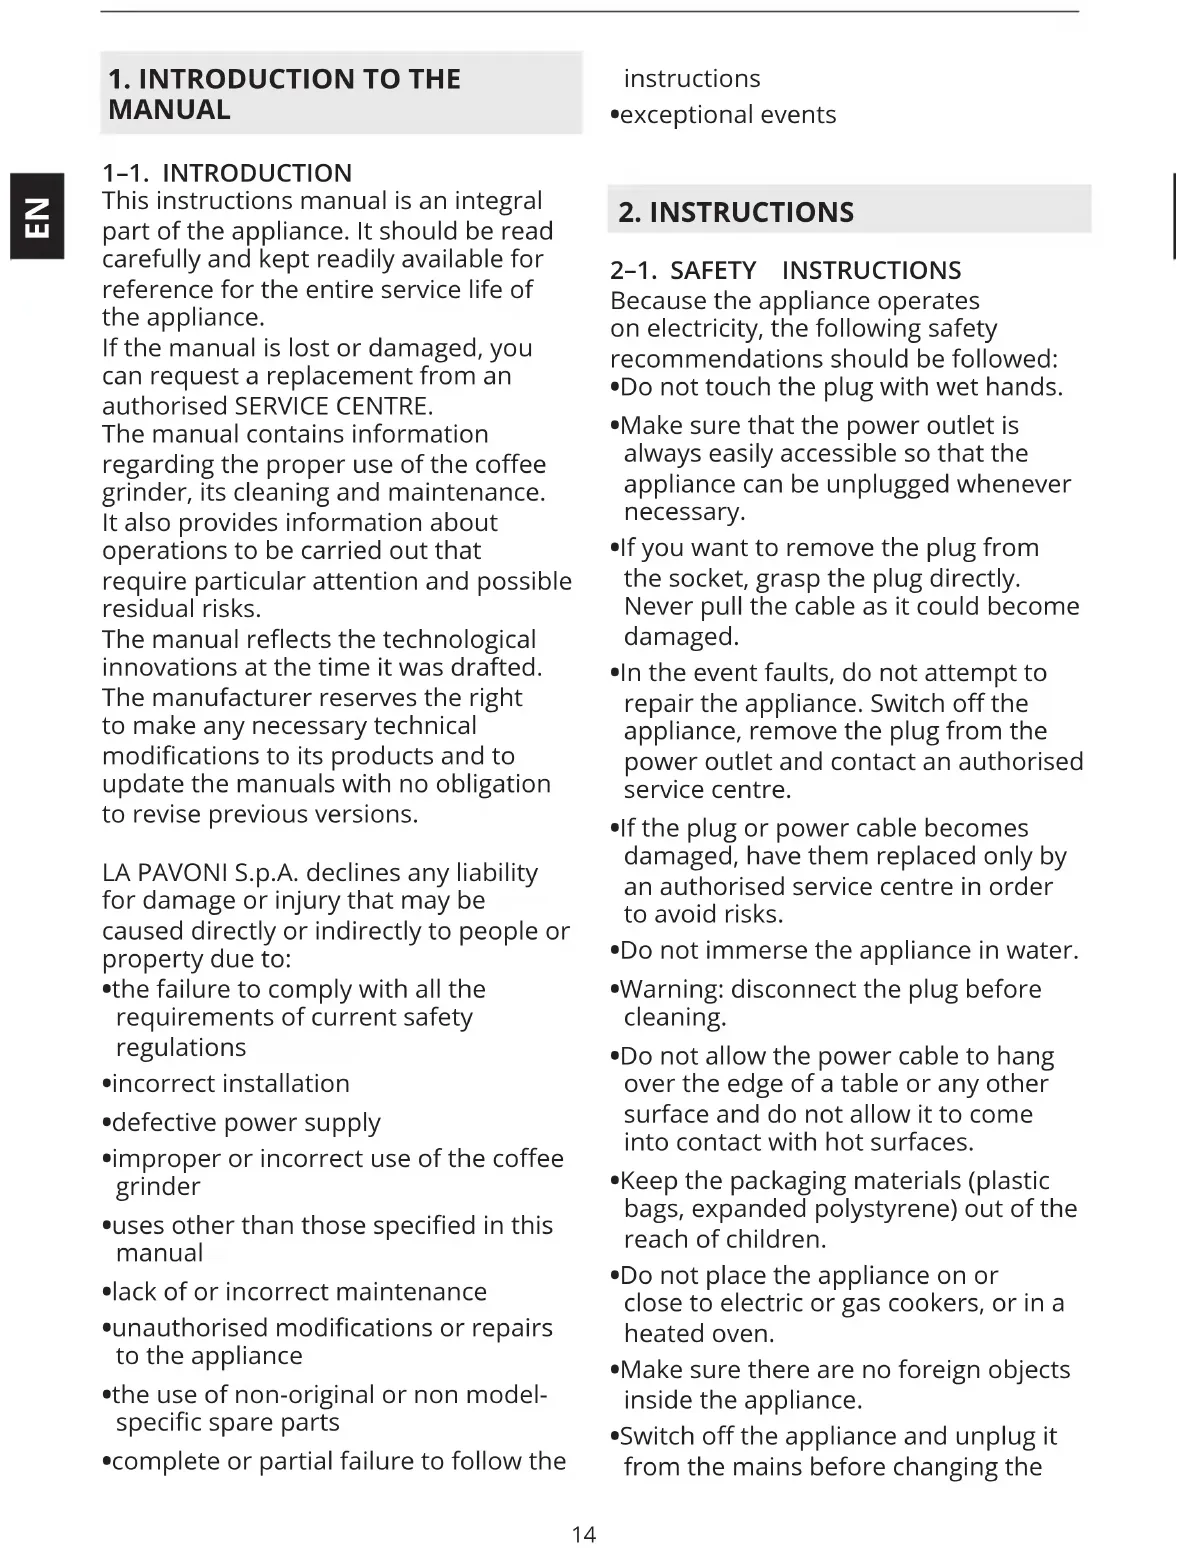
Tighten the locking screw (9) (Fig. B).
4. USE
4-1. STARTING THE APPLIANCE
Carefully unpack the appliance and remove all the packaging materials and promotional labels Before starting the appliance:
- Insert the container (2) into its seat (Fig. A), positioning it so that the hole is aligned with the screw on the back of the appliance.
•Tighten the locking screw (9) (Fig. B).
- Insert the filter holder clip (7) (Fig. E) into the appropriate hole.
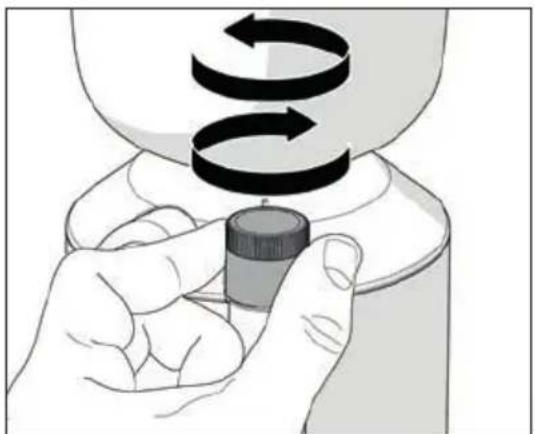
•After plugging in the appliance, pull the tab (3) at the base of the coffee bean container (2) to close it (Fig. C).
- Remove the lid (1) from the container (2) and fill it with coffee beans.
- Replace the lid (1) and pull the tab (8) to allow the coffee beans to pass.
•The machine has to be set up before use according to the type of coffee blend (more or less roasted) and the degree of grinding.
- Decide the type of coffee blend (more or less roasted).
- Decide the degree of grinding.
4-2. SWITCHING ON THE MACHINE

When appliance is first switched on, it is set to the factory settings. Then next time it is switched on, it will maintain the settings prior to being switched off.
- Switch on the coffee grinder by pressing the on/off switch (10).
- When turned on, the display loads the firmware and prepares to deliver ground coffee.
- Select the required dose by pressing the single dose (15) or double dose (16) button on the display.
•Coffee delivery will start with a single (quick) press of the start grinding button (6).

To ensure that the appliance operates correctly, avoid grinding more than 160g of coffee at a time.
- Once the ground coffee has been dispensed, the grinding time returns to the set value. The dose counter (single or double) increases by 1.

To pause automatic dispensing before the grinding time has finished, press the start grinding button with the filter holder (6):
- Press the button (6) again to resume dispensing for the remaining time.
- Press and hold the button of the selected dose (flashing) to stop dispensing. The grinding time returns to the set value.
It is possible to adjust the delivery time of the selected amount of ground coffee.
This is done as follows:
- Select the single (15) or double dose (16) button and press the buttons (13) and (14) to increase or decrease the delivery time of the selected dose.
- The changes can be seen directly on the display.
•Alternatively, if you briefly press and hold the button (13) or (14), the time will be increased or decreased by the length of time the button is pressed.
CONTINUOUS DELIVERY
- Pressing the single dose (15) and double dose (16) button at the same time causes the (11) symbol to appear on the display.
- Continuous delivery lasts for a maximum of 60 seconds.
•To exit from the continuous delivery mode, briefly press and hold the single dose (14) or double dose button (15). - Press buttons (13) — and (14) remain lit on the display +. When they are released, the dose delivery time adjustment is locked. Furthermore, buttons (13) — and (14) on the display become dark. +. Press both buttons (13) — and (14) remain lit on the display + to unlock the functions.
DOSE COUNTS
When turning on the machine, keep the start grinding button (6) pressed for 5 seconds and then select one of the counts:
- Single dose button (15) : access to the dispensed single doses count
- Double dose button (16) : access to the dispensed double doses count
- Single dose button (15) and double
dose (16) button ☒ access to the continuous delivery doses count
- Only the selected buttons remain lit on the display and the numbers of doses are displayed in pairs in succession.
For example, if the total number of doses is 142536, digits 14, 25 and 36, appear on the display, each for two seconds.
After the last digit pair, there is a pause of 4 seconds and then the sequence restarts.
To exit from the count function, press the start grinding button (6).
CONTRAST ADJUSTMENT
- When turning on the machine, keep the start grinding button (6) pressed and then press the button (13) or button (14) to access the contrast adjustment function.
- Only buttons (13) and (14) remain lit on the display. To exit from the contrast adjustment function, press the start grinding button (6).
4-4. GRINDING ADJUSTMENT
To change the degree of grinding:
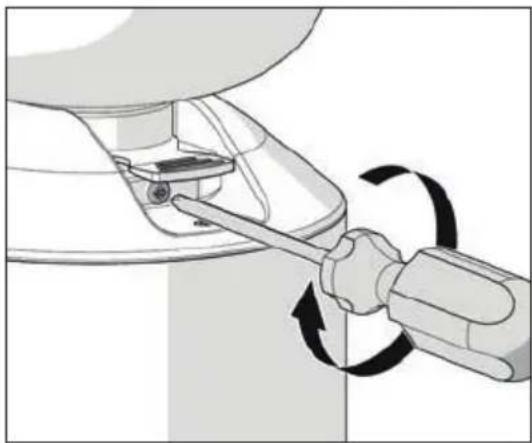
- Turn the knob (8) clockwise for more finely ground coffee.
- Turn the knob (8) anticlockwise for a coarser grind.

- Adjustment should be made gradually by grinding a small amount of coffee at each small turn.
•We recommend using finely ground coffee with La Pavoni lever or semi-professional machines.

We recommend that you do not rotate the knob by one turn if the motor is not running.
4-5. ADJUSTING THE FILTER HOLDER CLIP
- The height of the filter holder clip can be adjusted.
- Insert the filter holder clip (7) (Fig. E) into the appropriate hole.
- Using a screwdriver, loosen the fixing screw of the filter holder clip (7). Do not loosen the screw completely.
- Raise or lower the clip to adjust it according to the size of the filter holder.
- Once you have found the correct position, tighten the filter holder clip fixing screw (7).

The clip is suitable for any type of filter holder available in the market.
5. CLEANING AND MAINTENANCE

Unplug the appliance from the power supply before carrying out cleaning or maintenance. Do not pull the power cable or the appliance itself to remove the plug from the power outlet.

Maintenance and cleaning must be carried out by trained personnel that are authorized by the manufacturer.

Do not carry out unprofessional of dangerous repairs and do not use non-original spare parts.
5-1. CLEANING
- Make sure that the hopper is empty and then start the grinding to remove any coffee residues from the burrs.
- Make sure that you have unplugged the appliance from the power supply before carrying out cleaning or maintenance.
5-2. CLEANING THE HOPPER
•After having emptied the hopper, remove it from the machine and wash it with water and neutral soap to remove the oily film left by the coffee beans.
•Rinse and dry it thoroughly.
- Do the same for the plastic lid.

It is recommended that you clean the appliance at least once a week.
5-3. CLEANING THE GRINDING SYSTEM
•After removing the lid, open the upper burr holder.
- Clean the burrs and the other internal parts with a brush or a dry cloth. Use a vacuum cleaner or a jet of compressed air if necessary. Reinstall the hopper after replacing the upper burr holder and the lid.
- For thorough cleaning, use commercially available detergent tablets for coffee grinders.

All cleaning and sanitizing must be carried out using products approved for use with foodstuffs.
5-4. CLEANING THE OUTSIDE OF THE MACHINE
•To remove residues of coffee and dirt from the outside of the machine, use a damp cloth. Avoid using detergents or abrasive materials.
5-5. MAINTENANCE
To ensure that the appliance works correctly, check the burrs every 250 kg of coffee and replace if necessary. To carry out maintenance on the burrs, disconnect the appliance from power supply and remove the coffee bean container. Then loosen the screw on the cover and the screws below, which

secure the upper burr holder. To clean the burrs, use a brush or a dry cloth. If necessary, use a vacuum cleaner or a jet of compressed air.

Maintenance must be carried out by trained personnel that are authorized by the manufacturer.

Do not carry out unprofessional of dangerous repairs and do not use non-original spare parts.
6. TROUBLESHOOTING
PROBLEM CAUSE SOLUTION
| The appliance does not turn on | 1. Plug the appliance into the power outlet2. Check the power cable | 1. Plug the appliance into the power outlet2. Check the power cable |
| The appliance works but no ground coffee is dispensed. | 1. No coffee beans in their container2. the burrs are in contact3. Foreign body between the burrs | 1. Add coffee beans2. Adjust the coffee grinder to a coarser grind3. Contact an authorised service centre |
| The grinding setting is incorrect or difficult | Worn burrs Contact the SERVICE CENTRE | |
1. INTRODUCTION AU MANUEL 24
1-1. INTRODUCTION 24
2. AVERTISSEMENTS 24
2-1. AVERTISSEMENTS DE SÉCURITÉ 24
2-2. USAGE PRÉVU DE LA MACHINE 26
2-3. ÉLIMINATION 26
3. DESCRIPTION 26
3-1. DESCRIPTION DU PRODUIT 26
3-2. VERROUILLAGE RÉCIPIENT 27
4. UTILISATION 27
4-1. MISE EN SERVICE DE L'APPAREIL 27
4-2. MISE EN MARCHE DE LA MACHINE 27
4-3. FONCTIONNEMENT DE L'ÉCRAN 28
4-4. RÉGLAGE DE LA MOUTURE 29
4-5. RÉGLAGE DE LA FOURCHE DU PORTE-FILTRE 29
5. NETTOYAGE ET ENTRETIEN 29
5-1. NETTOYAGE 29
5-2. NETTOYAGE DE LA CLOCHE 29
5-3. NETTOYAGE DU SYSTÈME DE MOUTURE 30
5-4. NETTOYAGE DU CORPS 30
5-5. ENTRETIEN 30
6. CAUSES DE DYSFONCTIONNEMENT OU ANOMALIES 31
1. INTRODUCTION AU MANUEL
1-1. INTRODUCTION
6. CAUSES DE DYSFONCTIONNEMENT OU ANOMALIES
PROBLÈME CAUSE SOLUTION
2. WAARSCHUWINGEN 44
2-1. VEILIGHEIDSWAARSCHUWINGEN 44
2-2. BEOOGD GEBRUIK VAN HET APPARAAT 46
2-3. VERWIJDERING 46
3. BESCHRIJVING 47
3-1. BESCHRIJVING VAN HET PRODUCT 47
3-2. BLOKKERING CONTAINER 47
4. GEBRUIK 47
4-1. INBEDRIJFSTELLING VAN HET APPARAAT 47
4-2. AANZETTEN MACHINE 47
4-3. WERKING VAN HET DISPLAY 48
4-4. MAALINSTELLING 49
4-5. AFSTELLING FILTERHOUDERVORK 49
5. REINIGING EN ONDERHOUD 49
5-1. REINIGING 50
5-2. REINIGING VAN DE CONTAINER 50
5-3. REINIGING MAALSYSTEEM 50
5-4. REINIGING VAN DE BEHUIZING 50
5-5. ONDERHOUD 50
6. OORZAKEN VAN GEBREKEN OF STORINGEN 51
1. INLEIDING OP DE HANDLEIDING
1-1. INLEIDING
2-1. VEILIGHEIDSWAARSCHUWINGEN
PROBLEEM OORZAAK OPLOSSING
PROBLEMA CAUSA SOLUÇÃO
INNEHÅLLSFÖRTECKNING
1. INTRODUKTION TILL BRUKSANVISNINGEN 74
1-1. INTRODUKTION 74
2. ANVISNINGAR 74
2-1. SÄKERHETSANVISNINGAR 74
2-2. AVSEDD ANVÄNDNING AV APPARATEN 76
2-3. BORTSKAFFANDE 76
3. BESKRIVNING 76
3-1. BESKRIVNING AV PRODUKTEN 76
3-2. BLOCKERING BEHÅLLARE 77
4. ANVÄNDNING 77
4-1. SÄTTA APPARATEN I DRIFT 77
4-2. FÖRSTA START AV APPARATEN 77
4-3. DISPLAYENS FUNKTION 78
4-4. MALNINGSINSTÄLLNINGAR 78
4-5. JUSTERING AV FILTERHÅLLARENS KLYKA 79
5. RENGÖRING OCH UNDERHÅLL 79
5-1. RENGÖRING 79
5-2. RENGÖRING AV UPPSAMLINGSKÄRL 79
5-3. RENGÖRING AV MALVERKET 79
5-4. RENGÖRING AV HÖLJE 80
5-5. UNDERHÅLL 80
6. ORSAKER TILL FELFUNKTION OCH ANOMALIER 81
1. INTRODUKTION TILL BRUKSANVISNINGEN
1-1. INTRODUKTION
- i bed & breakfast.
4-1. SETTE APPARATET I DRIFT 127
4-2. SLÅ PÅ MASKINEN 127
4-3. SKJERMENS FUNKSJON 127
4-4. JUSTERING AV MALING 128
4-5. JUSTERING AV FILTERHOLDERGAFFEL 128
5. RENGJ∅RING OG VEDLIKEHOLD 129
5-1. RENGJ∅RING 129
5-2. RENGJ∅RING AV B∅NNEHOLDER 129
5-3. RENGJ∅RING AV MALINGSSYSTEMET 129
5-4. RENGJ∅RING AV HOVEDDELEN 129
5-5. VEDLIKEHOLD 129
4-1. SETTE APPARATET I DRIFT


- 4-2. ACCENSIONE MACCHINA
- PROBLEMA CAUSA SOLUZIONE
- MODEL LPGGRI01
- SYMBOLS USED IN THIS MANUAL
- CONTENTS
- INTRODUCTION TO THE MANUAL 14
- INSTRUCTIONS 14
- DESCRIPTION 16
- USE 17
- CLEANING AND MAINTENANCE 19
- TROUBLESHOOTING 21
- INTRODUCTION TO THE MANUAL
- 1-1. INTRODUCTION
- INSTRUCTIONS
- 2-1. SAFETY INSTRUCTIONS
- 2-2. INTENDED USE OF THE MACHIN
- 2-3. DISPOSAL
- DESCRIPTION
- 3-1. PRODUCT DESCRIPTION
- 3-2. SECURING THE CONTAINER
- USE
- 4-1. STARTING THE APPLIANCE
- 4-2. SWITCHING ON THE MACHINE
- CONTINUOUS DELIVERY
- DOSE COUNTS
- CONTRAST ADJUSTMENT
- 4-4. GRINDING ADJUSTMENT
- 4-5. ADJUSTING THE FILTER HOLDER CLIP
- CLEANING AND MAINTENANCE
- 5-1. CLEANING
- 5-2. CLEANING THE HOPPER
- 5-3. CLEANING THE GRINDING SYSTEM
- 5-4. CLEANING THE OUTSIDE OF THE MACHINE
- 5-5. MAINTENANCE
- TROUBLESHOOTING
- INTRODUCTION AU MANUEL 24
- AVERTISSEMENTS 24
- DESCRIPTION 26
- UTILISATION 27
- NETTOYAGE ET ENTRETIEN 29
- CAUSES DE DYSFONCTIONNEMENT OU ANOMALIES 31
- INTRODUCTION AU MANUEL
- CAUSES DE DYSFONCTIONNEMENT OU ANOMALIES
- WAARSCHUWINGEN 44
- BESCHRIJVING 47
- GEBRUIK 47
- REINIGING EN ONDERHOUD 49
- OORZAKEN VAN GEBREKEN OF STORINGEN 51
- INLEIDING OP DE HANDLEIDING
- 1-1. INLEIDING
- 2-1. VEILIGHEIDSWAARSCHUWINGEN
- INNEHÅLLSFÖRTECKNING
- INTRODUKTION TILL BRUKSANVISNINGEN 74
- ANVISNINGAR 74
- BESKRIVNING 76
- ANVÄNDNING 77
- RENGÖRING OCH UNDERHÅLL 79
- ORSAKER TILL FELFUNKTION OCH ANOMALIER 81
- INTRODUKTION TILL BRUKSANVISNINGEN
- 1-1. INTRODUKTION
- RENGJ∅RING OG VEDLIKEHOLD 129
- 4-1. SETTE APPARATET I DRIFT
Brand : LA PAVONI
Model : Cilindro
Category : Coffee grinder