
GD 460 A - Drill FESTOOL - Free user manual and instructions
Find the device manual for free GD 460 A FESTOOL in PDF.
| Product type | Adjustable drill guide frame |
| Brand | Festool |
| Model | GD 460 A |
| Maximum drill bit length | 460 mm |
| Maximum drilling depth | 310 mm |
| Maximum drilling diameter without guide plate | 45 mm |
| Inclination | Continuously from 90° to 45° |
| Clamping sleeve diameter | 57/43 mm with reducer |
| Weight | 3.7 kg |
| Overall height | 672 mm |
| Base dimensions | 207 × 172 mm |
| Adjustable parallel stop (parallel direction) | 8 - 190 mm |
| Adjustable parallel stop (perpendicular direction) | -25 - 185 mm |
| Maximum supported torque | 75 Nm |
| Guide plate for drill bits | Even diameters 8 to 26 mm (optional odd 6 to 27 mm) |
| Use with drills | Electric drills with 57 or 43 mm collar |
| Power supply | No power supply (mechanical accessory) |
| Main functions | Precision vertical and inclined guidance, adjustable depth, parallel rules |
| Safety | Mandatory clamping for inclined drilling, two-hand operation |
| Maintenance and cleaning | Clean guide rods, lightly lubricate, keep support surfaces clean |
| Spare parts and repairability | Guide plate (ref. 621947), clamping devices (ref. 621949), extensions (ref. 622471); repair by manufacturer or authorized workshop |
| General information | Tiltable frame for angled drilling, delivered without drill |
Frequently Asked Questions - GD 460 A FESTOOL
User questions about GD 460 A FESTOOL
0 question about this device. Answer the ones you know or ask your own.
Ask a new question about this device
Download the instructions for your Drill in PDF format for free! Find your manual GD 460 A - FESTOOL and take your electronic device back in hand. On this page are published all the documents necessary for the use of your device. GD 460 A by FESTOOL.
USER MANUAL GD 460 A FESTOOL
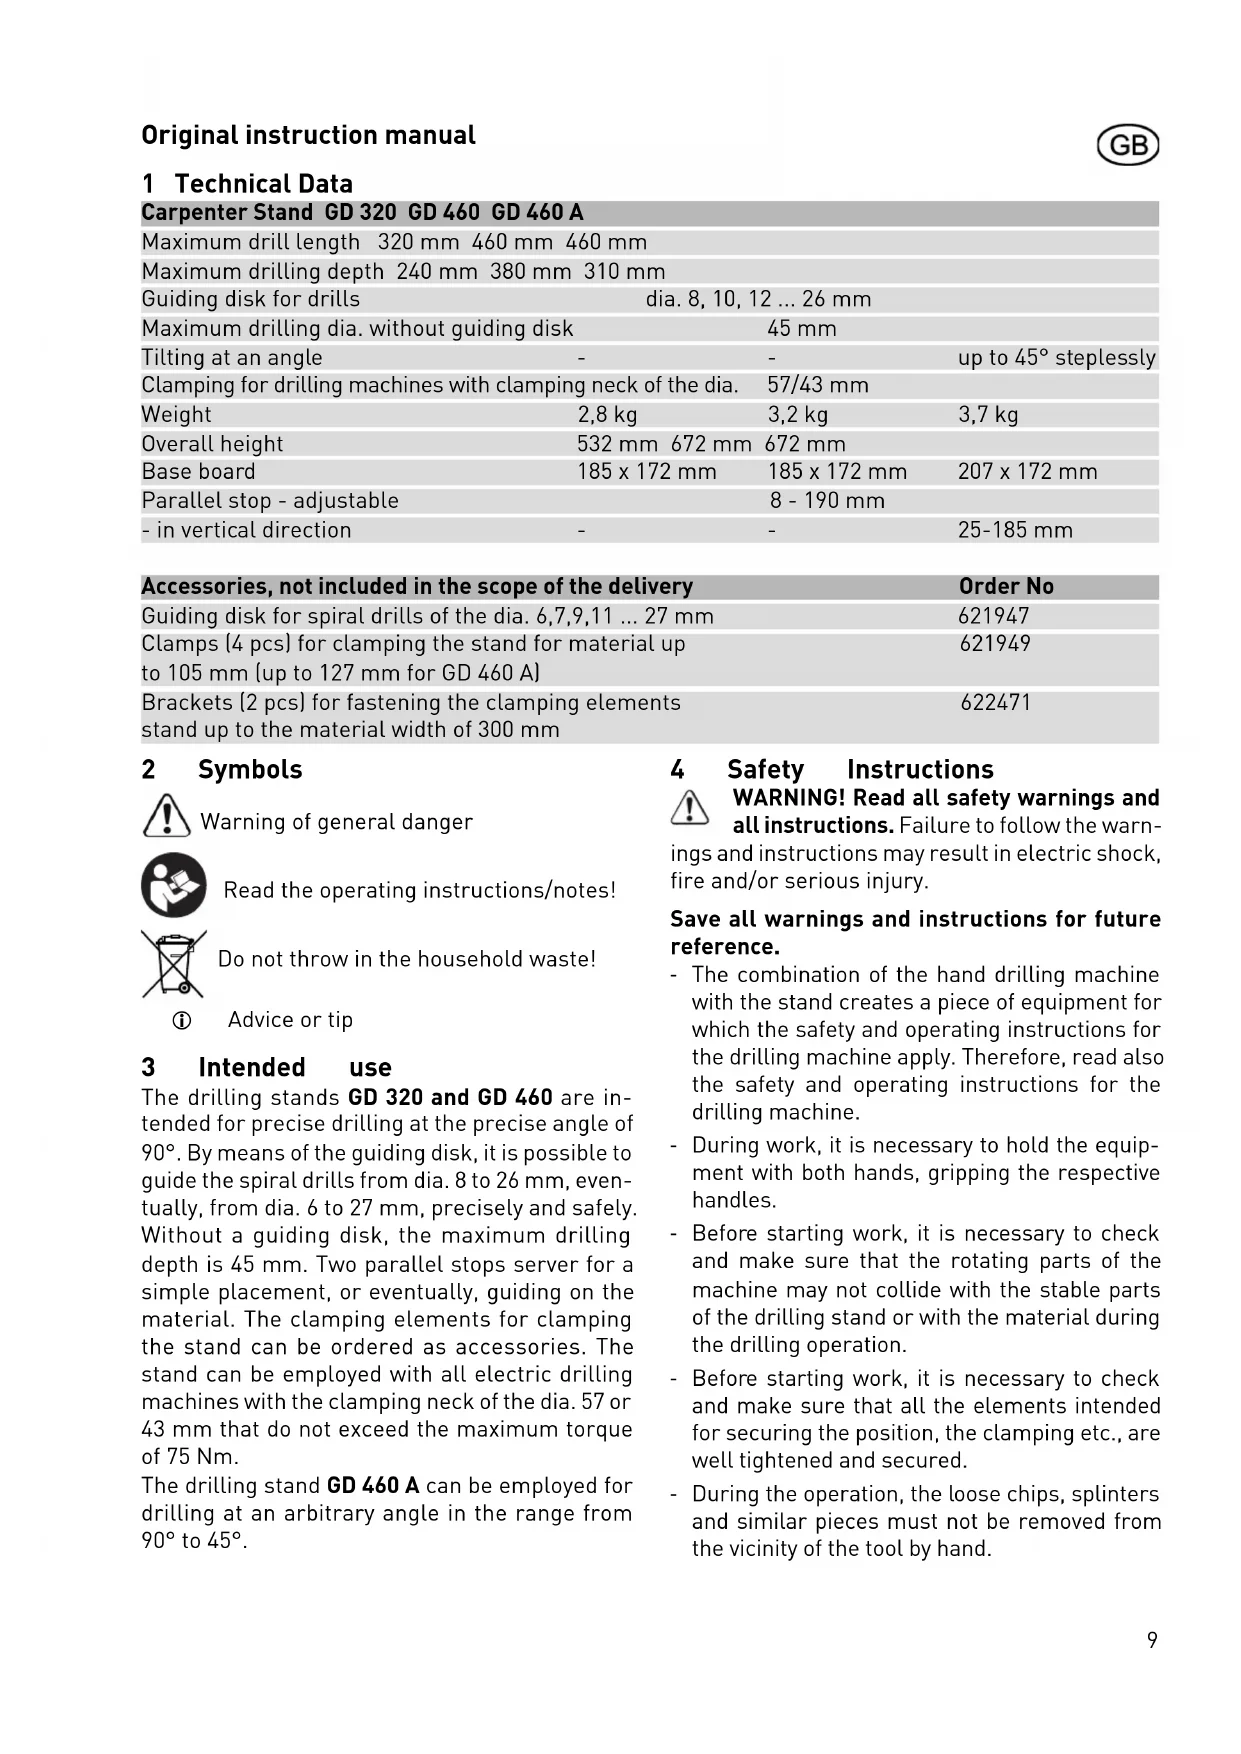
| Carpenter Stand GD 320 GD 460 GD 460 A | |||
| Maximum drill length 320 mm 460 mm 460 mm | |||
| Maximum drilling depth 240 mm 380 mm 310 mm | |||
| Guiding disk for drills | dia. 8, 10, 12 ... 26 mm | ||
| Maximum drilling dia. without guiding disk | 45 mm | ||
| Tilting at an angle | - | - | up to 45° stepplessly |
| Clamping for drilling machines with clamping neck of the dia. | 57/43 mm | ||
| Weight | 2,8 kg | 3,2 kg | 3,7 kg |
| Overall height | 532 mm 672 mm | 672 mm | |
| Base board | 185 x 172 mm | 185 x 172 mm | 207 x 172 mm |
| Parallel stop - adjustable | 8 - 190 mm | ||
| - in vertical direction | - | - | 25-185 mm |
| Accessories, not included in the scope of the delivery | Order No | ||
| Guiding disk for spiral drills of the dia. 6,7,9,11 ... 27 mm | 621947 | ||
| Clamps (4 pcs) for clamping the stand for material up to 105 mm (up to 127 mm for GD 460 A) | 621949 | ||
| Brackets (2 pcs) for fastening the clamping elements stand up to the material width of 300 mm | 622471 | ||
2 Symbols

Warning of general danger

Read the operating instructions/notes!

Do not throw in the household waste!
① Advice or tip
3 Intended use
The drilling stands GD 320 and GD 460 are intended for precise drilling at the precise angle of 90^ . By means of the guiding disk, it is possible to guide the spiral drills from dia. 8 to 26mm , eventually, from dia. 6 to 27mm , precisely and safely. Without a guiding disk, the maximum drilling depth is 45mm . Two parallel stops server for a simple placement, or eventually, guiding on the material. The clamping elements for clamping the stand can be ordered as accessories. The stand can be employed with all electric drilling machines with the clamping neck of the dia. 57 or 43mm that do not exceed the maximum torque of 75Nm .
The drilling stand GD 460 A can be employed for drilling at an arbitrary angle in the range from 90^ to 45^ .
4 Safety Instructions
WARNING! Read all safety warnings and all instructions. Failure to follow the warnings and instructions may result in electric shock, fire and/or serious injury.
Save all warnings and instructions for future reference.
- The combination of the hand drilling machine with the stand creates a piece of equipment for which the safety and operating instructions for the drilling machine apply. Therefore, read also the safety and operating instructions for the drilling machine.
- During work, it is necessary to hold the equipment with both hands, gripping the respective handles.
- Before starting work, it is necessary to check and make sure that the rotating parts of the machine may not collide with the stable parts of the drilling stand or with the material during the drilling operation.
- Before starting work, it is necessary to check and make sure that all the elements intended for securing the position, the clamping etc., are well tightened and secured.
-
During the operation, the loose chips, splinters and similar pieces must not be removed from the vicinity of the tool by hand.
-
With drilling machines with a torque of more than 55Nm , it is necessary to use always the extension piece for the additional handle.
- The material must always rest on a stable pad, and be secured against turning over and slipping.
- The tilting drilling stands (GD 460 A) must be always secured against shifting when drilling orifices at an angle. For this purpose, we recommend that you employ clamps (accessories).
- During work, stand always in a safe and stable position.
- During all the tasks that serve for the preparation, assembly, re-setting, adjustment, replacement of the drills or maintenance and care, it is always necessary to pull the plug of the drilling machine out of the mains.
5 Machine features
1 Base board
2 Parallel guide
3 Guiding disk for drills
4 Guide bars
5 Springs
6 Stop tube
7 Depth stops
8 Guiding sleeve
9 Adapter D 57/43 mm
10 Additional handle
11 Extension piece for the additional handle
12 Clamps
13 Brackets
14 Screw for adjusting the vertical position
15 Feet
16 Clamping nut
17 Scale
18 Indicator
19 Clamping screw of the indicator
20 Yoke
All the accessories shown and described here are not included in the scope of the delivery.
The specified illustrations appear at the beginning of the Operating Instructions.
6 Bringing the Stand into Operation
6.1 Adjustment of the guiding disk
Choose the corresponding orifice in the guiding disk in compliance with the required drill diameter, and insert it into the axis of the drill (1.1):
- turn the rotary button (3.1) to the left through 5 revolutions approximately,
lift the guide disk above the arresting pin,
turn it to the required position and lower it back
upon the base board.
Take care that the disk may engage with the locking pin.
Retighten the rotary button (3.1).
6.2 Clamping of the drill
- Clamp the spiral drill into the chuck of the drilling machine, and tighten the chuck.
It is allowed to employ only spiral drills of a length that does not exceed the indicated maximum drill length.
6.3 Clamping of the drilling machine
For the drilling machines with a clamping neck of the dia. of 43mm use a reducing ring.
- Situate the reducing ring in such a way that its notch may be directed to the clamping point [8.1].
Fit the drilling machine into the sleeve and tighten the clamping screw [8.1].
6.4 Adjustment of the drilling depth
The upper limit of the stop is set up by means of the stop ring (7.1) and tightened with the clamping screw.
- The position of the upper stop can be chosen in such a way that the drill may be directed by the guide ring, and the drill tip may be at a distance of 5 - 10mm from the surface of the base board. In this way, you avoid a risk of damage to the drill or the material. The bottom stop ring [7.2] serves for limiting the drilling depth.
Find out the required drilling depth by measuring or by a drilling test, and tighten the stop ring [7.2] under the sleeve.
The stop ring is of importance in particular if you are to drill several orifices of the same depth.
6.5 Additional handle
The additional handle (10) can be mounted in three positions according to choice (see the sketch). For the drills the torque of which exceeds 55Nm , the extension piece (11) is employed. Always use the additional handle with the extension piece on the front side of the sleeve (see the picture).
6.6 Drilling with a parallel guide
Both the parallel guides (2) contribute to the safety of work. At the same time, they increase the precision and save time if it is necessary to drill more orifices at the same distance from the edge of the material. You can choose to use either one parallel guide at one side, or both the parallel guides at both the sides. The parallel guide is adjusted either to comply with the mark on the material (visual control according to the marking
(1.1) on the base board or with the scale on the parallel guide.
The parallel guide is then tightened in the required position by means of the clamping screw [2.1].
① With the tilting version, the ruler can be adjusted in the vertical direction [2.2] as well.
6.7 Adjustment of the angle of inclination (GD 460 A)
The tilting drilling stands (GD 460 A) allow for oblique drilling at the angles ranging from 90^ to 45^ . In perpendicular drilling, the indicator (18) on the scale (17) reads zero.
Before the eventual adjustment of the angle of inclination, both the clamping nuts (16) are to be loosened.
Now it is possible to tilt the guide bars to the required angle.
This angle can be ascertained on the scale (17) with an accurate division.
The indicator (18) is set to the required value of the scale, and then both the clamping nuts (16) are tightened again.

CAUTION: With the tilted drilling stand, the base board must be secured against sliding along the workpiece, because of safety reasons. The employment of the clamping elements (accessory) is an ideal way of fastening it.
6.8 Correction of the stop position (GD 460 A)
With the tilting drilling stands, the perpendicular position has been adjusted in the manufacturing plant by means of the stop screw (14). If an additional adjustment of the set stop position is required, proceed in the following way:
- Loosen the securing nut (14.1) and the clamping nut (16).
Bring the foot (15) to rest upon the head of the screw (14). - Turning the stop screw in the required direction, you will change the angle to the required position.
- Tighten the securing nut (14.1) and the clamping nuts (16) again.
The indicator (18) can also be reset after having loosened the screw (19), and screwing it tightly again in the required position.
6.9 Clamping of the drilling stand
For the clamping of the stand upon the material, there serve the clamping elements (12). These can be fastened upon the base board (1).
Insert the clamping element into the orifice
(1.4) from below, screw the clamping nut (12.1) upon it from above, and tighten it.
By means of the screw (12.2), tighten it in the required position.
The clamping elements (not included in the scope of the delivery but accessories) are used always in pairs, from both the sides. We recommend employing four clamping elements.
For materials up to the maximum dimension of 300mm , the clamping elements can be fastened on the bracket (13).
Fit the screws [13.1] from below into the orifices in the base [1.4].
Set the brackets upon the screws [13.1] from above, and tighten them with nuts [13.2].
The brackets (which are not included in the scope of the delivery, accessories) are offered in pairs [2 pcs]. It is necessary to pay attention to the stand to be clamped on the beam between two clamps [12], situated on one bracket (the distribution of forces in the longitudinal sense of the bracket), not by means of two brackets (see the figure). The brackets have been designed in such a way that it might be possible to clamp them upon both the basic types of the stands (the vertical ones and the tilting ones) both in the longitudinal and the vertical directions.
7 Drilling
- Before you proceed to drilling, make sure that both the spiral drill and the drilling machine are well clamped.
- Check the stops and the guide disk, to see, whether they are set tightly, and if necessary, tighten the clamping elements.
- Do not work with blunt of damaged drills.
- During the drilling operation, hold the equipment always with both hands: one hand on the additional handle of the drilling stand, and the other hand on the handle and the switch of the drilling machine.
- The marking on the base board (1.2 and 1.3) serves for drilling with visual control according to the mark.
7.1 Guiding disk
gFor the spiral drills with even diameters, there is employed a guide disk which is included in the scope of the delivery. For the spiral drills with odd diameters, there is employed a guide disk with odd diameters, supplied as an accessory.
For the replacement of the guide disk, unscrew the rotary button (3.1).
Next, it is possible to remove the installed guide
disk and to install another one.
7.2 Drilling jobs without a guiding disk
For working with drills of a larger diameter than 27mm (up to 45mm as the maximum), the guide disk can be dismounted in compliance with the above procedure. According to necessity, it is possible to dismount also the springs [5], the stop tube [6] and the depth stops [7.1 and 7.2]. In such a case, proceed with utmost care. In any case, we recommend employing the bottom stop ring [7.2] for protection against undesirable contact of the rotating parts with the material.
In particular, take care that the rotating parts of the drilling machine or the employed drills may not come into contact with the parts of the drilling stand.
8 Maintenance and care

Customer service and repair only through manufacturer or service workshops: Please find the nearest address at: w.festool.com/Service

Use only original Festool spare parts! Order No. at: www.festool.com/Service
-
Maintain the clamping elements and the clamping points free of dust, dirt and fi lings.
-
Using a rag, remove the dirt from the guide bars, and applying lubricating grease or machine oil upon them, make sure they can slide easily.
-
Maintain the seating surfaces of the base board clean; in this way, you will guarantee the accuracy and precision of the angles of the orifices.
Respect the following rule:
- The chosen springs of the drilling stand are at a larger distance from the guide bars intentionally. This is no shortcoming; on the contrary, in this way, a better functioning of the springs is achieved. These springs allow for a lower resistance during the drilling
9 Environment
Do not throw the power tool in your household waste! Dispose of the machine, accessories and packaging at an environmentally-responsible recycling centre! Observe the valid national regulations.
Information on REACH:
www.festool.com/reach
Varning for allman risk!

KpoHTeHbI (2 wt.) Jn KpePHeHn yacTe Kpenexa 622471
Ha cTaHHe do shnpHbI MaTePnaja 300 MM
2 CnMBoJIbI

PpeynpekdeHne 06 o6eien onacnoctn

CobioTaTe PykoBoDCTBO no 3KcPnyaTa- uHn/uHcTpyKuH!


PonarobaynHctpyKzua
3 PnpMeHHeHne no Ha3HaueHHIO
ПлOTнцке сToиКG 320, GD 460прднзанчыДлгпсионногocBернгьпдуLO90°.Сnomоью ВedyшeroДИСКа BO3MOxHNOпрuzn3noHNOибezoNacHo npIMeHЯТсиральныеCBepla c8do26MM,IINJc6do27MM.Be3BedyшeroДИСКa BO3MOxHNo CBepnITb MaKc,do45MM.DBa napalneIbIbIX ynpoa npedHa3HaueHbIДлгпpoctOrO paCNoLoXeHry,IINJxpepeMe-шени МATEриANA.Чacterи КрЕнждяЗakpe-Пеленя CTahINbI Heo6xOДМо 3aKa3aTbВВIDepinHaJIeXHOCTe.CTAHHy MoXHO npIMeHЯТCo BCeMn 3JIeKTPnueCKmN CBePnJIbHbIMMaUNHAMC 3axmHOnIWeiKoДnAmETpOM 57IIN43MM.MakcImaJIbHbIK KpyTAnM MOMENT KOTopbIX
He npebbiaae7 75 Nm.
CbepeHbIe cToKn GD 460 A MoXHo npMeHrTb DJIa CbepeHn IoJ IIO6bIM yRlOM B Dnana3OHe C 90^ no 45^
4 Yka3aHnI NO TexHnke 6e30nacHo-CTN

BHIMAHHE!PpoTuTeBce yka3aHnno
TexHnke 6e3oNaChOCTN u peKomeHdaun. OUn6- Kn npu co6IIOJeHN npuBeDeHHbIX yka3aHn u peKomeHdaun MOyT npuBecTN K nopaxeHIO eJIeKtpuYeCKM TOKOM, noXapY, n/nn Bbl3BaTb TjXeJIbIe TpaBMbl. CoXpaHnTe BCE yka3aHn no TexHnke 6e3oNaChOCTN u PykoBoDcTBa No 3Kc- Npyataun B kaeeTbe cnpaBoOHoro MaTePnaJa.
- Pnp coeHHeHH pyHOn CBePnIbHO mAMnHbI CO CBePnIbHO CToKoN o6pa3yeTcayctpoNCTBO,ДЯ KOTOPOro TaKxpe DeNCTByOT npaBnla 6e3OpacHocTN INHCTpyKuIN CBePnIbHO CToKn. IpoHTaTe TAKxpe npaBnla 6e3OpacHocTN INHCTpyKuIN NO 3KcnLyatauIN CBePnIbHO MaunHbI.
-Bo Bpempa60bI Heo6xOIMo ydepKnBaTb yCTpoiCTBO DByM pyKaMn B npEHa3HaueHHbIX IJIa 3TOrO MecTx /pykoTkax/. Do hauJa pa60tbI Heo6xOIMo pOBepntb, Ny6eINtbcraB TOM, UTo B npoUceCse CBepeHnHe npOn3oJTe KaCaHne BpaAuaOuXcyaCTeN cTaHka C HenoD-BHXHbIMn DeTajMaN CBepNJbHOJ CToKN nn MaTePnaJOM.
-Доначарабови Heo6xOДmo npOBepNTb,И y6eINTBcB B TOM,уTO BCE 3JIeMeHTbI,КOTOpbI e npEHa3HauCheHbI ДЯ 3aKpePNeHnNo3nCn, KpePHeHn ... KaK cIeDyET nOДТанHytBI nФИКСИpoBaHbI.
-06pa3yiouocB npocece pa6oTbI ctpyxkky, nnoxKne yactn, 3aPpeuaetc ydaJrpykoB HenocepDCTBeHHoN 6nn3OCTn ot yctpoiCTBa.
- Y cBepnIbHbIX Maun H C KpyTAAUM MOMHTOM Bblwe yem 55 Nm Heo6xOaIMo IJIy DoOpJHnTeIbHoI pyKoATrKn PnpMeHrTa HacaKy.
- Poi Maepnai Heo6xOIMO yCTaHOBntb HenoBnKHyIO npoklaIky 3aΦnKcnpoBaTb npotNB npokpyuBaHnI nIcMeIeHnI.
- HaKIOHbIe CBepINbHbIe CToiKn (GD 460 A) Heo6XoIMo BO BpeMra CBepHeNra OTBepCTn IoD yrIOM, 3aΦNKcnpoBaTb O T CMeUeHn.ДЯ DaHHoI cJIpeN peKOMeHdyetc npImeHryactn KpeNexKa (npHaIeXHoCTn).
-BoBpempa6oTbIco6nOdaaTe 6e30nacHyuNyctOuHByIO n03nHIO.
-BoBpempa6oTbI DnI NOIroTOBKn C6OpKn, nepeo6opuyOBAHn, CMeHbI CBePna IIN O6CnyKuBaHn, Heo6xOdmo OTcoeDInHTb yCTpoiCTBOOTNtOCHNkA 3JeKtpnuYeCKo3Heprnn.
5 3JIeMeHtbl HnCtpymeHTa
1 OchOBaHne
2 NapaJIeJIbHaI HnPaBaJIouJiaJ
3 Beynu nnck nna cBepn
4 HanpaBlaJIOuIe WtHaTn
5 npyKnHbI
6 YnpnHa Tpy6a
7 Iny6nHHbIe ynpbl
8 HappaBnaIouaMyΦTa
9 PeNyKuIa I 57/43 MM
10 DoonHnTeNbHa pyKoYKa
11 HacaKa IOnoJIHnTeJbHoI pyKoAaTKn
12 Yactn Kpenexka
13 KpoHHTeHbI
14 BnHT IJIy yCTaHOBKn IeppeHdNkyIpypHo-CTn
15 PtTkn
16 Kpenekna raKa
17 Ⅲkaana
18 yKa3aTeIb
19 3aTjXHNoBnHTyKa3aTeJr
20 Ctpemr
He BCE n3o6paXeHHbIe nnOnncAHHbIe npHaJLeKHOCTn BXOaT B KOMNJIeKT NoCTaBKn.
HnIIOCTpaun HaxoJrTcB Haayane PykoBoDCTBa no 3Kcnnyatau.
6 BBeHeHne B 3KcPnyaTaunu npnMeHenne
6.1 YctaHOBKa BeDyUeRo DnCKa
B cooTBetCTBnC Tpe6yeMbIM DnaMeTpom CBepNa Bbl6paTb OTBepCTne B BeDyUeM DnCKe N yctaHOBNTb B erO ocB CBePna [1.1]:
noBOpOTHyIO KhoNky (3.1) noBepHyTb Ha 5 o6o- pOtOB BJIeBO, NOJHrTb BeDyUuN IINCK Bblwe appetupoBOUHO nAIBca, noBepHyTB Tpe- 6yEmyIO n03nIuN IONyCTuTb o6paTHo Ha ocHOBHyIO PINTy.
Cneintb 3a TeM, yTo6bl DnCK 3aCKOuHn Ha appeTnpoBOuHbI napeU. NOBOPOTHyKHOkKy (3.1) ONrTB NOITAHyTb.
6.2 3akpenIeHne CBepna
3akpeNTb cnpaIbHoe CBepIO B naTPOH CBepIINbHO MaUNHBI N naTPOH NOITAHyTb.
① Pa3peweno npmehaTb cnnpalbHbIe CbePna nnHO, KOtopa He npeBbIwaet yka3aHHyOMaKcImMaJIbHyO dInHy CbePna.
6.3 3aKpenJIeHne CBepnJIbHoMaunHbI
Y CBepnHbIX MaunH C 3axmHoJ Wei-KoI dnaMeTpom 43 MM npImeHrtb nepeXoHoe KOJIbUO.
NepexoHoe KOJbUO yCTaHOBHTb TaK, YTo6bl npoceyka yKa3bIBaIa B HAnpaBJeHN MeCTa 3akpenJIeHn (8.1).
YcTaHOBtB CBePnIbHyMoMaHHy B NaTpOHNoTMyTb KpeJexHbI BNHT (8.T).
6.4 YctaHOBka rny6nHbI cBepHeHa
BepxHn npedeI ynpa ycTaHOBntb c nOmoIbO ynpHoro KoIbca (7.1) nIOdTMyTb KpeIeXHbIM BnHTOM.
IOnuHOBepxHrOynpaMOKHO BbI6paTbTaK, UTo6bICBepNo 6blIO BeJeHO HAnpaBIAUm DNCKOM, INBepuHa CBePna HaxoJnAcb Ha paacctOAHn5-10MMnDIOBepxHocTBIOOCHOBaHHa.
Takm 6pa30m npedotBpaaem nobpekdeHne Cbepna MATEPnana. HxKHee ynpHoe KoIbco (7.2) npedHa3HaueHo dIra orpaHueHnra Iy6HbI CBepeHnra.
Tpe6yemyo rnybinycBepnHn yctaHOBTb N3-MepeHnEM nIIN NCbITaTeJIbHbIM CBePJIeHnEM IpoTAYbY npOpHoe KOBuO (7.2) noI naTpoHom.
Ynophoe Kobluo 3oΦeKTHBHO, npexJe Bcero, npn CBepJIeHnn 60JbUoro KOJNueCTBa OTBepCTn OAnHaKOBn rny6uHbl.
6.5 DonoHnTeJbHa pyKa
IOnoHnTeBHyO pyky [10] B COOTBeTCTBUN C Tpe6oBaHnEM BO3MOxHO yCTaHOBtB B Tpex No- 3uX (cm. 3CKN3). Y CBepINbHbIX MaunH, MaK
CIMaIbHbI KpyTAAUH MOpENT KOToPbIX BblIe YcEM 55 Nm, npImeHntb HacaIky (11). PpImeHnTe doNoJIHnTeIbHyIO pyuKy c HacaIko BceIda Ha φpoHTaIbHOI CTopoHE (cm. n3o6paXeHne) naTPOHa.
6.6 CbepeHne c npaJIeIbHOH HnpaBnaIoueH
06e napalneIbHbIe HnpaBIAOJe (2) NOBbIa-OT 6e3oNacHocTb Tpyda. OndHOBpeMeHHO NOBbIwaeTcTouHOCtB, N3KOHOMITbcr BpeM B Clyuae,ecn Heo6xOIMo CBepJIITb HeCKOJBKO OTBepCTnHaxOJxNXcra Ha OINHaKOBom pacctOAHnOT rpaHm MaTePnaJa. B COOTBeTCTBnC Tpe6oBaHNem BO3MOXHO NCIOb3OBAbI IIN ONDy napalJIbHyIO HnpaBIAUOyIO IIN B COOTBeTCTBnCOTMeTKoH a MaTePnaJe (Bn3yaJIbHi KOnTpOJIb B COOTBeTCTBnC O6O3NaueHnEM (1.1) Ha OChobAHn) IIN B COOTBeTCTBnC O SkaIOn Ha napalJIbHo HnpaBIAIOSeI.
PapaJIeJIbHyIO HAnpaBIAIooIyIO NOITAHyTB Tpe6yeMoI PO3uCn C NOMOUsIO KpeNExHOro BnHTa (2.1).
① Y HAKLOHHO NOJINHEHNA BO3MOXHO yCTaHOBNTb JINHeN Ky N B INePNeHNKUJpHOM HaPaBJIeHn (2.2).
6.7 YctaHOBka yrna HAKIOHa (GD 460 A)
HaKIOHbIe CBePnIbHbIe cToiKn (GD 460 A) no3BOJHOr HaKIOHHe CBePJIeHne NOyUgIOM B DnaNa3OHe c 90^ do 45^ . PnBepTnKaJIbHOM CBePJIeHNu yKa3aTeIb (18) Ha uKane (17) noka3bIbAet Ha Hylb.
Дя Heo6xOdHmOy yCTaHOBKn yrna HaKNoHa ocna6ntb o6e KpeNexKhble raikn (16) Tepepb BO3MOxHObYCTaHOBNTb ynpabJIOUne wTaHn Ha Tpe6yEmbI yroI.
Данны yroJ yka3aH ha uKaJIe (17) cToUHbIM pa3deJeHnE M Ha CTepeHn.
Yka3aTeIb (18) yCTaHOBnTb Ha Tpe6yEmyIO BeJInuHy Ha uKaJIe n NOTOM ONrTb oBe KpeNexHbIe raIKn (1 6) NOITaHyTb.

OCTOPOXKHO:BoBpeMaHaKnloHa CBepeIINbHOI cTahHbI Heo6xOIMo, B COOTBETCTBnC npaBnJAMN 6e3OnacHoCTn,OCHOBaHHe Ha 06pa6aTBiBaemoi DetaIIIN3aΦNKcnpoBaTb OT CMeUeHn. IDeaIb-HhI cNoCo6 3aKepeJIeHn -PpImeHneHuacte KpeEka (pnHaadJeKHOctn).
6.8 Koppekun noJoxeHn ynpa (GD 460 A)
NepneHnkyIpaHna NOBepxHocTb HAKNoHHbIX CBepeINbHbIX cToeK yCTaHOBJeHa Ha 3aBOe-N3- roTOBHTe BnHTOM yNopa (14).Ecn Heo6xoIMo DOnOJIHNTeJbHO KoppeKTnpOBaTB yCTaHOBJeHHoe IonoJXHe, To Heo6xoIMo yKa3aHHoe CDeJaTB cJeDyUoIcM cnOCo6om:
0cna6ntb cToOpHyo raKy (14.1) n 3aXmHyo raKy (16).
PtKy (15) yctaHOBNTb do ynpa rOIOBKn BnHTa (14).
NOBOPOTOM ynpHOro BnHTa B Tpe6yeMOM Ha- npabLeHN n3MeHnTb yroI B Tpe6yeMoe no- loxKeHne CToOpHyTO raKy (14.1) n 3axmHbIe raKn (16) noTAYtB.
Yka3aTeIb (18) Bo3MoXHo TaKxke KoppeKTnpoBaTb nocIe ocna6JeHnBnHTa (19) n B Tpe6yeMOM noLoXKeHn Heo6xoJnMo erO 3aΦnKcnPobAtb.
6.9 3aKpenJIeHne CBepnIbHoN CTaHHbI
ДяЗкpenнястаньHa MaTePnJaI npedHa3HaueHbI KpeNexKhble YaCTn [12].Yka3aHHbIe B03MOxH0 3akpenTb Ha OCHOBaHne (1).
KpenexHyu yactb CHN3y yCTaHOBnTb B OTBepctne (1.4), CBepxHaBnHTnTb 3axmHyo raKy (12.1) n e noTarytB.
C nOmoUbIO BnHTa [12.2]B Tpe6yeMOM noIooXeHN.
3aXMMHbIe 3JeMeHTbI (He BXoJrT B COCTaB NOCTaB KI, INMOxHO 3aKa3aTb B BVde npHaJNeKHoCTe) npImeHryOTcBceTaB Nape C o6Enx CTOpOH. PekomeHnyETcR npImeHryTb YeTbipe 3aXMMhBX 3JeMeHTa. JnMaTePnaNoB Do MaKcMmaNbHorO pa3mepa 300 MM KpeNexHbIe 3JeMeHTbI yCTaHO-BNTb Ha KpoHwTeYHe (13).
BnHTbI [13.1] yCTaHOBNTb CHN3y B OCHOBaHne [1.4].
KoHcOJIyCtAHOBHTb CBepxHa BnHTbl (13.1) n noDTaHyr raikamn (13.2).
KoHcOJI (He BXoJrT B NoCTaBky, INx MoXHO 3aKa-3aTb B BVide npHaJnEHXocTei) npeINaIaOTcB Inape (2 wT). Heo6xOIMo CneIITb 3a TeM, YTO6bl 3akpeJIeHne cTaHHbI Ha 6aIKy 6blIO ocUeCT-BleHo MeKdy DBym npxBaTaMn (12) pacnoJIoXeHHbIMn Ha ODoHoi KOHcOI (pacpeJeHne CNB II pOdoJIbHOM HApPabJIeHIn KOHcOI), IN HN B Koem cIyuae MeKdy DBym KOnCJIaMn (cm. n30-6paXeHne). KoHcOI KOHcTpynpOBaHbI TaK, YTO INx Bo3MOxHO 3aKpeINrB Ha 06a OCHOBhIX TUNa CTaHH (nppeHdNKyIrpHbI N HaKlONHeMbI) B IIpoJoBHom IN nppeHdNKyIrpHOM HApPabJIeHIn.
7 CBepeHne
-До haayana CBepnEny y6eInTeCb, yTO cnpaIbHoe CBepno n CBepnIbHa MaunHa HeNoDbNxHo 3akpePnHebl.
- PpOBePbTe ynpbl N BeDyuN dNcK, N ecn He06xOaMo, To pOdTJHnTe KpeJeXHbI eJIeMeH-Tbl.
- He pa6oTaTb c TyNbIMn IIN DeΦeKTHbIMn CBepJIaMn.
-BoBpeMa CBepHeHn Heo6xOJMo yIepXnBaTb yCTpoiCTBO 06eIMn pyKaMn: OJHOpyKo3a DIOJIINHTeJbHyTO pyuKy CBepJNlBHOn CTAHnHbI, dpyra PyKa Ha pyKoTKe N BblKlIoUaTeJe CBepJNlBHOn MaunHbI.
-Дя CBepJIeHnC Bn3yaJIbHbIM KOHTpoJem B COOTBeTCTBnC OTMeTKoI ppeHa3HaueHo 060-3HaueHne Ha OCHOBaHn [1.2 n 1.3].
7.1 Beyuyni Dnck
Дя сиральнбix CBepn C ueTHbIMN dnaMeTpamn npimehareTcBedyuynI DnCK, KOTOpBn BXoNT B coCTaB noCTaBKn.Дя сиральнбix CBepn C he-yeTHbIMN dnaMetpamn npimehareTcBedyuyn I nCK C HeueeTHbIMN dnaMetpamn, KOTOpBn NOCTaBnreTcB BVnde npHaNdlexKHOcTei.
Pn cme He BeDyUeTo DnCKa OTBnHTnTb NOBOpOTHyIO KhoNky (3.1).
Iocne 3TOrO MoXHO yCTaHOBJIeHHbI BeDyuN INCK CHaTb N yCTaHOBNTb dpyroB BeDyuN INCK.
7.2 CbeprnIbHbIe pa6oTbI 6e3 BeyuJero DnCKa
Дя pa6oTbI co CBepnAm DnAmetpom 60nbWe yem 27 MM Do MaKc.45 MM MoXHo BeDyuN INCK DeMOHTnpOBaTB B COOTBeTCTBUN C Bblwe Yka3aHHO INCTpykUnei.B COOTBeTCTBUN C Tpe6oBaHNEM MOxHO TaKKe DeMOHTnpOBaTB npJxNbI (5), ynpHyTOpy6y (6) n rIy6bHHbIe ynpObl (7.1 n 7.2). B daHHom cIyuae BecTu Ce68 OueHb OCTOpoxHo. PekomeHdyem Bcerda npimeHtB HxJHee ynpHoe KOnbUo (7.2) B BVNe IpeOxpanTeJI, UTo6bI He CoPnKOCHTbcr C DBxJyUe qactbIO mATEpHaIOM. Heo6xOdmo CMOTpeTb 3a TeM, UTo6bIBDNKUneCraCTn CBepnNbHO MauINHbI NIn npimeHeHHbIe CBepla He KacaIncb qacteY cbepnnbHO CTAHHbI.
8 Texnueckoe obcnykn BaHne n TeKyuyn peMOHT

CepBnchoe 6cbnyKbAHne n peMoHT TOnbko Upe3 0npMy- N3rTOBNTeJIa NN B HaIINx CepBnCHbIX MaCTepCKNX: aApcec 6JnxKaIweMactepckOcM. Ha www.festool.com/Service

IcnoJb3yInTe TOnbKO opuRnHaJIbHbIe 3a- nacHbIe qactn Festool! Ng dJa 3aKa3a Ha: www.festool.com/Service
- ΘηεΜΕΝΤΙ 3αχΟΜΑ Μ MeCTa 3αχΟΜΑ ΟΥΝΙΑΤΒ Θ ΠβΙΝι, ΓρλΗ Ι ΕΟΝΙΚ.
- Ynctntb TpIkoHnnpaBnaIOuNe 8TaHn OTo rpa3n.
-06ecneuNb HaneceHnem Cma3oHoro Xnpa nnPiNtSeBOrO Macna Ha HApBaJIouIe WtAHrXopoWne CBOICTBa CKoJIbXeHn.
-Поверхноctи npNKOCHOBEHnO OCHOBaHnCo6JIIOdaTb B YnCTOTe, 3TNM OBeCneuBaETcra ToU-HoCTb yIIOB OTBepCTn.
Co6IIOdaTb cIeMyIoUoee:
- Bb6paHbIe npKnHbI CBepnIbHoM MaunHbI ImeOT 60JIb7yU DnCTaHcNIO OT HApPabJIaOuix XTaHr. Yka3aHHoe He RaBJIeTcRA KeueCTBeHHbIM HeIOCTaTKOM, HaobOpOT, 3TNM DoCTnraeM LyuWei XapaKTepNCtIKN npKuH. Yka3aHHbIe npKnHbI oEscneuBaHT Meh7yU cOnpoTnBJIeMoCTb BO BpeM CBepeHn.
9 OnacHocTb IJIy OkpykaIooJe cpe- dbl
He BbI6paCbIBaIe 3JIeKTpOHCTpyMeHTbI BMeCTe C 6bITOBbIMN OTXODAMn! NpepaIte NHCTpyMeHr, OCHACTKy uYnaKOBky IJRA 3KOLOrHuHOy YTuIN3a- cun. Co6JIouaIte DeIcTByUOuNe HaCuNoHaJIbHbIe INHCTpyKcun.
ИнфорmaцьnoДиpeктUBE REACH:
www.festool.com/reach
1 Technické úda
Vrtacistojan GD 320 GD460 GD460A