
POWX075740DB - Saw PowerPlus - Free user manual and instructions
Find the device manual for free POWX075740DB PowerPlus in PDF.
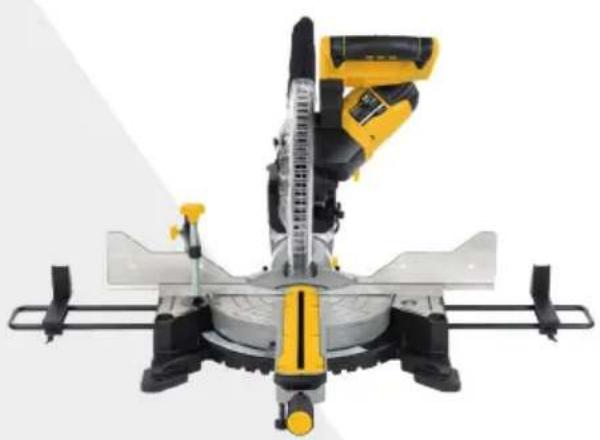
| Product Type | Telescopic Dual Bevel Miter Saw |
| Brand | PowerPlus |
| Model | POWX075740DB |
| Rated Power | 2200 W (S6 25%) |
| Supply Voltage | 220-240 V ~ 50 Hz |
| No-Load Speed | 5000 min⁻¹ |
| Blade Dimensions | 254 mm diameter, 30 mm bore, 3.0 mm thickness |
| Cutting Capacity (90°/90°) | 90 x 310 mm (height x width) |
| Horizontal Miter Angle | -45° to 45° |
| Dual Bevel Angle | 45° left and right (vertical) |
| Sliding System | Yes, with sliding bar and lock |
| Guide Laser | Yes, class 2, on/off switch |
| Dust Extraction | Dust bag included, adaptable to vacuum |
| Clamping Device | Integrated locking lever (clamp) |
| Side Guides | Two side guides included, mounting on rods |
| Protection Class | II (double insulation) |
| Weight (estimate) | Approximately 18 kg |
| Warranty | 36 months (excluding normal wear and accessories) |
| Intended Use | Stationary, for wood, particle board and fiberboard – domestic use only |
| Maintenance | Regular cleaning with damp cloth, replace blade with original part |
| Spare Parts Available | Saw blades, dust bag, hex key, side guides |
Frequently Asked Questions - POWX075740DB PowerPlus
User questions about POWX075740DB PowerPlus
0 question about this device. Answer the ones you know or ask your own.
Ask a new question about this device
Download the instructions for your Saw in PDF format for free! Find your manual POWX075740DB - PowerPlus and take your electronic device back in hand. On this page are published all the documents necessary for the use of your device. POWX075740DB by PowerPlus.
USER MANUAL POWX075740DB PowerPlus
15 PROBLEEMOPLOSSING
02/11/2021, Lier - Belgium
1 APPLICATION 3
2 DESCRIPTION (FIG A & B) 3
3 PACKAGE CONTENT LIST 3
4 SYMBOLS 4
5 GENERAL POWER TOOL SAFETY WARNINGS 4
5.1 Working area 4
5.2 Electrical safety 4
5.3 Personal safety 4
5.4 Power tools use and care 5
5.5 Service 5
6 ADDITIONAL SAFETY INSTRUCTIONS 5
7 ADDITIONAL SAFETY INSTRUCTIONS FOR LASERS. 7
8 ASSEMBLY 7
8.1 Assembling the side support bars 7
8.2 Assembling the lever 7
8.3 Assembling the clamp 7
9 OPERATING INSTRUCTIONS 7
9.1 Transporting the litre saw 7
9.2 Dust and chip extraction 8
9.3 Clamping the work piece 8
9.4 Horizontal mitre angle 8
9.5 Adjusting of the cutting angle (Fig 1) 8
9.6 Dual bevel (Fig. 2) 8
9.7 Slide lock adjustment 8
9.8 Depth stop (Fig. 3) 8
9.9 Switching ON/OFF 9
9.10 Laser 9
9.11 Dust bag 9
9.12 Sawing 9
9.13 Sawing special work pieces 9
9.14 Replacing the saw blade (Fig. 4) 10
10 CLEANING AND MAINTENANCE 10
10.1 Cleaning 10
10.2 Connecting cable 10
11 TECHNICAL DATA 10
12 CUTTING CAPACITY 11
13 NOISE 11
14 STORAGE 11
15 TROUBLESHOOTING 11
16 WARRANTY 12
17 ENVIRONMENT 12
18 DECLARATION OF CONFORMITY 13
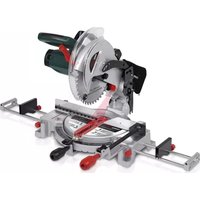
DOUBLE BEVEL SLIDING MITRE SAW 2200W-254MM POWX075740DB
1 APPLICATION
This power tool is intended as a stationary machine for making straight and cross cuts in wood. You can saw hard and soft wood as well as chip and fibre boards.
Only adults may use this tool.
Not suitable for professional use/

WARNING! For your own safety, read this manual and the general safety instructions carefully before using the appliance. Your power tool should only be given to other users together with these instructions.
2 DESCRIPTION (FIG A & B)
- Protective hood
- Saw blade
- Side support bar
- Fence
- Saw table
- Lever
- Table lock Lever
- Table insert
- Scale for metre angle (horizontal)
- Mounting hole
- Clamp
- Slide bar
- Operating handle
- ON/OFF switch
-
Release lever
-
Carrying handle
- Retaining pin
- Dust collection bag
- Angle scale
- Angle lock lever
- Slide bar lock
- Extension hoop screws
- Laser
- Spindle lock
- Pointer
- Lock pin for angle adjustment
- Lock screw for clamping device
- Lock screws for workpiece support
- Laser switch
3 PACKAGE CONTENT LIST
- Remove all packaging materials.
- Remove remaining packaging and packing inserts (if included).
- Check that the package contents are complete.
- Check the appliance, the power cord, the power plug and all accessories for transportation damage.
- Keep the packaging materials as far as possible until the end of the warranty period. Then take it to your local waste disposal system.

WARNING! Packaging materials are not toys! Children must not play with plastic bags! There is a danger of suffocation!
In this packaging, you can find:
1 litre saw
1pc 6mm hex spanner,
1 clamp
1 manual
2 side guides
1 dust bag

If any parts are missing or damaged, please contact your dealer.
4 SYMBOLS
The following symbols are used in this manual and/or on the machine:
| ! | Denotes risk of personal injury or damage to the tool. | Wear eye protection. | |
| Read manual before use. | CE | In accordance with essential requirements of the European directive(s) | |
| Wear gloves. | Class II - The machine is double insulated; Earthing wire is therefore not necessary. |
5 GENERAL POWER TOOL SAFETY WARNINGS

Read all safety warnings and instructions. Failure to heed warnings and follow instructions may result in electric shock, fire and/or serious injury. Keep safety warnings and instructions for future reference. The term "power tool" in the safety warnings refers to your mains- operated (corded) power tool or battery- operated (cordless) power tool.
5.1 Working area
- Keep working area clean and well lit. Untidy and dark areas can lead to accidents.
- Do not operate power tools in potentially explosive surroundings, for example, in the presence of inflammable liquids, gases or dust. Power tools create sparks which may ignite the dust or fumes.
- Keep children and bystanders at a distance when operating a power tool. Distractions can cause you to lose control of it.
5.2 Electrical safety
Always check that the power supply corresponds to the voltage on the rating plate.
- Power tool plugs must match the outlet. Never modify the plug in any way. Do not use adapter plugs with earthed power tools. Unmodified plugs and matching outlets will reduce the risk of an electric shock.
- Do not expose power tools to rain or wet conditions. If water gets inside a power tool, it will increase the risk of an electric shock.
- Do not damage the cord. Never use the cord for carrying, pulling or unplugging the power tool. Keep the cord away from heat, oil, sharp edges or moving parts. Damaged or entangled cords increase the risk of an electric shock.
- When operating a power tool outdoors, use an extension cable suitable for outdoor use. Using a cord suitable for outdoor use reduces the risk of an electric shock.
- If operating a power tool in a damp location is unavoidable, use a power supply protected by a residual current device (RCD). Using an RCD reduces the risk of an electric shock.
5.3 Personal safety
- Stay alert, watch what you are doing and use common sense when operating a power tool. Do not use a power tool when you are tired or under the influence of drugs, alcohol or medication. A moment of inattention when operating a power tool may result in serious personal injury.
POWX075740DB EN
-
Use safety equipment. Always wear eye protection. Using safety equipment such as a dust mask, non-skid safety shoes, a hard hat, or hearing protection whenever it is needed will reduce the risk of personal injury.
-
Avoid accidental starts. Ensure the switch is in the off position before inserting the plug. Carrying power tools with your finger on the switch or plugging in power tools when the switch is in the on position makes accidents more likely.
- Remove any adjusting keys or spanners before turning on the power tool. A spanner or key left attached to a rotating part of the power tool may result in personal injury.
- Do not reach out too far. Keep your feet firmly on the ground at all times. This will enable you retain control over the power tool in unexpected situations.
- Dress properly. Do not wear loose clothing or jewellery. Keep your hair, clothing and gloves away from the power tool. Loose clothes, jewellery or long hair can become entangled in the moving parts.
If there are devices for connecting dust extraction and collection facilities, please ensure that they are attached and used correctly. Using such devices can reduce dust-related hazards.
5.4 Power tools use and care
- Do not expect the power tool to do more than it can. Use the correct power tool for what you want to do. A power tool will achieve better results and be safer if used in the context for which it was designed.
- Do not use the power tool if the switch cannot turn it on and off. A power tool with a broken switch is dangerous and must be repaired.
- Disconnect the plug from the power source before making adjustments, changing accessories, or storing power tools. Such preventive safety measures reduce the risk of starting the power tool accidentally.
- Store power tools, when not in use, out of the reach of children and do not allow people who are not familiar with the power tool or these instructions to operate it. Power tools are potentially dangerous in the hands of untrained users.
- Maintain power tools. Check for misalignment or jammed moving parts, breakages or any other feature that might affect the operation of the power tool. If it is damaged, the power tool must be repaired. Many accidents are caused by using poorly maintained power tools.
- Keep cutting tools sharp and clean. Properly maintained cutting tools with sharp cutting edges are less likely to jam and are easier to control.
- Use the power tool, accessories and cutting tools, etc., in accordance with these instructions and in the manner intended for the particular type of power tool, taking into account the working conditions and the work which needs to be done. Using a power tool in ways for which it was not intended can lead to potentially hazardous situations.
5.5 Service
Your power tool should be serviced by a qualified specialist using only standard spare parts. This will ensure that it meets the required safety standards.
6 ADDITIONAL SAFETY INSTRUCTIONS
Always wear eye protectors.
- Never use the equipment in the presence of flammable liquids or gases.
- NEVER use the equipment when a cutting disc (and not a saw disc) has been attached.
- Before each use, check the saw blade for small cracks or damages. Replace a cracked or damaged blade immediately.
- Only use saw blades that are recommended by the manufacturer and that fulfil the EN847-1 standard.
Always use the accessories that are recommended by this manual.
- Select the correct saw blade for the material must be sawn.
- To reduce the generation of noise, always make sure that the blade is sharp and clean.
POWX075740DB EN
-
Only use correctly sharpened saw blades. Never exceed the maximum speed that is indicated on the saw blade.
-
Before installing the saw blade, clean the axle, the flanges (especially the assembly surfaces) and the hexagonal nut. Incorrect mounting can lead to vibrations/knocking or slipping of the saw blade.
-
Prevent that the saw comes into contact with metals, such as nails and screws. Search for and remove all nails, screws and other foreign materials from the workpiece, before you start to work.
-
Remove spanners, cut off pieces and the other items from the saw table, before turning on the switch.
-
NEVER wear gloves while working; the wearing of gloves is only recommended while cutting tools are being replaced.
-
Make sure that your hands stay clear of the cutting line of the saw blade.
-
NEVER stand in the cutting line of the saw blade and NEVER let anyone else stand in that position.
-
Let the saw run for a few moments before inserting a workpiece. Listen for vibrations or knocking of the saw blade, which can indicate improper mounting or balancing of the blade.
-
The equipment may not be used for making grooves or recesses.
-
Replace the table insert when it is worn out.
-
NEVER make any adjustments on the machine while it is turning. Remove the plug from the socket before making any adjustments.
-
If necessary, use a push block. A push block MUST be used for longitudinal sawing of smaller workpieces, so that your hands and fingers are kept well away from the saw blade.
Always store your push block, whenever it is not in use.
-
Pay special attention to the instructions that help to reduce the hazard of KICK BACK. KICK BACK is a sudden reaction to a jammed, bent or badly aligned saw blade. KICK BACK causes the workpiece to be thrown back in the direction of the operator. KICK BACK can lead to serious injuries. KICK BACK can be avoided by keeping your saw blade sharp, by keeping the rip fence parallel to the saw blade, by maintaining the riving knife and the saw guard in good condition and in the right position, by keeping a good grip on the workpiece until you have pushed it completely past the saw blade, and by not sawing any twisted or skewed wood pieces, or pieces that do not have a straight edge for moving along the rip fence, in a longitudinal direction.
-
Do not carry out any free-hand operations. Free-hand means that you use your hands for supporting the workpiece, or for leading it with your hands, instead of using the rip fence or the metre block.
-
NEVER bend over or around the saw blade. NEVER reach for a workpiece, before the saw blade has come to a complete stop.
-
Avoid a sudden or too quick infeed of a workpiece. Workpieces made of hard material should be fed in as slowly as possible. Never fold or turn a workpiece while feeding it into the saw. If the saw blade jams or ceases to turn while the workpiece is being fed in, turn the equipment off immediately. Remove the plug from the socket. Remove the piece that is blocking the saw.
-
NEVER try to remove sawed off chips, and never touch the saw guard, as long as the saw blade is turning.
-
Remove all lose knots from the workpiece. BEFORE starting to saw.
-
Do not maltreat the cable. Never pull on the cable, for removing the plug from the socket.
Do not expose the cable to heat, oil, water or sharp edges. -
Some types of dust that is generated while working with the saw may contain chemicals, which can cause cancer, birth defects or other genetic damages. Some examples of these substances are:
-
Lead derived from paints containing lead:
-
Arsenic and chrome from chemically treated wood.
The hazard to your health from such exposures is dependent on how frequently you do this kind of work. - Measures for reducing your exposure to such chemicals: Always work in well-ventilated surroundings and with certified safety equipment, such as dust masks that have been specially designed for filtering out microscopic particles.
- For sawing operations, connect the equipment to a dust exhaust system.
- The guard may be lifted up while positioning a workpiece, or for easier access during maintenance works. Make sure that the saw guard has been lowered and is positioned flat against the sawing table, before connecting your tool to the mains supply.
7 ADDITIONAL SAFETY INSTRUCTIONS FOR LASERS

Warning! The laser beam potentially causes eye damage. Do not look or stare into the laser beam.
- During use, do not point the laser beam at people, directly or indirectly through reflecting surfaces.
- This laser complies with class 2 according to the relevant standard. The unit includes no servicing components. Do not open the housing for any reason. If the unit is damaged, have the damage repaired by an authorized repair agent.
- Laser viewing glasses are not protective glasses against laser radiation.
8 ASSEMBLY
Disconnect the power plug before carrying out any adjustments or maintenance.
Do not operate this metre saw until it has been fully assembled and correctly prepared for use in accordance with this instruction manual.
8.1 Assembling the side support bars
- Place the two guide rails into the side supports and secure them.
- Loosen the screw and place the side support bars into the positioning holes.
- Secure the side support bars with the screw to prevent them sliding out of position.
8.2 Assembling the lever
Screw the lever (6) into the threaded hole, but not too tightly.
8.3 Assembling the clamp
The clamp (11) can be installed on either left or right side of the guide fence. Insert the viser rod into the hole in the guide fence and fasten with locking screw
9 OPERATING INSTRUCTIONS
9.1 Transporting the litre saw
To transport the power tool, use the retaining pin (17).
Pull the litre saw downwards and lock it in the lowered position by pull, twist and push in the retaining pin. That way, the saw is secured.
Pull the sawblade to the front and block by tightening slide bar lock (21).
9.2 Dust and chip extraction
For integrated dust extraction, place the dust bag (18) on the sawdust outlet.
For external dust, you can use a vacuum cleaner hose.

The dust bag is only for a partial dust removal! It is designed to break the dust extraction.
9.3 Clamping the work piece
Make sure the work piece can't be catapulted. The clamp (11) is the most perfect gadget to avoid this.
- Press the work piece against the fence (4) and between the clamp
- Tighten the clamp (11) clockwise to secure the work piece.
9.4 Horizontal litre angle
The horizontal metre angle can be set in the range from -45^ to 45^ . The horizontal metre angle scale shows the currently set in degrees.
- Loosen the locking knob (7). -
- Rotate the saw table (5) to the required angle (to the right or to the left). The required angle can be read of the scale flute (9).
- Tighten the locking knob (7) clockwise.
9.5 Adjusting of the cutting angle (Fig 1)
- Position the saw in the lower position and block it with the blocking pin.
- Now hold the try square (90^) against the guide rail and the saw blade. The latter must make complete contact with the try square. If this is not the case, then you can adjust the angle by loosening the counter nut and adjust with adjustment bolts until the angle between the blade and the turn table equals 90^ .
- To carry out this step, use the delivered key for loosening the screws. Do not forget to tighten the screws afterwards.
9.6 Dual bevel (Fig. 2)
The litre saw can be used to make cuts to the left and right side at an angle of 45^ to -45^
- Lift the machine head to its top position
- Release the turntable by loosening the locking handle (7)
- Adjust the turntable by its handle to the required angle
- Re-tighten the locking handle (7) to fix the turn table in position
- Undo the lock knob (20), lock pin (26) and hold the handle (13), tilt the machine head to the left or right, to the required angle scale (19)
- Re-tighten the lock know (20), lock pin (26) and make the cut
9.7 Slide lock adjustment
- To unlock and lock the slide bar (12), turn the slide bar lock knob (21) counterclockwise or clockwise
9.8 Depth stop (Fig. 3)
When not a complete cut through the work piece is desired, use the depth stop bolt to control the depth of cut.

Only adjust the front bolt. The rear bolt is used to prevent the blade from cutting the table during normal cutting. Do not adjust the rear bolt.
- Unlock the retaining pin.
- Raise the saw head assembly.
-
Push the depth stop to the left to use the depth stop bolt settings.
-
Pull down on the saw head to check the current setting.
- To change the setting, first loosen the knurled depth stop nut on the depth stop bolt. Turn the depth stop bolt clockwise to decrease depth and counterclockwise to increase depth. Tighten the depth stop nut after adjustment.
- If needed, push the depth stop to the right to temporarily disable it.
9.9 Switching ON/OFF

For your safety use both hands to switch the power tool on and off.
- Connect the power tool to the power supply.
- To turn the machine on, simultaneously press the main switch (14) and locking button (24).
- When you want to turn off the machine, you have to release the on/off switch (14).
- Important! Place the material you want to saw flat on the machine surface and secure with the clamping device (11) so that the material cannot move while you are cutting.
- After switching on the saw, wait for the blade (2) to reach its maximum speed.
- Press the release lever (15) sideways and, using the handle (13), apply steady and light downward pressure to move the machine head through the workpiece.
- When the cut is completed, return the machine to its top parking position and let go of the On/Off switch.
Caution! A return spring causes the machine head to rise automatically at the end of the cut. Do not let go of the handle (13) as soon as the cut is completed but steady the machine head and allow it to rise slowly.
9.10 Laser
- You can switch the laser ON and OFF with the switch (29)
- The laser (22) directs a beam onto the workpiece
- Extremely precise cuts can be made using the laser function.
9.11 Dust bag
To attach the dust bag (18), fit it onto the dust extraction adapter. When the dust bag is about half full, remove the dust bag from the tool and empty it.
9.12 Sawing

Make sure the saw blade doesn't block while you are sawing. It causes damage to and burning of the motor. If there is a blockade of the saw blade, please loosen the switch immediately to prevent damage at the motor.
- Clamp the work piece firmly.
- Set the required horizontal metre angle or the required vertical bevel angle.
- Switch on the power tool.
- Move the handle (13) slowly downwards.
- For long workpieces you should use the slide; loosen the locking knob for this purpose.
- Saw trough the work piece.
- Switch off the power tool.
- Wait until the saw blade (2) has come to a complete standstill before removing the work piece.
9.13 Sawing special work pieces
Curved or round work pieces need to be secured against slipping.
Make sure there is no gap between the work piece and the fence (4) or the saw table (5).
9.14 Replacing the saw blade (Fig. 4)

Disconnect the tool from the outlet before working on the saw blade.
Wait a while before touching the saw blade. It can be very hot.
The teeth of the saw blade are very sharp.
- Swing the machine head upwards.
- Loosen the cover plate screw (A), but do not remove this screw from the tool.
- Lift and hold up the lower blade guard to expose the threaded blade bolt
- Press the saw shaft lock (24) with one hand while positioning the Allen key on the flange bolt with the other hand. The saw shaft lock (24) engages after no more than one rotation.
- Now, using a little more force, slacken the flange screw in the clockwise direction.
- Turn the flange screw right out and remove the external flange.
Take the blade (2) of the inner flange and pull out down wards. - Carefully clean the flange screw, outer flange and inner flange.
- Fit and fasten the new saw blade (2) in reverse order.
- Important! The cutting angle of the teeth, in other words the direction of rotation of the saw blade (2) must coincide with the direction of the arrow on the housing.
- Check to make sure that all safety devices are properly mounted and in good working condition before you begin working with the saw again. Important! Every time that you change the saw blade, check to see that it spins freely in the table insert (8) in both perpendicular and 45^ angle settings.

When replacing the saw blade, you can tighten the slide bar with the locking knob (20).
10 CLEANING AND MAINTENANCE

Before performing any work on the equipment, pull the power plug.
10.1 Cleaning
- Regularly clean the machine housing with a soft cloth, preferably after each use.
- If the dirt does not come off use a soft cloth moistened with soapy water.
- Never use solvents such as petrol, alcohol, ammonia water, etc. These solvents may damage the plastic parts.
Make sure no water can reach the inside of the power tool!
10.2 Connecting cable
If the connecting cable (or mains plug) is damaged, it must be replaced. Replacement of the connecting cable should only be carried out by a qualified specialist (qualified electrician).
11 TECHNICAL DATA
| Nominal Voltage | 220-240V ~ 50 Hz |
| Power rating | 2200 W (S6 25%) |
| No load speed | 5000 min-1 |
| Protection class | II |
12 CUTTING CAPACITY
| Worktable tilting angle | Head tilting angle | Height x width (mm) |
| 90° | 90° | 90 x 310 mm |
| 45° | 90° | 90 x 215 mm |
| 90° | 45° | 38 x 310 mm (left) |
| 90° | 45° | 38 x 310 mm (right) |
| 45° | 45° | 38 x 215 mm (left) |
| 45° | 45° | 38 x 215 mm (right) |
13 NOISE
Noise emission values measured according to relevant standard. (K = 3)
Acoustic pressure level LpA 95 dB(A)
Acoustic power level LwA 108 dB(A)

ATTENTION! Wear hearing protection when sound pressure is over 85 dB(A).
14 STORAGE
- Thoroughly clean the whole machine and its accessories.
- Store it out of the reach of children, in a stable and secure position, in a cool and dry place, avoid too high and too low temperatures.
- Protect it from exposure to direct sunlight. Keep it in the dark, if possible.
- Don't keep it in plastic bags to avoid humidity build-up.
15 TROUBLE SHOOTING
| PROBLEM | POSSIBLE CAUSE | SOLUTION |
| Motor does not run. | No electricity arrives at the machine. | Check the power supply and the power line. |
| The motor is overloaded or overheated. | Allow the machine to run idle for about 2 minutes to cool down. | |
| Vibrations are too strong. | Screws or parts are loose. | Tighten all screws. |
| The litre saw is not correctly mounted. | Mount the litre saw correctly. | |
| Work piece is not properly supported. | Secure the work piece. |
16 WARRANTY
This product is warranted for a 36-month period effective from the date of purchase by the first user.
- This warranty covers all material or production flaws excluding : batteries, chargers, defective parts subject to normal wear & tear such as bearings, brushes, cables, and plugs, or accessories such as drills, drill bits, saw blades, etc. ; damage or defects resulting from maltreatment, accidents or alterations; nor the cost of transportation.
- Damage and/or defects resulting from inappropriate use also do not fall under the warranty provisions.
We also disclaim all liability for any bodily injury resulting from inappropriate use of the tool.
- Repairs may only be carried out by an authorized customer service centre for Powerplus tools.
- You can always obtain more information at the number 00 32 3 292 92 90.
- Any transportation costs shall always be borne by the customer, unless agreed otherwise in writing.
- At the same time, no claim can be made on the warranty if the damage of the device is the result of negligent maintenance or overload.
- Definitely excluded from the warranty is damage resulting from fluid permeation, excessive dust penetration, intentional damage (on purpose or by gross carelessness), inappropriate usage (use for purposes for which the device is not suitable), incompetent usage (e.g. not following the instructions given in the manual), inexpert assembly, lightning strike, erroneous net voltage. This list is not exhaustive.
- Acceptance of claims under warranty can never lead to the prolongation of the warranty period nor commencement of a new warranty period in case of a device replacement.
Devices or parts which are replaced under the warranty therefore remain the property of Varo NV.
- We reserve the right to reject a claim whenever the purchase cannot be verified or when it is clear that the product has not been properly maintained. (Clean ventilation slots, carbon brushes serviced regularly, etc.).
- Your purchase receipt must be kept as proof of date of purchase.
- Your appliance must be returned undismantled to your dealer in an acceptably clean state, (in its original blow-moulded case if applicable to the unit), accompanied by proof of purchase.
17 ENVIRONMENT

Should your appliance need replacement after extended use, do not discard it with the household rubbish but dispose of it in an environmentally safe way. Waste produced by electrical machine items should not be handled like normal household rubbish. Please recycle where recycle facilities exist. Check with your Local Authority or retailer for recycling advice.
18 DECLARATION OF CONFORMITY

Vario
VARO N.V. - Joseph Van Instraat 9 - BE2500 Lier - BELGIUM, declares that,
product: Double Bevel Sliding Mitre Saw
trade mark: POWERplus
model:POWX075740DB
is in conformity with the essential requirements and other relevant provisions of the applicable European Directives, based on the application of European harmonized standards. Any unauthorized modification of the apparatus voids this declaration.
European Directives (including, if applicable, their amendments up to the date of signature);
2011/65/EU
2006/42/EC
2014/30/EU
European harmonized standards (including, if applicable, their amendments up to the date of signature);
EN62841-1:2015
EN62841-3-9:2015
EN IEC 55014-1:2021
EN IEC 55014-2:2021
ENIEC61000-3-2:2019
EN61000-3-3:2013
Keeper of the Technical Documentation: Philippe Vankerkhove, VARO - Vic. Van Rompuy N.V.
The undersigned acts on behalf of the company CEO,

Philippe Vankerkhove
Regulatory Affairs - Compliance Manager
02/11/2021, Lier - Belgium
02/11/2021, Lier - Belgium
1 APLICACION 3
2 DESCRIPCION (FIG. A & B) 3
3 LISTADE CONTENIDO DEL PAQUETE 3
4 SIMBOLOS 4
02/11/2021, Lier - Belgium
Regulatory Affairs - Compliance Manager
02/11/2021, Lier - Belgium
02/11/2021, Lier - Belgium
1 BRUKSOMRADE 3
2 BESKRIVELSE (FIG. A & B) 3
3 PAKKENS INNHOld 3
4 SYMBOLFORKLARING 4
5 GENERELLE SIKKERHETSADVARSLER 4
5.1 Arbeitsplassen 4
5.2 Elektrisk sikkerhet 4
5.3 Personsikkerhet 4
5.4 Vær noyaktig og omhyggelig nr du omgås elektroverktøy... 5
5.5 Service 5
6YTTERLIGERE SIKKERHETSINSTRUKSJONER 5
7YTTERLIGERE SIKKERHETSINSTRUKSJONER FOR LASERE . 7
8 MONTASJE 7
8.1 Montering av sidestottene 7
8.2 Montering av lasespak for sagbord 7
8.3 Montere tvingen 7
9 BRUKSANVISNING 7
9.1 Transportere gjaeringsagen 7
9.2 Stov og flisavsug 7
9.3 Feste arbeidsstykket 8
9.4 Vannrett gjaeringsvinkel 8
9.5 Justere kuttevinkel (Fig. 1) 8
9.6 Dobbel skraskjaering (Fig. 2) 8
9.7 Justering av gldestanglas 8
9.8 Dybdestopp 8
9.9 Sla pa/av. 9
9.10 Laser 9
9.11 Stovposen 9
9.12 Saging 9
9.13 Saging av spesielle arbeidsstykker 9
9.14 Skifte sagblad (Fig. 3) 9
10 RENGJØRING OG VEDLIKEHOLD 10
10.1 Rengjaring 10
10.2 Strømledning 10
11 TEKNISKE DATA 10
12 SAGEKAPASITET 11
13 STOY 11
14 OPPBEVARING 11
15 FEILSØKING 11
16 GARANTI. 12
17 MILJ0 12
18 SAMSVARSERKLÄERING 13
GJÆRINGSSAG MED DOBBEL SKRÅSKJÆRING OG GLIDER 2200 W - 254MM POWX075740DB
1 BRUKSOMRADE
10 RENGJØRING OG VEDLIKEHOLD

02/11/2021, Lier - Belgium
1 ANVÄNDNINGSOMRÄDE 3
2 BESKRIVNING (FIG. A & B) 3
3 FÖRPACKNINGSINNEHÄLL 3
4 SYMBOLER 4
02/11/2021, Lier - Belgium
02/11/2021, Lier - Belgium
1 EΦAPMÖΓH 3
2 IEPIIRPAΦH (EIK. A & B) 3
3 ΛΙΣΑ έπΕχΟΜΕΝΟύN ΣΥΣΚΕYΑΣΙΑΣ ............................ 3
4 SYMBOAA 4
02/11/2021, Lier - Belgium
1 UREDAJ 3
2 OPIS (SLIKA A & B) 3
3 POPIS SADRZAJA PAKETA 3
4 SIMBOLI 4
5 OPÇA UPOZORENJA O SIGURNOSTI RUKOVANJA
ELEKTRICNIM ALATIMA 4
5.1 Radno mesto 4
5.2 Elektricna sigurnost 4
5.3 Osobna sigurnost 5
5.4 Uporaba i odrzavanje elektricnog alata 5
5.5 Servis 6
6 POSEBNA SIGURNOSNA UPOZORENJA 6
7 DODATNE SIGURNOSNE UPUTE ZA LASERE 7
8 SASTAVLJANJE 7
8.1 Montaza za bocnih sipki 7
8.2 Montaza ručice za blokadu stola 7
8.3 Sklapanje brze pritege 8
9 UPUTE ZARUKOVANJE 8
9.1 Transport kutne pile 8
9.2 Izvlačenje piljevine i strugotine 8
9.3 Pričvṛścivanje izračevine 8
9.4 Horizontalni kut rezanja 8
9.5 Postavljanje kuta rezanja (slika 1) 8
9.6 Dvostruki nagib. 8
9.7 Podešavanje klizne blokade 9
9.8 Graničnik dubine (slika 3) 9
9.9 Uključivanje/Isklijucivanje 9
9.10 Laser 9
9.11 Vreica za prasinu 9
9.12 Piljenje 10
9.13 Piljenje posebnih izradevina 10
9.14 Zamjena pile (slika 4) 10
10 CIsCENJE I ODRZAVANJE 11
10.1 Cijscenje 11
10.2 Prikljucni kabel 11
11 TEHNICKI PODACI 11
12 KAPACITET REZANJA 11
13 BUKA 11
14 SKLADIStENJE 11
15 RJESAVANJE PROBLEMA 12
16 JAMSTVO 12
17 OKOLIS 13
18 IZJAVA O SUKLADNOSTI 13
KOMBINIRANA KLIZNA KUTNA PILA 2200 W - 254MM POWX075740DB
1 UREDAJ
02/11/2021, Lier - Belgium
1 PRIMENA 3
2 OPIS (SL. A & B) 3
3 SPISAK SADRZAJA PAKOVANJA 3
4 SIMBOLI 4
5 OPŠTA BEZBEDNOSNA UPUTSTVA ZA ELEKTRICNE ALATE.4
5.1 Radna oblast 4
5.2 Elektricna bezbednost 4
5.3 Lična bezbednost 5
5.4 Korisćenje i održavanje elektrichnog alata 5
5.5 Servisiranje 6
6 DODATNE BEZBEDNOSNE NAPOMENE 6
7 DODATNE BEZBEDNOSNE NAPOMENE ZA LASERE
8 SKLAPANJE 7
8.1 Montiranje bočnih oslonaca 7
8.2 Montiranje ručice za blokadu obrtne ploce 8
8.3 Montiranje stege 8
9 UPUTSTVA ZA RUKOVANJE 8
9.1 Transport kombinovane kružne testere 8
9.2 Uklanjanje prase i strugotine 8
9.3 Pričvšćivanje radnog predmeta stegom 8
9.4 Horizontalni kosi ugao 8
9.5 Podesavanje ugla secenja (Sl. 1) 8
9.6 Dual Bevel funkcija (Sl. 2). 8
9.7 Podesavanje blokade klizanja 9
9.8 Graničnik dubine 9
9.9 Uključivanje/isključivanje 9
9.10 Laser 9
9.11 Vreca za prašinu 10
9.12 Sechenje testerom 10
9.13 Sechenje posebnih radnih predmeta 10
9.14 Zamena lista testere (Sl. 3) 10
10 CIsCENJE I ODRZAVANJE 11
10.1 Cijscenje 11
10.2 Priključni kabl. 11
11 TEHNICKI PODACI 11
12 KAPACITET SEÇENJA 11
13 BUKA 11
14 ODLAGANJE 12
15 REsAVANJE PROBLEMA 12
16 GARANCIJA 12
17 ZIVOTNA SREDINA 13
18 IZJAVAOUSKLAGENOSTI 13
KLIZNA KOMBINOVANA KRUZNA TESTERA 2200 W - 254 MM POWX075740DB
1 PRIMENA
Ovaj elektrichi alat je namenjen kao stacionarna masina za vrsenje pravih i kosih rezova u drivetu. Mozete da secete tvrdo i meko drvo kao i iverice i ploce vlaknatice.
Ovaj alat smeju da koriste samo odrasle osobe.

02/11/2021, Lier - Belgium
1 OBLASTPOUZITI 3
2 POPIS (OBRAZEK A A B) 3
3 OBSAH BALENI 3
4 SYMBOLY 4
5 OBEÇNÁ BEZPEČNOSTNI UPOZORNÉNÍ PRO ELEKTRICKÉ STROJE 4
02/11/2021, Lier - Belgium
1POUZIVANIE 3
2 POPIS (OBR. A & B) 3
3 OBSAH BALENIA 3
4 SYMBOLY 4
5 VŠEOBECné BEZPEČNOSTné VAROVANIA PRE ELEKTRICKÉ NÁRADIE 4
5.1 Pracovná plocha 4
5.2 Elektrická bezpečnost 4
5.3 Osobná bezpečnost 5
5.4 Použivanie elektrického náradia a starostlivost' on 5
5.5 Servis 6
6 DOPLNKOVé BEZPECNOSTNÉ POKNY 6
7 DOPLNKOVé BEZPECNOSTNÉ POKNY PRE LASERY......7
8 MONTAZ. 7
8.1 Montaz bocej opomej tyce.. 7
8.2 Montáž páky na zamknutie stola 8
8.3 Montáz zveráka 8
9 PREVADZKOVE POKNY 8
9.1 PrepravaPokosovej pily.. 8
9.2 Vysavanie prachu a ulomkov.. 8
9.3 Upnutie obrobku 8
9.4 HorizontalnyPokosovy uhol 8
9.5 Nastavenie uhlarezania (obr. 1) 8
9.6 Dvojity sklon (obr. 2) 8
9.7 Nastavenie posuvného zámku 9
9.8 Hbkbovy doraz.. 9
9.9 Zapnutie / vypnutie 9
9.10 Laser 9
9.11 Vrecko na prach 9
9.12 Pilenie 10
9.13 Pilenie spezialnych obrobkov 10
9.14 Vymena piloveho listu (obr. 3) 10
10 CISTENIE A UDRZBA 11
10.1 Cistenie 11
10.2 Napajací kabel 11
11 TECHNICKE UDAJE 11
12 KAPACITA REZANIA 11
13 HLUK 11
14 SKLADOVANIE 11
15 ODSTRANOVANIE PORUCH 12
16 ZARUKA 12
17 ZIVOTNÉ PROSTREDIE 13
18 VYHLASENIE O ZHODE 13
POSUVNÁ POKOSOVÁ PILA NA DVOJITÉ ŠIKMÉ REZY 2200 W – 254MM POWX075740DB
1 POUZIVANIE
Tento nastroj je urceny na pouzitie ako stacionarny stroj na robenie rovnych a priechnych rezov do dreva. Mozte pe lit tvrdé a makké drevo, ako aj dewottrieskové a dewovlaknité dosky.
Tento nastroj smu pouzivat'lenDSPeli.
02/11/2021, Lier - Belgium
1 ALKALMAZAS 3
2 LEIRAS (A & B ABRA 3
3 CSOMAGOLAS TARTALMA 3
4 JELZÉSEK 4
5 ALTALÁNOS BIZTONSAGI UTASITÁSOK
SZERSZÁMGEPEKHEZ 4
02/11/2021, Lier - Belgium
1 OBJACTb PIPMEHEHn3
2 OINCAHNE (PNC A & B) 3
3 COIDEPJKMOE YNAKOBKN 3
4 YCJIOBHBIE OBO3HAUEHN 4
5 OБшЯ ИНСТРУКЦИ NO TEXHиKE 6E3ОПАСHOCTN ПРИ PABOTE C 3ЛЕКТPOHHTCPUMEHTOM 4
5.1 Pa6ooye mecmo 4
5.2 3neKmpo6e3oJnacHocmb... 4
5.3 5
5.4 3Kcnnyamaua u yxod 3a 3neKmpouHcmpyMehmom... 5
5.5 06cnyxueaHue 6
6ДОПОЛНТЕЛьнtie INHCTPYKLIIN NO TEXHNIKE 6E3OПАСHOCTN
7ДОПОЛНТЕNBHIE INHCTPYKUNI NO TEXHNIKE 6E3OПАСHOCTNДЛЯЛA3EPOB.8
8 MOHTAX 8
8.1 MoHmax 6okobix onop... 8
8.2 MoHmax qukcupyioe pykocrku cmona 8
8.3 C6opka 3axuma.. 8
9 IHCTPYKUNI NO 3KcNlyATAU. 8
9.1 TpaHcnopmuoeKa mOpuo-ycoooyHou nuiI 8
9.2 Omcoc nbilu u cmpykku 9
9.3 3aXum 3aZomoeku.. 9
9.4 Yzoi Kocozopacnulae20pu3ohmaJIbHOu nlockocmu.. 9
9.5 Pezynupoeka yana pacnuna (Puc. 1) 9
9.6 ⅡeouHou cKoc (Puc. 2) 9
9.7 乌
9.8 Ospanuumelb aIy6unbl nponuna... 9
9.9 BkIIOyeHue/6bIKIOyeHue 10
9.10 Ⅱa3ep 10
9.11 Mewok dna c6opa onuok 10
9.12 11
9.13 Pneneue cneuaJIbIbIX 3a2omoeok... 11
9.14 3aMeHa nulbHOzo ducka (Puc. 3) 11
10 12
10.1 Yucmka 12
10.2 CoedunumelbHbi Ka6eIb 12
11 TEXHnueCKNE DAHHbIE 12
12 PEXyUaCnOCOBHOCTb 12
13 12
14 XPAHEHNE 13
15 INAHTHOCTNKA HENCINPABHOCTEI 13
16 TAPAHTIA 14
17 OKPYXKAIOUCAPEDA 14
18 DEKJIAPAUJIO COOTBETCTBNI 15
PA3ДВИЖHAЯ TOPICOBO-UCOBOUHЯ ПИЛACДВОИHBIM CKOCOM 2200 BT - 254 MMPOWX075740DB
1 OBJACTb IPIPIMEHEHnA
3TOT 3NEKTPONHCTPymeHT ABJARETCaUHOHApHbIM CTAHKOM I ppeHa3HaueH DnBbINOJIHeHn npMbIX N KocbIX paCnIOB B dpeBecnHE. MoXHO nINITb dpeBecnHy TBepdbIX MRAKNX NOPoD, a TAKKe dpeBECHO-CTpyKeHbIe I dpeBECHO-BOJOKHNCTbIe PINTbl.
3TNIM INCTpyMeHToM pa3peWaeTcnoB3OBaTbcra TOnbKO B3POCnBIM IIOJAM.

3 CODEPXXHMOE YNAKOBKN
- YdaIInTe BCE ynaKOBOHybIe MaTePnAbI.
- YdaJInte ocTaTKn yNaKOBKn n peKJaMhBie JnCTKn-BKJaDbIuN (ecnI eCTb).
- PpOBepbTe NOnHOTy KOMNNEKTA NOCTaBKn.
- Пюверьтae annapat, синоов Кавь, Утупсь И Вс Бпнадлжхости На пpeДмет NOВржденnpу Транспоровke.
XpaHnTe ynaKOBOHyIe MaTePnaJIbI NO BO3MOxHOCTN Do nCTeueHra paHTnHOrO cPOKa. Iocne 3TOro n36aBbTEcB OT HIX, NcNoJIb3yR MeCTHyO CnCTeMy yTNJIN3aUIN 6bITOBbIX OTXODOB.

ПЕДУПЕЖDEHNE:Уразковочьie MaTeрналы -ЗTo He nrgPyшк! He nO3BOJnTe DeTЯm nrgpTaB c ПlaCTNKOBbIMn naketam! Ectb onaChoctb ydyuweHn!
ByaKOBky BKnIOueHbI:
1pa3dBnKHaTOpOBO-ycOBouHaNla
1 WecTnIrpHbI KJIIOU 6 MM
1 KOMJIeKT 3aXIMOB
1raeHbIKIou
26OKOBbIe HappaBnIouIue
1 nbIne6opHbIM MeUOK

Ecni n deTann OTCyTcByoT nn nobpekdeHb, o6paTnTeCb K CBOemy dInepy.
4 YCJIOBHBIE OBO3HAUEHNIA
B daHOM pyKOBOCTBe n/nn Ha cAmO MaunHe NCNoJIb3yOTc CJeNyUOuNe CMBOJIbI:
11 TEXHnueCKNE DAHHbIE
3NaeHn yPobH yMa, n3MepeHHbIe cornaCHO COOTBeTCTByIOUcEmy CTAHApTy. (K=3)
17 OKPYXKAIOUJCAPEDA
EcnB Bau annapat Tpe6yet 3aMeHb Iocne dIITeJIbHOro nCPOJb3OBaHnA, He Bbl6paCbBaIte erO BMecTe C DoMaUHM MycOpOM, a NCNoJIb3yIte 3KoJIoRnueCKN 6e3oNaChb cnocob nra erO yTINn3aun.
C OTXoAMN DeTaNEn 3NeKtpnuecknx MaunH HeNb3aOBpaAaTbc KaK C O6bIyHBIMN 6bITOBbIMN OTXoAMN. I03a6oTbTeCb 6bYtIN3aunr Tam, rKe dJa 3TOrO eCTb COOTBeTcBtuOuJe yCTaHOBKn. IpokoHcyJbTnpuYTeCb y MeCThIx OprAHOB Bnactn INy npOdaBua O BO3MOxHocTu YtIN3aunn.
VARO N.V. - Joseph Van Instraat 9 - BE2500 Lier - BEBN, HactoIm 3aBnE,
PpOdyKT: Pa3dBnKHaT TopoBO-ycOBouHna NJIa C DBOHbIM CKOCOM
Mapka: POWERplus
Mopenb:POWX075740DB
COOTBETCTByET 683aTeIbHbIM Tpe6OBaHnM INHbIM COOTBETCTByIOUIM NOIOXeHnM DeiCTByIOuIX Ebponecknx DnpeKtNB, OCHOBaHHbIX Ha Ebponecknx rapMOHN3IpOBAHHbIX CTaHdapTax. IIO6oe HecaHKUHOHnpoBaHHoe N3MeHeHne yCTpoIcTba aHHyJIpyeT daHHOe 3aYBLeHne.
Ebponeckne DnpekTbbl (BKnHoua, ecnn npmehmo, nx nonpaBkn Do DaTbI NODncaHna):
2011/65/EU
2006/42/EC
2014/30/EU
Ebponeckne rapMOHN3nPOBaHHbIe cTaHdapTbI (BKNIOUa, eCNN npIMeHMo, INX nonpaBKn Do DaTbI NOINsCAHNA):
EN62841-1:2015
EN62841-3-9:2015
ENIEC55014-1:2021
ENIEC55014-2:2021
ENIEC61000-3-2:2019
EN61000-3-3:2013
Держателlexhneyecко ДOKуMeNTaци:ФИПиВанКерхов (Philippe Vankerkhove), VARO - Vic.Van Rompuy N.V.
HnKeNoDnncabuHmCra DeIcTByET O T mEHN IcnoNHTeJIbHOrO dIpeKTopa KOMNaHnn,

Philippe Vankerkhove (Фильп Ванkeрхов)
OTdHn HopMOKoHTpOJa -MeHeJxep no Bonpocam cornaobAHn
02/11/2021, Lier - Belgium
1 IPEdHA3HauEHNHe HA EJEKTPOHCTPymeHTA. 3
2 OINCAHNE (ФИГ A N B) 3
3 CINcBKHACbDbPjAHNETo HA ONAKOBKATA. 3
4 CnMBOJIi 4
5OBsI INPEyINPEXJEHNA 3A BE3OJACHOCT PnN3PON3BAHE HA EJEKTPOHHCTPYMEHTU.4
5.1 Pa6omHa 3oHa 4
5.2 EneKmpo6e3onachocm 4
5.3 1uyna 6e3oNaChocm.. 5
5.4 3non36aHe u apuxu 3a enekmpouHcmpyMeHa 5
5.5 Cepeu3Ho o6cnykeaHe 6
6 6
7ДОПьIHNTENHУKA3AHЯ3AБE3ONACHA PABOTA C JIA3EPN 8
8 CΓIO6BAHE 8
8.1 MoHmupaHe Ha cmpaHuHume onopHu nlaHku... 8
8.2 Caoobaehe Ha Iocma 3a 3aknoehe Ha Macama 8
8.3 Caoobaehe Ha ckobama 8
9 INHCTPYKUN 3A PABOTA 8
9.1 TpaHcnpmupaHe Ha Hoxa 3a pR3aHe noD b2bI
9.2 1367u7e Ha npaxma u cmbpeomuhme... 8
9.3 3akpeneneHa pa6omnua demaun
9.4 Xopu3ohmaJIHu Kocu bJU 9
9.5 Hacmpouka Ha babla Ha p3aHe (Pue. 1) 9
9.6 10ouHo cKocBaHe (Fua.2) 9
9.7 Pezynupahe Ha 3aknioyeaHemo Ha nIb32auama ce nnaHa...
9.8 OepaHuyumen Ha dbIb6oUHama 10
9.9 BkIIOueHa e u 3KIOueHae 10
9.10 JIa3ep 10
9.11 Ipxoxoynoeumen 10
9.12 P3aHe 11
9.13 P83ane Ha cneuajnu pa6omhu demaJnu.. 11
9.14 CmHa Ha Hoxa Ha mpuoHa (Fus. 3) 11
10 IOUHCTBAHE I NOIDPbJKA 12
10.1 Pocumbehe 12
10.2 CeIbp3eauKa6eI 12
11 TEXHnueCKn DAHHN 12
12 Bb3MOXHOCTN 3A P83AHE 12
13 12
14 CbXPAHEHNE 13
15 HAMIPAHE N OTCTPAHRAHE HA HEN3INPABHOCTN.....13
16 TAPAHU 14
17 OKOHATA CPeIa 14
18 DEKJIAPAUJRA 3A CbOTBETCTBNE 15
HAKJIAHRAI CE HACTOJEH LIPKUYIPEH TPOHO C PJIb3rAaCE PJIAHKA 2200 BT - 254 MM POWX075740DB
1 ПЕДHA3HAЧЕНИЕ HA ELEKTPОИСТРУМЕNTA
To3m MexaHn3npaH nHCTpyMeHT e npedHa3HaueH da cnyKu KaTO HaCTOJIHa MaUNHa 3a npabeHe Ha npaBn I Kocn Cpe3Obe B DbPBO. MoKeTe Da pexKeTe TBbpDo N MeKO DbPBO, KaKTo N TaNaUnT INI DbPBeCHN PLOCKOCTN.
To3n INHCTpyMeHT MOKe Ia Ce I3NoJ3Ba CaMO OT Bb3paCTHn.
HenoXoJa3a npofoecnoHaHa ynoTpe6a.

IpeynpexdHne! Ipei Da n3noJ3BaTe HnCTpyMeHTa, npoTeTe BHNMaTeJIHO TOBa pKOBODCTBO n 06uNTe HnCTpyKcNn 3a 6e3OnaCHocT, 3apaN BaWata Co6CTBeHa cnryphOCT. BaWNr T eNEkTPoINHCTpyMeHn Tp8Ba Da ce IpeDaBa Ha dpyr cAmO 3aeDHO C hAcToaUnte HnCTpyKcNn.
2 ONICAHNE (ФИА NВ)
- PpeDna3eH uNT
- Pekeunck
- CtpaHnHa onOpHa nHaHa
4.празаэогрда - Macnuka Ha TpnoHa
- NocT
- JIOCT 3a 3aKJIIOUbaHe Ha Macata
- BINOJka Ha Macata
- CkaIa 3a Kocn bIIn (45 rpaIyca) (xOpN3OHTaJIHa)
- MoHTaKeH OTBOP
11.Бьрзодэнтваца ckоба
12.ПьзraацacnHaHka - Pa6oTHa pbKOXBaTKa
- PpeBknHouBaTeN BkN./n3KnL.
-
JIoCT 3a ocB06oxJaBaHe
16.Дрьжka3a npehache -
3aIbpxkaIuΦT
- PpaxoynoBnten
- Ckana 3a brrnnte
- Joc3a 3aknoubaHe Ha bbrna
- 3aknoubahe Ha nIb3raaata ce nnaHka
- BuHTOBe 3a pa3uInpuTeJIHnTe paMKn
- Janaep
24.3aknoubaHe Ha ⅢINHdeJa - Ctpenka
26.ФИКСИРацифТЗаperулпаHeHa bIbIa
27.ФИКСИРаПВИNT3a3aTЯrgaIoTO yCTpoIcTBO
28.ФИКСИРаи BИНTOBE 3a onopaTa 3a DeTaNJa - PpeBknIouBaTeJ Ha Jna3epa
3 CπисьК HA CьДьРЖAHNETO HA ONAKOBKATA
- OtctpaHete BCnKoNAKOVByHN MaTePnaI.
OTCTpaHete octHaHnTE onaKOBbUHN IN BpeMeHHN NOCTaBKN (ako NMa TaKnBa).
PpOBepeTe daHn NaKeTbT CbIbpxKa BCNUK KOMNoHEHTN.
IpoBepTe daHypeDbT,3axpaHbAunrKa6en,ueencnT n akcecoapTe He ca 6nnnoBpeDeH np TpaHCnpTupaHe. - Ipa3eTe onakOBbUHnTe MaTePnaJI nouTn Do kpa Ha rapaHcNoHHnepnoD. CJeI TOBa n3XBpIeTe B nyHKT 3a cb6npaHe Ha OTNaDbuN.

BHIMAHHE! OnakobbHnTe MaTePnaHn He ca nrpauKn! He no3BoJBaTe Ha deca da nrpaT c HainnoHOBn Top6nueKn! Pnck ot 3adyuabahe!
B onakobkata ue Hamepnte:
1 NaCTOJIENIUPKUJIpeH TpnoH
1 WecTOCTeHEN KIOU(6MM)
1ctra
1 hapbvnK ha notpe6nten
2 ctpaHnHn BODaHa
1 npaxoyuOBuTeI

B cnyuay, ye Hyaon yactn Iuncbat nn ca nobpeDeH, CbpxeTe ce c MeCTHna dnctpu6yTop.
4 CnMBOJN
B HactoIaHapbUHNK I/INN BbPxMyMaunHaTa ca N3NoJ3BaHn CJIeDHNTE CIMBOJN:
BHMaHHe! Ja3epnIbIc3daBa noteHuaHa 3aannaxa 3a TeKnyBpeKaHa Ha OHTe. Hkora He norJexJaTe n He ce BtpeHuBaTe DInpeKTHO B Ja3epeH IbU.
- IopBpeMe Ha pa6oTa He HacoUBaIe JIa3epHnJbY KbM Xopa, npraKO nnHn HnnpaKo, npe3 OTPaKaTeHNIOBbOxHOCTN.
To3n Ia3ep cBoTBcTbHa Ha Klaac 2 cbIpaCHO cBoTBeTHna CTAHapr. YcTpoiCTBTO He pa3noIarcaactn, KOHTo ce HyKdaT OT TexHNuecko O6CJyKBaHe. Ako ce nobpeNi, To Tp8Ba Da 6bJe pmoHTnpaHO OT npabocnoc6en TexHK.
Ja3epHnTe Ounna 3a IneDaHe He 3aunTabat OT Ja3epHO IbueHne.
8 CΓΙΟΥBAHE

N3KJIIOUHbAte Te IeIcena, npEIN Da N3BbPunTe KaKBnTo n da Ca HAcTPOIKn nn noDpBkka.
He pa6oTe c Hox 3a p3aHe nO bI, npEi ToJ da e HanbIHO crIo6eH npaBnH0 IIOIOTBeH 3a N3NON3BaHe B CbOTBeTCTBne C TOBA pbKOBOIDCTBO c INHCTpyKcN.
8.1 Mohmupahe Ha cmpaHuHume onOpHu nHaHKU
IOCTaBeTe DbHaNpaBnBaun PbTa B CTPaHnHTe OIOPOu IIN 3aTeHHeTe.
Pa3xIa6eTe BnHTa I NOCTaBeTe CtpaHnUHnTe ONOpHN IIaHKN B OTBOPNTe 3a N03mUNOHnpaHe.
3aTeHHeCTpaHnHHTe ONOpH NIIaHKn C BNHTOBeTe, 3a IpeIOTbPaTITe TxHOTO da3MeCTBaHe.
8.2 CenoboeaHe Ha Iocma 3a 3akIouyeHa Macama
3aBnIte IocTa 3a 3akNIOUbaHe Ha Macata (6) B OTbopa c pe36a, Ho He npeKaaneHO CTERHATO.
8.3 CaoobaeHa cko6ama
Cko6ata (11) MoKe da 6bJe IHCTaIIpaHa OT JIABaTa IIN DcHata CtpaHa Ha OrpaTaHa BOdaHa. BkapaTe npITnCKaUng npbT B OTBopa Ha OrpadaTa Ha BOdaHa n 3aTeHete 3actOpraBaun BnHT
9 INHCTPYKUN 3A PABOTA
9.1 TpaHcnpmupaHe Ha Hoxa 3a p83ane noD b2bI
3a da TpaHcnpOpTnape MexaHn3npaHn INHCTpyMeHT, n3NoJ3BaIte 3aIbPkaUmaN IuΦT (17).
N3dbpnaTe HOxA 3a p3aHe NOD bTbn HADOny N ra 3actOnopTe B Na-DOJHa NO3nua KaTO
n3DbpNaTe, 3aBbPTnTe N Bkapate 3aIbPkaUmaN uΦT. No To3n Haun HTPNOHbT e 3aTeHAT.
N3dbpnaTe HOxA 3a p3aHe HAnpei N rO 6blokpaTne Upe3 3aTgraHe Ha 3akIIOvBaHeto Ha
nnb3raUata ce nnHaKa (21).
9.2 N3eNuHaHe Ha npaxma u cmbpeomuHume
3a da n3noJ3BaTe BrpaJeHTo n3BnUaHe Ha npaxTa NoCTaBeTe TOp6Nkata 3a npax (18) Bbpxy KOMNoHETa 3a n3XBpIaHe Ha DbPBeCHnI npax.
3a BBnHnI npax MoKeTe Da n3NOJ3BaTe Mapky O T npaxOCMyka.
Top6nukata 3a npax cnyxu cmo 3a yactnuho oTcpaHBAhe Ha npaxTa! Tae npedHa3NayeHa da npekpatu N3BnUyHeTo Ha npaxTa.
9.3 3aKpeBaHe Ha pa6omHua demaun
YBepTe ce, ye pa6oTHnT deTaun He MoKe da 6bJe KaTanyltnpaH. Cko6aTa (11) e HauDobprr T hauH da ro n36erHete.
- PnTnCHTe pa6oTHna DeTaJn KbM npedna3HaTa orpaDa (4) n KbM orpaHnHTeJHaCKo6ata.
3aterhe cko6ata (11) no nocoka Ha yacobnKOBaTa CTpeIka, 3a da 3akpenTe pa60THna Detai.
9.4 Xopu3oHmaHnku Kocu bJlu
Xopn3oHTaHnTe Kocn bTm Morat da 6bDat 3aadHeB Dnaana3oHa oT -45° do 45°. CkaJata 3a Xopn3oHTaHnKocn bTm Noka3Ba TeKyuata HactpOka B rpaDyCn.
Pa3xna6ete JocTa 3a 3aknIOyBaHe Ha Macata (7).
3aBbptTeMacnKataHaTPOHA(5)do Heo6xoDmMna bTbn(HaJrCHO HnHaJIBO). bTbIbT MoKe Da 6bDe OTYeTeH NO MapKePte Ha cKaJaTa (9).
3aTeHHeTIOCTa 3a3AKnIOUbaHe Ha Macata (7) NO NOCOKa HA YAcOBHNKOBaTa CTpeJIka.
9.5 Hacmpouka Ha b2bJa Ha p3aHe (Uz. 1)
-ПОЗИНОНРаTe TROHаВ ДОнHaTЯ ПОЗИУ N IOТБКИРaTe CбКИРaUIMuI MΦT.
Cera noctabete winocepckn npab bbl (90°) kbm hnapabnaaata penca n pejxunia Dnck. IocneHNrT Tp6Ba Da KOHTaKtYBa HAnbHNo C WIOcepckn npab bbl. Ako ToBa He e TaKa, Toraba MoKeTe da perynpaTe bIbNa Upe3 pa3XJa6BaHe Ha KOHTparaiKaTa N perynipahe c perynpaUte 6oNTOBe, DOkato bIbT MExdy OCTPnETo N BbpTAAata ce Maca cTaHe paBEN Ha 90'.
3a n3nbHHeH He Ta3n CTbNka n3NOJ3BaIte DoCTaBeHn KIOU 3a OTBnHTBaHe H BnHTOBTe. He 3a6paBraIte Da 3aTeHHeTe OTHOBO BNHTOBeTcJeD TOBA.
9.6 BoUHOCKOc8aHe (Fua.2)
HaKnaHnAHT Ce TpnoH MoKe Da 6bIe N3NoI3BaH 3a N3pa6oTbaHe Ha N3pe3N OT JraBata n ot Ta CtpaHa NoI bIg O T 45^ do-45°
- Повднг He Te ГаВаТа Н MaUNHаТД Д HeNHaTа TOPHЯ NO3Hua
Ocbo6oTe BbptTaaTa ce Maca Ype3 pa3Xna6BaHe Ha loCTa 3a 3aKIOuBaHe Ha macata (7)
PerynpaTe BbptraTa ce Maca C HeHaTa pbkoXBtKa Do JeenaHra bTbn
3aterheTe OTHOBO JIOCTa 3a 3akJIIOUBAHe Ha Macata (7), 3a da fHKcnpate Bbptraata Ce MacaBn03N4H
Ocbo6oTe IocTa 3a 3akIouBaHe (20), fKcnpaunu uΦT (26) n KaTo Dbpxnte pkoBtKaTata (13), HKnHOHe TnaBaTa Ha MaunHaTa HJaBO Nn HaJxCHO Do XeJHaHn TaHn Ha ckanata (19)
3aTeHHeTe OTHOBO JIOCTa 3a 3akIIOUbaHe (20),ΦnKcnpaunu uNΦT (26) n N3BbPseTe P83aHETo
9.7 Pezynupahe Ha 3aknoyehaHemo Ha nIb3aUama ce nlaHa
3a OTKIIOUOBAHe H 3aKIOUOBAHe Ha Nb3raaata Ce NnAHa (12) 3aBbptTe pkoXbaTkata 3a 3akIOUoBaHe Ha Nb3raaata Ce NnAHa (21) o6paTHo Ha YacOBHnKa nnn no YacOBHnKa.
9.8 OspaHcyumen Ha dbIb6ouhama
Korato e Heo6xOIMO HenbIHO p3aHe npe3 3arOTOBkata, n3non3BaTe orpaHnHTeHa dbl60uHaTata, 3a da KOHTpOlnpuTa dbl60uHaTata Ha p3aHe.

PerynpaTe cmo npedHna 6oNT. 3aHnT 6oNT ce n3non3Ba 3a npedOTbpaTaBaHe Ha p3aHe Ha macata OT HOxa npi HopMaJHo p3aHe. He perynpaTe 3aHnA 6oNT.
- Ocbo6oJeTe 3aIbpxkauny uNΦT.
BdHHeTe Bb3eJa Ha TJIaBaTa Ha TpnoHa.
BkapaTe orpaHnHTeHa 1bIbOuHHaTa HJRABO,3a Da N3NON3BaTe HaCTPOIKTe Ha 60NTa Ha ORpaHnHTeHa 1bIbOuHHata. - ɪəʌpənɪteɪrəbɑtæHaTPOHə.3aɪnɪpɒBepnteTeKvUHTeHACTPOJKN.
3a npomHa Ha HactpoKaTa IIpBO OTBnHTe TaKaTa C HakaTka Ha OrpaHnHTeJHa Dbl6OuHnHaTa OT 60NTa Ha OrpaHnHTeJHa Dbl6OuHnHaTa NO YacOBnKOBaTa CTpeJIka, 3a Da HamaJIte Dbl6OuHnHa T Go 3aBbPTe ObaTHo Ha YacOBnKOBaTa CTpeJIka, 3a Da yBeJInuHTe Dbl6OuHnHa. 3aTeHHe Ta Rkata Ha OrpaHnHTe JHa Dbl6OuHnHa Ta CJeI HaCTpoKaTa.
Ako e Heo6xOJIMO, BkapaTe orpaHnHTeNa HbJIbOuHata OTJRCHO, 3a da ro DeakTNBupaTe BpemeHHO.
9.9 BkIIOU8aHe u U3KIOU8aHe
3a da cn ocnrypnte 6e3onacnoct, n3non3BaTe n Dbete cn pbcu npn BKnIOUbaHe n N3KnIOUbaHe Ha MexaHn3npaHn IHCTpyMeHT.
CbpxTe MExaHn3IpaHn IHNCTpyMeHT KbM eNkTPO3aXpaHbHeTO.
3a da BkIIOHTe MaunHaTa, eHOBpeMeHHo HaTnCHTe rnaBHnKIOU (14) n 6JOKIPAuN 6yToH (24).
Ako NCKaTe Da n3KJIIOHTe MaunHaTa, OTNVCHETe npeBkIIOYBaTeJra 3a BKn./n3Kn.(14).
Baxho! NocTabete MaTePnana, KoTo JKeNaTe Da OTpEKeTe, Da IerHe BbPxy paHaTa NOBbpxHOCT Ha MaunHata n Io oBe3onaceTe cbc 3aKpenBaUto npncnocO6JeHne (11), Taka Ye MaTePnAbT Da He MoKe Da Ce IpeMeCTN, DOKaTO PeKeTe.
CneK KaTO BKNIOUHTe TPOHnA, N3aKaIte OCTPNeTo (2) Da DOCTNHe MAKcMmaJIHa CKOoCT.
HaTnCHTe OcB6OxJaBaUaJna JocT (15) HactpaHn i c nOMoUta Ha pByKaTa (13) HaTnCHTe paBHomepHo I neKo HadoJy, 3a Da npuBnxTe MaunHHata TnaBa npes
Korato 3aBbPHTe p3aHTo, BbpHeTe MaunHaTa B rOpHO n3XoDHO nOIOxHne mN3KnOyTe OT KIOUa.
BHHMaHHe! Bb3BpaTHaTa npyKHa aBTOMaTNUHO NOBnra MaunHHaTa rnaBa B KpaHa p3aHTo. He otnyckaTe pTuKaTa (13) BeHara cIeD 3aBpUbaHe Ha p3aHTo, a CtaBnIn3npaTe MaunHHaTa rnaBa n octabete 6abHo da ce nobnirHe.
9.10 Janaep
MaunHata Bn e o6OpyDbHa c Ja3ep.
ToB BV NOMaRa Da peXeTe pa6OTHnTe DeTaN Ha npabUNHOTo MRCTO.
9.11 Ppaxoynoumen
3a 3akpenBaHe Ha npaxoyNoBtEn (18) ro MOHTnpaTe KbM aanTepa 3a ekctpaKunHa npax. Korato npaxoyNoBtEnT ce HnblHn Do noNoBuHaTa, n3BaTe npaxoyNoBtEn OTHCTpyMeHTa I rO n3nPa3HeTe.
9.12 P3aHe

YBepTe ce,Ye HOXbT Ha TpNoHa He ce 6Ioknpa,doKaTo pexKeTe.ToBa 6n npuHHno NOBpeDa n3rapHe Ha MOTopa.Ako ce noLyuN 6IoknpaHe Ha HOxHa TpNoHa,MOJ,pa3XnaBeTe MOMeHTaJIHO KJIIOUa,3a Da npedotBpaTne NOBpeDa Ha MOTopa.
3aterheTe 3dpaBo pa60THnJaTeaJl.
HactpoTe Heo6xoDMITE KOC bJIN JIN BEPTKJIHNTE CKOCEHN bJIN.
BknioyeTe MexaHn3npaHn INhctpymEnT.
-ПидвижeteбаноHaДОу paMToHaИHCTpyMeHTa(13).
3a dbnpu60TH n deTauHn Tp86Ba da n3noJ3BaTe nIb3raaata ce nHaKa, KaTo pa3Xna6nte 3a Ta3n ueN 6nOKupaata pbkoxbatka.
- HanpaBete cpe3a ha pa60THnA deTaNJ.
-ИзклочеMexaHиЗиразниИнСтчмЕNT.
- 3yakaTe DOkato HOKbT Ha TpnoHa (2) He cTaHe a6cOHTHO HEnoDbXKeH, npeN da CBaNTe pa6OTnA Detai.
9.13 P83aHe Ha cneuunHu pa6omHu demauJlu
I3BHTTE nnn KpbTn pa60THn DeTaN Tp8Ba da 6bDaT 3akpeHn, 3a da He ce nbp3aJr. YBepeTe ce, ye Hma XnaHa MeKdy pa60THn DeTaN n PpeDn3HaTa orpaJa (4) nn MacuKaTa Ha TpnoHa (5).
9.14 CmHa Ha HOKa Ha mpuOHa (Fue. 3)

N3KJIHcTe HnCtpymeHa KaHTaKaTa, npEi Da pa6oTnte C HoXa Ha TpnoHa.
I3yakaTe, npedn da dokochete HOka Ha TpnoHa.ToM MoKe Da e MHoro ropeu.
3b6nte Ha HOka Ha TpnoHa ca MHoro octpn.
3abpheTe InaBaTa Ha MaunHaTa Harope.
Pa3xna6ete BnHTa 3a Kanaka (A), Ho He OTCpaHbAte BnHTa OT INCTpyMeHTa.
- Повдигнелу И заимькге Harope Долпя прдпаител Ha peжшя диck, 3a DA ce nokakxe 6oIra 3a 3akpenBaHe Ha dincka.
HaTnCHeTe 3aKJIIOUByaIgMexAHN3bM Ha BaIa Ha TpNOHa (24) c eHApKa, DOKaTO I03nIOHInpATE WeCTOrpAMHn KJIIOH Ha 6oJTa Ha pNaHeca C dpyrata PbKa. 3aKIOUByaIgT MEXAHN3bM Ha BaIa Ha TpNOHa (24) ce aKTINBnpa CneI He nOBue OTo eHN o6OpOT.
Cera kaTo n3non3BaTe MaNko NOBuecNla pa3Xna6eTe BnHTa Ha fNaHeca no Nocoka Ha YacOBHnKOBaTa CTrpEnka.
- 3BaTe BnHTa Ha φλaHeça n CHEMeTe BbHnHn φλaHeL.
B3emTe HOxka (2) Ha BbTpewHnHa fnaHeu n3TerJte HADony.
BHHMaTeHNO NOUcTete BnHTa Ha naHeca, BbHsHna naHeu N BbTpEshnna naHeu.
- ПикpenTeиЗaterHete HOBnHOXK(2)ВобразнpeД.
Baxho! PexeunrTa bIHa 3b6nTe, c pyuN dymn nocokata Ha BbpTeHe Ha HOka (2) TpaBa Da cBnada C nocokata Ha cTpeJIkata Ha Kopnyca.
YBepTe Ce,Ye BCnUKN PpeJNa3Hn YcTPOJCTBa Da npABUNHO MOHTupAHN Bdo6po paBoTHO CbCToRHe, Ppei Da 3anOuHete pa6Toa c TpnoHa OTHOB. BaXHO! BceKn PbT, KOrato CMeHrTe peKeunI DNCK, PPOBepraBaiTe daHn ToJ ce BbPTN CBO6OJHO BB
BLOKKaTa Ha Macata (8) npn nepneHdNkUyRHa HAcTpoKa, KaKTo n npn HAcTpoKa noD bTbN 45°.

Pn cMaHa Ha HOxHa TpNoHa MoXeTe Da 3aTerHeTe Nb3raaTa Ce NnHaKa C NOMOuTa Ha pKoXBaTKaTa 3a3kNIOUbaHe (20).
10 NOUHCTBAHE I NOIDPbJKA

Ipei Da 3anoyhe Te KaKBaTo n da e pa6ota no o6OpyDbaHeTo, N3BaTe UenceJa OT KOHTa.
10.1 Nocmbane
PeIOBHO noUcTBaIe KOpNyCa Ha MaunHaTa C MeK napua, NO Bb3MOXHOCT CJeD BCaKa ynoTpe6a.
AkoMpbcotnraHe naDa, n3noJ3BaIe MeK napua, Hamokpeh cbc canyHeHa Boda.
He n3no13BaIte pa3TBOpNTeIN, KaTO 6eH3nH, HApT, CNpT, pa3TBOP Ha aMOHrK I.T.H. Te3n pa3TBOpNTeIN MORaT Da IOBpeRr TnactMacOBTe Yactn.

YBepTe Ce, Ye BbB BbTpewHOCTTa Ha MexaHn3npaHn HNCTpyMeHT He MoKe Da npOHKHe BOda!
10.2 Cebp38au, ka6eJ
Ako Cbbp3Baunna Ka6e (n nn nce) e nobpeH, ToT Tp8Ba Da 6bde cmeH. CmHaTa Ha Cbbp3Baunna Ka6e Tp8Ba Da ce N3BbpWBA camo OT KbaNnOu npaH CneuaJIncT (KbaNnOu npaH eNeKTPOTeXnK).
11 TEXHnueCKN DAHHN
| Hominahalino hyapexeinen | 220-240 B ~ 50 Σ |
| Hominahalna mozhoct | 2200 BT (S6 25%) |
| Сkopocт на праzenхов | 5000 ob./min. |
| Клас на зашита | II |
| Големина на ресенья досk | 254 MM x 30 MM x 3,0 MM |
12 Bb3MOXHOCTN 3A P3AHE
CTOHOCTHa 3ByKOBOTo HaJIraHe N3MepeHn B CbOTBeTCTBne C PpNJIOXIMNcTaHdapT. (K=3)
| HиBO Ha 3ByKOBoTo HаЯганe LpA | 95 dB(A) |
| HиBO Ha 3ByKObTa Moшноct LwA | 108 dB(A) |
14 CbXPAHEHNE
-Поунстетешателноцеляинстуренти пинадпхостпуМ.
CbxaHraBaTe Ha HeoCTbHn 3a Dea MeCTa B CtaBnHO N 6e3OanHO NOJoxHe,Ha CTydeHO n cyxo MRCTO, KATO N36raBaIe CbXpaHeHneTo PpN PpeKaJIeHO BUCOKn HNCN TEMNEpatyn.
3aunTe ro ot n3naIarHe Ha dIupeKTHa CbHueBa CBETnHa. Ako e Bb3MOxHO, cbXpaHraBaIte ro Ha TbMHO.
He ro cxbxaHbAte B nonneTnneHOBa Top6a, 3a da n36erHeTe 3aIbpxaHeTo Ha BJIara.
15 HAMNPAHE N OTCTPAHRAHE HA HEN3ПРABHOCTN
| Немпразвноct | Прочина | День捶 vale |
| Двигателовся не равOTи. | До машината не достуга[eilektprucecki TOK. | Проберete зхранвашию и кабela. |
| Двигателовся не ретоварени e[nperpял. | Оставete машината за павOTи на пра themselves xod okolno 2 minhUTи, за дуИЗSTиhe. | |
| Вибрацнице спракалено силии. | Има разхалбени виHTObе улчади. | Затеге BCИЧКВИHTOBe. |
| Hожьт за рязани по лгьл не e моNTиран павилно. | Монт在现场 павилно до лгьл. | |
| РавOTниот DeТайл не e зakpenен павилно. | Зakpenete павOTниотал. |
16 TAPAHUN
To3n npOdyKT mHa rapaHcNoHeh cpoK 36 Meceua, KOITo BIn3a BCnna OT daTata Ha nOKyNka Ha nbpbBna NOTpe6nten.
Ta3n rapaHnzI NOKPbBA BCNUKn DeEeKTn Ha MaTePmaJIu I npOn3BOcCTBeHn DeEeKTHN, HO He BKnIOUBa: 6aTePN, 3apJdHn yCTpOJCTBa, DeEeKTHN Yactn BCNeIcTBE Na HOpMaJIHO n3HOCBaHe n3TpINBaHe KaTo JArepn, YeTKn, Ka6eN uIeNceN nn AkcecoApn KaTO CBpeJa, HApKaHNIz 3a npoBbHn INHCTpyMeHTn, peKeIu DNCKOBe N T.H., NOBPeDN I DeEeKTHn PpON3TuHa OI HnpaBUNHa yNoTpe6a, 3JIoNOLyKN IJIH HAnpaBeHN IpOMEHN, HHTO TpaHCnOpTHNTpe pa3XODn.
IobpeHn/nnIeepKtn npOn3TuHaun ot HnpabNHO ynoTpe6a He ce 0xbaaat OT Te3n rapaHnOHH yCNOBna.
OcbeH ToBa He Hocm HnKaKbA OTROBOpHOCT 3a TeNECHn HapaHbAHn Ipon3TuauN OTHnpabNJHaTa ynotpe6a Ha IHCTpyMeHTa.
PemOHn MoT a 6bDaT n3BbPbBaHc mo OT yIbJIHOMOeH nOTpe6nteJckn cepBn3eH ceHTbp 3a eNEKTPoHCTpyMeHTN.
MoxTe Da noJyUte DoIbJIHtEnHa HOpMaun Ha Homep 00 32 3 292 92 90.
BcnuK TpaHcnpTH pa3xoJn 6bDat noEtN OT nOteBnte,OCBeH aKO nMCMeHO He e dorobopeHo npyro.
B cbto BpeMe, He Morat da ce npedraBaT npTeHcNn no rapaHcnaTa, ako nobpeDaTa Ha ypea e BCneDCTBHe OT nphe6perBaHe Ha TexHueCKOTO 06CnyKBaHe nIIN npetOBapBaHe.
- Ot rapaHcraTa KaTeOpuHc Ce n3KlNoUbNa NOBpeJa, KOrTo e B pe3yJITaT ot npOnHKBaHe Ha TeuHOCT, MHOrO npax, npeHaMepeHa NOBpeJa (ymnIeHa nn NopadN TotAnHO 6e3rpXkne), HeNOxOJaIO n3nON3BaHe (n3nON3BaHe 3a ceEN, 3a KOnTO ypeIbT He e nOxDoxA), HEKOMNeTeHTHO n3nON3BaHe (Hanp. Hecna3BaHe Ha NHCTpyKUnTE B pBkoBOdCTBOTO), HEKOMNeTeHTeMOtAq, rpbMOTeBuueH yIap, HeppaBUNHO HanpeXeHne. To3n CNscbK He e n3YeepNaTeJIeH.
- Ppiemaheto Ha rapaHcnoHHn IpTeHcnn HNKora He MoKe Da DOBeDe Do yDbJxKaBaHe Ha rapaHcnoHHn CpOK, HHTO Do 3aNoUbaHe Ha HOB rapaHcnoHcPOK B CnyaH Ha 3amHa Ha yCTPOIcTBO.
- YcTpoiCTBaTa HnN DeTaNITE, KOtO ca 3aMeHEn CbO6pa3HO rapaHcNoHHnte ycNoBna, cJeIOBaTeJIHO OCTaBAT CO6CTBeHOCT Ha Varo NV.
Hne cn 3ana3BaMe npaboto Da OTXBbpln BcKa npeTeHcna, B cnyaaye NOKyPkata He MoKe da 6bJe npOBepHa nn, KOrato e rCHO, Ye npOdykTbT He e NODbpxaH npabuHNO. (NouchBaHe Ha BeHTnlaunOHnTe OTBOpn, peoBHa NOdRpKka Ha KapboHOBnTe YETKN,...)
CbXpaHbAaTeΦakTypaTa3a NOKyPkata KaTO DOKa3aTeJIcTB0 3a DaTata,Ha KOrTo e HapabaHe Ta.
Tp6Ba Da BbPHeTe HeMeHTnPaHna HNCTpyMeHT Ha npOdaBaua B nPnEMJINBO YnCTO CbCToRHe, BOpuHaHnTO My JIto Kyapue, aKO yCTpoiCTBOTO mTaKOBa, PnpDpyKaBAHO OT DOKa3aTeJICTBOTO 3a NOKyPkata.
17 OKOJIHATA CPEDA

Korato ypeBbT Bn Tp86Ba Da 6bDe 3aMeHen Cnei npoBjNKeHna ynotpe6a, He ro n3XBbPnIe Tc DOMAKINCKITE OTNaDbu, a No HauHn Cbo6pa3eH c ONa3BaHeTo Ha OKoHaTa CpeDa.
OTnabnte OT eJektpnueckn npodykTn He Tp86Ba da 6bdaT n3XBbPnHn 3aeHoc domaknHcknte OTnadbu. MoJ, npoyte Kbde NMa Bb3MOxHOCTN 3a peuKnpaHe. POnckaiTe OT MeCTHnE Bnactn NIn OT npodabaCbBETN OTHOHO peuKnpaHeto.
VARO N.V. - Joseph Van Instraat 9 - BE2500 Lier - Bérlný deklapupaT, ye
IpoodyKT: HaknaHau ce HaToJeH cIpKyJpeH TpnoH
cnIb3raa Ce IHaHka
Mapka: POWERplus
Moen:POWX075740DB
e B CbOTBcTCTBnE C OCHOBHnTe N3NCKBaHnry N dpyrN CbOTBeTHn pa3nope6n Ha npInoXmnte Ebponeickn DnpeKtNB, 6a3npaHn Bbpxy npJlaraHeto Ha EbponeicknTe xapMOHN3npaHn CTAndaptN. Bcya HeynbIhMoOSeHa MoINΦnKaUng Ha anapaTa aHyIpa Ta3n DeKnapauu.
Ebponeckn DnpeKtNB (BKnIOHTeJIHO TexHITe npOMEHN KbM daTaTa Ha NOpncBaHe, aKO ca npINOxMM):
2011/65/EU
2006/42/EC
2014/30/EU
Ebponeckn xapMOH3npaHn cTaHdapTN (BKNIOHTeJIHO TEXHITe npOMEHN KbM daTata Ha noDnncBaHe, aKO ca npINOJXIMN):
EN62841-1:2015
EN62841-3-9:2015
ENIEC55014-1:2021
ENIEC55014-2:2021
ENIEC61000-3-2:2019
EN61000-3-3:2013
CbXpaHnTeJ Ha TexHnueckaTa DOKyMeHTaUra: ΦuInn BaHkepKxOB, VARO - Vic. Van Rompuy N.V.
ДolyногиcaHЯТ ДeИСТВа OТ Имeto Ha I3пьНHTeHnЯ ДиpeKTop Ha KOMnaHЯТa,
Philippe Vankerkhove
PerylaunOHn Bbnpocn-MeHNKbpNo cBOTBeTCTBnTa
02/11/2021, Lier - Belgium
1 OTSTARVE 3
2 KIRJELDUS (JOONIS A JA B) 3
3 PAKENDI SISU 3
4 SUMBOLID 4
5 ÜLDISED HOIATUSED JA OHUTUSJUHISED 4
5.1 Tööpiirkond 4
5.2 Elektriohutus 4
5.3 Oht inimstele 5
5.4 Elektritööristade kasutamine ja hooldamine 5
5.5 Teenindus 5
6 TAIENDAVAD OHUTUSJUHISED 5
7 TAIENDAVAD OHUTUSJUHISED LASERITELE
8 KOKKUPANEK 7
8.1 Assembling the side support bars
8.2 Kangi paigaldamine 7
8.3 Klambri paigaldamine 7
9 KASUTUSJUHISED 7
9.1 Miiusae transportimine 7
9.2 Tolmu ja tootlusjäkide kogumine 7
9.3 Tooriku kinnitamine 8
9.4 Horisontaalne kaldenurk 8
9.5 Liokenurga seadistamine (joonis 1). 8
9.6 Dual bevel (joonis. 2) 8
9.7 Liuglati luku seadistamine 8
9.8 Sugavuspiirik 8
9.9 Sisse- ja valjalulitamine 8
9.10 Laser 9
9.11 Tolmukott 9
9.12 Saagimine 9
9.13 Eritoorikute saagimine 9
9.14 Saeketta asendamine (joonis 3)
10 PUHASTAMINE JA HOOLDAMINE 10
10.1 Puhastamine 10
10.2 Kaabliuhendamine 10
11 TEHNILISED ANDMED 10
12 LIOKEVOIMSUS 10
13 MURA 11
14 HOIUSTAMINE 11
15 VEAOTSING 11
16 GARANTII 11
17 KESKKOND 12
18 VASTAVUSDEKLARATSIOON 12
KAHE KALDENURGAGA LIUGALUSEL MIIUSAAG 2200 W - 254MM POWX075740DB
1 OTSTARVE
- Protective hood
- Saw blade
- Side support bar
- Fence
- Saw table
- Lever
- Table lock Lever
- Table insert
- Scale for metre angle (horizontal)
- Mounting hole
- Clamp
- Slide bar
- Operating handle
- ON/OFF switch
-
Release lever
-
Carrying handle
- Retaining pin
- Dust collection bag
- Angle scale
- Angle lock lever
- Slide bar lock
- Extension hoop screws
- Laser
- Spindle lock
- Pointer
- Lock pin for angle adjustment
- Lock screw for clamping device
- Lock screws for workpiece support
- Laser switch
3 PAKENDI SISU
5 ÜLDISED HOIATUSED JA OHUTUSJUHISED

8.1 Assembling the side support bars
- Place the two guide rails into the side supports and secure them.
- Loosen the screw and place the side support bars into the positioning holes.
- Secure the side support bars with the screw to prevent them sliding out of position.
8.2 Kangi paigaldamine
Pull the sawblade to the front and block by tightening slide bar lock (21).
The mitre saw can be used to make cuts to the left and right side at an angle of 45^ to -45^
- Lift the machine head to its top position
- Release the turntable by loosening the locking handle (7)
- Adjust the turntable by its handle to the required angle
- Re-tighten the locking handle (7) to fix the turn table in position
- Undo the lock knob (20), lock pin (26) and hold the handle (13), tilt the machine head to the left or right, to the required angle scale (19)
- Re-tighten the lock know (20), lock pin (26) and make the cut
9.7 Liuglati luku seadistamine
- You can switch the laser ON and OFF with the switch (29)
- The laser (22) directs a beam onto the workpiece
Extremely precise cuts can be made using the laser function.
9.11 Tolmukott
- Swing the machine head upwards.
- Loosen the cover plate screw (A), but do not remove this screw from the tool.
- Lift and hold up the lower blade guard to expose the threaded blade bolt
POWX075740DB ET
- Press the saw shaft lock (24) with one hand while positioning the Allen key on the flange bolt with the other hand. The saw shaft lock (24) engages after no more than one rotation.
- Now, using a little more force, slacken the flange screw in the clockwise direction.
- Turn the flange screw right out and remove the external flange.
Take the blade (2) of the inner flange and pull out down wards. - Carefully clean the flange screw, outer flange and inner flange.
- Fit and fasten the new saw blade (2) in reverse order.
- Important! The cutting angle of the teeth, in other words the direction of rotation of the saw blade (2) must coincide with the direction of the arrow on the housing.
- Check to make sure that all safety devices are properly mounted and in good working condition before you begin working with the saw again. Important! Every time that you change the saw blade, check to see that it spins freely in the table insert (8) in both perpendicular and 45^ angle settings.

Saeketta asendamisel saate liuglati pingutada lukustusnupuga (23).
02/11/2021, Lier - Belgium
Vario
WWW.VARO.COM
DESIGNED AND MARKETED BY VARO
Copyright by varo
VARO - VIC. VAN ROMPUY nv
JOSEPH VAN INSTRAAT 9 - 2500 LIER - BELGIUM
OFFICES:
IBERICA BRICOLAGE S.L. - ESPANA
ASIA PACIFIC HONG KONG Ltd / SHANGHAI PRC
AUSTRALIA Pty Ltd / GERMANY GmbH


- PROBLEEMOPLOSSING
- DOUBLE BEVEL SLIDING MITRE SAW 2200W-254MM POWX075740DB
- APPLICATION
- DESCRIPTION (FIG A & B)
- PACKAGE CONTENT LIST
- SYMBOLS
- GENERAL POWER TOOL SAFETY WARNINGS
- Working area
- Electrical safety
- Personal safety
- POWX075740DB EN
- Power tools use and care
- Service
- ADDITIONAL SAFETY INSTRUCTIONS
- ADDITIONAL SAFETY INSTRUCTIONS FOR LASERS
- ASSEMBLY
- Assembling the side support bars
- Assembling the lever
- Assembling the clamp
- OPERATING INSTRUCTIONS
- Transporting the litre saw
- Dust and chip extraction
- The dust bag is only for a partial dust removal! It is designed to break the dust extraction.
- Clamping the work piece
- Horizontal litre angle
- Adjusting of the cutting angle (Fig 1)
- Dual bevel (Fig. 2)
- Slide lock adjustment
- Depth stop (Fig. 3)
- Only adjust the front bolt. The rear bolt is used to prevent the blade from cutting the table during normal cutting. Do not adjust the rear bolt.
- Switching ON/OFF
- For your safety use both hands to switch the power tool on and off.
- Laser
- Dust bag
- Sawing
- Sawing special work pieces
- Replacing the saw blade (Fig. 4)
- CLEANING AND MAINTENANCE
- Cleaning
- Connecting cable
- TECHNICAL DATA
- CUTTING CAPACITY
- NOISE
- STORAGE
- TROUBLE SHOOTING
- WARRANTY
- ENVIRONMENT
- DECLARATION OF CONFORMITY
- GJÆRINGSSAG MED DOBBEL SKRÅSKJÆRING OG GLIDER 2200 W - 254MM POWX075740DB
- BRUKSOMRADE
- RENGJØRING OG VEDLIKEHOLD
- KOMBINIRANA KLIZNA KUTNA PILA 2200 W - 254MM POWX075740DB
- UREDAJ
- KLIZNA KOMBINOVANA KRUZNA TESTERA 2200 W - 254 MM POWX075740DB
- PRIMENA
- POSUVNÁ POKOSOVÁ PILA NA DVOJITÉ ŠIKMÉ REZY 2200 W – 254MM POWX075740DB
- POUZIVANIE
- PA3ДВИЖHAЯ TOPICOBO-UCOBOUHЯ ПИЛACДВОИHBIM CKOCOM 2200 BT - 254 MMPOWX075740DB
- OBJACTb IPIPIMEHEHnA
- CODEPXXHMOE YNAKOBKN
- YCJIOBHBIE OBO3HAUEHNIA
- TEXHnueCKNE DAHHbIE
- OKPYXKAIOUJCAPEDA
- HAKJIAHRAI CE HACTOJEH LIPKUYIPEH TPOHO C PJIb3rAaCE PJIAHKA 2200 BT - 254 MM POWX075740DB
- ПЕДHA3HAЧЕНИЕ HA ELEKTPОИСТРУМЕNTA
- ONICAHNE (ФИА NВ)
- CπисьК HA CьДьРЖAHNETO HA ONAKOBKATA
- CnMBOJN
- CΓΙΟΥBAHE
- Mohmupahe Ha cmpaHuHume onOpHu nHaHKU
- CenoboeaHe Ha Iocma 3a 3akIouyeHa Macama
- CaoobaeHa cko6ama
- INHCTPYKUN 3A PABOTA
- TpaHcnpmupaHe Ha Hoxa 3a p83ane noD b2bI
- N3eNuHaHe Ha npaxma u cmbpeomuHume
- 3aKpeBaHe Ha pa6omHua demaun
- Xopu3oHmaHnku Kocu bJlu
- Hacmpouka Ha b2bJa Ha p3aHe (Uz. 1)
- BoUHOCKOc8aHe (Fua.2)
- Pezynupahe Ha 3aknoyehaHemo Ha nIb3aUama ce nlaHa
- OspaHcyumen Ha dbIb6ouhama
- BkIIOU8aHe u U3KIOU8aHe
- Janaep
- Ppaxoynoumen
- P3aHe
- P83aHe Ha cneuunHu pa6omHu demauJlu
- CmHa Ha HOKa Ha mpuOHa (Fue. 3)
- NOUHCTBAHE I NOIDPbJKA
- Nocmbane
- Cebp38au, ka6eJ
- TEXHnueCKN DAHHN
- Bb3MOXHOCTN 3A P3AHE
- CbXPAHEHNE
- HAMNPAHE N OTCTPAHRAHE HA HEN3ПРABHOCTN
- TAPAHUN
- OKOJIHATA CPEDA
- KAHE KALDENURGAGA LIUGALUSEL MIIUSAAG 2200 W - 254MM POWX075740DB
- OTSTARVE
- PAKENDI SISU
- ÜLDISED HOIATUSED JA OHUTUSJUHISED
- Kangi paigaldamine
- Liuglati luku seadistamine
- Tolmukott
- POWX075740DB ET
Brand : PowerPlus
Model : POWX075740DB
Category : Saw