Quant - Stroller Anex - Free user manual and instructions
Find the device manual for free Quant Anex in PDF.
| Product type | Modular stroller (chassis + carrycot + seat) |
| Brand | Anex |
| Model | Quant |
| Recommended age | From birth to 48 months (depending on configuration) |
| Maximum child weight (carrycot) | 9 kg |
| Maximum child weight (seat) | 22 kg |
| Number of backrest recline positions | 4 (plus 1 fold position) |
| Harness type | 5-point, adjustable in 3 positions |
| Seat orientation | Forward-facing or parent-facing |
| Front wheels | 360° swivel with lock and Anti-shock suspension |
| Rear wheels | Fixed with suspension |
| Brake | Brake pedal on rear wheels |
| Night lighting | 2 front lights (AA batteries), 2 modes + automatic shut-off after 2h |
| Shopping basket capacity | 5 kg maximum |
| Maximum load on handlebar | 1 kg (with cup holder or mommy bag) |
| Maximum load back pocket | 0.5 kg |
| Frame materials | Aluminium or steel (not specified) |
| Folding | Compact, two positions (horizontal and vertical) |
| Accessory compatibility | Anex cup holder, rain cover, foot muff |
| Maintenance | Wipe with damp cloth, lubricate ball bearings, tyre pressure 0.8 bar |
| Warranty | 12 months (subject to conditions) |
Frequently Asked Questions - Quant Anex
User questions about Quant Anex
0 question about this device. Answer the ones you know or ask your own.
Ask a new question about this device
Download the instructions for your Stroller in PDF format for free! Find your manual Quant - Anex and take your electronic device back in hand. On this page are published all the documents necessary for the use of your device. Quant by Anex.
USER MANUAL Quant Anex
text_image
QUANT Maintenance manualMaintenance manual · Instrukcja obsługi · Příručka údržby · Bedienungsanleitung Manual de Mantenimiento · Kasutusjuhend · Manuel d'entretien · Manuale di manutenzione ÚGÓZOLOU OBLÍKÍTÍJOS · Priežiúros instrukcija · Lietošanas instrukcija Onderhoudshandleiding Instrucțiuni de întreținere · Инструкция обслуживания Underhállsmanual · Príručka údržby · Kullanım Kilavuzu · Інструкція обслуговування
 |  |  |  |  |  |  |  |  |  |  |  |  |  |
 |  |  |  |  |  |  |  |  |  |  |  | ||
 |  |  |  |  |  |  |  |  |  |  | |||


01 EN Maintenance manual....4
02 PL Instrukcja obsługi....14
03 CZ Příručka údržby 24
04 DE Bedienungsanleitung 34
05 ES Manual de Mantenimiento 44
06 ET Kasutusjuhend 54
07 FR Manuel d'entretien....63
08 IT Manuale di manutenzione 73
09 KA དྱོབྱིན་འབྱུལ་པོད་སྐྱིད་......83
10 LT Priežiūros instrukcija....94
11 LV Lietošanas instrukcija.... 103
12 NL Onderhoudshandleiding 112
13 PT Manual de manutenção ....122
14 RO Instructiuni de întreținere....132
15 RU Инструкция обслуживания....142
16 SE Underhållsmanual....152
17 SK Príručka údržby 162
18 TR Kullanım Kılavuzu....172
19 UA Інструкція обслуговування....182
20 Warranty cards 192
IMPORTANT — KEEP THESE INSTRUCTIONS FOR FUTURE REFERENCE
WARNING
- Never leave your child unattended.
- Ensure that all the locking devices are engaged before use.
- This stroller can become unbalanced by attaching any extra load to its handle, and/or its backrest's backside, and/or its sides.
- It is not recommended to place additional cushioning into this carrycot/stroller.
- The carrycot is suitable for a child who cannot sit up by itself, roll over and cannot push itself upon its hands and knees. Maximum weight of the child: 9 kg (in the case of the carrycot).
- It is prohibited to carry the carrycot with a child inside while holding it by the hood.
- It is recommended to mount the stroller's carrycot on the frame only in a way ensuring that the child is facing their mother.
- The seat unit is suitable for use from birth. Use the most reclined position for newborn baby.
- Always use both belt elements (its lumbar part and the one that runs through the child's legs).
- Avoid serious injury from falling or sliding out. Always use the restraint system.
- This product is not suitable for running or skating.
- Do not let your child play with this product.
- To avoid injury ensure that your child is kept away when unfolding and folding this product.
- Check that the carrycot or seat unit or car seat attachment devices are correctly engaged before use.
- Do not lift the stroller using the security barrier, it is not a carry handle.
- The carrying handles shall be left out of the carry cot during use.
CAUTIONS
BEFORE USING OUR STROLLER, CAREFULLY READ THIS MAINTENANCE MANUAL.
• Non-compliance with this manual's requirements threatens your child's safety.
- This stroller is designed to transport one child at a time.
- The stroller should not be used to transport more children at a time than it is designed.
- This product is designed for children aged 0 to 48 months. Max. weight: 22 kg.
- Leaving this stroller with a baby on slanted surfaces (even with blocked brakes) is strictly prohibited.
- The parking mechanism should be activated, when placing a child in or out.
- It's prohibited to use this stroller if either of its parts is faulty or malfunctioning.
- Before assembling this stroller, ensure that the product and its parts are faultless; if any malfunction is detected, do not use the product.
- When adjusting this stroller, ensure that its moving parts don't touch your child's body.
• Using brakes at every stop is mandatory.
- The max. weight loaded in the cup holder is 0.5 kg. The max. weight load in the mom bag is 1 kg. The maximum weight load on the basket is 5 kg, on the pocket on the backrest — 0.5 kg.
- Heavy object or accessory items, or both, placed on the unit may cause the unit to become unstable. Excessive weight may cause a hazardous unstable condition to exist.
- Use only manufacturer-approved accessories.
- You should only use spare parts supplied or recommended by the manufacturer/distributor.
- Lift the front wheels of your stroller, if there's a need for crossing an edge of pavement or a step.
- Driving this stroller down the stairs is not allowed.
- The Quant chassis can be used only with a Quant carrycot or a Quant seat or a Quant car seat.
- This stroller should be stored out of the reach of children.
- For car seats used in conjunction with a chassis, this vehicle does not replace a cot or a bed. Should your child need to sleep, then it should be placed in a suitable carry cot, cot or bed.
PRE-USE PROCEDURES
STROLLER ASSEMBLING/DISASSEMBLING
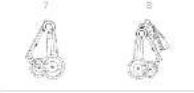
Remove the stroller frame from the box and place it horizontally on the floor (Fig. 1). Holding the handle with one hand, pull it up vigorously until the system locks in (you should hear a distinctive sound) (Fig. 2, 3). To fold the frame, press the button on the frame and turn the mechanism to fold the frame in the specified direction (Fig. 4). Then, without releasing the frame, pull it up (Fig. 5) and bring it to the original position in which it was after unpacking (Fig. 1).
The frame has two folding positions with the wheels installed: Horizontal position — to do this, you need to unlock and rotate the front wheels in the direction of each other so that they are on the same line (Fig. 6); Vertical position — it is necessary to lock the front wheels. This position is convenient for storage of the frame in the room (Fig. 7).
Besides, the stroller can be folded together with the seat, provided that the seat is installed in facing the direction of movement. Here, the footboard is mounted in the lower position and the hood visor is wrapped inside (Fig. 8).
HANDLE HEIGHT ADJUSTMENT
Press the button on the handle and set it to a comfortable height, it is necessary to pull the handle upward (Fig. 9) simultaneously. The handle is adjustable in 4 positions. Last position (lowest) is only for folding the stroller. Do not use it to operate the stroller.
MOUNTING/DISMOUNTING OF THE REAR WHEELS
To install the rear wheel, it is necessary to insert the wheel axle in a particular place on the frame and push it until it is fixed (Fig. 10). To remove the wheel, press the button and drag the wheel along the axis (Fig. 11).
INSTALLING/REMOVING FRONT WHEELS SWIVEL/LOCK
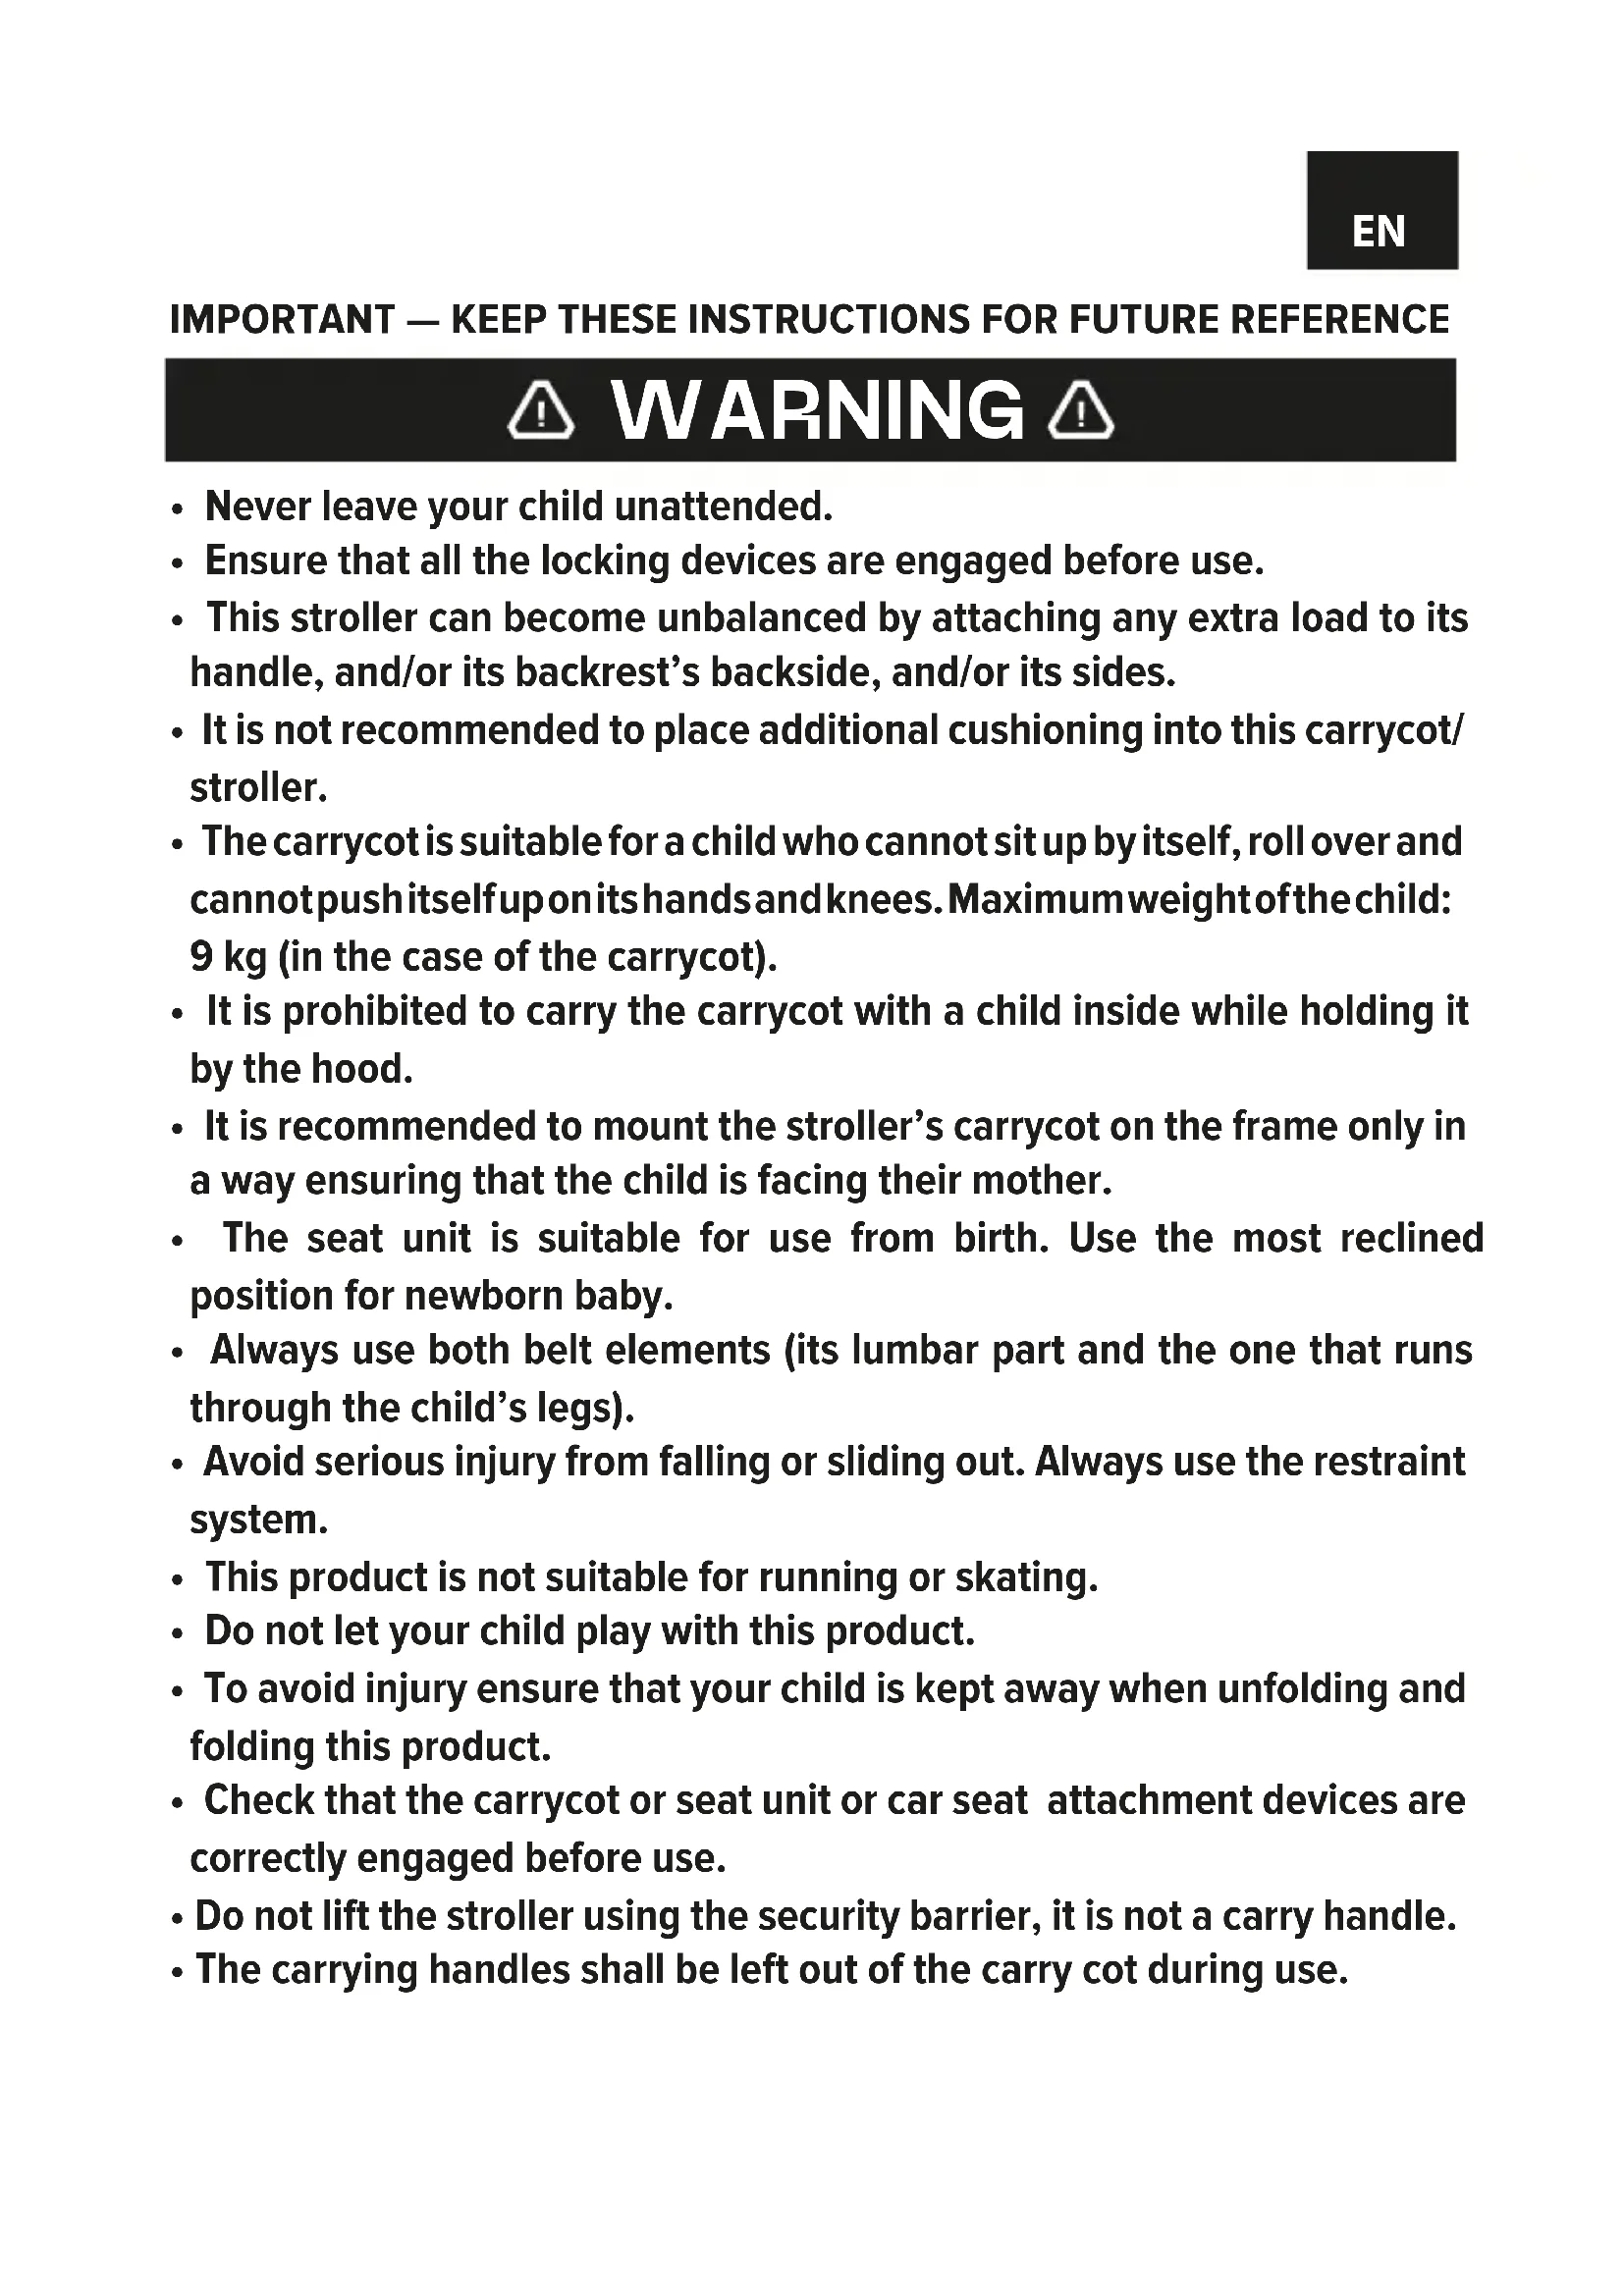
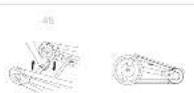
The frame of the stroller is equipped with two front swivel wheels that rotate at 360^ degrees around vertical axis. To fit the front wheels, the wheel axle must be installed in the appropriate position on the frame
and pushed up until the system is fixed (Fig. 12). In order to remove the wheel, press the button. The wheel is automatically disconnected (Fig. 13). If you need to fix the swivel wheel system, press the button above the wheel (Fig. 14). Additionally, for convenience and efficiency, you can lock/unlock the wheels by pressing the button by both hand and foot.
BRAKE
The stroller is equipped with a Parking brake that fixes the rear wheels (Fig. 15). To stop the stroller, press the pedal that blocks the rear wheels (Fig. 15). To continue driving, turn the pedal to its original position (Fig. 15).
SHOCK ABSORPTION
The front wheels are equipped with Anti-shock and anti-wobble systems, which ensure the comfort of your baby. Also, the rear wheels of the stroller are fitted with spring shock-absorbers.
CARRYCOT MOUNTING/DISMOUNTING
To install the carrycot, insert its adapters into the pockets of the adapter placed on the inside (before the appearance of a characteristic sound) (Fig. 16). The carrycot adapters are locked automatically.
To remove the carrycot, press the buttons of the adapters that are equipped with the memory system and lift it up (Fig. 17). You should not take out the carrycot when holding it by the visor or when the child is inside.
Also, for convenience, the carrycot must be removed using unique handles, which are placed in the pockets on both sides of its inner part (Fig. 18) These pens can also be used for the easy carrying of the carrycot. For the safety of the child after use, carry handles must be returned in the same pockets.
If necessary, the inside of the carrycot can be removed and washed (Fig. 19). To do this, first, you need to remove the coconut mattress and unfasten the inside with a zipper. It is also possible to completely remove the inner lining of the carrycot. To do this, remove the fabric part from the hooks around the contour of the carrycot (Fig. 20). Besides, it is possible to remove and wash the mattress cover from the mattress.
Additionally, the carrycot is equipped with a ventilation function, which is regulated on the external bottom part of the carrycot. To adjust the ventilation, move the switch to the appropriate position (on/off).
CARRYCOT HOOD, FEET COVER
The carrycot is equipped with a hood that protects the child from rain, snow, wind, sun. The position of the canopy of the stroller is adjusted by pressing its top using the hand (Fig. 22).
To lock the hood (5 positions available), pull the hood and set it to the desired position (Fig. 22).
To expand the hood enough to pull it over. If desired, the hood visor can be hidden by wrapping it inside the stroller (Fig. 23). The shade of the carrycot is ventilated, it is necessary to unzip it and then unfasten its back (Fig. 24). In addition, it is possible to remove the hood, unfastening the contour of the carrycot (Fig. 25).
The carrycot is equipped with rain cover, which is universal and can be used for both the carrycot and the seat unit, which fastened to the stroller by tightening the elastic band at the bottom of the rain cover (Fig. 26, 27).
The carrycot is equipped with a feet cover, which is worn from the front of the carrycot and fastened with a zipper and carabiners (Fig. 28).
SEAT UNIT MOUNTING/DISMOUNTING
To install the seat unit, insert its adapters into the adapter pockets, which are placed on the inside of the frame until a distinctive sound appears (Fig. 29). The seat unit will be locked automatically. Installation of the seat unit is possible in two positions: face in the direction of movement of the stroller and face in direction of the mother.
To remove the seat unit, press the buttons of the adapters, which are equipped with a memory function (Fig. 30) and lift it up (Fig. 31).
The back of the seat unit can be adjusted at an angle of inclination in 4 positions and moved to the 5th position for folding (provided that the seat unit is installed face in the direction of movement of the stroller).
To adjust the position, press the button on the back of the seat unit and set the desired angle (Fig. 32).
The back is also equipped with an additional summer ventilation (Fig. 33). To apply the summer ventilation, it is necessary to completely unfasten the additional wedge of the fabric on the back of the seat unit. Also, the back of seat unit is equipped with a zipper pocket, where you can conveniently store the raincoat (Fig. 34).
SEAT UNIT HOOD
The seat unit is equipped with a convenient folding hood that protects the child from natural phenomena (wind, sun, snow, rain). The hood can be adjusted in 3 positions by pressing its top using the hand (Fig. 35). You need to fully take off the textile kit together with the plastic adjustment to remove the hood (Fig. 36).
For the proper protection of the child in the fully reclining position of the back, the hood of the seat unit is equipped with an additional wedge. To install the hood for a fully reclining position, you need to unfasten the zipper of the additional wedge and pull the hood in the desired direction (Fig. 37). The hood of the seat unit is ventilated, for this, it is necessary to unfasten its lower part (Fig. 38).
FOOTREST ADJUSTMENT
The footrest can be adjusted in two directions: by the angle of inclination and by the length (Fig. 39, 40). To change the position of the footrest, press the button on the footrest and set the desired angle and height (Fig. 41).
SEAT UNIT'S SECURITY BARRIER
The seat unit is also equipped with a bumper that prevents the child from falling out of the stroller. To install the bumper - insert it in series in the holes of the holders, which are placed on both sides of the seat unit (Fig. 42). If necessary, remove the bumper, press the buttons in sequence and slightly pull the handle up (Fig. 43).
SAFETY BELTS
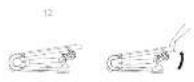
The seat unit features 5-point safety belts (Fig. 44). They can be adjusted in three different positions depending on the age of the child (Fig. 45). To fix your baby with the safety belts, fit the belt buckles into the catch locks (Fig. 46). Moreover, you can adjust the length of the belts (Fig. 47). Push the button to unbuckle the belts from the locks (Fig. 44). You can easily take off the belts by putting them through the hole in the back of the seat (Fig. 48).
The front part of the frame of the stroller is equipped with two-way lighting for safe walks in the dark. The night light works with two regular
AA batteries. To install/replace the batteries, you need to unscrew the cover on the frame, install the batteries, and then tighten it again. To turn on the backlight, press the button on the stroller frame (Fig. 49). The backlight has 2 lighting modes and the self-automatic shutdown function after 2 hours from the moment of switching on. Attention! Do not let electrical parts, lighting in particular, get into water.
CAR SEAT
The child car seat can be mounted on this stroller's frame as well. It must be attached to special adapters for frame and separate adapters for the car seat (Fig. 51). To secure the removable child car seat, insert the adapters into the adapter pockets on the frame. The adapters are blocked automatically. To remove the adapter from the frame, press the memory buttons of the adapters (Fig. 52). The car seat can be installed with the standard car safety belts. Please carefully read the manual instruction before using the car seat.
INSTALLING ADDITIONAL ACCESSORIES ON THE FRAME
The frame is equipped with a unique fastening system for the branded cup holder TM Anex. To attach them, you only need to apply the cup holder to a bracer and pull it down until you hear a distinctive fixation sound (Fig. 50). In addition, the stroller is equipped with a shopping basket, which is attached to the bottom of the frame with a zipper and Velcro.
MAINTENANCE AND CLEANING
Please ensure that the stroller is kept clean and dry (both the coating and the frame). In case the stroller gets dirty or wet, it should be dried, and the metallic parts be cleaned with a dry cloth. Avoid getting dirt (sand, dust, etc.) on the stroller. Clean the dirt off the stroller as soon as possible. Please note that if you do not do so, the product can stop functioning either partially or fully.

The cleaning of the stroller's coating can be done with a wet washcloth or brush and detergent. There is no need to take the coating off. The color of materials and textile can fade when exposed to sunlight for a long time. The wear level of wheels should be controlled; the wheels should be cleaned from dirt. The pressure in the inflatable wheels should be kept at 0,8 bar.
natural_image
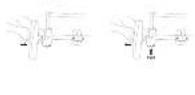
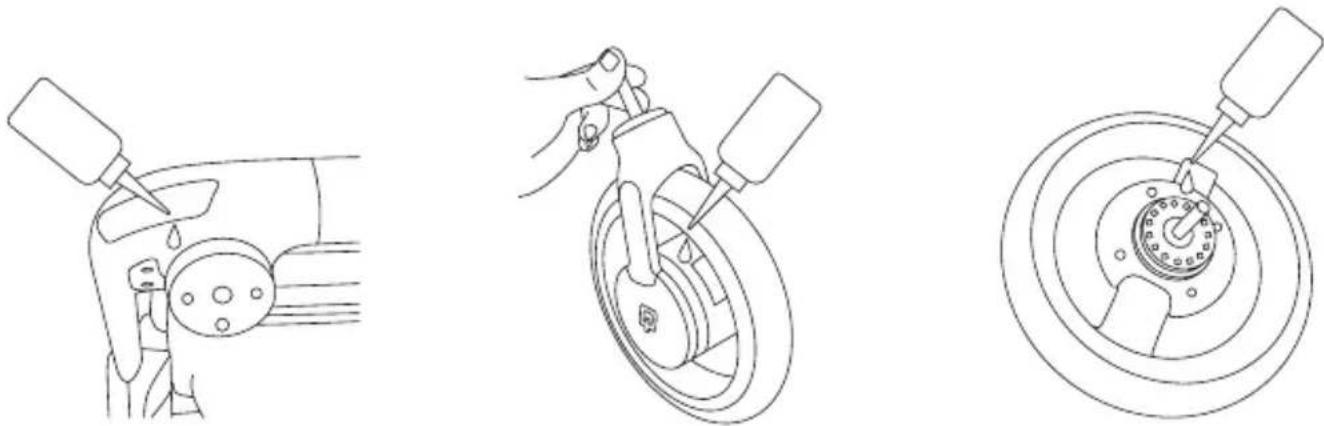
Three technical line drawings showing car steering wheel assembly, hand tool, and wheel rim (no text or symbols)Besides that, there are eight ball bearings in the stroller (2 in each wheel), which should be greased regularly and protected from dirt and liquids. In the event that such substances get in, the ball bearings should be cleaned, dried and greased with several oil drops. Any spillage of the oil should be wiped with a dry cloth.
WARRANTY
TERMS OF WARRANTY
The warranty offered for a product sold becomes void if such product is operated improperly — in breach of this manual's rules.
- The official warranty is available if there is a receipt/a filled in warranty list with a stamp/an invoice.
- Anex provides warranty for all strollers purchased within the period up to 12 months, on the condition that they are used as intended. The warranty period may differ according to the actual legal status about consumer's right protection of that country, where the item is purchased. The warranty is provided only for the first owner and it cannot be assigned to other parties.
- Any claims concerning product failures should be addressed to your Seller or by filling in a form with detailed info on anexbaby.com in the Services section.
- Warranty repair is performed by the manufacturer, an authorized service center, or an authorized representative.
- Warranty period is prolonged for the repair time.
- The entity providing the warranty defines the repair methods for the stroller.
- The product under reclamation should be clean.
- In the event of losing the warranty list, you can use the website registration information.
- The production warranty is only valid for that country, where purchasing is performed by an Anex official member representative.
THE WARRANTY IS INVALID:
- In the case of damage due to improper use, for example, ladder elevation or sloping, also incorrect care of the product.
- For the repair of the elements of the frame and fixing repairs that were made by non-authorized agents.
-
For damages and tearing made by the customer or another persons (knots that have been made mechanically, faults, deformations, dents, discontinuities caused by force).
-
For used wheels which were damaged or punctured because of mechanical actions; natural wear out or resource exhaustion.
- For accidental damages caused by a customer or damages caused as a result of careless attitude or usage; damages caused by natural disasters (natural phenomena).
- In the event of product damage as a result of external impact, for example, during baggage carriage.
- When the product has been deformed or damaged due to overloading, for example, when excess weight is applied (Any heavy object that is hanged on the handle, at the back or on the sides of the carriage, disturbs its balance. The maximum load on the pocket on the backrest — 0.5 kg, load of a bag/backpack on the handle of the carriage is 1 kg, and 5 kg on the basket. The maximum weight of the child on the carrycot is 9 kg and 22 kg on the seat unit) or when the product was used on a very uneven surface.
- In the case of textile material deformations. All of our fabrics meet the standards regarding color fastness against UV radiation. Nevertheless all fabrics fade if caused by long-term exposure to sunlight.
- The effects that have been brought about by the oscillation of the carriage from side to side and the weakening of the structure at the rivets.
The company reserves the right to introduce design changes to the product's performance without prior notice for improvement.
text_image
Five types of recycling symbols: crossed-out box, square, triangle, hand holding cup, and letter Fnatural_image
Three technical line drawings showing car wheel assembly, steering wheel, and tire alignment (no text or symbols)GWARANCJA JEST NIEWAŻNA
natural_image
Three technical line drawings showing car steering wheel assembly, hand tool, and wheel rim (no text or symbols)natural_image
Three technical line drawings showing car wheel assembly, hand tool, and wheel rim (no text or symbols)VALGUSTUS PIMEDAS LIIKLEMISEKS
CONDITIONS DE GARANTIE
natural_image
Line drawing of a mechanical device with a dropper and lever (no text or symbols)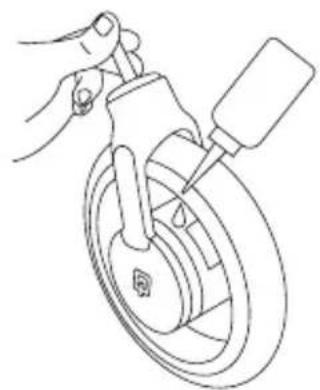
natural_image
Line drawing of a hand using a tool to lift a wheel (no text or symbols)
natural_image
Technical line drawing of a mechanical assembly with concentric circles and a tool (no text or symbols)modification of the following text in the source image:
3m6s8g7m7n0 s33b0l d0d0s/da6b6s
s33bou qsdmbgsgdoumzou, douo sqssghmdo huzom dsbd o gsbmszhydwno sqssghnou xodjo (lsbsd bdsu zsogdom)(bsb. 16). s33bou sqssghmdo s3gmdsghmsq hszygmos. s33bou dmbsblbgmsq, qssfomqon dgblongmdou lougdom qsdmhgsjgdwn mowszjdu, hmddwjdoz smfymzomos dgblongmdou lougdom pos shogm (bsb. 17). omjib sm dggodmosom dmblbsom s33bou, hmqqlbsg ds3dzo smol dozboom. slj3j, zmdgmhdgoumzou lsfooms gjcom u l3jgoosmymo lsbgnwnmcon dmblbs, hmddwjdoz dmouszhydwnos xodgdom dooos bsfomado mnozj dbsmj (bsb. 18). ju zsmdjo de jgodwnjs gsdmygbjdywn ojbsu dsmgozo jsmdoumszou. gsdmygbjdu djdqja, ds3dzo u ylsgmmbmdoumzou, lsbygnwnmdo ybcos hsopmlu ods3j xodgdom. sygmoyndmmdou djdombzja do, dylsdmygdwnos s3bou dozboosb sdmygs cos ysmygbzs (bsb. 19). zoimjm mozdo, omjib nybos sdmonom odjmubu myodjo do os dozboom dylszmszo zsbbsom. slj3j dylsdmygdwnos dcmmosbsq oslsgsmygdno sadomom s33boqsb (bsb. 20). zsmqos sdols, dsgsmygdno smfymzomos lszjbgommsbon gybjzoom, hmddwq on hygymnomcymds zsmdmqou zsmj d3jcos bsfomby . zsmqos sdols, dylsdmygdwnos fmjmubu myodo myodgdoqosb sadomom os zsmygbmn.
JQQMOU HSMBML JOBS BSHOOMO SQUYH30MOS MHDBM30
zsbsmgdom lodbgmdo ylsgmbomq bgombdolmzol. ysdoi dynjo dyndsmdu mno nygymmsymo AA dsgsmgnom. dsgsmggdol qsdmbgsgddol/hsbs33mydol dofbom, oyl396 ybcos dmblbsom qsbsgsmgydmo hsmhmbj, hswmon dsgsmggdo oos djdqqg33ms3 dmynfohmon.
modification of the following forms:
natural_image
Three technical line drawings showing car wheel assembly and steering wheel (no text or symbols)zsngos sdois, smgdmbl hzs dymono gmdo(2 ommygwr lsfg), mndgmoz ybcos oymb ndgmsmncgo ddamhdgmymo os qszgmo fyyqols os lombgdouzsb. od ddombzgsdo, omy nsody bozmoŋgds dmzogds sd dymmdo, ybcos zsohdobmu os zsobjuul msdogbody bgomu hzgomom. bgomu hydoldogno hzgom ubcos zsdobcomo ddmsmo fluzomom.
zsmsbQos
zsmsbqouu 30mmdgdo:
natural_image
Three technical line drawings showing car steering wheel assembly, hand tool, and wheel rim (no text or symbols)GARANTIJAS NOSACĪJUMI
BARA DE SIGURANTĂ A SCAUNULUI
natural_image
Three technical line drawings of car steering wheel components: wheel, wheel rim, and wheel rim (no text or symbols)natural_image
Line drawing of a car interior with a dropper and mechanical components (no text or symbols)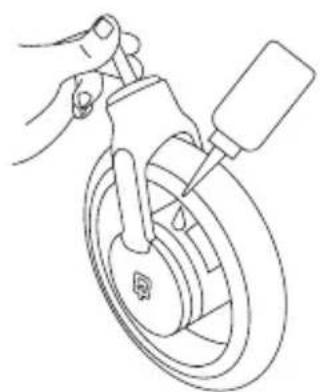
natural_image
Line drawing of a hand gripping a bicycle wheel (no text or symbols)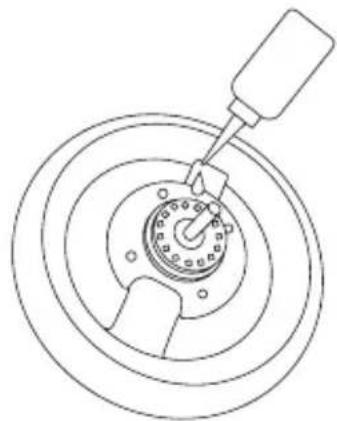
natural_image
Technical line drawing of a mechanical assembly with concentric circles and a tool inserted (no text or symbols)JUSTERING AV HANDTAGETS HÖJD
Warranty card N° \_\_\_\_
Product model and short name ____
Buyer's full name (for individuals) ____
Purchasing company's name ____ ____
Date of sale "____" ____20__.
Product value ____ ____
The field for a seller's stamp or signature
The terms of warranty were noted and agreed upon ____
Client's signature
The period of warranty is
months from the date of sale
Warranty case N° 1
Receipt date: Issue date:
“____”____20____.“____”____20____.____
Damage type: ____ or a repair workshop
Warranty case N° 2
Receipt date: Issue date:
“____”____20____.“____”____20____.____
A supervisor's signature and the stamp of a repair workshop
Damage type: ____
00-140 Warsaw, Poland
+48 22 211 67 08
office@anexbaby.com