AMTRON Premium E 22 C2 - Battery charger Mennekes - Free user manual and instructions
Find the device manual for free AMTRON Premium E 22 C2 Mennekes in PDF.

User questions about AMTRON Premium E 22 C2 Mennekes
0 question about this device. Answer the ones you know or ask your own.
Ask a new question about this device
Download the instructions for your Battery charger in PDF format for free! Find your manual AMTRON Premium E 22 C2 - Mennekes and take your electronic device back in hand. On this page are published all the documents necessary for the use of your device. AMTRON Premium E 22 C2 by Mennekes.
USER MANUAL AMTRON Premium E 22 C2 Mennekes
natural_image
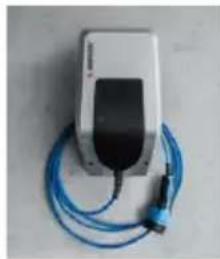
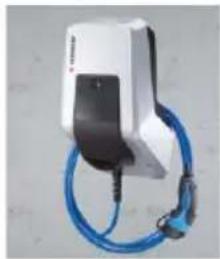
Exterior view of a modern electric vehicle charging station with blue and silver cables against a concrete wall (no visible text or symbols)Inhaltsverzeichnis
natural_image
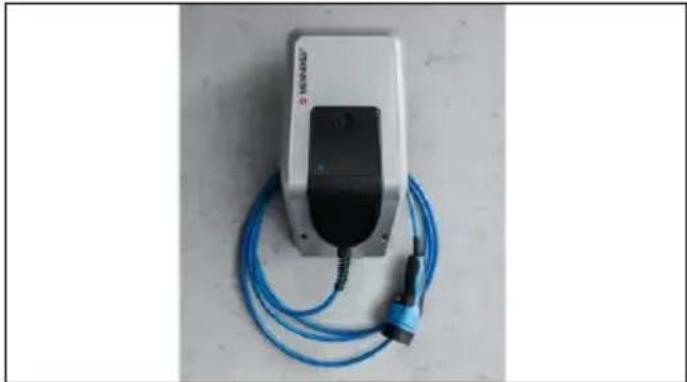
White and black electric vehicle charging station with blue cable (no visible text or symbols)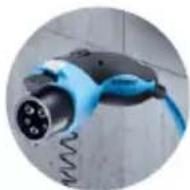
natural_image
White electronic device with black top and blue cables, no visible text or symbols
natural_image
White electronic device with a black lid and metallic casing, placed on a plain surface (no visible text or symbols)
natural_image
White handheld device with a black control panel and a small screen, mounted on a plain surface (no visible text or symbols)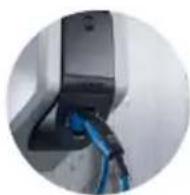
natural_image
Medical device with blue and black cables, no visible text or symbols on the device bodynatural_image
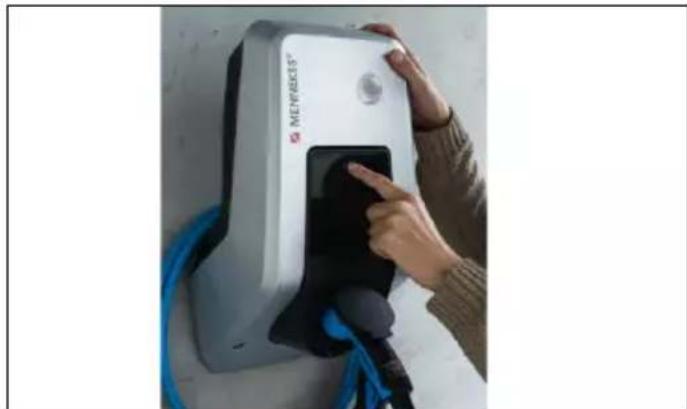
Person using a MELHEE'S electric vehicle charging station with blue cables (no visible text or symbols)Abb.: 5. Stopp-Taster
natural_image
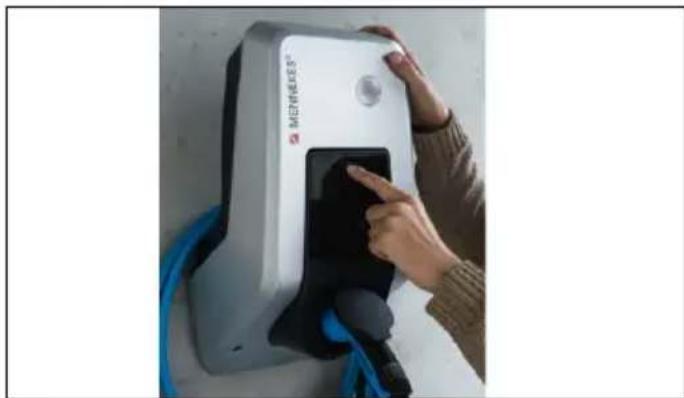
Person interacting with a white Membership EV charging station connected to a blue cable (no visible text or symbols)Ohne MENNEKES Charge APP
natural_image
Line drawing of a device with a plug inserted into a socket (no text or symbols)https://www.chargeupyourday.com/

11. Glossar
1.2 Warning information....2
1.3 Symbols used....3
2. For your safety 3
2.1 Target groups....3
2.2 Intended use 3
2.3 Improper use....4
2.4 Basic safety information....4
2.4.1 Do not open the device....4
2.4.2 Proper condition....4
2.4.3 Observing supervisory duties....4
2.4.4 Observing ambient conditions....5
2.4.5 Proper use of charging cable....5
2.4.6 Keeping order 5
3. Product description....5
3.1 Delivery content....5
3.2 Name plate 6
3.3 Device layout....6
3.4 Optional equipment....7
3.5 Device variants....8
3.6 Cable suspension 9
3.7 Stop button....9
3.8 Multifunction button 9
3.9 RFID card....9
3.10 Energy meter....10
3.11 Operating modes....10
3.12 LED Info bar....11
4. Start-up....12
4.1 Switching on the device....12
4.2 Connect MENNEKES Charge APP to the device ... 12
5. Operation....13
5.1 Functional description of the operating modes ..... 13
5.1.1 "APP control" 13
5.1.2 "Time control" 14
5.1.3 "Mains control" 15
5.1.4 "Energy Manager"......16
5.1.5 “SCU”....18
5.2 Local RFID cards management....19
5.3 Charge vehicle....20
5.3.1 Authorization....20
5.3.2 Starting the charging process....20
5.3.3 Terminating the charging process....21
5.4 Operation with MENNEKES Charge APP 21
5.5 Multifunction button 22
5.5.1 Terminating charging and acknowledging faults .. 22
5.5.2 Restarting residual current devices and miniature circuit breakers....22
5.5.3 Checking the residual current device 23
5.6 Stop button....23
6. Maintenance....24
6.1 Maintenance....24
6.2 Cleaning....25
7. Remedy....25
7.1 Troubleshooting with MENNEKES Charge APP....25
7.2 Troubleshooting without MENNEKES Charge APP.... 27
8. Storage 28
-
Disposal......28
-
Accessory....28
-
Glossary....28
1. About this document
The AMTRON ^® , hereafter referred to as “device”, is available in various variants. You can find the version of your device on the name plate. This document refers to the following variants of the device:
■ AMTRON Xtra
■ AMTRON Xtra E
■ AMTRON Xtra R
■ AMTRON Premium
■ AMTRON Premium E
■ AMTRON Premium R
■ AMTRON Premium W
This manual is intended for the operator (electrotechnical layman) and gives instructions for safe operation.
For installation instructions, see the installation manual.
The installation manual is intended exclusively for the qualified electrician.
Observe all additional documentation for the use of the device. Keep all documents for later reference and pass these on to the new operator.
The German version of this manual is the original manual. Manuals in other languages are translations of this original manual.
MENNEKES reserves the right to change the software with respect to the description in this manual. The functions described in this manual are based on AMTRON ^® software 1.10.
Copyright © 2019 MENNEKES Elektrotechnik
GmbH & Co. KG
1.1 Service
If you have questions concerning the device, please contact MENNEKES or your responsible service partner. On our homepage in “Partnersuche” you will find further contacts in your country.
Use the form in "Contact" on
https://www.chargeupyourday.com/ for a direct contact to MENNEKES.

Please have the following information ready to hand for a quick processing:
■ Type designation / serial number (see name plate on the device)
At www.amtron.info you can always find the latest news, software updates, change logs, and frequently asked questions about AMTRON. Have the serial number ready to hand.
Further information about electromobility can be found on our homepage "FAQs".
https://www.chargeupyourday.com/faqs/

1.2 Warning information
Warning of personal injury

This warning notice indicates imminent danger that will result in death or severe injuries.

This warning notice indicates a dangerous situation that may result in death or severe injuries.

This warning notice indicates a dangerous situation that can result in minor injuries.
Warning of material damage

This warning notice indicates a dangerous situation that may result in property damage.
1.3 Symbols used

Only a qualified electrician may carry out operations marked with this symbol.

This symbol indicates an important note.

The symbol indicates additional, useful information.
This symbol marks a prompt for action.
■ This symbol marks a listing.
→ This symbol is used to refer to another section in this manual.
This symbol is used to refer to another document.
This symbol is used to point out a result.
2. For your safety
2.1 Target groups
Owner
As the operator, you are responsible for the device. You are responsible for proper and safe use of the device. This includes instructing persons who use the device.
As an operator without specialist electrical training, you may only carry out activities that do not require a qualified electrician.
Electrician

As a qualified electrician, you have received recognised electrotechnical training. Based on this knowledge, you are authorised to carry out the electrotechnical work requested in this manual.
Requirements for qualified electricians:
■ Knowledge of general and special regulations pertaining to safety and accident prevention.
■ Knowledge of electrotechnical regulations.
■ Knowledge of national regulations.
■ Ability to identify risks and avoid possible hazards.
2.2 Intended use
The AMTRON ^® is a charging station for use in private and semi-public areas, such as private property, company car parks or depots, access to which is limited.
The device is used solely to charge electric vehicles.
■ Mode 3 charging according to IEC 61851-1.
■ Plugs and sockets according to IEC 62196.
The unit is intended for permanent installation and for indoor and outdoor use.
For Premium versions only: the device can be used as a single charging point or in a group of several devices with a back-end system. Several devices are connected via a MENNEKES ACU. An ACU is installed in the MENNEKES eMobility-Gateway and in a Smart charging column.
For Xtra versions only: the device can be operated as a single charging point.
Legal requirements in some countries provide additional protection against electric shock. A possible additional protective measure can be the use of a shutter.
The device may only be operated taking into account all international and national regulations. Please observe the following international regulations or the respective national transposition:
IEC 61851-1
IEC 62196-1
IEC 60364-7-722
Read and observe these instructions as well as all additional documentation for the use of the device.
2.3 Improper use
Using the device is safe only when used as intended. Any other use as well as changes to the device are improper use and therefore not permitted.
The operator is responsible for the proper and safe use. MENNEKES Elektrotechnik GmbH & Co. KG accepts no liability for any consequences arising from improper use of the device.
2.4 Basic safety information
2.4.1 Do not open the device
The device contains electrical components that carry high voltage. Improper handling, especially in connection with moisture, of the opened housing will cause severe injury of persons by electric shock.
▶ Never open the device.
Only a qualified electrician may open the device.
- Carry out only the work described in this manual and concerning the operation.
2.4.2 Proper condition
Damaged device
If the device is damaged or defective, has a defective housing or missing components, people can be seriously injured by electric shock.
▶ Avoid collisions and improper handling.
▶ Do not use the device in case of damage / defects.
▶ Mark a damaged device, so that other persons cannot use it.
▶ Have a qualified electrician rectify the damage without delay.
Improper maintenance
Improper maintenance can affect the safety of the equipment and cause accidents. This can seriously injure or kill people.
▶ Observe the maintenance schedule.
▶ Have maintenance work regularly carried out by qualified electricians (twice a year or annually).
2.4.3 Observing supervisory duties
Persons, especially children, and animals who are not fully able to assess potential hazards pose a danger to themselves and others.
▶ Keep away from the device and charging cable.
3. Product description
The devices may differ due to customer or country-specific requirements. Depending on the model, the device may differ visually from the illustrations in this guide.
2.4.4 Observing ambient conditions
If the permissible ambient conditions are not adhered to, the functionality and operational safety of the device is affected. This can cause accidents and severe injuries to people. Observe the following environmental conditions:
▶ Avoid direct sunlight.
If necessary, install the weather protection cover.
▶ Keep the ambient temperature from -25 to +40 °C.
▶ Avoid penetration of water.
▶ Avoid strong temperature fluctuations.
▶ Ensure adequate ventilation of the unit and avoid heat accumulation.
▶ Keep device away from heat sources.
2.4.5 Proper use of charging cable
Improper handling of the charging cable can cause hazards such as electric shock, short circuit or fire.
▶ Do not touch the contact pins.
▶ Do not use adapter connectors or extension cables.
- Avoid kinks, sharp edges, loads and impacts.
▶ Avoid accumulation / knotting of the charging cable.
▶ Unroll the charging cable completely when charging.
▶ Remove the charging cable only by pulling the plug from the charging socket.
- Keep small animals away from the charging cable. Use protective flap.
▶ Do not expose the charging cable to tensile stress.
2.4.6 Keeping order
A charging cable lying around presents a stumbling hazard.
Objects on the device may fall.
▶ Minimize stumbling hazard.
▶ After charging store the charging cable properly or use the cable suspension.
▶ Do not store any objects on the device.
3.1 Delivery content
Fig.: 1. Delivery content
- Device
- RFID cards (2× master, 3× user) ^1)
- Hex wrench
- Bag with installation hardware (screws, dowels, sealing plugs)
- Operating manual
- Installation manual
- Set-up data sheet
- Drilling jig
^1) Optional

Without set-up data sheet, access to certain functions and the configuration is not possible.
▶ Keep the device data sheet in a safe place.
▶ Contact the MENNEKES support if you have lost it.
→ „1.1 Service“
The device can be used with or without MENNEKES Charge APP. The MENNEKES Charge APP is not supplied. However, it is available free of charge in the App Store and the Google Play Store.

MENNEKES recommends using the device with the MENNEKES Charge APP.
3.2 Name plate
The name plate contains all important device data. The name plate shown is a pattern.
▶ Note the name plate on your device. The name plate is installed on the housing base.
Fig.: 2. Name plate (pattern)
- Manufacturer
- Type
- Item / serial number
- Rated current
- Rated voltage
- Frequency
- Standard
- Barcode
- Number of phases
- Protection type
- Information
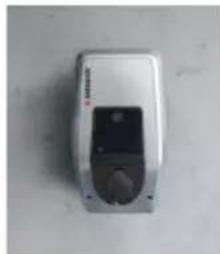
3.3 Device layout
The enclosure of the device has three parts and consists of bottom part, top part and front panel. The design of the front panel depends on the version of the device.
Front view
Fig.: 3. Front view (example)
- Multifunction button 1)
- LED Info bar
- Fastening screws for upper housing part
- Upper enclosure section
- Energy meter with inspection window
- Front panel
- RFID card reader 1)
- Type 2 charging socket with hinged lid ^1)
- Pre-cut recess for supply cable / cable duct
^1) Optional
3.4 Optional equipment
| RFID card reader Fuse protection Control element | |||
| Premium E(EU version) | RFID card reader - Stop button | ||
| Xtra E(EU version) | -- Stop button | ||
| Premium R(EU version) | RFID card reader | Personal protection(RCD) | Multifunction button |
| Xtra R(EU version) | - | Personal protection(RCD) | Multifunction button |
| Premium W(EU version) | RFID card reader | Personal and circuit protection (RCD and MCB)with shunt release | Multifunction button |
| Premium(Version for Germany) | RFID card reader | Personal and circuit protection(RCD and MCB) | Multifunction button |
| Xtra(Version for Germany) | - | Personal and circuit protection(RCD and MCB) | Multifunction button |
EN
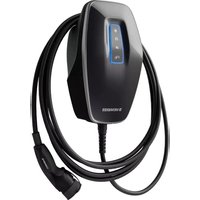
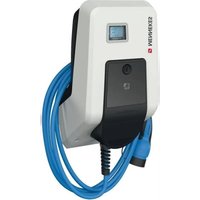
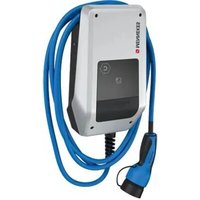
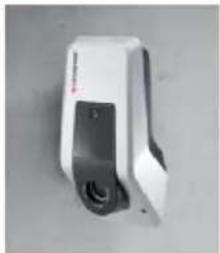
3.5 Device variants

natural_image
White and black handheld electric vehicle charging station with blue cable (no visible text or symbols)
Permanently connected charging cable with type 1 charging connector.
These variants have a permanently connected charging cable. They can be used to charge all electric cars equipped with type 1 plug. You do not need to use a separate charging cable.
natural_image
White electronic device with black top and blue cable, no visible text or symbols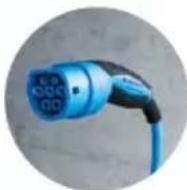
Permanently connected charging cable with type 2 charging connector.
These variants have a permanently connected charging cable. They can be used to charge all electric cars equipped with type 2 plug. You do not need to use a separate charging cable.
natural_image
White rectangular device with a black lid and circular button, placed on a plain surface (no visible text or symbols)
Type 2 charging socket for use of separate charging cables
These variants have a type 2 charging socket for the use of separate charging cables. They can be used to charge all electric cars equipped with type 2 or type 1 plug.
natural_image
Close-up of a white and black electronic device with a button and lens (no visible text or symbols)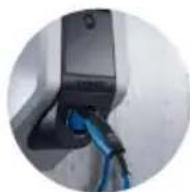
Type 2 charging socket with shutter for the use of separate charging cables
These variants have a type 2 charging socket with shutter for the use of separate charging cables. The shutter provides additional protection against electric shock and is legally prescribed in some countries.
→ "2.2 Intended use"
They can be used to charge all electric cars equipped with type 2 or type 1 plug.
All charging cables from MENNEKES can be found on our homepage in "charging cable". https://www.chargeupyourday.com/

3.6 Cable suspension
The device is designed in such a way that the charging cable can be hung directly on the housing.
natural_image
White medical device with blue cable and connector, no visible text or symbolsFig.: 4. Cable suspension
3.7 Stop button
For devices without authorization you end the charging process with a light touch of the button.
natural_image
Person using a MELINDIS brand electric shock absorber device with blue cable (no visible text or symbols)For devices without authorization (autostart) you end the charging process with a light touch of the multifunction button. In addition, you can easily switch the RCD and the MCB back on from outside if there is a fault.
natural_image
Person interacting with a white Mennes' charging station device, no visible text or symbols on the device itselfFig.: 6. Multifunction button
3.9 RFID card
Up to 98 users can access one or more devices via an individual RFID card. The charging cards are read out directly on the device.
The user database (whitelist) can be managed as follows:
■ locally on the device
■ via Charge APP
■ centrally in the eMobility-Gateway (when connecting)
■ in a back-end system
Fig.: 7. RFID card
3.10 Energy meter
You can read your energy consumption directly from your device at any time. In conjunction with the MENNEKES Charge APP you can conveniently read out the consumption values via your mobile terminal and use them for your energy statistics.
3.11 Operating modes
The device provides five operating modes that can be changed even during operation depending on the configuration. The operating mode is selected via the MENNEKES Charge APP.

The availability of operating modes and functions depends on the equipment and the configuration of the device.
Operating mode "APP control"

In this operating mode, the charging process is controlled by the MENNEKES Charge APP.
Operating mode "Mains control"

In this operating mode, the charging process is controlled over an external contact (such as a ripple control receiver). In addition, the available charging current can be adapted to various main / off-peak tariffs as in operating mode “Time control”.
Operating mode "Time control"

In this operating mode, the charging process is controlled by the integrated tariff-switching timer. This allows adapting the available charging current to various main / off-peak tariffs. For example, during the off-peak period the charging station can charge with higher charging power than during more expensive main tariff periods. The valid tariff periods supplied by the electricity provider are entered in the MENNEKES Charge APP and the device adapts the charging current according to the periods entered. Updating the tariff-switching timer and changing of daylight saving / standard time happen in connection with the charge APP.
Operating mode "Energy Manager"

In this operating mode, the charging process is controlled by an Energy Manager.
Depending on the installed Energy Manager, various functions are possible.
Operating mode "SCU"

In this operating mode, all charging processes of the devices integrated in the network are controlled via a higher-level back-end system (e.g. chargecloud).

You cannot use the device with the MENNEKES Charge APP in "SCU" mode.
→ "5.1 Functional description of the operating modes"
3.12 LED Info bar
The LED information field indicates the operating status of the device. Operational readiness, charging, wait time, and faults are indicated by four symbols in the colours blue, green, white, and red. The MENNEKES Charge APP uses these symbols for displaying the operating status.
EN
| LED Info bar Charge APP Description | ||
lit blue permanently  | Ready for operationThe device is ready for use. No vehicle is connected to the device. | |
pulsating green Ready to charge: vehicle pauses  | All requirements for charging an electric vehicle are met. A charging process is not taking place. The charging process is paused due to a vehicle feedback or was terminated by the vehicle. | |
lit green permanently Ready to charge  | All requirements for charging an electric vehicle are met. The charging process is paused due to a missing activation signal or a charging current configuration of 0 A. | |
lit green permanently animated green Charging process active  |  | All requirements for charging an electric vehicle are met. Charging in progress. |
flashes green animated green Overtemperature warning 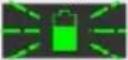 |  | Charging in progress. The device reduces the charging current to prevent overheating and deactivation. |
flashes blue steady white Action required 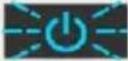 |  | Connection with vehicle is pending or has been established or charging has been paused due to specification by the MENNEKES Charge APP. A subsequent action is required, such as connecting or disconnecting the charging cable, starting the charging process by RFID card or MENNEKES Charge APP. |
lit red permanently or flashing red   | lit red permanently | FaultA fault prevents the vehicle from charging.→ “7. Remedy” |
steady white  | Data processingThe device processes data. | |

The colour scheme (green / blue) for “Ready for operation / charging” depends on the setting during setting-up process.
4. Start-up
4.1 Switching on the device
WARNING
Risk of electric shock due to damaged device
Using a damaged device may result in electric shock.
▶ Do not use the device if there is external damage.
▶ Mark the possibly damaged device to ensure that no one uses it.
▶ Have a qualified electrician rectify the damage immediately.
▶ Have an electrician take the device out of service if necessary.
▶ Switching on the supply voltage.
The "Ready for operation" LED on the LED info field lights up.
4.2 Connect MENNEKES Charge APP to the device

You cannot use the device with the MENNEKES Charge APP in "SCU" mode.
The device is operated with a mobile terminal (smartphone, tablet) via the MENNEKES Charge APP. Your mobile terminal can control the device and shows you all information about the current charge. In addition, you can start or stop the current process at any time via remote control.
Requirements:
To operate the device with the MENNEKES Charge APP, the following requirements must be met:
- Your mobile terminal has the operating system IOS or Android.
■ Installation of the MENNEKES Charge APP on a mobile terminal. The MENNEKES Charge APP is available free of charge in the Apple App Store and in the Google Play Store.
■ The device is switched on and ready for use.
■ There is a network connection between the mobile terminal and the device.

For some tasks it is necessary to enter a PIN. These can be found on the set-up data sheet. After entering an incorrect PIN ten times, PIN input will be blocked for five minutes.
Automatic connection
▶ Open the MENNEKES Charge APP.
- Tap "Search for Wallbox" to find the devices on your network.
▶ Select the desired device using the serial number (see name plate).
▶ Enter PIN1 (APP PIN) of the device and change the name if necessary.
▶ Confirm the entry with "Save".
If further devices are to be connected, repeat the above steps.
Manual connection
In rare cases, the device will not be detected automatically. You can then connect the device manually.
▶ Touch "Set up manually".
▶ Enter the IP address and associated PIN1 (APP PIN) of the device and change the suggested name as desired.
The IP address differs depending on the configuration made during setting-up process.
If necessary, contact your responsible service partner.
■ IP address as access point (the mobile terminal is connected to the WLAN of the device): 172.31.0.1
■ IP address for direct connection (The device is connected to the router with a LAN cable. The mobile terminal is in the same network): 192.168.0.100
■ IP address for integration into your home network: readable in the user interface of your router.
▶ Confirm the entry with "Save".
5. Operation
Operation of the device depends on the selected operating mode.
5.1 Functional description of the operating modes
5.1.1 "APP control"
EN
| Operating mode “APP control” | |
| Start of charging process | Without RFID card:■ Automatically after connection to the vehicle■ Manually via the MENNEKES Charge APP. |
| With RFID card:■ Authentication with valid RFID card■ Manually via the MENNEKES Charge APP by selecting a valid RFID card. | |
| Controlling the charging process | Via the MENNEKES Charge APP:■ Changing the charging current for the on-going charging process■ Interrupting the charging process (pause)■ Continuing the charging process■ Terminating the charging process. |
| By using the multifunction button:■ Terminating the charging process.The stop function with the multifunction button must be enabled during the setting-up process. | |
| With RFID card:■ Terminating the charging process with the same card used for starting the charging process. | |
| i In operating mode “APP control”, all functions of other operating modes are disabled.The charging capacity is then not controlled by time, network or an Energy Manager. | |
| Setting up the operating mode | ► Make settings in the MENNEKES Charge APP |
| Changing the operating mode | You can use the MENNEKES Charge APP “Configure Wallbox” to change to all operating modes configured during the setting-up process. The change of operating mode will apply for the on-going and subsequent charging processes. |
| Behaviour after a power failure | The behaviour after a power failure is configured during setting-up process.■ Charging process is aborted (default setting when charging with authorization).■ Charging process continues (default setting to charging without authorization). |
5.1.2 "Time control"
| Operating mode “Time control” | |
| Start of charging process | Without RFID card:■ Automatically after connection to the vehicle |
| With RFID card:■ Authentication with valid RFID card■ Manually via the MENNEKES Charge APP by selecting a valid RFID card. | |
| Controlling the charging process | By using the internal timer:■ Adjusting the charging current depending on the active period (main / off-peak tariffs) |
| Via the MENNEKES Charge APP:■ Terminating the charging process. | |
| By using the multifunction button:■ Terminating the charging process.The stop function with the multifunction button must be enabled during the setting-up process. | |
| With RFID card:■ Terminating the charging process with the same card used for starting the charging process. | |
| In operating mode “Time control”, the functions of the operating modes “Mains control” and “Energy Manager” are disabled. The charging capacity is then not controlled by network or an Energy Manager. | |
| Setting up the operating mode | ► Make settings in the MENNEKES Charge APP |
| Changing the operating mode | By using the MENNEKES Charge APP during a charging process:■ Change to operating mode “APP control”.The change of operating mode will apply to the on-going charging process. The following charging process is performed in the mode selected in “Configure Wallbox”. |
| Via the MENNEKES Charge APP in “Configure Wallbox”:■ Changing to all operating modes configured during the setting-up process.The change of operating mode will apply for the on-going and subsequent charging processes. | |
| Behaviour after a power failure | The behaviour after a power failure is configured during setting-up process.■ The charging process is aborted (default with RFID card reader).■ The charging process is continued (default without RFID card reader). |
5.1.3 "Mains control"
| Operating mode “Mains Control” | |
| Start of charging process | Without RFID card:■ Automatically after connection to the vehicle |
| With RFID card:■ Authentication with valid RFID card■ Manually via the MENNEKES Charge APP by selecting a valid RFID card. | |
| Controlling the charging process | By using the external tariff-switching signal:■ Adjusting the charging current depending on the active period (main / off-peak tariffs) |
| Via the MENNEKES Charge APP:■ Terminating the charging process. | |
| By using the multifunction button:■ Terminating the charging process.The stop function with the multifunction button must be enabled during the setting-up process. | |
| With RFID card:■ Terminating the charging process with the same card used for starting the charging process. | |
| In operating mode “Mains control”, the functions of the operating modes “Time control” and “Energy Manager” are disabled. The charging capacity is then not controlled by time or an Energy Manager. | |
| Setting up the operating mode | To use the operating mode “Mains control” it is necessary to use an external tariff-switching signal e.g. to install by a ripple control receiver in the household application.► If necessary, it has to be installed by a qualified electrician. |
| Changing the operating mode | By using the MENNEKES Charge APP during a charging process:■ Change to operating mode “APP control”.The change of operating mode will apply to the on-going charging process. The following charging process is performed in the mode selected in “Configure Wallbox”. |
| Via the MENNEKES Charge APP in “Configure Wallbox”:■ Changing to all operating modes configured during the setting-up process.The change of operating mode will apply for the on-going and subsequent charging processes. | |
| Behaviour after a power failure | The behaviour after a power failure is configured during setting-up process.■ The charging process is aborted (default with RFID card reader).■ The charging process is continued (default without RFID card reader). |
5.1.4 "Energy Manager"
| Operating mode “Energy Manager” | |
| Start of charging process | Without RFID card:■ Automatically after connection to the vehicle |
| With RFID card:■ Authentication with valid RFID card■ Manually via the MENNEKES Charge APP by selecting a valid RFID card. | |
| Controlling the charging process | About the Energy Manager:■ The Energy Manager specifies the charging current according to the parameters set in the MENNEKES Charge APP. |
| Via the MENNEKES Charge APP:■ Terminating the charging process.■ Changing the remaining amount of charging energy.■ Changing the remaining charging time.■ Changing the distribution of solar energy (enable / disable excess charging). | |
| By using the multifunction button:■ Terminating the charging process.The stop function with the multifunction button must be enabled during the setting-up process. | |
| With RFID card:■ Terminating the charging process with the same card used for starting the charging process. | |
| In operating mode “Energy Manager”, the functions of the operating modes “Time control” and “Mains control” are disabled. The charging capacity is then not controlled by time or the network. | |
| Setting up the operating mode | To use the operating mode “Energy Manager”, it is necessary to install the respective devices (such as a photovoltaic system) in the household application and to implement the Energy Manager.► If necessary, it has to be installed by a qualified electrician. |
| Changing the operating mode | By using the MENNEKES Charge APP during a charging process:■ Change to operating mode “APP control”.The change of operating mode will apply to the on-going charging process. The following charging process is performed in the mode selected in “Configure Wallbox”. |
| Via the MENNEKES Charge APP in “Configure Wallbox”:■ Changing to all operating modes configured during the setting-up process.The change of operating mode will apply for the on-going and subsequent charging processes. | |
| Behaviour after a power failure | The behaviour after a power failure is configured during setting-up process.■ The charging process is aborted (default with RFID card reader).■ The charging process is continued (default without RFID card reader). |
The operating mode “Energy Manager” must be enabled during the setting-up process to become available. If the operating mode “Energy Manager” is selected, the following settings must be made via the MENNEKES Charge APP. They are transmitted to the Energy Manager.
▶ If necessary, consult a qualified electrician.
Parameter "Battery capacity"
Enter the maximum capacity of the battery of your electric vehicle.

If the parameter "Battery capacity" is set to 0 kWh, charging in operating mode "Energy Manager" is not possible.
Parameter "Power demand"
Enter the minimum amount of energy for a charging process.

If the parameter "Energy capacity" is set to 0 kWh, charging in the operating mode "Energy Manager" is not possible.
Parameter "Maximum charging time"
Enter the maximum time for charging the amount of energy to the vehicle specified with the parameter "energy demand".
Parameter "Excess charge"
Select the option "Excess charge" if you want to use only excess energy for charging your electric vehicle.
The parameters "Maximum charging time" and "Power demand" are then ignored.
The parameter "Battery capacity" is transmitted as an option.

A minimum charging current of 6A is required according to IEC 61851-1 for charging.
If the excess energy and the resulting current per phase are lower than these 6A, the vehicle can no longer be charged.

In case of connection problems to the Energy Manager, the charging current is limited to 6A and the charging process continues.
5.1.5 "SCU"
| Operating mode “SCU” | |
| Start of charging process | With RFID card:■ Authentication with valid RFID card |
| Via the ACU (Remote). | |
| Controlling the charging process | By using the higher-level back-end system:■ Control takes place completely over the higher-level back-end system. |
| By using the multifunction button:■ Terminating the charging processThe stop function with the multifunction button must be enabled during the setting-up process. | |
| With RFID card:■ Terminating the charging process with the same card used for starting the charging process. | |
| i In operating mode “SCU”, all functions of other operating modes are disabled. Using the MENNEKES Charge APP is not possible. | |
| Setting up the operating mode | To use the operating mode “SCU” it is necessary to integrate further devices and an ACU in the network and to install a higher-level back-end system. You can set up the device for permanent operation in „SCU“ mode (only for AMTRON® software 1.10 and higher).► If necessary, it has to be installed by a qualified electrician. |
| Changing the operating mode | Via the service interface of a qualified electrician:■ Changing to all operating modes configured during the setting-up process.The change of operating mode will apply for the on-going and subsequent charging processes. |
| Behaviour after a power failure | The behaviour after a power failure is configured during setting-up process.■ The charging process is aborted (default with and without RFID card reader).■ The charging process is continued. |
5.2 Local RFID cards management
For RFID authorization, prior once-off registration of the user's RFID card is required. The device can manage up to 100 RFID cards (2x master, 98x users) in an internal database (whitelist).
There are the following two ways of managing the RFID card:
■ Without MENNEKES Charge APP:
The operator of the device is authorised by his master RFID card to add new RFID cards to the internal database.
■ With MENNEKES Charge APP:
In conjunction with MENNEKES Charge APP, the whitelist is particularly convenient for RFID authorisation. In addition, names can be assigned to RFID cards, RFID cards can be deleted, and the whitelist can be transferred to other devices.

The master RFID cards cannot authorize charging processes.

The device necessarily requires two RFID cards taught as masters.
If a card taught as master is deleted with the MENNEKES Charge APP, the next unknown RFID card held against the RFID card reader will be taught as master.
Without MENNEKES Charge APP
Adding a new RFID card:
▶ Hold the master RFID card in front of the RFID card reader to activate the teach-in mode.
▶ Hold the RFID card to be taught in front of the RFID card reader within 30 seconds.
▶ If necessary, hold another RFID card to be taught in front of the RFID card reader.
▶ Hold the master RFID card in front of the RFID card reader to exit the teach-in mode.
RFID card(s) has been added to the whitelist.

If during teach-in mode for an RFID card the symbol lights up permanently, the whitelist is full and no more RFID cards can be added.
With MENNEKES Charge APP
▶ Navigate to "Manage RFID cards"
▶ Enter PIN2 (whitelist PIN).
A list of all RFID cards appears.
Adding a new RFID card:
▶ Click on “+” to add new RFID cards.
▶ Enter the desired name and number of the RFID cards.
If the number of the RFID card is not known, it can be read out via a card reader.
Deleting an RFID card:
▶ Click on the "Settings" icon.
▶ In "Delete selected entries" individual RFID cards are deleted.
Transfer whitelist to other devices:
▶ Click on the "Settings" icon.
In "Copy all entries" the whitelist is copied.
▶ Navigate to the same menu of the destination device and click "Copy" to insert the whitelist.
Alternatively, the whitelist can be copied via "Save entries locally" and inserted in the same menu of the destination device in "Paste local entries".

This also requires a network connection to the destination device.
5.3 Charge vehicle
WARNING
Risk of injury by unsuitable aids
Use of adapter plugs, extensions, or additional charging cables in connection with the device can result in electric shock or cable fire.
▶ Use only the charging cable intended for the vehicle and the device.
▶ Do not use adapter plugs, extensions, or additional charging cables to charge the vehicle.
Depending on the configuration, the device can be used with or without prior authorisation.
5.3.1 Authorization
Charging without authorisation
If the device was configured during the setting-up process that no authorisation is required, the charging process starts automatically after connecting the charging cable to the vehicle.

In "SCU" mode, charging without authorization is not possible.
Authorisation with RFID card
▶ Hold the RFID card in front of the RFID symbol on the front panel.
After successful authorization, the device is ready for charging and can be started by inserting the charging cable into the device.

If charging does not start within the release time of approximately 60 seconds, the authorisation is reset and the charging system changes to status "Ready for operation". A new authorisation is required.
Authorization via MENNEKES Charge APP
You can also authorize yourself by selecting an RFID card from the whitelist. To do this, you need the PIN2 (whitelist PIN).
The device then responds as if you have authorised directly at the device with a valid RFID card.
5.3.2 Starting the charging process
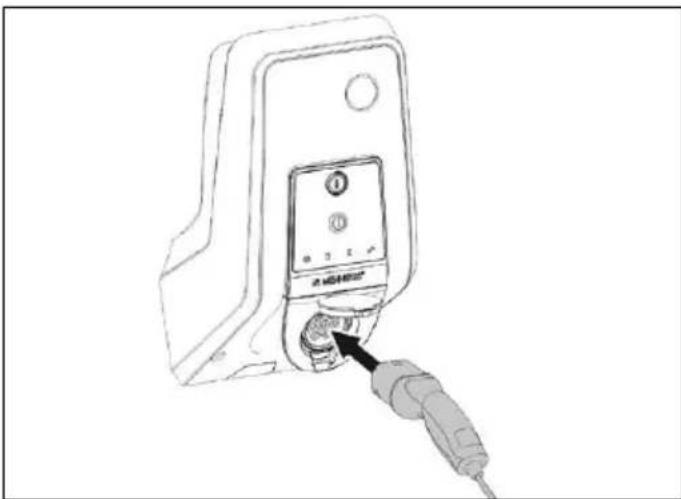
natural_image
Line drawing of a handheld electronic device with a plug inserted into the socket (no text or symbols visible)Fig.: 9. Insert the charging cable
▶ Unroll the charging cable completely.
▶ Connect the charging cable to your vehicle.
▶ If necessary, authorize.
▶ If necessary, connect the charging cable to the device.
For the version type 2 charging socket with shutter:
▶ Insert the plug into the type 2 charging socket on the device. The contour of the grey ring indicates the orientation of the plug.
▶ Turn charging plug 60° counterclockwise to open the shutter.
▶ After opening the shutter, insert the charging plug completely into the charging socket.
The following steps are performed automatically:
■ Detection of the current carrying capacity of the charging cable. Unsuitable charging cables are rejected.
■ Prerequisites for a proper charging are verified.
■ Communication with the vehicle via the charging current upper limit and the protective conductor connection.
The charging plug is automatically locked and the charging process is started.
5.3.3 Terminating the charging process
TENTION
Damage to the charging cable
Tensile stress of the charging cable may cause cable breaks and other damage.
▶ Only pull the charging cable directly from the socket outlet.
▶ End charging process in a controlled manner (e.g. with MENNEKES Charge APP, multifunction button or stop button or on the vehicle)
▶ Pull the charging cable out of the charging socket on the plug.
▶ Fit on the protective cap
▶ Hang or store the charging cable kink-free.

For a type 1 charging connector, press the release button to unplug.
Charging cable cannot be removed
If the charging plug cannot be removed, e.g. after a power failure, the charging plug could not be unlocked in the device. The charging plug cannot be removed and must be unlocked manually.
▶ Have the charging plug unlocked by a qualified electrician.
Installation manual AMTRON Xtra (E/R), Premium (E/R/W): "8.3 Emergency unlocking charging plug"
5.4 Operation with MENNEKES Charge APP

In "SCU" mode, operation via the MENNEKES Charge APP is not possible.
EN
All information about the status of your device can be found via the MENNEKES Charge APP directly on your smartphone or tablet.
The MENNEKES Charge APP offers, for example, the following functions:
■ Start charging, pause and stop
■ Configure the device
■ Change the charging mode
■ Manage the RFID cards
■ Overview of your electric vehicle
■ Display of charging processes
■ Display of errors
A functional description of the MENNEKES Charge APP can be found in German on YouTube under "MENNEKES Charge APP".
Please contact your authorised service partner if you have questions concerning the MENNEKES Charge APP.

Fig.: 11. Video "MENNEKES Charge APP" (English)
5.5 Multifunction button
Only available for the equipment variants Xtra R, Xtra, Premium R, Premium W and Premium.
5.5.1 Terminating charging and acknowledging faults
Fig.: 12. Terminating charging and acknowledging faults
Terminating a running charging process (only for devices without authorization) and acknowledging faults.
▶ Press the multifunction button (about 10 mm).
The charging process is terminated and the charging plug in the device is unlocked.
5.5.2 Restarting residual current devices and miniature circuit breakers
The residual current device and the miniature circuit breaker in the device can be manually switched on again from outside via the multifunction button, without opening the housing.
▶ Press the multifunction button up to the end position (> 15 mm).
Residual current device and miniature circuit breaker are switched on again.
5.5.3 Checking the residual current device

Fig.: 14. Checking the residual current device
The residual current device can be tested for functionality using the multifunction button without opening the housing.
▶ Insert a flat screwdriver with a blade width of 8 to 10 mm into the slot of the multifunction button.
▶ Turn the multifunction button 90° counterclockwise.
▶ Press the multifunction button for about two seconds (>5mm).
Is the residual current device functional?
The residual current device triggers.
The fault indicator on the LED info field flashes red.
▶ Switch the residual current device on again.
→ “5.5.2 Restarting residual current devices and miniature circuit breakers”
5.6 Stop button
Only available for the equipment variants Premium E and Xtra E.
Terminating charging and acknowledging faults
Fig.: 15. Terminating charging and acknowledging faults
Terminating a running charging process (only for devices without authorization) and acknowledging faults.
▶ Press the stop button (about 10 mm).
The charging process is terminated and the charging plug in the device is unlocked.
6. Maintenance
6.1 Maintenance
ANGER
Risk of electric shock due to damaged device
Using a damaged device may result in electric shock.
▶ Do not use the device if there is external damage.
▶ Mark the possibly damaged device to ensure that no one uses it.
▶ Have a qualified electrician rectify the damage immediately.
▶ Have an electrician take the device out of service if necessary.
Regular inspection and maintenance assist in trouble-free and safe operation of the device and help increase the service life.
This allows early detection of possible error sources and prevents hazards.
Defects found on the device must be eliminated immediately by a qualified electrician. Do not use a damaged device as this could increase the risk of electric shock and damage to property.
Examples of damage:
■ Defective housing / front panel (e.g. severe deformations, cracks, breaks)
■ Defective or missing components (e.g. protective elements, socket hinged lids, multifunction buttons)
■ Unreadable or missing signs
Recommended maintenance intervals
Testing intervals of charging infrastructure for electric vehicles based on DGUV (German Social Accident Insurance) regulation 3.
| Component Maintenance work Person | ||
| responsible | ||
| Daily / At every charging | ||
| Device Visual inspection for defects | User / Owner | |
| Control of operational readiness | Owner | |
| Every 6 months | ||
| Residual current device | Function check Operator / electrician | |
| Charging cable | Repeat the measurements and tests according to VDE 0701/702 | Electrician |
| Once a year | ||
| Device Repeat | the measurements and tests according to VDE 0105-100 | Electrician |

Performing the semi-annual and annual maintenance only by a qualified electrician.
▶ Document maintenance sufficiently.
▶ If necessary, request maintenance protocol from MENNEKES support.
→ "1.1 Service"

A maintenance contract with a responsible service partner guarantees regular tests.
7. Remedy
6.2 Cleaning

NGER
Danger to life by electric shock
The device contains electrical components that carry high voltage. Improper handling, especially in connection with moisture, of the opened housing will cause severe injury of persons by electric shock.
▶ Clean only outside of the device.
▶ Keep the device and protection systems closed.

TENTION
Material damage due to incorrect cleaning
Incorrect cleaning can cause damage to the housing or components.
▶ Do not use running water and ensure that water cannot reach live parts.
▶ Do not use high-pressure cleaning devices.
▶ Only use tools (e.g. brushes, cleaning agents) that are suitable for plastic surfaces.
▶ Do not use aggressive cleaning agents or chemicals.
The device can be cleaned with a dry cloth or a damp cloth, depending on application conditions and soiling.
The cleaning is carried out exclusively from the outside.
Procedure:
▶ First remove coarse dust and dirt with a hand brush with soft bristles.
▶ If necessary, moisten a clean cloth suitable for plastic surfaces with water and thoroughly wipe off the device.
▶ Only clean the charging cable when it is unplugged.
If a fault occurs, the "Fault" LED lights up or flashes on the LED info field and the MENNEKES Charge APP displays an error message. The device cannot be used as long as the fault has not been rectified and acknowledged, if necessary.
7.1 Troubleshooting with MENNEKES Charge APP
To correct the fault, observe the following sequence:
- Open MENNEKES Charge APP and read error code.
-
Disconnect the device from the mains for three minutes and restart it.
-
Check the following aspects:
■ There is a power supply and a network connection.
■ The suitable charging cable has been inserted correctly.
- Fix the problem using the error codes.

If the error code is not listed in this operating manual or if the fault could not be rectified, contact your responsible service partner.
- Acknowledge, the fault, if necessary, with the multifunction button or stop button or disconnect the device from the mains for three minutes and restart it.
→ "5.5 Multifunction button"
→ "5.6 Stop button"
Calling up the error codes in the MENNEKES Charge APP
▶ Select the "Configure Wallbox" menu.
▶ Select the "Wallbox information" menu.
The error code can be found in "Current error code".
| Error code | Meaning Trigger (examples) | Remedy | |
| 00 No error | |||
| 10 Installation error | Residual current device or miniature circuit breaker has triggered | ▶ Restart residual current devices and miniature circuit breakers→“5.5.2 Restarting residual current devices and miniature circuit breakers” | |
| 13 Overtemperature | Internal temperature sensor has triggered (at >60°C) | ▶ Allow the device to cool down.▶ Acknowledge fault. | |
| 15 | Device time invalid | Invalid or no system time | ▶ Connect with MENNEKES Charge APP. |
| 16 | Energy Manager connection error | No connection to the Energy Manager | ▶ Check network and Energy Manager settings in the service interface.▶ Check the LAN / WLAN connection. |
| 30 Device start failed | Device does not start or is in the faulty state after startup | ▶ Disconnect the device from the mains for three minutes and restart it.▶ Acknowledge fault. | |
| 31 Internal test failed Device does not start | ▶ Disconnect the device from the mains for three minutes and restart it.▶ Acknowledge fault. | ||
| 50 | Charging cable inserted incorrectly | Charging not possible | ▶ Disconnect charging cable and plug in again. |
| 51 | Wrong charging cable | Charging not possible | ▶ Check charging cable and replace if necessary. |
| 52 | Communication with the vehicle interrupted | Charging not possible | ▶ Disconnect the device from the mains for three minutes and restart it.▶ If the LED info field is permanently lit: Acknowledge the fault.▶ Check charging cable and replace if necessary. |
| 102 (only with operating mode “SCU”) | Maintenance | Maintenance of the ACU is performed | Once the maintenance has been completed, the fault has been eliminated. |
| 255 | Unknown error | ||
7.2 Troubleshooting without MENNEKES Charge APP
To correct the fault, observe the following sequence:
- Read the flashing code on the LED info field.
- Disconnect the device for three minutes and restart.
- Check the following aspects:
■ There is a power supply and a network connection.
■ The suitable charging cable has been inserted correctly.
- Correct the fault by means of the flash codes.
EN

If the fault could not be corrected, contact your responsible service partner.
- Acknowledge, the fault, if necessary, with the multifunction button or stop button or disconnect the device from the mains for three minutes and restart it.
→ "5.5 Multifunction button"
→ "5.6 Stop button"
Flash codes
For fault diagnosis, the following flash codes are displayed on the device's LED information field.
| LED Info bar Meaning Remedy | ||
lights up red An error  | has occurred. Can lead to reason■ Overtemperature■ Device start failed■ Internal test failed■ Maintenance■ Charging cable defective | ▸ Allow the device to cool down.▸ Disconnect the device from the mains for three minutes and restart it.▸ Check charging cable and replace if necessary.▸ Acknowledge fault. |
flashing slowly red (twice per sec.)  | An operating error has occurred. Can lead to reason■ Wrong charging cable■ Charging cable inserted incorrectly■ Charging cable defective■ Installation error | ▸ Disconnect charging cable and plug in again.▸ Check charging cable and replace if necessary.▸ Restart residual current devices and miniature circuit breakers→ “5.5.2 Restarting residual current devices and miniature circuit breakers” |
flashing fast red (eight times per sec.)  | A connection error has occurred.Possible causes:■ Energy Manager connection error■ Device time invalid | ▸ Check the LAN / WLAN connection. |
8. Storage
Proper storage can positively affect and maintain the operability of the device. The following important points should be considered.
▶ Clean the device before storing.
▶ Wind up the charging cable without kinking.
- Store the device in its original packaging or in suitable packaging materials in a clean and dry place.
▶ Observe permissible storage conditions.
| Permissible storage conditions | |
| Storage temperature -25 °C... + 40 °C | |
| Average temperature in 24 hours | < 35 °C |
| Relative humidity max. 95 % | (non-condensing) |
9. Disposal
Discard the device and packaging according to regulations at the end of its service life. Observe the national regulations for disposal and environmental protection applicable in the country of use.
Old devices and batteries must not be disposed of with household waste.
▶ Dispose of packaging material in designated collection containers.
▶ Dispose of old devices and batteries via your dealer.
10. Accessory
Accessories such as protective roofs or charging cables can be found on our homepage under “Accessories”. https://www.chargeupyourday.com/

11. Glossary
| Term Explanation | |
| ACU Accounting | Control UnitUnit for communication with the SCUs / HCC 3s of the charging stations and for connection to back-end systems.An ACU is installed in the eMobility-Gateway and Smart charging stations. |
| Back-end system | Infrastructure for controlling the charging stations and administration of personal access data. |
| eMobility-Gateway | MENNEKES eMobility-Gateway for intelligent networking of charging systems and for connection to back-end systems. |
| HCC 3 Unit for control of the charging process and communication with the vehicle (in mode 3 charging) | |
| MCB Miniature circuit breaker | |
| Mode 3(IEC 61851) | Charging mode for vehicles with communication interface on charging couplers type 2. |
| RCD Residual current device | |
| RFID Authorization option via RFID card to devices. | |
| SCU Socket Control Unit | Unit used to control each charging spot and communicate with the vehicle. |
| Type 2(IEC 62196-2) | Single and three phase charging couplers with identical plug geometry for charging powers from 3.7 to 44 kW AC. |
| Whitelist Internal database for managing user data (e.g. RFID cards). | |
Inhoudsopgave
3.5 Apparaatvarianten 8
3.6 Kabelophanging 9
3.7 Stoptoets 9
3.8 Multifunctionele schakelaar 9
3.9 RFID-kaart....9
3.10 Energiemeter....10
3.5 Apparaatvarianten
natural_image
White and black electric vehicle charging station with blue cable (no visible text or symbols)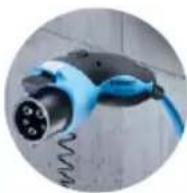
natural_image
White electronic device with black top and blue cable, no visible text or symbols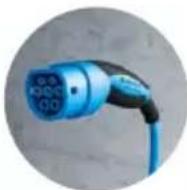
natural_image
White handheld device with a circular button and a small screen, placed on a plain surface (no visible text or symbols)
natural_image
White handheld device with a black control panel and a small screen, isolated on a plain background (no visible text or symbols)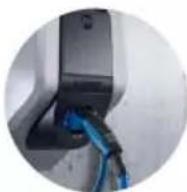
natural_image
Medical device with blue and black cables, no visible text or symbols on the device bodyAfb.: 4. Kabelophanging
3.7 Stoptoets
natural_image
Person using a Mercedes-Benz electric shock absorber device with blue cable (no visible text or symbols)Afb.: 5. Stoptoets
3.8 Multifunctionele schakelaar
natural_image
Person interacting with a white MEMS device connected to a blue cable (no visible text or symbols)Zonder MENNEKES Charge APP
▶ PIN2 (whitelist PIN) invoeren.
natural_image
Line drawing of a handheld electronic device with a cable inserted, showing no text or symbols on the device itself.Afb.: 11. Video "MENNEKES Charge APP" (Engels)
https://www.chargeupyourday.com/

5.6 Bouton Stop....23
- Entretien....24
6.1 Maintenance....24
6.2 Nettoyage....25
- Dépannage 25
https://www.chargeupyourday.com/faqs/

natural_image
White and black electric vehicle charging station with blue cable (no visible text or symbols)
natural_image
White electronic device with black top and blue cable, no visible text or symbols
natural_image
White rectangular device with a circular lens and a small screen, placed on a plain surface (no visible text or symbols)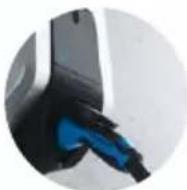
natural_image
White handheld device with black buttons and a small screen, isolated on plain background (no visible text or symbols)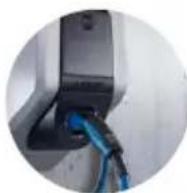
natural_image
White medical device with blue cable and connector, no visible text or symbolsnatural_image
Person using a MENSUS-branded electric shock absorber device with blue cable (no visible text or symbols)natural_image
Person interacting with a MENNEX® electric shock absorber device (no visible text or symbols on device body)Conditions requises :
natural_image
Line drawing of a device with an attached plug and connector (no text or symbols)Fig.: 13. Réarmement
https://www.chargeupyourday.com/

11. Glossaire
https://www.chargeupyourday.com/
Fig.: 3. Vista frontale (esempio)
natural_image
White and black handheld device with blue cable, no visible text or symbols
natural_image
White electronic device with black top and blue cable, no visible text or symbols
natural_image
White rectangular device with a black lid and circular base, placed on a plain surface (no visible text or symbols)
natural_image
White handheld device with black control panel and indicator lights (no visible text or symbols)
natural_image
White medical device with blue cable and connector, no visible text or symbolsFig.: 4. Avvolgimento cavo
natural_image
Person using a MENSUS-branded charging station with blue cable, no visible text or symbols on device or backgroundnatural_image
Person interacting with a MENNEXS® electric shock absorber device (no visible text or symbols on device body)natural_image
Line drawing of a device with a plug inserted into a terminal block (no text or symbols visible)Fig.: 11. Video „MENNEKES Charge APP“ (in inglese)
Fig.: 13. Reinserimento
www.chargeupyourday.com/

11. Glossario
Termine Spiegazione
3.5 Apparatvarianter....8
3.6 Kabeloppheng....9
3.7 Stopp-knapp....9
4. Igangsetting....12
5.6 Stopp-knapp....23
6. Vedlikehold 24
6.1 Vedlikehold 24
6.2 Rengjøring....25
7. Feilretting....25
Fig.: 3. Sett forfra (eksempel)
- Multifunksjonsknapp 1)
- LED-infofelt
- Festeskruer for husoverdel
- Husoverdel
- Energimåler med visningsvindu
- Frontpanel
- RFID-kortleser 1)
- Ladestikkontakt type 2 med vippedeksel ^1)
- Forhåndsutstanset utsparing for tilførselsledning / kabelkanal
^1) Valgfritt
3.4 Ekstrautstyr
3.5 Apparatvarianter

natural_image
White and black electric vehicle charging station with blue cable (no visible text or symbols)
Fast tilkoblet ladekabel med ladekobling type 1
natural_image
White electronic device with black top and blue cable, no visible text or symbols
Fast tilkoblet ladekabel med ladekobling type 2
natural_image
White rectangular device with a circular button and a small screen, placed on a plain surface (no visible text or symbols)
natural_image
White handheld device with a black control panel and a small screen, mounted on a plain surface (no visible text or symbols)
natural_image
Medical device with blue and black cables, no visible text or symbols on the device bodyFig.: 4. Kabeloppheng
3.7 Stopp-knapp
natural_image
Person inserting a device into an electric vehicle charging station (no visible text or symbols)Fig.: 5. Stopp-knapp
natural_image
Person interacting with a device labeled 'MENNES' and a black screen, no visible text or symbols on the device itself.Fig.: 7. RFID-kort
3.10 Energimåler
natural_image
Line drawing of a device with a plug inserted into a socket (no text or symbols visible)Fig.: 11. Video "MENNEKES Charge APP" (engelsk)
Fig.: 13. Gjeninnkobling
https://www.chargeupyourday.com/

11. Ordliste
3.7 Stopp-knapp....9
5.1.1 "App control" (App-styrning).... 13
5.1.2 "Time control" (Tidsstyrning)....14
5.1.3 "Mains control" (Nätstyrning)....15
5.1.4 "Energy Manager" (Energihanterare).... 16
5.1.5 "SCU"....18
5.2 Administration av lokala RFID-kort....19
5.3 Ladda fordon....20
5.3.1 Auktorisering....20
5.3.2 Starta laddningen....20
5.6 Stopp-knapp....23
6. Underhåll....24
6.1 Underhåll....24
6.2 Rengöring....25
7. Felsökning....25
7.1 Felsökning med MENNEKES Charge APP....25
natural_image
White and black handheld electric vehicle charging station with blue cable (no visible text or symbols)
natural_image
White electronic device with black top and blue cable, no visible text or symbols
natural_image
White handheld device with a black lid and circular button, placed on a plain surface (no visible text or symbols)
natural_image
White handheld device with a black control panel and a small screen (no visible text or symbols)
natural_image
Medical device with blue and black cables, no visible text or symbols on the device bodynatural_image
Person using a Mercedes-Benz electric vehicle charging station with blue cables (no visible text or symbols)natural_image
Person interacting with a device labeled 'MENNES' and pointing at a screen (no visible text or symbols on device body)Bild: 7. RFID-kort
3.10 Elmätare
5.1.1 "App control" (App-styrning)
■ Utan MENNEKES Charge APP:
Utan MENNEKES Charge APP
natural_image
Line drawing of a device with a plug inserted into a socket (no text or symbols)→ "5.5 Multifunktionsknapp"
→ "5.6 Stopp-knapp"
Hämta felkoder i MENNEKES Charge APP
▶ Välj menyn "Configure Wallbox" (konfigurera Wallbox).
Välj menyn "Wallbox information" (Wallbox-information).
Felkoden finns under "Current error code" (aktuell felkod).
Tillvägagångssätt:
→ "5.5 Multifunktionsknapp"
→ "5.6 Stopp-knapp"
Blinkkoder
https://www.chargeupyourday.com/

11. Ordlista
Begrepp Förklaring
natural_image
White and black handheld electric vehicle charging station with blue cable (no visible text or symbols)
natural_image
White electronic device with black screen and blue cable, no visible text or symbols
natural_image
White handheld device with a black lid and metallic casing, placed on a plain surface (no visible text or symbols)
natural_image
White handheld device with black buttons and a small screen, isolated on plain background (no visible text or symbols)
https://www.chargeupyourday.com/

natural_image
White medical device with blue cable and connector, no visible text or symbolsnatural_image
Person interacting with a white MELKES device and blue cable, pointing at the screen (no visible text or symbols)Fig.: 5. Pulsador de parada
natural_image
Person interacting with a white medical device labeled 'MENKES' and blue cables (no visible text or symbols on device body)natural_image
Line drawing of a device with a plug inserted into the socket (no text or symbols visible)Fig.: 13. Rearme
https://www.chargeupyourday.com/

11. Glosario
3.5 Apparatvarianter....8
https://www.chargeupyourday.com/

https://www.chargeupyourday.com/faqs/

1.2 Advarsler
Advarsel mod personskader

Fif.: 3. Set forfra (eksempel)
3.5 Apparatvarianter
natural_image
White and black handheld electric vehicle charging station with blue cable (no visible text or symbols)
Fast tilsluttet ladekabel med ladekobling type 1
natural_image
White electronic device with black top and blue cable, no visible text or symbols
natural_image
White rectangular device with a circular button and a small protrusion, placed on a plain surface (no visible text or symbols)
natural_image
White handheld device with a black control panel and a small screen, isolated on a plain background (no visible text or symbols)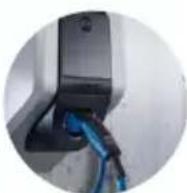
https://www.chargeupyourday.com/

3.6 Kabelophængning
natural_image
White medical device with blue cable and connector, no visible text or symbolsnatural_image
Person inserting a device into a white appliance with blue cables (no visible text or symbols)Fif.: 5. Stop-knap
natural_image
Person interacting with a white MENNÉUS® electric shock absorber device, no visible text or symbols on device bodyFif.: 7. RFID-kort
3.10 Energitæller
▶ Åbn MENNEKES Charge APP.
natural_image
Line drawing of a device with an attached plug and connector (no text or symbols)Fif.: 11. Video "MENNEKES Charge APP" (engelsk)
Fif.: 13. Gentilkobling
https://www.chargeupyourday.com/

11. Glossar
https://www.chargeupyourday.com/
natural_image
White and black handheld device with blue cable, no visible text or symbols
natural_image
White electronic device with black top and blue cable, no visible text or symbols
natural_image
White rectangular device with a circular button and a small knob, placed on a plain surface (no visible text or symbols)
natural_image
White handheld device with a black control panel and ventilation slots (no visible text or symbols)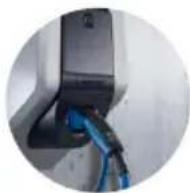
natural_image
Medical device with blue and black cables, no visible text or symbols on the device body- ábra: Kábeltartó
3.7 Stop gomb
natural_image
Person using a Mercedes-Benz electric vehicle charging station with blue cables (no visible text or symbols)- ábra: Stop gomb
natural_image
Person interacting with a device labeled 'MENNES' and pointing at a black screen (no visible text or symbols on device body)natural_image
Line drawing of a handheld electronic device with a cable inserted, showing no text or symbols on the device itself.https://www.chargeupyourday.com/

11. Szójegyzék
natural_image
White and black handheld device with blue cable, no visible text or symbols
natural_image
White electronic device with black top and blue cable, no visible text or symbols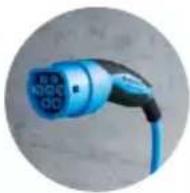
natural_image
White handheld device with a black lid and metallic casing, placed on a plain surface (no visible text or symbols)
natural_image
White handheld device with black buttons and a small screen, isolated on a plain background (no visible text or symbols)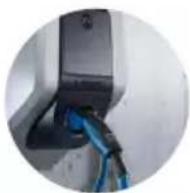
https://www.chargeupyourday.com/

natural_image
White medical device with blue cable and connector, no visible text or symbolsnatural_image
Person using a MiniBox electric shock absorber device with blue cable (no visible text or symbols)Рис.: 4. Кнопка останова
natural_image
Person interacting with a white Mennes' EV charging station connected to a blue cable (no visible text or symbols)C MENNEKES Charge APP
natural_image
Line drawing of a handheld electronic device with a cable inserted, showing no text or symbols on the device itself.https://www.chargeupyourday.com/

11. Глоссарий
Термин Пояснение
https://www.chargeupyourday.com/

https://www.chargeupyourday.com/faqs/

1.2 Vaaraohjeet
natural_image
White and black handheld electric vehicle charging station with blue cable (no visible text or symbols)
natural_image
White electronic device with black top and blue cable, no visible text or symbols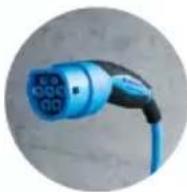
natural_image
White rectangular device with a black lid and circular button, placed on a plain surface (no visible text or symbols)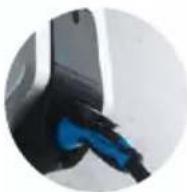
natural_image
White handheld device with a black control panel and a small circular button (no visible text or symbols)
natural_image
Medical device with blue and black cables, no visible text or symbols on the device bodynatural_image
Person inserting a device into a white station labeled 'MENIKES' with blue cables (no additional text or symbols visible)natural_image
Person interacting with a device labeled 'MENNES' and pointing at a screen (no visible text or symbols on device body)natural_image
Line drawing of a device with a plug inserted into a socket (no text or symbols visible)Kuvio: 11. Video "MENNEKES Charge APP" (englanti)