
HC400010 - Heating BOSCH - Free user manual and instructions
Find the device manual for free HC400010 BOSCH in PDF.

| Product type | Wall-mounted or floor-standing electric convector |
| Brand | Bosch |
| Model | HC400010 (HC4000-5...-25) |
| Nominal power | 500, 1000, 1500, 2000 or 2500 W depending on version |
| Supply voltage | 230 V AC ± 10%, 50 Hz |
| Protection rating | IP24 / Class II |
| Power cable | 1.3 m with CEE 7/17 plug |
| Temperature setting range | 7 °C (frost protection) and 12 to 28 °C |
| Operating modes | Heating, ECO, PROG (scheduled programs), TIMER |
| Predefined programs | 5 daily programs (P1 to P5) + 1 customizable (P6) + weekly program (7d) |
| Open window function | Automatic detection and heating stop |
| Frost protection | Yes, adjustable to 7 °C or 6 °C in ECO mode |
| Key lock | Yes, to prevent unintended changes |
| Temperature calibration | Adjustment possible from -3 °C to +3 °C |
| Display | Backlit screen, turns black after 5 minutes of inactivity |
| Installation | Horizontal wall mounting or floor installation with feet |
| Safety zone | Do not install in the grayed area (fig. 3 of the manual) |
| Maintenance and cleaning | Clean the grilles twice a year with a vacuum cleaner or brush. Do not use abrasive products. |
| Standby power consumption | 0.000 kW (complete shutdown) |
| Energy efficiency | Electronic regulation with weekly timer |
| Dimensions and weight | Not specified in the extracted manual. Estimate: approx. 500x200x400 mm (WxDxH) and 5 kg according to similar models. |
Frequently Asked Questions - HC400010 BOSCH
User questions about HC400010 BOSCH
0 question about this device. Answer the ones you know or ask your own.
Ask a new question about this device
Download the instructions for your Heating in PDF format for free! Find your manual HC400010 - BOSCH and take your electronic device back in hand. On this page are published all the documents necessary for the use of your device. HC400010 by BOSCH.
USER MANUAL HC400010 BOSCH
106acheHHe Ha cMbONHTe n yka3aHHa 3a 6e3oNaCHOCT
1.1 06aCHeHne Ha cHMBoJIHTe
PpeynpeintenHyka3aHn
B npdpnpeHnteHnTe yka3aHnCnHaHnTe dymn
06o3HaBaT HauHnHa N TeKeCTTa Ha NoCleDnIeTe, aKo He Ce CneBAt MepKIne 3a npeDoTbPaTbAHe Ha OnaCHOCTTa.
IeHnHpaHn ca cneHnTE CnHaHn Dymn n CbUHT MeMOrTa 6bDaT H3NO3BaHn B HAcTOAUN DOKUMENT:

ONACHOCT:
ONACHOCT O3Haaba, Ye Ie Bb3HnKHaT TeKKn IIO ONaCHN 3a JKNBota TeneChn NOBpeNi.

PNEyIpyKJDEHNE:
PNEyPEXDEHNE O3HaayBa,YeMoraTdaCeNoIyatTeKKn DoOnaChn 3aXKNBota TeneChn NOBpeiN.

BHIMAHHE:
BHIMAHNE O3HaUaBa, Ye MoRaT Da HaCTbIa TNeKn Do CpeHOTekkn TeneChn NOBpeH.
YKA3AHHE:
YKA3AHNE O3HaHaBa, Ye MoTaT Da Bb3HnKHaT MaTePnaHn UeTH.
Baxha HhΦopmaun

Baxha HhOpmaqna 6e3 onacHoc 3a xopa nIi BeuI ce o6o3nauBa C noka3AHn HhOpmauHOHeH cIMBOJ.
DpyrncmboH
CMBO
3начени
CTbPkHaHaJeIcTBHe
→ПpenpaTka KbM npyro MCTO BdoKymeHtA
H36po8aBe/3aNNbC CnncbK
-ИЗбpoяBaHe/3aПиСВспсьК(2.НИВО)
Ta6n.14
1.2 06u yka3aHna 3a 6e3oNaHocT
Aya3aHna 3a ceIeBaTa rpyna
ToBa PbKOBOcTBo 3a o6cnyXbaHe e npedHa3HaueHo 3a nOpTeNa Ha npOdyKta.
Yka3aHnra Ta BbB BCnUKN pkoBODCTBa Tp6Ba da ce cna3Bat. Hecna3BaHeTo MOKe DaIOBeDe IO TeKKn HapaHbAHHa KaKTo N BnOcNeIcTBHe Do CmbPT, a OCBeH TOBa MoKe Da IpeN3BnKa MaTePnAHNu 3aMbpCBAhe Ha OKoJHaTa cpea.
PpOyeTepeKOBODCTBaTa 3a 06cnyXBaHe (3a peryIaTopa Ha OTOpJIeHHeTO nT.H.) npEi n3nON3BaHeTo n Tn 3ana3eTe.
CneiBaIte yka3aHnIa 3a 6e3oIacHOCT n npEduynpeIHTeHHITe HNCTpyKcII.
IounCTBaHetoNIOdpbKkataTp6Ba da Ce npOBexKaT Ha-MaIKo BeHNbK rOINuHO CbIacHO NOCOueHnte INTEPBANI. Pn TOBa npOBepBaIte cIaTa HcTaIauJra 3a 6e3aBapnHo cyHKUOHnpaHe.
OtctpaHeTe BeHaRa yCTaHOBeHnTe HeN3nPaBHOCTn.
Be30nacHocT Ha eNeKtpnuecknte ypeN 3a 6HTOBA ynoTppe6a n noDobHn ceH
3a npedotbpaTbaHe Ha onacnoCTn OT eIektpueckn OTOpHtEnH ypeHn ca BaIIndn B cboTBcTcBne c EN 60335-1 n EN 60335-2-30 cIeHNte H3NcKBaHn: «DocbT Ha Deua PoJ 3-roHnHa Bb3pact He e pa3peWeH dOpH n Da ca PoJ NOCTOAnHo HabJeHne. Deua Ha Bb3pact MeJy 3 n 8 roHn MoKe camo
da BkIIOUvBaT n N3KJIIOUvBaT ypea, KOrato
ca noD KOHTpO nII ca 6nII
HHCTpyKTHpaHn OTHOcHo 6e3OpacHaTa
yNoTpe6a Ha ypea n ca pa3bpaII
IPOIN3TuAuNTe OT TOBa ONaCHOCTN, HO
cAmO pRn ycIOBHe ue ypeDbTe IocTaBeH
H MOHTpAHn Ha oBuHOTo CN MAcTO 3a
yNoTpe6a. DeCuTa Ha Bb3pact MeJdy 3 n
8 rOInn He Tp8Ba Da BkIIOuVBat
UeNCeLa B KOHTaKtA, Da perylnpaT
yPeDa, Da NouchTBaT ypeDa nIi Da
h3BbPWBat NOdPbXkata OT CTPaHa Ha
noTpe6nteIa.》
«Ako npOBODnKbT 3a CBbp3BaHe KbM
3axpaHbAsnT Ka6e e NobpeDeH, Toi
Tp8Ba da 6bJe IOdMeHeH OT
IpOn3BOIDnTeIa nII OTHeROB cepBn3eH
IpeDCTaBnTeI, nII OT IInCe Cbc
CbOTBeTHaTa KBaIIΦnKaZna, 3a Da Ce
IpeD0TbPaTAT ONaCHOCTN.
CnryphocT ha eNeKtpnuecknte ypeH 3a 6HToBa ynoTppe6a n noDobHn ceH
3a npedotbpaTBAHe Ha onaCHOCTN OT eIektpnueckn ypeDn BCbOTBeTCTBne c EN 60335-1 ca BaIIdHn CneHnTe n3NCKBaHn:
«To3n ypei MoKe Ja Ce H3NoJ3Ba OT Deca Ha Bb3pact NaI 8 rOdHH, KaKTo IOT NlUc a C OrpaHnueHn OHN3NueCKn, CeTbBn HnYmCTBeHn cNoC6HOCTn Hn 6e3 ONIT n PO3HaHncaMo aKO Te ca NOD Ha6JIoJeHne n Ca 6NIu INHCTpyKTHnpaHn OTHOcHo 6e3OpaCHOTO H3NoJ3BaHe Ha ypea n pa3bupat pNcKOBTe OT TOBa. DeaTa He Tpr6Ba Da nIgPaTc ypeDa. POnucTBaHeTO n ObcLnyXbaHeTO He Tpr6Ba Da ce H3BbPWBat OT Deca 6e3 HaI3Op.
«Ако пюворнкьт за CBьрзВаHe Кьм 3axpaHbaHeTo e NOBpeDEн,TOI Tpr6Ba da 6bde NOdmeHEN OT pON3BOДNTeJI ИИN OT HeROB cepBN3eHпpeDCTaBHTeI, ИИN OT IInCe Cbc CbOTBeTHaTа KBaIIINФИКаци,3a Дa ce пpeDOrTbpaTn ONaCHOCTTa.»
HnctanaunnynoTe6a
He nHcTaInpaIte ypeDa noD KOHTaKT HnB 6n3OCTdo 3aBeCn nn dpyrN rOpMm MaTePnaII.
He n3no13BaIte OToIeHneTO B HEnocpeIcTBeHa 6n3OCT Do BaHa 3a KbnaHe, Dyu nn PnyBeH 6aceH.
He n3noI3BaIte npOdyKta B MaIKn NOMeueHna, aKO Te Ce n3noI3BaT OT INa, KOHTo He CaB CbCTOHNcAMN Da HApYCHaT NOMeueHneTO, OCBEN aKO NOMeueHneTo He e NOd HEnpeKbCHaTO Ha6JIouDeHne.
Topeu npBbpxHOCT
HЯkon chaTn Ha npOdykTa MOraT da ce HaraOpEaT CInHO n npN KOHTaKT C KoxaTa Da npuHnT n3rapaHn. Heo6xOdmo e Oco6eHo BHNMaHne, KOraTO npNCbCTBaT Deca n HjXdaeUc Ce OT 3aUnTa Bb3paCTHn.
Onachoct ot nperpЯBaHe, onachoct ot noxap
3a da hamaIte onacHocTta OT noXap:
ДрьжTe TEKCTINH TbKaHN,3aBeCNIIIpyrN TOpHM MaTePnaIHa pa3CTOJHHe MHHmym 1 M OTn3XoJa 3a Bb3dYx.
HelenocTaBnyTe HnO Bbp KOHBekTopa. He nokpNaTe KOHBekTopa n He ce KaBaYTe Bbpy Hero.
Ochnypete 6e3npenTCTBeHOTnIOOTdABaHe Ha KOHBeKTopa.
H3noI3BaIte ypeDa cMo Bbpxy XOpN3OHTaIIHa nCTa6nIIHa IOBbpxHOCT IINr03aKpeIe Bbpxy CTeHa.
Onachoct3a XHBOTA nopadneleektpnueckn TOK!
ДokocbaheTo Ha nobpeDeH npOdyKT nIIN 3axpaHbAs Ka6e MoKe Da IOBeDe Do TOKOB yDap.
He n3noI3BaIte npOdyKta, aKO ToIe naIaI.
He n3noJ3BaIte npOdyKta, aKO nMa HaJInce BnIMN pN3Haun Ha NOBpeJa.
HeotBaapnepoDyKta.
H36raBaeBCaKaBnHaMeCN.
IpekpaTe ynoTpe6aTa Ha npOdyKta Iro n3KIOUeTe OT eNEKtpnueckaTa Mpeka.
ObpheTe ce KbM cepBn3a.
Ie hamePte cepBn3HnTe aDpeCn B
rnaBa 10,ctpaHnca 28.
-NN
Ytvn3npaTe npOdyKta cnopei npaBnlaTa.
2ДаHHN3a npOyKta
HactoIto pkoBDCTBO cbbpka Baxha HOpMaun 3a 6e0nachoto o6cnykBaHe Ha Heat Convector 4000, npedHa3NayeHa 3a IOn3BaTeNa Ha HnctalaunTa.
KoHBeKTOpbT TpI6Ba Da ce NoCTaBn MOHTnpa CaMo H3BbH 30HaTa 3a 6e30anachocT (PpeIcTaBeHa B CnBO ΦHr. 3, cTpaHnca 211).
3a ceIa:
Cb6IIOaBAIte pkoBOIDCTB0To 3a MoHTaK.
2.1ДeКларанязсвтБETCTBNE
IIO CBOIa KOHCTpyKUH na paOtro NOBeHeHne To3n npOdyKT OTROBapHa EBPOeNCKHTu HAUNOHAHHTe N3NCKBAHNA.
C CE 3HaKa ce DeKJIapnpa CbOTBeTCTBHeTo Ha npOdykTa C BCNUKn npHIOXmN 3aKOHOBn H3NCKBaHnHa EC, KOHTo npeDbXkdT NOCTABHHeTo HA To3n 3HaK.
ПьлниТTekт Ha ДекларацяТа 3a CbOTBeTCTBnE e HaniueH BHTepHET: www.bosch-thermotechnology.com.
2.2 06xbat Ha ooctaKaTa
Pn doctabka npoBepeTe cenoocTtHa onaKOBkata.
PpOBepeTe nBnHnO6xBaT Ha DocTaBkata:
- Heat Convector 4000
-TexHHuecka DOKymeHTaUN
2.3 06acheHne Ha TepMHHTe
Heat Conventor 4000 ce hapnua no-HataTbK BTO3nIOKymeHT NpoDyKT, "KoHBeKToP" nn "ype".
2.4 YnOTope6a no npEHa3HaueHne
KoHBeKTopbTe npedHa3HaueH 3a OTOpIeHne Ha JnnnIHN IOMeIeHH.
CnA3BaIe yCIOBnIa 3a Cbbp3BaHe B cbOTBeTCTBHe C TexHnueCKNte DaHHn I CneuΦnHInTe CTaHApTn I npedncaHHa 3a CbOTBeTHa Ta DbpKxBa.
-ПocTаВЯЛТe И моHTирайтЕ KOHBeКТОпа сAmO ИЗБьH 3ОнТа 3a 6e30IacHOCt (пpeДСТаВЕнA B CИВО ФИг. 3, CTpaHnцa 211).
Bcko npnojKeHne He e n3noJ3BaHe no
npedHa3NaueHne. He ce eoMa OTROBOPHOCTa npoN3TeKn O TakaBa ynotpe6a etsn.
2.5 OmmcaHne Ha npodykTa
Heat Convector 4000 e cTeHeH nnn nooBO cTOnu eNeKtpnueckn nnocbK KOHBekTOp 3a OTonneHne Ha nomeeHn ( nr,1, cTpaHnca 211).
Ako ypeDbTe HnctaHpaH, nocTaBeH nn DoHeceH OT
3HaHTeHNO-CTyHeHa cpea,TOI Tp86BaJa ce aJaTnPa KbM TEMpepaTpyaB NOMeUeHneTo.
Ponobn uac He BKIOuBaIte ypea.

Ako ypeBt 3aqrBa 3a nbpBn Tb, MoKe da ce CTnRhe Do neKo OTdienHe Ha MnpH3Ma (MaKcHmym 2 yaca) nopadn
N3CyuBaHa Ha npOn3BODCTBeHN OCTaTbU.
4 06cnyxbahe npa6ota
CnataBaIte yka3aHnraTa 3a 6e3oNaCHOCT
( rnaBa 1.2, ctpaHnua 17).
4.1 BkIIOUbaHe/ɪn3KlIOUbaHe Ha KoHBeKTopa
KoHBeKTOpbT Ce BkIIOUBa n N3KIIIOUBa C npEkbCBAu BAKn./ n3Kn. ( 尼.1,[3], cTpaHnua 211).
3a da BKNIOUHTe KOHBekTopa:
PocTaBeTe npeKbCBAuHaI.
3a Da n3KIOUHTe KOHBekTopa:
IocTaBeTe npeKcbBaVaHa 0.

N3KIOUyBaIe KOHBekTopa cMo Upe3 IpeKbCBAu BKn./H3Kn., KOrato HMaJa e Heo6xoJm 3a No-DbIro BpeMe, HAp. B Kpa Ha OTOpJIHTeHHa Ce3OH.
4.2 06cnyxbaHe ha perylaTopa
Elenentte 3a ynpabneHne Ha perynaTopa ca npedctabeHn B rnaBa 4.5, ctraHnca 21.

PerynaTopbT HMa NaMeT 3a DaTaTa. Ako KOHBeKTOpbTe 6nN 3KIOUeH OT eIeKtpuYeCKaTa MpeXa 3a NObue O5 cekyHn (H3TerHeN uenCen), DaTaTa N acbT ce r6aT. OToPiHTeHNHte nporpaMn ce 3ana3BaT.
4.2.1 BkIouBaHe Ha perynaTopa
Bytoh BkN./n3Kn.
C6byToHa > (→Φn.r.2,[7],cTpaHnua 211)perynaTOpbTce BKIOUBa H N3KIOUBa C DnCnIeJ.
3a Da BKNIOUHTe peRyIaTopa:
HaTnchTe6yToH.>
3a da n3knHouHe peryIaTopa:
HaTnCHeTe 6yToHa >3a noBce oT 5 ceKyuHm.
Korato peryanaTopbTe BkNoueH, nCnneT noKa3Ba nocNeH0 H3noI3BaHHra paBoTeH peKm C aKTyaanHHe NaCTpoiKN.
Korato nucnneT ce BknoyBa 3a npBn nbT, e hactpoeh paobTHnT peXm Pexm OTOnnHeHne. FapnHaTa HacToPKa 3a TemnepaTypa T paobTHnA peXm Pexm OTOnnHeHne e 19^

AkoIINCIIeT NOBue He Ce IOKOCBA,ToI Ce 3aTbMHBa CneI5 MNHyTN.
4.3 3aabahe Ha napametpn HactpoKn
4.3.1ИЗВИКВанеHaMeHIO3aДаВанeHa napametprn
Upe3 MeHIOTo 3aDaBaHe Ha napaMeTpH MoRaT Da ce H3BbPWBat NaCTpOiKn Ha ypeHa.
3aДаИЗВИКАТеMeHIOTo 3aДaВaHЕНa npaMeTpN:
HaTnCKaIte NOBTOPO 6yToHa ,DOKATO CBETHe KOHTPOHHaTa IaMna HaI INKTOrpaMaTa no MNra.
HaTnckaHte6yToH m,doKatoce noKaXe go.
HaTnCHte 6yToH,3a Da NotBbPdnte go.
Ha nncnpe ce noBBA MeHIOTo 3aDaBaHe Ha npaMeTpH.
4.3.2 N3BVKBaHe Ha MeHIOTo 3a HAcTppoKn
Mozete Da n3BnKBaTe CneHHTe MeHHOTo 3a HAcTPOKn:
-ДенOTсEDMnuaTaNac(d/HH/MM)
-Дневна пограма (P6)
CédmHnHaPpPam
13BnKaTe MeHIO 3aDaBaHe Ha npaMeTpN.
HaTnCKaTe NOBtOHO 6yToHa, DOKaTO CBeTHe KOHTpONHaTa JAmNa Ha XeNaHOTo MeHIO.
4.3.3 N3n3aHe oT MeHIO 3aDaBaHe Ha napaMeTpH
3a da n3ne3eOT MeHIO 3daBaHe Ha npaMeTpH:
HaTnCKaIe NOBTOPO 6yToHa ,DOKATO CBETHe KOHTPOHHaTa IaMna HaI INKTOrpaMaTa no Mnra.
HaTnCHeTe 6yToH,3aJa nOTBbPdnte no. YpeBcCe HAMnpBa6oTHnpeKm Pekm OToJIneHne.
i
Cnei 60 cekyHn HeaKTNBHOCT B HRAKoe OT MeHIOTaTa 3a NaCTpOKN peYNaTOpBt ABTOMaTHUHO N3N3a OT TOBa MEHIO. Toraba ypebT ce HaMnpa OTHOBo B pa6OTHnpeXm Pexm OTOnJIeHnE.
4.4 HactpoKaHaJeHnUaca
i
JeHrOT cEmnuaT N acbT TpaBa da ca HacptpoehN, npednaMoraT daee HactpoT dHeBHa n cEmnua Hporpama.
3a da hactponTe DeHr OTeCmUcaTa Haca:
H3BnKaIe MeHIO 3aDaBaHe Ha napaMeTpH ( IanaBa 4.3.1, cTpaHnua 20). Ha nCpIe Ce NOKa3Ba MeHIO DeH OT ceDMucaTa uac. Ha DcNIIe MHa d/1 u MoKe Da ce HAcTpoBa DeHrOT ceDMNuTa.
HaTnchete6byToH 3a npomeHnte DeHr OTeMncaTa.1O3NaabaNoHeDenHK,a7-HeDenI.
HaTnCHete 6yToHa,3a Da NOTBbPdNte HAcTpoEHH DeH ot CeMnuaTa. Ha nCnpe Mrra HH/12.YacOBeTe Moat da ce HAcTpoRt.
HaTnCKaHTe 6yToH ,3a HAcTpOnTe yacOBete ot Odo 23.
HaTnCHe6yToHa,3a Da NOTBbPdnte HAcTpoEHnTe
YacOBe.
HaDnCnIeMraV00.MnHyTnte Moat Da ce
HAcTPOAT.
HaTnCKaIe 6yToHa ,3aHAcTpOte MHyTHTe or0do59.
HaTnCHete 6yToHa ,3a Da NtBbPnTe HAcTpoEHnTe MNHyTH. Ha nCnIe Ce noka3Ba MeHIO nHeBHa nporpaMa (P6).
4.5 Pa6oTHn peXHMn n oka3aHna Ha peryNaTopa
Ta6π. 15 Pa6oTHn peKHMn Ha perynatopa ( →Φn.r. 2, ctpaHnμa 211)
| ПосmiumРабOTEN рекIM Опсанne | Опсанne | ||
| 1 | P OTONLENHNE | HастpoуTe TempepaTypaТа зраBOTня рекIM РекIM OTONLENHNE. | → Глив4.5.2M CTpaHIca 22 |
| 2ECO Pa6OTEN pexIM 3a ИкOHOMЯ БЕТС Ф�бriчнATERа Hастpoиka TempepaTypaТа e HabstpoeHa c 3°C по TempepaTypaТа на рбOTня рекIM РекIM OTONLENHNE. | → Глив4.5.3, CTpaHIca 22 | ||
| 3ПОН БeВКЛЮЧВа abTOM матчно мени рбOTня рекIM РекIM OTONLENHNE и рбOTня рекIM ECO. | → Глив4.5.4, CTpaHIca 23 → Глив4.5.5, CTpaHIca 24 → Глив4.5.6, CTpaHIca 24 | ||
| 4 | TIMER | Таймер за В装配ВаТа погама за ВКЛЮВаHe/ ИЗКЛЮВаHe Ha урда. | → Глив4.5.7, CTpaHIca 25 |
| ПосmiumСHMВОЛОбreachни 15 Hab相对较 На дени у саа LED на тои симвов мига, когато ce нас相对较 чьт и дата (→ га ва 4.4,станиca 21). |
| 16 Семпун相对较 рогама 7d LED на тои симвов мига, когато ce нас相对较 чьт и дата погама 7d (→ га ва 4.5.6,станиca 24). |
| 14 Дnevва相对较 рогама P6 LED на тои симвов мига, когато ce нас相对较 чьт и дата погама P6 (→ га ва 4.5.5,станиca 24). |
| 5 Разноиз Bavалу на оворень празорец При весаен сад на темпера typа Таши Фуншоня разноота, чь e OTворень позорец в пошени. 6 Hab相对较 к; Чретсимь могатда баят Наравен нах相对较 К. 12 Отолени Когато с Bretи LED до тои симвов, уреьт награва. |
| 7/8 Раб对接 сожим/Потьрждаванe/ Вк. С тои субира разимп! пегим лиме с повождава надени пас相对较 рогама. Когато с Bretи LED до тои симвов, уреьт награва. |
| 11/10/9 Дoly/Tope/Бл_OKровka на Бутонite С тои суби ce увени за лим намая за лима Stоюност (Hаши. Temпера typа).Чрет дыа Бутона моче на с пов? Бл_OKровka на суб�п; пегдовп: пегдовп: пегдовп: пегдовп: пегдовп: пегдовп: пегдовп: пегдовп: пегдовп: пегдовп: пегдовп: пегдовп: пегдовп: пегдовп: пегдовп: пегдовп: пегдовп: пегдowп: пегдowп: пегдowп: пегдowп: пегдowп: пегдowп: пегдowп: пегдowп: пегдowп: пегдowп: пегдowп: пегдowп: пегдowп: пегдowп: пегдowп: пегдowп: пегдowп: пergама: пergама: пergама: пergама: пergама: пergама: пergама: пergама: пergама: пergама: пergама: пergама: пergама: пergама: пergама: пergама: пergама: пergама: пergама: пergама: пergамa: пergама: пergама: пergама: пergама: пergама: пergама: пergама: пergама: пergама: пergама: пergама: пergама: пergама: пergама: пergама: пergама: пergама: пergама: пergама: пergамal: пergама: пergама: пergама: пergама: пergама: пergама: пergама: пergама: пergама: пergама: пergама: пergама: пergама: пergама: пergама: пergама: пergама: пergама: пergама: пergам�: пergама: пergама: пergама: пergама: пergама: пergама: пergама: пergама: пergама: пergама: пergама: пergама: пergама: пergама: пergама: пergама: пergама: пergама: пergама: пergаме: пergама: пergама: пergама: пergама: пergама: пergама: пergама: пergама: пergама: пergама: пergама: пergама: пergама: пergама: пergама: пergама: пergама: пergама: пergама: пergамaf: пergама: пergама: пergама: пergама: пergама: пergама: пergама: пergама: пergама: пergама: пergама: пergама: пergама: пergама: пergама: пergама: пergама: пergама: пergама: пergам�: пergама: пergама: пergама: пergама: пergама: пergама: пergама: пergама: пergама: пergама: пergама: пergама: пergама: пergама: пergама: пergама: пergама: пergама: пergама: пergамaz: пergама: пergама: пergама: пergама: пergама: пergама: пergама: пergама: пergама: пergама: пergама: пergама: пergама: пergама: пergама: пergама: пergама: пergама: пergама: пergаму: пergаму: пergаму: пergаму: пergаму: пergаму: пergаму: пergаму: пergаму: пergаму: пergаму: пergаму: пergаму: пergаму: пergаму: пergаму: пergаму: пergаму: пergаму: пergаму: пergамоу: пergаму: пergаму: пergаму: пergаму: пergаму: пergаму: пergаму: пergаму: пergаму: пergаму: пergаму: пergаму: пergаму: пergаму: пergаму: пergаму: пergаму: пergаму: пergаму: пergamу: пergаму: пergаму: пergаму: пergаму: пergаму: пergаму: пergаму: пergаму: пergаму: пergаму: пergаму: пergаму: пergаму: пergаму: пergаму: пergаму: пergаму: пergаму: пergаму: пergامу: пergаму: пergаму: пergаму: пergаму: пergаму: пergаму: пergаму: пergаму: пergаму: пergаму: пergаму: пergаму: пergаму: пergаму: пergаму: пergаму: пergаму: пergаму: пergаму: пergAMу: пergAMу: пergAMу: пergAMу: пergAMу: пergAMу: пergAMу: пergAMу: пergAMу: пergAMу: пergAMу: пergAMу: пergAMу: пergAMу: пergAMу: пergAMу: пergAMу: пergAMу: пergAMу: пergAMу: пergIMу: пergAMу: пergAMу: пergAMу: пergAMу: пergAMу: пergAMу: пergAMу: пergAMу: пergAMу: пergAMу: пergAMу: пergAMу: пergAMу: пergAMу: пergAMу: пergAMу: пergAMу: пergAMу: пergAMу: пergAmу: пergAMу: пergAMу: пergAMу: пergAMу: пergAMу: пergAMу: пergAMу: пergAMу: пergAMу: пergAMу: пergAMу: пergAMу: пergAMу: пergAMу: пergAMу: пergAMу: пergAMу: пergAMу: пergAMу: пergAу: пergAMу: пergAMу: пergAMу: пergAMу: пergAMу: пergAMу: пergAMу: пergAMу: пergAMу: пergAMу: пergAMу: пergAMу: пergAMу: пergAMу: пergAMу: пergAMу: пergAMу: пergAMу: пergAMу: пergANу: пergAMу: пergAMу: пergAMу: пergAMу: пergAMу: пergAMу: пergAMу: пergAMу: пergAMу: пergAMу: пergAMу: пergAMу: пergAMу: пergAMу: пergAMу: пergAMу: пergAMу: пergAMу: пergAMу: пergABу: пergAMу: пergAMу: пergAMу: пergAMу: пergAMу: пergAMу: пergAMу: пergAMу: пergAMу: пergAMу: пergAMу: пergAMу: пergAMу: пergAMу: пergAMу: пergAMу: пergAMу: пergAMу: пergAMу: пergIAMу: пergAMу: пergAMу: пergAMу: пergAMу: пergAMу: пergAMу: пergAMу: пergAMу: пergAMу: пergAMу: пergAMу: пergAMу: пergAMу: пergAMу: пergAMу: пergAMу: пergAMу: пergAMу: пergAMу: пergEMу: пergAMу: пergAMу: пergAMу: пergAMу: пergAMу: пergAMу: пergAMу: пergAMу: пergAMу: пergAMу: пergAMу: пergAMу: пergAMу: пergAMу: пergAMу: пergAMу: пergAMу: пergAMу: пergAMу: пergAMEy: пergAMу: пergAMу: пergAMу: пergAMу: пergAMу: пergAMу: пergAMу: пergAMу: пergAMу: пergAMу: пergAMу: пergAMу: пergAMу: пergAMу: пergAMу: пergAMу: пergAMу: пergAMу: пergAMу: пergAMu: пergAMу: пergAMу: пergAMу: пergAMу: пergAMу: пergAMу: пergAMу: пergAMу: пergAMу: пergAMу: пergAMу: пergAMу: пergAMу: пergAMу: пergAMу: пergAMу: пergAMу: пergAMу: пergAMу: пergAMy: пergAMу: пergAMу: пergAMу: пergAMу: пergAMу: пergAMу: пergAMу: пergAMу: пergAMу: пergAMу: пergAMу: пergAMу: пergAMу: пergAMу: пergAMу: пergAMу: пergAMу: пergAMу: пergAMу: пergAУ: пergAMу: пergAMу: пergAMу: пergAMу: пergAMу: пergAMу: пergAMу: пergAMу: пergAMу: пergAMу: пergAMу: пergAMу: пergAMу: пergAMу: пergAMу: пergAMу: пergAMу: пergAMу: пergAMу: пergAMУ: пergAMY: |
Ta6n.16 Noka3aHn( Φn.r.2,ctpaHnua 211)
4.5.1 N3BHKBaHe H NaCTpoNka Ha BnOBeTe pa60THn peKHMn
3a da n3BnKaTe HAKo ot pa60Thnte peXmN:
HaTnCKaIte NOBTOPO6yToHa,poKaTO CBETHe KOHTpOHaTaJaMaNaIOI NIKTORpaMaTa HaKeJHaHna pa6oTeHpeKm.
Ha nncnpe Ce noka3Ba nocneHNO HactpoeHaTa 3a pa60THNA peKHM TempepaTypa.
3a da npomeHHTe TemnepaTpaTa Ha pa6OTHnpeXHM:
HaTnckaTe 6yToHa ,DOKto ce nokaxe XeHaHata TempepaTypa. Cnei 5 cekyn6e3 HaTnckaHe HAcTpoeHaTa TempepaTypa ce 3anameTBA aBTOMaTHUHO. Ha dncnner ce noka3Ba TempepaTypa Ta B nomueHHeTo.
4.5.2 Pa60TeH pexHM Pekm otponneHne
PerynatopbT noDbpxKa KOHBeKTopa Ha HacTpoeHaTa TemnepaTypa.
Kenahata TemnepaTypa Moke da 6bde hactpoeHa ot 7^ n 12^ do 28^ .Фабрн haTа hactpoKa e 19^ .
3aДаИЗВИКATEиHACTpOHTe pa6OTHnpeKIM PeKIM OTONJIeHHe:
PpoueHpaIte, KaKTo e onHcHo B rIaBa 4.5.1, cTpaHua 22.

Ako tempepatpata 3a pa6oTHnRA peKIM PeKIM OToJIeHne e NaCTPOeHa No-HNcKa OT Tempepatpata 3a pa6oTHnRA peKIM ECO, TempepatpHaTn HAcTpoJa 3a pa6oTHnRA peKIM ECO aBtOMaTHuHO ce HaMaJIbBa Do 1°C noD Tempepatpata Ha pa6oTHnRA peKIM PeKIM OToJIeHne.
4.5.3 Pexmm Ha pa60Ta ECO
Фабрнчнata NaHCTpoKa Ha TempepaTypaTa 3a pa6oTHnepKIM ECO e HacTpoEHa c 3^ nOД TempepaTypaTa Ha pa6oTHnepKIM Pekm OToJIeHne.
Kenahata TemnepaTypa MoKeJa 6bJe HAcTpoeHa B Dnana3oHa ot 6^ Do 1 ^ C NOD TemnepaTypa Ha Tekyu npa60TeH pexim.
3a da n3BnKate n HactpoTe pa6oTHna peXm ECO:
IpoeHpaIte, KaKTo e onHcHo B rIaBa 4.5.1, cTpaHua 22.

IpenopbUbaMe da HacptponTe pa60THnRApeKIM ECO npes HOHTa HN KOrato NOMEuHHeTo HMa Da ce H3No13Ba 3a noBuee ot 2 yaca.
4.5.4 Pa6oTeH pexm PROG
3a da n3BnKaTe n HacTpOne pa6oTHnpeKm PROG:
IpoueHnpaTe, KaTo e OnncAoB TnaBa 4.5.1, cTpaHua22.

3a pa6oTHnpeKHM PROG ca BaJIuHn TeMtnepaTyPHTe, HAcTpoEH B 4.5.2 n 4.5.3.Ype3 dHeBHaTa n CeMnUHaTa npOrpama ce ynpabIbBa Kora KoJ pa6oTeH peKHM da e aKTINBeH.
Ima 5 npedBapnteHNO 3aadedHn DHeBn nporpaMn (P1...P5).
DonbHnTeHATA dHeBHa nporpama e HnDnBnDyAnHO
perynpyema (P6) ( rna5.5, cTpaHua 24).OTte3n
nporpaMn ce cb3daBa ceDMnHaTa nporpama (7d).
CedmnuHata nporpama moKe da 6bJe hAcTpoEHa
HHINBnDyAnHo ( rna5.6, cTpaHua 24).
PpeBapntenHo 3aDaeHn DHeBn nporpaMn P1doP5
B cneBaunTe Ta6nCn Ca npedCTaBeHn OTonHnTe HnHe Za3n Ha npedBapuTeHnO 3aJaDeHnTe nporpaMn.
PpOprpamnte(P1...P5) He MoRaT da 6bDaT npOMeHnH.

B cIeIbauIte Ta6nIcI nMa uepeH Kbapat 3a pa6oTHnIpeKIM Pekm OTonJIeHne I He3aIbJIHeHa KJIeTKa 3a pa6oTHnIpeKIM ECO.
Ta6π.17PporpaMa P1
| поблжни Телноct | 00 | 01 | 02 | 03 | 04 | 05 | 06 | 07 | 08 | 09 | 10 | 11 | 12 | 13 | 14 | 15 | 16 | 17 | 18 | 19 | 20 | 21 | 22 | 23 | ||||||||
| Раобтени разжим | ■ | ■ | ■ | ■ | ■ | ■ |
P1 e npedBapntNo 3aAedeHa nporpaMa, KOTo ce npenopbUba npn OTCbCTBHe npe3 DeH (pa6oTeH peKIM ECO:22:00...06:00 yaca n 08:00...18:00 yaca; pa6oTeH
peKIM PeKIM oToJIeHHe: 06:00...08:00 yaca n 18:00...22:00 yaca).
Ta6π.18IporpamaP2
| Пюдьлжи Телноct | 00 | 01 | 02 | 03 | 04 | 05 | 06 | 07 | 08 | 09 | 10 | 11 | 12 | 13 | 14 | 15 | 16 | 17 | 18 | 19 | 20 | 21 | 22 | 23 | ||||||||
| РабOTен разжIM | ■ | ■ | ■ | ■ | ■ | ■ | ■ |
P2 e npedBapnteH0 3aadepHa npoRpama, KoTo ce npenopbUba npn OTcbCTBne npes DeHn npncbCTBne Ha o6n (paoboten pexm ECO:22:00...06:00 yaca, 08:00...12:00
yaca n 14:00...18:00; pa6oTeH peXIM Pexm oToJIeHne: 06:00...08:00 yaca, 12:00...14:00 yaca n 18:00...22:00 yaca).
Ta6π. 19Пограма P3
| Проблжни Телност | 00 | 01 | 02 | 03 | 04 | 05 | 06 | 07 | 08 | 09 | 10 | 11 | 12 | 13 | 14 | 15 | 16 | 17 | 18 | 19 | 20 | 21 | 22 | 23 |
| РавOTEN разожим |
P3 e npedBapntenH0 3aadaeHa nporpama, KoTo ce npenopbUba npn nocTOnHH npncbCTBne, HApHmep B cb6ota
HHeJ (pa6oTeH peKHM ECO:22:00...08:00 yaca; pa6oTeH peKHM Pekm OTonneHne: 08:00...22:00 yaca).
Ta6n.20 PporpmaP4
| Пюдьлжи Телноct | 00 | 01 | 02 | 03 | 04 | 05 | 06 | 07 | 08 | 09 | 10 | 11 | 12 | 13 | 14 | 15 | 16 | 17 | 18 | 19 | 20 | 21 | 22 | 23 | ||||||||
| РабOTен раз_KИМ | ■ | ■ | ■ | ■ | ■ | ■ | ■ | ■ | ■ | ■ | ■ | ■ | ■ | ■ | ■ | ■ |
P4 e npédBapntenho 3aadenaHa npoRpama, KOTo ce npeOpbUba 3a HnpeKbChaTa pa60Ta B pa60THnpeKm Pekm OToTneHne.
| Проблажи Телност | 00 | 01 | 02 | 03 | 04 | 05 | 06 | 07 | 08 | 09 | 10 | 11 | 12 | 13 | 14 | 15 | 16 | 17 | 18 | 19 | 20 | 21 | 22 | 23 | ||||||||
| Рабoting реким |
Ta6n.21 Pporpama P5
P5 e npedbapntenho 3a daeHa nporpama, kOTo ce npenopbUba 3a HnpeKbchata pa6oTa B pa6oTHna pexHm ECO.
4.5.5 HactpoKaHa dHeBHa nporpamaP6 (HnDnBnuyanaHa)
Ako npedn TOBa ca 6HnH HAcTpoEH DeHrOT CeMncaTa n uacbT, DHeBHaT a nporpama P6 Beue e n36paHa n IpbBNTe DBe pa60THN CTbIKn He ca Heo6xOdMM.
3a da hactponTe dHeBbHaT a nporpaMa P6:
H3BnKaIe MeHIO 3aDaBaHe Ha npaMeTpN (→ rnaBa4.3.1, cTpaHua 20).
H3BnKaIe MeHIOTo 3a HAcTPOiKa IHeBHa npoRpaMa (P6) ( mBa4.3.2, cTpaHua 21). Ha nCpIe MfA P6/no.
HatackaiTe 6yToH nnH,doKaTo ce noKaKe P6/go.
HATNCHe6yToH>,3aJa notBbPdnte P6/go. Ha nncnna Mna 00/Ec. 00ob03NaayBa yacOBTe,aEc-pabOTnpeKIM ECO.
HaTnchete 6yToHa m4,3a npomeHnte pa6oTHna peXHM Ec (ECO) Ha Co (PexHM OTOnJIeHne).
HaTnCHete 6yToHa ,3a Da NOTBbPdTe HAcTpoEH na6oTeH peKm 3a NOKa3aHHa Yac. Ha nCpIeM Mra 01/Ec.
P6/no.
HaTnCHete 6yToHa,3a Da nOTBbPdnte dHeBHata nporpama P6. Ha nCnner ce noka3Ba ceMnHata nporpama (7d).
Tabnucata noka3Ba npedbapntenHO 3aadenHe NaCTPOKN Ha DHeBHaTnporpamaP6.
| Пю Doubлж Телноct | 00 | 01 | 02 | 03 | 04 | 05 | 06 | 07 | 08 | 09 | 10 | 11 | 12 | 13 | 14 | 15 | 16 | 17 | 18 | 19 | 20 | 21 | 22 | 23 | |||||||||
| Раобтен разжим | ■ | ■ | ■ | ■ | ■ |
Tabn. 22 Iporpama P6 (HNDNBdyanno peynpemya)
P6 Иma npedBapnteHNo 3aJaTeHte HacTpoKn Ha nporpaMaTa P1 (pa6oTeH peXm ECO:22:00...06:00 yaca n 08:00...18:00 yaca; pa6oTeH peXm PeXm OToJIeHne: 06:00...08:00 yaca n 18:00...22:00 yaca).
4.5.6 HactpoKaHa dHeBHa nporpama 7d (HnDnBnDyaIHa)
Ako npedn TOBa e 6Hna HactpoeHa dHeBHata nporpaMa P6, ceMnHaTApoRpama 7d Beue e n36paHa nIbPbTe DBe pa6OTHN CTbIKn He ca Heo6xOIMN.
3a da hacptponTe ceMnHuHaTa nporpama 7d:
N3BnKaIe MeHIO 3aDaBaHe Ha npaMeTpN ( nAB4.3,CTpaHua 20).
H3BnKaIe MeHIOTo 3a HAcTPOJka CeMnUHa Iporpama 7d ( mBa4.3.2, cTpaHnua 21). Ha nucPJIe Mra 7d/no.
HaTnCKaIe 6yToH nnN,doKaTo ce nokaKe 7d/go.
HaTnCHTe 6yToH>3aJa nOTBbPdnte 7d/go. Ha nCnIeMra d1/P1. d106o3NaUaBA DeHrO TceMnUaTa,a P1- npedBaPHTenHO HAcTPOEHaTa 3aTO3nDeHnPoRpaMa.
HaTnCHeTe 6yToH H,3a Da npOMeHrTe nporpaMaTa P1 HaP6.
HaTnchTe 6yToHa,3aJaNtBbPdHte HAcTpoeHaTa nporpaMa 3a NOKa3aHnI DeH OT CeMnUcTa. Ha dncnpe Mra d2/P1.
Повторе пюцета 3a BCEKN DeH OT ceMncaT a O T d1do d7. CneннactpoiKaTaHaIocNeHnA DeH (d7)HaIncnner Mnra 7d/no.
HaTnCHete 6yToHa,3a Da NOTBbPdHte ceMnHata nporpama 7d. Ha nCnIe Ce noka3Ba FyHKnIra 3a OTBopeH npO3opeu. TaNtA TnOKa3Ba PpeBapHTeHNo 3aJaDeHHe HAcTPOKn Ha ceMNHaTa nporpama 7d.Ha BceKn DeHOT cE MnTa MoKe da 6bJe npuNCHeHa DHeBHa nporpama P1 Do P6.
| Дени d1 d2 d3 | d4 d5 | d6 d7 | |||||
| Пэрorationа P1 | P1 P2 | P1 P1 | P3 P3 |
Ta6n.23 CeMnUHa nporpama 7d (HNDNBdyaAnHo perynpyema)
4.5.7 Pa60TeH TeXHM TIMER
C pa6oTHnRA peKIM TaHmep MoKe Ja ce npOMeHN HAcTpoEHaTa npOrpama 3a Do 8 Yaca (PpezAncBaHe). Korato n3Teue BpeMeTo Ha TaHmepa, KOHBekTopbT Ce BpbUa B HAcTpoEHaTa npOrpama.
4.5.8 3aunhta ot 3ampb3BaHe
Upe3 pa6oTHnIe peKIM PeKIM OToJIeHHe MoKeJa 6bJe HAcTePoEH pa6oTHnIe peKIM 3aIHTa OT 3AmPb3BaHe.
3a da hacptone 3aunntata O T 3ampb3BaHe:
Hactpoite temnepaypata Ha pa60THnpeXm PexnM OTOJIeHHe Ha 7°C. KOHBekTopbT Ie ce aKTHBnpa, KoraTo Temnpaypata B NOMeueHHeTo NaHe NoJ 7°C. KoraTo HAcTpoehata nporpama npeBknOuHn B pa60THnpeXm ECO, Hactpoehata Temnpaypa 3a 3auHtata OT 3ampb3BaHe naHa Ha 6°C.
BHHMaHHe:
Korato e 36paH pa60THnT peKHM PROG, tempeaTpata ce noHHkaBA B yacOBete, B KOHTo e aKTINBeH pa60THnT peKHM ECO, cdo 6^ (fa6pnuHa hactpoiKa 3°C) ( maba 4.5.3, ctpanuca 22).

Ipe npbUbaMe da Hacponte To3n pa6oTeH peKIM, KOraTo DaedeHO NOMEueHHe HMa Da Ce H3NON3Ba HRAKOIO dH.
4.6 Hac troka ha yHKnraTa 3a OTbOpEn np03opeu
Ako npedn ToBa e 6nla HactpoeHa ceMnHata nporpama 7d, fynkunra 3a OTBopeH npo3opeu Beue e n36paHa nIbPbTe DBe pa60THn CTbIKn He ca Heo6xOdHM.
3a da akTbInpaTe fynKcunra 3a otBOpEn np03opeu:
13BnKaTe MeHIO 3aDaBaHe Ha npaMeTpN (→ rnaBa4.3.1, cTpaHua 20).
H3BnKaIte MeHIOTo 3a HAcTPOJka CeMnUHa IporpaMa 7d ( rna4.3.2, cTpaHua 21). Ha nCnIe Mra][/of.
HATnckaIte 6ytoh m,doKTo ce nokaxe][/on.
HaTncheTe 6yToH,3a Da NotBbPdNte][/on. FyHKuYraTa 3a OTBOpEn IpO3opeue aKTHBnpaHa.Ha INcPiJe Ce NOKa3Ba MeHITo 3aJaBAHe Ha napaMeTpN.
Ako ypeNbT pa3no3Hae OTBopeH npo3opeu B nomeueHneTo, B KOeTO e HnctaInpaH, ypeNbT cnpa Pexm OToPnEHe n Ha DnCnJe Mna] []
3a da npoDbIxKIne PeXkIM oToJIeHHe:
HATnckaTe 6yToH m,doKto ce noKaKe][/go.
HaTnchTe 6yToH,3a Da nOTBbPdnte][/go. YpeIbT OTHOBe B Pexm OTOpHeHne.Ha IncnpeCe noka3Ba TeMnepaTypaB NOMeSeHHeTo.

B nkyuanypebT moKe da He pa3no3Hae OTbopeh npo3opeu (Haep. aKo ypeBt e pa3noJoxeH BnOIpaHa 30Ha Ha NOMeHHeTo Ha pa3CTOAHne OT Bb3DyHHTO TeueHne, aKO e pa3noJoxeH B6n3OCTdo HarpBeBATENnAko TemnepaTyPHTe Kone6aHHa B NOMEeHHeTo ca TBbpDe HnCK).
4.7БлokировkaHa6yToHnTe
3a da ce npedotbpaTHeBONH IpomEnHa HAcTroKHTe, e Bb3MOxHO da ce 6IOknpa perynaTopbT.
3a da 6nokpupe peryanatopa:
3aPbXTe HaTnCHaTH eHOBpeMeHHo 6yToHHTe 3a NOBuee ot 5ceKHyN. BIOKpOBkata Ha 6yToHtE eakTNBnPaHa. Ha DnCnIe ce NOKa3Ba cAmO TemnepaTypaT B NOMEuEHNrTo.
3a da oTKHNoHTe peRyIaTopa:
3a npbxte HATnchatn eHOBpeMeHHo 6yToHnTe 3a noBue oe 5 ceKHydN. Perynatopbt e OTKnIOUey.
4.8 KaIIh6pnpaHe Ha ypeHa
3a da ce aanTnpa noka3aHaTa Ha dncnpe Ta KbM DeiCTBHTenHata TemepaTpa B NOMEeHHeTO, ypeBt MoKe da ce KaH6pnpa.
3a da kaJIIN6pnpate ypeDa:
H3mepeTe TempepaTpyaTb NOMeueHHeTo n r cpaBHeTe C POKa3aHaTa Ha DERVJaTOpa TEMpepaTpya.
3aDpBxTeHaTnCHaTHeHOBpeMeHHo6yToHHTe,
Ha nncnne Ce noka3Ba TeKyaTa cToHocT 3a KopeKun (pha6pnuHa HactpoiKa O,O°C).
HATNCHETe 6yToH ,3a araanTnpate NOKa3aHaTa TemnepaTypa Cbc CTOnHocTTa 3a KopeKunr O- 3^ + 3^
3a Da 3aBbPwHte KaINbPpHaHeTo:
3aPbXTe HaTnchTaH eNHOpeMeHHo 6yToHHTe , H YpeBt OTHOBO CE HAmHPa B TEKUYINRApaBOTeH peKHM.

AkoB npoDbIxkeHne Ha 5 cekyHn Hnn NOBeue He 6bde HATNCHaHT HnTo eINH 6yTOH, ypeNbT aBTOMaTHUHO n3n3a OT pexkMa 3a KaIIb6pnpaHe.
Aeavra eikovac 1, oeiia 211:
3 Pwtn evapn Aetoupyia
OTav yivetaeykataotaon,tonoetnon n metakivnon Tc oukeunc ano eva nou nio yuxpo nepiaalov, anatei tai npocapoynTnc otn thepokpaia touxpwou.
Mny evpyonoioe Te ouokeun ia uon opa.

OTav n ouakeun thepaivetai yia npwn foopa, evdeltaetal va npokuwei ia eaaoppia ooun (muy. 2 wpc) lovw tnc Ehpavonc Twv unolaemuatw npaywnc.
1 Explanation of symbols and safety instructions. .56
1.1 Explanation of symbols. 56
1.2 General safety instructions. 56
2 Product Information 58
2.1 Declaration of conformity 58
2.2 Scope of delivery. 58
2.3 Definition 58
2.4 Intended use 58
2.5 Product description. 59
3 Commissioning 59
4 Operation 59
4.1 Switching the convector on/off 59
4.2 Operation of the control unit 59
4.2.1 Switching on the control unit 59
4.3 Parameter settings and settings. 59
4.3.1 Calling up the Parameter settings menu .59
4.3.2 Calling up the Settings menus 60
4.3.3 Exiting the Parameter settings menu. 60
4.4 Setting the day and time 60
4.5 Operating modes and displays on the control unit 60
4.5.1 Calling up and setting operating modes .61
4.5.2 Heating mode operation mode 61
4.5.3 Operating mode ECO .61
4.5.4 PROG operating mode 62
4.5.5 Setting (individual) day program P6 . 63
4.5.6 Setting 7d week program (individual) 63
4.5.7 TIMER operating mode.. 64
4.5.8 Frost protection 64
4.6 Setting the window open function 64
4.7 Key lock function 64
4.8 Calibrating the appliance 65
5 Cleaning and maintenance 65
6 Environmental protection and disposal. 65
7 Data Protection Notice. 66
8 Troubleshooting 66
9 Data. 67
9.1 Technical Data.. 67
9.2 Product data for energy consumption 67
10 Service addresses. 67
11 Appendix 211
1 Explanation of symbols and safety instructions
1.1 Explanation of symbols
Warnings
In warnings, signal words at the beginning of a warning are used to indicate the type and seriousness of the ensuing risk if measures for minimizing danger are not taken.
The following signal words are defined and can be used in this document:

DANGER:
DANGER indicates that severe or life-threatening personal injury will occur.

WARNING:
WARNING indicates that severe to life-threatening personal injury may occur.

CAUTION:
CAUTION indicates that minor to medium personal injury may occur.
NOTICE:
NOTICE indicates that material damage may occur.
Important information

The info symbol indicates important information where there is no risk to people or property.
Additional symbols
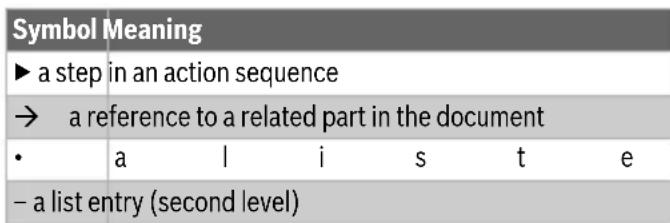
Table 53
1.2 General safety instructions
Notices for the target group
These operating instructions are intended for the operator of the product. All instructions must be observed. Non-observance can result in serious personal injury with potentially fatal consequences as well as damage to property and the environment.
Read and retain the operating instructions (heating controller, etc.) prior to operation.
Observe the safety instructions and warnings.
- Carry out cleaning and maintenance at least once a year at the specified intervals. Also check when you do so that the entire system is in proper working order.
- Immediately remedy any defects identified.
n t y
Safety of electrical appliances for domestic use and similar purposes
The following guidelines apply in accordance with EN 60335-1 and EN 60335-2-30 in order to prevent hazards when using electrical space heaters:
"Children younger than 3 years of age must be kept away from the appliance, unless continuously supervised.
Children between 3 and 8 years of age must only switch the appliance on and off if they are supervised or have been shown how to use the appliance safely and have understood the associated dangers, provided that the appliance is positioned or installed in its normal place of use. Children between 3 and 8 years of age must not insert the plug into the socket, adjust the appliance, clean the appliance and/or not carry out the maintenance by the user."
"If the power cable is damaged, in order to avoid hazards it must be replaced by the manufacturer or its customer service department or a similarly qualified person."
Safety of electrical devices for domestic use and similar purposes
The following requirements apply in accordance with EN 60335-1 in order to prevent hazards from occurring when using electrical appliances:
"This appliance can be used by children of 8 years and older, as well as by people with reduced physical, sensory or mental capabilities or lacking in experience and knowledge, if they are supervised and have been given instruction in the safe use of the appliance and understand the resulting dangers. Children shall not play with the appliance. Cleaning and user maintenance must not be performed by children without supervision."
"If the power cable is damaged, it must be replaced by the manufacturer, its customer service department or a similarly qualified person, so that risks are avoided."
Installation and use
- Do not install the device below a socket or near curtains or other combustible materials.
- Do not use the heating near a bathtub, shower or swimming pool.
Do not use the product in small rooms if these are used by persons who are not able leave the room by themselves, unless the room is continuously monitored.
Hot surface
Some parts of this product can become very hot and inflict burns when they come into contact with the skin. Proceed with extreme caution if children and vulnerable adults are present.
Risk of overheating, risk of fire To reduce the risk of fire:
- Maintain a clearance of at least 1m between the air outlet and textiles, curtains or other combustible materials.
Do not place anything on the convector. Do not cover the convector or climb onto it. - Ensure that the heat transfer from the convector is unhindered.
Only use the product on a horizontal stable surface or fasten it to the wall.
Danger to life from electric shock!
Touching a defective product or connecting lead may result in electric shock.
Do not use the product if it has been dropped.
Do not use the product if there are visible signs of damage.
Do not open the product.
Avoid carrying out any interventions.
- Stop using the product and disconnect it from the mains power supply.
- Please contact Service.
You can find the service addresses in chapter 10, page 67.
-or
Dispose of the product properly.
2 P r o d u c t I n These instructions contain important information for the system user regarding safe operation of the Heat Convector 4000.
The convector must only be set up or mounted outside the safety zone (shown in grey Fig. 3, page 211). For this:
observe the installation instructions.
2.1 Declaration of conformity
The design and operating characteristics of this product comply with the European and national requirements.
The CE marking declares that the product complies with all the applicable EU legislation, which is stipulated by attaching this marking.
The complete text of the Declaration of Conformity is available on the Internet: www.bosch-thermotechnology.com.
2.2 Scope of delivery
Check packaging upon receipt of delivery for damage.
Check the scope of delivery for completeness.
-HeatConvector4000
- Technical documentation
2.3 Definition
The Heat Convector 4000 is subsequently referred to in this document as "product", "convector" or "appliance".
2.4 Intended use
The convector is intended for heating of living spaces.
Comply with the connection conditions in accordance with the specifications, standards and regulations of the relevant country.
The convector must only be set up or mounted outside the safety zone (shown in grey Fig. 3, page 211).
Any other purpose is considered improper use. Any damage that results from such use is excluded from liability.
2.5 Product description
The Heat Convector 4000 is a wall mounted or floor standing electric plate space heating convector ( Fig.1, page 211).
Legend for figure 1, page 211:
[1] Convector
[2] Display
[3] On/Off switch
3 Commissioning
If the appliance is installed or set up in or was previously stored in a much colder environment, it must be allowed to adjust to the room temperature.
Wait half an hour before switching on the appliance.

When the appliance is heating for the first time, it may emit a slightly unpleasant odour (for 2 hours at the most) which is caused by the product residues drying out.
4 O p e r a t i o
Observe safety instructions ( Chapter 1.2, page 56).
4.1 Switching the convector on/off
The convector is switched on and off at the ON/OFF switch ( Fig. 1, [3], page 211).
To switch on the convector:
Set the switch to I.
To switch off the convector:
Sett hesw itchto0.

Only switch off the convector via the ON/OFF switch if you will not be needing it for a while, e.g. at the end of the heating period.
4.2 Operation of the control unit
The control elements of the control unit are shown in Chapter 4.5, page 60.

The control unit has no date memory. The date and time will be lost if the convector is disconnected from the mains power supply for longer than 5 seconds (by pulling out the plug). The heating programs are retained.
4.2.1 Switching on the control unit
On/Off key
Press the key ( Fig. 2, [7], page 211) to switch the control unit on and off with the display.
To switch the control unit on:
Press> button.
To switch the control unit off:
Press the key for longer than 5 seconds.
When the control unit is switched on, the last operation mode used appears in the display with the current settings.
When the display is switched on for the first time, the heating mode operation mode is set. The default setting for the temperature in the heating mode operation mode is 19^

If the display is no longer touched, it goes dark after 5 minutes.
4.3 Parameter settings and settings
4.3.1 Calling up the Parameter settings menu
The appliance settings can be made in the Parameter settings menu.
To call up the Parameter settings menu:
Press the key repeatedly until the indicator light above the pictogram lights up.
no flashes.
Press the or key until go appears.
Press the key to confirm go.
The Parameter settings menu appears on the display.
4.3.2 Calling up the Settings menus
The following settings menus can be called up:
Day of the week and time (d/HH/MM)
Day prg r a m (P6)
- We e k pr o g r a m ( 7 d )
- Window open function ()[]
To call up the Settings menu:
Call up the Parameter settings menu.
Press the key repeatedly until the indicator light of the required menu lights up.
4.3.3 Exiting the Parameter settings menu
To exit the Parameter settings menu:
Press the key repeatedly until the indicator light above the pictogram lights up.
no flashes.
Press the key to confirm no.
The appliance is in the heating mode operating mode.
4.5 Operating modes and displays on the control unit
The control unit exits the menu automatically if there has been no activity for 60 seconds in one of the settings menus. The appliance then reverts to the heating mode operating mode.
4.4 Setting the day and time
The day of the week and time must be set before the day program and week program can be set.
To set the day of the week and the time:
Call up the Parameter settings menu
( Chapter 4.3.1, page 59).
The Day of the week and time menu appears on the display.
d/1 flashes on the display and the day of the week can be
| Position Operation | mode | Description | ||
| 1 Heating | mode | Setting the temperature for the heating mode operating mode. | → Chapter 4.5.2, page 61 | |
| 2 ECO Energy saving operating mode. The temperature default setting is 3 °C below the temperature of the heating mode operating mode. | → Chapter 4.5.3, page 61 | |||
| 3 PROG Changeover automatically between the heating mode operating mode and ECO operating mode. | → Chapter 4.5.4, page 62 → Chapter 4.5.5, page 63 → Chapter 4.5.6, page 63 | |||
| 4 | TIMER | Timer for the time program for switching the appliance on/off. | → Chapter 4.5.7, page 64 | |
Table 54 Operating modes at the control unit ( Fig.2, page 211)
| Position Symbol Explanation | |
| 15 Setting the day and time | |
| The LED above this symbol flashes if the day and time are being set (→ Chapter 4.4, page 60). | |
| 16 7d week program | |
| The LED above this symbol flashes if the 7d week program is being set (→ Chapter 4.5.6, page 63). | |
| 14 Day program P6 | |
| The LED above this symbol flashes if the day program P6 is being set (→ Chapter 4.5.5, page 63). | |
| 5 Open-window detection | |
| This function detects when a window in the room is open due an accompanying sudden drop in temperature. | |
| 6 Adjust | Settings can be made via this symbol. |
| 12 Heating | The appliance is heating when the LED next to this symbol lights up. |
| 7/8 Operating mode/Confirm/On | |
| Press this key to select the operating mode or confirm a setting. Press this key to switch the appliance on when the appliance is switched off. | |
| 11/10/9 Up/Down/Keylock | |
| Press these keys to reduce or increase a value (e.g. the temperature). The keylock can be activated via both keys to prevent the settings being changed accidentally. | |
| 13 Display output | |
Table 55 Displays ( Fig. 2, page 211)
4.5.1 Calling up and setting operating modes
To call up one of the operating modes:
Press the key repeatedly until the indicator light below the pictogram of the required operating mode lights up. The last temperature set in this operating mode appears on the display.
To change the temperature of the operating mode:
Press the on key until the required temperature is set. The set temperature is saved automatically if the key is not pressed for 5 seconds. The room temperature appears on the display.
4.5.2 Heating mode operation mode
The control unit keeps the convector at the set temperature.
The temperature can be set from 7^ and 12^ up to 28^ . The default setting is 19^ .
To call up and set the heating mode operating mode:
▶ Proceed as described in Chapter 4.5.1, page 61.

If the temperature for the heating mode operating mode is lower than the ECO operating mode temperature, the temperature setting for the ECO operating mode is automatically reduced to 1^ below the temperature of the heating mode operating mode.
4.5.3 Operating mode ECO
The temperature default setting for the ECO operating mode is 3^ below the temperature of the heating mode operating mode.
The temperature can be set from 6^ to 1^ below the temperature of the current operating mode.
To call up and set the ECO operating mode:
▶ Proceed as described in Chapter 4.5.1, page 61.

We recommend setting the ECO operating mode during the night or if the room is not going to be used for more than 2 hours.
4.5.4 PROG operating mode
To call up and set the PROG operating mode:
▶ Proceed as described in Chapter 4.5.1, page 61.

The temperatures set under 4.5.2 and 4.5.3 apply for the PROG operating mode. The day and week program controls which operating mode is active and when.
There are 5 predefined day programs (P1...P5). One other day program (P6) can be adjusted individually ( Chapter 4.5.5, page 63). The week program (7d) is comprised of these programs. The week program can be adjusted individually ( Chapter 4.5.6, page 63).
Predefined day programs P1 up to P5
The heating phases of the predefined programs are shown in the following tables.
The programs (P1...P5) cannot be changed.

In the following tables, a black square represents the heating mode operation mode and an empty cell represents the ECO operating mode.
Table 56 Program P1
| Duration | 00 | 01 | 02 | 03 | 04 | 05 | 06 | 07 | 08 | 09 | 10 | 11 | 12 | 13 | 14 | 15 | 16 | 17 | 18 | 19 | 20 | 21 | 22 | 23 |
| Operation mode | ■ | ■ | ■ | ■ | ■ | ■ |
P1 is the recommended predefined program for daytime absence (operating mode ECO:22:00...06:00 Clock and
08:00...18:00 Clock; heating mode operating mode:
06:00...08:00 Clock and 18:00...22:00 o'clock).
Table 57 Program P2
| Duration 00 | 01 | 02 | 03 | 04 | 05 | 06 | 07 | 08 | 09 | 10 | 11 | 12 | 13 | 14 | 15 | 16 | 17 | 18 | 19 | 20 | 21 | 22 | 23 | ||||||||||
| Operation mode |
P2 is the recommended predefined program for midday absence during the day (operating mode ECO:22:00...06:00 o'clock, 08:00...12:00 Clock and 14:00...18:00; heating mode operating mode:
06:00...08:00 o'clock, 12:00...14:00 Clock and 18:00...22:00 o'clock).
Table 58 Program P3
| Duration | 00 | 01 | 02 | 03 | 04 | 05 | 06 | 07 | 08 | 09 | 10 | 11 | 12 | 13 | 14 | 15 | 16 | 17 | 18 | 19 | 20 | 21 | 22 | 23 |
| Operation mode | ■ | ■ | ■ | ■ | ■ | ■ | ■ | ■ | ■ | ■ | ■ | ■ | ■ |
P3 is the predefined program which is recommended for continuous absence, on Saturday or Sunday for example
(operating mode ECO:22:00...08:00 Clock; heating mode operating mode: 08:00...22:00 o'clock).
Table 59 Program P4
| Operation mode | ■ | ■ | ■ | ■ | ■ | ■ | ■ | ■ | ■ | ■ | ■ | ■ | ■ | ■ | ■ | ■ | ■ | ■ | ■ | ■ | ■ |
P4 is the recommended predefined program for continuous operation in the heating mode operating mode.
Table 60 Program P5
| Operation mode | 01 02 03 | 04 05 06 | 07 08 09 | 10 11 12 | 13 14 15 | 16 17 18 | 19 20 | 21 22 | 23 | |||||||||
P5 is the recommended predefined program for continuous operation in the ECO operating mode.
4.5.5 Setting (individual) day program P6
If the week day and time were previously set, the day program P6 has already been selected and the first two action steps can be omitted.
To set the day program P6:
Call up the parameter settings menu ( Chapter 4.3.1, page 59).
- Call up the day program settings menu (P6)
(→ Chapter 4.3.2, page 60).
P6/no flashes on the display.
Press the or key until P6/go appears.
Press the key to confirm P6/go. 00/Ec flashes on the display. 00 stands for the hours and Ec stands for the operating mode ECO.
Press the or key to change the Ec (ECO) operating mode to Co (heating mode).
Press the key to confirm the set operating mode for the hour displayed. 01/Ec flashes on the display.
Repeat the operation for every hour from 0 to 23. After the last hour has been set (23), P6/no flashes on the display.
Press the key to confirm the day program P6. The week program (7d) appears on the display.
The table shows the predefined settings of the day program P6.
Table 61 Program P6 (can be adjusted individually)
| Operation mode | Operatior mode | Operatior mode | Operatior mode | Operatior mode | Operatior mode | Operatior mode | Operatior mode | Operatior mode | Operatior mode | Operatior mode | Operatior mode | Operatior mode | Operatior mode | Operatior mode | Operatior mode | Operatior mode | |
| Operation 00 | 01 02 03 | 04 05 06 | 07 08 09 | 10 11 12 | 13 14 15 | 16 17 | 18 19 | 20 21 | 22 23 | ||||||||
| Operation mode | Operatior mode | Operatior mode | Operatior mode | Operatior mode | Operatior mode | Operatior mode | Operatior mode | Operatior mode | Operatior mode | Operatior mode | Operatior mode | Operatior mode | Operatior mode | Operatior mode | Operatior mode | Operatior mode |
P6 has the predefined settings of program P1 (operating mode ECO:22:00...06:00 Clock and 08:00...18:00 Clock; heating mode operating mode: 06:00...08:00 Clock and 18:00...22:00 o'clock).
4.5.6 Setting 7d week program (individual)
If the day program P6 was previously set, the 7d week program is already selected and the first two action steps can be omitted.
To set the 7d week program:
Call up the parameter settings menu ( Chapter 4.3, page 59).
- Call up the settings menu for the 7d week program ( Chapter 4.3.2, page 60).
- 7d/no flashes on the display.
Press the or key until 7d/go appears.
Press the key to confirm 7d/go. d1/P1 flashes on the display. d1 stands for the day of the week and P1 stands for the program that has been preset for this day.
Press the key to change the program from P1 to P6.
Press the key to confirm the program that has been set for the day of the week shown. d2/P1 flashes on the display.
Repeat procedure for every day of the week from d1 to d7. After the last day has been set (d7), 7d/no flashes on the display.
Press the key to confirm the 7d week program. The Window open function appears on the display.
The table shows the predefined settings of the 7d week program. A day program (P1 to P6) can be assigned to each day of the week.
Table 62 7d week program (can be adjusted individually)
The set program can be changed (overwritten) for up to 8 hours in the Timer operating mode. Once the timer time has expired, the convector reverts to the set program.
The default setting is 1 hour.
The timer can be changed within a range of 1 to 8 hours (in 1-hour increments).
To call up the TIMER operating mode:
Press the key repeatedly until the indicator light below the pictogram lights up. The time that is currently set after which the appliance is switched off appears on the display.
To change the time setting in the TIMER operating mode:
Press the or key until the required time is set (range of 1...8 hours). The set temperature is saved automatically if the key is not pressed for 5 seconds. The room temperature appears on the display.
To exist the TIMER operating mode:
Press> button. Timer is stopped. The Parameter settings menu appears on the display.
- Please note: if the PROG operating mode is selected, the temperature is up to 6^ lower (default setting 3^ ). This applies at the times where the ECO operating mode is active ( Chapter 4.5.3, page 61).
4.5.8 Frost protection
The frost protection operating mode can also be set via the heating mode operating mode.
To set the frost protection:
Set the temperature of the heating mode operating mode to 7^
The convector is activated if the room temperature falls below 7^ .
If the set program changes to the operating mode ECO, the set frost threshold temperature falls to 6^ .
Please note:
if the PROG operating mode is selected, the temperature falls at the times in which the ECO operating mode is active by up to 6 ^ C (default setting 3^ ) ( Chapter 4.5.3, page 61).

We recommend setting this operating mode if the room is not going to be used for several days.
4.6 Setting the window open function
If the 7d week program was previously set, the window open function is already selected and the first two action steps can be omitted.
To activate the window open function:
- Call up the parameter settings menu (→ Chapter 4.3.1, page 59).
- Call up the settings menu for the 7d week program ( Chapter 4.3.2, page 60).
[ [/\mathsf{oF} ] flashes on the display.
Press the or key until [/on appears.
Press the key to confirm][/on. The window open function is activated. The Parameter settings menu appears on the display.
If the appliance detects an open window in the room in which it is installed, the appliance stops the heating mode and ] [ flashes on the display.
To continue the heating mode:
Press the or key until [/go appears.
Press the key to confirm][/go. The appliance reverts to heating mode. The room temperature appears on the display.

The appliance cannot detect an open window in some cases (e.g. if the appliance is in an isolated draught-free part of the room, if it is near a heat source or if the temperature fluctuation in the room is insufficient).
4.7 Key lock function
To avoid accidental changes to the settings, the control unit can be locked.
To lock the control unit:
Hold the and keys pressed for longer than 5 seconds. The keylock is activated. Only the room temperature appears on the display.
To unlock the control unit:
Hold the and keys pressed for longer than 5 seconds. The control unit is unlocked.
4.8 Calibrating the appliance
The appliance can be calibrated in order to adapt the temperature shown on the display to the actual room temperature.
To calibrate the appliance:
Measure the room temperature and compare it to the temperature displayed at the control unit.
Press and hold the , and keys at the same time. The actual correction value appears on the display (default setting 0.0^
Press the or key to adjust the displayed temperature with the correction value of -3^ to +3^ .
To end the calibration:
Press and hold the, and keys at the same time. The appliance reverts to the current operating mode.

If a key is not pressed for 5 seconds or more, the appliance automatically exits calibration mode.
5 Cleaning and maintenance
No intervention whatsoever is permitted in the product.
Do not use abrasive or caustic cleaning agents.
Before cleaning the appliance, disconnect it from the power supply and allow it to dry before reconnecting.
Do not place the connecting lead on the heated convector.
Prevent ingress of water into the electrical components.
Clean the air inlet and outlet grille every six months with a vacuum cleaner or a brush to remove dust and dirt.
6 Environmental protection and disposal
Environmental protection is a fundamental corporate strategy of the Bosch Group.
The quality of our products, their economy and environmental safety are all of equal importance to us and all environmental protection legislation and regulations are strictly observed.
We use the best possible technology and materials for protecting the environment taking account of economic considerations.
Packaging
Where packaging is concerned, we participate in country-specific recycling processes that ensure optimum recycling. All of our packaging materials are environmentally compatible and can be recycled.
Old electrical and electronic appliances
This symbol means that the product must not be disposed of with other waste, and instead must be taken to the waste collection points for treatment, collection, recycling and disposal.
The symbol is valid in countries where waste electrical and electronic equipment regulations apply, e.g. "European Directive 2012/19/EC on old electronic and electrical appliances". These regulations define the framework for the return and recycling of old electronic appliances that apply in each country.
As electronic devices may contain hazardous substances, it needs to be recycled responsibly in order to minimize any potential harm to the environment and human health. Furthermore, recycling of electronic scrap helps preserve natural resources.
For additional information on the environmentally compatible disposal of old electrical and electronic appliances, please contact the relevant local authorities, your household waste disposal service or the retailer where you purchased the product.
You can find more information here:
www.wee.bosch-thermotechnology.com/
7 Data Protection Notice

We, Bosch Thermotechnology Ltd., Cotswold Way, Warndon, Worcester WR4 9SW, United Kingdom process product and installation information, technical and connection data, communication data,
product registration and client history data to provide product functionality (art. 6 (1) sentence 1 (b) GDPR), to fulfil our duty of product surveillance and for product safety and security reasons (art. 6 (1) sentence 1 (f) GDPR), to safeguard our rights in connection with warranty and product registration questions (art. 6 (1) sentence 1 (f) GDPR) and to analyze the distribution of our products and to provide individualized information and offers related to the product (art. 6 (1) sentence 1 (f) GDPR). To provide services such as sales and marketing services, contract management, payment handling, programming, data hosting and hotline services we can commission and transfer data to external service providers
and/or Bosch affiliated enterprises. In some cases, but only if appropriate data protection is ensured, personal data might be transferred to recipients located outside of the European Economic Area. Further information are provided on request. You can contact our Data Protection Officer under: Data Protection Officer, Information Security and Privacy (C/ISP), Robert Bosch GmbH, Postfach 30 02 20, 70442 Stuttgart, GERMANY.
You have the right to object, on grounds relating to your particular situation or where personal data are processed for direct marketing purposes, at any time to processing of your personal data which is based on art. 6 (1) sentence 1 (f) GDPR. To exercise your rights, please contact us via privacy.ttgb@bosch.com To find further information, please follow the QR-Code.
8 T r o u b l e s h o o t i n g
| Error Causes Remedy | ||
| The appliance heats continuously. | The appliance is continuously exposed to draughts. | \( \blacktriangleright \) Close doors and windows. |
| The selected appliance output does not match the size of the room. The convector is sized too small. | \( \blacktriangleright \) Check whether the selected output is suitable for the size of the room \( (50\mathrm{\;W}/{\mathrm{m}}^{3}) \) . | |
| The surface of the convector is very hot. | The selected appliance output does not match the size of the room. | \( \blacktriangleright \) Check whether the selected output is suitable for the size of the room \( (50\mathrm{\;W}/{\mathrm{m}}^{3}) \) . |
Table 63 Faults, possible causes and remedies
9 D a t a
9.1 Technical Data
| Unit Heat Convector HC4000-5...-25 | ||
| Operating voltage V 230 V AC | ±10% 50 Hz | |
| Rated output of the convector (→ Fig. 1, [1], page 211) | W 500, 1000, 1500, 2000, 2500 | |
| IP rating/protection class IP 24/II | ||
| Connection cable - 1.3 m, plug version: | CEE7/17 | |
| Temperature setting range | °C 7; 12...28 | |
| Installation position | - | Horizontal on the wall. With mounted feet standing vertically on the floor. |
Table 64 Specifications for HC4000-5...25
9.2 Product data for energy consumption
The following product data satisfy the requirements of the EU Regulation No. 2015/1188 supplementing Directive 2014/30/EU.
| Product data | Symbol | Unit | Heat Convector HC4000-5...- 25 |
| Heat output | |||
| Specified heat output | Prated | kW 0.5; 1.0; 1.5; 2.0; 2.5 | |
| Minimum heat output (indicative) | Pmin | KW | 0.0 |
| Maximum continuous output | Pmax, c | KW | 2.5 |
| Product data | Symbol | Unit | Heat Convector HC4000-5…-25 |
| Auxiliary electricity consumption | |||
| For rated heat output | elmax | KW | 0.000 |
| At minimum heat output el | min | KW | 0.000 |
| In standby mode | elsb | kW | 0.000 |
| Type of heat transfer/room temperature-dependent control | |||
| Electronic room temperature-dependent control with week timer | - | - Yes | |
| Other control options | |||
| Room temperature-dependent control with presence detection | - | - | No |
| Room temperature-dependent control with open-window detection function | - | - | Yes |
| Room temperature-dependent control with remote control option | - | - | No |
| Room temperature-dependent control with adaptive control of heating start | - | - | Yes |
| Room temperature-dependent control with operating time limit | - | - | Yes (timer) |
| Room temperature-dependent control with black ball sensor | - | - | No |
Table 65 Product data for energy consumption
10 Service addresses
You can find the service address for this product by scanning the QR code below.

Indice
Algunos componentes de este productoSEOSEOSEOSEOSEOSEOSEOSEOSEOSEOSEOSEOSEOSEOSEOSEOSEOSEOSEOSEOSEOSEOSEOSEOSEOSEOSEOSEOSEOSEOSEOSEOSEOSEOSEOSEOSEOSEOSEOSEOSEOSEOSEOSEOSEOSEOSEOSEOSEOSEOSEOSEOSEOSEOSEOSEOSEOSEOSEOSEOSEOSEOSEOSEOSEOSEOSEOSEOSEOSEOSEOSEOSEOSEOSEOSEOSEOSEOSEOSEOSEOSEOSEOSEOSEOSEOSEOSEOSEOSEOSEOSEOSEOSEOSEOSEOSEOSEOSEOSEO SEOHNINHNINHNINHNINHNINHNINHNINHNINHNINHNINHNINHNINHNINHNINHNINHNINHNINHNINHNINHNINHNINHNINHNINHNINHNINHNINHNINHNINHNINHNINHNINHNINHNINHNINHNINHNINHNINHNINHNINHNINHNINHNINHNINHNINHNINHNINHNINHNINHNINHNINHN
[1] Convector
[2] Pantalla
[3] Interruptor ON/OFF
-HeatConvector4000
-Documentation technique
2.3 Terminologie
Position Symbol Explication
Omde convector in te schakelen:
D-73249 Wernau / Germany