USER MANUAL IAN 388687 CRIVIT
natural_image
Exterior view of a modern rectangular water tank with rounded side and side panels, shown in grayscale (no text or symbols)
PLANSCHBECKEN / PADDLING POOL / PISCINE GONFLABLE
DE AT CH
PLANSCHBECKEN
Operation and safety notes
NL BE
OPBLAASBAARZWEMBAD
GB / IE Operation and safety notes Page 11
natural_image
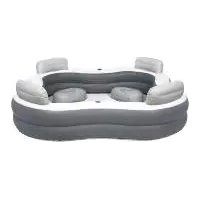
Line drawing of a person rolling down a large rectangular object (no text or symbols)
B
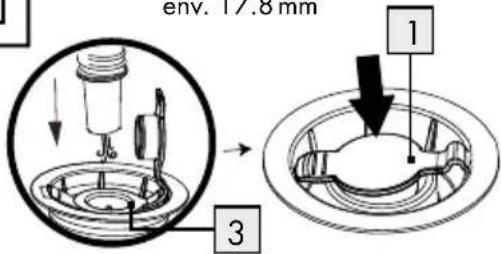
∅ ca./approx./
env. 17.8 mm
natural_image
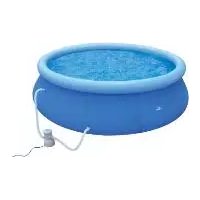
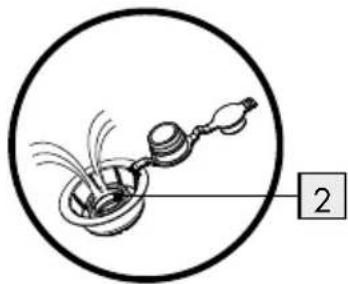
Simple line drawing of a pot with a funnel and a handle, enclosed in a circle, with a numbered label '2' on the right (no text or symbols on the diagram itself)
∅ ca./approx./env. 10.2 mm
C
flowchart
graph TD
    A["7"] --> B["Arrow"]
D

natural_image
Simple black upward arrow with wavy line above it, no text or symbols present
Intended use......Page 12
Description of parts and features......Page 12
Technical data......Page 12
Contents......Page 12
Safety advice Page 12
Non swimmers safety....Page 13
Safety devices....Page 13
Safety equipment Page 13
Safe use of the mini-pool Page 13
Operation Page 13
Pumping up the product....Page 14
Deflating the product....Page 14
Cleaning and Maintenance......Page 14
Repairing the product....Page 14
Storage instruction......Page 15
Disposal Page 15
Warranty Page 15
Warranty claim procedure....Page 15
Service Page 16
Paddling pool
- Introduction
We congratulate you on the purchase of your new product. You have chosen a high quality product. Familiarise yourself with the product before using it for the first time. In addition, please carefully refer to the operating instructions and the safety advice below. Only use the product as instructed and only for the indicated field of application. Keep these instructions in a safe place. If you pass the product on to anyone else, please ensure that you also pass on all the documentation with it.
- Intended use
This article is intended for use for playing / paddling. This product is intended for private, outdoor use only. The product is not intended for commercial use. The product is suitable for children for 3 years or above.
• Description of parts and features
1 End cap
2 Valve opening
3 Stopper
4 End cap
5 Valve opening
6 Valve (for pillow)
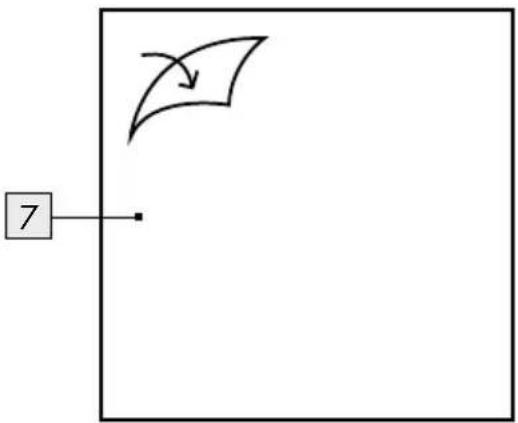
7 Patches for repairs
- Technical data
Dimensions:
HG03357A: approx. 202 x 186 x 46 / 60 cm (W x D x H) (when inflated) (included headrest)
HG03357B: approx. 202 x 151 x 46 / 60 cm (W x D x H) (when inflated) (included headrest)
Weight:
HG03357A: approx. 3250g
HG03357B: approx. 3350g
- Contents
1 paddling pool
2 interlocking quick-release valve
2 patches for repairs
1 deflation tube
1 instruction manual

Safety advice
PLEASE READ CAREFULLY AND KEEP FOR FUTURE REFERENCE!

Avoid the risk of injury!
RISK OF TO INFLAN
WARNING!
LOSS OF LIFE OR ACCIDENT
TO INFANTS AND CHILDREN!
Never leave children unsupervised with the packaging material or the product. The packaging material presents a suffocation hazard and there is a risk of loss of life from strangulation and / or drowning. Children often underestimate danger. Always keep the product out of reach of children.
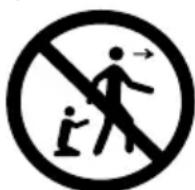
WARNING! Never leave your child unattended - drowning hazard.
■ WARNING! Only for domestic use.
Children can drown in very small amounts of water. Empty the pool when not in use.
- Do not install the paddling pool over concrete, asphalt or any other hard surface.
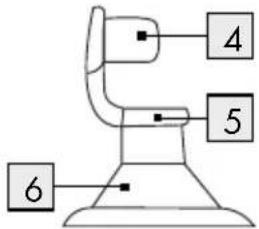
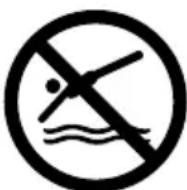
- When filling with water, the maximum depth of the water should not exceed the maximum water level mark on the product. (see fig. D).
■ Once inflated, make sure that the product does not come in contact with stones, gravel or other sharp objects which could puncture the item.
• Non swimmers safety
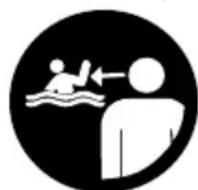
■ Continuous, active, and vigilant supervision of weak swimmers and non-swimmers by a competent adult is required at all times (remembering that children under five are at the highest risk of drowning).
- Designate a competent adult to supervise the pool each time it is being used.
■ Weak swimmers or non-swimmers should wear personal protection equipment when using the mini-pool.
- When the mini-pool is not in use, remove all toys and appealing objects from the water and the coping to avoid attracting children to the mini-pool
- When the mini-pool is not in use, remove all toys or other objects from its surrounding that could be used by a child as a device to facilitate the access into the mini-pool (e.g. chairs, big toys, etc.).
- Safety devices
It is recommended to install a barrier (and secure all doors and windows, where applicable) to prevent unauthorized access to the mini-pool.
■ Personal protective equipment, barriers, pool covers, pool alarms, or similar safety devices are helpful aids, but they are not substitutes for continuous and competent adult supervision.
● Safety equipment
- Keep a working phone and a list of emergency phone numbers near the mini-pool.
● Safe use of the mini-pool
■ Encourage all users especially children to learn how to swim.
Learn Basic Life Support (Cardiopulmonary Resuscitation - CPR) and refresh this knowledge regularly. This can make a life-saving difference in the event of an emergency.
■ Instruct all mini-pool users, including children, what to do in case of an emergency
■ Never dive into shallow water. This can lead to serious injury or death.
- Do not use the mini-pool when using alcohol or medication that may impair your ability to safely use the mini-pool.
- When pool covers are used, remove them completely from the water surface before entering the pool.
- Replace water regularly according to manufacturer recommendations and, depending on hygienic conditions, its cleanliness, its clarity, and its odour, or if any debris or stains are present in the minipool. Use of chemicals in mini-pools without water circulation may result in direct contact with the chemicals or in areas of high chemical concentration resulting in injury to the users.
If chemicals are occasionally used to reduce the frequency of water replacement, follow chemicals manufacturer instructions closely (especially never use more than recommended), ensure the appropriate mixing of chemicals to avoid possible personal injuries and store chemicals out of reach of children.
The use and installation of any electrical appliances around mini-pools shall be in accordance with the national regulations.
■ Where applicable, remove any means of access from the mini-pool and store it out of reach of children whenever the mini-pool is not in use.
Use of accessories not approved by the mini-pool manufacturer (e.g. ladders, covers, pumps, etc.) may result in risks of injuries or property damages.
Operation
Note: Before using the product for the first time, check it carefully for holes, porous places and seams that are not airtight.
Recommendation: An adult should always assemble the product. Please follow the individual assembly steps in the order indicated.
Recommendation: Choose a suitable flat and clean surface with plenty of space to unpack and
unfold the product. Spread the product out in the place where it will later be used.
Recommendation: Pump the product up and leave it alone for one day. Let a new product air outside in fresh air for a couple of days.
Recommendation: Place the activity toy on a level surface at least 2 m from any structure or obstruction such as a fence, garage, house, overhanging branches, laundry lines or electrical wires.
- Pumping up the product
CAUTION! Inflatable plastic products react sensitively to the cold and hot. That is why you should never use the product when the ambient temperature falls to below 15 °C and rises above 40 °C. Otherwise damage to the product may result.
Note: Basically, only an adult should be responsible for pumping the pool up. Make sure that you do not pump too much air into the product. On no account should you use a compressor. Stop the process when resistance increases during pumping and the seams start to stretch. Otherwise the material might tear. Only use manual pumps and / or pumps specifically designed for use with inflatable plastic products.
☐ Roll the product out first and then check for holes, tears and other damage (see Fig. A).
Note: You will need a pump with conical adapter (ø approx. 10.2 mm) for the air valve 6 to inflate the product. Use a pump with conical adapter with a diameter of approx. 17.8 mm for the valve opening 2.
Take the end cap 1 off the stopper 3 in order to open it.
Take the end cap 4 off the valve opening 5 in order to open the valve 6.
□ Pump the product up.
IMPORTANT! Keep in mind that air temperature and weather conditions can affect the air pressure inside inflatable products. In cold weather the product behaves as if it has less air pressure in it because the air inside contracts. Under these conditions you may have to add air. In hot weather the air inside expands.
Under these conditions you may have to remove air in order to avoid overfilling.
Place the end cap 1 onto the stopper 3 in order to close it.
Place the end cap 4 onto the valve opening 5 in order to close the valve 6.
- Deflating the product
☐ Pull the stopper 3 off the valve opening 2 in order to open it.
☐ Pull the end cap 4 off the valve opening 5 in order to open the valve 6.
☐ Press the sides of the air valve 6 together using your thumb and index finger or insert the deflation tube into the valve to allow the air to escape quickly.
☐ Allow the air to escape completely.
☐ Slowly fold the product together (see Fig. A).
Note: Make sure that the product is completely dry before folding it together.
● Cleaning and Maintenance
- On no account should you use corrosive or scouring detergents.
☐ Use a slightly damp, lint-free cloth to clean the product.
Change the water of paddling pools frequently (particularly in hot weather) or when noticeably contaminated.
- Repairing the product
Note: Minor damage can be repaired by the owner using the supplied repair kit. Have any major damage carried out at a specialist repair shop.
☐ First let all the air escape from of the product.
☐ Cut the patch 7 to suit the size of the hole.
Note: Ensure that the patch 7 is larger than the hole and overlaps the edges of the hole.
Round off the sides of the patch 7 and pull off the protective foil.
Place the patch 7 on the hole and press it down firmly. If necessary, stand a heavy object on the patch 7.
☐ Wait for 24 hours before you pump up the product again.
● Storage instruction
☐ Make sure that the product is completely dry both inside and out when wishing to store it for any length of time. Otherwise mildew and mould may form.
Store the product in a dark, dry place – out of reach of children.
☐ The ideal storage temperature is 10–20 °C.
☐ Ensure that the product does not come into contact with sharp objects during storage.
- Disposal
The packaging is made entirely of recyclable materials, which you may dispose of at local recycling facilities.
Contact your local refuse disposal authority for more details of how to dispose of your worn-out product.
- Warranty
The product has been manufactured to strict quality guidelines and meticulously examined before delivery. In the event of product defects you have legal rights against the retailer of this product. Your legal rights are not limited in any way by our warranty detailed below.
The warranty for this product is 3 years from the date of purchase. The warranty period begins on the date of purchase. Please keep the original sales receipt in a safe location. This document is required as your proof of purchase.
Should this product show any fault in materials or manufacture within 3 years from the date of purchase, we will repair or replace it – at our choice – free of charge to you. This warranty becomes void if the product has been damaged, or used or maintained improperly.
The warranty applies to defects in material or manufacture. This warranty does not cover product parts subject to normal wear, thus possibly considered consumables (e.g. batteries) or for damage to fragile parts, e.g. switches, rechargeable batteries or glass parts.
- Warranty claim procedure
To ensure quick processing of your case, please observe the following instructions:
Please have the till receipt and the item number (IAN 385259_2107) available as proof of purchase. You will find the item number on the rating plate, an engraving on the front page of the instructions for use (bottom left), or as a sticker on the rear or bottom of the product.
If functional or other defects occur, please contact the service department listed either by telephone or by e-mail.
You can return a defective product to us free of charge to the service address that will be provided to you. Ensure that you enclose the proof of purchase (till receipt) and information about what the defect is and when it occurred.
Service
GB Service Great Britain
Tel.: 08000569216
E-Mail: owim@lidl.co.uk
IE Service Ireland
Tel.:1800200736
E-Mail: owim@lidl.ie
Introduction......Page 18
HG03357B: pribl. 3350g
Obseg dobave
Pooblaščeni serviser:
OWIM GmbH & Co. KG
Stiftsbergstraße 1
74167 Neckarsulm
NEMČIJA