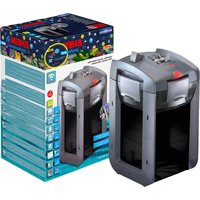
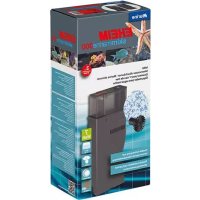
LOOPpro 8000 - Aquarium filter EHEIM - Free user manual and instructions
Find the device manual for free LOOPpro 8000 EHEIM in PDF.

| Product Type | Filter for ornamental pond (outdoor aquarium) |
| Brand | EHEIM |
| Model | LOOPpro 8000 |
| Dimensions (L × W × H) | 525 × 435 × 380 mm |
| Discharge connection | 2" (50.8 mm) |
| Operating temperature | 4 °C to 35 °C |
| Included pump | EHEIM FLOW2500 |
| UVC clarifier | EHEIM CLEARUVC-11 |
| Filtration type | Mechanical (pre-filter, sponge) and biological (bioballs) |
| Backwash function | Yes, via backwash nozzle |
| Housing material | UV-resistant plastic |
| Recommended use | Ornamental ponds with or without fish |
| Installation | At the edge of the pond, submersible pump (min. depth 20 cm) |
| Electrical safety | Minimum safety distance 2 m, disconnect before maintenance |
| Cleaning frequency | Every 4 weeks (check contamination level) |
| Sponge replacement | Every 2-3 washes, two sponges at different times |
| Spare parts | Available (references on page 3 of the manual) |
| UVC clarifier maintenance | See specific manual for CLEARUVC-11 |
| Winter storage | Clean and store frost-free |
Frequently Asked Questions - LOOPpro 8000 EHEIM
User questions about LOOPpro 8000 EHEIM
0 question about this device. Answer the ones you know or ask your own.
Ask a new question about this device
Download the instructions for your Aquarium filter in PDF format for free! Find your manual LOOPpro 8000 - EHEIM and take your electronic device back in hand. On this page are published all the documents necessary for the use of your device. LOOPpro 8000 by EHEIM.
USER MANUAL LOOPpro 8000 EHEIM
natural_image
Technical line drawing of a mechanical housing or enclosure with ventilation slots and a bolted outlet (no text or symbols)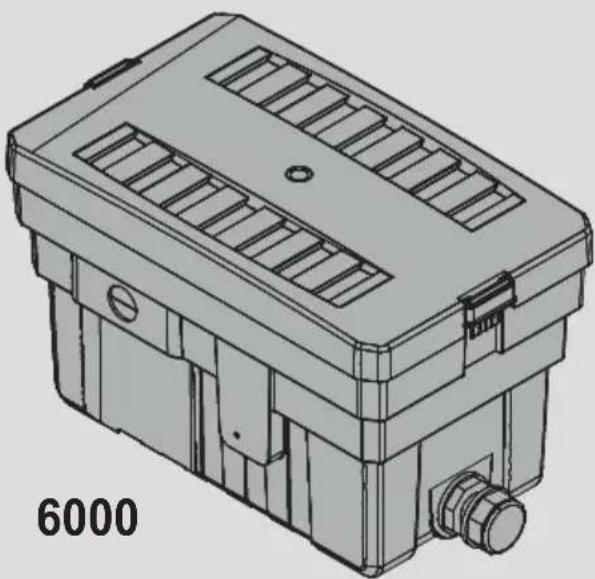
natural_image
Technical line drawing of a mechanical housing or enclosure with ventilation slots and a bolted outlet (no text or symbols)

de Bedienungsanleitung
en Operating manual
fr Mode d'emploi
it Istruzioni per l'uso
es Manual de instrucciones
pt Manual de instruções
nl Bedieningshandleiding
da Betjeningsvejledning
sv Bruksanvisning
tr Kullanım kılavuzu
pl Instrukcji obsługi
ru Руководство по обслуживанию
de Bedienungsanleitung (Original)
Durchlauffilter LOOPpro 6000 / 8000....6
Operating manual (translation)
LOOPpro 6000 / 8000 through-flow filter....12
fr Mode d'emploi (traduction)
Système de filtration continue LOOPpro 6000 / 8000....18
it Istruzioni per l'uso (traduzione)
filtro a circuito chiuso LOOPpro 6000 / 8000....24
es Manual de instrucciones (traducción)
Filtro de recirculación LOOPpro 6000 / 8000....30
Manual de instruções (Tradução)
Filtro de fluxo contínuo LOOPpro 6000 / 8000....36
nl Bedieningshandeiding (vertaling)
Doorloopfilter LOOPpro 6000 / 8000....42
da Betjeningsvejledning (Oversættelse)
Gennemløbsfilter LOOPpro 6000 / 8000....48
SV Bruksanvisning (översättning)
Genomströmningsfilter LOOPpro 6000 / 8000....54
Kullanım kılavuzu (çevirisi)
Akiş filtresi LOOPpro 6000 / 8000....60
pl Instrukcja obsługi (tłumaczenie)
Filtr przepływowy LOOPpro 6000 / 8000 .... 66
RU Руководство по обслуживанию (перевод)
Проточного фильтра LOOPro 6000 / 8000....72
text_image
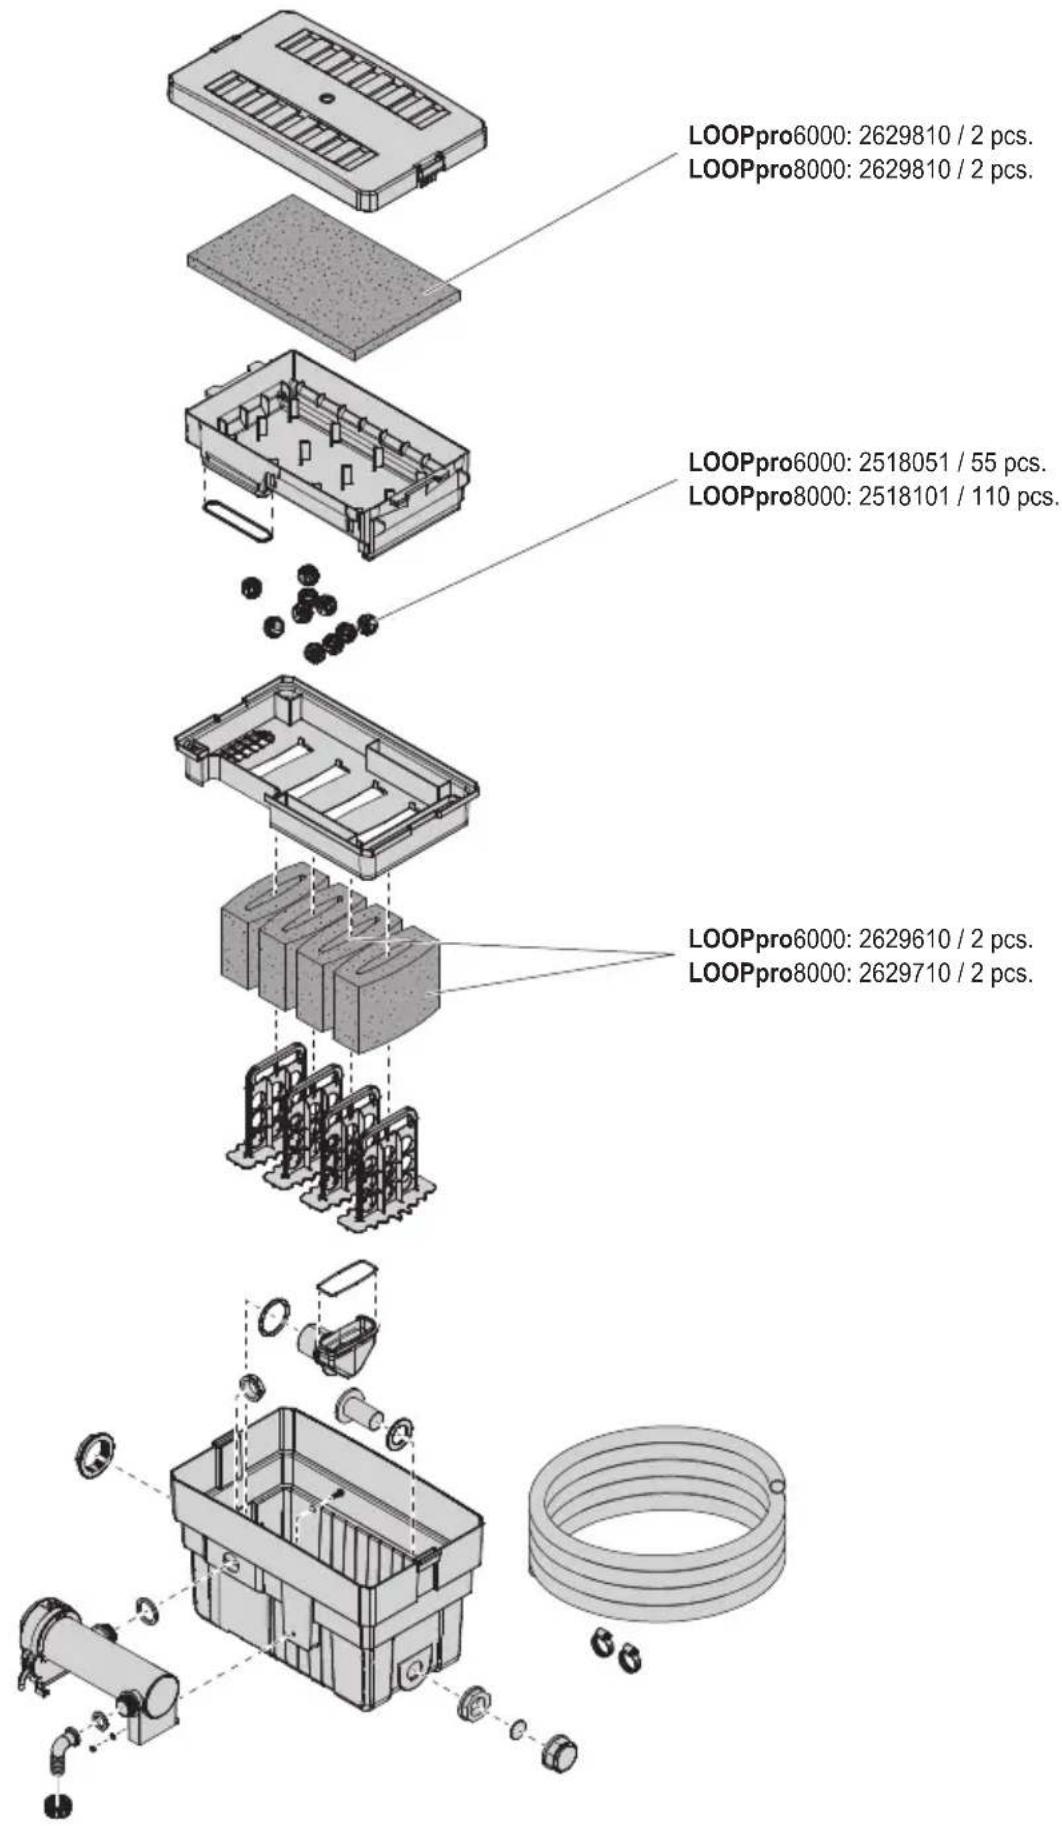
LOOPpro6000: 2629810 / 2 pcs. LOOPpro8000: 2629810 / 2 pcs. LOOPpro6000: 2518051 / 55 pcs. LOOPpro8000: 2518101 / 110 pcs. LOOPpro6000: 2629610 / 2 pcs. LOOPpro8000: 2629710 / 2 pcs.
text_image
A ① ② ①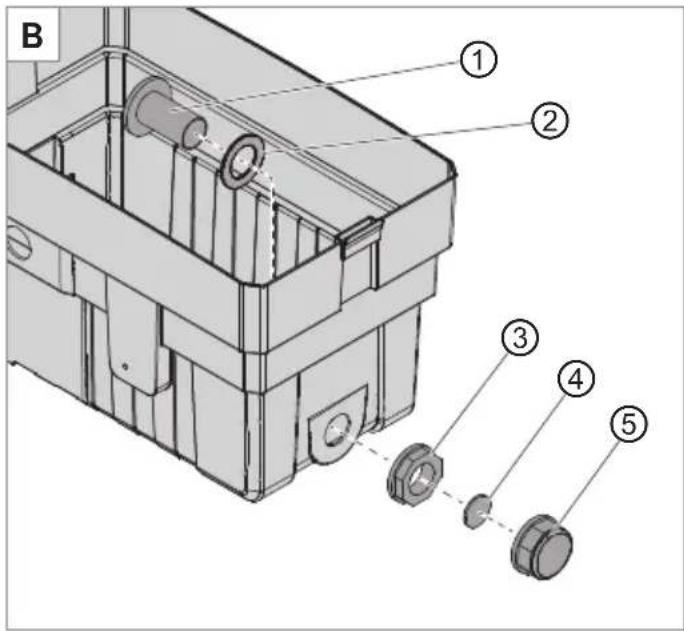
text_image
B ① ② ③ ④ ⑤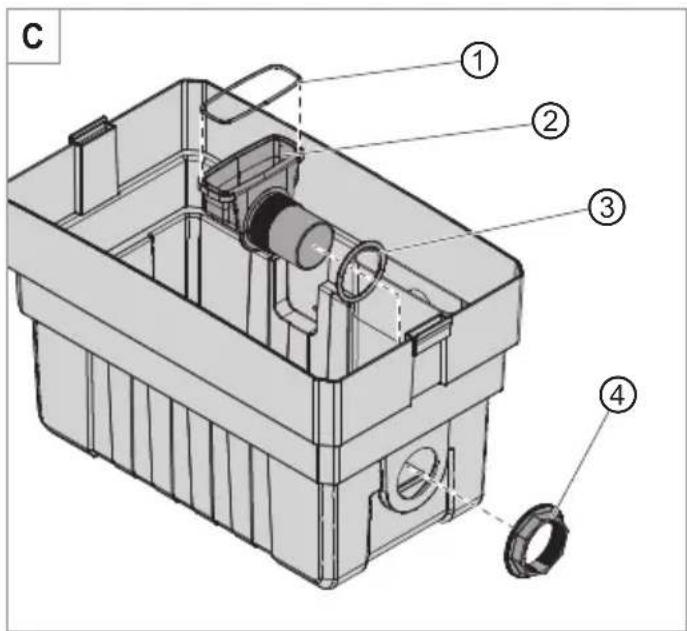
text_image
C ① ② ③ ④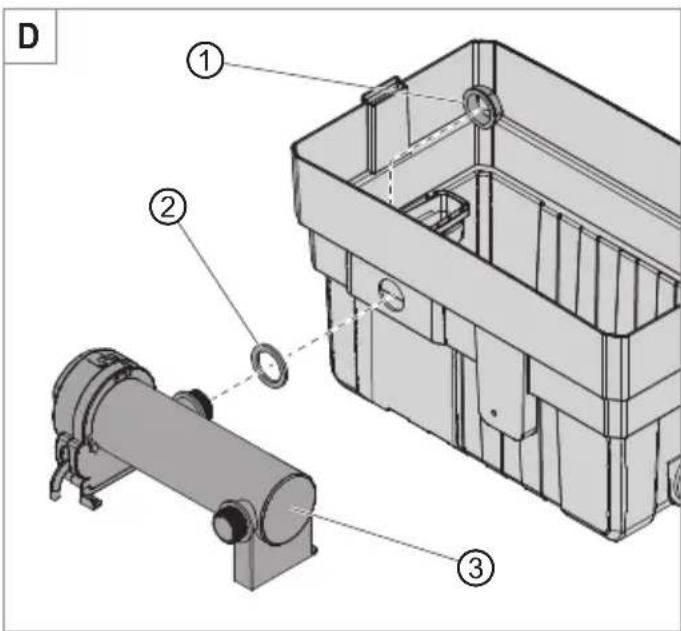
text_image
D ① ② ③
text_image
E ④ ⑤ ⑥ ⑦
text_image
F ① ② ③
text_image
G ④ ③ ⑤ ② ①
text_image
H 50% 5% 50% 75%
text_image
Technical diagram of a mechanical or electrical device with numbered components and directional arrows indicating flow or movement.
text_image
J min 20 cm min 200 cmOperating manual (translation)
LOOPpro 6000 / 8000 through-flow filter
General user instructions
Information on using the operating manual

Before using the appliance for the first time, the operating manual must be read fully and understood.
- Consider the operating manual as part of the product and keep in a safe and accessible location.
- Enclose this operating manual if passing the appliance on to a third party.
Symbol explanation
The following symbols and signal words are used in this operating manual.

DANGER!
Risk of serious personal injury or death from a general source of danger.

DANGER!
Danger of electric shock with the risk of serious personal injury or death.

WARNING!
Warning of serious personal injury or health hazard.

CAUTION!
Note on the risk of material damage.

Note with useful information and tips.
Typographical conventions
☒A Reference to a figure, in this case, reference to figure A
▶ You are prompted for an action.
Application
The appliance and all parts included in the scope of delivery are intended for private use and must only be used:
· for cleaning garden ponds with and without fish
· in compliance with the technical data
The following limitations apply to the appliance:

· Do not use for commercial or industrial purposes
· do not use in swimming ponds
Safety
Risks for persons and property can arise from this appliance if the appliance is improperly used or not used as intended or if the safety instructions are not heeded.
For your safety

- Do not let the appliance packaging and small parts get into the hands of children or people who are unaware of how to handle them, as hazards can arise (danger of suffocation!). Keep away from animals.
- This appliance is not intended for use by persons (including children) with reduced physical, sensory or mental capabilities, or lack of experience and knowledge, unless they are under the supervision of someone responsible for their safety or have received instruction on usage of the appliance from said person. Children should be supervised to ensure that they do not play with the appliance.
· Only for European markets:
This appliance can be used by children from the age of 8 and by persons with reduced physical, sensory or mental capabilities or lack of experience and/or knowledge if they are supervised and have been instructed in the safe use of the appliance and have understood the resulting dangers. Children must not play with the appliance. Cleaning and user maintenance must not be carried out by children unless they are supervised.
- The appliance is operated using the pump and UVC clarifier supplied. Heed the operating manual, especially the chapters concerning the safety, commissioning, operating and maintenance of these components!
- Before use, carry out a visual inspection to ensure that the appliance is undamaged.
- Do not use the appliance if it is not working properly or is damaged.
- Only carry out the work described in these instructions.
- Never make technical modifications to the appliance.
- Only use original spare parts and accessories for the appliance.

- When the UVC clarifier is fitted, the device's safety distance from the water must be at least 2m .
4. Commissioning
Removing the filter container cover (☒A)
- Press in the lower part of both side locks with your fingers (☒A1) and pull the upper part with your thumbs at the same time (☒A1).
- Lift the filter container cover off the filter container (☒A2).
- Remove all components from the filter container.
Fitting the backwash connecting piece (☒B)
- Fit the flat seal ② onto to backwash connecting piece ①.
- Insert the backwash connecting piece from the inside through the opening in the filter container.
- Fasten the backwash connecting piece with the union nut ③.
- Insert the sealing washer ④ into the plug ⑤.
- Seal the backwash connecting piece with the plug.
Fitting the outlet funnel (☒C)
- Check the correct fit of the seal ① in the outlet funnel ②.
- Slip the sealing ring ③ onto the outlet funnel.
- Insert the outlet funnel from the inside through the opening in the filter container.
- Fasten the outlet funnel with the union nut ④.
Fitting the UVC clarifier (☒D/E)
- Slip the sealing washer ② onto the thread of the UVC clarifier.
- Insert the UVC clarifier through the opening in the filter container.
- Fasten the UVC clarifier with the union nut ①.
- Insert the screw ④ with the O-ring ⑤ from the inside through the hole in the mounting bracket of the UVC clarifier.
- Screw the UVC clarifier tight with the nut ⑦ and the washer ⑥.
Fitting the hose connecting piece (☒F)
- Slide the union nut ③ onto the hose connecting piece ②.
- Insert the seal ① into the union nut.
- Screw the hose connecting piece onto the UVC clarifier with the union nut.
Inserting the filter (☒G)
- Check that the seal ⑤ is correctly seated in the pre-filter tray ③.
- Insert the filter in the filter housing in the following order:
① Filter insert with filter foams
② Bioballs
i
Make sure that there are no bioballs on the outlet funnel (☒E)!
③ Prefilter tub
④ Blue prefilter mat
- Seal the filter container with the filter container cover.
Installing the pump connection (☒J)
- Connect the spiral hose of the pump to the hose connecting piece on the UVC clarifier.

We recommend fastening the hoses with hose clamps.
Connecting the outlet hose (optional)
If required, an outlet hose ( 2") can be fitted onto the outlet funnel from the outside.
5. Operation

DANGER! Electric shock!
- When the UVC clarifier is fitted, the device's safety distance from the water must be at least 2 m.

DANGER!
- Heed the operating manual for the UVC clarifier and the pump, especially the chapters on safety, commissioning and operation!
- Place the filter on the pond bank (☒J).
- Place the pump on a solid surface as horizontal as possible in the pond so that the filter housing of the pump is covered by at least 20 cm of water. Pay attention to the maximum pond depth (see Technical data).
Switching on the pump and UVC clarifier
- Insert the respective mains plug into the mains socket.
Attention: The pump starts immediately!
Switching off the pump and UVC clarifier
- Remove the respective mains plug from the mains socket.
6. Maintenance

DANGER! Electric shock!
▶ Before all maintenance work, disconnect the mains plugs of the pump and the UVC clarifier.

DANGER!
- Heed the operating manual for the UVC clarifier and the pump, especially the chapters on safety and maintenance.

CAUTION! Material damage.
- Do not use hard objects or aggressive cleaning agents for cleaning.

The following sections describe maintenance work necessary for optimum and fault-free operation.
Regular maintenance prolongs the service life and assures functionality of the through-flow filter over a long period.
Contamination indicator (☒H)
The through-flow filter has a contamination indicator. Check the contamination indicator approximately every 4 weeks. To do so, proceed as follows:
- Take off the filter container cover (☒A).
- Remove the prefilter tub from the filter container with the prefilter.
- Check whether the water level is at 50% or 75%. If the level of contamination is 75%, the through-flow filter must be cleaned.

For a correct indication of the degree of contamination, the pump must be switched on.
Cleaning
- Remove the mains plugs of the pump and the UVC clarifier.
- Take off the filter container cover (☒A).
- Remove all filters from the housing (☒G).
- Clean all filters under cold, running water.
- Clean the inside of the filter container with a water jet.
- Put the filters back in reverse order and close the filter container (☒G).
Replacing the filter foams

Recommended maintenance
After every second or third cleaning, the filter foams must be replaced. In order to ensure the bacteriological functioning of the filter, only two foams at a time may be replaced at delayed intervals.
- Turn the receptacle ① of the filter foam ② to the right (☒I).
- Pull the filter foam downwards, and out of the filter insert (☒1②).
- Remove the filter foam from the receptacle.
- Fit the new filter foam onto the receptacle.
- Install the filter foam again in reverse order.
Clearing faults

DANGER! Electric shock!
▶ Before clearing faults, remove the mains plug.
Fault Possible cause Remedy
| Filter capacity decreases Filters are soiled ▶ Clean the filter | |
| Pump is soiled ▶ Clean the filter housing of the pump (see pump operating manual) | |
For other faults, please contact EHEIM Service.
Decommissioning
Storing and overwintering

- Clean the appliance
- Store the appliance in a frost-proof place.
Disposal

When disposing of the appliance, pay attention to the relevant statutory regulations.
The appliance may no longer be disposed of with the municipal or household waste. The appliance will be accepted free of charge at municipal collection points or recycling centres. The product packaging is made up of recyclable materials. Dispose of them in an environmentally responsible manner and take them for recycling.
Technical data
| LOOPpro 6000 8000 | ||
| Type 5215 5216 | ||
| Pump PLAY1500 FLOW2500 | ||
| UVC clarifier CLEARUVC-9 CLEARUVC-11 | ||
| Dimensions with UVC clarifier (L × W × H) | 525 × 435 × 290 mm | 525 × 435 × 380 mm |
| Water outlet 2" | ||
| Media temperature 4°C – 35°C | ||

The technical data of the pump and the UVC clarifier are found in the associated operating manuals.
10. Spare parts
See page 3.
Storing and overwintering

- Clean the appliance
- Store the appliance in a frost-proof place.
Disposal

When disposing of the appliance, pay attention to the relevant statutory regulations.
The appliance may no longer be disposed of with the municipal or household waste. The appliance will be accepted free of charge at municipal collection points or recycling centres. The product packaging is made up of recyclable materials. Dispose of them in an environmentally responsible manner and take them for recycling.
Datos técnicos
| LOOPpro 6000 8000 | ||
| Modelo 5215 5216 | ||
| Bomba PLAY1500 FLOW2500 | ||
| Esterilizador UV-C CLEARUVC-9 CLEARUVC-11 | ||
| Dimensiones con esterilizador UVC (L×B×H) | 525×435×290 mm | 525×435×380 mm |
| Salida del agua 2" | ||
| Temperatura del medio 4°C – 35°C | ||

Reproduction or copying – even parts thereof – only with the express permission of the producer.