Modul 4000 - Water pump EHEIM - Free user manual and instructions
Find the device manual for free Modul 4000 EHEIM in PDF.
| Product type | Filter water pump for ornamental pond |
| Brand | EHEIM |
| Model | Modul 4000 |
| Nominal power | 38 W |
| Maximum flow rate | 2300 l/h |
| Max. delivery head | 2.4 m |
| Max. immersion depth | 1 m |
| Dimensions (L × W × H) | 385 × 230 × 120 mm |
| Cable length | 10 m |
| Water temperature | 4 °C to 35 °C |
| Water connections | 1/2" – 3/4" – 1" |
| Voltage / frequency | 220 – 240 V / 50 Hz |
| Protection rating | IP68 (permanent immersion) |
| Use | Ornamental ponds, fountains, waterfalls, aeration, circulation |
| Main functions | Filtration, circulation, aeration, water feature creation |
| Maintenance | Regular cleaning of filter cartridges, pump and nozzles |
| Safety | Thermal circuit breaker, dry-run protection, IP68 |
| Spare parts available | Filter cartridges, pump impeller, seals, water feature nozzles |
| General information | Multilingual manual, extended lifespan through regular maintenance, outdoor use |
Frequently Asked Questions - Modul 4000 EHEIM
User questions about Modul 4000 EHEIM
0 question about this device. Answer the ones you know or ask your own.
Ask a new question about this device
Download the instructions for your Water pump in PDF format for free! Find your manual Modul 4000 - EHEIM and take your electronic device back in hand. On this page are published all the documents necessary for the use of your device. Modul 4000 by EHEIM.
USER MANUAL Modul 4000 EHEIM
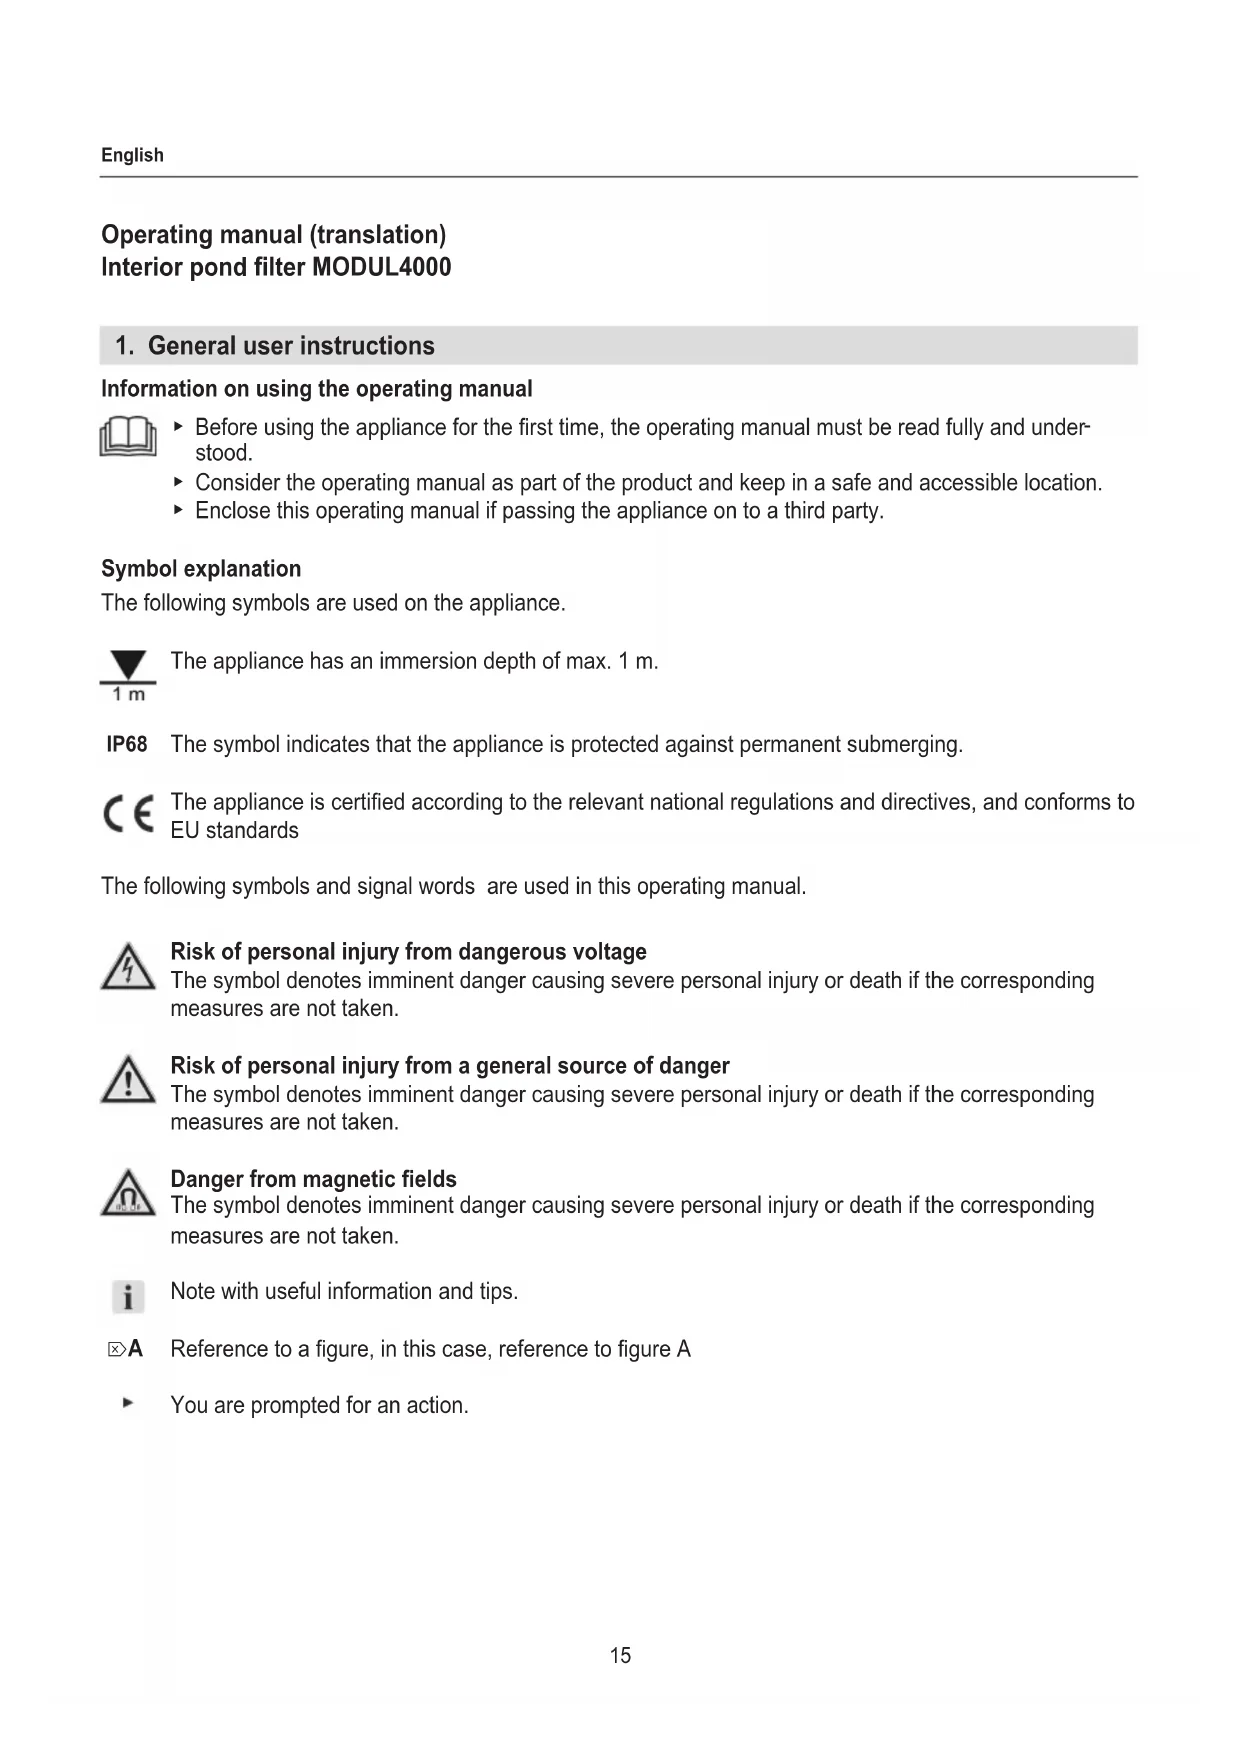
Operating manual (translation) Interior pond filter MODUL4000
1. General user instructions
Information on using the operating manual

Before using the appliance for the first time, the operating manual must be read fully and understood.
Consider the operating manual as part of the product and keep in a safe and accessible location.
- Enclose this operating manual if passing the appliance on to a third party.
Symbol explanation
The following symbols are used on the appliance.

The appliance has an immersion depth of max. 1 m.
IP68 The symbol indicates that the appliance is protected against permanent submerging.

The appliance is certified according to the relevant national regulations and directives, and conforms to EU standards
The following symbols and signal words are used in this operating manual.

Risk of personal injury from dangerous voltage
The symbol denotes imminent danger causing severe personal injury or death if the corresponding measures are not taken.

Risk of personal injury from a general source of danger
The symbol denotes imminent danger causing severe personal injury or death if the corresponding measures are not taken.

Danger from magnetic fields
The symbol denotes imminent danger causing severe personal injury or death if the corresponding measures are not taken.

Note with useful information and tips.

Reference to a figure, in this case, reference to figure A

You are prompted for an action.
2. Application
The appliance and all parts included in the scope of delivery are intended for private use and must only be used:
- for cleaning garden ponds with and without fish
for pumping water
for operating water features, waterfalls, streams, etc.
for water aeration and circulation
in compliance with the technical data
The following limitations apply to the appliance:

- Do not use for commercial or industrial purposes
-
the water temperature may not exceed 35^ C
-
do not pump caustic, inflammable, aggressive or explosive substances, salt water or drinking water
-
do not use in swimming ponds
- never operate without a water flow
3. Safety instructions
Risks for persons and property can arise from this appliance if the appliance is improperly used or not used as intended or if the safety instructions are not heeded.
- Do not let the appliance packaging get into the hands of children as hazards can arise (danger of suffocation!).
- This appliance is not intended for use by persons (including children) with reduced physical, sensory or mental capabilities, or lack of experience and knowledge, unless they are under the supervision of someone responsible for their safety or have received instruction on usage of the appliance from said person. Children should be supervised to ensure that they do not play with the appliance.
- Only for European markets:
This appliance can be used by children from the age of 8 and by persons with reduced physical, sensory or mental capabilities or lack of experience and/or knowledge if they are supervised and have been instructed in the safe use of the appliance and have understood the resulting dangers. Children must not play with the appliance.
Cleaning and user maintenance must not be carried out by children unless they are supervised.
Electrical safety

-
The electrical installations must comply with the international and national erection specifications.
-
The appliance must be protected by a residual current protection device with a maximum rated residual current of 30mA .
-
Please contact an electrician if there are any questions or problems.
-
Disconnect the appliance from the mains before all work.
-
The electrical data of the appliance must match the data of the power mains. This data is found on the type plate, the packaging and in these instructions.
- Extension cables and power distributors must be suitable for outdoor use (protected against splashing water).
- Mains connection cables must not have a smaller cross-section than rubber hose lines with the abbreviation H05RN-F3G0,75. Extension cables must meet the requirements of DIN VDE 0620.
- The mains connection cable of this appliance cannot be replaced. If the cable is damaged, the appliance must be scrapped.
- Protect the mains socket and mains plug against moisture. It is recommended to form a drip loop with the mains cable to prevent any water running along the cable to the mains socket.
- Only connect the appliance to a correctly installed protective contact mains socket.
Safe operation

- Before use, carry out a visual inspection to ensure that the appliance, especially the mains cable and plug, are undamaged.
- Do not use the appliance if it is not working properly or is damaged.
- Never use the appliance with a damaged mains cable.
- Repairs must only be carried out by an EHEIM service centre.
- Do not carry the appliance by the mains cable, and to disconnect from the mains, always pull on the plug and not on the cable or appliance.
- Protect the mains cable against heat, oil and sharp edges. If the connection cable has been laid in the ground or in gravel without an empty conduit, it must not be possible to step on it.
- Only carry out the work described in these instructions.

- Never make technical modifications to the appliance.
- Only use original spare parts and accessories for the appliance.
- Only operate the appliance when there are no persons in the water!
- The appliance has a magnet with a strong magnetic field that can affect pacemakers or implanted defibrillators (ICD). Maintain a distance of at least 30~cm between the implant and magnet.
4. Commissioning
The MODUL4000 interior pond filter is ready for operation, complete with filter cartridges.
Installing the water feature nozzle
- Screw the water distributor ③ onto the pump ( B)
- Screw the telescopic pipe ② onto the water distributor.
- Push the required water feature nozzle ( A) onto the telescopic pipe.
Connecting the hose
- Use a saw to shorten the outlet spigot to the diameter of your hose (C).
- Screw the outlet spigot onto the water distributor ( D)
- Connect your hose to the outlet spigot.

The hose connection is only required if the pump should additionally supply a water spout or stream.
We recommend fastening the hose with a hose clamp.
- Hint: Moisten the hose with water for easier installation.
5. Operation
Placement of the filter (E)
- Place the filter on a solid surface as horizontal as possible in the pond so that the filter housing is covered by at least 20~cm of water. Pay attention to the maximum immersion depth (see Technical data).

- Do not place the filter on the soft substrate.
- Ensure that the filter housing's suction openings are open. Open the suction openings with the slider (☑K).
The filter will remain buoyant after being placed in the pond. Weigh the filter down with some stones.
Adaptation/expansion of the filter ( J)
The filter's lifetime can be increased by installing additional modules to expand the filter surface area. The filter can be individually adapted to conditions in the pond through the utilisation of container parts.
- Press on the locks (H1) and separate the filter housing(H2).
- Remove the cover of the desired filter housing (I).
- Insert the filter housing until it clicks into place on the filter housing.

- Ensure that the filter housing's suction openings are facing upward.
- When a filter has been expanded, take into account its additional weight and the changed weight distribution - hold the filter at the handle as well as the longest side ( > L)
Switching on the pump

Caution! Material damage.
The pump must never run dry.
1.Pull the telescopic pipe ① out to the required length (一 G)
2. Align the telescopic pipe vertically with the ball joint ③.
3. BUBBLE water feature nozzle: Turn the insert ② out of the nozzle until the water feature has the required shape.
4. Insert the mains plug in the mains socket. Attention: The pump starts immediately!
Adjusting the water distribution
- Regulate the amount of water for the water feature ( F) with rotary tap 1 ①.
- Regulate the amount of water for the hose connection with rotary tap 2 ②
Switching off the pump
- Remove the mains plug from the mains socket.
6. Maintenance

Attention! Electric shock!
Before all maintenance work, remove the mains plug.

Caution! Material damage.
Do not use hard objects or aggressive cleaning agents for cleaning.
The appliance components are not dishwasher-proof!

The following sections describe maintenance work necessary for optimum and fault-free operation. Regular maintenance prolongs the service life and assures functionality of the appliance over a long period.
Cleaning the water feature nozzle and telescopic pipe
- Unscrew the telescopic pipe.
- Remove the water feature nozzle.
- Clean the telescopic section and water feature nozzle under running water.
Cleaning the filter
- Close the filter housing's suction openings ( K) .
- Remove the filter from the water ( L)
- Remove the outlet spigot with the hose.
- Press on the locks (H1) of the filter housing and separate it(H2).
- Remove the filter cartridges from the filter housings (I).
- Place the filter cartridges under running lukewarm water.

Do not use hot water!
- Hint: It is recommended to only clean or replace some of the filter cartridges at a time so as not to interrupt the biological filter effect.
- Replace the filter cartridges after cleaning for the second or third time.
- Clean the filter housing and connecting parts under running water.
- Install the filter housing again in reverse order.
Cleaning the pump
- Close the filter housing's suction openings ( K)
- Remove the filter from the water ( L)
- Remove the outlet spigot with the hose.
- Press on the lock (M1) and remove the pump from the grip housing (M2).
- Loosen and remove the two lateral fastening screws ③ ( N)
- Remove the adapter ② from the motor housing ① .
- Unscrew the locking ring ④ from the motor housing.
- Use a screwdriver to carefully pris the pump cover ⑦ uniformly to the front out of the motor hous ing.
- Pull the impeller ⑥ out of the motor housing.
- Clean all components under running water.
- Install the pump again in reverse order.

- When assembling, make sure that the bearing bushings ⑤ are inserted correctly in the pump cover and in the motor housing.
When assembling, make sure that the locking ring engages easily when being screwed on.
7. Clearing faults

Attention! Electric shock!
Before clearing faults, remove the mains plug.
Fault Possible cause Remedy
| Pump does not start | No mains voltage | Check the mains voltage Check the supply line |
| Pump does not pump | Mains plug is not inserted | Insert the mains plug in the mains socket |
| Impeller is blocked | Clean the pump | |
| Thermal cut-out has activated 1. Remove the mains plug and let the pump cool down. 2. Insert the mains plug again after approx. one hour. | ||
| Pump not pumping sufficiently | Suction openings are dirty | Clean the suction openings |
For other faults, please contact EHEIM Service.
8. Decommissioning
Storing and overwintering

- Take the appliance out of the pond.
- Clean the appliance
- Store the appliance in a frost-proof place.

Store the appliance in a water-filled container to avoid starting difficulties in the spring. The mains plug must not be submerged.
Disposal

When disposing of the appliance, pay attention to the relevant statutory regulations.
Information on the disposal of electrical and electronic appliances in the European Union:
Within the European Union, disposal of electrically operated appliances is governed by national regulations that are based on the EU Directive 2012/19/EU on waste electrical and electronic equipment (WEEE). The appliance may no longer be disposed of with the municipal or household waste. The appliance will be accepted free of charge at municipal collection points or recycling centres. The product packaging is made up of recyclable materials. Dispose of them in an environmentally responsible manner and take them for recycling.
9. Technical data
| Type 5205 | |
| Rated power 38 W | |
| Delivery rate 2300 l/h | |
| Max. delivery head 2.4 m | |
| Max. immersion depth 1 m | |
| Dimensions (L×W×H) 385× | 230×120 mm |
| Cable length 10 m | |
| Water connections 1/2" - 3/4" - 1" | |
| Media temperature 4°C - 35°C | |
| Mains voltage/frequency 220 - 240 V / 50 Hz |
A I03OBaBaHe Ha nIIOCTpaCnry, Tyk no3OBaBaHe Ha nIIOCTpaCnry A
Bne ce npn3OBaBaTe 3a daJeHo DeIcTBnE.
2. 3onaHa npnloxehne
YcTpoIcTBOTO IN BCNUKIN YactN, BKJIIOUeHN B O6XBaTA Ha DoCTaBkata, Ca IpeHa3NaueHn 3a YacTHa ynoTppeBa N MoRat Da Ce H3NoJ3BaT cAmO:
3a NOUHCTBaHe Ha rpaINHcN BOIOeMn CbC n 6e3 np6eH 3anac
3a npnDnKBaHe Ha BODaTa
-3a ekcnnoataunna Hnrgyn C Boda, BDOnda, nTOUIN np.
3a aepnpahe n cypkynaucn Ha Boda
B CbOTBETCTBNE C TEXHNUeCKNTe DaHHN
CneHnTe orpaHnueHn Baxat 3a yctpoCTBOTO:

- He n3nO3BaIe 3a TbPROBcN INI INPOMNIJIeH N CEIN
TeMnepaTpaTa Ha BODaTa He Tp6Ba Da HAdBnShaBa 35 °C
He Tp86Ba Da ce npuBnKbAt pa3aJdaun, neCHO 3aapanMn, arpeCnBn nIe EKcNIO3NBn BeueCTBa, coJeHa BODa, KaTOn I NITeHb ODa
He n3no3BaIte B e3epa, KbJeTo ce pnyBa
HnKora He n3noJ3BaIte 6e3 BOeH NOtOK
3. Yka3aHn 3a 6e3oNaCHOcT
ToBa yCTpoIcTBo MOKe Da IpeIcTaBJIbBa ONaCHoc 3a Xopa NIMyUeCTBO, aKO yCTpoIcTBOTO Ce n3NoJ3Ba HeIpaBnIHo nIIi He NO IpeIHa3NaYeHne nIIaKO He Ce cna3BaT INCTpyKcNITe 3a 6e3ONaCHOCT.
- Onakobkata da He nonada B deTcN pbue, Tb' KaTO OT TOBa MOraT da npOn3TeKAT onachoctn (onachocT OT 3aDywaBaHe).
To3n ypei He e nOxOJa 3a nOJ3BaHe OT xopa (BKnHouHTeJIHO I deca) c OrpaHnueHn fN3nueCKn, CeTINBHN IINI NCNXUeCKN Bb3MOXHOC- Tn IINIcA Ha ONIT N 3HaHnY, OCBeH aKO He ca NOD HAp3Op IINI He Ca INHCTpyKTIpaHn, KaK Da CE nOJ3Ba ypeDa OT JInCe, KOEtO OTROBapr 3a TjXHaTa 6e3oNaChocT. DeaTa Tp8Ba Da ce Na6JIOdaBat, 3a Da He cn IrpaT C ypeDa. - Camo 3a eBpOneiCKnTe na3apn:
To3n ypei mojke da ce noJ3Ba ot deca na 8 roJnHa Bb3pact, KaKTO n OT IuCa C OrpaHnueHn fN3nueCKn, CETNBn IIn INCNXnueCKn Bb3MOXHOCTn IIn 6e3 ONIT n 3HaHnA, cAmO aKO ca nOd HAp3Op n Ca INHCTpyKTnpaHn, Ka Da ce noJ3Ba 6e3OnacHo ypeDa, KaKTo n 3a npoIIN3XOXJaUHTe OT TOBa ONaCHOCtN. Deua He Tpr6Ba da cn irpaarT c ypeDa.
Почиствано и подрьжkaту He ТразБа Да ce ИЗВьршВа OT Deца 6e3 Контрп.
EneKtpnuecka cnrgpHocT

- EJIeKtpnuecknte HnctaIauu Tp6Ba Da OTROBaprT Ha MeJdyHapOd Hnte NHaCIOHaJIHn pa3npoe6b 3a MOHTaJ.
- YcTpoiCTBOTO TpI6Ba Da 6bJe oBe30naceHo Upe3 3aUHTHO yCTPOICTBO 3a OCTaTBueH TOK C HOMHaJIeH OCTaTBueH TOK OT MaKcIMyM 30 mA.
Ako nMaTe Bbnpocn nn npo6neMn, CbpxKeTe Ce c KBaIuΦnUpaH eJeKTPoTeXnK. - Изклочete устpoиството OT eilektpruceckaTа Мржа, пpeДа ИЗВьршITE КakBaTo Ида e pa6ota.
- EneKtpnuecknte daHHn Ha yCTpoiCtBOTO Tp8Ba Da cBbnaadat C daHHnte Ha 3axpaHbauata Mpeka. Moxe Ta hamepuTe Te3n daHHn Ha Ta6eIkata 3a Tnna, ONAKOBAtA nIN B Ta3N INHCTpyKcIy.
- YdIbJIxHITeKabEIn Ipa3npdeJIITeJIte Ha TOK Tp6Ba da ca IoJXODa 3a BbHsHa yNoTpe6a (yCTOuINBn Ha npckn).
·Ka6eIte 3a Cbbp3BaHe KbM MpeXaTa He Tp8Ba Da NMaT No-MaJIko HappeHNo CeueHne OT rymeHnte Mapkyu n c KoJ H05RN-F3G0,75. YdJIxHtelnHte Ka6eJIr Tp8Ba Da OTROBaprT Ha N3NCKBaHnra Ta Ha DIN VDE 0620.
3axpaHbauT Ka6eHa TOBa yCTPOiCTBO He MoKe Da Ce 3aMeHN. Pn yBpeDen Ka6e, ypeBt Tp86Ba Da ce n3XBbpIn.
·KoHTaKTn n ⅢeNcEJI na ce 3aunTЯT OT Bnara. IpeOpbUHTeHNo e da oΦopMITE KaNKOB KOHTyp C MpeXOBnRA Ka6eJ, KOITO He N03BOJRA Ba Ha BOdAra Da Teue No Ka6eNa Da CTnIrHe Do KOHTaKTa.
Cbpxe yctpoCTBOTO cMO KbM npaBnHNO nHCTaJnpaH 3aunTeH KOHTaKT.
Бezona的答案

- Празугни, устювото, осobeshо зхарвашият kaбел и сеньт, He ca noBpehen.
He n3no3BaIte yCTpoiCtBOTo, aKO He pa6OTn npaBnHNo nIIN aKO e NOBpeDeHo. -
YpeT HIKora Da He Ce PON3Ba C NOBpeDeH 3axpaHbaU Ka6eI.
-
Pemontte Tp6Ba da ce n3BbPWBat cmo OT cepBn3eH ueHTbp Ha EHEIM.
- YpeDbT da He ce Hocn 3a Ka6eNa i npn n3BaXdaHe OT KOHTaKTa da He ce Dbpna 3a Ka6eN nn 3a ypeDa, a 3a ukepa.
3auntete 3axpanBaunKa6eI OT TOnnHa, Macno n OCTpn p6oBe. Cbpr3BaunTe npOBODnU He Tp6Ba Da ce HacTbNBAt, aKO ca noJooXeHN B 3emrTa nn YaKbl 6e3 Tpb6a.
·ИЗВьршваitecamo pa6OTn,ОпиcaнВТa3NИHCTpyKця.
Hnkora He npaBeTe Texnueckn npomeHn no yctpoiCTBOTO. - Използваite само оригинални peзервни части и akcecoapи за уг.TюйстВOTO.
·Използваite устpoиCTBOTOcamO, KOrato HЯma Xopa BbВ BOData! - YcTpoIcTBOTO CbIbpxKa MaHHT Cbc CnJIHO MaHHTHO NOJe, KOeTo MOKe Da IOBIIaRe Ha NeiCMeKbPn IIN NmPNaHTnpaHn DeΦn6pNlatoPn (ICD).ДрБxTe pa3CTOJHne OT Hau-MaIko 30 cm MeXdY ImPnaHTa N MaHNTa.

BHHMaHHe! TokOB ydap!
- 13Tertjare npedn Bcunpa60tn no nDpBkkaTa Ukeepa OT KOHTaTa.

BHHMaHHe!MMyIeCTBeHa 1eTa.
He n3noJ3BaIe TBbPdI npEIMTe IINn aRpeCnBn IOUncTBaU INpEnapATn 3a NOuNCTBaHe.
KOMNOHENTTE Ha yCTPOINCTBOTO He ca yCTOINHBN 3a NOUINCTBaHE CbC bDOMNIAHa MaUNHa!

CneBaunTe pa3denn OINCBat DeHOCHTe NO NOIDpbXkKaTa, KOITo Ca HeO6xOIMN 3a ONTImaJIHa n 6e3npo6IemHa paBota. PeIOBHATA NOIDpbXkka YdbJXkaba XIBOTA n rapaHTnpa, ye yCTpoiCTBOTO paBOTn cnrypHo 3a Dblr nepnoD OT BpeMe.
NouchBaHe Ha IIO3aTa 3a XapaKTepeNCTnKa Ha BODaTa N TeJeCKOnnHaTAt Pb6a
- Pa3BnTe TeJIeCKoNHyHaTa Tpb6a.
- OtrtpaHeTe IIO3aTa 3a XapaKTepeNCTnKa Ha BOdaTa.
- NouncTe Te Tneckona n IIO3aTa 3a XapaKTepeNCTnKa Ha BOdaTaNOD TeuAaBa BOa.
NouctBaHe Ha qnntbpa
- 3aTbOpTe CmyKaTeHnHTe OTbOpHa KOpNyCa Ha φηntbpa (K).
2.Изваде TeФиNTьра OT BoDAta (L). - ПремахнейиЗхова Та Вьзka C Маркуа.
- Hatachete 6nokupaune enemeHTn (H1) Ha Kopnyca Ha fntbpa n otdeene Tep Kopnycnte eHN ot npyr (H2).
5.ИЗваде TeФнгьрнite NaTpoHn OT KOpnycnte HaФнгьpa (I).
6.ИЗТССКАТеФИТБРНTE NaTPOH NOД Teuаа,ХlaДka BODa.

- He n3noJ3BaIte ropeza Boda!
-
Yka3aHHe: IpenOpbUHTeHNo e BnHaRn Da nouchTbATE NII NOmHeTe cAmO qact OT fIITbPHTe NaTPOH, 3a Da He IpeKbChTe eEkeTa Ha 6BIOJOruHOTo fIITbPHO DeiCTBHe.
CmeHeTe pHnTbPnHTe nAtPOHN cIe2-3 nouCTBaHe. -
NocnteTe Kopnyca Ha nntbpa n uactte 3a CBp3BaHe noT Teaasa Boda.
- MoNTpaIte KOpnyca Ha ФИЛТьрв OБразнata NocJeIOBATEJIHOCT.
NouchBaHe Ha NOMnata
- 3aTbOpTe CmyKaTeHnHTe OTbOpHa KOpNyCa Ha φnIITbpa (K).
2.ИЗваде TeФиNTьра OTВОДаТa(L).
3.ПремaxHeteиЗхоннада Вьбka C Маркучa. - Hatachete 6nokpaunte enemehtn (M1) n 3terne Te nomnata ot Kopnyca c dpbka (M2).
- Pa3xla6ete n OTCpaHte Dbata CTPaHnH 3aKpeBaun BnHTa ③ (N).
6.Издрпайе рапета ② ot коруca на двогателя ① . - Pa3BnIte ΦnKcnpaun npbCTeH ④ OT KOpnyca Ha DnBnraTeJIA.
8.Изпальайу Te OTBepTKa,За Да NOВДИRGHeTe BHNMaTeHNO KaNaka Ha NOMnata ⑦ paBHomepHo Ha-NpeД OT KOpnyca Ha DBuratela.
9.ИЗдьрnaиTe NOMпeHOTOKОлEO ⑥ OT KOpnyCa Ha DBnIaTeJIa. - NocTeTe yactnte noT TeauaBoa.
- MoNTpaIte NOMnata B o6paTHaT a nocJeDoBaTeJIHOCT.

- Pn crno6BaHeTo ce yBepTe, Ye IarepHIne BTyIKN ⑤ ca npabunHNo nocTaBeHN B KaNaka Ha NOMnata N B Kopnyca Ha DBrarTeJIa.
- PnC rIIO6BaHe, BHNMaBaIte ΦNkCnpaunr npbCTeH np3aBnHTBaHe da npeupaKa JekO.
7. OtpaHЯBaHe Ha Heu3npaBHOCTN

BHHMaHHe! TokOB ydap!
- N3TerIeTe Κεkepa Ha 3axpaHbauηa Ka6eπ Ippeπ OTCTpaHraBe Ha HEn3npaBHOCTn.
Hen3npabHocT Bb3MOxHa npuHa OToCTpaHraBaHe
| Помпanta He ceстарna | Линсва зхранвацу наразожени | →Прobеретe зхранвацу наразожени →Контураиte зхранваца линя |
| Помпanta He priдвижва сеньейн He e поставен в кон заоста | - | →Пробовete с绿色发展 в кons�а →Контураиte зхранваца →Октоны →Контураиte зхранваца |
| Помпеното калло e бл Okирано | →Почистete помпата | |
| Актычиран e тершени 3ашитeten пексысан | 1. ИзTERгеле с绿色发展 в 2. В��оче с绿色发展 образно след, okoно 1 чac. | |
| Помпanta He priдвижва достаъчно | СмужATEЛнITE OTВори ca 3amьр- сени | →Почистete с发展理念 OTВори |
B cnyuahn daynr Henn3npabHocTm, moJ, cbbpkeTe ce cbc cepbn3 EHEIM.
8.ИЗвождане ot уnotpe6a
Cbxpahene n 3mmyBaHe

1.ИЗвадеустpoиCTBOTOOTe3epoTO.
2.Почиреу устpoистбото
3. CbxpahraBaTe yctpoiCTBOTO Ha MxTo, KOeTo He 3aCtpaWeHO OT 3aMpb3BaHe.

CbXpaHraBaTe yCTpoiCTBOTO B KOHTeHep, HAnbJIHeN C BOJa, 3a Da N36BerHeTe TpydHocTn npn 3anOuBaHe Ha yNoTpe6a npes3 npoNETta. UenceIbT He Tp8Ba Da ce 3aInBa!
N3XBpbJnHe
Pn n3XbpynHe Ha ypea, cna3BaIte cboTBeTHnte 3aKoHOBn pa3npoe6n.
HOpmaa 3a nXbPnHe Ha eKtpueeckn n eKtpoHHypein B Ebponeckata o6hocT:
B paMKnTe Ha EbponeiCKaTa obuHocr 3XbPJIHeTo Ha eJekTpueckn ypeNi e perJaMeHTnpaHo OT haunohnTe npdncnna, KOto ce 6a3nPAT ha EC-dIpeKtnBa 2012/19/EC 3a cTapn eJekTPOHNypeN (WEEE). CbrnacHO TOBa ypeBt He moKe NOBeYe da ce 3XbPJI npn 6ntOBnTe n KOMyHaHn OTNaDbci. YpeBt ce npneMa 6e3PiAtHO OT KOMyHaHnTe C6bnapTeHN pNHKTObE, CbotB. OT nyHKTOBe 3a peuknaun. Onakobkata Ha npOdykTa e OT MaTePnAn, KOto mOrat da ce pezIKnPaT. N3XBpIyTe r ekONOruHo n Ra BpHete 3a npepa6oTKa.
9. TexHHueckn daHHN
| Tin 5205 | |
| Hominahina Moi hocst 38 W | |
| Kolnuechtbo Na priudbixkbahe 2300 | I/h |
| Bisocoina Ha priudbixkbahe 2,4 m | |
| Дълбочина Ha noitaIGNHe maks. 1 m | |
| Pazmepri (Д × Φ × В) 385×230×120 mm | |
| Дължина на kaibel 10 m | |
| Врьзки за вoda 1/2" - 3/4" - 1" | |
| Temnepatupa Na cpejata 4°C - 35°C | |
| Мөхово нарөхөнөчүлүүүлүүлүүлүүлүүлүүлүүлүүлүүлүүлүүлүүлүүлүүлүүлүүлүүлүүлүүлүүлүүлүүлүүлүүлүүлүүлүүлүүлүүлүүлүүлүүлүүлүүлэ |
PykoBoDCTBO no 3KcPnyatau (nepeBOD)
BnytpenHnΦnIbTp dnn npya MODUL4000
1. 06uyeka3aHnIЯ nolb3OBaTeJIa
HOpMaunnoNcNoB3OBaHnIO pyKOBOdCTBa no 3Kcnnyatau

-ПердпьвIM Вбдом устюгсВа B Эклуатуину hyжно NOHOCь IO npoHTb И NOHЯТь руКВODCTBO NO Эклуатуи.
PykoBoCTBO IO 3KcPnyaTaun CneJeT paccmatpnaTb KaK Yactb npOyKta N aKKypaTHo XpaHNTB B DOCTyINHom MeCTe.
DaHoe pyKOBOCTBO NO 3KcNpyaTuCN CNeDyET npNKnaDbIBaTb K yCToiCTBy npn erO daJIbHeIWe nepeJaue TpeTbei CTOpOHe.
3Kcnnkaia
Ha yctpoicTBHe nCnOJIb3yIOCTc CNEyIOUne CNMBOJIbI.

Iny6nHa norgyKeHna yctpoNCTBa coCTaJIeT MaKcImaJIbHo 1 M.
IP68 Cnmbon yka3bIbaeT Ha To, YTO yCTpoiCTBO 3aunuEHO OT dInTeIbHOro Norpyxehna.

YcTpoIcTBo pa3peIaETCra HcNoIb3OBaTb corIaCHO COOTBeTCTByUOUM HaUHOHaJIbHbIM npeIINcaHNm N dIupeKTHBaM. OHO COOTBeTCTByET cTaHdApTAM EC.
B daHHOM pykoOoCTBe no o6cnykBaHIO nCNoJIb3yOTc CneDyUe nCMBOJI bI cRHaJIbHbIe cNoBa.

Onachoctb TpaBMPOBaHn, nCXoJaaO t OnaCHO 3JeKtpueeCKOro HapjKeHH
Cnmbon yka3bBaet Ha HenocpeDCTBeHHyU yrpoXaOuIyU ONaCHOctb, KOTopar MoKET NOBNeYb 3a co6oB cmepTb INI TJeBle TpaBMbl, ecIn He npHrTb COOTBeTCTByUOuIe Mepbl.

Onachoctb TpaBMnpoBaHna, nCXoJaa oT o6ux NCTOuHKnOB onachoctn
CnmboJ yka3bIbaet Ha HeNocpeDCTBeHHyU yrpoXaOuIyU ONaCHOCTb, KOTopA MoKET NOBHe 3a co6oBcMePb Hnn TJeBle TpaBMbl, ecHn He npHrTb COOTBeTCTByUOne MepbI.

Onachoctb n3-3a MarHHTHOI NOJIA
CnB0J yka3bIbaet Ha HeNocpeiCTBeHHyU yrpoXaIoUO onaCHOCTb, KOTopA MoKET NOBLeYb 3a c6oBcMepTb INI TJeJIe TpaBMbl, ecIn He npHrTb COOTBeTCTByIOUne MEPbl.

Yka3aHHe c noJe3HO HOpMaueNe u COBeTaMn.

CcbIka Ha pncyHOK, 3decb ccbIka Ha pncyHOK A

Yka3aHHe Ha BbINOJIHeHne DeICTBna.

YcTpoiCTBO COOTBETCTByeT PnIMeHmMbIM Tpe6OBAHnM 6e3OpaCHOCTN IN TEXHNueCKnM perIamEntam EbpaaNCKORO 3KOHOMNuECKORO coH03a.
2.Oblaactb npimehenra
YcTpoIcTBO IN BCE qACTN, BXoJaIe B Oobem NOCTaBKn, IpeHa3HaueHbI DnA YactHO NcNoJIb3OBaHnI IN DOJXHbI PpIMHeYbCnCKIIuHTeJIbHo DnI:
OuNCTKn CaIOBbIX npyIDOB,3aceJIeHHbIX ININ He3aceJIeHHbIX pbIbOJ
ПОДаЧВОДы
·3KcPnPyatauIN KAcKaIOB BOdbI, BOOnaIOB,pyUbeN T.Ⅱ
a3paunn u npkyjnau B0dbI
- npn ycnoBn co6JIIOeHn TeXnHuecknx ycNoBn
7. YctpaHHe HeNCnpaBHOCTeI

BHHMaHHe! OnachocTb ydapa TOKOM!
- Ipeed yctpaHHeHem HeNCnpaBHOCTe CneDyET OTKlnOHTb BUNky CeTeBOrO Ka6eIaT 3NeKTPOCe-TN.
HencnpaBHOCTb Bo3MOxHa npuHa YcTaPaHeHne
| Hacoc He 3anyckaetc | Het ceteBoro NaPRAJKeHn | ΠρOBepntb ceteBoe NaPRAJKeHnne ΠρOBepbTe pNTaIOUyU LInHnU |
| Hacoc He kaCyAET Bodv BvnKa ceteBoro Ka6eIe He IodCoe DinHeHa K P03EtKe | - | ΒCTaBbTe BUnKy ceteBoro Ka6e- IaB V P03EtKu |
| KpbIbUcTka HacOca 3a6Loku- BaHa | ΟчAstIte Hacoc | |
| AktiBnPoBaH TepMnueckn 3aUHT- HbI BbIKNoUaTeNb | 1. OTcoEiHNITe BUnKy ceteBoro Ka6eIa OT aJIeKTPoCetN i DaIte HacOCy OCTbITb. 2. ΠprIMepHoo Ype3 1 qac ChOba POnkNoUTe ceteByU BUnKy. | |
| HedocTaToHna PoDaCa Hacoca | BcAsbIbAUOüNe OTBepCTn 3aRpy3- HeHbI | ΟчAstIte BCasbIbAUOüNe OTBep- CTnIa |
Pn npouhx HencnpaBnoctx o6paTntecb B cepBncHyo cnyk6y EHEIM.
8. BbIbOd n3 3KcPnyatauH
XpaHHeHn uYcNoBn XpaHEnb B 3mHn nepnoD

- BbTaunTe ycTpoNCTBO n3 npya.
- OuInCTte yCTPOINCTBO.
- XpaHnTe yctpoNCTBO B MecTe, 3aunuHemOT Mopo3OB.

Bo n36exkHne npo6nem c 3anyckom BechOH xpaHnte yctpoiCTBO B eMKoCTN, HanoJIHeHHoB BOIOB. BnIka cTeBOrO ka6eI He doJxHa haxoDntbC B BOe!
YTNIN3aIy

B cnyuae ytnin3aun yctpoiCTBa co6nIouaTe COOTBeTCTByUOuine npaBOBbIe npedncaHn.
Hnopmaun o6 ytnin3auun 3neKtpuecknx u 3neKtpoHHbIX npnbopOB B Ebponeckom Co03e:
Bnytpn Ebponeckoro coo6uec7Ba ytnin3aun 3neKtpueckoro 60bOpyDobAHn onpeJeTcra
HaonhaNbHMn npabnAmn Ha ochobe DnpeKTNBbE C 2012/19/EC o6 otXoJax 3neKtpueckoro
n 3neKtpoHHoro 60bOpyDobAHn (WEEE). POnToM yctpoiCTBO HeJIb3y ytnin3nPoBaTB Bmecte C
6bITOBIMN OTxODAMn. YcTPOINCTBO 6ecnPaTHO npinHMaETcR NyHKTaMn c6opa KOMMyaHbHix Cnyj6
nn NynkTAMn C6opa BTOPCbIPBJ. YnaKOBKa COCTOHT n3 npriOndhIX dIy nepepa6OTKn I BTOpHOrO
ncnoB3oBAHn MaTePnaJOB. Ee cNeDuY e TynIn3npoBaTB DoNyCTmblIMN C 3KOLOrueckoi ToKNI
3peHnCnOC6amn HnapBaTb Ha nepepa6OTKy.
9. TexHnueckne xapaKTepeNCTnKN
Reproduction or copying - even parts thereof - only with the express permission of the producer.