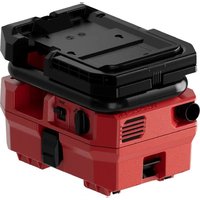
VC 20UY - Vacuum Cleaner HILTI - Free user manual and instructions
Find the device manual for free VC 20UY HILTI in PDF.
| Product type | Wet and dry vacuum cleaner |
| Model | VC 20UY (VC 20-U-Y / VC 20-UM-Y) |
| Brand | Hilti |
| Dimensions (L x W x H) | 545 mm x 380 mm x 545 mm |
| Weight (according to EPTA) | 15.3 kg |
| Container volume | 21 liters |
| Usable water volume | 13.5 liters |
| Mains power supply | 220-240 V, 50/60 Hz, 1,200 W |
| Battery power supply | Li-Ion 36 V battery pack (Hilti) |
| Max. vacuum (mains) | 23 kPa |
| Max. airflow rate | 74 l/s |
| Protection class | Class I |
| Protection rating | IP X4 (protected against water splashes) |
| Sound pressure level | 71 dB(A) |
| Automatic filter cleaning | Yes (deactivatable, cycle every 15 s) |
| Integrated power outlet | Yes, max. 2,000 W (mains) |
| Integrated charging station | Yes, for Hilti Li-Ion battery packs (14 V / 22 V / 36 V) |
| Use as transport trolley | Yes, with push handle and adapter plate (accessories) |
| M function (dust class M) | Yes (VC 20-UM-Y): suction of hazardous dust ≥ 0.1 mg/m³ |
| Mains cable length | 5 m |
| Suction hose diameter | 36 mm (rotating sleeve); adaptable to 27 mm with accessory |
| Included accessories | Complete suction hose, PE dust bag, instruction manual |
| Spare parts available | Dust bags (plastic, paper), filter cartridges (PTFE, PES, standard), antistatic hoses, push handle, adapter plate |
| Routine maintenance | Automatic filter cleaning, replacement of bag and filter cartridge, cleaning of electrodes |
Frequently Asked Questions - VC 20UY HILTI
User questions about VC 20UY HILTI
0 question about this device. Answer the ones you know or ask your own.
Ask a new question about this device
Download the instructions for your Vacuum Cleaner in PDF format for free! Find your manual VC 20UY - HILTI and take your electronic device back in hand. On this page are published all the documents necessary for the use of your device. VC 20UY by HILTI.
USER MANUAL VC 20UY HILTI
natural_image
Red industrial vacuum cleaner with black control panel and wheels, displayed against red background (no visible text or symbols)1

text_image
Technical diagram of a robotic device with numbered parts for identification and assembly reference.2
text_image
1 click
natural_image
3D rendering of a white toy car with visible wheels and a handle, labeled with number 2 (no text or symbols on the car itself)3

natural_image
Interior view of a robotic vehicle with open lid and internal compartments (no visible text or symbols)4

natural_image
Black plastic-wrapped robot with four wheels, no visible text or symbols
text_image
110° 1 2 3VC 20-U-Y/VC 20-UM-Y/VC 40-U-Y/VC 40-UM-Y Nass-Trockensauger
de
Head of BA Quality and Process Mana-
gement
Business Area Electric Tools & Acces-
sories
07/2012 07/2012
Senior Vice President
Business Unit Diamond
It is essential that the operating instruct are read before the appliance is operat the first time.
Always keep these operating instructions gather with the appliance.
Ensure that the operating instructions a with the appliance when it is given to persons.
Contents Page
| 1 General information 20 | |
| 2 Description 21 | |
| 3 Accessories 23 | |
| 4 Technical data 24 | |
| 5 Safety instructions 25 | |
| 6 Before use 28 | |
| 7 Operation | 30 |
| 8 Care and maintenance | 33 |
| 9 Troubleshooting | 34 |
| 10 Disposal | 36 |
| 11 Manufacturer's warranty | 37 |
| 12 EC declaration of conformity (original) | 37 |
1 These numbers refer to the corresponding illustrations. The illustrations can be found on the fold-out of pages. Keep these pages open while studying the operating instructions.
In these operating instructions, the designation "the appliance" always refers to the VC 20-U-Y/ VC 20-UM-Y/ VC 40-U-Y/ VC 40-UM-Y wet/dry vacuum cleaners. The information given in these operating instructions applies to all 4 versions unless explicitly stated that it refers only to the VC 20-UM-Y / VC 40-UM-Y.
Parts, operating controls and indicators 1
other (1) Grip
② Control switch
③ Catch
④ Waste material container
⑤ Gripping areas
⑥ Hose socket
⑦ Cover for hose socket (only VC 20-UM-Y/ VC 40-UM-Y)
⑧ Power outlet for power tools
⑨ Hose holder
⑩ Supply cord stowage point
⑪ Vacuum cleaner top section
⑫ Battery cover locking clip
⑬ Hose diameter selector switch (only VC 20-UM-Y/ VC 40-UM-Y)
⑭ Pushbar attachment point (pushbar is an accessory)
⑮ Charging status indicator
⑯ Filter cleaning system ON / OFF button
(17) Charging station status indicator
⑱ Battery compartment (left/right)
⑲ Filter cover retaining screws
⑳ Automatic filter cleaning system status indicator
1 General information
1.1 Safety notices and their meaning
DANGER
Draws attention to imminent danger that will lead to serious bodily injury or fatality.
WARNING
Draws attention to a potentially dangerous situation could lead to serious personal injury or fatality.
CAUTION
Draws attention to a potentially dangerous situation could lead to slight personal injury or damage to the equipment or other property.
NOTE
Draws attention to an instruction or other useful information.
1.2 Explanation of the pictograms and other information
Prohibition signs

Transport by crane is not permissible.
Warning signs

General warning

Warning: caustic substances

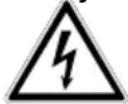
Warning: electricity
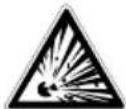
Warning: explosive substances
Obligation signs

Wear
protective
clothing

Wear
protective
gloves.

Wear ear protection.

Wear safety shoes.

Wear
respiratory
protection!
Symbols

Read the operating instructions before use.

Return waste material for recycling.
On the appliance

text_image
M ! i Men
WARNING: This unit contains hazardous dust. Emptyi and maintenance, including the removal of the dust bag, may only be carried out by someone with the unit and wearing suitable protective gear. Do not switch on the unit until the complete filter system has been installed and the function of the volume-flow control has been tested.
Location of identification data on the appliance
The type designation and serial number can be found on the type identification plate on the appliance. Make a note of this data in your operating instructions and always refer to it when making an enquiry to your Hilti representative or service department.
Type:
Generation: 01
Serial no.:
2 Description
2.1 Use of the product as directed
The appliance is a universal industrial vacuum cleaner with an effective filter cleaning system for dry dust. It is suitable for wet and dry vacuum cleaning applications.
The appliance can be powered by the electric mains supply or operated cordlessly using Hilti 36V Li-ion batteries. When powered by the electric mains supply, the appliance can be used simultaneously as a charging station for all Hilti Li-ion batteries (14V/22V/36V). When the adapter plate and pushbar are fitted (accessories), the vacuum cleaner can be used as a trolley to transport up to three Hilti toolboxes.
The appliance is suitable for collecting the slurry created by wet drilling or wet cutting operations on mineral materials using Hilti diamond coring or Hilti diamond sawing equipment and for collecting large quantities of dry mineral dust when working with Hilti diamond grinders and cutters, rotary hammers and dry cutting core bits.
The VC 20-UM-Y and VC 40-UM-Y are suitable for picking up dry and non-flammable dusts, liquids, wood chips or shavings, mineral dusts containing quartz and hazardous dusts with exposure limit values (e.g. MAK or AGW values) ≥ 0.1mg / m^3 (dust class M as per IEC/EN 60335-2-69).
Picking up any other hazardous substances is not permissible.
Picking up oil or liquids with a temperature of over 60^ C is not permissible.
When picking up dusts with an exposure limit value, steps must be taken to ensure adequate air exchange in the room if the exhaust air from the appliance is released into the room (please observe the locally applicable regulations).
The appliance must not be used to pick up materials that present a risk of explosion, glowing or burning materials, flammable materials (exception: wood chips or shavings), aggressive dusts (e.g. magnesium or aluminium dust, etc.) or aggressive liquids (e.g. gasoline, solvents, acids, coolants or lubricants, etc.).
Do not operate the appliance when laid on its side (always operate in upright position).
Thetotalweightoftheapplianceincludingthewastematerialpickedupmust not exceed 80
Do not stand on the appliance (do not use as a substitute for a ladder).
Do not use the appliance for continuous, stationary operation in automatic or semi-automatic systems.
The operating personnel must be instructed on how to use the appliance prior to beginning work, they must be informed of any hazards associated with the materials to be picked up and they must be familiar with the correct procedures for safe disposal of these materials.
Underwater use is not permissible.
Use of the appliance to clean down persons or animals is not permissible.
Use an antistatic suction hose in order to avoid electrostatic effects.
This appliance is suitable for commercial use, e.g. in hotels, schools, hospitals, factories, shops, offices and by rental companies.
Working on materials hazardous to the health (e.g. asbestos) is not permissible.
The working environment may be as follows: construction site, workshop, renovation, conversion or new construction.
Observe the information printed in the operating instructions concerning operation, care and maintenance.
To avoid the risk of injury, use only genuine Hilti tools and accessories.
The appliance and its ancillary equipment may present hazards when used incorrectly by untrained personnel or when used not as directed.
Modification of the appliance or tampering with its parts is not permissible.
Observe the safety rules and operating instructions for the accessories used.
To avoid hazards, use only the approved batteries and chargers.
Do not use the battery as a power source for other unspecified appliances.
2.2 Hose diameter settings (only VC 20-UM-Y/ VC 40-UM-Y)
In order to ensure that the M-function warning signal tone threshold is configured correctly, the hose diameter setting must correspond to the hose diameter used.
2.3 The items supplied as standard include:
1 Appliance with filter element
1 Suction hose complete with hose connector (electrically conductive), hose sleeve and tapered adapter
1 PE VC 20 plastic dust bag
1 Operating instructions
2.4 Using extension cords
Use only extension cords of a type approved for the application and with conductors of adequate gauge. The appliance may otherwise lose performance and the extension cord may overheat. Check the extension cord for damage at regular intervals. Replace damaged extension cords.
Recommended minimum conductor cross section and max. cord length for operating the appliance in conjunction with an electric tool plugged into the built-in power outlet:
| Conductor cross section | 1.5 mm^2 2.5 mm^2 | 3.5 mm^2 | |
| Mains voltage 220-240 V 20 m 40 m 50 m |
Use only extension cords equipped with an earth conductor.
Do not use extension cords with a conductor cross section of less than 1.5 mm ^2 .
2.5 Using extension cords outdoors
When working outdoors, use only extension cords that are approved and correspondingly marked for this application.
2.6 Using a generator or transformer
This appliance may be powered by a generator or transformer when the following conditions are fulfilled: The unit must provide a power output in watts of at least twice the maximum value printed on the type identification plate on the power tool or appliance. The operating voltage must remain within +5% and -15% of the rated voltage at all times, frequency must be in the 50 – 60 Hz range and never above 65 Hz, and the unit must be equipped with automatic voltage regulation and starting boost.
Never operate other power tools or appliances from the generator or transformer at the same time. Switching other power tools or appliances on and off may cause undervoltage and / or overvoltage peaks, resulting in damage to the powertoolor appliance.
2.7 Use of accessories
| Accessories Type of use | |
| PE VC 20/40 plastic dust bag Working with mineral materials, | wet and dry |
| PaperdustbagforVC20/40 Workingwithwood | |
| PTFE filter element Wet use and heavy dry use | |
| VC 20/40 filter element Mainly dry | |
| PES VC 20/40 filter element Wet and dry | |
| Suction hose, 27 mm dia., length 3.5 m Wet and dry | |
| Antistatic suction hose, 36 mm dia., length 4.65 m Wet and dry |
With the VC 20-UM-Y and the VC 40-UM-Y, use of a dust bag (plastic dust bag or paper dust bag) is mandatory.
2.8 Charge status of the Li-ion battery during charging
| LEDs light constantly | LEDs blink | Charge status in % |
| LED 1, 2, 3, 4 | - | = 100% |
| LED 1, 2, 3 | LED 4 | 75 % to 100% |
| LED 1, 2 | LED 3 | 50 % to 75 % |
| LED 1 | LED 2 | 25 % to 50 % |
| - | LED 1 | < 25 % |
3 Accessories
Spare parts, tools and accessories are available through Hilti sales channels.
| Designation | Item number, description |
| PE VC 20 plastic dust bag | 203854, M-class vacuum cleaner: working with mineral materials |
| PE VC 40 plastic dust bag | 203852, M-class vacuum cleaner: working with mineral materials |
| Paper dust bag, complete, for VC 20 | 203858, M-class vacuum cleaner: for working with wood |
| Paper dust bag, complete, for VC 40 | 203856, M-class vacuum cleaner: for working with wood |
| PTFE filter element | 436058 |
| VC 20/40 filter element | 203862 |
| PES VC 20/40 filter element | 203863 |
| Suction hose, 27 mm dia., length 3.5 m | 203865 |
| Suction hose, 36 mm dia., length 4.65 m | 203867 |
| Tapered adapter | 203878 |
| VC 20 pushbar | 2044214 |
| VC 40 pushbar | 2047174 |
| Adapter plate | 2044211 |
| Accessory box 2044212 | |
| Accessory set | 2044213, 1 bend, 3 extension tubes, 1 floor nozzle lamellar lips and 1 set of brushes |
4 Technical data
Right of technical changes reserved.
| Rated voltage | 220...240 V | 220...240V / CH | 220...240V / GE20...240V/NZ | 36 V |
| Rated power input | 1,200 W 1,200 W | 1,200 W 1,200 | W 750 W | |
| Maximum load on built-in power outlet for electric tools (if fitted) | 2,000 W 700 W | 1,400 W 800 W | ||
| Mains connection (type) | H07 RN-F3G 1.5 mm ^2 | H07 RN-F3G 1.5 mm ^2 | H07 RN-F3G 1.5 mm ^2 | H07 RN-F3G 1.5 mm ^2 |
| Power source | AC mains supply (230V) | Battery-powered operation |
| Max. air flow rate,VC 20-U-Y / VC 40-U-Y | 74 l/s 57 l/s | |
| Max. air flow rate,VC 20-UM-Y / VC 40-UM-Y | 136 m^3/h 106 m^3/h | |
| Max. vacuum, C 20-U-Y / VC 40-Y | U23 kPa 16.6 kPa | |
| Max. vacuum VC 20-UM-Y,VC 40-UM-Y | 22 kPa 15.6 kPa |
Information about the appliance and its applications
| Protection class Protection class I |
| Protection class IP X4 protection against sprayed water |
Noise and vibration information (measured in accordance with EN 60335-2-69):
| Typical A-weighted emission sound pressure level 71 dB (A) | |
| Uncertainty for the given sound level 2.5 dB (A) | |
| Triaxial vibration value (vibration vector sum) < 2.5 m/s ^2 | |
| Uncertainty (K) | is taken into account in the vibration value |
| Appliance | VC 20-U-Y/ VC 20-UM-Y | VC 40-U-Y/ VC 40-UM-Y |
| Mains frequency | 50 / 60 Hz | 50 / 60 Hz |
| Weight in accordance with EPTA procedure 01/2003 | 15.3 kg / 15.3 kg | 16.9 kg / 16.9 kg |
| Weight of suction hose | 1.3 kg | 1.3 kg |
| Dimensions (L x W x H) | 545 mm x 380 mm x 545 mm | 530 mm x 380 mm x 675 mm |
| Supply cord | 5 m | 5 m |
| Container capacity | 21 l | 36 l |
| Effective dust capacity | 23 kg | 40 kg |
| Effective water capacity | 13.5 l 25 l | |
| Suction hose diameter (rotary connector at nozzle end; connector at vacuum cleaner end) | 36 mm 36 mm | |
| Air temperature | -10...+40°C | -10...+40°C |
| Automatic filter cleaning (can be disabled) approx. every | 15 s | 15 s |
Charging station
| Output power 365 W |
| Output voltage 7.2...36 V |
| Control Electronic charging control (microcontroller) |
| Cooling Active cooling |
| Battery Li-ion |
en
NOTE
Battery charging times are extended if temperatures are too high or too low. Cold temperatures may result in the battery not being fully charged.
| Voltage Type | Charging time | For power tools (examples): | |
| 14.4 V B 14/1.6 Li-Ion 21 | min SFC 14-A | ||
| 14.4 V B 14/3.3 Li-Ion 23 | min SFC 14-A | ||
| 21.6 V B 22/1.6 Li-Ion 21 | min SFC 22-A | ||
| 21.6 V B 22/2.6 Li-Ion 24 | min SFH 22-A | ||
| 21.6 V B 22/3.3 Li-Ion 31 | min SFC 22-A | ||
| 36 V B 36/3.0 Li-Ion 24 | min TE 6-A36 | ||
| 36 V B 36/3.9 Li-Ion 44 | min TE 7-A | ||
| 36 V B 36/6.0 Li-Ion 42 | min TE 30-A |
| Battery B 36/6.0 Li-Ion | |
| Rated voltage 36 V | |
| Capacity 6 Ah | |
| Energy capacity | 216 Wh |
| Weight | 1.8 kg |
| Type of cell | Li-ion |
| Temperature monitoring | NTC |
| Deep discharge prevention | Yes |
5 Safety instructions
5.1 General safety instructions
WARNING! Read all safety instructions and other instructions. Failure to follow safety instructions and instructions may result in electric shock, fire and/or serious injury. Keep all safety instructions and other instructions for future reference.
5.1.1 Work area safety
a) Keep your work area clean and well lit. Cluttered or dark working areas invite accidents.
b) Do not operate appliances in explosive atmospheres, such as in the presence of flamm liquids, gases or dust. Tools and appliances sparks which may ignite the dust or fumes.
c) Keep children and other persons away from the area while the appliance is in use. Distra cause you to lose control.
5.1.2 Electrical safety
a) The appliance's supply cord plug must match the other outlet. Never modify the plug in any way. Do not use any adapter plugs with earthed (grounded) or inappliances. Unmodified plugs and matching outlets will reduce risk of electric shock.
b) Avoid body contact with earthed or grounded surfaces, such as pipes, radiators, ranges and refrigerators. There is an increased risk of electric shock if your body is earthed or grounded.
c) Do not expose appliances to rain or wet cond
ble tions. Water entering an appliance will increase the
rake risk of electric shock.
d) Do not abuse the cord. Never use the cord for carrying, pulling or unplugging the appliance. Keep the cord away from heat, oil, sharp edges or mo
ing parts. Damaged or entangled cords increase risk of electric shock.
e) When operating an appliance outdoors, use extension cord suitable for outdoor use. U a cord suitable for outdoor use reduces the risk electric shock.
f) If use of the appliance in a damp environ cannot be avoided, use a ground fault ci interrupter. Use of a ground fault circuit interrupt reduces the risk of electric shock.
5.1.3 Personal safety
a) Stay alert, watch what you are doing and common sense when operating the applan. Do not use the appliance while tired or the influence of drugs, alcohol or medicat moment of inattention while operating appliances may result in serious personal injury.
b) Avoid accidental starting. Check that the a
ance is switched off before you connect
electric supply and/or the battery and befe
ing it up or carrying it. Carrying appliances
finger on the switch or plugging in appliances tha
are already switched on invites accidents.
c) Avoid unusual body positions. Keep proper ing and balance at all times. This enables control of the power tool in unexpected situations
d) Dress properly. Do not wear loose clothing jewellery. Keep your hair, clothing and glo away from moving parts. Loose clothes, jewe or long hair can be caught in moving parts.
e) If devices are provided for the connection extraction and collection facilities, ensure that are connected and properly used. Use of a collection can reduce dust-related hazards.
5.1.4 Use of the appliance
a) Do not overload the appliance. Use the appliance for the work you are doing. The appliance will do the job better and safer at the for which it is designed.
b) Do not use an appliance if its switch is An appliance that cannot be controlled by the sv (switched on and off) is dangerous and must be repaired.
c) Disconnect the plug from the power source and/or remove the battery before making adjustments, changing accessories, or storing the appliance. Such preventive safety measures reduce the risk of starting the appliance accident
d) Store appliances out of reach of children not n use. Do not allow persons unfamili the appliance or these instructions to ope Appliances are dangerous in the hands of untrain users.
e) Maintain the machine carefully. Check for alignment or binding of moving parts, break of parts and any other condition that make the machine's operation. If damaged, have machine repaired before use. Poor maintain the cause of many accidents.
f) Use the appliance and its accessories etc. in accordance with these instructions and in the manner intended for the particular type of appliance use of taking into account the working conditions and of the work to be performed. Use of appliances for applications different from those intended could res-
ment ult in a hazardous situation. cuit
e5.1.5 Service
Have your appliance serviced by a qualified repair person using only identical replacement parts. This will ensure that the safety of the appliance is maintained. use
ce5.2 Additional safety precautions under 5.2.1 Personal protective equipment


better
s. a) The user and any other persons in the vicinity or must wear suitable eye protection, a hard hat, gives ear protection, protective gloves, safety footwear and respiratory protection while the appliance is in use or during servicing.
When working with mineral drilling slurry, wear these protective clothing and avoid skin contact with the slurry (pH>9: caustic).
5.2.2 Requirements to be met by users
a) The machine may be operated, serviced and re-orrect-paired only by authorized, trained personnel. This correct personnel must be informed of any special hazard rate ards that may be encountered.
b) Use extra care when cleaning on stairs.
def Do not put any object into openings. Do not witch with any opening blocked; keep free of dust, hair, and anything that may reduce air flow.
5.2.3 Proper organization of the work area
any
g

when
ara) will ensure that the workplace is well ventilated. Ex-rate exposure to dust at a poorly ventilated workplace may be due to damage to the health.
b) Keep the work area tidy. Any objects which may mis-cause injury should be removed from the area.
akage Untidiness at the workplace can lead to accidents.
y c) affect not allow other persons to touch the applia the or the extension cord.
d) Always lead the supply cord, the extension and the suction hose away to the rear ing. This will help to prevent tripping while work
e) After finishing the work, always tidy up at the supply cord, extension cord and suction away securely. This will reduce the risk of trip and falling.
f) Do not transport the appliance by crane.
g) Children must be instructed not to play w appliance.
h) This appliance is not intended for use by sons (including children) with reduced phys sensory or mental capabilities, or lack of ence and knowledge, unless they have be supervision or instruction concerning use of appliance by a person responsible for the
5.2.4 Use and care of the appliance
a) Never leave the appliance unattended.
b) Protect the appliance from frost.
c) With vacuum cleaners of the class M, take to ensure that the hose socket cap is f the appliance is transported or not in us
d) Check that the filter is seated correctly. ensure that the filter is undamaged.
e) Do not pull the wheels of the vacuum the supply cord.
f) The water level limiting device must be cl regularly with a brush in accordance with tions and checked for signs of damage.
g) Recharge only with the charger specified by manufacturer. A charger that is suitable for one type of battery pack may create a risk of fire which used with another battery pack.
h) When battery pack is not in use, keep it from other metal objects, like paper clips, keys, nails, screws or other small metal that can make a connection from one to another. Shorting the battery terminals together because burns or a fire.
i) Under abusive conditions, liquid may be eje from the battery; avoid contact. If contact dentally occurs, flush with water. If liquid eyes, additionally seek medical help. Liquid ted from the battery may cause irritation or burns
j) Do not expose batteries to high temperature fire. This presents a risk of explosion.
k) Do not disassemble, squash or incinerate ies and do not subject them to temperat 80^ . This presents a risk of fire, explosion or through contact with caustic substances.
I) Avoid ingress of dampness. Dampness may cause a short circuit resulting in a risk of burning injury fire.
m) Do not use batteries other than those ap for use with the applicable tool or applia of other batteries or use of the battery for purpo for which it is not intended presents a risk of fire explosion.
n) Observe the special instructions applicable transport, storage and use of Li-ion battery
Avoid short-circuiting the battery. Before inserting when the battery in the tool or appliance, check that the ing. terminals of the battery and the tool or appliance are nd stow from foreign objects. Short-circuiting the battery on hoseninals presents a risk of fire, explosion or contact ping with caustic substances.
p) Do not charge or continue to use damaged batteries (e.g. batteries with cracks, broken parts, th bent or pushed-in and/or pulled-out contact en
p5.2.5 Mechanical
icElblow the instructions concerning care and mainter experi- en given
f 5k2e6 Electrical r safety.
(a) insert the plug in a suitable earthed/grounded
tted power outlet which has been correctly and safe
e. installed and is in compliance with local regula
Checktidos.
b) If you are in doubt about the effectiveness of eanerpower outlet's earth/ground connection, have it checked by a qualified specialist. ear)Check the appliance's supply cord at regular in-instrervals and have it replaced at a Hilti service center if damage is found. Check extension co ly that regular intervals and replace them if found be damaged.
( end) Check the condition of the appliance and its accessories. Do not operate the appliance and its away accessories if damage is found, if the appliance coincomplete or if its controls cannot be operated object faultlessly.
Do not touch the supply cord or extension con may they are damaged while working. Disconnect the supply cord plug from the power outlet. Damag ected supply cords present a risk of electric shock.
The electric supply cord may be replaced only contacts a cord of the type specified in the oper- jec-instructions.
. g) In case of an interruption in the electric supply es of switch the appliance off and unplug the supply cord.
batterAvoid using extension cords with multiple power ures outlets and the simultaneous use of several ap injury pliances connected to one extension cord.
i) Use the electric tool power outlet only for the purposes described in the operating instructions.
j) Never spray the top section of the vacuum clean with water: this presents an electrical hazard a proverday damage the appliance.
nce. Connectors on mains power cables, extension
ses cords or supply cords must provide protection
e and from sprayed water.
1) Grip the plug when unplugging the supply cord to the (do not pull or tug at the supply cord).
m) Never pull the vacuum cleaner by the suit to a new working position.
n) Never operate the appliance when it is di wet. Dust (especially dust from conductive terials) or dampness adhering to the surfa the appliance may, under unfavorable cond lead to electric shock. Dirty or dusty app should thus be checked at a Hilti service at regular intervals, especially if used freq for working on conductive materials.
o) Check to ensure that the supply cord does in a puddle of water.
p) Do not use the power outlet or accessories the hands are wet.
5.2.7 Material picked up


a) Do not use the appliance to pick up flar explosive dusts or dusts which present a hazard (magnesium or aluminium dust, asb etc.).
b) A vacuum cleaner of the dust class M is suitable picking up dry, non-flammable dusts, wood chips
apply or shavings, mineral dusts containing quartz and hazardous substances with an exposure limit value of rty or 0.1mg/m³. The vacuum cleaner must be equipped ma-with a filter suitable for the hazard classification of the dusts to be picked up. itions Do not use the appliance to pick up flammable liances explosive or aggressive liquids (coolants and lub cements, gasoline, solvents, acids (pH<5), alkalis uently(pH>12.5) etc.)
d) Switch the appliance off immediately if foam or s not liquids escape from it.
e) Avoid contact with alkaline or acidic liquids. If s w/ontact accidentally occurs, flush with water. In the event of the liquid coming into contact with the eyes, rinse the eyes with plenty of water consult a doctor.
f) Wear protective gloves when using the vacuum cleaner to pick up hot materials with a max. perature of 60°C.
g) Do not pick up objects or materials that could cause injury by piercing through the dust bag (e.g. or pointed or sharp objects).
health 5.2.8 Thermal
Do not use the vacuum cleaner to pick up hot foals with a temperature of over 60°C (glowing cigarettes, hot ash, etc.).
6 Before use

6.1 Using the vacuum cleaner
CAUTION
The mains voltage must comply with the spot given on the type identification plate. Ensure appliance is disconnected from the electric source
DANGER
Connect the appliance only to properly earthed/grounded power sources.
CAUTION
Always check to ensure that the vacuum cl standing securely. Engage the castor brakes.
CAUTION
When fitting the top section of the vacuum take care to avoid pinching your fingers or the supply cord.
6.1.1 Operating the appliance for the first time
- Remove the appliance from the packaging and connect the suction hose supplied to the hose socket.
NOTE Use the class M version for picking up dusts with an exposure limit value of ≥ 0.1 mg/m^3 . Fit a plastic dust bag for mineral dust or a paper dust bag for wood chips or shavings in the container in accordance with the instructions.
that NOTE When used to pick up harmless dusts: Fit a supply. plastic dust bag in the container in accordance with the instructions (see printed instructions).
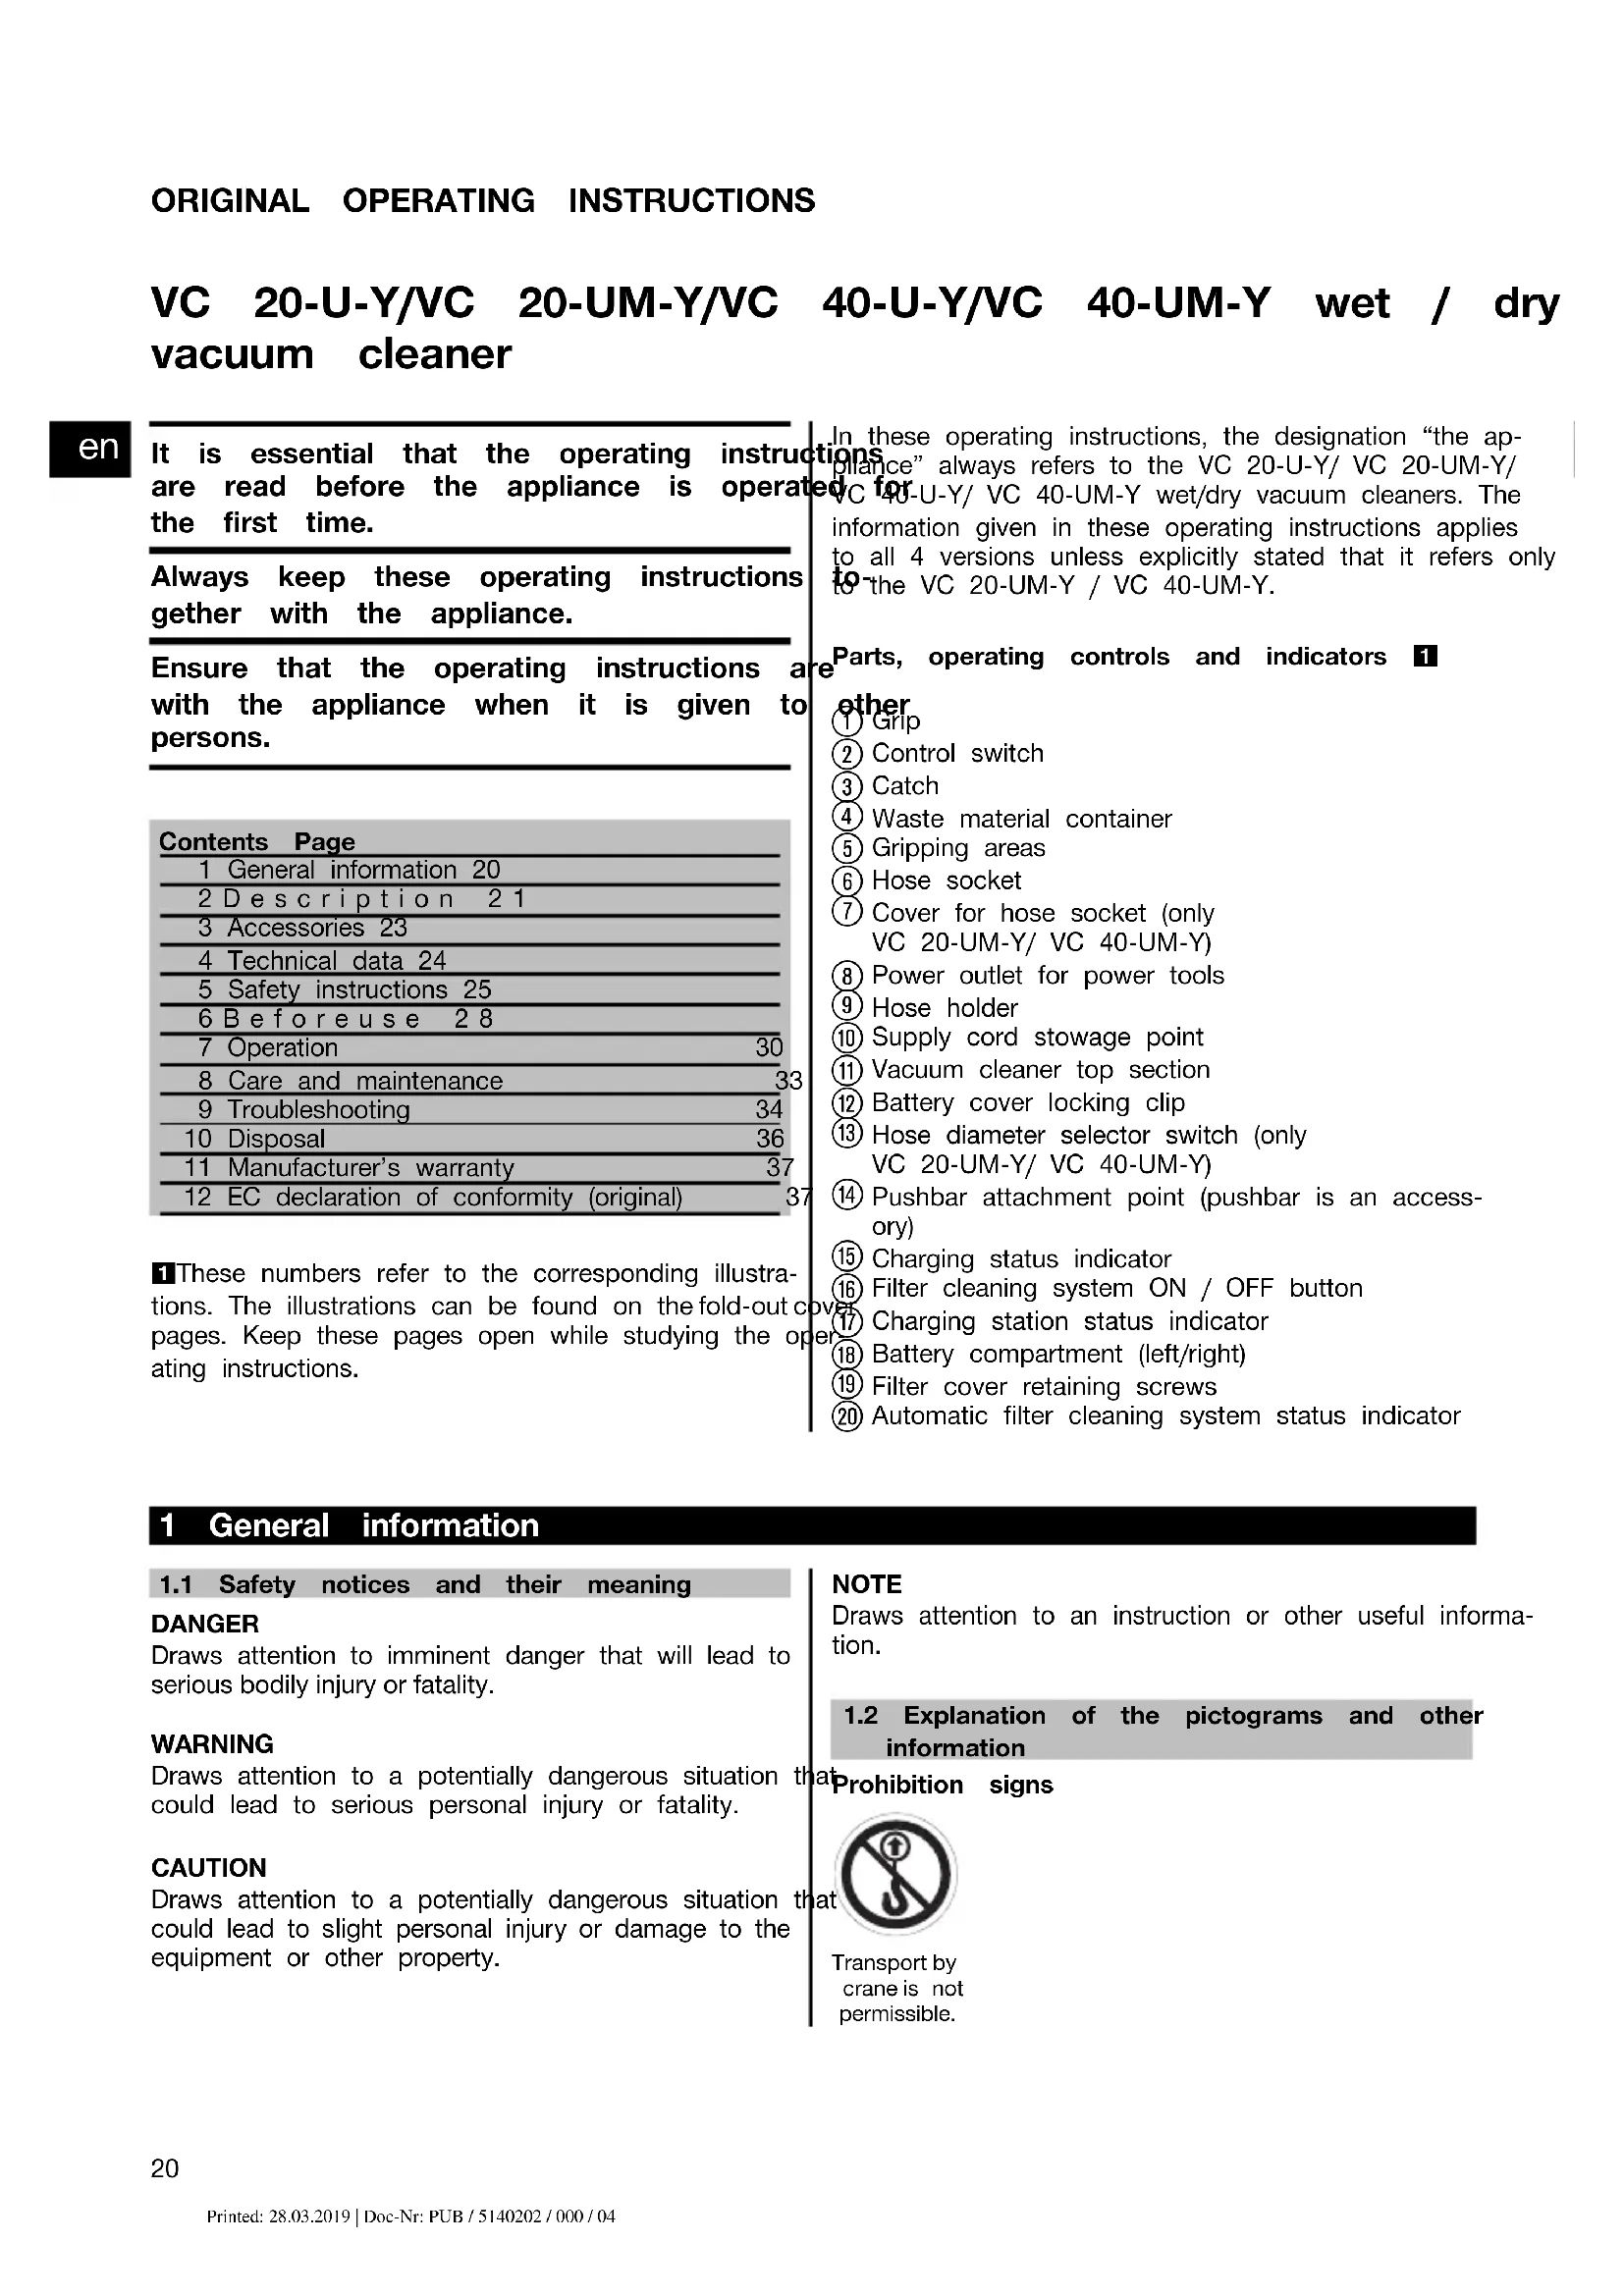
6.1.1.1 Fitting a paper dust bag for picking up wood chips or shavings 2
- Open the two catches.
- Lift the vacuum cleaner top section away from the waste material container.
-
Push the cardboard flange of the paper dust bag into the plastic adapter.
4 Engage the plastic adapter with the paper dust bag in the holder provided in the container. -
Fit the vacuum cleaner top section onto the waste material container.
- Close the two catches.
- Check to ensure that the vacuum cleaner top sec is fitted correctly and secured.
- Connect the suction hose to the appliance.
6.1.1.2 Fitting the plastic dust bag
- Open the two catches.
- Lift the vacuum cleaner top section away from the waste material container.
- Fit a new plastic dust bag (see instructions print on it) in the waste material container.
- Fit the vacuum cleaner top section onto the waste material container.
- Close the two catches.
6.2 Charging batteries
6.2.1 Battery use and care
CAUTION
This appliance is designed for use with the specified batteries. Charging other batteries is not permissible. risk of personal injury or fire and irreparable damage the battery and appliance may otherwise result. A caliquid may leak from defective batteries. Avoid contact with this liquid.
NOTE
Before inserting the battery, check that the contacts the charging station are clean and free from grease.
Store the battery in a cool, dry place. Never store the battery where it is exposed to the heat of the sun, radiator or behind glass, e.g. at a window. Batteries have reached the end of their life must be disposed safely and correctly to avoid environmental pollution.
6.2.2 Charging the battery

DANGER
Use only the specified Hilti batteries.
DANGER
Charge the batteries only in this appliance or Hilti charger.
6.2.2.1 Charging a new battery for the first
Charge the battery fully before using it for the first
6.2.2.2 Charging a previously used battery
DANGER
Charge the batteries only in this appliance or Hilti charger.
6.2.2.3 Recharging Li-ion batteries
CAUTION
Make sure that the outer surfaces of the battery clean and dry before inserting it in the charging tion.
Lithium-ion battery packs are ready to use at any time, even when only partially charged. Charging progress is indicated by the LEDs.
6.2.3 Fitting the battery
DANGER
Use only the specified Hilti batteries.
- Open the battery compartment cover.
- Push the battery into the appliance from the rear as far as it will go and until it is heard to engage with a click.
- CAUTION A falling battery may present a risk of injury to yourself and others. Before beginning the work, check that the battery is Hilti fitted securely to the appliance.
to 6.2.4 Removing the battery 3
ustic. Open the battery compartment cover.
- Press one or both release buttons.
- Pull the battery out of the appliance toward the rear.
in 6.2.5 Transport and storage of battery packs
If you disconnect a battery pack from the power tool for transport or storage, make sure that the contacts of the battery pack are not short-circuited. Remove loose metal parts such as screws, nails, clamps, loose screw bits, wires or metal swarf from the case, toolbox or transport container, or prevent these parts from coming into contact with the battery packs.
Observe national and international transport regulations when shipping battery packs (transportation by road, rail, sea or air).
6.3 Using the vacuum cleaner in battery-powered mode (after charging)
Fit one or two batteries of a type specified for use with the appliance, as previously described.
NOTE
Make sure that the batteries are charged.
with a 6.4 Transport
DANGER
With vacuum cleaners of the class M, take care time ensure that the hose socket cap is fitted when t appliance is transported or not in use.

Ensure that the outer surfaces of the battery are clean and hot carry the appliance when it is full of waste material. dry before inserting the battery in the charging station.
7 Operation
en
WARNING
For vacuum cleaners of the class M, please note: Vacuum off the outer surfaces of the appliance, it clean or seal it in a suitable container or ial before removing it from an area containing with hazardous substances. All parts of the a must be regarded as being contaminated when are removed from the hazardous area and su measures must be taken to avoid spreading
CAUTION
For vacuum cleaners of the class M, please note: CATION: Always use a suitable dust bag. This contains harmful dust. Emptying or maintenance cedures, including disposal of the dust bag contents, may be carried out only by correct trained specialists wearing the appropriate pro equipment (respiratory protection of the class higher and disposable clothing). Do not operate appliance if the filter system is incomplete.
CAUTION
Always check to ensure that the vacuum cle standing securely. Engage the castor brakes.
7.1 Mains-powered operation
- Plug the supply cord into the power outlet.
- Turn the control switch to the "ON" position.
7.2 Battery-powered operation
NOTE
The appliance may be powered by either one or two batteries. With one battery, running time will be reduced by half.
NOTE
In battery-powered mode, the built-in electric supply socket for power tools cannot be used.
- Insert at least one Hilti 36V 6.0Ah Li-ion battery in battery compartment.
- Turn the control switch to the "ON" position.
- Charge status is indicated by the LED display on appliance during operation.
7.3 Hose diameter setting
$$ (V C 2 0 - U M - Y / V C 4 0 - U M - Y) $$
In order to ensure that the M-function warning signal tone threshold is configured correctly, the hose diameter setting must correspond to the hose diameter used.
7.4 Using the electric tool power outlet on the appliance (applies only to mains-powered wipe operation)
in water DANGER
hated
The power outlet is to be used only to connect electric
appliance
tools directly to the vacuum cleaner.
en they
suitable
NOTE
dust
Check that the power tool is switched off before plugging it into the power outlet on the vacuum cleaner.
u
NOTE
appliance
The operating instructions and safety instructions for the power tool plugged into the power outlet on the vacuum cleaner must be observed.
bondingly
P2 or
Check to ensure that the maximum power drawn by the power tool is below the maximum permissible output of the power outlet on the vacuum cleaner (please refer to the “Technical data” section of the operating instructions and information printed on the power outlet).
-
Plug the vacuum cleaner's supply cord into the power outlet.
-
Turn the control switch to the "AUTO" position.
-
Switch on the power tool. The vacuum cleaner starts automatically.
NOTE The vacuum cleaner will continue to run for a short time after switching off the power tool in order to ensure that all dust is removed from the suction hose.
b 36
7.5 Picking up dry dust
NOTE
Before using the appliance to pick up dry dust, especially dust from mineral materials, always check to ensure that the correct dust bag (Hilti accessory) is fitted in the container. The material collected can then be disposed of cleanly and easily.
CAUTION
The material collected must be disposed of in accordance with the applicable regulations.
CAUTION
Never use the appliance without a filter element.
CAUTION
When fitting the top section of the vacuum take care to avoid pinching your fingers or the supply cord.
7.5.1 Automatic filter element cleaning
NOTE
Do not attempt to clean the filter element by knocki against a hard object and do not use pointed instrur. This will reduce the life of the filter element.
NOTE
Do not use compressed air to clean the filter element. This may cause tears in the filter material.
NOTE
The condition of the filter will deteriorate with use. It should be replaced at least every 6 months and more frequently if the appliance is subject to heavy use.
NOTE
The filter element cleaning system functions only who suction hose is connected.
The appliance is equipped with an automatic filter cleaning system which removes most of the dust adhering to the filter element. The filter cleaning system can be switched OFF by pressing the button (16) and switch back ON by pressing the button again. The system's status is shown by the automatic filter cleaning system indicator LED: LED lights = the filter cleaning system is active. LED does not light = the filter cleaning system has been deactivated. The filter cleaning system is set to "ON" (active) automatically each time the appliance is switched on.
The filter element is cleaned automatically by a blast air (a pulsating noise is heard).
7.5.2 Changing the paper dust bag 2
DANGER
Check that the bag has not been pierced to objects which may cause injury.
CAUTION
The material collected must be disposed of ance with the applicable regulations.
- Disconnect the supply cord plug from the power outlet.
- Open the two catches.
- Lift the vacuum cleaner top section away from the waste material container.
- Carefully release the mouth of the paper dust bag from the adapter.
- Close the slider on the dust bag sleeve.
- Clean the waste material container with a cloth.
- Fit a new dust bag in the waste material container.
- Fit the vacuum cleaner top section onto the waste material container.
- Close the two catches.
7.5.3 Changing the plastic dust bag 4
CHANGER
demaging check that the bag has not been pierced through objects which may cause injury.
CAUTION
The material collected must be disposed of in acc ngance with the applicable regulations.
nents.
- Disconnect the supply cord plug from the power outlet.
- Open the two catches.
nt3. Lift the vacuum cleaner top section away from the waste material container. - Use a cable tiet o clo sethe p lastic dust b the punched holes.
- Remove the plastic dust bag.
- Clean the waste material container with a cloth.
- Fit a new plastic dust bag (see instructions printed on it) in the waste material container.
- Fit the vacuum cleaner top section onto the waste in a material container.
- Close the two catches.
ean-7.6 Audiblesignal(VC20-UM-Y/VC40-U
For safety reasons, an audible warning signal is emitted when the air speed in the hose drops below 20 m/s.
Please refer to the "Troubleshooting" section for possible causes of this problem.
sys-
7.7 Picking up liquids
DANGER
^ie Do not use the appliance to pick up hazardous dusts.
of DANGER
The supply cord plug must be unplugged from the power outlet and the batteries removed from the appliance before beginning maintenance.
hr6AdHTION
Never use the appliance without a filter element.
7.7.1 Before picking up liquids
in1. Remove the dust bag from the waste material container.
2. Check that the level monitoring electrodes (two metal discs on the underside of the vacuum cleaner top section) are clean. If necessary, use a brush to clean these parts.
7.7.2 When picking up liquids
If possible, use a separate filter element for wet applications.
NOTE
If possible, use a Hilti PTFE filter element.
If foaming occurs, switch the appliance off immediately and empty the container.
The appliance switches itself off automatically when liquid in the container reaches the maximum level.
7.7.3 After picking up liquids
- Open the two catches.
- Lift the vacuum cleaner top section away from the waste material container.
- Empty the container and use a water hose to cle it. Use a brush to clean the electrodes.
7.8 After finishing work
- Switch off the power tool.
- Turn the control switch to the "OFF" position.
- Disconnect the supply cord plug from the power outlet.
- Coil the supply cord around the supply cord store point.
- Coil the suction hose around the appliance and secure the end of the hose in the hose holder pro
- Storetheapplianceinasecure,dr is inaccessible to unauthorized users.
7.9 Emptying the waste material container
CAUTION
Remove all items attached to the adapter the vacuum cleaner top section (e.g. Hilti before emptying the container holding the picked up.
7.9.1 Emptying dry dust from the waste material container
7.9.1.1 Before emptying the waste material container, proceed as follows:
- Disconnect the supply cord plug from the power outlet.
- Lift the vacuum cleaner top section away from the waste material container and place it on a level surface.
7.9.1.2 After emptying the waste material container, proceed as follows:
CAUTION
When fitting the top section of the vacuum cleaner take care to avoid pinching your fingers or damage the supply cord.
e-Fit the vacuum cleaner top section onto the waste ma-vitel container and close the two catches.
placewhereit
7.9.2 Emptying the waste material container when no dust bag is fitted (collecting liquids)
NOTE
The material collected must be disposed of in accordance with the applicable regulations.
te on
(boxes) Held the container by the grip areas provided and tip it over to empty out its contents.
- Clean the edge of the waste material container with adampcloth.
7.10 Using the appliance as a charging station
Overview of the charging station status indicator
| . | LED lights constantly | The appliance is connected to the elec-tric supply and is ready for use. |
| LED blinks | The battery is too cold or too hot and is not being charged. The charger switches automatically to charging mode as soon as the battery reaches the required temperature. | |
| LED doesn’t light | Charger malfunction. Unplug the appli-ance and then plug it in again. If the LED still doesn’t light, the appliance should be returned to a Hilti Service Center for repair. |
7.10.1 Charging status display
While the green charge status LED on the charging station lights constantly, if one of the two charge status LEDs blinks this indicates that charging is in progress.
7.10.2 Indication of too high / too low temperature
The green charge status LED will blink If the battery is too hot or too cold. At the same time, the LEDs on the battery indicate the charge status of the Li-ion battery.
7.10.3 Indication of a defective battery
Remove the battery from the charging station If the green status LED on the charging station lights constantly but all charge status LEDs do not light. If all charge status LEDs on the battery fail to light even after being activated then the battery is defective. Have the battery tested at a Hilti center.
7.11 Using the appliance as a transport trol
- Fit the pushbar, following the assembly instructions provided.
- Attach the adapter plate, following the assembly instructions provided.
- Bring the toolbox retaining bar into the vertical position.
- Slide the grip of the applicable Hilti toolbox over it toolbox retaining bar. Make sure that the lettering on the Hilti toolbox is the right way up.
- The toolbox retaining bar and the ribs prevent the toolbox from sliding out of place.
NOTE The maximum permissible additional load is 25 kg. Do not stack too many toolboxes one or top of the other. The toolbox retaining bar must always project beyond the grip opening in the uppermost toolbox.
ley7.12 Attaching the DPC 20 (for use with the DG grinder)
- Fit the pushbar, following the assembly instructions provided.
- Attach the adapter plate, following the assembly instructions provided.
- Make sure that the toolbox retaining bar is engaged the in the horizontal position.
- Place the DPC 20 in the recess provided. Make s that the power outlet is facing towards the front.
- Secure the DPC 20 with the rubber straps.
8 Care and maintenance
NOTE
All items attached to the vacuum cleaner top section (Hilti toolboxes) should be removed from the adapter before the battery compartment cover is opened.
NOTE
The automatic filter cleaning system should not be switched off when the vacuum cleaner is used to pick up mineral dust containing quartz.
CAUTION
For vacuum cleaners of the class M, please note: CAU-
TION: Always use a suitable dust bag. This contains harmful dust. Emptying or maintenance cedures, including disposal of the dust bag contents, may be carried out only by corrected trained specialists wearing the appropriate pro equipment (respiratory protection of the class higher and disposable clothing). Do not operate appliance if the filter system is incomplete.
8.1 Changing the filter element
CAUTION
Never use the appliance without a filter element
8.1.1 Removing the filter element 5
- Disconnect the supply cord plug from the power outlet.
- Open the filter cover clips.
- Open the battery compartment cover clip.
- Remove any batteries from the battery compartment.
- Use a screwdriver to unscrew the two filter cover retaining screws (turn the screws counterclockwis)
- Lift the filter cover by the centrally-positioned grip until it engages in place.
- Remove the filter element carefully.
8.1.2 Fitting the filter element
(e.g. Clean the sealing surface with a cloth.
plate 2. Fit the new filter element.
-
Close the filter cover by pivoting the cover catch forward.
-
Use a screwdriver to tighten the two filter cover retaining screws (turn the screws clockwise).
-
Reinsert any batteries you previously removed.
-
Close the battery compartment cover and secure the regulating.
apphance Checking the waste material level
Check the cut-out contacts and clean them with a brush and necessary (if dirty).
bondingly
tective 8.3 Closing the appliance
P2 or
teCAUTION
When fitting the top section of the vacuum clean take care to avoid pinching your fingers or damage the supply cord.
- Check the seal at the vacuum cleaner top section and also clean this with a cloth.
- Fit the vacuum cleaner top section onto the waste material container.
- Close the two catches.
8.4 Care of the appliance
DANGER
Disconnect the supply cord plug from the power let. Remove any batteries from the battery compartment.
Never operate the appliance when the ventilation slots are blocked. Clean the ventilation slots carefully using a
dry brush. Cleantheoutsideoftheap intervalswithacloth.Donotuseaspray water-jet system, steam pressure cleaning equipment running water for cleaning. This may negatively affect electrical safety of the appliance. Always keep the gr surfaces of the appliance free from oil and grease. Use cleaning agents which contain silicone.
For vacuum cleaners of the class M, please note: The appliance must be handled for cleaning and maintaining in a way that avoids exposing maintenance personnel and other persons to any hazards. Use filtered force ventilation. Wear personal protective equipment. Clean the maintenance area in a way that prevents hazardous substances escaping into the surrounding environment. Vacuum off the outer surfaces of the appliance, wipe clean or seal it in suitable container or material before removing it from an area contaminated with hazardous substances. This will help to avoid distribution of the hazardous dust deposited on it.
When maintenance or repairs are carried out, all contaminated parts which cannot be satisfactorily cleaned must be packed in impermeable bags and disposed compliance with the applicable disposal regulations. A vacuum cleaner of the class M must be subjected technical inspection by Hilti Service or a trained person at least once a year to check, for example, for damage the filter, air leakage, and to ensure correct operation controlling devices.
8.5 Care of the Li-ion battery
Avoid ingress of moisture.
Charge the battery fully before using it for the first In order to achieve maximum battery life, stop discha the battery as soon as a significant drop in performa is noticed.
NOTE
If use of the tool continues, further battery discharge be stopped automatically before the battery cells suffi damage. The tool switches itself off.
Change the battery with the Hilti charger approved for use, with Li-ion batteries.
oNOTE
the A conditioning charge (as is required with NiCd batteries) is not necessary.
do not
Interruption of the charging procedure has no negative effect on battery life.
Charging can be started at any time with no negative effect on battery life. There is no memory effect (as with NiCd batteries).
- For best results, batteries should be stored fully charged in a cool dry place. Storing the battery in places subject to high ambient temperatures (e.g. at a window) has an adverse effect on battery life and increases the rate of self-discharge.
e - If the battery no longer reaches full charge, it may have lost capacity due to aging or overstressing. It is possible to continue working with a battery in this condition but it should be replaced in good time.
8.6 Maintenance
WARNING
Repairs to the electrical section of the appliance be carried out only by trained electrical specialists.
age to
Check all external parts of the appliance for damage at regular intervals and check that all controls operate faultlessly. Do not operate the appliance if parts are damaged or when the controls do not function faultlessly. If necessary, the appliance should be repaired by Hilti Service.
time.
8.7 Checking the appliance after care and maintenance
After carrying out cleaning and maintenance, check that the vacuum cleaner has been correctly reassembled and that it operates faultlessly.
Test each of the functions.
9 Troubleshooting
DANGER
In the event of a malfunction, disconnect the supply cord plug from the power outlet. Remove any batteries from the battery compartment. The malfunction must be remedied before further use of the appliance.
9.1 Battery and mains-powered operation
| Fault | Possible cause | Remedy |
| The warning tone is activated (reduced suction performance; VC 20-UM-Y/ VC 40-UM-Y). | The dust bag is full. | Change the dust bag.See section: 7.5.3 Changing the plastic dust bag 4See section: 7.5.2 Changing the paper dust bag 2 |
| Fault Possible cause Remedy | ||
| The warning tone is activated (reduced suction performance; VC 20-UM-Y/ VC 40-UM-Y). | The filter element is clogged with dust. | Switch the automatic filter cleaning system on then perform the "power cleaning" procedure: Disconnect the suction hose, cover the suction opening with your hand and keep it covered until three cleaning cycles have been completed.Change the filter element if necessary.See section: 8.1 Changing the filter element |
| Blockage in the hose, vacuum clean or power tool dust hood. | Clean the hose and dust hood. | |
| The hose diameter selector switch is set incorrectly. | See section: 7.3 Hose diameter setting (VC 20-UM-Y/ VC 40-UM-Y) | |
| Dust is blown out of the appliance. | Dust on the sealing surfaces between the container and top section of the appliance. | Clean the sealing surfaces. |
| The filter element is not fitted correctly. | Remove the filter element and refit it correctly. | |
| The filter element is damaged. Fit a new filter element. | ||
| The filter seal is damaged. Fit a new filter element. | ||
| The appliance doesn't start or switches itself off after a short time. | The container level monitoring system has been triggered. | Clean the container level monitoring sensors and surrounding area with a brush. |
| No battery is detected, i.e. no LED lights or blinks. | The battery was inserted and removed too quickly. | Pull the battery out, wait approx. 2 seconds, and then re-insert it. |
9.2 Mains-powered operation
| Fault Possible cause Remedy | ||
| The motor doesn’t restart. The mains circuit breaker has been tripped. | Reset the circuit breaker. Find the reason for the overload current if it trips again. | |
| The container is full. Switch the appliance off. Empty the container.See section: 7.9.2 Emptying the waste material container when no dust bag is fitted (collecting liquids) | ||
| The appliance switches itself offElectrostatic charge is not dissipated or on inadvertently or the user correctly; the appliance is connected to an unearthed/ungrounded power discharge). | Connect the appliance to an earthed/grounded power outlet; use an antistatic hose. | |
| The charging station status LEDThe battery is too hot or too cold. Bring the battery to room temperature. | ||
| Doesn't switch over to a discharged battery. | No contact. Reinsert the battery. | |
| The battery was not detected. Remove the battery from the appliance and contact Hilti. | ||
| The motor doesn’t run when set to “AUTO”. | The electric tool is faulty or is not plugged in fully. | Check the electric tool for correct operation and plug it in fully. |
| The automatic filter element cleaning system doesn’t work. | No suction hose is connected. Connect the suction hose. | |
| APFC button is in the OFF position. Press the APFC button. (LED doesn’t light). | ||
9.3 Battery-powered operation
Fault Possible cause Remedy
| The appliance doesn't work. The wrong battery has been used. Fit the correct battery. | ||
| The battery is discharged or fitted incorrectly. | The battery must engage with an audible click or, respectively, needs to be charged. | |
| Electrical fault. Remove the battery from the power tool and contact Hilti Service. | ||
| The battery is too hot or too cold. Bring the battery to room temperature. | ||
| The power tool doesn't work and 1 LED blinks. | The battery is discharged. Change the battery and recharge the discharged battery. | |
| The battery is too hot or too cold. Bring the battery to room temperature. | ||
| The appliance doesn't work and the charging station LED blinks. has been activated. | Allow the power tool to cool down. | |
| The battery runs down more quickly than usual. | Battery condition is not optimal. Have the battery condition checked by Hilti or replace the battery. | |
| The battery doesn't engage with an audible click. | The retaining lugs on the battery are dirty. | Clean the retaining lugs and check that the battery engages securely. Contact Hilti Service if the problem persists. |
| The appliance or battery get very hot. | Electrical fault. Switch the tool off immediately, remove the battery and contact Hilti Service. | |
| Doesn't switch over to a fully-charged battery. | No contact. Reinsert the battery. | |
| The battery was not detected. Remove the battery from the appliance and contact Hilti. | ||
| The appliance switches itself off when a battery is removed even though a second battery is already fitted. | The battery you removed was "active", i.e. it was powering the system again. | Switch the appliance off and then on |
10 Disposal
CAUTION
Improper disposal of the equipment may have serious consequences: The burning of plastic components generates toxic fumes which may present a health hazard. Batteries may explode if damaged or exposed to very high temperatures, causing poisoning, burns, acid burns or environmental pollution. Careless disposal may permit unauthorized and improper use of the equipment. This may result in serious personal injury, injury to third parties and pollution of the environment.
CAUTION
Dispose of defective batteries without delay. Keep them out of reach of children. Do not attempt to open or dismantle batteries and do not dispose of them by incineration.
CAUTION
Dispose of the batteries in accordance with national regulations or return them to Hilti.
Most of the materials from which Hilti power tools or appliances are manufactured can be recycled. The materials must be correctly separated before they can be recycled. In many countries, Hilti has already made arrangements for taking back your old power tools or appliances for recycling. Ask Hilti customer service or your Hilti representative for further information.
en

For EC countries only
Do not dispose of electrical appliances together with household waste.
In observance of the European Directive on waste electrical and electronic equipment and its implementation in accordance with national law, electrical appliances and batteries that have reached the end of their life must be collected separately and returned to an environmentally compatible recycling facility.
Disposing of drilling slurry
Disposing of drilling slurry directly into rivers, lakes or the sewerage system without suitable pretreatment presents environmental problems. Ask the local public authorities for information about current regulations. We recommend following pretreatment:
- Collect the drilling slurry (for example, using a wet-type vacuum cleaner).
- Allow the drilling slurry to settle and dispose of the solid material at a construction waste disposal site (the addition of a flocculent may accelerate the separation process).
- The remaining water (alkaline, pH value greater than 7) must be neutralized by the addition of an acidic neutralizing agent or diluted with a large volume of water before it is allowed to flow into the sewerage system.
Disposal of drilling dust
The drilling dust collected must be disposed of in accordance with the applicable national regulations.
11 Manufacturer's warranty
Please contact your local Hilti representative if you have questions about the warranty conditions.
12 EC declaration of conformity (original)
| Designation: Wet / dry vacuum cleaner | |
| Type: VC 20-U-Y/VC 20-UM-Y/VC 40-U-Y/VC 40-UM-Y | |
| Generation: 01 | |
| Year of design: 2012 |
We declare, on our sole responsibility, that this product complies with the following directives and standards: 2006/42/EG, 2014/30/EU, 2011/65/EU, EN 60335-1, EN 60335-2-29, EN 60335-2-69, EN ISO 12100.
Hilti Corporation, Feldkircherstrasse 100, FL-9494 Schaan

text_image
fals leain
Paolo Luccini Johannes Wilfried Huber
Head of BA Quality and Process Man-
agement
Business Area Electric Tools & Ac-
cessories
07/2012
Senior Vice President
Business Unit Diamond
07/2012
Technical documentation filed at:
Head of BA Quality and Process Mana-
gement
Business Area Electric Tools & Acces-
sories
07/2012
Senior Vice President
Business Unit Diamond
07/2012
Head of BA Quality and Process Management
Business Area Electric Tools & Accessories
07/2012 07/2012
Senior Vice President
Business Unit Diamond
Head of BA Quality and Process Mana-
gement
Business Area Electric Tools & Acces-
sories
07/2012 07/2012
Senior Vice President
Business Unit Diamond
to 52.7suMaterial aspirado
elho
ou


Des-
6.2 Carregar as baterias
Head of BA Quality and Process Management
Business Area Electric Tools & Accessories
07/2012 07/2012
Senior Vice President
Business Unit Diamond
Head of BA Quality and Process Mana-
gement
Business Area Electric Tools & Acces-
sories
07/2012 07/2012
Senior Vice President
Business Unit Diamond
Head of BA Quality and Process Management Business Area Electric Tools & Accessories 07/2012 07/2012
Senior Vice President
Head of BA Quality and Process Mana-
gement
Business Area Electric Tools & Acces-
sories
07/2012

Johannes Wilfried Huber
Senior Vice President
Business Unit Diamond
07/2012
Teknisk dokumentation vid:
Head of BA Quality and Process
Senior Vice President
Management
Business Area Electric Tools & Access-
Business Unit Diamond
ories
07/2012 07/2012
Head of BA Quality and Process Mana-
gement
Business Area Electric Tools & Acces-
sories
07/2012 07/2012
Senior Vice President
Business Unit Diamond
Head of BA Quality and Process
Management
Business Area Electric Tools &
Accessories
07/2012 07/2012
Senior Vice President
Business Unit Diamond
Head of BA Quality and Process Mana-
gement
Business Area Electric Tools & Acces-
sories
07/2012
Senior Vice President
Business Unit Diamond
07/2012
text_image
M ! ! i MHead of BA Quality and Process
Management
Business Area Electric Tools &
Accessories
07/2012

Johannes Wilfried Huber
Senior Vice President
Business Unit Diamond
07/2012
Hilti = registered trademark of Hilti Corp., Schaan
W 4223 | 0314 | 00-Pos. 2 | 1
Printed in Germany © 2014
Right of technical and programme changes reserved S. E. & O.
2055199/A5