RBR120 - Vacuum Cleaner GRE - Free user manual and instructions
Find the device manual for free RBR120 GRE in PDF.
| Brand | GRE |
| Model | RBR120 |
| Product Type | Robotic pool cleaner |
| Maximum water depth | 300 cm |
| Minimum water depth | 40 cm |
| Water temperature | 4 °C to 35 °C |
| Power supply | Rechargeable lithium battery via USB charger (5V) |
| Charging time (first use) | 5 hours |
| Full charging time | Approximately 8 hours |
| Battery life after full charge | Approximately 30 minutes |
| Filter type | Filter cartridge for microparticles |
| Navigation system | 180° rotating head to avoid obstacles |
| Automatic stop | Yes, when battery is depleted or in case of obstacle |
| Usage | Only in pools |
| Safety | Do not use with active pool filter; do not let children use; use only original charger |
| Maintenance | Clean the compartment and filter after each use; rinse with clean water |
| Storage | Well-ventilated place, away from sun and heat, temperature 10-25 °C |
| Warranty | 2 years |
| Spare parts | Available from the distributor (battery, wheel, filter, etc.) |
Frequently Asked Questions - RBR120 GRE
User questions about RBR120 GRE
0 question about this device. Answer the ones you know or ask your own.
Ask a new question about this device
Download the instructions for your Vacuum Cleaner in PDF format for free! Find your manual RBR120 - GRE and take your electronic device back in hand. On this page are published all the documents necessary for the use of your device. RBR120 by GRE.
USER MANUAL RBR120 GRE
When installing and using this electrical equipment, you should always follow the basic safety precautions. Please read the following carefully.
WARNING
The robot is not a toy, and is operated by people older than 8 years age.
Any people who operates the cleaner, has to read the manual carefully before work it.
- Appliances can be used by children of 8 years or older and by persons with reduced sensory or mental capabilities or lack of experience and knowledge if they have been given supervision or instruction concerning use of the appliance in a safe way and if they understand the risks involved.
- Children should not play with the device.
- The cleaning and maintenance to be carried out by the user should not be carried out by children. The cleaner is designed to clean the swimming pool.
- Please use the original batteries and charger when using. Only charging it when the robot is power off.
- Put the robot into a clean and dry place. Do not expose it under the sun, or close to explosive.
- Do not close to the vacuum head when it is working, due to its suction power, especially for the human body, animals, hairs or clothes.
- Do not disassemble the robot without professional guidance or notice from the authorized distributor or manufacturer.
- Do not leak the lubricant oil, and it causes water polluted.
- Stop to work the cleaner when there is anything wrong; Please contact with the authorized distributor or replace it to the original parts/accessories.
- Robot working conditions:
11.1 Maximum applicable water depth: 3 m (10 ft)
11.2 Water temperature: 4^(39.2^) - 35^(95^)
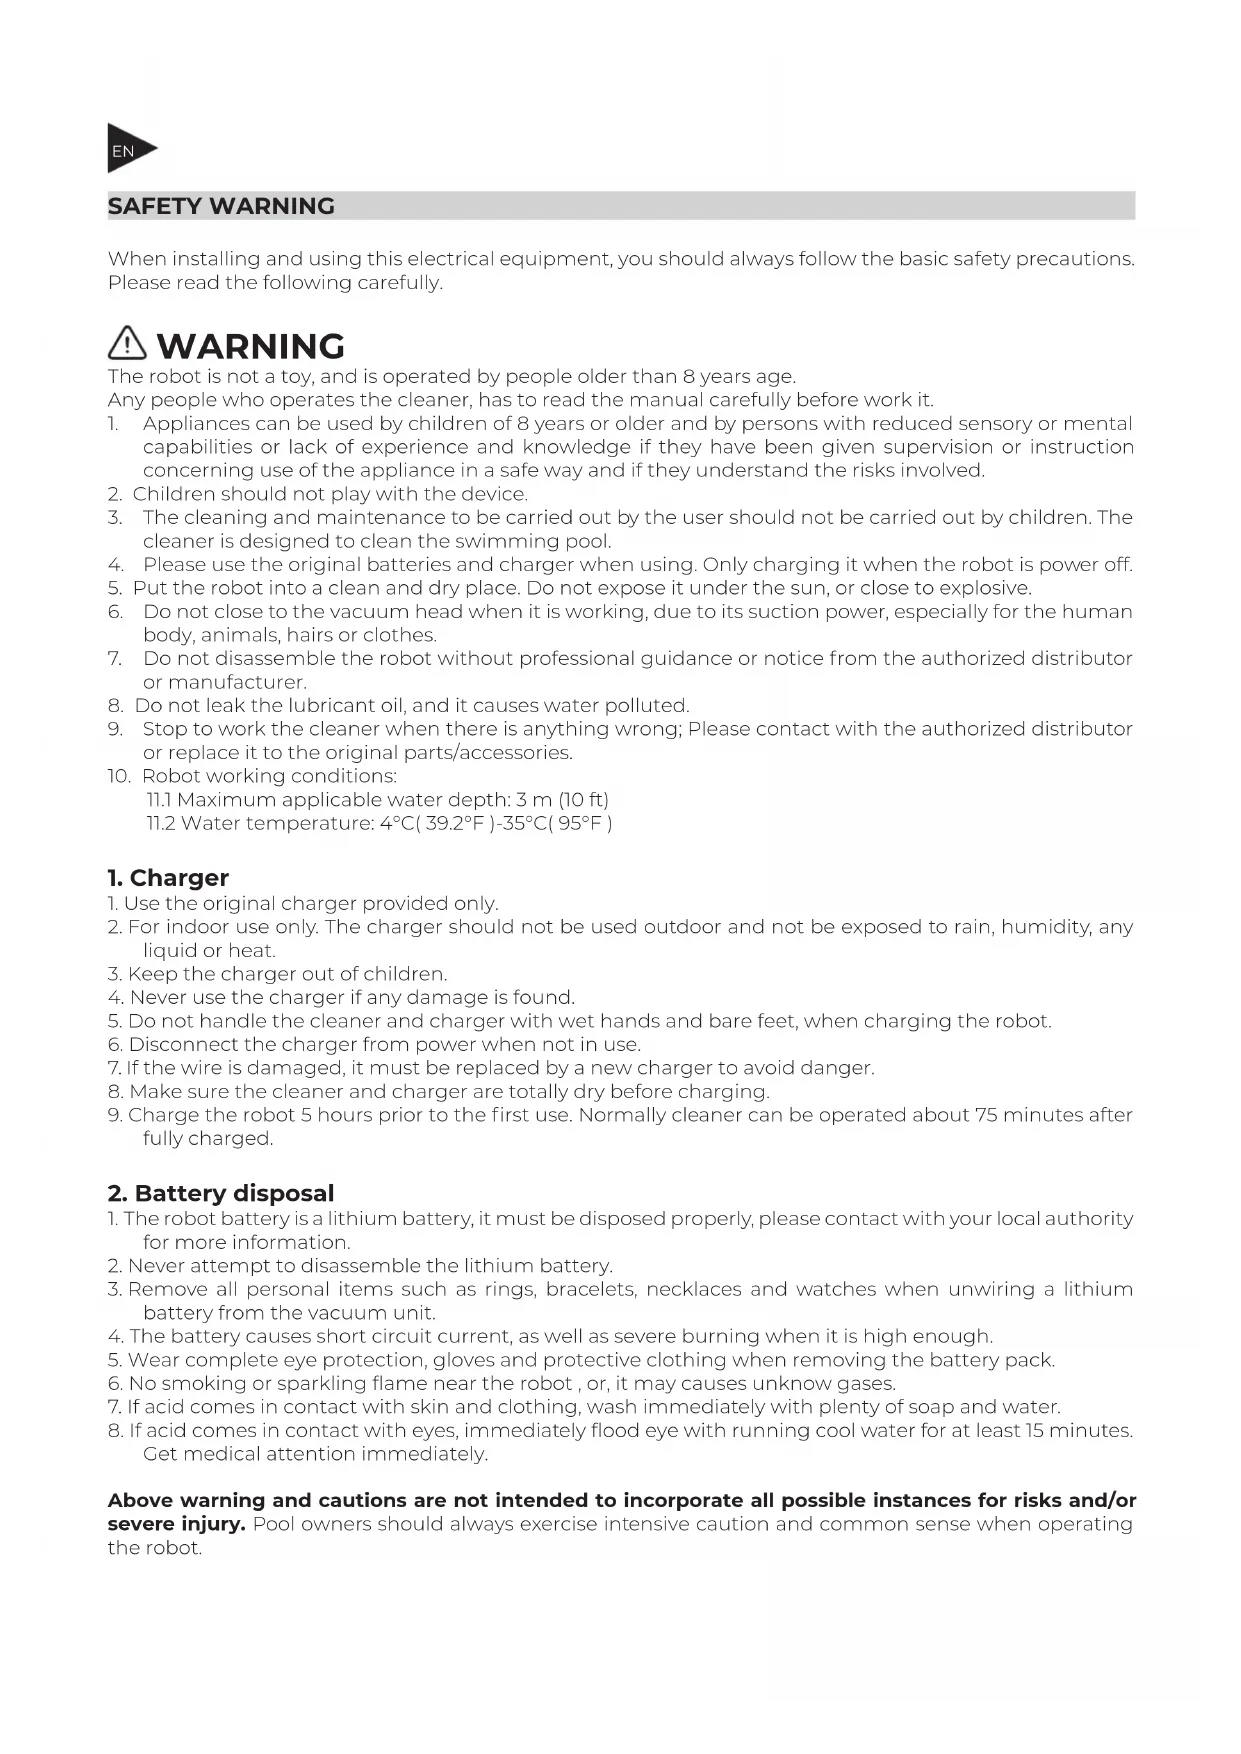
1. Charger
- Use the original charger provided only.
- For indoor use only. The charger should not be used outdoor and not be exposed to rain, humidity, any liquid or heat.
- Keep the charger out of children.
- Never use the charger if any damage is found.
- Do not handle the cleaner and charger with wet hands and bare feet, when charging the robot.
- Disconnect the charger from power when not in use.
- If the wire is damaged, it must be replaced by a new charger to avoid danger.
- Make sure the cleaner and charger are totally dry before charging.
- Charge the robot 5 hours prior to the first use. Normally cleaner can be operated about 75 minutes after fully charged.
2. Battery disposal
- The robot battery is a lithium battery, it must be disposed properly, please contact with your local authority for more information.
- Never attempt to disassemble the lithium battery.
- Remove all personal items such as rings, bracelets, necklaces and watches when unwiring a lithium battery from the vacuum unit.
- The battery causes short circuit current, as well as severe burning when it is high enough.
- Wear complete eye protection, gloves and protective clothing when removing the battery pack.
- No smoking or sparkling flame near the robot, or, it may causes unknow gases.
- If acid comes in contact with skin and clothing, wash immediately with plenty of soap and water.
- If acid comes in contact with eyes, immediately flood eye with running cool water for at least 15 minutes. Get medical attention immediately.
Above warning and cautions are not intended to incorporate all possible instances for risks and/or severe injury. Pool owners should always exercise intensive caution and common sense when operating the robot.
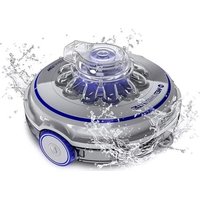
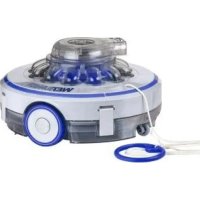
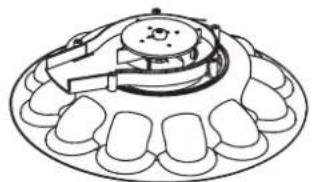
INSTRUCTION MANUAL
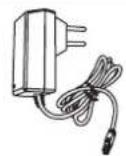
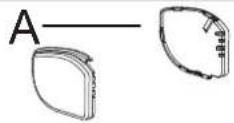
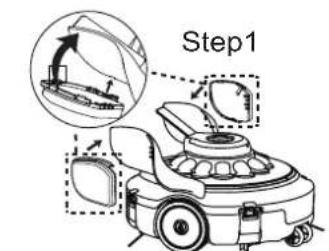
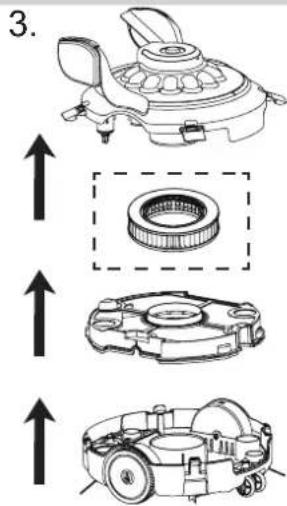
ASSEMBLY
A: Floating foam.
(Use it when climbing the slope difficulty, or when the machine is upside down)
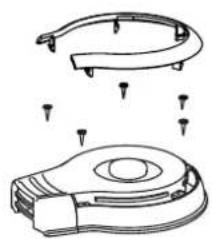
B: Upper cover
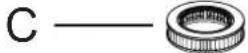
C: Cartridge filter
(ONLY assembling it while small micro dust cleaning needed)
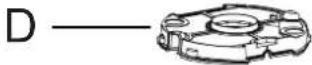
D:Filter
E: Bottom base
F:Charger
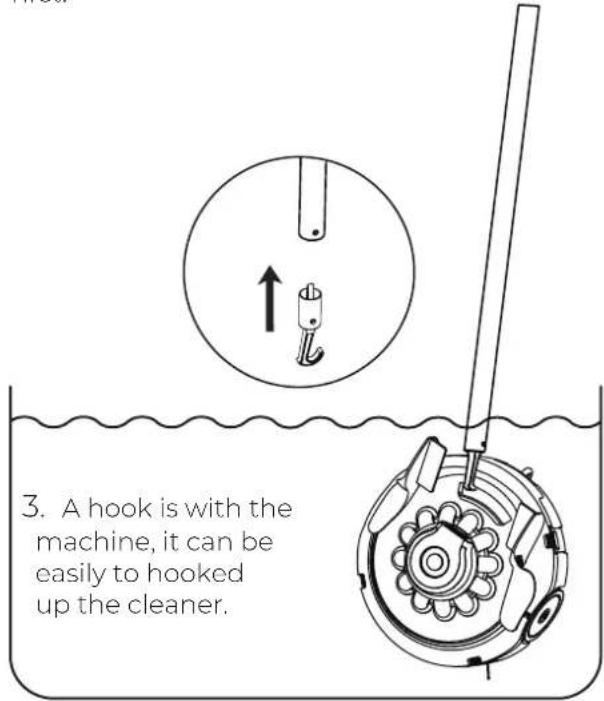
G:Hook
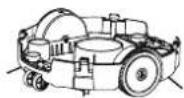
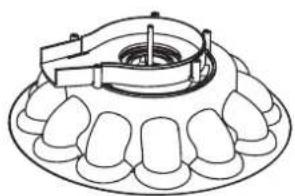
There is a rotation jet head at the upper cover, the water is passing from bottom to the jet head to make the robot moving. While facing obstacle, the jet head turns around 180 degrees, the robot rounds the obstacle and moving by another line. The rubbish is collected and installed by the bottom filter cabine.
F

G
E
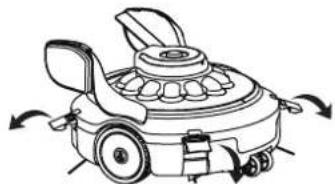
ASSEMBLY AND OPERATION
(Use it when climbing the slope difficulty, or when the machine is upside down)
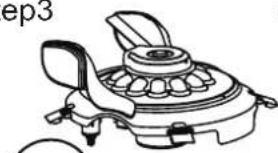
Step3
( ONLY assembling it while small micro dust cleaning needed )
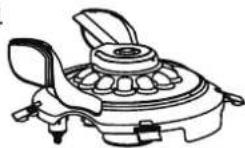
Step4
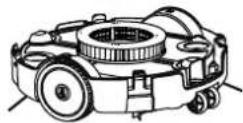
Step5
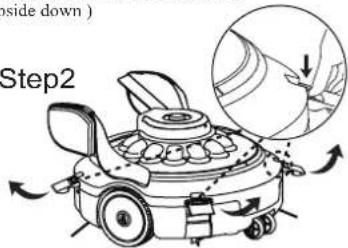
Step2
Charging warning:
- Only use the external adapter and the charging cable provided.
- Make sure that the robot and charger ports are clean and dry before installation.
-
Power up the robot before using it for the first time (about 5 hours)
-
Please turn off the robot before charging
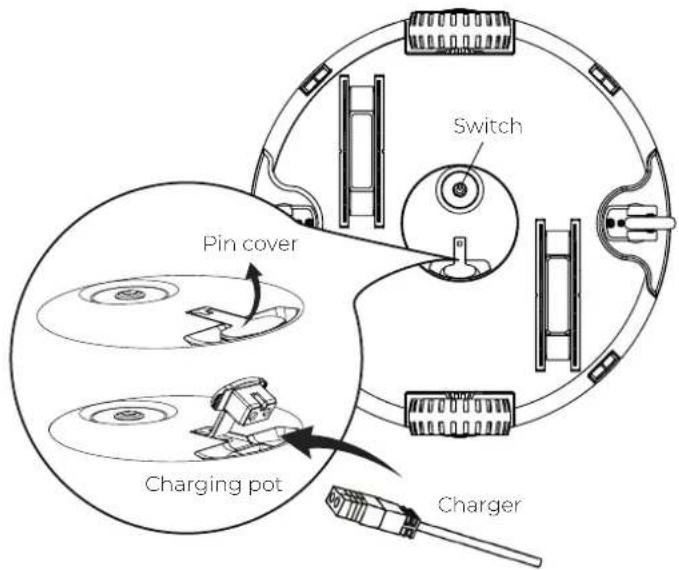
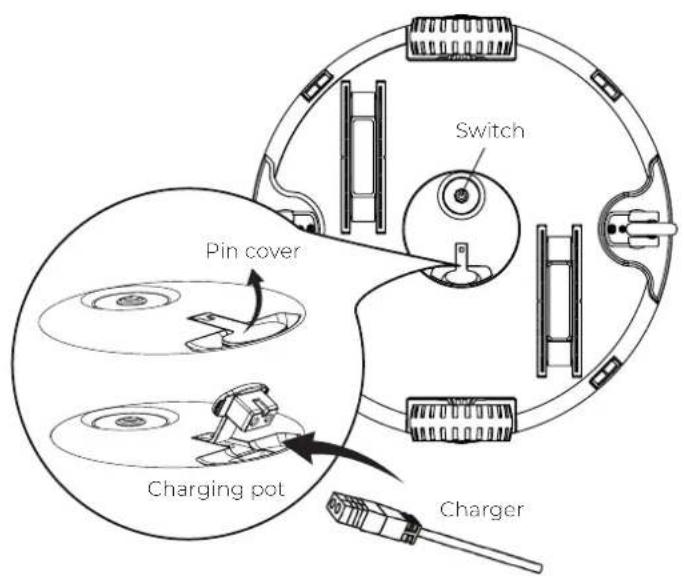
- Take the pin cover off before charging.
- Plug the charger into the charging port, then start to charge.
Note: Once the robot starts charging, the indicator light on the external adapter will turn red. When the robot is fully charged, the indicator light will turn green.
4. After charging, put the pin cover back on the charging port. Make sure that the pin cover is fully sealed before submerging in the water.
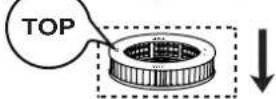
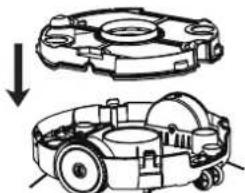
Bottom cover body assembly
POWER ON
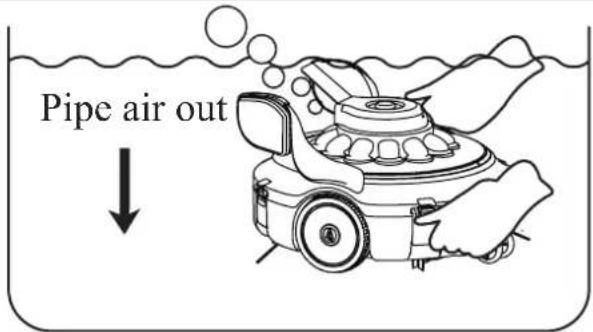
- Turn on the switch, the indicator lights up, put the robot horizontally into the pool, and wait for the robot to sink freely down to the pool bottom, it takes around 20-30 seconds to pipe air out first.
- When the robot has no power, it will automatically stop at the edge of the pool. (may also get stuck in the middle of the pool by obstacles)
Note:
- It is recommended that the filtration system be turned off as the water circulation in the pool may affect the robot's motion mode.
- Any obstacle in the swimming pool such as a ladder will affect the robot's crawling and cleaning track.
- If you are using a brine tank, make sure that all the salt is dissolved before putting the robot into the water.
GARBAGE DISPOSAL

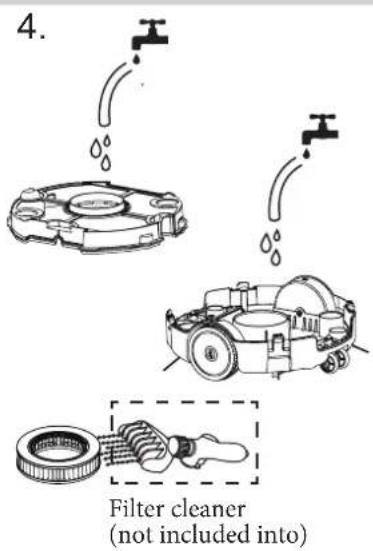
MAINTENANCE AND STORAGE
- The battery discharges itself during storage.
Make sure the robot is fully charged before storage. -
When not in use, you must recharge the battery at least every three months.
-
Unplug the external adapter from the socket and then the charging cable from the external adapter and the robot.
-
Remove the attachment from the robot. If necessary, rinse the robot and accessories with clean water. Do not use detergent.
-
Before storage, make sure the robot is drained.
-
Use a wet cloth to clean and dry the robot and its accessories.
-Store in a well ventilated place away from sunlight, heat, fire sources, pool chemicals and children.
The storage environment temperature should be 10^ - 25^ (50°F - 77°F).
Note: higher storage temperatures may shorten battery life.
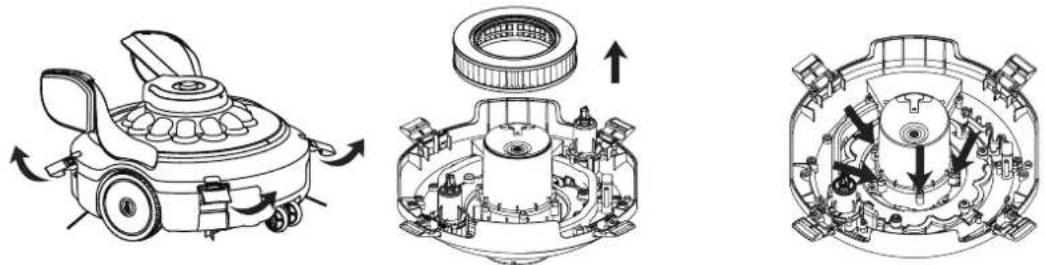
Maintenance and replacement of impeller:
Recommended tool (not included): screw driver
1.
2.
3.
Impeller

Maintenance and replacement of the wheels:
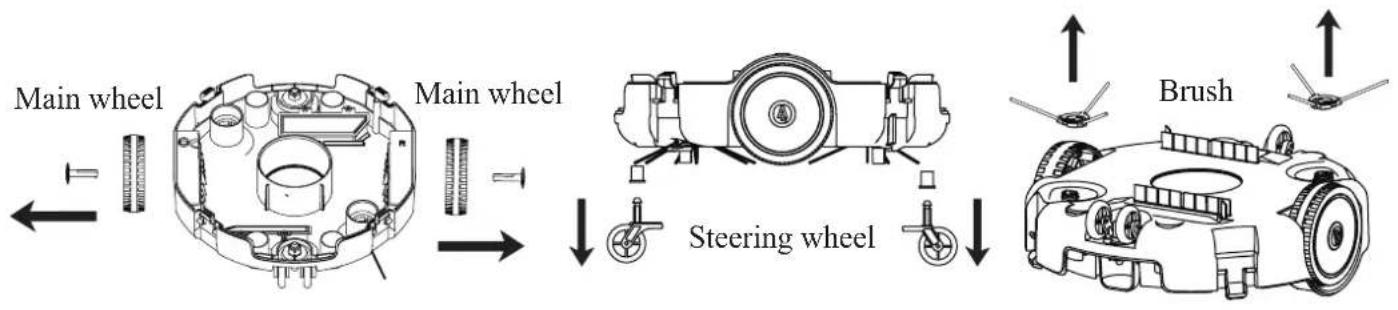
Note: the main wheel on this side has magnets. Please contact your dealer for spare parts or maintenance work.
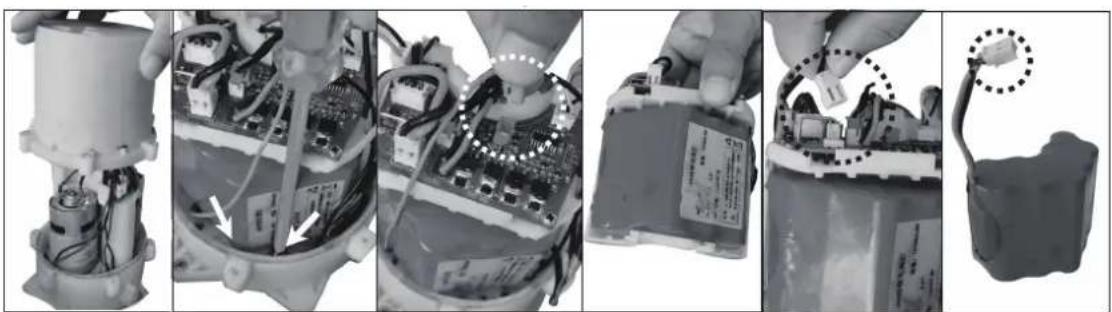
BATTERY ASSEMBLY AND REPLACEMENT
WARNING
#
Do not treat electrical appliances as unclassified municipal waste. Use separate collection facilities. For information on available collection systems, contact your local authorities.
- Do not remove the lithium battery without authorization.
- When removing the lithium battery from the vacuum device, please remove any rings, bracelets, necklaces or watch that your are wearing.
- The short-circuit current generated by a battery is enough to suck up rings (or similar items), which can cause severe burns.
- Before removing the battery pack, please wear eye protection, gloves and protective clothing.
-
Be careful not to touch the wire or any metal parts, as this can cause sparks or a short circuit.
-
Do not smoke or light naked flames near the robot, as this can set the battery on fire and give off gas.
- Avoid exposing the battery to fire or high temperatures, as this could cause an explosion.
Note!
If the battery leaks, avoid contact with the damaged battery and put it in a plastic bag.
If skin or clothing comes into contact with acid, wash immediately with plenty of soap and water.
If the eyes come into contact with acid, rinse them with water for at least 15 minutes and seek treatment from a doctor.
Battery replacement:

Note: User must consult dealer before any battery replacement.
- Pull the four clips out of the core part of the upper cover outwards, remove it from the body assembly of the bottom cover and take out the micro-particle filter.
- Use a screwdriver to remove all screws on the power cover of the bottom cover.
-
Open the battery cover, find the battery connection line, press the clip on the connector, pull it out and take out the battery.
-
Follow the steps for disassembly to re-install the battery and assemble the charging components. Note: (1) If there are impurities in the seal ring, clean it and put it back into the seal ring groove. (2) Make sure that the components are reassembled in the right direction. The six screw holes must be aligned to lock the screws.
Note: wrap the connector with insulating tape immediately to avoid a short circuit caused by two wire terminals coming into contact with each other.

TROUBLE SHOOTING
If you have problems with your cleaner, follow the troubleshooting steps below to restore performance. Note: turn off the power before making any repairs.
| PROBLEM POSSIBLE CAUSES SOLUTION | ||
| The robots fails to suck up debris. | The battery is low. Then charge the robot. | |
| Impeller stuck. | Turn off the power supply of the robot and visually check whether the impeller rotates. If necessary, contact your dealer for further instructions. Warning! Before servicing the equipment, make sure that the robot is turned off. | |
| The impeller is damaged. Please contact your dealer for replacement. | ||
| The debris chamber is full. Clean the glove box and filter cover. | ||
| The robot stops moving in the middle of the pool (the rotating head is still turning). | The robot was stopped by an obstacle. | Check the cleaner for obstructions. Remove obstacles. |
| The robot has been blocked by the suction of the main pool floor drain. | Turn off the filtration system (see instructions in the manual). | |
| The ground is not totally flat | It takes more minutes before moving again or Make the bottom of the pool flat or trim the bottom brush strip. Contact your dealer for replacement parts. | |
| The robot cannot cover the entire pool or move along the walls of the pool. | The debris chamber is full. Clean the glove box and filter cover. | |
| The operation time was shorter than expected. | Clean the filter chamber and recharge the robot for 4-5 hours | |
| The water circulation generated by the filtration system interrupts the direction of movement. | Turn off the filtration system (see instructions in the manual). | |
| The wheel is stuck. Check and remove debris from the wheels. | ||
| The robot moves slowly. | The debris chamber is full. Clean the glove box and filter cover | |
| The turning head does not rotate or is clearly rotating slowly. | The bottom of the swivel is stuck. | The glove box is full, check and remove any debris that may be stuck under the rotating head. It can be rotated by hand and rinsed with water until smooth. |
| The debris chamber is full. Clean the glove box and filter cover. | ||
| PROBLEM POSSIBLE CAUSES SOLUTION | ||
| Debris is being discharged from the robot. | The valve of the suction nozzle (bottom of the cleaner) is broken. | The baffle at the suction cup is like a door to prevent debris from getting out of the debris chamber. Contact your dealer for spare parts and instructions. |
| Debris enters the outside of the filter cover. | The filter cover is damaged. | Replace the filter cover with a new one. Please contact your dealer for spare parts. |
| If the charger's indicator light is red all the time, it cannot change to green for more than 8 hours. | Battery damaged | Please contact your dealer to replace the battery. Warning! Do not turn the robot on or replace the battery yourself. This can cause serious or fatal injury, so the warranty will not be valid. |
| If the charger's indicator light changes to green in a very short time, and the device also only works for a short time (i.e., half an hour, multiple checks must be performed). | ||
| When the product starts to charge after it has been working, if the charger's indicator light is green all the time. (Make sure the charger cable is properly connected to the external adapter and robot). | Charger damaged | Contact your dealer for spare parts. Warning! Using the wrong external adapter will result in damage to the robot or battery, so the warranty will not be valid. |
| If the charger's indicator light is no longer displayed. | ||
| Switch not working or out.* | There is rubbish around the sener or senser oxidataion. | Cleaning the senser by a paper, or a cloth, or a brush, as pics; or see video online. |


GENERAL TERMS
In accordance with these provisions, the seller guarantees that the product corresponding to this guarantee ("the Product") is in perfect condition at the time of delivery.
The Guarantee Term for the Product is two (2) years from the time it is delivered to the purchaser.
In the event of any defect in the Product that is notified by the purchaser to the seller during the Guarantee Term, the seller will be obliged to repair or replace the Product, at his own cost and wherever he deems suitable, unless this is impossible or unreasonable.
- If it is not possible to repair or replace the Product, the purchaser may ask for a proportional reduction in the price or, if the defect is sufficiently significant, the termination of the sales contract.
- The replaced or repaired parts under this guarantee, will not extend the guarantee period of the original Product, but will have a separate guarantee.
In order for this guarantee to come into effect, the purchaser must provide proof of the date of purchase and delivery of the Product.
If, after six months from the delivery of the Product to the purchaser, he notifies a defect in the Product, the purchaser must provide proof of the origin and existence of the alleged defect.
This Guarantee Certificate is issued without prejudice to the rights corresponding to consumers under national regulations.
INDIVIDUAL TERMS
This guarantee covers the products referred to in this manual.
This Guarantee Certificate will only be applicable in European Union countries.
- For this guarantee to be effective, the purchaser must strictly follow the Manufacturer's instructions included in the documentation provided with the Product, in cases where it is applicable according to the range and model of the Product.
- When a time schedule is specified for the replacement, maintenance or cleaning of certain parts or components of the Product, the guarantee will only be valid if this time schedule has been followed.
LIMITATIONS
This guarantee will only be applicable to sales made to consumers, understanding by "consumer", a person who purchases the Product for purposes not related to his professional activities.
-
The normal wear resulting from using the product is not guaranteed. With respect to expendable or consumable parts, components and/or materials, such as batteries, light bulbs, etc. the stipulations in the documentation provided with the Product, will apply.
-
The guarantee does not cover those cases when the Product; (I) has been handled incorrectly; (II) has been repaired, serviced or handled by non- authorised people or (III) has been repaired or serviced not using original parts. In cases where the defect of the Product is a result of incorrect installation or start-up, this guarantee will only apply when said installation or start-up is included in the sales contract of the Product and has been conducted by the seller or under his responsibility.
CROSSED-OUT WASTE CONTAINER
- In order to reduce the amount of waste of electric and electronic apparatus, to reduce the danger of components, to encourage the reuse of apparatus, to assess waste and to set up a suitable waste treatment system, with the aim of improving the efficiency of environmental protection, a set of rules has been established applicable to the manufacture of the product and other rules regarding the correct environmental treatment when these products become waste.
It is also intended to improve the environmental practices of all agents involved in electrical and electronic goods, including manufacturers, distributors, users and particularly those directly involved in the treatment of waste derived from these apparatus.
From 13th August 2005, there are two ways of disposing of this apparatus:
If you purchase a new equivalent apparatus or which has the same functions as the one you wish to dispose of, you can hand it over, free of charge, to the distributor when making your purchase. - You can take it to local collection points.
We shall cover waste treatment costs.
The apparatus are labelled with a symbol of a "crossed-out waste container". This symbol means that the apparatus is subject to selected waste collection, different from general waste collection. - Our products are designed and manufactured with top-quality, environmental-friendly materials and components, which can be reused and recycled. In spite of this, several parts of this product are not biodegradable and therefore it should not be left in the environment. For the correct recycling of this product, please completely detach the electrical motor from the rest of the filtration equipment.
Maintenance and replacement of wheels:
VEILIGHEIDSWAARSCHUWING

WAARSCHUWING
Maintenance and replacement of wheels:
PROBLEMA POSSIVEIS CAUSAS SOLUÇAO
INDIVIDUALNI PODMINKY
MANUFACTURAS GRE, S.A.
ARITZ BIDEA N°57 BELAKO INDUSTRIALDEA, APARTADO 69
48100 MUNGUIA (VIZCAYA) ESPANA
N^ Reg.Ind.48-06762
We reserve the right to change all or part of the articles or contents of this document, without prior notice
Nos reservamos el correcho de embarir total o parcialmente las caracteristicas de nuestros articulos o el contenido de este documento sin previo aviso
- Nous nous réservons le droit de modifier totalement ou en partie les caractéristiques de nos articles ou le contenu de ce document sans prévis
- Wir behalten uns das Recht vor, die technischen Daten unserer Antikel oder den Inhalt these Dokumentes ohne vorherigen Hinweis ganz oder teilweise zu ändern
- Ci riserviamo il diritto diambiare totalmente o parzialmente le caratteristiche tecniche dei nostri prodotti ed il contentuto di questo documento alla nessun preavviso
Wij behouden ons hetrecht voor geheel of gedeeltek de kenmerken van onsze artikelen of de inhoud van deze handleiding zonder Voorafgaand bericht te wijzigen
Reservamo-nos o direito de alterar, total ou parcialmente, as caracteristicas dos)nossos artigos ou o conteudo deeste documento sem aviso previo.
Zastrzegamy sobie prawo do zmiany w calosci lub czeci niniejszej instrukcji bez uprzednej informacji
Vyhrazujeme si pravo nazmenu soucasti nebo prvku vyrobku nebo obsahu tohoto dokumentu bez oznameni.
- Vyhradzujeme si pravo na zmenu všetkých clankov alebo ich Častí alebo obsahu tohto dokumentu bez predchodzajúceho upozornenia.
- Ne rezervam sã schimbam total sau partial articolele sau continutul acestui document, fãrã notificare prealabila.
Vi forbehaller oss ratten att andra hela ell derar av Funktionerna i artiklarna ell innehallet i detta dokument utan foregäende meddelande.

EVIDENCE OF CONFORMITY