
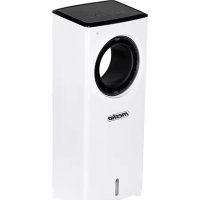
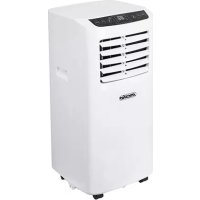
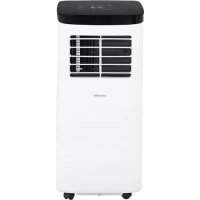
MS 7854 - Air Conditioning Mesko - Free user manual and instructions
Find the device manual for free MS 7854 Mesko in PDF.
| Product type | Monoblock mobile air conditioner |
| Brand | Mesko |
| Model | MS 7854 |
| Cooling capacity | 9000 BTU/h (2600 W) |
| Power consumption (cooling) | 950 W |
| Noise level | ≤ 64 dB |
| Air flow rate | 270 m³/h |
| Energy class | A |
| Timer | 24 hours (programmable on/off) |
| Refrigerant | R290 (propane), max 160 g |
| Power supply | 220-240 V ~ 50 Hz |
| Functions | Cooling, dehumidification, ventilation |
| Remote control | Yes, with batteries (range 5 m) |
| Temperature range | 16 °C to 31 °C |
| Fan speeds | Low and high |
| Maintenance | Clean air filter every 2 weeks |
| Condensate drainage | Manual via plug or hose (inner diam. 9 mm) |
| Safety | Anti-freeze, overheat protection, stop on full tank (code E4) |
| Minimum distance to walls | 60 cm |
| Refrigerant weight | 160 g maximum |
Frequently Asked Questions - MS 7854 Mesko
User questions about MS 7854 Mesko
0 question about this device. Answer the ones you know or ask your own.
Ask a new question about this device
Download the instructions for your Air Conditioning in PDF format for free! Find your manual MS 7854 - Mesko and take your electronic device back in hand. On this page are published all the documents necessary for the use of your device. MS 7854 by Mesko.
USER MANUAL MS 7854 Mesko
SAFETY CONDITIONS. IMPORTANT INSTRUCTIONS ON SAFETY OF USE PLEASE READ CAREFULLY AND KEEP FOR FUTURE REFERENCE
- Before using the device, read the operating manual and follow the instructions contained in it. The manufacturer is not liable for damages caused by using the device contrary to its intended purpose or improper operation.
- The device is for home use only. Do not use for other purposes that are not for its intended purpose.
- The device should only be connected to an AC outlet with a grounded 220~240V 50Hz . To increase operational safety, multiple electrical devices should not be connected to one current circuit at the same time.
- Use extreme caution when using the device when children are nearby. Do not allow children to play with the device, do not allow children or people unfamiliar with the device to use it.
- WARNING: This equipment may be used by children over 8 years of age and people with limited physical, sensory or mental ability, or people who have no experience or knowledge of the equipment, if this is done under the supervision of a person responsible for their safety or have been granted them information on the safe use of the device and are aware of the dangers of using it. Children should not play with the equipment. Cleaning and maintenance of the device should not be performed by children, unless they are over 8 years old and these activities are carried out under supervision.
- Always disconnect the power plug by holding the socket with your hand after use. DO NOT pull on the power cord.
- Do not immerse the cable, plug and the whole device in water or any other liquid. Do not expose the device to atmospheric conditions (rain, sun, etc.) or use in conditions of high humidity (bathrooms, damp mobile homes).
- Periodically check the condition of the power cord. If the power cord is damaged, it should be replaced by a specialist repair shop to avoid danger.
- Do not use the appliance with a damaged power cord or if it has been dropped or damaged in any other way or if it is not working properly. Do not repair the device yourself, as there is a risk of electric shock. Take the damaged device to an appropriate service center for checking or repair. All repairs may only be carried out by authorized service points. Incorrectly performed repairs can cause serious danger for the user.
- Place the device on a cool, stable surface, away from hot kitchen appliances such as: electric stove, gas burner, etc.
- Make sure that nothing is blocking the air inlet and outlet of the device
- Use the device only on a level surface to prevent the condensation from spilling out
- To provide additional protection, it is advisable to install a residual current device (RCD) in the electric circuit with a rated residual current not exceeding 30mA . Ask an
electrician for this.
14. Clean the air filter regularly. The frequency of cleaning depends on the cleanliness of the air.
15. After turning off the machine, wait at least 5 minutes before turning it back on.
16. Do not use the device in sunny places. When the device overheats, the overheat protection will switch on the device.
17. To ensure effective cooling, a distance of at least 60~cm should be kept between the side walls of the device and the wall or furniture or curtains.
18. Due to the limited performance of the device, if the difference between the target temperature and the ambient temperature is too great, the target temperature may not be reached.
19. To reduce the risk of fire, electric shock or injury when using the air conditioner, observe the following basic precautions:
a) Connect to a grounded outlet with 3 pins.
b) Do not remove the grounding prong.
c) Do not use the adapter.
d) Do not use an extension cord.
e) Disconnect the air conditioner before servicing.
f) Use two or more people to move and install the air conditioner.
20. Do not use agents accelerating the defrosting or cleaning process other than those recommended by the manufacturer.
21. The device should be stored in a room without constantly operating sources of ignition, for example: open fire, gas appliances or electric heaters.
BEFORE FIRST USE - (picture E)
Connect the connectors to the air exhaust duct as follows:
- Extend the air exhaust duct (9) by drawing out the two ends of the duct.
- Screw the air exhaust duct (9) into the connector of air exhaust duct (10).
- Connect the connector of air exhaust duct (10) to the device.
REMARKS:
- Keep the unit at least 1 meter away from TV or radios to avoid electromagnetic interference.
2.Do not expose the unit under direct sun light to avoid surface color fading.
3.Do not tilt the unit for more than 35^ or upside-down while transporting. If the device has been turned over during transport, put it down correctly and wait 2-4 hours before starting it. - Place the unit on a flat surface with less than 5^ inclination.
-
The unit operates more efficiently in certain room locations, select the best location:
-
Beside a window, a door or a French window.
- Keep the required distance from the return air outlet to the wall or other obstacles at least 60~cm
- Extend the air hose to ensure that other end of the air hose has clearance between the window door, or French window, or wall hole.
- Air outlet or intake cannot be blocked by protective grid or any obstacle.
To extend the life of the unit, drain the condensed water from drain hole (8) before putting the unit into storage at the end of the season.
DEVICE DESCRIPTION (pictures A and B)
- Control panel 2. Cold air outlet 3. Signal receptor
- Remote controller 5. Transport handle 6. Exhaust duct
- Evaporator inlet 8. Drain plug 9. Air exhaust duct
- Connector of air exhaust duct 11. Window exhaust adapter
CONTROL PANEL (picture C)
A. Power button B. Fan speed button
C.Mode button D. Timer / Temperature up button
E. Timer / Temperature down button F. Fan low speed indicator
G. Fan high speed indicator K. Cool mode indicator
L. Dehumidify mode indicator M. Fan mode indicator
N. Timer button R.WF - full water indicator
S. Set temperature / Timer display W. Timer indicator
REMOTE CONTROLLER - picture D
The remote controller transmits signals to signal receiver (3).
Button "A" - the appliance will be started when it is energized or will be stopped when it is in operation, if you press this button.
Button "C" - press it to select operation mode: "K", "L" or "M". Suitable indicator will be lighted up.
Button "B" - press it to select fan speed in sequence. Suitable indicator will be lighted up.
Button "D" / "E" - press to set up desired temperature in room or the timer. The display "S" present desired temperature, not present temperature in room.
Button "N" - press to set the time of automatic off and automatic on.
-
Turn on the device.
a) Connect the device and then the device beeps once.
b) Press the "A" button, then the device will turn on.
c) LED display indicates the set temperature. -
Choose the operating mode
Press the "C" button to select the desired mode of operation by sequence:
Cooling mode "K" -> Drying mode "L" -> Fan mode "M."
- Adjust temperature
The temperature can be set within a range 16^ - 31^ . Press "D" or "E" button to increase or decrease the temperature by 1^ by pressing once. The device LED panel shows the target temperature for 5 seconds and then displays the set temperature, not present temperature in room.
After setting temperature under Cooling mode "K", if you select again cooling mode "K" or Fan mode "M", then LED display indicates the default target temperature 25^ .
- Adjust fan speed
Press the button "B" to select a desired fan speed shows by sequence:
Low speed "F" -> High speed G
- Power
When you press the "A" button again, the device will sound "di" and stop working.
- Press this button "N" to set a timer.
Modes working principles:
Dehumidify "L" mode:
- The fan will run at low speed, and the speed can't be adjusted.
The adjustment of temperature is no effective. The device automatically adjusts the set temperature to 2^ below the room temperature when entering the dehumidification mode.
- When room temperature ≤ 16^ , cannot dehumidify, the fan will run at low speed.
WARNING:
When operating the device in conditions of varying humidity, the drain plug (8) should be constantly open and ensure constant water drainage. To comfortable water draining use the pipe included in kit.
COOL "K" mode:
- When the room temperature is higher than set temperature on control panel, the compressor starts to run. The device cools the room.
- When the room temperature is lower than set temperature on control panel, the compressor stop and the fan operates at original set speed.
Fan "M." mode.
- The fan runs at set speed, and the compressor does not run.
- The adjustment of temperature is no effective.
Timer operation "N":
- Press "N" button to set Automatic Off time while the unit is running.
- Press "N" button to set Automatic On time while the unit is ready.
- The time can be adjusted within a range of 1 hour to 24 hours by pressing the button "D" (+) or "E" (-).
Notice:
The main control board has memory function, when the device is ready to run but in stop status, the main control board can memorize the initialization of working mode. When you turn on the unit, it will work as the same enactment of working-mode as last time, no need to reset the working mode again.
REMOTE CONTROLLER
-
Slide the back cover to open and take off the isolating film on the batteries.
-
Insert the batteries into the compartment with the correct side. The poles of the batteries must match the signs "+" and "-" on the remote control.
- For long time no use, take out the batteries.
- To prevent environmental pollution, take out the used batteries and dispose safety and appropriately.
To operate the device, aim the remote controller (4) at the signal receptor (3). The remote controller (4) will operate the device at distance 5 meters when pointing at signal receptor (3) of the device.
PROTECTIVE DEVICES
The protective device may trip and stop the appliance in the cases listed below:
- at cooling mode: indoor air temperature is over 43^
- at cooling mode: room temperature is below 16^
- at dehumidifying mode: room temperature is below 16^
If the device runs in cooling "K" or dehumidify "L" mode with door or window opened for a long time when relative humidity is above 80% , dew may drip down from the outlet.
The protective device will work in the following cases:
- Restarting the device immediately after stopping work or changing the selected mode while working, you must wait 3 minutes.
- If the plug has been removed, after restarting the device will return to the original mode, TIMER ON and TIMER OFF - must be set again.
REMARK: there is condensing water recycling hidden within this device. The condensing water is partly kept recycling between the condenser and build in water plate. When the water level rises to the upper level, it is raised by the float switch, then (W.F.) the full water level indicator "R" lights up to remind you to drain the water. Please cut off the power supply, move the appliance to a suitable place, remove the drain plug, drain water completely. After the drain, re-install the drain plug (8), or the appliance may leak and make your room wet. If it is not drained 5 minutes after the W.F. indication on, the display will show E4.
If the appliance is placed in a position admitting drain water, you also can connect the drain pipe to the drain port to drain the water. Drain pipe is added to kit, with inner diameter 9mm, outer diameter 12mm, material: PVC.
Troubleshooting
1) Trouble: Do not work.
Analysis:
a) maybe the protector trip or fuse is blown, please wait for 3 minutes and start again, protector device may be preventing device from working.
c) maybe batteries in the remote controller are exhausted.
d) maybe the plug is not properly plugged in.
2) Trouble: works for a short time only
Analysis:
a) if the set temperature is close to room temperature, you can lower the set temperature.
b) maybe air outlet is blocked by obstacle. Take the obstacle away.
3) Trouble: Works but not cools
Analysis:
a) maybe door or window are open.
b) maybe in close distance there is another appliance heat-working like heater or lamp, etc.
c) the air filter is dirty, please clean it.
d) air outlet or intake is blocked.
f) set temperature is too high.
4) Trouble: Water leak during moving.
Analysis:
a) drain the condensate before moving.
b) to avoid water leakage, please locate the device on flat ground.
5) Trouble: Do not work and water full indicator "W.F" light on
Analysis:
a) pull out rubber plug to drain water.
b) if it is often in this state, please contact qualified service technical.
Troubleshooting
6) Trouble: Device fails to start up.
Analysis:
a) maybe not plugged. So, plug in it.
b) maybe plug or socket damages. Replace by service provider.
c) maybe fuse broken. Replace the fuse by service provider (specification: 3,15A/250VAC).
7) Trouble: Device automatically stops.
Analysis:
a) timing shut down or set temperature reached. Restart it or wait for auto-switch.
8) Trouble: no cold air under COOL "K" mode.
Analysis:
a) room temperature is lower than set temperature. It is a normal phenomenon, the machine will auto-switch while the room temperature is higher than the set temperature.
b) Device enters into anti-frost protection. The device will auto switch after anti-frost protection is over.
9) Trouble: LED display indicates failure code "E0"
Analysis:
a) room temperature sensor fails or damages. Replace the room temperature sensor by service provider.
10) Trouble: LED display indicates failure code "E4"
Analysis:
a) water-full warning. Drain out the water.
CLEANING AND MAINTENANCE
Device maintenance
- Turn off the device first before disconnecting from power supply.
- Wipe with a soft and dry cloth. Use lukewarm water below 40^ to clean if the appliance is very dirty.
- Never use volatile substance such as gasoline or polishing powder to clean the device.
Air filter maintenance
It is necessary to clean the air filter every 2 weeks if the device operates in an extremely dusty environment. Clean as follows:
- Stop the device first, push up the air filter (Picture F).
-
Clean and reinstall the air filter.
-
If the dirt is conspicuous, wash it with a solution of detergent in lukewarm water. After cleaning dry it in a shaded and cool place, then reinstall it.
Maintenance after seasonal using
- If the device will not use for longer time, be sure to pull out the rubber plug of drain hole (8) in order to drain the water.
- Keep the appliance running with fan mode only for a half day during a sunny day to dry the appliance inside and prevent from going moldy.
- Stop the device and pull out the power cord plug, then take out the batteries of remote controller and store device properly.
- Clean the air filter and reinstall it.
- Remove the air hoses and store them properly, and cover the hole tightly.
TECHNICAL DATA:
Cooling capacity at BTU: 9000 BTU / hour
Cooling capacity in watts: 2600 W
Energy consumption (cooling) W: 950 W
Volume: <= 64 dB
Air flow: 270 ~m^3 / h
Energy class: A
Timer: 24 hours
R290 coolant weight: max. 160 grams
Voltage 220-240V 50Hz

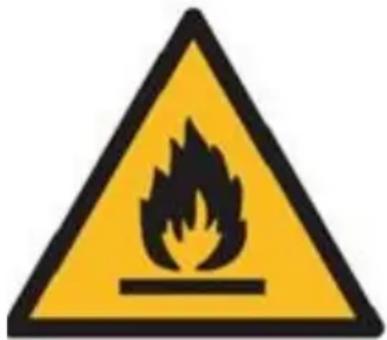
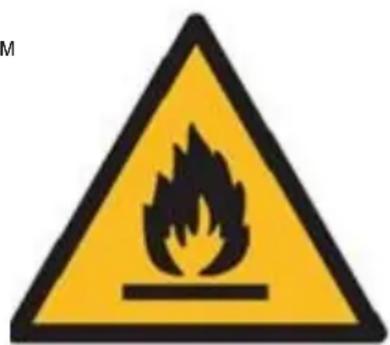
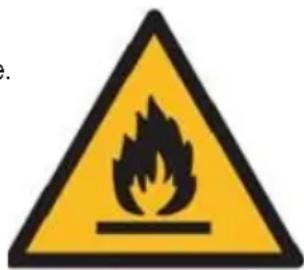
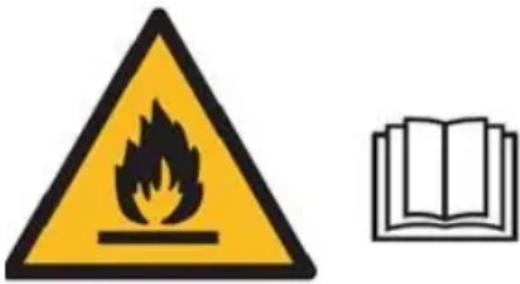
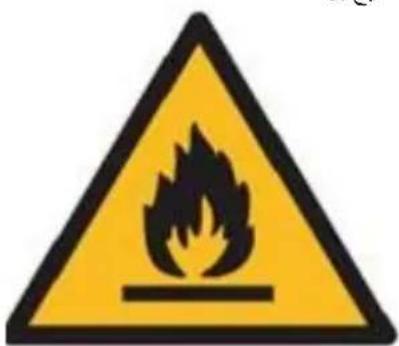
Caution, risk of fire.
Do NOT pierce or burn.
Be aware that the refrigerant may not contain an odour.
The maximum refrigerant charge amount: 160g.
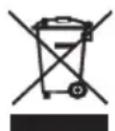
To protect your environment: please separate carton boxes and plastic bags and dispose them in corresponding waste bins. Used appliance should be delivered to the dedicated collecting points due to hazardous components, which may effect the environment. Do not dispose this appliance in the common waste bin.
DEUTSCH
Zems atrums "F" -> Liels atrums G
- Jauda
Ventilator "M." rezims.
- Ventilators darbojas ar iestatito atrumu, un kompresors nedarbojas.
- Temperatūras regulešana nav efektiva.
Taimera darbiba "N":
- Nospiediet "N" pogu, la iestatitu automatiskas izslegsanas laiku, kamiriekarta darbojas.
- Nospiediet "N" pogu, lui iestatitu automatisko ieslegsanas laiku, kamiriekarta ir gatava.
- Laiku var regulēt diapazonā no 1 stundas lidz 24 stundām, nospiéžot pogu "D" (+) vai "E" (-).
Piezime:
Galvenajam vadibas panelim ir atminas fungcija, kad icerce ir gatava darbam, bet ir aptureta, galvena vadibas pults var iegaumet darba rezima initializaciju. lesledzot iekartu, ta darbosies tapat ka ieprieksejara darba rezima, nav nepieciesams atkartoti atiestatit darba rezimu.
Talvadibas pults
Skalums: < = 64 dB
Gaisa plusma: 270 m3/h
Energijas klase: A
Taineris: 24 stundas
R290 dzesesanas skidrama svars: maks. 160 grami
Spiregums 220-240V 50Hz

Piesardziba, ugunsbistamiba.
NAV caurdurt un nededzinat.
Reziimide toopohimotted:
Kuivatusreziim "L":
Skalums: < = 64 dB
Gaisaplusma:270m3/h
Energijsklase:A
Taineris: 24 stundas
R290 dzesesanas skidrama svars: maks. 160 grami
Spiregums 220-240V 50Hz

PABOTA PAHEJIN YNPABNEHNA
OXJAXDEHNE/OCUHEHNE/BEHTNJIYTOP
1.BkIIOHTe yCTpOINCTBO.
a) IOnKJIIOUHTe yCTPOINCTBO, INyCTPOINCTBO n3dAcT OINH 3ByKOBoCnHaJ.
6) Haxmte KhoNky «A», nocne 3TOrO yCTPOIcTBO BKNIOHcTcra.
B) CBeToOnIOHbI JINCNJIe NOKa3bIbAET yCTaHOBNeHHUTo TEMNepaTpy.
- BBi6epnTe pexm pa6oTbI
Haxmte KhoNkY «C», yTo6bI nocneIOBaTeJbHO BbIbpaTb xeJaembl peXIM pa60TbI:
Pexm oxlaeHnK 一 _ 一 Pekm cyuK 一 _ 一 Pekm BENTIaTopa M.
- OTPerynpyiTe TemnepaTyPy.
Temnepatypy moxho yctahOBtB dnaana3oHe ot 16 do 31^. Haxmte KhONky D nIIN E , YTObI yBeJIuHTb nIIN yMeHbIHTb Temnepatpy Ha 1^. hXab Odn pa3. CBeToNDnHa naHeJy cTPOcTBa nOKa3bBaet ZeNEByTOtempepatpy B TeueHne 5 ceKyHd, a 3aTEM oTo6paKaet yCTAHOBLeHHyIO Temnepatpy, a He TEkyUO TEMnpatpy B NOMeHnn.
Iocne yctahOBKn TemnepaTpyb B pexKmE oxJaXeHnR «K», ecN BB CHoBa BblBepeTe peKm OxJaXeHnR «K» nIN peKm BHTnIaTopa «M», TO cBeToDnOHDh IucnIe NOKaKeT ueJeByIO TemnpaTpy no yMOUHaHHIO 25 °C.
- OTPerynnyte ckopocb TbBeHTnIaTopa.
HaxMnte KhONky B ,YTO6bblb6paTbJKeNaemyIOCKOpocTBbpaueHHBeHTNJIaTopa,OTobpaXaEmyIO B NocJeDoBaTeIbHOCTN: H3kajckopocTB"F"->BbICOKaCKOpocTB G
- MoUHooCTb
При NOВTOPHOM HAXATM KHOПКИ «А» yctpoCTBO n3ДaCT 3ByK «ДИ» n pepeCTaHET pa6OtaTb.
- Haxmte 3ry KOnky «N», yTo6bI yCTaHOBt b TaHMeP.
PpHunbipa6oBtpeXmOB:
PexkIMocyueHnA《L》
- BeHTnIaTOp 6ydt pa60TaB Ha Hn3KoN cKOpOCTn, n cKOpOCTb He MoXeT 6bITb OTpeYJIpObaHa.
PeynpoBkA TeMepaTpybI He3ofoeKTHBHa. Pnp nepexoBe B pexm ocyuueHna yctpoCTBO ABtOMaTuueckn yctHaBnBaET 3aahnhyo TeMepaTpy Ha 2^ C Hnke KomhaTHOH.
- EcIn TemnepaTpya B NOMEUeHN ≤ 16^ , OcyuHHeN HeBO3MOxHO, BeHTnIyTop 6yJeT pa6OtaTb Ha Hn3KoN CKOpocTN.
PNEyPPEKDEHNE:
Pn3KcNpyataun yCtpoCTBa YcNobnx nepemehHO BnaXHocTn CnVBnA np6ka (8) DoJXHa 6bIb NocToa HNO OTKpbTa n oBeceNeuBaTB noCToHHb cInB BoDbI. JnKOMΦopTHoro CInBa BOdbI NCNoJIb3yTe naTpbyok, BXOJaM B KOMnEKT.
OXJIAXKDEHNE"K"pejxIM:
- Korda TemnepaTpa B NOMEUHIN Bblie, Yem TemnepaTpa, yCTaHOBNEHHa Ha NaHeN ynpabNeHn, KOMnPecccop 3anyckaetc. YcTpoiCTBO OXnaKDaET KOMHaTy.
- Korda TemnepaTpa B NOMEUeHIN HNKe, Yem 3aHaHHa TemnepaTpa Ha naneJIn ynpabJIeHn, KOMnPecCOP OCTaHaBJIbAeTCs, a BeHTIyTop pa6Otaet C nCXoHNo 3aDaHHo CKOpocTbHO.
BeHTnJIrToP «M» peKIM.
- BeHTnJIrTop pa6OtaET cyTahOBJIeHHoN CKOpocTbH, a KOMnPecccOp He pa6OtaeT.
- PerynipoBka TempepatypbI He3ΦΦeKTHBHa.
1) Beja: He pa6oTaet.
AhaJIIn3:
a) Bo3MOxHcpa6aTbIBaHHe npedoxpAHNTeJI nn npedeoxpAHNTeJI nepeoropeJ, nooKdTe 3 MInHyTbI n 3anyCTnTe cHOBa, npedeoxpAHNTeJIHOE yCTpoiCTBO MOKeT npenrTcTBoBAb pa6ote ycTPOiCTBa.
c) Bo3MOxHNO, 6aTapeiKn B nyIbTe IncTaHnOHHoro ynpabInHe npa3pAnuNcB.
B03MOXHO,BNIKA HENpaBnIbHo BCTaBNeHa.
2)Поблема:работаet только на КорOTКOE Время
AhaJin3:
a) ecJIn yCTaHOBJIeHHa TEmpeAtypa 6JIN3ka K KOMHaTHoN, Bbl MoXeTe IIOHN3NTb yCTaHOBJIeHHyO TEMpeAtypy.
6) BO3MOxH0, BbIXoD BO3dyxa 3a6nKnpOBaH npeTCTBneM. YcTpahnte npenrTCTBne.
3)Поблема: pa60taeT, HO He octbIbaeT
AhaJin3:
a) BO3MOXHO, DBepb INN OKHO OTKpbITbl.
6) BO3MOXHO, B HENOCpeIcTBeHHoB 6JIIN3OCTn HaxoIITcra Ipyro np6op, pa6oTaIOUm ot TeIIa, HApPImep, o6OrpeBaTeIb IIIM JAMNA N T. D.
B) BO3dUshbI ΦnJbTp 3aTpr3HeH, OUYCTnte eRO.
T) BO3DyX03a6OpHnK IJIN BbIXoHoe OTBepCTne 3a6NOKIpObaHO.
e) yctaHOBHeHHa TEmnepaTpya CmIKOM BbICKa.
4)Пpo6JIeMa:уTeUkaBoДыпprnДВИЖeHIN.
AhaJIIn3:
a) nepe npemeHcneHcT
6) BO n36exkHne npoTeKN BODb pa3MeaJte yCTpoIcTBO Ha pOBHOI NOBepxHocTN.
5)Пpo6IeMa: He pa6oTaITe, roPHT INHdIkaTOp 3aONJIHeHnB BoIbI «W.F».
AhaJIIn3:
a) BbItaunTe pe3nHOByIO npO6ky, yTo6bl CInTb BDOy.
6)ecn OH yacto 6bIbaet B TaKOM COCTOAHIN, oBpaNTeCb K KBaIINΦHIpOBaHHOMY TexHNueckOMy CneUaJIncTy.
IcnpaBneHne npo6nem
6)Пpo6лема:устpoичТBO He 3anyckaeTcA.
AhaJin3:
a) BO3MOxH0, He noKJIIOueH. IVtak, noKJIIOHTe erO.
6) BO3MOXHO NOBpeKdEHeN BUNIK NnIPO3eTKN. 3aMeHHTe NoCTaBUnKOM yCnyr.
B) BO3MOxHNO, neperopel npeoxpaHITeIb. 3aMeHITe npeoxpaHITeIb y noCTaUka ycnyr (cneuKau: 3,15 A / 250 B nepemHHoro ToKa).
7)Пpo6лema:устpoичТВо abTomatUcheKn ocTaHaBnBaTeTc.
AHaJIIn3:
a) OTKIIOHHe NO BpeMeHN IIN DOCTNKeHne 3aHaHHo TEMnepaTpybI. Ipee3arpy3nte erO IIN DoXdNTecb ABTOMATueckoro nepeKIOUcHnE.
8)Пpo6лema:НетхолоногоВОзdyxaВ ржиме OXЛАЖДЕHINE«К».
AhaJin3:
a) KOMHaTHa TEmnepaTypa Hxke yCTaHOBLeHHoH. 3TO HopMaJIbHOe ABLHeHne, MaUNHa aBTOMaTnueCKn nepeKlHoayetcra, Korda TeMnepaTypa B NOMeHnn Bblwe yCTaHOBNeHHoH.
6) YcTpoiCTBO BXoNT B 3aunTy OT 3amep3aHn. YcTpoiCTBO aBtOMaTHueCKn nepeKNIouHTc nocIe cpaBaTBaHn 3aunTbI OT 3amep3aHn.
9) HencpaBHOCTb: CBeToIOIOHbI INcPNeI NOka3bBaet KoI HenCpabBHOCTN «EO».
AhaJIIn3:
a) daTnK Tempeatpyb IB NOMEeHIN BblIeN I3 CTPOJ INI NOBpeXKeH. 3aMeHInTe daTnK Tempeatpyb IB NOMEeHIN y nOCTaBUnka ycIyr.
10) HenncpabHoctb: cBeToIOIDhB Iucnne NOKa3bIbAe KOD HeNCnpaBHOCTN «E4».
AhaJIi3:
a) npedynpckdene o noHnom 3anonHeHH BOOn. CJeTe BOy.
YICTKA IN TEXHINUECKOE OBCJNYKINBAHNE
06cnykmbaHne yctpoiCTBa
1.Перд OTКЛIOUHHeM OTe INTOCHNka ПИТАнг ВБIKIQUHTe yCTPOnCTBO.
2. IpoTpnte MraKo cyXO TkaHbIO.EcI np6op ouHb rpa3HbI, nCnoJIb3yIte TeIpyo BDOy npTeMnepaType Hxke 40^ C.
3. Hikorda He nCnojIb3yIe Ietyne BeIecTba, TaKe KaK 6eH3nH nnNoI npoBaIbHbI NopoOwOk, dJIa OChCTKn YcTpOInCTBa.
06cnyxmbaHne BO3dyuHoro fNJIbTpa
Heo6xOIMMO OUYaTB BO3dyuHbI ΦnIbTp KaKdIe 2 HeJeI, ecnn yctpoiCTBO pa6oTaET B ouehb 3aBilneHHoI cpeIe. OunCTnte CJeDyUoIIM o6pa3OM:
TEXHUYECKNE DAHHBIE:
XoONOpOnPOn3BODnTeNbHOCtB B BTE:9000 BTE/uaC
XoONOpOnPOn3BODnTeNbHOCTb B BAeTax: 2600BT
3Hepronotpe6JeHne (oxIaJxDHe) Bt: 950 Bt
TpOMKocTB: < = 64D6
PacxoB03dyxa:270m3/4
3HepeTeTneckn KJIacc: A
Taimep:24 yaca
Bec oxlaqdaoue jxukoctn R290: mka. 160 rpaMM
HanpajkeHne 220-240 B 50 T

OctopoxHo, onaHocTh noKapa.
HE npokanbBaTb n He Cxiratb.
POMHHTe, YTO XlaIaIaReHT He MoXKeT coIepKaIb 3anax.
MaKcImaJIbHoe KOJIueCtBO 3anpaBIAeMOro XlaIaReHrTa:160 r.
3a60TcB 6bKpyKaHcpe.ynakOBky n3 KAPToHa nepedaite,noXaIyIcTa,Ha MaKyIaTyp. IOnmTneHOBBie MeWKn (PE) BbIKDaTb B p3epByap dIyPiactMaCCbl. H3NooehHOe yCTPOCTBO HApO nepeDAtb B COOTBeCTBYOuTO TOpKxpaHeHnra, TaK KaHaxOJaUncBcYCTPOIcTBEOAnChBle CoCTABnIOUme MOrTy ABJrBCy rypO30n DnO OKpyKaHOe CpeDb. 3NeKtpnueckoe yCTPOCTBO HApO nepeDAtb TAKIM OpbzOM, YTO6bI OrpaHnHTb Ero NOBtPOHoe yNtpeBHe NcONb3OBAHne. EcIn B yCTPOIcTB HaxOJaTcBaTapeH, INHao BbITAHyTb N pepeDAtb BToukY XpaHEHnO tDeJIbHo. UCTPOCTBO He BbIKDaTb B p3epByap dIy KOMMyHaJIbHbIX OTxOIOB!
ITALIANO
Ventilator "M." -tilstand.
IPIN THN IPQTH XPHSH - (Eikova E)
Suvtnpnon pIaTpu aepa
MHN tputnate n kaite.
AβεTE UTOI TO yukTIKo μTPOe i va μην TEPiEx Oμn.
H TTOOtNTa ophiou yukTKoU oEou: 160g.
SNEREBLANNA
ALGEMENE VEILIGHEIDSVOORWAARDEN
BELANGRIJKE VEILIGHEIDSINSTRUCTIES LEES AANDACHTIG EN BEWAAR VOOR TOEKOMST
DAHHCN YNPABJbAu-cnkaI.
JaBnHcN ynpaBbA npenoc cnHaIe npjemHky CnHaIa (3).
Dyrrme "A"-ypehaj he cnoKpeHyTu KaJa je noH HanoHom nIn He ce 3ayctaBHTn DOK paN, Ako npntncHe OBO Dyrme.
Dyrrme "L" - npntncnre ra 3a n36op pexnma pada: "K", "J" nn "M". Ondrobajpyh nHdkatop he ce ynaHTN.
Dyrrme "B" - npntncnre ra 3a n36op 6p3nHe BeHTnataOp a Hn3y. Ondrobajayh nnHdkatop he ce ynaNTn.
Dyrrme "Д" / "E" - npntnchnte da 6ncte noDecnnn JKeJbeHy tempeatpy y npocTopnj nn Tajmep. Ppka3 ,C" npka3yje KeJbeHy Tempeatpy, a He TpeHyTHy Tempeatpy y npocTopnj.
Dyrrme "H" - npTnCHNTe 3a noDeIaBaBe BpeMeHa ayTomatCKor NckbYuNbHa n ayTomatCKor yKbYuNbHa.
PADyPABbAueKIIIOUE
XIAHNO/CUHNO/BEHTINATOP
- Ykbyuhtye ypehaj.
a) Pπρκλbγυηte ypehaj, a 3aτιν θε ce ypehaj ornacntu jeδHOM.
6)Пи捜снITE дугme "A", a 3atm he ce ypehaj yкьычт.
ü) JIENDINCNNEJ npKka3yje noDeeH NeuMepaTpy.
2.Oda6epeTe Naunpa
PnTncnte DyIme "L" da 6ncte n3a6paan JkeJbEnn HauH npa npema peDocney:
HauHH xhaheBa "K"--> HauHH cyweBa "I"--> HauHH paaba BeHTnlaTopa "M"
3.ПодесиTe Temпepатуру
Temnepatypa ce moxe noecun y paonohy od 16°-31°L. PnTncnte dyrme "I" uN "E" da 6ncte jeHOM nObehaHn nn CmaHn nn Temnepatypy 3a 1° L. IED nloya ypehaja npka3yje cnilbHy Temnepatypy 5 cekyn, a 3aTm npka3yje nodeheny Temnepatypy, a He TpeHy y npocstopin.
Hakon noeaaaba temepaType y pexmy xnaheba ,K" ako noHOBO n3a6epTe pexm xnaheba ,K" uIN pexm BeHTnataTopa "M",JIED dinCnnej npka3yje nopa3ymeBaHy cInbHy temepaTypy 25° U.
- BeHTnJIatOp he paIaTI npu mAIIOJ 6p3Hn I 6p3Ha ce He MoKe IIOdeCInT.
Iopeaabahe TemepaType Hnje ephiKacHO. Ypehaj ayTomatcKn Iooewaaba IooeweHy TemepaTy 2 己 lcnoD co6He
TempeType npn ynapcy y pexim OdBnaKBaHa.
- Kaça ce co6ha tempepaTypa ≤ 16 °C He Moxe oBnaKHTn, BeHTnlaTOp he paIITn npi MaJIIM 6p3Hama. YINO3OPEHbE:
Ppnnikom pada ypehajy ycIOBIMApomHbIbe BnaXHOCTn, OBOHN 8) 6n Tpe6ao 6NTn CTaIHO ODBOD BOe. 3a ydo6ho nCnyuTaBe BOe KopnCTnte uekoja ce Hana3n y KOMNNeTy.
XJIADHIN"K"pejxIM:
- Kaça je co6ha TempepaType Bnla oD 3aTe TempepaType Ha KOHTpOHOJ Tabl, KOMPecOp noUHe da paDi. Ypehaj xIaDi npocstopiy.
- KaJa je co6Ha TempepaTpya HIXa OJ 3aIate TempepaType Ha KOHTpOJIHOJ Ta6JI, KOMPecOp ce 3ayCTABBa N BENTINaTOp paI npn npBo6nTHo NOdeUeHoj 6p3HHI.
PekmBentnataTopa"M".
- BeHTnJaTOp paIIN IOeIeHOM 6p3IHOM, a KOMnpecOp He paIIN.
2.Подшаваныеtemпаразиенjee epnkacho.
Tajmep"H":
1.Пптснite Дугмe“H"3a noDeшаВаье ВрemeHa ayTomatckor nckbvyBaHa дok ypehaj paДn.
2.Пптисніе Дугмe“H"3a noDEшаBa№ ayTomatckor yкьучиBa№ДOK je уpehaj cnpeMaH.
3.BpeMe ce moKe nOecnTu y paCOnHy o1 cata do 24 cata npTnCKOM Ha dyIme "D" (+) nn "E" (-).
0jaba:
Tnabha KOHTPOJHa IIOUa HMa MemOpjcky fynKunjy, KaJa je ypehaj cnpemah 3a pad, aIn y cTaTcy 3ayCTaBbAba, Tnabha KOHTPOJHa IIOUa MoKe 3aamTITN INHcJanaIN3aCJy padHOr pexIma. KaJa yKbYuHte jeINHcU, OHa he paDITN Kao nCTn paDNpexIM KAO INpoWNIpy, Hema Notpe6e da noHOBO NOCTABbATE padHn peXIM.
DAJbHCKN UYPABJbAH
- TpyHnTe 3aIbI noknonau da 6ncTe ra OTBOpNJN iCKHHTe I3OlaunOH fJIM ca 6aTepeJa.
- YeMeTHnIe 6aTepeJy oJeBak ca nCnpaBHOM cTpaHOM. IOnOBn 6aTepeJia Mopajy OndroBaPaTN 3HaKOBIMa "+" " HaJaBnHcKOM ynpablaay.
3.ИЗвашие батуговема Бз уnotpe6e.
4.ДабиTe cnpeHn 3arahebe JKBOTHe cpeHne,ИЗBaNTe nCTpoWeH e batepniJ e OndoxNte nx Ha be36edan noTROBapajyHn HauHH.
Ia 6ncte ynpabbaJn ypehajem, ycmepnte daBnHcN ynpabbauch (4) npema npjemHKy cHana (3). DaBnHckn ynpabbauch (4) he ynpabbaTn ypehajem Ha ydaBeHoCTn od 5 MeTapa Kaia nokaYJe Ha npjemHK cHana (3) ypehaja.
3AWTHTHN YPETBJN
3aHTTNH ypehaj moke da ce cnoTaKHe 3ayctabn ypehaj y done HabeDeHm CnyajeBMa:
1.y pexmy xnaheha: TemnepaTypa Ba3dyxa y 3aTbopeHOM npocTopy je npeko 43^ L
2.ypeKmMy xnaheHa:co6Ha temnepaTypa je nCnoD 16^ L
3.ypeKIMy OdBnaxKbHa:b:co6ha TeMnepaTypa je nCno16°L
Ako ypehaj paani y pekmy xnaheba, K" nIOn OdbnaxnBaHe, " ca OTbOpEHm BpaTnMa IIN npO3Opom dyke BpeMe kaJa je peNaBBA BlaXHocT Ba3dyxa n3HaD 80%, poca moKe da KaJIbe n3 n3Ja3a.
3aunTHn ypehaj he pauny cneheHm cnyuajeBma:
- NohOBn NOpeTaBe ypehaja OdMax HAKOH IpocTaHka paJa nn npomHe n3a6paHor pexmTa TOKOM paJa, Mopate caeKaTn 3 MNHyTa.
- Ako je yTnKaay KIOHbEn, HAKOH noHOBHor nokpeTaHa ypehaj he ce BpaTn y npBo6uTHn peXmM, TIMEP OH n TIMEP OΦΦ - Mopajy ce noHOBO NOCTaBtN.
HANIOMEHA: yypehajy ce kpije peuzknpahe KOHNHe3OBAHe BOe. KOHNHe3aOnoHa BOa ce DeIIMnUHO peuzknpa n3Mehy KOHNHe3aTopa uYpahjene nloue 3a BOy. Ka a ce HbO BOe noirhe Ha ropbu HbO, noinke Ce npeknaayem Ha IIOBak, a 3aTtM (B.Φ.) cBeTIN uHdkatop nyHor HbOa BOe "P" da BAC NOcETn Da NCnyCTte BOy. PpeKnHTe Hanajahe ctpyjom, npemjcTe yehaj ha oJroBaapjhe mjcTo, yknOHte Yen 3a NcNyTahe, notnyHO nCnpa3Hte BOy. Hako hcyTuHa, noHOBO yMeTHne ODBoHn Yen (8) nn ypehaj moKe npouypntu uYunHIn BAuy co6y MOKpOM. Ako ce He nCnpa3Hn 5 MmHyta Hako B.Ф. Ka ja je INDkaqja ykbyuheHa ekpaHy he ce npka3aTn E4.
Ako je anapat noctabbe Ha MeCTO 3a IcnyuTaBe ODbODHe BOe, Takohe MoXeTe NOBcTn ODbODHy cEB Ca ODbODHm OTBOPOM 3a IcnyuTaBe BOe. ODbODHa ce DoJaJe y KomnNet, Ca HyTpauhHm IppeHnKoM 9 MM, CNoBHM IppeHnKoM 12 MM,
MATEPNJAN:INBLI.
PeuabaBHe npo6Jema
1)Поблелм: He paДиTe.
Ahanm3a:
a) Mojda je 3aHTTNH npekndaun ocnrypaun nperopeo, cayekajte 3 MInyta nNoHNTE noHOBO, 3aHTTNH ypehaj Mojda cnpeyaba pad ypehaja.
U)MOKda cy ce 6aTepeJe y daBnHcKom ynpabBaayu nCpna3Hnne.
Д) можда утickenчи ще правлно рпкъчен.
2)Поблел: ради само кратко Врeme
Ananu3a:
a) ako je noideuheha Tempeatypa 6n3y co6he Tempeatype, moKeTe je cmaHbntn.
6) moKja je n3na3 6nokpaH npenpekom. YknOHTe npenpeky.
3)Поблел:Ради,аин He xnaи
Ananina:
a) MoJda cy BpaTa nn IpO3Op OTBopeHn.
6) Mojda y 6n3nnnoctoj npyn pyehaj kojn paH na TOnnToN, nOyT rpejaya nn lamne, nTd.
U)Ba3dyuHnΦnItepe npBab,OuNCTnte ra.
i) n3Ja3 nn yJa3 Ba3dya cy 6nOKupaHn.
Φ) nOeSeHa TeMnepaTpya je npEbncoKa.
4)Поблел:Чуренье BODE TOKOM KpeTaHa.
Ahaun3a:
a) NcnyTe KOHDeH3aT npe NOMepaHa.
6) da 6nCTe n36erIu typeHe BoDe, noCTaBnTe ypehaj Ha paBHO TNO.
5)Поблел: He paДиТи ИнДиКаТор HanYьЕнOCТи BOДOM ,B.Ф" cBeTnI
Ananin3a:
a) n3ByuTe rymeHn YeI 3a IcnyuTaHaBe BOJe.
6) ako je yeTo y oOB mCTaHb, oBaTnTe ce KBaIuΦnKOBaHOJ TexHnKoJ cnYk6n.
PeWaaBaHbpe npo6nema
6)Пpo6JIem: Ypehaj ce He nokpehe.
Aha#a3a:
a) MoKda Hnje npNKbUeye. DaKne, yKbUyHte ra.
6) MoKda oWTeHeBe yTnKaayu nn yTuHnue. 3aMeHIne KoD IO6abBaayu cnyra.
B)MOxJa je ocInrypaN pOKBapeH.3aMeHnTe ocInrypaN oD IO6abJbaua ycnyra (cneuΦkaunja: 3,15A/250BAL).
7)Пpo6лeM:Урehaj ce ayToMaTcKn 3ayCTaBbA.
Ananin3a:
a) NCKbUyHbAbe BpeMeHa IINI DoCTn3aBe 3aTe TeMnepaType. IOnHOBa IpOKpeHte IINI caYeKaJte ayTomatcko npeBaunBaHe.
8)Пpo6лeM: Hema xlaIaHor Ba3dya y peKmY LOOJI "K".
AhaJn3a:
a) co6ha TemnepaTpa je Hnka od noJeHe TemnepaTpe. To je HopMaHa noJaBa, MaunHa he ce ayTomatckn npebauNTn Dok je co6ha TemnepaTpa BnHa oD 3aTe TemnepaTpe.
6) Ypehaj yna3n y 3aunTu od cmp3aBaHa. Ypehaj he ce aytomatckn ppebaunH akOH To ce 3aBpHn 3aunTa oD cmp3aBaHa.
9)Поблел:ЛЕД диспай щрказуjee кд Краза ,E0"
Anjna3a:
a) ceh3op co6he temnepaType oTKkae nIe ce oWTeTn. IobabJbay ycnyra 3ameHn ceh3op co6He temnepaType.
10)Поблел:ЛДдиспльnpикадужкнгтpeшke"E4"
AhaHIm3a:
a) yno3opehe o nyhoj BOiN. IcnyctTe BoIy.
UHHeBNE ODPKABAH
Ondkabaheypehaja
1.Ппeнckыунbaа ca HanajaHa nckbyuTe ypehaj.
2. 06pniHte MeKOM n cybOM KPNOM. KopnCTHe MnaKy BDOy NcNO4 40^ Li 3a Ynshene ako je anapaT jako npIbA.
3. 3a nuihebe ypehaja Hnka da hemoje Kopncnttnncnapbne Cynctanue, noyt 6eHnHa nn npaa Ka 3a noiparabe.
OdpkaabaBeBa3DyushorФnItepa
Φππερ 3a Ba3dμx je ποτpe6H O uCtιTn CBAke 2 HepeJbe aKo ypehaj paɪn y n3y3eTHO ppaHbAOM OkpyKeBv. OuNCTnte Ha cIeHeH hauH:
1.Прво 3ауctавиTe ypehaj,грнITE Ba3duyuHnФплтep пема rape (слкaΦ).
2. OuInCTnTe n BpaTne Ba3dyuHn nnTep.
3. Ako je npJBabTuHa ynaIbNbBa, onepnte je pactBopom detepeHtay MnaKoJ BoNn. Hakoon uHHeBa ocuWnte ra Ha
OdpkaBaHbe HakoH ce3oHcke ynoTppe6e
1.Ako ypehaj HeheTe KopnCTHTu Dyke Bpeme, oBaBe3HO n3ByuTe rymen Yen OndoHe pyne (8) KaKo 6ncte Ncnpa3HnIn Body.
2. Yehehaj Heka paDi ca BeHTnIaTOPOM cMo IOnla DaHa TOKOM cyHuaHor daHa da ce anapaT ocUu y HyTpawbocTu n cnpeu CTbapAbe PneCHN.
3. 3ayctabnte ypehaj n 13ByuNTe yTuKaH ka6na 3a HanajaJIbe, 3aTm N3BaJNTe 6aTepeJIe daBnHcKOr ynpaBbAua HypeHO
OJIOKHTyejaj.
- Ouchntte Ba3dyuHHn fIJItep nIOHOBO rA noCTaBNTe.
- YKIOHnTe UpeBa 3a Ba3dUx IN npabINHO IN CKNaIIMHTne, a pyNy YBpCTo NOKpnjTe.
TEXHnUKNIOALN:
KanaqtTeT xnaheha Ha BTy: 9000 BTy / cat
KanaunTeT xnaheha y BaTmAm: 2600 B
Iotpouhaeneprnje (xnahebe)B:950 B
JaunHa 3Byka: < = 64 έ
PpToK Ba3Dyxa: 270 m3/x
Ehepretcka klaaca:A
Tajmep: 24 cata
P290 TeKHa paacxnaIHe TeHocTn: MaK. 160 rpaMa
HanoH 220-240B 50X3

Onpe3, onacnoct od noxkapa
HE6byuHTe nHe naHTe.
IImajTe Ha yMy da pacxnaHcpeiCTBO MOKJa He caPkn MmPnc.
MaKcImaHa KOJIuHnHa nyHeBa paXnaIHor cpeIcTBa:160r.
3a 3aHTy JxNBOThe CpeHHe: MOJIMOB Bac Da OdoBojnte KapTOHcKe KyTnje N PnactTuHHe Kece N OndnoKTe nX y OndroBapajyHe KaHTe 3a CmeHe. KopuShHeHn ypehaj Tpe6a Da 6yde Ncnpuyen Ha HameHcKe cakynBaHe TaUKe 360r OwTpnx KOMNoHEHTn, WTo MoKe yTuCaATn Ha JxNBOTHy CpeDInHy. HeMoJTe Ondaratn Obaj ypehaj y 3ajeHNuKy Kopny 3a OTnATke.
SVENSKA
ALLMÄNNASAKERHETSVILLKOR
VIKTIGA SÄKERHETSINSTRUKTIONER LÄS NU OCH SPARA FÖR FRAMTID
Varning, risk for brand.
Pexm oxioJoxeHHN "K" -> pexm cyuHnH "L"-> pekm BeHTnIaTopa "M."
3. BiDpeRyIIOIte TemnepaTpy
Temnepatypy moHa BCTaHOBuN B diaa3oHi 16°-31° C. HATNCiB KhoNky "D" a60 "E", 9o6 36iNbHTu a60 3MeHUnTt Temnepatypy Ha 1° C, HATNCHyBwOn OAnH pa3. CbiTIOIOHa NaHeI npCtpoHO noka3yec ZInbOBy Temnepatypy npotrrom 5 cekyHd, a Notim BiIObpaXac BCTaHOBLeHy Temnepatypy, a He Temnepatypy B KimHati.
Iicra BcTahOBHeHHa Tempeatpyn B pexKMI oxoOnOKeHHa K, JaKIO Bu 3HOBy Bn 3HOBy Bn6ePeTe peKIM OxonoKeHHa K" a6o peKIM BeHTnIaTopa M", To cBtIoJIOHni DmCnne NOKae CTAHapTHy 3aHaHy Tempeatpy 25 °C.
4. BiDperynIe WbNdkicTb BeHTnJIrTopa
HaTnCHiB KhoNky "B", 106 Bn6paTu nOtpi6Hy WbUdkicTh BeHTnIaTopa, noka3aHy 3a nocniobHcTIO:
Hn3bka WbNdkicTb "F"->BncOka WbNdkicTb G
5. NotykhicTb
PnIOBTOPHOMy HATNCKaHHI KHOKN "A" npncpti npolyhae "di" i nepectane npaOBAtn.
- Hatnchitb 10 KhoNkY "N", 106 BCTaHOBtTu TaMep.
Peknmu p6oToT:
PeximocyuJehra"L":
- BeHTnJIyTOp 6ynde npauHOBaTn Ha Hn3bKii WbNdkocTi, i WbNdkicTb He MoXHa peRyIHOBaTn.
PeryIIOBaHHa Tempepatypn HeepeKTHBHe. PpncTpi aBToMaTuHOp peryIIOE BCTaHOBneHy Tempepatpy Ha 2° C HIXKue KIMHaTHOI Tempepatypn npn nepeXoDi B peKIM ocUeHHA.
- Koln KimhaTha Temnepatya ≤ 16^ He Moke ocuyBaTncb, BeHTnIaTOp npaObaTme Ha Hn3bKi WbNdkocTi.
YBAGA:
PnEeknnyataqii npncToPO B yMOBax p3HOI BOJorOCTI 3JINbHa np6ka (8) nobHHa 6ytN noCTiHb BiKpntoIO i 3a6e3neUyBaTN noCTiHm 3JINB BODn. DnA 3pyuHoro 3JINBy BODn BIKOpNCTOByte Tpy6ky, 00 BxOaNtB do KOMnNEkTy.
XOJIOHNI peKIM "K":
- Kolni TemnepaTpya B kimHati nepeBnUyec BCTaHOBJIeHy TemnepaTpyu Ha naHei ynpabJIHH, KOMnPecop nouHae npauBoAtn.
Ppnaad oxoJodky npmiueHHa.
- KoJI N TeMnepaTpya B npmiiueHHI HxKye BCTaHOBNeHoi TeMnepaTypu Ha naHeni ynpabNIIHH, KOMnpecOp 3ynHReTBcA, a BEHTNJrTO pauOe 3 NOATKOBO BCTaHOBJeHOIO WBNIKCtIO.
PexmBentnIaTopa"M".
-
BeHTnJIaTOp npauoE 3 BCTaHOBJIeHOU WbIaKICTHO, a KOMnPpeCOp He npauoE.
-
PeryIIOBaHHa TempepaTpy HeepeKTHIBHe.
OuHJEHHA OBCJYTOBYAHHH
TexHnHe 06cIyROByaHHN npNCtpoHO
- Nepu Hix BIDKNHOATn DKepeJeNo XJNBJEHn, BIMKHiB npncTpii.
2.ПopotриМякови сухо raHicpkoI.ДЯнишни npnay BnkopncToByTe Tenny Body HnKue 40°C. - Hikon He BnKopncToByTe dIra OunuHHe npNcTpoIO IeTI peObHN, Taki Jk 6eH3IN a6o nIpYBaJIbHn nopoWok.
Texhihe o6cnyroByBaHHn noBipraHoro fIbtpa
Iotpip6HO ouHuaTn nobitprn H Kxhi 2 Tnxhi, kuo npicpti npaue B Ha3BuaaHno 3aHJIeHomy cepedobuui. OucntItb TAKIM YHOM:
1.CnoaATky 3ynHnHb npncTpi, nIDHIMtB nobITpyHn fipb Brpy (MaJIOHOK F).
2. Ouchitib Ta BCTaHOBItb NOBITpHm fInbTp.
3. JkUo 6pyd nOMiTHn, npomnte noTo po3HnHom MIOOHOro 3acO6y B Tenni BODi. IicIra YIueHHBNCuWITb NOrO B 3aTIHeHOMy i npoxIoHOMy Micci, a NotIM BCtAHOBiTb Ha Micce.
Texhihe 06cnyroByaHHn iicna ce3OHHO BkOpNCTAHH
- JkIo npncptiH He 6yde npaOBAtn npotrrom Tpmbaloro yacy, oob'3KOBO BnTgHiB rmyoBy npo6ky 3JINBHOrO OTbOpy (8), 0o6 3JIHTN BOy.
- TpmaIte npnad y pexmi BeHTnIaTopa Nnse nIBnH npotrrom COHryHO Dn, 06 BnCyuHTn npnaD BCEpuHi Ta 3ano6irtn uBilno.
- BumKHiB npIcTpi i BITaRHiB 1teKeP shypa KnBHeHn, nOtIM BnMItb 6aTaepi NyIbTa dNCTaHcHOro KepyBaHHra Ta 36epiraTe npIcTpi HaleKHM YHOM.
4.OuHCTIb NOBITpHnIbIbTp I BCTaHOBt bNoHa Micue. - 3HIMITb NOBITpHi IaHaHrTa 36epiraTe ix HAnExKHM YHOM, a OTBip UJIbHO 3akpInTe.
TEXHIUHIDAHI:
IotyXhictb oxoJoxeHHHa BTU: 9000 BTU / ro
NotyKhictb oxoJOnOxKeHHaY BaTax: 2600 Bt
CnoxnbHn eheprii (oxoJdoKeHH) B: 950 BT
ΓγuHicTB:<=64dB
Notik nobiterp: 270 m3/roD
EhepretnuHn KnaC:A
Taimep: 24 roDHH
Baro oxonodkyuoyoi piinH R290:macc.160 rpaM
Hanpyra 220-240B 50Γ
ObepeKhiCt b, He6e3neKa noXeKi. HE npokoiHoe Ta He ropiB MaTe Ha yBa3i, 10 XOIOoAeHT MoKe He MICTTN 3anaxy.
MaKcImaJIbHa KJIbKICt b3apAу XoJIoOaReHTy: 160r.
Y iHTepecax HABKoJiNHbOTo cepeDoBnua.
Бydлackа,Вidдайткартону упakовь в мicе 3бору мукуатypи.Политиелови МИКИНВ CBITHNKДЯ пл actky.Вidпрацьогани рисчгій поинен bytвidправлени y BiID nobiDny toky 3берiraHHa, TOMU lo B npicstpoi e Hebe3neuHi InrpeiEHTN,яki moKyTB cTahOBHTN 3arpo3y habKOJIshbOMy cepeoBnUy.ЕнeКtrpuyнri npicstpiŋ notpi6no nobepHytn tak,ш6обобmexHTN noTO nobTOPhe BHKOPcSTAHNЯ.Kso y pIncSTPOI e 6atepeKn,To notpi6hoix BVTRAHyTN i BIDATn Do BIID nobIDHOrO nyHTKY.
MAKeEOHCKN
ONIHTN YCIOBN 3A B6E3BENDHOCT
BAHINHCTPYKUN 3A BE3BEOCT IPOUHTAJTE BHNMaTeJHO IN 3aWTeJeTe 3a INHINHA
- Празда Го кориспгуpeДOT, почитajte Го улатCTBOTO 3a pa6ToA n cIeTe ГулатCTBaTа COdpxaHn BO Hero. ПразИЗВОДNTeЛOT He OДROBapa 3a StTeTn PpeDIN3BVKaHn OД Кориспье Ha ypeДOT CnpOTINBHO Ha HameHETaTa HameHa IПN HeINPaBInHOpabTeHBe.
- YpeodTo cAmo 3a domaHa ynoTe6a. He KopncTeTe 3a npuTn TTo He ce 3a HameHeTaTataeI.
- YpeodTpe6a da ce noBp3e cmo co uTekep 3a HanojyBahe co 3a3emjeH 220 240V
50Hz 3a da ce 3rolemn 6e36eHocTa BO pa6oTeHbETo, NOBeKe eJektpuHn ypei HtepeBa da 6nDat NOBp3aHn CO eDHO cTpyjHo KOLO BO nCTO BpeMe.
- Kopnctete rolema npetna3nBOCT kora ro KOpNCTnte ypeoT kora decaTa ce BO 6n3Ha. He do3BOnyBaJTe dea Ta da cn nrgaaT co ypeoT, He do3BOJyBajTe dea nnIyre kon He ce 3an03HaTu co ypeoT da ro Kopnctat.
- ПРЕДУПЕДУBAE: Obaa onpeMa може да ѳ користд eca hab 8 roDINи илцaco ORpaHnueHa Фн3nUka, ceH3OpHa nIIM MeNTaJIHa cNoCo6HocT, nIIM lyre kon HeMaat NCKyCTBO nIIM NO3HaBaHBe Ha ONpeMaTa, dOKoJky Toa e HAnpaBeHo nOd NaD3Op HaODROBOPHO JIuce 3a HNBHata 6e36eHocT nIIM e daDEHa INΦopMaunja 3a 6e36eHNOKOPNCTeHbE Ha ypeDTo I Ce CBecHn 3a ONaCHOCTITE OD HeROBOTo KOPNCTeHbE. DeZaTa He TpeBa Da cn nIrpaat co ONpeMa. YInCTeHbeto n OdpKByBaHbEtO Ha ypeDTo He TpeBa Da ro BpWaT Deca, OCBen aKO He CE hab 8 roDINи NBne AKTINBHOCTn Ce BpWAT nOd NaD3Op.
- Cekoraш Исклунува对接угота наюува对接угота наюува对接угота наюува对接угота наюува对接угота наюува对接угота наюува对接угота наюува对接угота наюува对接угота наюува对接угота наюува对接угота наюува对接угота наюУвая.
- Cekoraш Исклунува对接угота наюува对接угота наюува对接угота наюуonta对接угота наюуonta对接угота наюуonta对接угота наюуonta对接угота наюуonta对接угота наюуonta对接угота наюуonta对接угота наюуonta对接угота наюуonta对接угота наюуonta对接угота наюуonta对接угота наюуonta
- Cekoraш Исклунува对接угота наюуonta对接угота наюуonta对接угота наюуonta对接угота наюуonta对接угота наюуonta
- Cekoraш Исклунува对接угота наюуonta对接угота наюуonta对接угота наюуonta
- Cekoraш Исклунува对接угота наюуonta对接угота наюуonta
- Cekoraш Исклунува对接угота наюуonta对接угота наюуonta
- Cekoraш Исклунува对接угота наюуonta对接угота наюуonta
- Cekoraш Исклунува对接угота наюуonta对接угота наюуonta
- Cekoraш Исклунува对接угота наюуonta对接угота наюуonta
- Cekoraш Исклунува对接угота наюуonta对接угота наюуonta
- Cekoraш Исклунува对接угота наюуonta对接угота наюуonta
- Cekoraш Исклунува对接угота наюуonta对接угота наюуonta
- Cekoraш Исклунува对接угота наюуonta对接угота наюуonta
- Cekoraш Исклунува对接угота наюуonta对接угота наюуonta
- Cekoraш Исклунува对接угота наюуonta对接угота наюуonta
- Cekoraш Исклунува对接угота наюУья�е对接о
- Cekoraш Исклунува对接о
- Cekoraш Исклунува对接о
- Cekoraш Исклунува对接о
- Cekoraш Исклунува对接о
- Cekoraш Исклунува对接о
- Cekoraш Исклунува对接о
- Cekoraш Исклунува对接о
- Cekoraш Исклунува对接о
- Cekoraш Исклунуensa对接о
- Cekoraш Исклунуensa对接о
- Cekoraш Исклунуensa对接о
- Cekoraш Исклунуensa对接о
- Cekoraш Исклунуensa对接о
- Cekoraш Исклунуensa对接о
- Cekoraш Исклунуensa对接о
- Cekoraш Исклунуensa对接о
- Cekoraш Исклунуensa对接о
- CekORA SHI KINJYUBAJI TRO PRINKJLYUOKOT 3a HANOJYBAJIte CO ДРЖЕБЕ Na I STEKEPOT CO pakata no ynotpe6bata. HE BnleyeTe ro Ka6eJot 3a HANOJYBAJIte. Cakara no ynotpe6bata. Cakara no ynotpe6bata. Cakara no ynotpe6bata. Cakara no ynotpe6bata. Cakara no ynotpe6bata. Cakara no ynotpe6bata. Cakara no ynotpe6bata. Cakara no ynotpe6bata. Cakara no ynotpe6bata. Cakara no ynotpe6bata
- He ro notobajte ka6eIOT, npKnyokOT u cJIIOr ypei BO BODa IIN dpyra TeuHOCT. He ro n3noxybajte ro ypeiOT ha aTMocOepcKn ycNOBn (doXd, coHce i CInuHO) IIN KOpNCTeTe BO ycNOBn Ha BnCOKa BnaJxHOCT (6aHbN, BnaJxHn DomOBn 3a MObNJn TeNeΦoHn).
- Перношино поверува对接а на кабелот за наютусы. Ако кабелот за наютусы сортах,在 Треба дд ce 3amehn co cneцллпрана рpopавнида за поравka за дд ce n36erhe onachoct.
- He kopncTeTe ro anapatot co oWTeTeH ka6eI 3a haNojyBaJIbe IIN aKO e IcnyuTeH IIN OwTeTeH Ha KOJ 6nIO dpyr Naun HauH NII aKO He pa6OT npabUNHO. He nonpaBajTe ro ypeDTo cam, 6nJeKn NoCTOn OnaCHocT od eNeKtpueH yIap. IOnecTe ro oWTeTeHNOT ypeD Bo COoDBeTeH cepBnCeH ueHTap 3a npOBepKa IIN nonpaBka. Cnte nonpaBkn MoKe Da rN n3BpShyBaAT camO OBnacteHn cepBnCHn TouKn. HenpaBnIHo n3BpShenHe TneonpaBkn MoKAT da npeDN3BnKAaT cepNO3Ha ONaCHOCT 3a KOpNCHKOT.
- NocTabete ro ypeodot Ha naHa, cta6nHa NOBpHnHa, noJaIeKy oD TOnJIu KyjHcKn ypei KaKO wTO Ce: eJeKTprUeH WnOpet, rOpNJHnK 3a rAc, nTH.
- OcnrgypeTe ce deKa HnITo He ro 6noknpa Bne3OT Ha BO3dyXOT n 3Ne3OT Ha ypeDTo
- KopinCTeTo ypeoT cmo Ha pamHa NOBpHnHa 3a Da cnpeuTe n3JIeBaHe Ha KOHNDeH3aCunjata
- 3a Да ce obe36eДи дононтелна 3aшТИТа, прорачиВо e Дa ce Инстапра урд 3a пеocтанatura стуja (RCD) BO eЛeКТprHOTO KОLO co HOMHaJIha пeoCTaHaTa cтуja ШTO He наdmHyBa 30mA. 3a OBA пашajte eЛeKТprUap.
- PeioBHO uHCTeTe ro fIJItePOT 3a BO3dyx. PpeKBeHcJjata Ha uHCTeHe 3aBnCn OJ YNCTOTATA HA BO3dyXOT.
- Řtrakо ке ќисклунITE машинату, поекajte наималу 5 мнутп ррдда ќ вклунITE NOВТОРно.
- He kopinctete ro ypeot ha cohuebn mecta. Kora ypeot ce nperpee, 3aunntata od
nperpeBahe ke ce Bknyu ypeoT.
- 3a da ce obe36eNi eФикасHo NaideHbe, TpeBa Da ce ChyBa paCtoJaHne od HajMaIky 60 cm nomery cTpaHnUHnTe wallsuObN Ha ypeDoT n theIdot nnn Me6eNoT nnn 3aBeCnTe.
- Поради оранчehа на зavedьа на у畴от, akо разлката nomERY цHLHATA Temперatype и Temперatype на Н Okолина в пемногу rolема, He може за се постигецелта.
- 3a Да Гамалinte ризкот od пожар, щелковуар удap плповрда пуnotpe6а на Климатик, почтува对接 сдеднibe ochobни мерки на петпа3лвoc't: a) Поврете сс co 3a3emjenшт ekр со 3пина.
6) He oTcTaHyBaJTe ro 3a3emjyBaQOT.
B) He kopncTeTe ro aanTepoT.
r) He kopncTeTe npoJxhen Ka6eJ.
IcknyeTe ro KInma ypeoT nped cepBncnpahe.
r) KopncTeTe DBe nIIN NOBeKe Iuca 3a Da ro npemecTne NnHCTaIInpaTe KInMaTu3epoT. - He kopructeTe cpeIcTba ITO ro 3a6p3yBaat npouecot Ha oMp3HyBaIbe IINu YnCTeHe, OCBEN OHne npenopauAHN OD pON3BODNTeNoT.
- YpeIOT Tpe6a Da ce cyBa BO npocToPnJa 6e3 nocToJHo da pa6Otn N3BOp Ha naIeHBe, Ha npIMep: OTbOpeH OraH, rachn anapatN IIN eNeKtpuHn rpejaUn.
PNEIINPBATAUYNOTPEBA-(cNkaE)
Iobp3eTe n KOHeKTOpHTe CO n3yBHNOT KaHJI 3a BO3dyX Ha CJIeHNOB HauHH:
- IpoIOnJxTe ro n3dyBHNOT KaHAn 3a BO3dyx (9) n3BNeKyBajkn rN Dbata Kpaja Ha KaHaJIOT.
- 3aupapete ro n3dyBHNOT kaHAn 3a Bo3dyx (9) BO KOHeKTopoT Ha n3dyBHNOT kaHAn 3a Bo3dyx (10).
- Nobp3eTe ro KOHeKToPoT Ha n3dYbHnO T KaHaJ 3a Bo3dyx (10) co ypeIOT.
3ABEJIELKNI:
- YbajTe ro ypeDoT hajMaIky 1 MeTap noJaIeKy od TB nII paJa 3a da n36eHHe eJeKtPOMaHHeTHn ppeKN.
- He n3noxybajte ro ypeot noi dapektha coHcyeBa cbETnHa 3a da n36berhe Te n36JeDyBaBe Ha 6oJaTa Ha nobpunHaTata.
- He Habanybajte ro ypeiOT nobKe OE 35° nHn Haonaky 3a BpeMe HA TpaHCNOpTOT. Ako ypeiOT e npebTeH 3a BpeMe H TpaHCNOpTOT, cnWtete ro npabInHO nNoeKajte 2-4 Yaca nped da ro cTapTyBaTe.
- Ctabete ro ypeodT ha pamHa noBpHnHa co HaknoH nomaJ od 5^
- Edinuata pa6oTn noeikacno Ha opeedeHn Iokaun 3a npocTopnn, n36epTe ja HajdoopaTa Iokaunja:
-Покраиnpo3opeц,врataипсphaнczynpo3opeц. - Odpkybajre ro noTpe6hOTo pactojaHne od n3ne3OT ha noBpaTHnOT Bo3dyx Do wallnDt nn Dpyn npeKn HajMaIky 60 cm.
-Пюдогжete ro ueBOTo 3a BO3dYx 3a da ce OcHrypate Deka Ha npyHOT KpaJ Ha ueBOTo 3a BO3dYx IMa OTBOp nOmeFbPaTaTHa npo3opeoT, nIIN npo3opeoT od npo3opeoT, nIII wallnHaTa dynka. - IV3ne3OT nnn BHeCOT Ha BO3dyx He MoKe da Ce 6JIoKInpaat Co 3aUHTnHa MpeKa nn KaKbA 6JIO npeKa.
3a da ro npoJOnjKInTe JINBOOT Ha ypeIOT, NcueJe ta KOHnEHN3npaHaTb Oda oN OTBOPOT 3a ODBO (8) nped da ro cTabnteypeIOT BO CKnAinuTe Ha Kpajot Ha ce3OHata.
ONIC HA YPEJOT (cIknA u B)
- KoHTpOJIHa Ta6JIa 2. I3JIe3 3a IaIeH Bo3dIyX
- Peuentop Ha cnHan 4. JaeneHHckn ynpaByBaay
- PaKa 3a TpaHcNopt 6. N3dyBEN KaHaI
7.Bne3a ncapayBa 8.PnKnyOK 3a OBD
9.Bo3dyuWeHn3dyBeH KaHaJI 10.KoHeKToP Ha Bo3dyuWeHn3dyBeH KaHaI - AanTep 3a n3dyBn racobn Ha npo3opeoT
IIAHEJI 3A KOHTPOJA (cIka B)
A. Konue 3a Bknyvbahe
B. Konue 3a 6p3nHa Ha BeHTnJaTopoT
C. Konue 3a pexmm
D. Konue 3a Tajmep / TemnepaType
E. Tajmep / konye 3a HamaNyBaHe Ha TemnepaTpaTa
F. INDkaTOp 3a MaHa 6p3nHa Ha BeHTnTaTOP
G.Индikatop 3a rolemea 6p3nHa Ha BeHTnataTopOT
K. INHДиKaTOp 3a peXIM Ha NaDeHBe
L. INHINKATOp 3a peXIM 3a ODBnaxHyBaIbe
M.Индikatop 3a peЖIM Ha BeHTnlaTOp
N. Konue 3a Tajmep
R.WF-Индikatop 3a noJHa Boda
S. NocTaBete TemnepaTpya / npKka3 Ha Tajmep
- BeHTnIaTOpOT Ke pa60Tu Co MaHa 6p3NuHa N 6p3NuHaTa He MoKe Da ce npuNarOdi.
PpnilarOyBaHbeto Ha TemnepaTpya He e eKacHO. YpeoT AToMaTcKn ja npnilarOdyBa NoCTabeHa Ta temnepaTpya Ha 2° C noD co6Ha TemnepaTpya Kora BneryBaTe BO peKIM Ha OdBnaXHyBaHe.
- Kora co6ha TemnepaTpa ≤ 16^ He moKe da ce OdBnaXHH, BEHTnAtoPoT pa60Tu Co mJa 6p3Ha.
PNEyPENEYBAE:
Kora pa6oTne co ypeoT BO yCNoBn Ha pa3NnHa BnaxHocT, npKnyokot 3a OBD (8) Tpe6a da 6nde nocTojaHO OTbOpEN Ida oBe36eYBa noctoJana Hpehaja Ha BOJa. 3a yO6Ho OBOdhyBaHe Ha BOJa, KopncTe ja cEbkata BknyeHa BO KOMJIETOT.
PekmHa nahebe, K
-
Kora temnepatypata BO npocstopujata e nobucoka od noctabehata TempepaTpa Ha KOHTponHaTa Ta6na, Komnpecopot nohyBa da paobotu. Ypeodot ja nai npocstopujata.
-
Kora TemnepaTypata Bo npocTopujata e noHnCKa od noCTaBeHaTa TempepaTpya Ha KOHTponHaTa Ta6na, Komnpecopot 3aCTaHyBa n BeHTnlaTopoT pa60Tu co npBo6nTHaTa noCTaBeHa 6p3nHa.
PexIM Ha BeHTnJaTop "M".
- BeHTnlaTOpOT pa6oTu co nocTaBeHa 6p3iHa, a KOMnPecOpOT He pa6oTu.
2.ПиларуваьetoHaTeMnepaTypaTa He e epnkacHo.
Pa60ta Ha Tajmep "N":
- PnTcHete ro konyeto, N" 3a da noCTabte Bpe me 3a abTomatcko nckIyBaHe dokeka ypeot pa60tn.
2.ПиТиСHTe ro konTuTe N" 3a da noCTaBte ABtOMaTcKO BkIyUyBaHb e Ha BpeMe DoJeka ypeDTo nOДrTOBHe. - BpemTo MoKe Da ce npuiarOu Bo oncer o1 qacdo 24 qaca co npitncKaHe Ha konqTeo "D"+) nn "E"-).
3a6eJeuka:
Tnabhata KOHTponHa Tabna HMa MemOpnca cyHKunja, Kora ypeot e noIrotBeH 3a pa60ta, HO BO CTatyc Ha cTOn, Tnabhata KOHTponHa Tabna MoKe da 3anametu Hnucjana3auJa ha pexmuH a pa60ta. Kora Ke ro BKnyuHte ypeot, Toj Ke pa60Tu KaKo nCTNOT peXIM Ha pa60ta kako N MInHaTNoT nat, HeMa Notpe6a NobTopHo da ro peceTnpate pa60THNOt peXIM.
DAJIeHHCKN YIIPABYBAU
1.II3HeTe ro 3aHnOT kanak 3a da ce OTbOpu n I3BaTeTe ro 3OJaOnHnOt fIM Ha 6aTePmnte.
2. BmTeHte 6aTePnTE BO OndeIOT CO npabunHaTa cTpaHa. IOnOBtE Ha 6aTePnTE Mopa da oDrobapaaT Ha 3HaUnte "+" u"-" Ha daneuHcknot ynpaByBaay.
3.Доно Врeme 6e3 ynoTpe6a,иЗвадеTe Гбatepente.
4. 3a da cnpeunTe 3araayBaHe Ha XINBOTHaTa CpeiHa, IN3BaTe Te NCKOpNCteHnTe 6aTePmN n pIeTe ja 6e36eHocTa n COODBeTHO.
3a da pakybaTe co ypeoT, hacoote ro daeneuHcknoynpaByBa (4) KOH peeentopot 3a cnHan (3). DaeneHHcknOT npabyBau (4) Ke pa60Tu co ypeoT ha pactojahne o5 metpn Kora nokayyaHa peeentopot 3a cnHan (3) Ha ypeoT.
3AHTTNYPEDN
3aHTHnOT ype moKe da ro conHe n 3anpe anapaTOT BO cIyAnTe HabeEni noDoJy:
- BO pexim Ha IaIeHbe: TEMpepaTpyaHa BO3dYXOT BO 3aTbOpEn npocTope Hn4 43^
2.Bo pexim Ha Janahe: co6HaTa TemnepaTypa e noD 16^ - BO pexim Ha oDblaxKyBaHbe: co6HaTa TeMnepaTypa e noD 16^
Ako ypeodT paobTn BO pexIM Ha naeHbe, K" nIIN rO dBnaXHyBa peXIMOT ,I" CO OTBopeHa Bpata nIIN npo3opeu DOIRO BpeMe KOra peIaTnBHATA bIaXHOCT e HAD 80%, MoKe da KaNE poCA oD IwTekePOT.
3aunTHnoT ypepaBToN Bo cJeHnBe cJyua:
- PecTApTnpaHe Ha ypeIOT BeDHaI No 3aIIpaHBe Ha pa6oTa Ta IIN IpomeHa Ha n36paHIOr peKIM DoEka pa6oTne, Mopa Da noyeKeTe 3 MNHyTu.
- Ako npnknyokot e oTcpanet, no pectaptnahe ypeoT ke ce bpaTN BO npboNTHnoT peKIM, BPEMETO BPEME n TAJME NCKIyYBAE - mopa nobToH O da ce noCTabaT.
3A6EJIeIJKA: BO OoJ ypeI CE KpIe peuKnnpaHe Ha KOHDeH3npaKa B0Ja. BoaTa 3a KOHDeH3auJa DeJyMHO ce peuKnnpa NOMery KOHDeH3atopot I CE BrpaDyBa BO YHHja CO B0Ja. Kora HNBOTo HA BoDaTc Ce NCKaYBa HA rOpHTo HNBO, CE KpeBa Co NOMOHa PNNBauchNt PpeKNHyBa, noToa (B.F.) CE NaIN INDNkAtopot 3a CELOCHa HNBO HA B0Ja R" 3a Da Be NotCetNa ja NCueIte BODATA. PpeKHeTe Ro HanojyBaHbeto, PpeMeCTeTe Ro anapATOT Ha COOBETHO MeCTO, INBAJeTe FO pNKluyOKOT 3a ODBOD, INCeTeTe ja B0dota UeNoCHO. PO ODbODT, NOBTOPO HNCTaJInpajTe FO pNKluyOKOT 3a ODBoI (8), INaKy anapATOT MoKe Da nCTeHe I da Ja HABnaXn BaWata co6a. Ako He ce nCzedi 5 MInHTn IO W.F. INDkaunja BKnyeha, Ha ekpaHOT Ke ce npKkaxe E4.
Ako anapatot e noctaben BO nO3njuja wTO d03BOyBa NCnyTahe BODa, MOKeTe NCTo Taka da ja NOBp3eTe ueBkata 3a ODBOD CO OJBOOT 3a da ja nCueDITE BOATA. DoJaDEHa CE DODaBA BO KOMPNeTOT, CO BHaTpeWeH DNJaMeTAP 9MM, HAdBopeWeH DiJaMeTAP 12MM, MaTePiJan: PBL.
CmeHa Ha npo6nemu
1)Пpo6JIemn: He pa6Otn.
AhaJn3a:
a)MOKe6n nATyBaHbTo nIN OCNrpyBaUOT ce pa3HeceHN,Be MOJIIME NOeKaJTe 3 MmHyTN IIOBTOPOCTApTyBaJTe,3aHTNTHNOt ypeD MoKe Da rO cnpeyBa ypeDoT da pa6oTu.
B) MoKe6n 6aTeepHnTe BO daneuHcknOT ynpaByBaY ce nCpneHn.
r) MoXe6n npKnyOkOT He e npaBnHb BKnYueH.
2)Пpo6JIeMn: pa6Otn caMo 3a KpaTko BpeMe
AhaJn3a:
a) ako noctabeHaTa TempePaType 6n3y do co6Ha TempePaTypa, MoKeTe da ja HaMaJIte NoCTabeHaTa TempePaTypa.
6) MoXe6n I3Ie3OT Ha Bo3dYxOe 6IokipaH co npueka. TprHete ja npuekata.
3)Пpo6JIeMn:Pa6OToN,Ho He ce Jana
AhaJn3a:
a)MOXeBn BpaTata NIN PpO3OpEoT Ce OTbOpEnH.
6)MOxBebNO HeNocepHa 5n3Ha HMa dpyr anapaT WTo pa6oTu Ha TOnJIHa KaKo rpeaH Nn CBeTNKa, nTH.
B)ФИNTepOT3aBO3dYxBaJIkaH,NCHNUCTeTe rO.
I) I3ne3OT IIN BHeCOT Ha BO3dyx e 6NoKnpaH.
IIOCTaBeHaTa TEMnepaTpa e npemHory Bucoka.
4)Пpo6IeM:ИCTeKyBaHbHe Na BOda npnДВиЖeHbE.
AhaJin3a:
a) nCueTeToKoHdEh3aTOT nped da ce IpemeCTHTe.
6) 3a da n36eHHe NTcEkyBaHBe Ha BOda, Be MOJIme IIOUpaJTe rO ypeDTo Ha paMaHa 3emJa.
5)Поблел: He pa6oTeTeи BknyeTe ro nHДиKaTopoT 3a haNojyBaHe „W.F"
AHaJIIm3a:
a) n3BJIeueTe rIyEm nIprnKnyOk 3a da INCeIITe BOJa.
6) ako e yecTo BO OBaa cocto6a, KOHTaKtnpajTe CO KBaJIuΦnkyBaH TeXHnUKN CepBNC.
CmeHa Ha npo6nemu
6)Пpo6лeM:УрeДOT He ce cTapTyBa.
AhaJin3a:
a)MOKe6n He e BknyeH.3NaH, BknyeTe ro.
6) Moxei owTeYBaHe Ha npKnyokot nIu Wtekepot. 3ameHeTe ro od cTpaHa Ha daBaTeNoH yClyrata.
B)MOxkebpaCnHaOcnrypBa.3aMeHeTe ro OcnrypyBaOT od cTpaHa Ha daBaTeNoT Ha ycnyrata (cneunkaunaja:
3,15A/250VAC).
J 1 J 1 J 1 J 1 J 1 J 1 J 1 J 1 J 1 J 1 J 1 J 1 J 1 J 1
-
jyjgll gall: jiaiiall jbal jzj 15 yj . jy jy jy jy jy jy jy jy jy
-
jiejly 8gll jz g jdo y
-
1
-
1 (RCD) 30 30
-
1glll lbi jyckjil
-
4
-
ylaal jjgljll 0r jy jy ldoie aaiall jslal jgll pddi y jlgll djjll
-
bilalj jie jiai jiai jian jin 50 n J 5a 5e 5 5n 5n 5n 5n
-
1 J 1 1 1 1 1 1 1 1 1 1 1 1 1 1 1 1 1 1 1 1
-
1e1y jyj yj yj yj yj yj yj yj yj yj yj yj yj yj yj yj yj yj yj yj yj yj yj yj yj yj yj yj yj yj yj yj yj yj yj yj yj yj yj
ailll aalw21 cllb21:
)
)
Jgaiy)
1
aIul1 Jg 1g1 50
aSall 15g g
-
45
-
Jlll jy 5e . jraa Jj 5i j 5i j 5i j 5i j 5i j 5i j 5i j 5i j 5i j 5i j 5i j 5i j 5i j 5i j 5i j 5i j 5i j
()-
yLg 1gall g yj
-
liell 9( 1
-
algal 104 (10).
-
jgl)10( p 111 1g 1 g 2g 2g 2g 2g
如: a1 = 2,an + 1 = 2( a_n + 1)
" D" / "E" - aaii i j 1000000000000000000000000000000000000000000
a
j"N"-slll jlll sllll lal bnal bnal.
sill
a1 = 2,an + 1 = _nn + 1
- jie 21 le
aoljol jia jia jia jia jia jia (1.
jllbcai ( "A" ] jaoi
(LEDdallj
2.
jll bcil "C" Jduill yolal jdlil
"K"→"L"→"M"
- ( \sigma \downarrow \uparrow \downarrow \uparrow \uparrow \uparrow \uparrow \uparrow \uparrow \uparrow \uparrow \uparrow \uparrow \uparrow \uparrow \uparrow \uparrow \uparrow \uparrow \uparrow \uparrow \uparrow \uparrow \uparrow \uparrow \uparrow \uparrow \uparrow \downarrow \downarrow \downarrow \downarrow \downarrow \downarrow \downarrow \downarrow \downarrow \downarrow \downarrow \downarrow \downarrow \downarrow \downarrow \downarrow \downarrow \downarrow \downarrow \downarrow \downarrow \downarrow \downarrow \downarrow \downarrow \uparrow \uparrow \uparrow \uparrow \uparrow \uparrow \uparrow \uparrow \uparrow \uparrow \uparrow \uparrow \uparrow \uparrow \uparrow \uparrow \uparrow \uparrow \uparrow \uparrow \uparrow \uparrow \uparrow \downarrow \uparrow \downarrow \downarrow \downarrow \downarrow \downarrow \downarrow \downarrow \downarrow \downarrow \downarrow \downarrow \downarrow \downarrow \downarrow
31- 16 jai "D" 1 E" aiaia 1
- aasall sAsy 2g, aiaeaia 2a as yaaas
2 2 2
a
a a a a a a a a a a a a a a a a a a a a a a a a a a a a a a a a a
g jy Jaaag aiae y aia y . aylll aal g Ls Jaaag Jaiu . siaill Jiaaie . Jaaal
soill jie
-
1j j j j j j j j j j j j j j j j j j j j j j j j j j j j j j j j j j j j j j j
-
1000000000000000000000000000000000000000000000000000000
-
CJIJIJIJIJIJIJIJIJIJIJIJIJIJIJIJIJIJIJIJIJIJIJIJIJIJIJIJIJIJIJIJIJIJIJIJIJIJIJIJIJIJIJIJIJIJIJIJIJIJIJIJIJIJIJIJIJIJIJIJIJIJIJIJIJIJIJIJIJIJIJIJIJIJIJIJIJIJIJIJIJIJIJIJIJIJIJIJIJIJIJIJIJIJIJIJIJIJIJIJIJ
-
aiaa, iaia iiai jyj yia jaiiaiaiaiaiaiaiaiaiaiaiaiaiaiaiaiaiaiaiaiaiaiaiaiaiaiaiaiaiaiaiaiaiaiaiaiaiaiaiaiaiaiaiaiaiaiaiaiaiaiaiaiaiaiaiaiaiaiaiaiaiaiaiaiaia
ie jai5 iiau ie jiall jaii 4(2jne sill sii Jaxiu)3(silil jaiua gai)4(2jne sill jaiu jaii
jLJI)3( oJUJ Juaa 1JzJI.
,
aaii 1
ailllll llll jiaaii jia
-
jil3 3 jilii jil jail ell jail g jil jail jil jil jil jil jil
-
1I 11
Lsic. clll 1 jie jie ai iaiy
a a a a a a a a a a a a a a a a a a a a a a a a a
12 9 8
LgXuol, gbi
1) Jani : y : ak .
山
Jaa Jaa Jaa Jaa Jaa Jaa Jaa Jaa Jaa Jaa Jaa Jaa Jaa Jaa Jaa Jaa Jaa Jaa Jaa Jaa Jaa Jaa Jaa Jaa Jaa Jaa Jaa Jaa Jaa Jaa Jaa Jaa Jaa
aaiiie 1
J 1
2) lao o juj, 3) jao lao iik
山
aal al aal aal aal aal aal aal aal aal aal aal aal aal aal aal aal aal aal aal aal aal aal aal aal aal aal aal aal aal aal aal aal aal aal aal aal aal aal aal aal aal aal aal aal aal aal aal aal aal
1y jilaln no jalz. jai 1gol al gall
3) 2 = +
a#
()
a1i1ii (2)
ai a ai all i = 1,2,3,4, ,2^k
aaiiiaaaiaaiii
4) is all ooll ooll a:
1
y j 1
5) cll cxia jiu gao ci xi jiān 2. dasyu "WF"
olall 1
Jaaalaoaill jlll 1
1
6) j_i = curl( - )
4.2.1.1.
aill jaiil
3.15:olalgall)adlljogay jay gann Jyai. cldalall yss la (2A/250VAC).
7) Li xiè 4. 知电力:
ydi ydi ydi ydi ydi ydi ydi ydi ydi ydi ydi ydi ydi ydi ydi ydi ydi ydi ydi ydi ydi ydi ydi ydi ydi ydi ydi ydi ydi ydi ydi ydi ydi ydi ydi ydi ydi ydi ydi ydi ydi ydi ydi ydi ydi ydi ydi ydi ydi ydi ydi
8) _a^b 1x^2 + y^2 + z^2 COOL "K".
a 1
a1 = 2,an + 1 = n1 + n2
aall aal all gaii ayai jai jai jai jai jai jai jai
9) aLLED "E0"
a 1
-
aIbI bIaJcAaBlaJgai Jgai IaJIaJIaJIaJIaJIaJIaJIaJIaJIaJIaJIaJIaJIaJIaJIaJIaJIaJIaJIaJIaJIaJIaJIaJIaJIaJIaJIaJIaJIaJIaJIaJIaJIaJIaJIaJIaJIaJIaJIaJIaJIaJIaJIaJIaJIaJIaJIaJIaJIaJIaJIA
-
153 154 155 156 157 158 159 160 161 162 163 164 165 166 167 168 169 170
-
jieaii iaiii gao yjy jiy jiy jiy jiy jiy jiy jiy jiy jiy jiy jiy jiy jiy jiy jiy jiy jiy jiy jiy jiy jiy jiy jiy jiy jiy jiy jiy jiy jiy jiy jiy jiy jiy jiy jiy jiy jiy jiy jiy jiy jiy jiy jiy jiy jiy jiy jiy jiy jiy jiy j
glsljdi
yLs 1i. Aell yia jay Jai jall jS lJn yu wJ Lgall y
-
156
-
S BCD = S COD + S BDO - S BOC
-
15.5, 21.4, 24.3, 28.2, 30.1, 32.9, 34.7, 36.6, 38.4, 40.3, 42.2, 44.1, 46.0, 48.1, 50.0, 52.9, 54.8, 56.7, 58.6, 60.5, 62.4, 64.3, 66.2, 68.1, 70.0, 72.9, 74.8, 76.7, 78.6, 80.5, 82.4, 84.3, 86.2, 88.1, 90.1, 92.9, 94.1, 96.0, 98.1, 99.9, 101.9
gaaal plaiiwl ay aial
64 = <
a1 = 12,a2 = 52
1,2,3 1,2
aL W :

PexIM Ha BeHTnJaTop "M."
- BeHTnlaTOpbT pa60Tu c 3aadaHa ckopocT, a KOMnPecOpbT He pa60Tu.
- PerynipaHeTo Ha TemnepaTypaTe HeepeKTHBHO.
OnepaHa TaMepa "N":
- Hatnche 6yToHa "N", 3a da hactponTe BpeMeTO 3a ABOMaTHUHO N3KJIHObBaHe, DOkaTO yCTpoiCTBOTO pa60Tu.
- Hatnche 6yToHa "N", 3a da 3aJaTe aBtOMaTHUHO BKHIOVAHe, DOkato yCTPOIcTBOTe b FOTOBHOCT.
3.BpeMeTo MoKe Da ce perynipa B dnaana3oHa ot 1 cac do 24 yaca, kaTo hataChte 6yToHa "D" (+) nn "E" (-).
3a6eIexka:
OchOBHata IIaTka 3a ynpabHeHne HMa fynKzna Namet, KOrato yctpoiCTB0To e B rOtOBHOCT 3a pa6ota, HO B cnpraNo noJoxHe, OCHOBHata IIaTka 3a ynpabHeHne MoKe da 3anOMn HnUzmaIzau3aunrTa Ha pa6oTHnpeXIM. Korato BKIOHTe yctpoiCTBOTO, To Ie pa6oTN B cbu npabTeH peXIM OT MInAIIy PtT, HMa HxJa Da HyIpate OTHOB pa6oTHnpeXIM.
ДИСТАЦИОНHO
1.Пьзhte ZeДнma Kanak,3a Da ro OTbOpTe,И CBaTe N3OJIpaUTo ΦJIno Ha 6aTePmTe.
2. NocTabete 6atepnte B OTdJeHHeTo C npabnHaTa cTpaHa. NOnKcTe Ha 6atepnTe Tp6Ba Da CbBnaat Cbc 3HaUte "+" " -" Ha nctaHIOHHO tnpabJIeHne.
3.ПиДьлговбаме63уnotpe6a,ИЗВадTe6atepnte.
4. 3a da npedotbpatnte 3ambpcaeaHTo Ha OKoHaTa CpeDa, n3BaTe N3xa6eHnTe 6aTePNn I nNn3xBpIeTe 6e3Oancho n no NOxodau NaHH.
3a da ynpabnbaTe yctpoiCTBOTO, hacouete dntcaHIOHOTO ynpabneHne (4) kbm npemHka Ha cnHana (3). NcTaHIOHOTo ynpabHe (4) ue npabnaBa yctpoiCTBOTO ha pa3ctoHne 5 metpa, koraTo e hacoueHO kbm npemHka Ha cnHana (3) Ha yctpoiCTBOTO.
3AUHTN YCTPOINCTBA
3aunTHoTO yCTpOcTbO MOKe Da ce BKnHou N da cnpe ypeDa B cIyuaTe, 36poeHN no-doJy:
1.BpeKIM Ha oxIaXJaHe: TempepaTypaTa Ha Bb3dyxa B IomeuEHHra Ta e Na4 43^
2.BpeKIM Ha oxnajdahe: ctaHata Tempepatypa e noD 16 ^ C
3. B pexim Ha n3cyuabahe: cTaNHaTa TempepaTpe nOd 16 °C
Ako yctpoCTBOTO pa60n B pexm Ha oxpaxdahe ,K" nnn n3cyuabaHe Ha b3dyxa ,L" c OTbpeHa Bpata nn npo3opec 3a nbIro BpeMe, KOrato OTHOCTeJIHATA BnaXHOCT e ha 80%, ot n3xoJa MOKe da kane poca.
3aunTHOTO yCTPOCTBO ue pa6OTn B cneHnTe Cnyan:
- Pecaptnpate yctpoiCTBOTo BeHara cneI cnipane Ha pa60Ta IIN IpomraHa Ha n36paHnpeXIM IO BpeMe Ha pa60Ta, Tpr6Ba da n3yakate 3 MNHyTN.
- Ako e n3baen, cne pectaptnahe yctpoictBOTo ue ce BbpHe B npboHaJHnpeKIM, TIMER ON u TIMER OFF Tp6Ba da 6bDat hactpoEH oTHOBO.
3A5EJIEXKKA: B TOBA yCTPOINCTBO IMa CkPnTO peuKNIpaHe Ha KOHDeH3Ha BOa. KOHDeH3IPAHaTb Oda YacTHNuHO ce peuKNIpa MeJdy KOHDeH3aTopa IN BrpaHEn HA BoJa. Korato HNBOTo HA BOdTa Ce NobuSh Do rOpHOTo HNBO, To CE NOBuaBa C nonlaBbHnna IpeBKnIOvBaTeI, CneD TOBa (W.F.) CBETBa INDkaTOPa 3a NbHNO HNBO Ha BOdTa "R", 3a Da BN HAnOMn Da n3TOUHTe BOATA. Monr, n3KIOUeTe 3axpAHBaHTo, IpemecTe Te yPeDa Ha IOxOJaIO MAcTo, INBaTe TanaTt 3a n3TOUBAHe, n3TOUeTe BOATA HnBnHO. CneD n3TOUBAHTo NOCTabete OTHO BpeHaxHnata Tana (8) INn ypeDbT MoKe da Teue n da HamOKpn cTAraTb. Ako He ce n3TOU 5 MNHytn CneD W.F. INDkaUyTA e BKnIOyeHa, Na DcNlner ue ce nokaxe E4.
Ako ypeT e noCTaBeH B noNoKeHne, No3BOJRAuO n3TOUBaHe Ha BOa, MOKeTe CbIoo Da CBbpXeTe DpeHaXHaTa Tpb6a KbM dpEHaXnO rOBp, 3a da n3ToUte BOaTa. KbM KOMJIeKta ce do6abr dpeHaXHa Tpb6a C BbTppeWeH DnaMeTbp 9 MM, BbHWeH dNaMeTbp 12 MM, MaTePnAn: PVC.
OTCTpaHraBaHe Ha Heu3npaBHOCTN
1)Пpo6JIeM:He pa6OToN.
AhaJIIN3:
a)MOKe 3uHTHOIO N3KIOUcBaHe IINI pEJaN3nteJIrTe eN3ropeI, MOJI IN3yAkaIte 3 MNHyTN I ONITaIte OTHOBO, 3AUHTHOTo yCTpOInCTBO MOKe Da nonpeHn Ha yCTpOInCTBOTo da pa60Tu.
B)MOxE 6n 6aTePunTe B DnCTaHcNoHHOTo ynpabNeHne ca n3ToUeHn.
r)MOKe 6n uenCeIbT He e npabuHIO BkIHOeH.
2)Пpo6Jem: pa60Tu caMo 3a KpaTko BpeMe
AHaJIIN3:
a) ako 3aadaeHaTa Tempeatypa e 6nna Ka do cTahata, MoKeTe Da HamaJInTe 3aadaeHaTa Tempeatypa.
6)MOKe 6n n3xOoBt 3a Bb3dy x e 6IbKnpaH OT npenrTCTBne. OTCpaHete npenrTCTBneTo.
3)Пpo6JIeM:Pa6OTn,Ho He oxJaKaJa
AHaJIIN3:
a)MOXe 6n BpaTaTaNJIN npo3OpueT ca OTBopeHn.
6) MoKe B 6n3Ko pa3cTOnHne da nHa dpyr ypei, KOTo Da pa60Tu C ToPnHa KaTo HArpeBaTeJ nn JAmna T.H.
B) Bb3dUHnIaT fNITbpe 3aMbpcEH, MoJI, NOnCTeTe rO.
I) n3XoDbT nnn BxOdbT Ha Bb3dyx e 6nokupaH.
e) 3aandaHaTa TempepaTpa e TBbpe BncoKa.
4)Пpo6JIeM:ИЗТИЧАЕНаВОДАпОВРЕМЯДВИЖЕнE.
AhaJIIN3:
a) n3TOyEt KOHNHe3aTa nppei npemecTBaHe.
6) 3a da n36eHHeTe n3TuHa He HbOa, MoJra, NoCTaBeTe yCtpoiCTBOTO Ha paBaHa 3emr.
5)Пpo6JIeM:He pa6OToIиHДИКaTOpOBt 3a ПьЛнa BOДa „W.F" CBETn
AhaJIIN3:
a) n3dpbnaIte rymehata Tana, 3a da n3TOHTe BOdaT.
6) aKo YecTo e B ToBa CbCTOHHne, MOJIa, CbBpKeTe Ce C KBaIINΦuIuPAH TexHnueckn cepBn3.
OTCTpaHbAbe Ha HEn3PpAbHOcTN
6)Пpo6JIeM:YcTpoIyCTBTo He ce BKJIIOHbA.
AhaJIIN3:
a)MOKe 6n He e BkJIIOUeHO.TakaYe,BKJIIOUeTe rO.
6) Moxe 6n uenceeta nn KOHTaKaTae NOBpeHEn. 3ameheTe ro cdoctabHnka Ha yCnyr.
B)MOxke6n npEpa3nteIe cyuHcMeHTe npEpa3nteIe OTOCTaBvHK Ha ycLyH (CneunФkaJua:3,15A/250VAC).
7)Пpo6JIeM:YcTpoIeCTBOTO abTomaTHUHO cINpa.
AhaJIIN3:
a)doCTnHaTO BpeMe 3a n3KnHouBaHe nn 3aJaDeHa TeMnepaTypa.PecTApTuPaIe nn 3uKaaiTe ABToMaTHUHO
IpeBknOuBaHe.

- SAFETY CONDITIONS. IMPORTANT INSTRUCTIONS ON SAFETY OF USE PLEASE READ CAREFULLY AND KEEP FOR FUTURE REFERENCE
- BEFORE FIRST USE - (picture E)
- REMARKS:
- DEVICE DESCRIPTION (pictures A and B)
- CONTROL PANEL (picture C)
- REMOTE CONTROLLER - picture D
- COOL "K" mode:
- Fan "M." mode.
- Timer operation "N":
- Notice:
- REMOTE CONTROLLER
- PROTECTIVE DEVICES
- Troubleshooting
- Analysis:
- CLEANING AND MAINTENANCE
- Device maintenance
- Air filter maintenance
- Maintenance after seasonal using
- TECHNICAL DATA:
- DEUTSCH
- Ventilator "M." rezims.
- Taimera darbiba "N":
- Piezime:
- Talvadibas pults
- PNEyPPEKDEHNE:
- OXJIAXKDEHNE"K"pejxIM:
- BeHTnJIrToP «M» peKIM.
- YICTKA IN TEXHINUECKOE OBCJNYKINBAHNE
- ITALIANO
- Ventilator "M." -tilstand.
- IPIN THN IPQTH XPHSH - (Eikova E)
- SNEREBLANNA
- ALGEMENE VEILIGHEIDSVOORWAARDEN
- BELANGRIJKE VEILIGHEIDSINSTRUCTIES LEES AANDACHTIG EN BEWAAR VOOR TOEKOMST
- DAHHCN YNPABJbAu-cnkaI.
- PADyPABbAueKIIIOUE
- XIAHNO/CUHNO/BEHTINATOP
- XJIADHIN"K"pejxIM:
- PekmBentnataTopa"M".
- Tajmep"H":
- 0jaba:
- DAJbHCKN UYPABJbAH
- 3AWTHTHN YPETBJN
- 3aunTHn ypehaj he pauny cneheHm cnyuajeBma:
- PeuabaBHe npo6Jema
- UHHeBNE ODPKABAH
- Ondkabaheypehaja
- OdpkaabaBeBa3DyushorФnItepa
- OdpkaBaHbe HakoH ce3oHcke ynoTppe6e
- SVENSKA
- ALLMÄNNASAKERHETSVILLKOR
- VIKTIGA SÄKERHETSINSTRUKTIONER LÄS NU OCH SPARA FÖR FRAMTID
- BiDpeRyIIOIte TemnepaTpy
- BiDperynIe WbNdkicTb BeHTnJIrTopa
- NotykhicTb
- PeximocyuJehra"L":
- YBAGA:
- XOJIOHNI peKIM "K":
- PexmBentnIaTopa"M".
- OuHJEHHA OBCJYTOBYAHHH
- MAKeEOHCKN
- ONIHTN YCIOBN 3A B6E3BENDHOCT
- PNEIINPBATAUYNOTPEBA-(cNkaE)
- 3ABEJIELKNI:
- ONIC HA YPEJOT (cIknA u B)
- DAJIeHHCKN YIIPABYBAU
- 3AHTTNYPEDN
- PexIM Ha BeHTnJaTop "M."
- OnepaHa TaMepa "N":
- 3a6eIexka:
- ДИСТАЦИОНHO
- 3AUHTN YCTPOINCTBA
- IpeBknOuBaHe.
Brand : Mesko
Model : MS 7854
Category : Air Conditioning