
MS 7856 - Air Conditioning Mesko - Free user manual and instructions
Find the device manual for free MS 7856 Mesko in PDF.
| Product Type | Bladeless Air Cooler |
| Brand | Mesko |
| Model | MS 7856 |
| Dimensions (L x W x H) | 18.6 x 25.5 x 62.5 cm |
| Weight | Approximately 4 kg (not exactly specified) |
| Power Supply | 220-240 V ~ 50-60 Hz |
| Rated / Max Power | 80 W / 350 W |
| Water Tank Capacity | 2 liters |
| Water Consumption | 230 ml/hour |
| Noise Level | 59.4 dB |
| Airflow Rate | 188.4 m³/h |
| Main Functions | Humid cooling with ice packs, 3 speeds, Normal/Natural/Sleep modes, horizontal oscillation, timer 1-8 h |
| Remote Control | Yes (CR2025 battery included) |
| Ice Packs | 2 plastic containers to freeze |
| Filter | Washable evaporation filter |
| Cleaning and Maintenance | Clean filter every 10 days; drain and clean tank every 3 days; descale every 3 months |
| Safety | Automatic shut-off by timer, overcurrent protection, unsupervised use not recommended, do not use near water or flammable materials |
| Spare Parts and Repairability | Evaporation filter, ice packs, remote control; repairs only by authorized service |
| General Information | Household use only; do not use for other purposes; read instruction manual before use |
Frequently Asked Questions - MS 7856 Mesko
User questions about MS 7856 Mesko
0 question about this device. Answer the ones you know or ask your own.
Ask a new question about this device
Download the instructions for your Air Conditioning in PDF format for free! Find your manual MS 7856 - Mesko and take your electronic device back in hand. On this page are published all the documents necessary for the use of your device. MS 7856 by Mesko.
USER MANUAL MS 7856 Mesko
natural_image
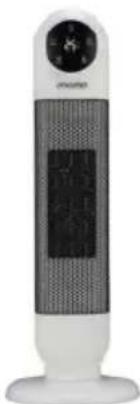
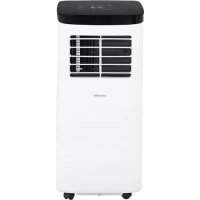
White and black white electronic device with a circular lens and 'mesko' branding (no additional text or symbols visible)MS 7856
(GB) user manual - 4 (BS) upute za rad - 35
natural_image
Exterior view of a white industrial washing machine with internal ventilation slots (no text or symbols visible)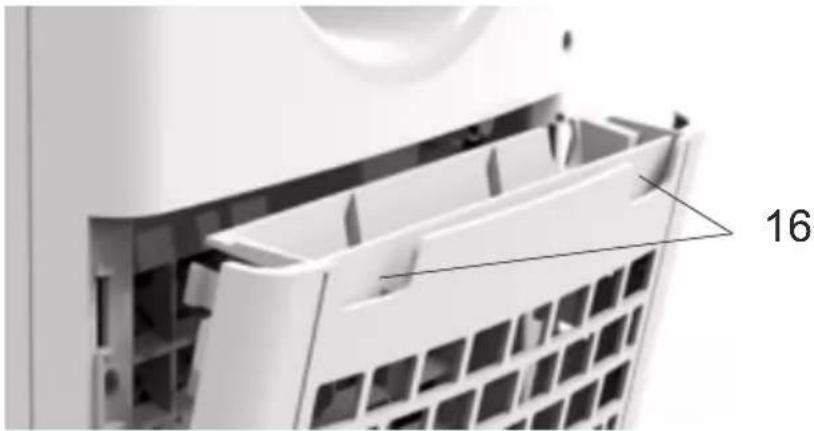
natural_image
Close-up of a white appliance drawer with a grid-patterned vent, showing internal structure and a numbered label '16' (no text or symbols on the diagram itself)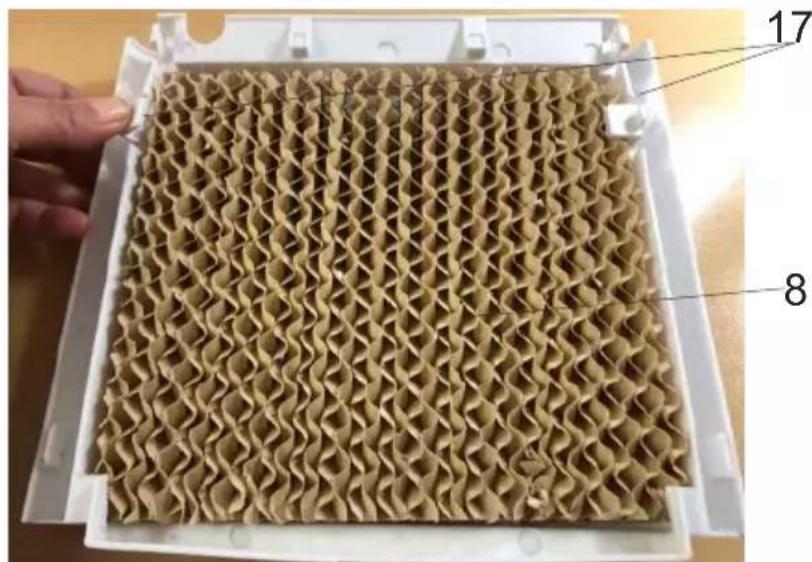
D
E
natural_image
Diagram of a device with two arrows pointing to a labeled point A (no text or symbols beyond label)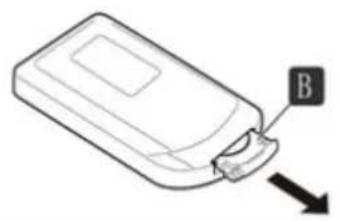
natural_image
Line drawing of a device with a labeled component 'B' and an arrow pointing to it (no text or symbols beyond label)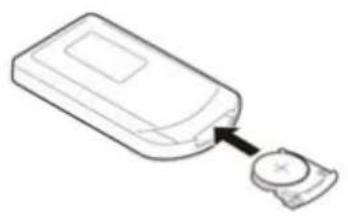
natural_image
Line drawing of a device with a button and arrow pointing to it (no text or symbols)ENGLISH
GENERAL SAFETY CONDITIONS IMPORTANT SAFETY INSTRUCTIONS READ CAREFULLY AND KEEP FOR FUTURE REFERENCE
- Before using the device, read the user manual and follow the instructions contained therein. The manufacturer is not liable for damage caused by using the device contrary to its intended use or improper operation.
- The device is for home use only. Do not use it for other purposes that are inconsistent with its intended use.
- The appliance should only be connected to a 220-240V \~ 50Hz grounded socket. In order to increase the safety of use, many electrical devices should not be connected to one power circuit at the same time.
- Be especially careful when using the device when children are around. Do not allow children to play with the device and do not allow children or people unfamiliar with the device to use it.
- WARNING: This equipment can be used by children over 8 years of age and persons with reduced physical, sensory or mental abilities, or persons without experience or knowledge of the equipment, if it is carried out under the supervision of a person responsible for their safety or they have been given instructions on the safe use of the device and are aware of the dangers associated with its use. Children should not play with the equipment. Cleaning and user maintenance should not be performed by children, unless they are over 8 years of age and are supervised.
- Always remove the plug from the socket after use by holding the socket with your hand. DO NOT pull on the net cord.
- Do not immerse the cord, plug or the entire appliance in water or any other liquid. Do not expose the device to weather conditions (rain, sun, etc.) or use it in high humidity conditions (bathrooms, damp mobile homes).
- Periodically check the condition of the power cord. If the power cord is damaged, it should be replaced by a specialist repair facility in order to avoid a hazard.
- Do not use the appliance with a damaged power cord or if it has been dropped or damaged in any other way or is not working properly. Do not repair the device yourself, as it may cause electric shock. Return the damaged device to the appropriate service center for inspection or repair. Any repairs may only be made by authorized service points. Improperly performed repair may result in serious danger to the user.
- Place the appliance on a cool, stable, level surface, away from heating appliances such as an electric cooker, gas burner, etc.
- Do not use the device near flammable materials.
- The power cord must not hang over the edge of the table or touch hot surfaces.
-
Do not leave the device switched on or the mains adapter unattended.
-
For additional protection, it is advisable to install a residual current device (RCD) in the electrical circuit with a rated residual current not exceeding 30 mA. Please consult an electrician for this.
- Do not allow the motor part of the device to get wet.
- It is forbidden to insert fingers or any other objects into the grilles in the casing of the device.
- Do not cover the exhaust and rear grilles.
- After finishing work, empty the water from the device before storing it away.
- If the device will not be used for a long time, disconnect it from the mains.
- Do not move the machine when there is water in the internal tank.
- Do not place any objects on the device.
-
The device may only be used with efficient ventilation of the room.
-
Be aware that high levels of humidity can encourage the growth of biological organisms in the environment.
- Do not allow the area around the device to become damp or wet. If moisture occurs, lower (reduce) the performance of the device.
- Do not allow absorbent materials such as carpets, curtains, tablecloths to get wet.
- When filling and cleaning, disconnect the device from the mains.
- Never leave water in the tank when the machine is not in use.
- Before storing the device, empty the water tank and clean the device.
- Clean the device and water tank before next use.
- WARNING: When the water is not replaced and the tank is not properly cleaned every 3 days, microorganisms that may be present in the water or in the environment where the appliance is used or stored may grow in the water tank and be blown out to the environment. This can cause a very serious health risk.
- WARNING: Every three days, empty the water tank and refill with clean water. Before refilling, clean the tank with fresh tap water or detergents. Remove any scale, deposits or film that has formed on the sides of the tank and on the inside surfaces. After washing, wipe all surfaces dry.
Before first use
- When the device is used for the first time, the device may produce an odor, which will disappear in the course of operation. You don't have to do anything about it.
- Always replace exhausted batteries in the remote control with new ones.
PRODUCT DESCRIPTION Bladeless air cooler Ms7856
- Handle
- Handle to manual up / down air flow direction control
- Water level gauge
- Back cover with net
- Water tank
- Ice boxes
- Water tank lock
- Pump
- Filter latches
Remote control & Control panel – picture B
A - power button
B-mode button
A noticeable reduction in the temperature of the outlet air occurs after putting into the water tank (9) the plastic containers (11) included to the product. The plastic containers should be previously frozen in the freezer for few hours. It is recommended to fill the plastic
- Air outlet
4. Front housing
- Back housing
- Evaporation filter
- Remote control
- Control panel
- Pump latch
- Cover's recess
container (11) with cold tap water and do not exceed MAX level marked on the plastic container. The content of plastic container is prohibited to edible. Keep away from children.
-
Place the device on a dry, flat surface. If the surface is not flat, the device can start vibrate and get abnormal noise.
-
Rotate to flat position the water tank lock (13) as shown at pictures C1 and C2. Then, pull out a little the water tank (9) from the back of the device. Use the jug to pour clear, cold water, be careful not to exceed the maximum level marked at water level gauge (5) at front of device. You can pour water w/o pulling out the water tank completely. During filling and cleaning, disconnect the device from the mains.
-
To remove water tank completely look at picture C3-C6. At first remove the pump (15) by releasing one pump latch (14) and pull out the water tank (8). Do not pull out the pump, let it stay connected to main housing. When you place the water tank (9) back take attention to not squeeze the water pipes connected to the pump.
After water pouring, turn the water tank lock (13) to horizontal position. Do not tilt the device after pouring the water to water tank. Do not remove water tank while the device is plug in power supply.
-
Connect the plug to power supply. Now can be used control panel (12) or remote control (10) to operate the device (figure B). Turn on the device by pressing the power button (A). Press the button (A) again to switch off the device.
-
The button SPEED (C) allows you to change the speed of the fan. The following speeds can be selected: high, middle and slow. The corresponding diode on the control panel will light up.
-
The air humidification function is operated by COOL button (F), it lowers the temperature of the air by running the water pump. Press the button (F) when there is water inside water tank ONLY, the corresponding diode will light up on the control panel (12). Additionally, a set of two plastic containers (11) is attached. Plastic containers (11) should be filled by cold, tap water and do not exceed maximum level. Next, put them on several hours inside the freezer. Then put one or both of containers into water tank (9). To blow the wet cool air, the device must be filled with water. When the device is operating, periodically check the water level to see whether to add water. Press button (F) again to turn off the wet cold air blowing.
-
Pressing the oscillation function by pressing the SWING button (E) to provide even distribution of cold air stream in left and right direction. The corresponding diode will light up at control panel (12).
-
The TIMER button (D) allows for programming the amount of operation time with 1 hour decrements from 1 to 8 hours. Repeated pressing of this button will light up a combination of diodes at control panel (12). The sum of lighted up diodes marking means chosen period the device will operate before switching off the device automatically.
-
The MODE button (B) allows for changing between one of 3 blowing modes:
normal wind, natural wind and sleep mode. Chosen mode diode will light up at control panel (12).
a) Normal Mode: allows the user to manually adjust the speed of fan between high, medium and low.
b) Natural Mode: mimics the natural wind action by repeating the fan speed sequence:
* When choose the low fan speed, the device blows out and repeats below cycle: low 4 seconds + stop 2 second + middle 4 seconds + low 6 seconds + middle 4 seconds + stop 2 seconds + high 2 seconds + low 6 seconds + middle 4 seconds + low 4 seconds + middle 2 seconds + low 4 seconds + middle 4 seconds + low 4 seconds + stop 2 seconds + high 2 seconds + low 4 seconds + middle 2 seconds.
* When choose the middle fan speed, the device blows out and repeats below cycle: low 4 seconds + middle 6 seconds + low 2 seconds + high 2 seconds + stop 2 seconds + middle 4 seconds + low 4 seconds + middle 4 seconds + low 2 seconds + middle 4 seconds + low 4 seconds + high 2 seconds + stop 2 seconds + middle 4 seconds + low 4 seconds + high 4 seconds + high 4 seconds.
* When choose the fast fan speed, the device blows out and repeats below cycle: high 4 seconds + stop 2 seconds + middle 4 seconds + high 4 seconds + low 4 seconds + high 2 seconds + middle 4 seconds + high 4 seconds + stop 2 seconds + middle 4 seconds + high 6 seconds + low 4 seconds + high 4 seconds + middle 4 seconds + low4 seconds + high 4 seconds + middle 4 seconds.
c) Sleep Mode: was designed to use the effects of Natural Mode to fall asleep. It will gradually decrease the speed of the fan in 30 minute increments:
* When choose the low fan speed: the fan will run the same as low speed Natural Mode.
* When choose the middle fan speed: the fan will blow 30 minutes at middle speed Natural Mode then switch to low speed Natural Mode.
* When choose the high fan speed: the fan will blow 30 minutes at high speed Natural Mode, next it will switch for 30 minutes at medium speed Natural Mode, then it will switch to low speed Natural Mode.
REMARK: If you prefer a constant fan speed whilst sleeping, we recommend setting the fan to Normal Mode and selecting low speed. Use the timer function to set the fan to switch off after an elapsed time (e.g. 1 hour after you are going to bed).
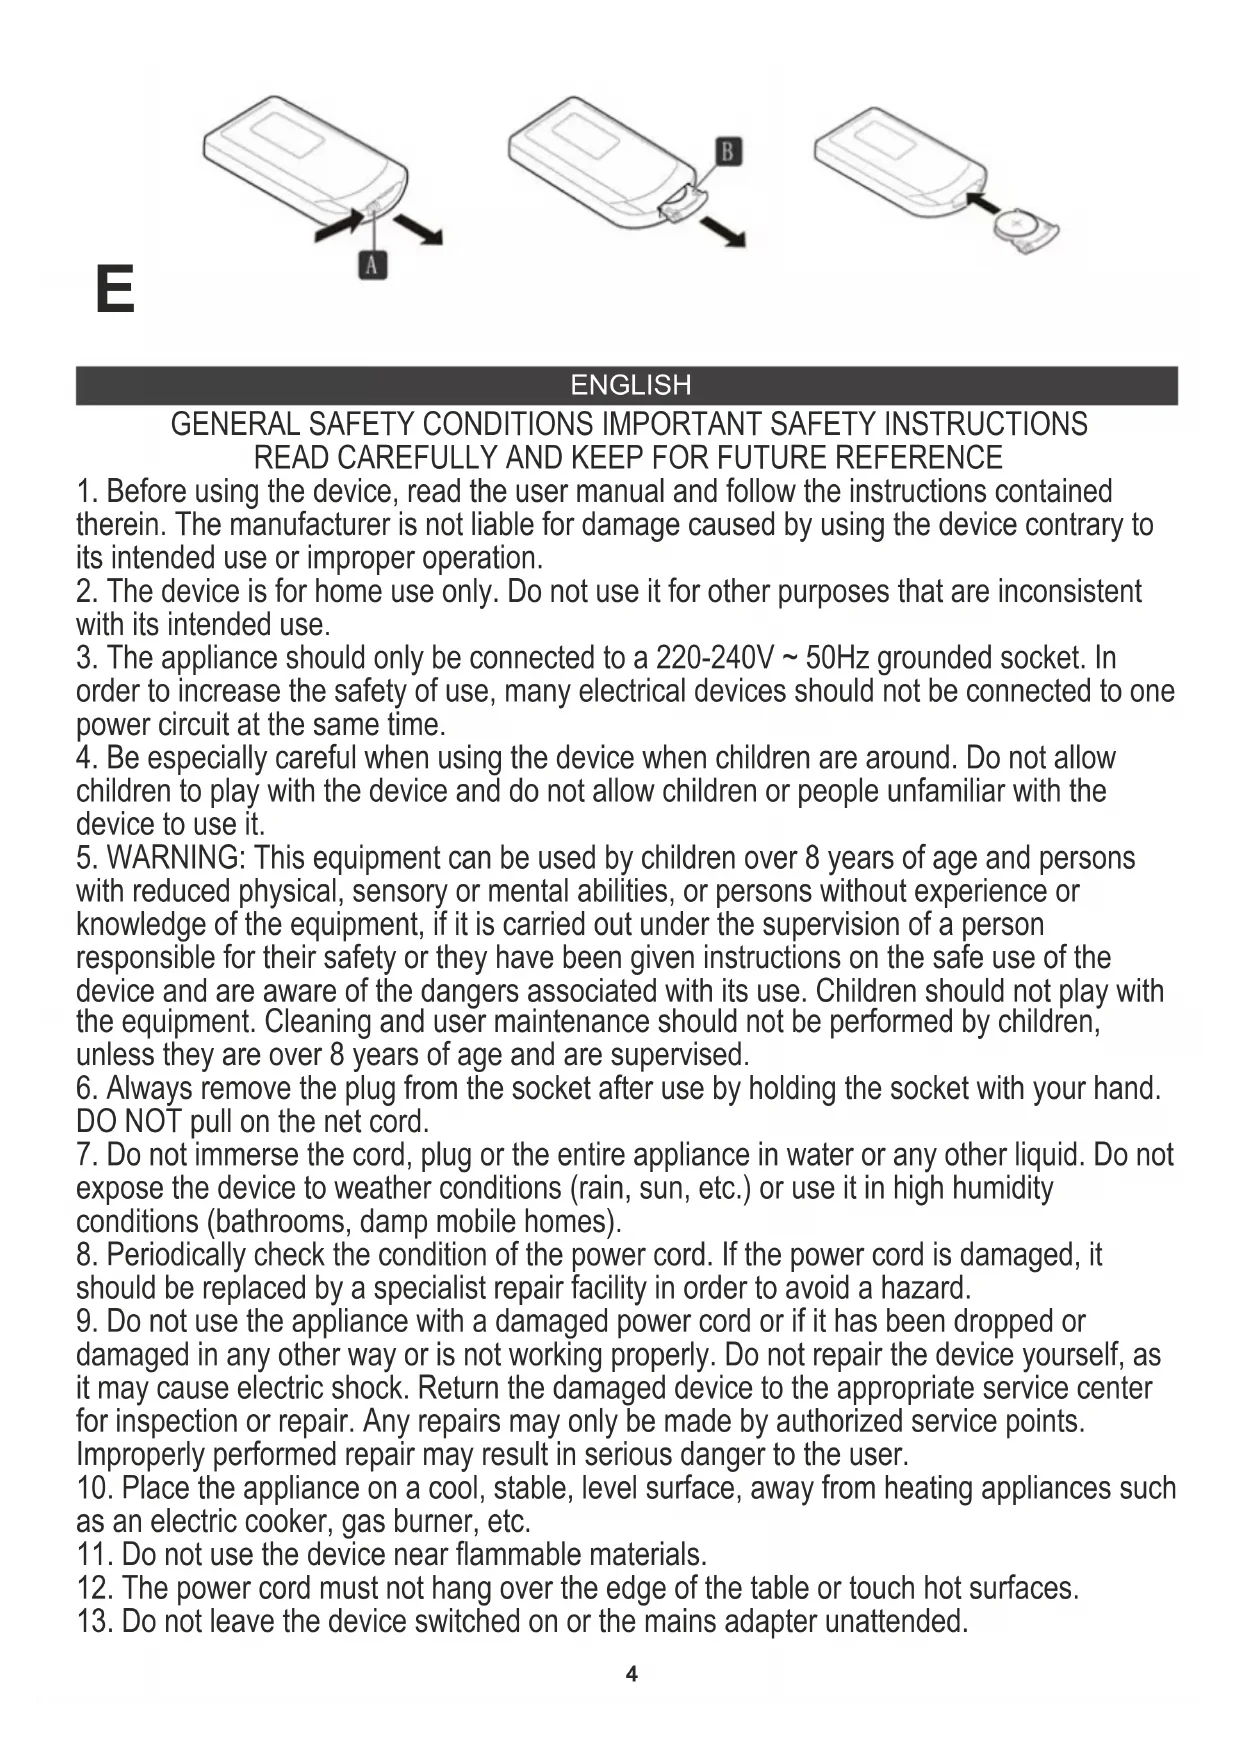
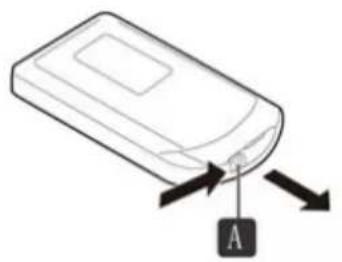
- All buttons on remote control (10) have got same functions as buttons on control panel (12). Do not place any objects between the device and the remote control to ensure proper communication between the remote control and the device. To start remote control (10) operation pull out the installing film. To replace the battery push the release tab on remote control housing as show at picture E. Replace with a battery of the same type, take attention to place it back in correct pole of polarization, reassemble the battery in reverse order.
CLEANING AND MAINTENANCE
Always unplug the device before you start to clean or add/ drain water or movement of device.
-
After finishing operation, before storing the device for longer time, empty the water tank and clean it and the entire device.
-
Clean with soft, dry cloth. Do not use chemical solvents because they can cause permanent damage or deformation of the device.
-
If the device is not used for three or more months, take the batteries out of the remote control.
-
After long time operation, the cover with net (7) and evaporation filter (8) may be clogged with the dust, which will greatly affect the device's performance of cooling. If long time the water is no exchanged, there may be mold. We suggest to clean the cover with net (7) and filter (8) once each 10 days. The filter (8) clean procedure is as below:
a) Unplug the device, pull the back cover (7) by both recess (16) to remove it – look at picture D. To remove the evaporation filter (8) pull back the filter latch (17), the plastic is flexible and will allow you to take out the evaporation filter (8).
b) Clean the evaporation filter (8) by using a vacuum cleaner. The cover with net (7) should not be rub with hands to avoid net deformation.
c) Put the filter (8) and the cover with net (7) back in place.
d) Make sure the water tank (8), the filter (5) and the cover with net (7) are replaced in correct position before switching on again. Before seasonal storage make sure all parts are dry by running the fan mode for 2 hours or shorter to make sure the filter (5) is dry completely.
- Drain the water before seasonal storage by removing the water tank (chapter Operation - point 2). Use mild soap and water to clean the water tank. Then dry the device and water tank completely to avoid the moisture damage.
- Drain the water from the plastic containers (11) before storage.
- Cover the device by plastic bag to protect against the dust and coil the power cord. Storage the device in dry place out of direct sunlight.
- Clean the device and water tank before next use.
DESCALING
- Perform the descaling procedure in accordance with the instructions of the descaling agent specified by the manufacturer.
- Use descaling agents intended for this purpose.
- Carry out the descaling procedure at least every 3 months.
- Descale the water tank only when the device turned off.
TECHNICAL DATA:
Power supply 220-240V \~50-60 Hz
Power Max: 350 W
Water Consumption: 230 ml / hour
Noise level: 59,4dB
Airflow volume: 188,4m3/h
Product dimensions: 18,6 x 25,5 x 62,5 cm
Power: 80 W
Tank capacity: 2 liters
Battery: CR2025 (3V)
To protect your environment: please separate carton boxes and plastic bags and dispose them in corresponding waste bins. Used appliance should be delivered to the dedicated collecting points due to hazarsous components, which may effect the environment. Do not dispose this appliance in the common waste bin.
DEUTSCH
A - virtapainike B - tilapainike
C - tuulettimen nopeuspainike D - ajastinpainike
Poraba vode: 230 ml 1 uro
Baterija: CR2025 (3V)

natural_image
White glass juicer with a lid and orange liquid, no visible text or symbolsCITRUS JUICER MS 4010
Milk Frother
MS 4493

natural_image
White blender with pink liquid, no visible text or symbols on the device itselfBLENDER WITH JAR MS 4079
natural_image
Exterior view of a modern kitchen mixer with a hand mixer (no text or symbols visible)MIXER WITH BOWL MS 4217
natural_image
Digital kitchen scale with digital display showing 0°C and 100% mark (no text or symbols on the device itself)KITCHEN SCALE MS 3165
natural_image
White water purifier with blue liquid and control knob (no visible text or symbols)AIR HUMIDIFIER MS 7965
natural_image
Black and white photo of a UV light bulb with grid pattern and 'mesko' branding (no text or symbols on body)MOSQUITO KILLER LAMP MS 7933
Weather Station MS 1177
natural_image
Close-up of a black medical or dental tool with a white label and metallic tip (no visible text or symbols on the device itself)NOSE TRIMMER MS 2929
mesko
natural_image
Black and white photo of a black water heater with a handle and side panel (no visible text or symbols)ELECTRIC KETTLE MS 1284
natural_image
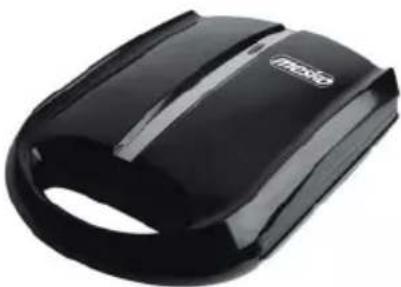
Black and white photo of a minio grater with a red and green button (no visible text or symbols)SANDWICH MAKER MS 3032
natural_image
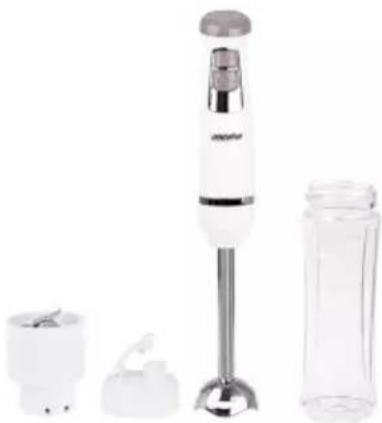
Product photo of a white electric shaver with a side view of its plastic bottle (no text or symbols visible)HAND BLENDER MS 4624
natural_image
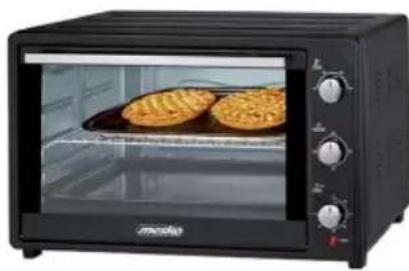
Black microwave oven with two baked goods inside a glass oven (no visible text or symbols)ELECTRIC OVEN MS 6021
natural_image
Black and white photo of a black electronic device with 'mossio' branding on the lid (no additional text or symbols visible)NUT MAKER MS 3041
natural_image
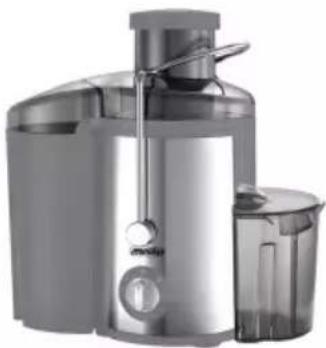
Exterior view of a modern stainless steel juiceizer with a side cup (no visible text or symbols)JUICE EXTRACTOR MS 4126
natural_image
Exterior view of a modern office building (no signage)CERAMIC FAN HEATER MS 7736

natural_image
White and black electric hair dryer with brand logo (no visible text or symbols on body)HAIR DRYER MS 2262
natural_image
White industrial air conditioner unit with control panel and ventilation slots (no visible text or symbols)AIR CONDITIONER MS 7911
| AFTER SALE SERVICE NOTICE | |
| GB | If you want to buy spare parts or make any complaints, please contact the seller who issued the receipt directly. |
| DE | Wenn Sie Ersatzteile kaufen oder reklamieren möchten, wenden Sie sich bitte direkt an den Vorkäufer, der die Quittung ausgestellt hat. |
| FR | Si vous couhaitez acheter dec pièces de rechange ou faire dec réclamatione, veuillez contacter directement le vendeur qui a émis le reçu. |
| ES | Si desea comprar repuestos o presentar alguna queja, comuniquese directamente con el vendedor que emitió el recibo. |
| PT | Se você quiser comprar peças de reposição ou fazer alguma reclamação, entre em contato diretamente com o vendedor que emitiu o recibo. |
| LT | Jei nonite įsigyti atsarginių dalių ar pateikti nusiskundimų, susisiekite tiesiogiai su kvitą išdavusiu pardavėju. |
| LV | Ja vēlaties iegādāties rezerves daļas vai izteikt pretenzijas, lūdzu, sazinieties tieši ar pārdevēju, kurš izsniedza čeku. |
| EST | Kui soovite osta varuosi või esitada pretensioone, võtke otse ühendust kviiitungi väljastanud mūūjaga. |
| HU | Ha pótalkatrėszeket szeretne vāsārolni, vagy panaszt szeretne tenni, forduljon közvetlenūl a bizonylatot kiállitó eladóhoz. |
| BS | Ako želite kupiti rezervne dijelove ili napraviti reklamaciju, obratite se direktno prodavaču koji je izdao račun. |
| RO | Если вы хотите купить запчасти или предъявить какие-либо претензии, пожалуйста, свяжитесь напрямую с продавцом, выдавшим чек. |
| CZ | Chcete-li zakoupit náhradní díly nebo uplatnit jakoukoli reklamaci, kontaktujte přimo prodejce, který účtenku vystavil. |
| RU | Dacă doriți să cumpārați piese de schimb sau să faceți vreo reclamație, vǎ rugăm să contactați direct vânzătorul care a emis chitanța. |
| GR | Eán ŋélek va ayoráokte avtallaλοκτικά Ů va kávete ottoiabíποτε παράπονα, «πικοινωνήστε απευθείας με τον τιμλητή του εξίδωσε την απόδε ιξη. |
| MK | Ако сакате да купите резервни делови или да поднесете какви било поплаки, контактирајте директно со продавачот кој ja издал сметката. |
| NL | Als u reserveonderdelen wilt kopen of een klacht wilt indienen, neem dan rechtstreeks contact op met de verkoper die de bon heeft afgegeven. |
| SL | Če želite kupiti nadomestne dele ali vložiti reklamacije, se obmite neposredno na prodajalca, ki je izdal račun. |
| FI | Jos ħaluat ostaa varaosia tai tehdā valituksia, ota yhteyttā suoraan kuitin antaneeseen myyjään. |
| PL | W przypadku chęci zakupu części zamiennych lub zgłoszenia ewentualnych reklamacji należy kontaktować się bezpośrednio ze oprzedawca, który wystawil paragon. |
| IT | Se desideri acquistare pezzi di ricambio o presentare reclami, contatta direttamente il venditore che ha emesso la ricevuta. |
| HR | Se desideri acquistare pezzi di ricambio o presentare reclami, contatta direttamente il venditore che ha emesso la ricevuta. |
| SV | Om du vill köpa reservdelar eller gora några reklamationer, vanligen kontakta saljaren som utfardat kvittot direkt. |
| DK | Hvis du ønsker at købe reservedele eller reklamere, bedes du kontakte sælgeren, som har udstedt kvitteringen, direkte. |
| UA | Якщо ви хочете придбати запчастини або подати ́будь-які претензії, зверніться безпосередньо до продавця, який видав чек. |
| SR | Ако желите да купите резервне делове или да уложите рекламацију, обратите се директно продавцу који је издаю рачун. |
| SK | Ak si choete küpit náhradně dicly alcibo uplatnit‘ akúkolvek reklamáciu, kontaktujte priamo predajcu, ktorý účtenku vystavil. |
| AR | إذا کنت تر غب في كوااء قطع غبار أو تقدمنّم أي تكوي، فيرحي الاتصال بالدالع الذي أصدر الإ Corpus مпатرة |
| BG | Ако искате да закупите резервни части или да направите оплаквания, моля, свържете се директно с продавача, който е издал касовата бележка. |
| AZ | Ehtiyat hissələri almaq və ya har hansı šikayat etmak istayirsinizsa, qəbzi verən satici ila birbaşa alqaqa saxlayın. |
| ALB | Nëse dëshironi të blini pjesë këmbimi ose të bëni ndonjë ankesë, ju lutemi kontaktoni drejtpërdrejt shitësin që ka lëshuar faturën. |

- MS 7856
- E
- ENGLISH
- GENERAL SAFETY CONDITIONS IMPORTANT SAFETY INSTRUCTIONS READ CAREFULLY AND KEEP FOR FUTURE REFERENCE
- Before first use
- PRODUCT DESCRIPTION Bladeless air cooler Ms7856
- Remote control & Control panel – picture B
- Front housing
- CLEANING AND MAINTENANCE
- DESCALING
- TECHNICAL DATA:
- DEUTSCH
- mesko
Brand : Mesko
Model : MS 7856
Category : Air Conditioning