
ERRP40 - Beard trimmer PANASONIC - Free user manual and instructions
Find the device manual for free ERRP40 PANASONIC in PDF.
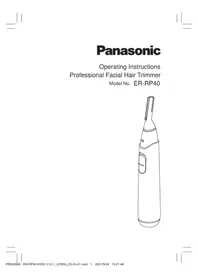



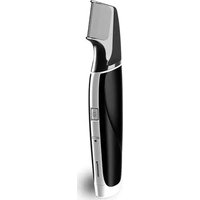
| Product type | Beard trimmer |
| Brand | Panasonic |
| Model | ER-RP40 |
| Dimensions (L x H x D) | 2.6 cm × 16.6 cm × 2.8 cm |
| Weight | 60 g |
| Power supply | AA alkaline battery (LR6) – not included |
| Battery life | Approximately 180 minutes (with Panasonic LR6 alkaline battery at 20°C) |
| Main functions | Beard trimming, eyebrow shaping, precision cutting |
| Included accessories | Eyebrow comb A (7/6/5 mm), eyebrow comb B (4/3/2 mm), precision comb, cleaning brush, protective cap |
| Use | Dry or on wet hair (without the combs) |
| Cleaning | Washable with water (body and blade) or dry cleaning with brush |
| Maintenance | Clean after each use, replace blade if worn |
| Safety | Do not use on sensitive or damaged skin; keep out of reach of children under 8 years old |
| Spare parts | Replacement blade WES9280 (sold separately) |
| Acoustic noise | 66 dB(A) |
Frequently Asked Questions - ERRP40 PANASONIC
User questions about ERRP40 PANASONIC
0 question about this device. Answer the ones you know or ask your own.
Ask a new question about this device
Download the instructions for your Beard trimmer in PDF format for free! Find your manual ERRP40 - PANASONIC and take your electronic device back in hand. On this page are published all the documents necessary for the use of your device. ERRP40 by PANASONIC.
USER MANUAL ERRP40 PANASONIC
Operating Instructions Professional Facial Hair Trimmer Model No. ER-RP40

English 3
Deutsch ....19
Français....37
Italiano....53
Español....69
Nederlands....85
Português....101
Svenska....117
Dansk....133
Norsk 149
Suomi 165
Polski....181
Česky....197
Slovensky....213
Magyar....229
Română 245
Türkçe....261
Ελληνικά......279
Panasonic
English
Operating Instructions Professional Facial Hair Trimmer Model No. ER-RP40
Contents
Safety precautions ....5
Parts identification 9
Installing the battery 10
How to use 11
Removing and mounting the attachments ..... 12
How to use with attachment 14
Maintenance....15
Removing and mounting the blade 16
Troubleshooting 17
Specifications 17
Thank you for purchasing this Panasonic product. Before operating this unit, please read these instructions completely and save them for future use.
WARNING
- This appliance can be used by children aged from 8 years and above and persons with reduced physical, sensory or mental capabilities or lack of experience and knowledge if they have been given supervision or instruction concerning use of the appliance in a safe way and understand the hazards involved. Children shall not play with the appliance. Cleaning and user maintenance shall not be made by children without supervision.
Safety precautions
To reduce the risk of injury, loss of life, electric shock, fire, and damage to property, always observe the following safety precautions.
Explanation of symbols
The following symbols are used to classify and describe the level of hazard, injury, and property damage caused when the denotation is disregarded and improper use is performed.

WARNING
Denotes a potential hazard that could result in serious injury or death.

CAUTION
Denotes a hazard that could result in minor injury or property damage.
The following symbols are used to classify and describe the type of instructions to be observed.

This symbol is used to alert users to a specific operating procedure that must not be performed.

This symbol is used to alert users to a specific operating procedure that must be followed in order to operate the unit safely.

WARNING
▶ Preventing accidents
Do not store within the reach of children or infants. Do not let them use it.

- Putting parts or accessories in the mouth may cause an accident or injury. → Store with the protective cap attached after use.

Immediately stop using if there is an abnormality or malfunction.
- Failure to do so may cause fire or injury.

CAUTION
▶ To protect skin
Do not use in the following cases:

• People with sensitive skin • People with skin allergies Do not use on areas with pimples, etc. - Doing so may result in injury to the skin.

Do not press the appliance forcibly against the skin.
Avoid repetitive shaving of the same area.
Do not pat the appliance during use.
- Doing so may result in pain, inflammation or injury of the skin.

Do not press the blade by force. Do not touch the blade directly with your fingers or nails during use.
- Doing so may cause injury to the skin or shorten the blade life prematurely.

CAUTION

Check the blade for deformation or damage before use.
- Failure to do so may cause skin injury.

When removing the protective cap, grasp it by the central part and pull it outward.
- Failure to do so may cause the blade to cut your hand.

Use the appliance only for shaping eyebrows, beard, downy hair, nape of neck, sideburns.
- Failure to do so may cause injury.

If there is any abnormality on skin after use, stop using the appliance and consult a dermatologist.
- Failure to do so may cause symptoms to worsen.

Be sure to attach the protective cap when carrying the appliance around or storing it.
- Failure to do so may cause injury to the skin or shorten the service life of the blade.
This appliance

Do not drop or subject to shock.
- Doing so may cause injury.

Do not modify, disassemble or repair.
- Doing so may cause an accident or injury.
→ Contact an authorized service centre for repair.

CAUTION
The battery

Do not throw into fire or disassemble.
The supply terminals are not to be short-circuited.
- Doing so may cause a burn or injury.
Always follow the cautions printed on the battery. Check the polarity of the battery (+ and -) and install it correctly.
Exhausted battery is to be removed from the appliance and safely disposed of.

Remove the battery when not using the appliance for an extended period of time.
Use the battery by the recommended use-by date. Non-rechargeable battery is not to be recharged.
- Failure to do so may cause overheating or explosion of the battery, injury or contamination of surroundings due to leakage.
Parts identification
A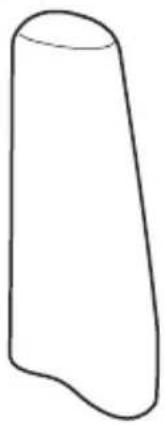
C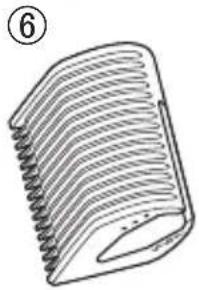
D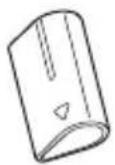
⑦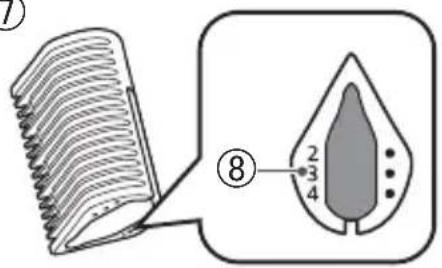
E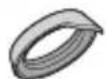
F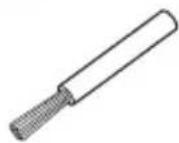
B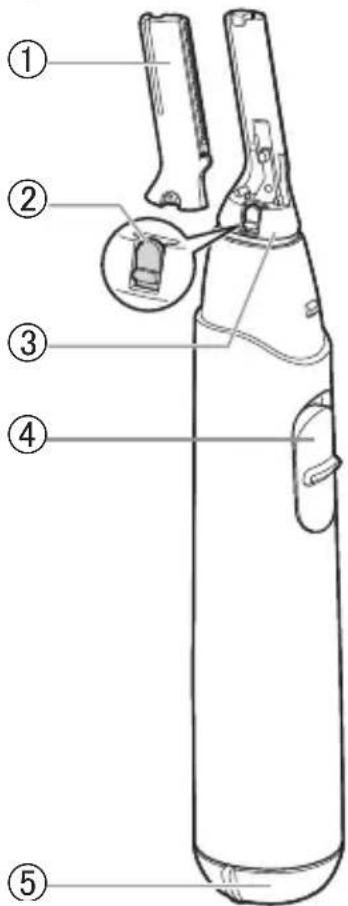
A Protective cap B Main body
① Blade ② Blade locker ③ Head ④ Power switch [O/I] ⑤ Battery cover
Attachments
© Eyebrow comb
⑥ Eyebrow comb A (7/6/5 mm) ⑦ Eyebrow comb B (4/3/2 mm) ⑧ Finish trimming length
D Detail attachment
E Swing lock attachment
Accessory
F Cleaning brush
Alkaline battery is not supplied.
Please buy it separately.
Installing the battery

• Make sure that the main body is turned off.
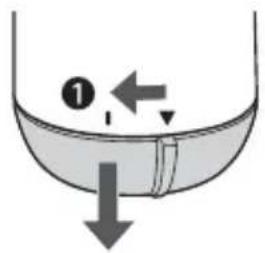
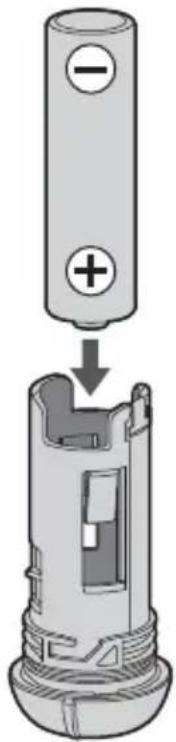
1. Remove the battery cover.
Turn the battery cover in the direction of the “①” arrow until the battery cover is removed.
2. Check the polarity (+ and -) and install the battery.
Thoroughly wipe the main body to prevent water droplets from getting inside when installing the battery.
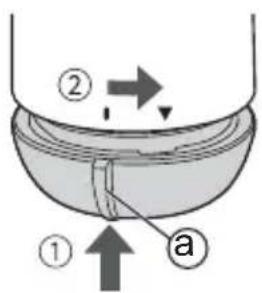
3. Attach the battery cover.
① Align the “” on the battery cover with the “” mark and insert the battery cover. ② Rotate the battery cover until the “a” is aligned with the “▼” mark on the main body.
Notes
- You can use the appliance for approximately 180 minutes with one Panasonic LR6 (AA alkaline battery). (when dry use in a room temperature of 20°C .) The use time will differ depending on the frequency and method of use.
- Be sure to use LR6 (AA alkaline battery).
How to use
- You should not allow permanent wave lotion, hair dyeing or hair spray to come into contact with the main body or the blade.
Doing so may result in cracking or corrosion.
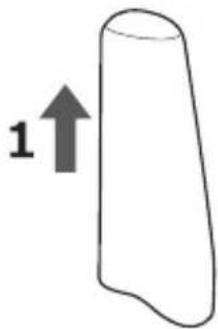
- Hold the protective cap to pull it out.
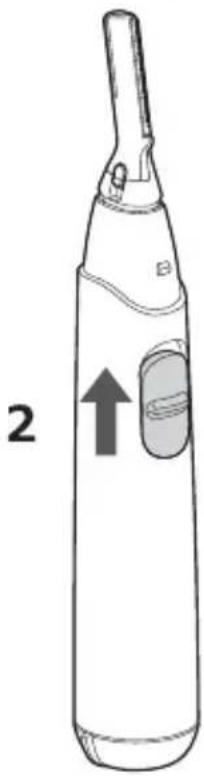
- Turn on the power switch, and start trimming.
- Lay the blade flat on the skin.
(How to use with attachment, see page 14.)
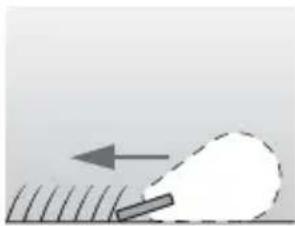
Skin

Trimming wet hair
- Do not use the eyebrow comb and detail attachment when trimming wet hair.
- Wet and apply soap beforehand to the area to be shaved.
- Slide the power switch to off position at the end of each use.
- Clean the appliance after each use.
- Failure to do so may cause the blade to lose sharpness.
(See page 15)
Removing and mounting the attachments
• Make sure that the main body is turned off.
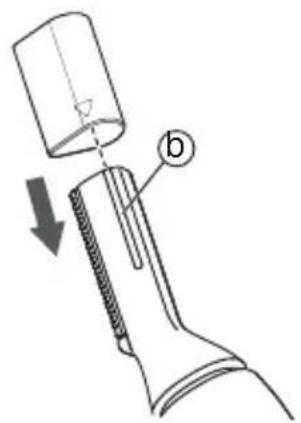
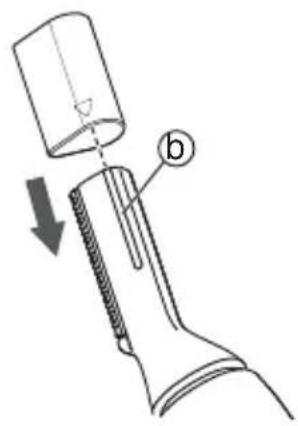
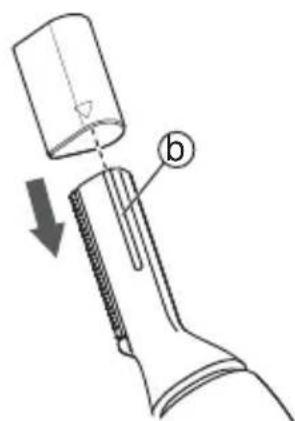
Eyebrow comb and detail attachment
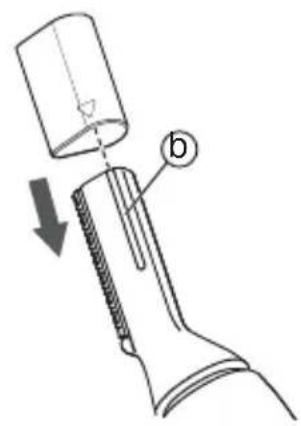
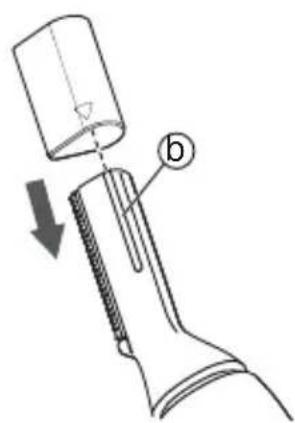
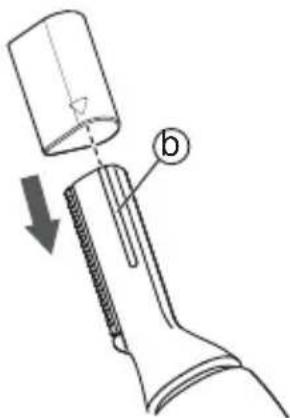
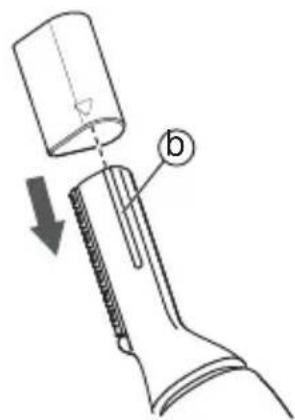
How to mount
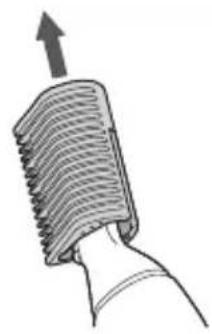
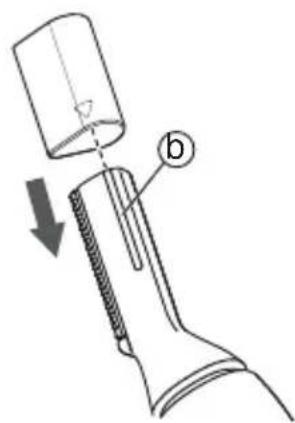
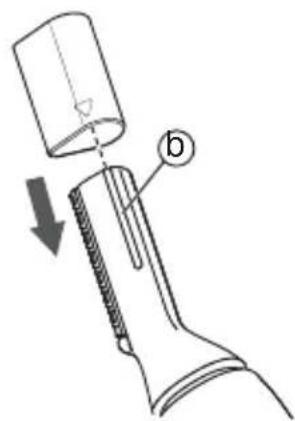
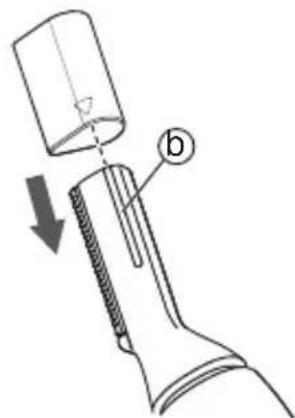
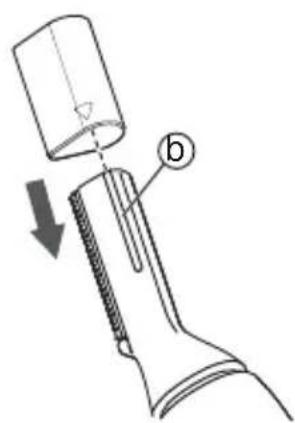
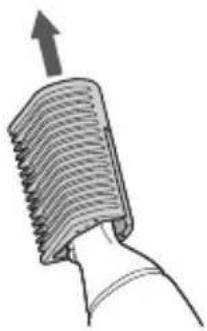
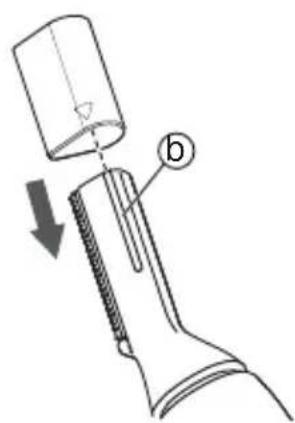
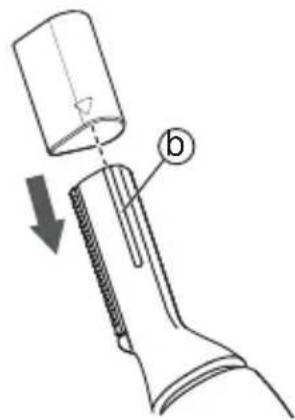
Align the “●” on the eyebrow comb or the “▽” on the detail attachment with the groove (b) of the blade, and insert it directly into the blade until a click is heard.
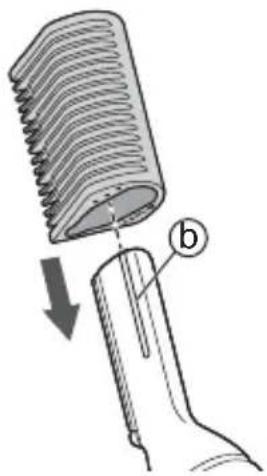
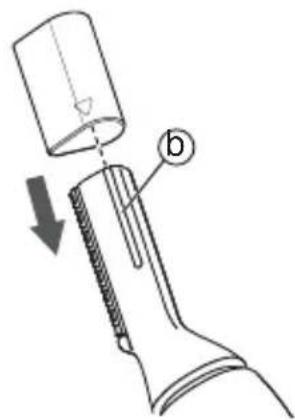
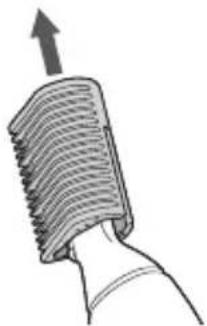
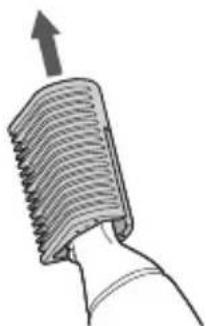
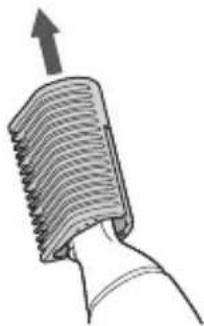
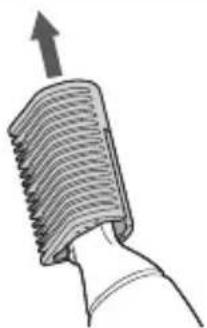
How to remove
Remove it straightly.
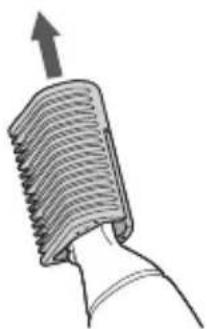
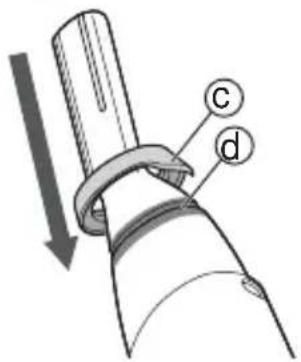
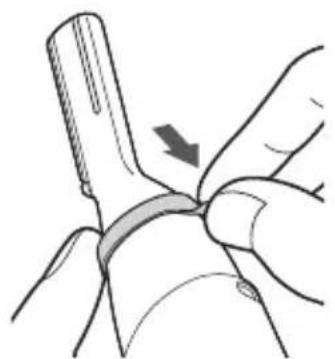
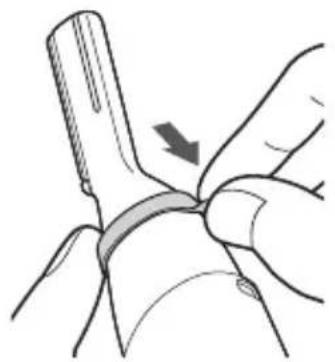
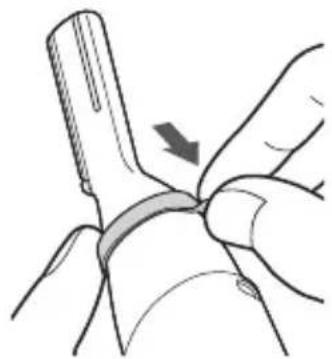
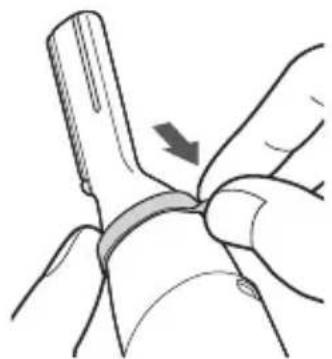
Swing lock attachment
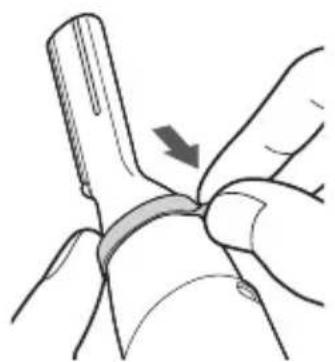
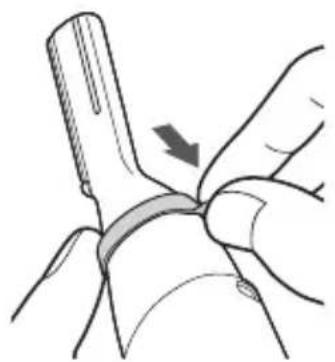
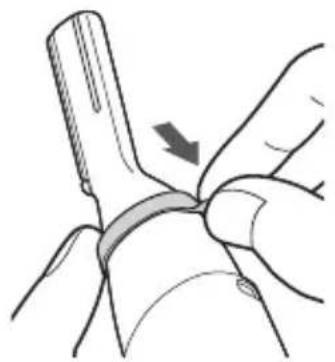
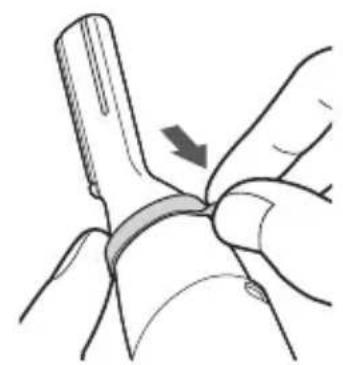
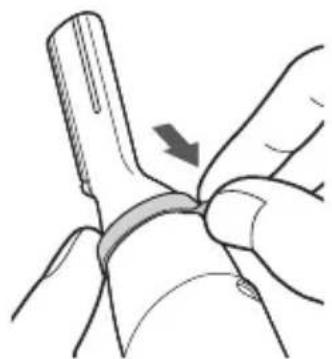
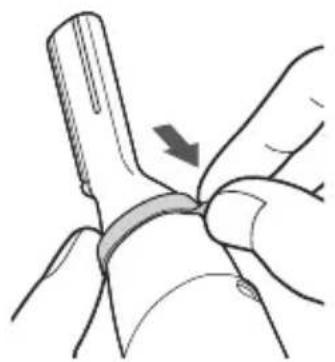
Attach it to lock the swing of the head.
- Be careful not to touch the blade when mounting or removing it.
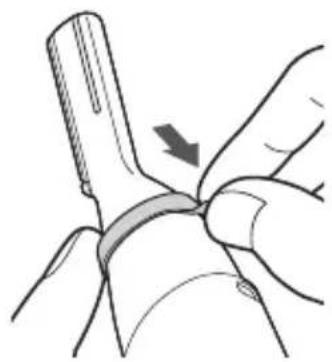
How to mount
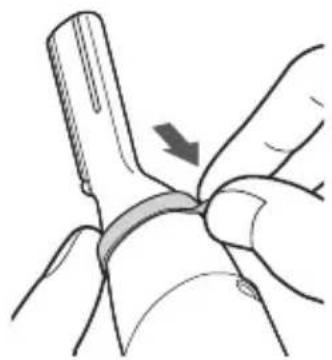
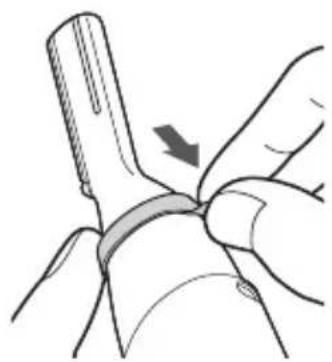
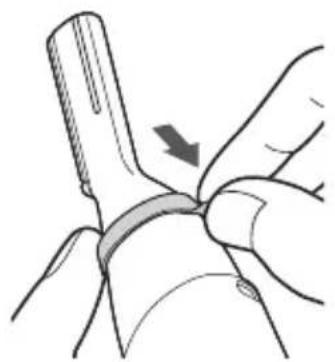
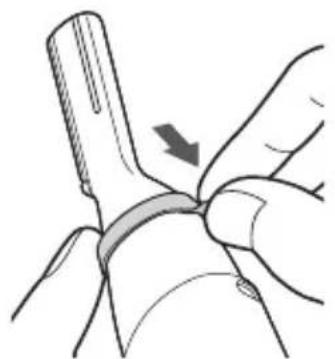
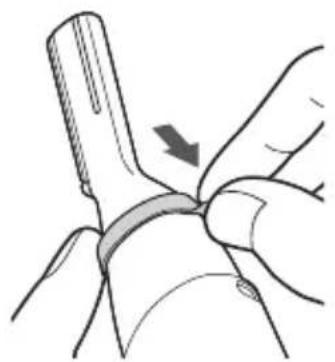
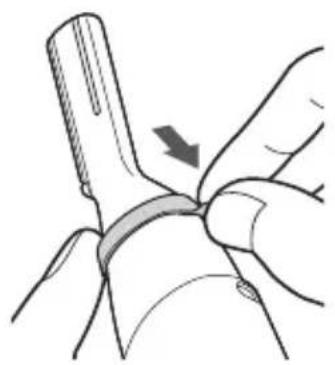
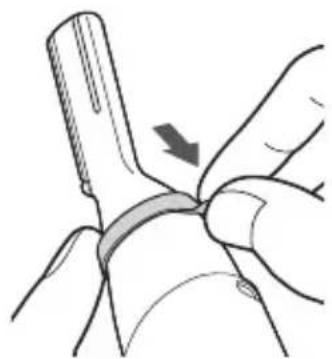
Insert the swing lock attachment as shown in the figure, and pull it by pinching the rib (c) so that it covers the groove (d).
How to remove
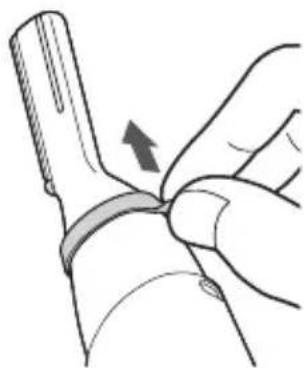
Remove it by pinching the rib.
How to use with attachment
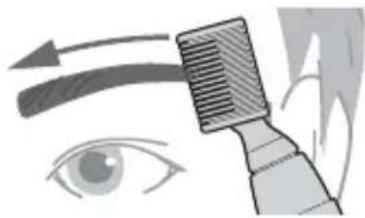
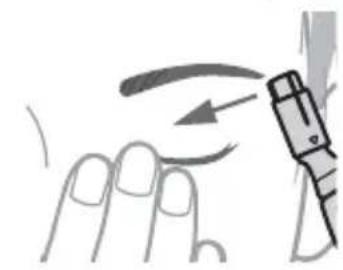
Eyebrow comb
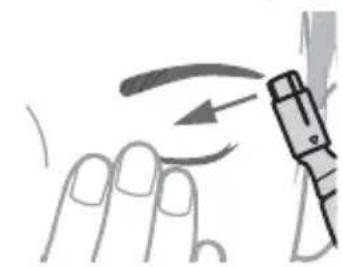
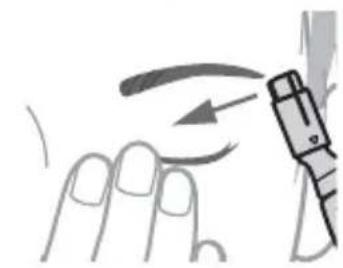
Press the plane surface of the eyebrow comb close to the skin to trim.
Move it slowly from the tail to the start of eyebrow. Repeat this step until the eyebrows are trimmed to the desired length.
Skin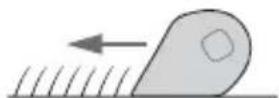
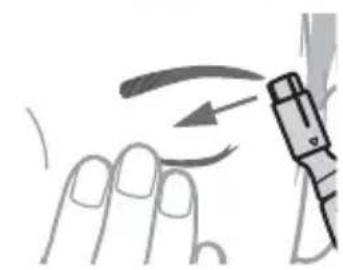
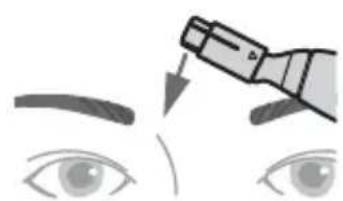
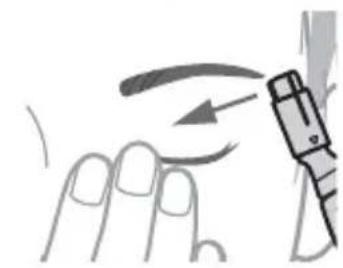
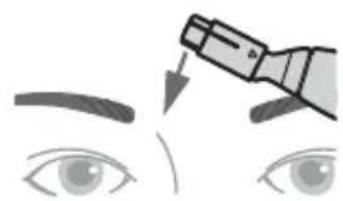
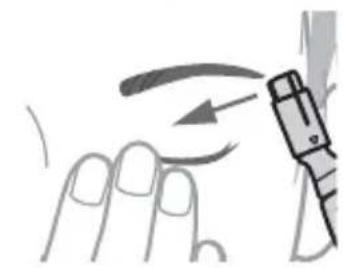
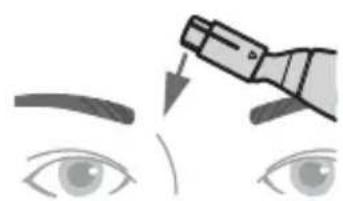
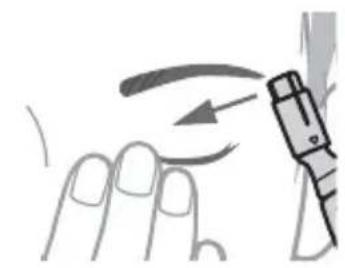
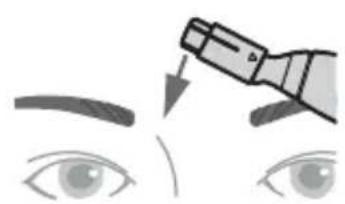
Detail attachment
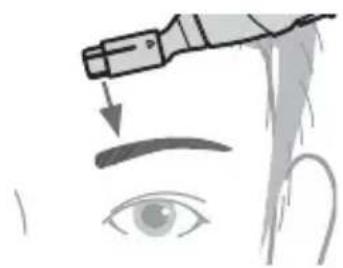
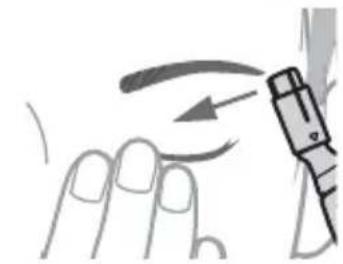
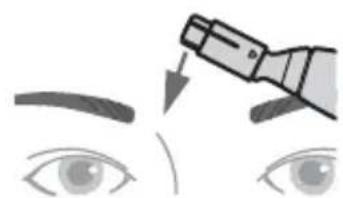
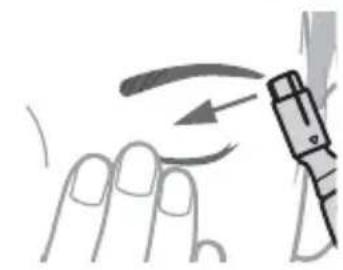
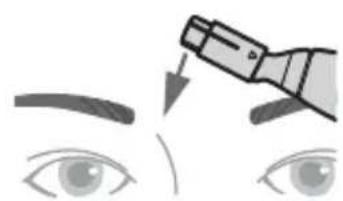
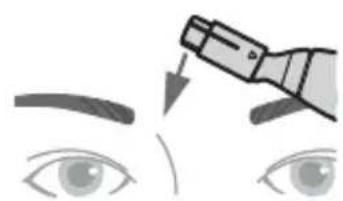
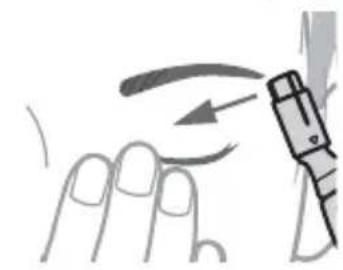
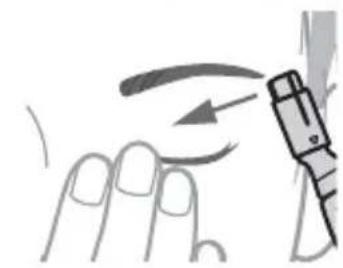
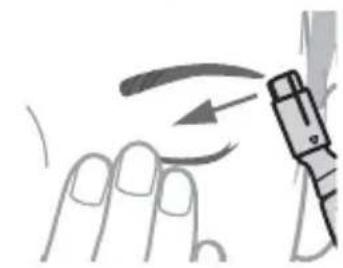
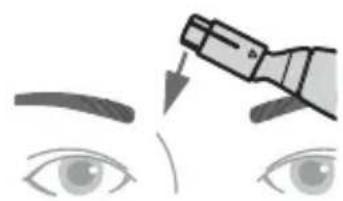
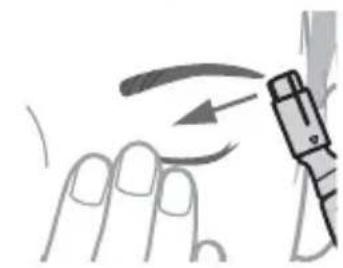
Press the plane surface of the detail attachment close to the skin to trim.
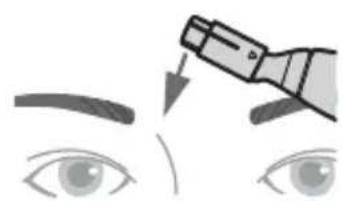
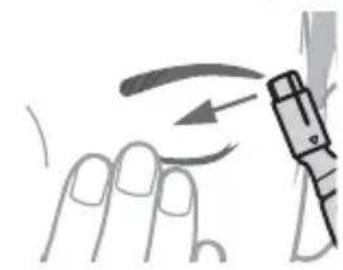
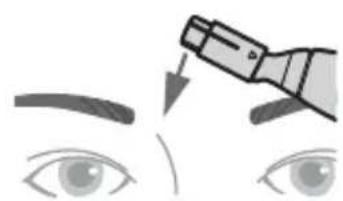
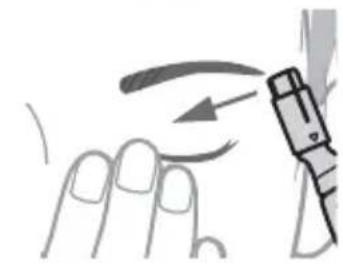
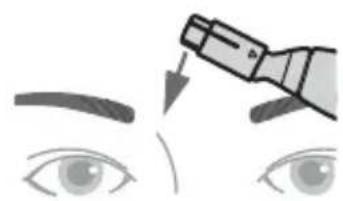
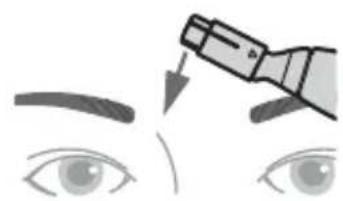
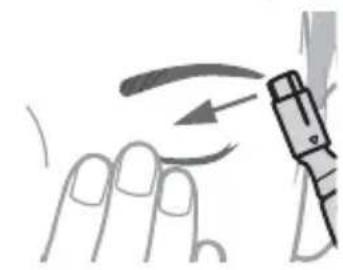
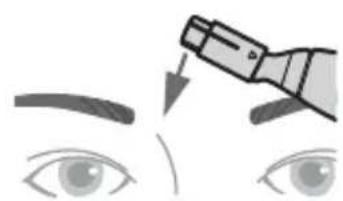
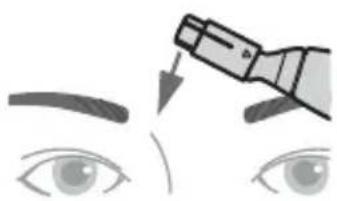
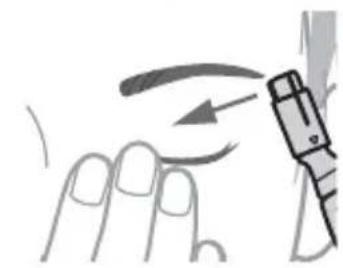
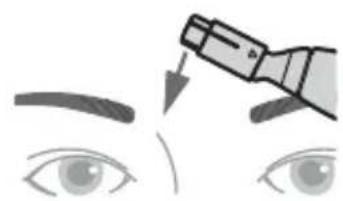
- Above the eyebrows Stop trimming at about 2 mm to 3 mm to the side of the eyebrow. • Below the eyebrows Press the eyelid gently and stretch the skin while trimming.
- Between eyebrows Trim in the direction of the arrow.
Maintenance
• Make sure that the main body is turned off.
- Be sure to clean the appliance with the battery cover attached.
• The blade can't be disassembled.
Wet cleaning
- Remove the blade and attachments (See pages 12 and 16) and rinse under running water.
- Cover the drainage outlet of washbasin to prevent the blade from flowing away.
- If you are concerned about the dirt, wash it off with hand soap or the like.
- Shake up and down several times to remove the water.
- Be careful not to hit the main body on the sink or any other object while draining the water. Failure to do so may cause malfunction.
- Wipe off the water with a towel and let it dry naturally. • It will dry faster with the blade removed.
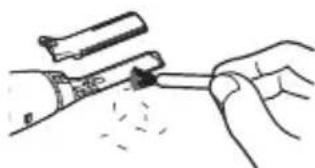
Dry cleaning
Brush off any remaining hair trimmings.
Notes
- Do not use thinner, benzine, alcohol or other chemicals.
Doing so may cause failure, cracking or discoloration of the main body. Wipe the main body only with a soft cloth slightly dampened with tap water or soapy tap water.
• After cleaning, attach the blade and the protective cap.
- Store the main body in a place with low humidity after use. Failure to do so may cause malfunction due to condensation or rust.
Removing and mounting the blade
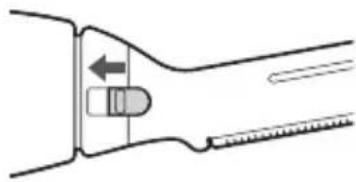
- Press the head with your fingers to avoid excessive vibration. • Make sure that the main body is turned off.
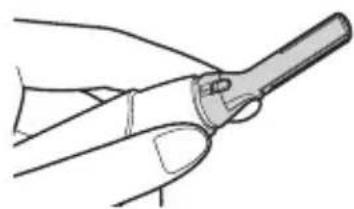
Removing the blade
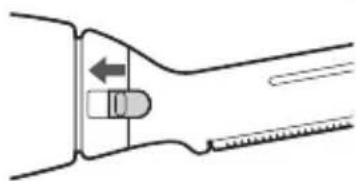
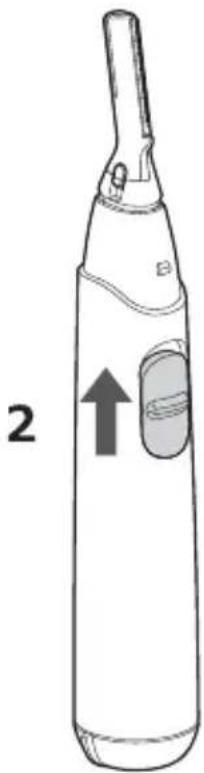
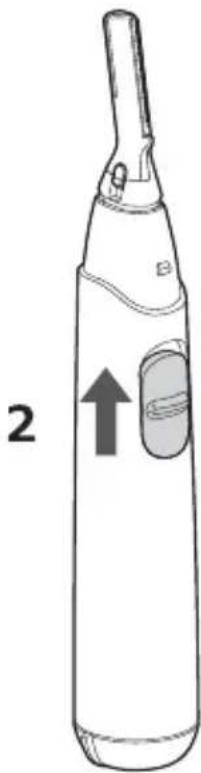
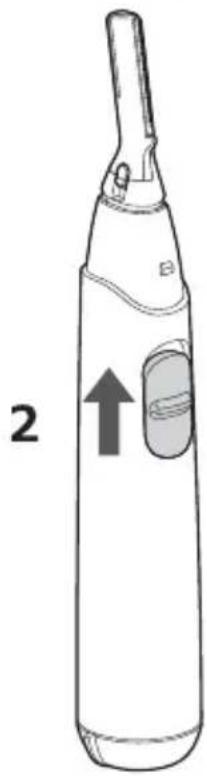
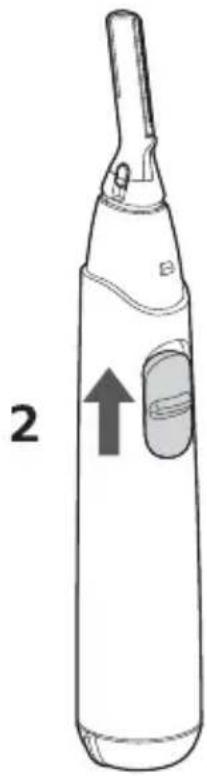
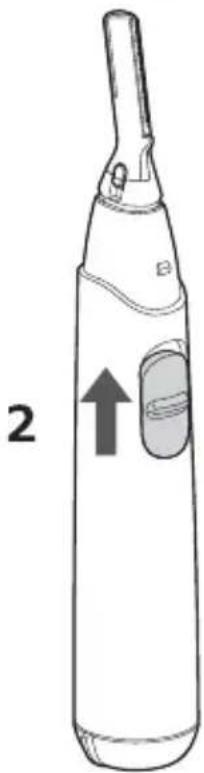
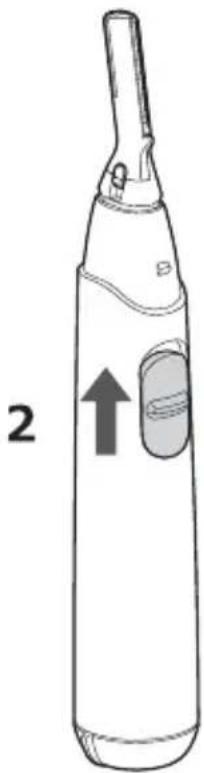
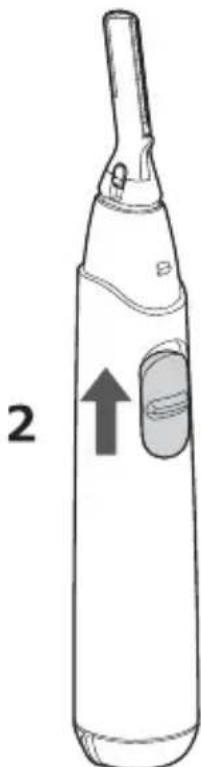
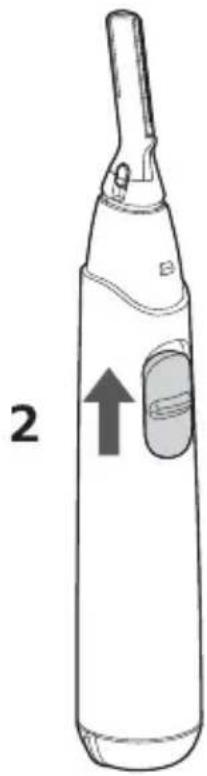
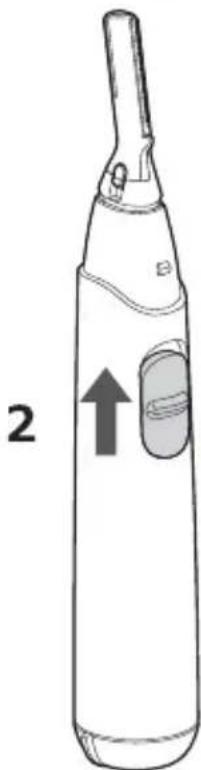
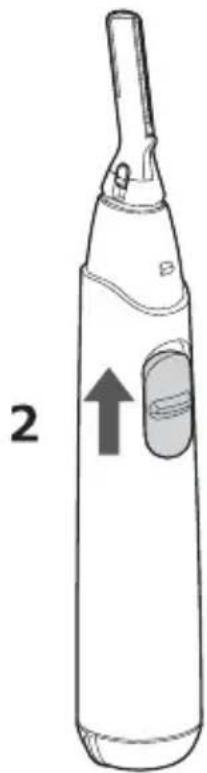
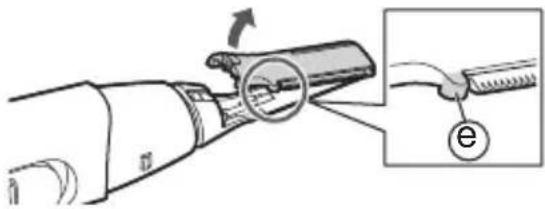
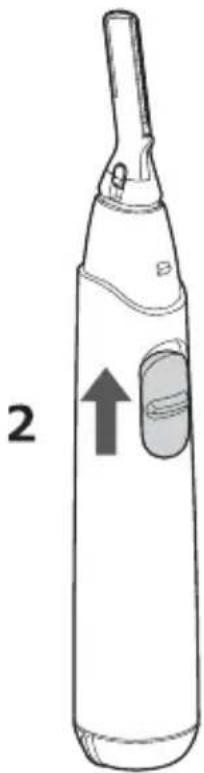
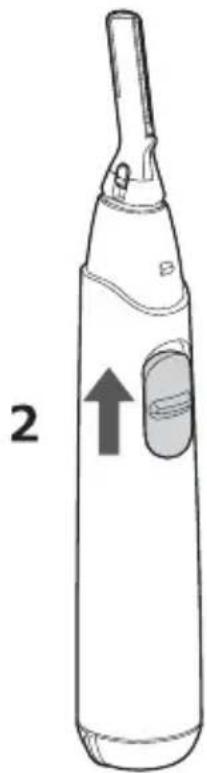
1. Slide the blade locker as indicated by the arrow.
- It is easier to slide it with your nail.
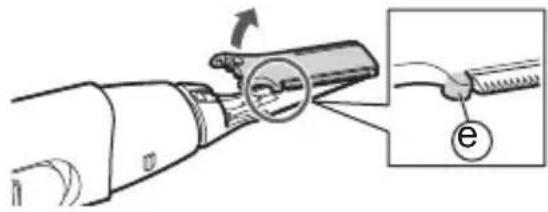
2. Remove it in the arrow direction.
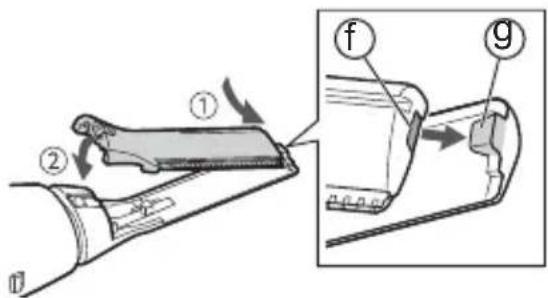
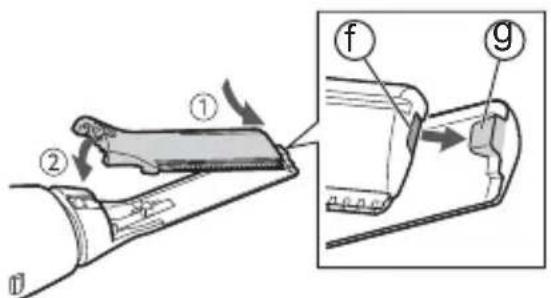
- You can remove it easily by raising the protrusion (e) with your fingernail.
- Be careful not to drop the blade.
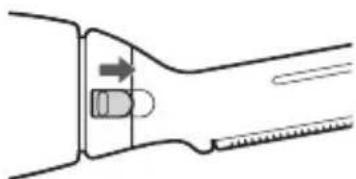
Mounting the blade
- Insert the tiny hook (⑨) on the top of the main body into the hole (①) of the blade.
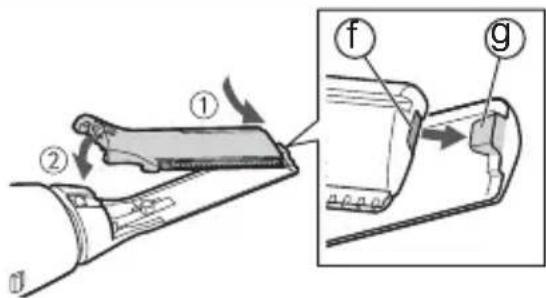
2. Slide the blade locker as indicated by the arrow.
- It is easier to slide it with your nail.
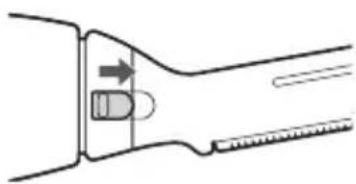
▶ Replacement part
Replacement part is available at your dealer or Service Centre.
Replacement part for ER-RP40 Blade WES9280
Troubleshooting
Problem Action
The appliance is not cutting as well as before.
▶ Replace the blade.
▶ Replace with a new battery.
Clean off any remaining hair from the appliance.
The appliance is not working.
▶ Replace with a new battery.
Make sure the battery is installed correctly.
If the problems still cannot be solved, contact the store where you purchased the unit or a service centre authorized by Panasonic for repair.
Specifications
| Power supply Dry-cell battery | |
| Battery type | One LR6 (AA alkaline battery) (Sold separately) |
| Airborne Acoustical Noise | 66 (dB (A) re 1 pW) |
Disposal of Old Equipment
Only for European Union and countries with recycling systems
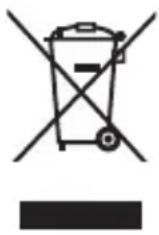
This symbol on the products, packaging, and/or accompanying documents means that used electrical and electronic products must not be mixed with general household waste.
For proper treatment, recovery and recycling of old products, please take them to applicable collection points in accordance with your national legislation.
By disposing of them correctly, you will help to save valuable resources and prevent any potential negative effects on human health and the environment.
For more information about collection and recycling, please contact your local authority.
Penalties may be applicable for incorrect disposal of this waste, in accordance with national legislation.
Panasonic
C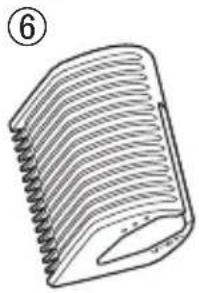
⑦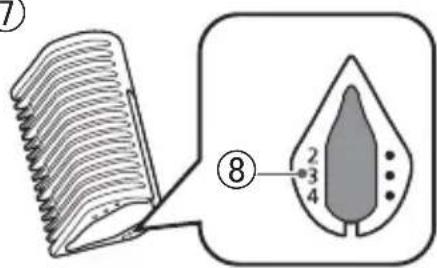
Deutsch
D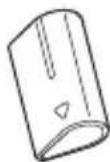
E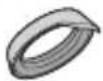
F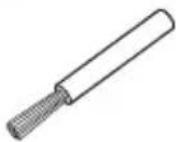
B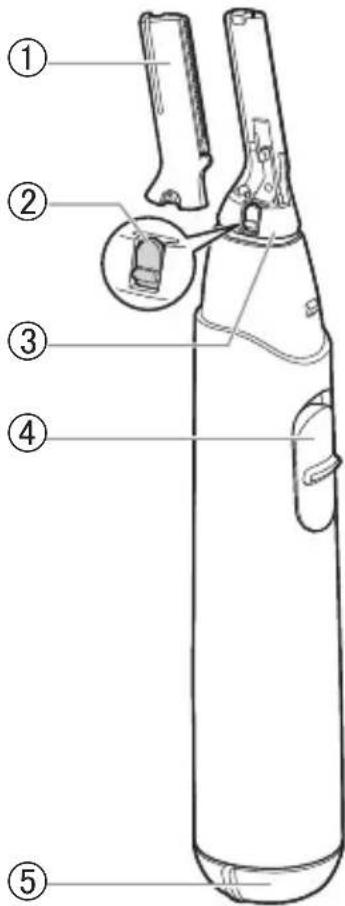
Notes
Skin
Cutting wet hair
Removing
Pivot lock
Removing
Precision attachment
Maintenance
▶ Notes
German
► Spare parts
▶ Accident prevention
C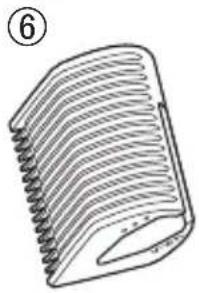
⑦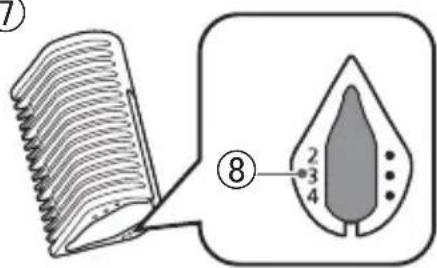
D
E
F French
B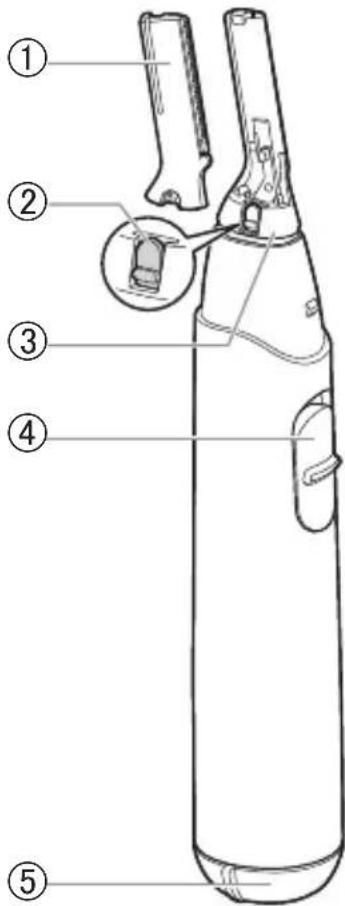
A Protective cap B Main body
© Eyebrow comb attachment
Notes
Skin
How to remove
Lock system
How to remove
Maintenance
Notes
Blade assembly
50
C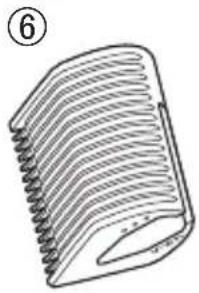
⑦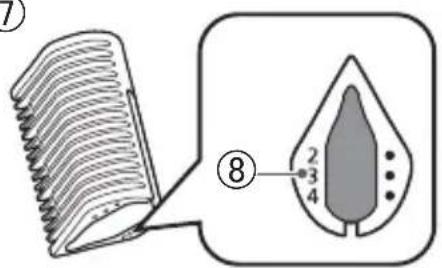
D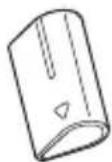
E
F
B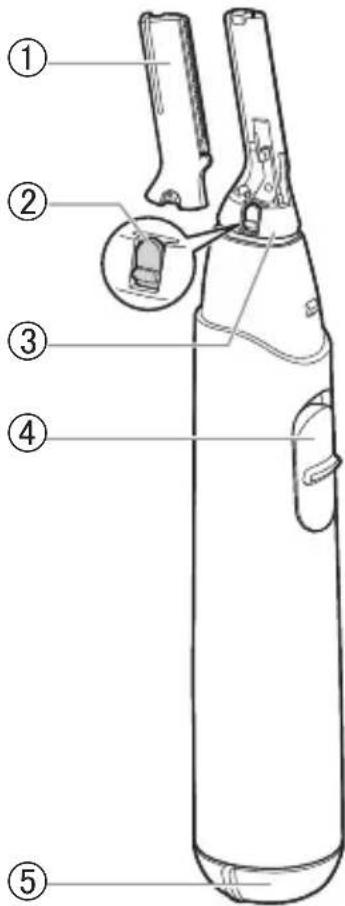
Eyebrow comb
Note
Italian leather
How to remove
How to remove
Maintenance
Mount the blade
▶ Spare parts
C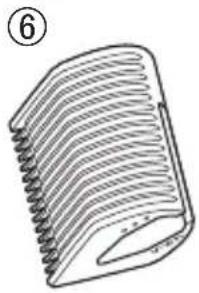
D
E
F
B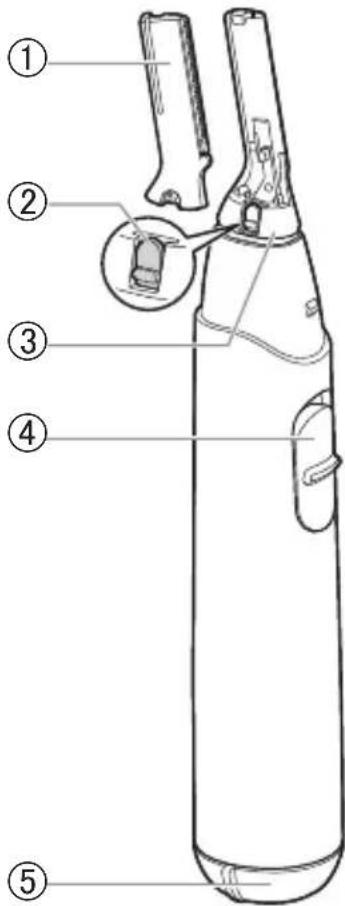
Notes
Skin
Spanish
How to remove it
Remove it straight.
How to remove it
Maintenance
Notes
C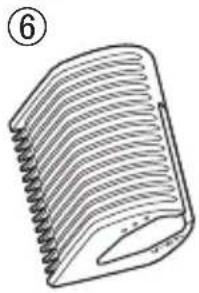
D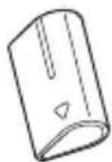
E
F
B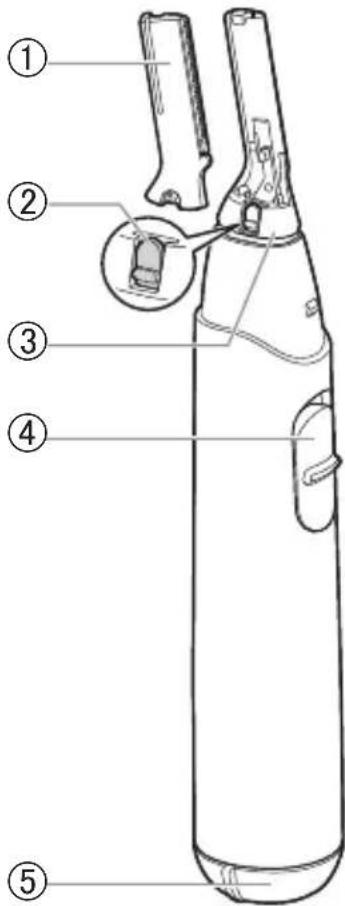
Remarks
Skin
Trimming wet hair
Removing
Removing
Dutch
Detail attachment
Maintenance
▶ Remarks
Attaching the blade
▶ Replacement parts
C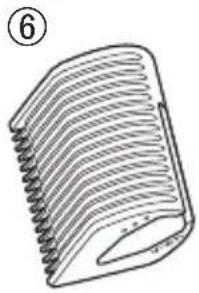
⑦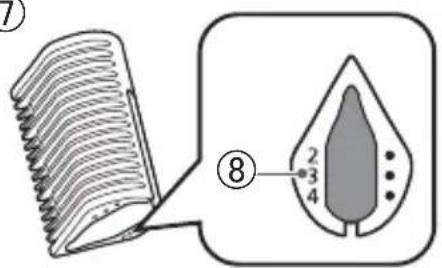
D
E
F
B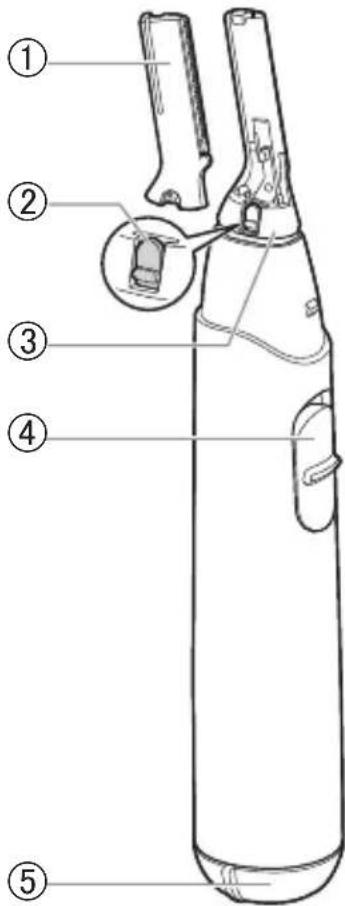
Notes
Skin
2

How to remove
Remove it horizontally.
Portuguese
How to remove
Portuguese

Maintenance
Notes
Removing the blade
114
C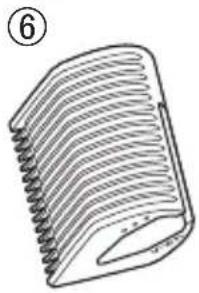
⑦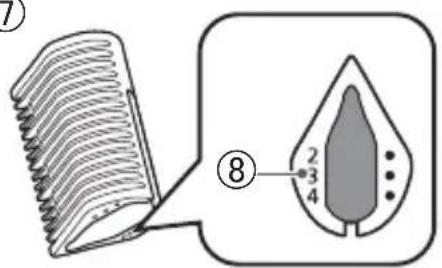
D
E
F
B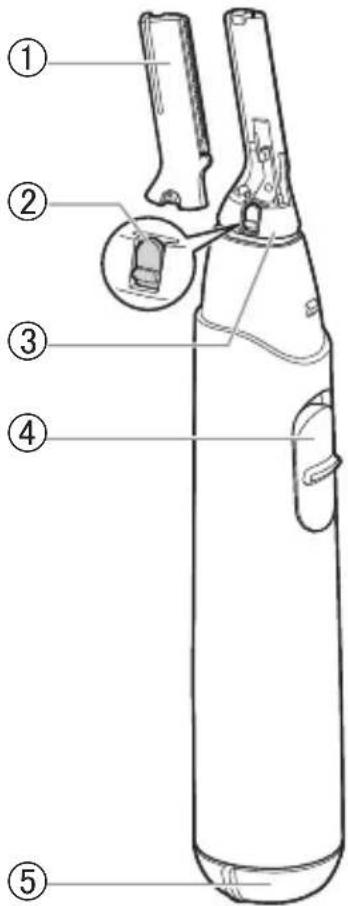
Comments
Skin
How to remove
How to remove
Detail accessories
Maintenance
Remove the blade
▶ Replaceable parts
C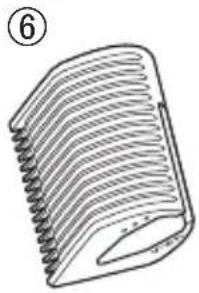
⑦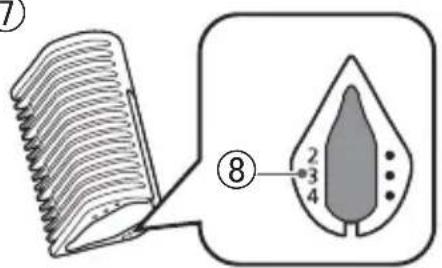
D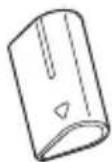
E
F
B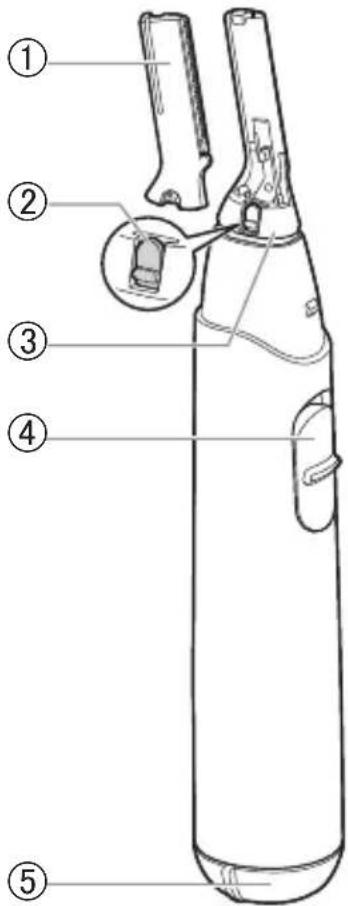
3. Attach the battery cover.
Notes
Skin
How to remove it
Remove it straight.
Danish
142
How to remove it
Detail accessories

Maintenance
▶ Notes
Mounting the blade
▶ Spare parts
Spare parts can be purchased from your dealer or service center.
Spare parts for ER-RP40 Blade WES9280
Troubleshooting
Problem Handling
C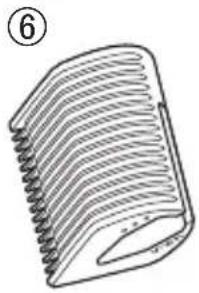
⑦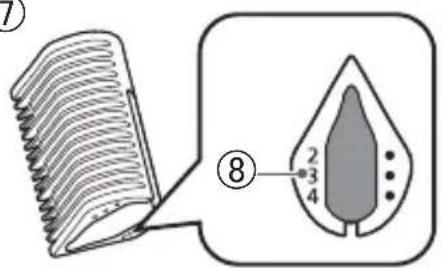
D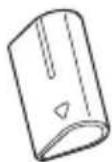
E
F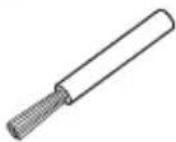
B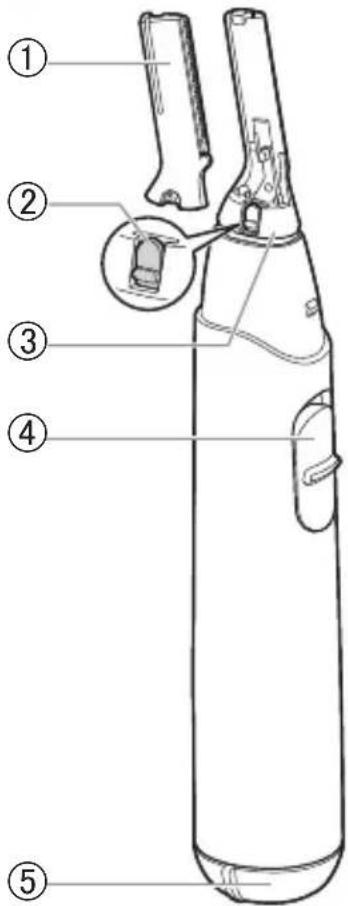
Notes
Skin
How to remove
Remove it directly.
Rotating lock
How to remove
Maintenance
Removing the blade
- Slide the blade lock in the direction of the arrow.
Installing the blade
- Insert the small hook (⑨) on the top of the main body into the hole (④) on the blade.
▶ Spare parts
Spare parts are available from the dealer or a service workshop.
Spare parts for ER-RP40 Blade WES9280
Troubleshooting
Problem Action
C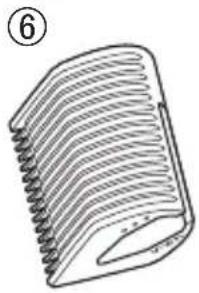
⑦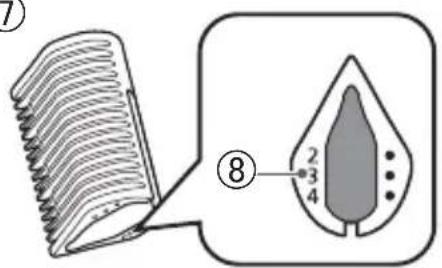
Finnish
D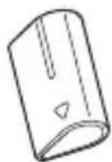
E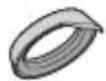
F
B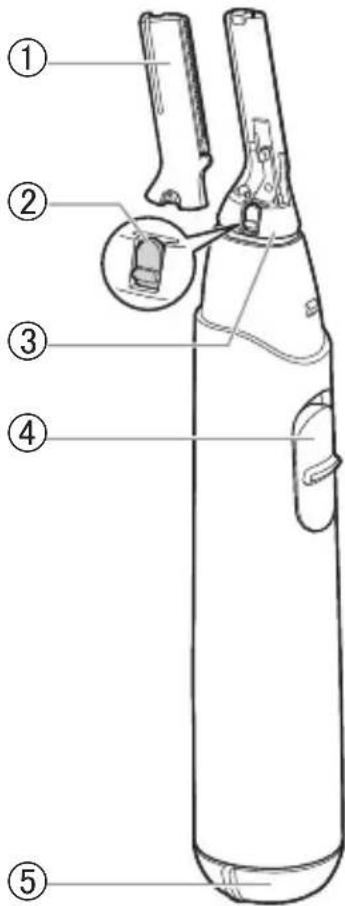
Notes
Skin

Rocking lock part
Precision accessory
Maintenance
Removing the blade
Blade attachment
▶ Spare parts
C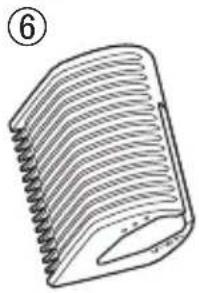
⑦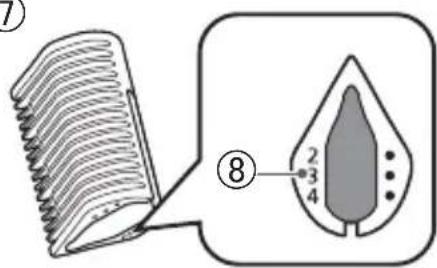
D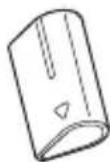
E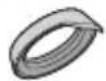
F
B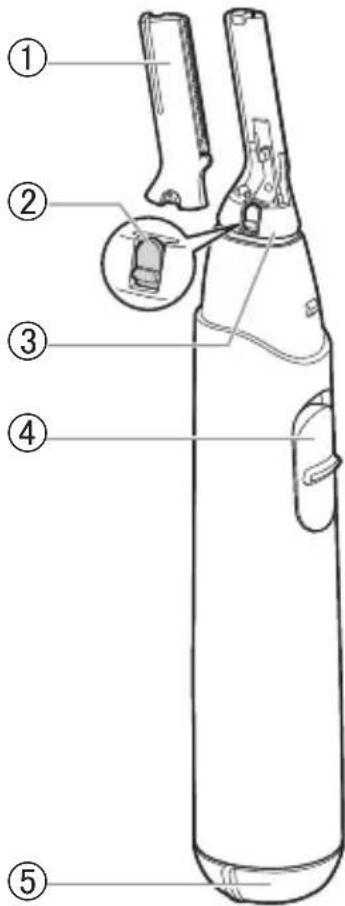
A Protective cap
B Body
Notes
Skin
How to remove
How to remove
Precision tip
Maintenance
Notes
Removing the blade
▶ Spare parts
C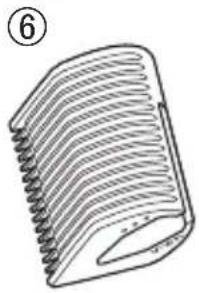
⑦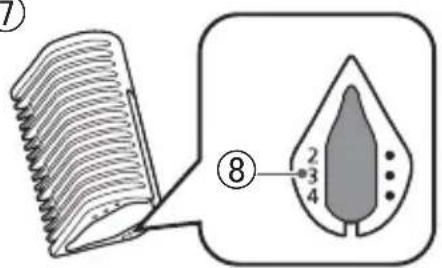
D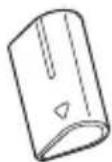
E
F Czech
B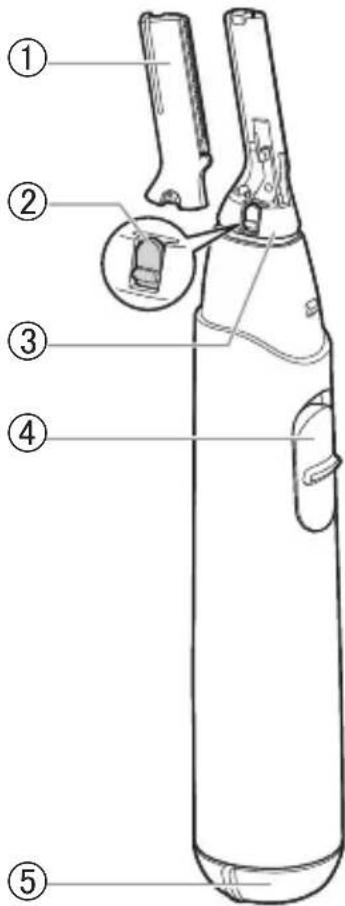
2. Check the polarity (+ and -) and insert the battery.
Notes
Skin

Removal
Czech
Removal
208
Maintenance
▶ Notes
Removing the blade
Installing the blade
▶ Spare parts
C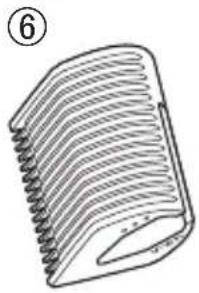
⑦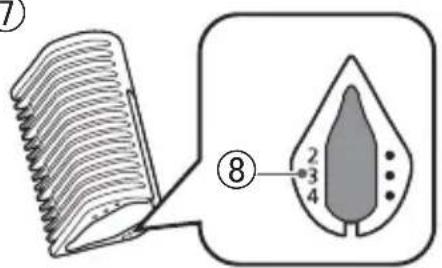
D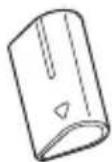
E
F
B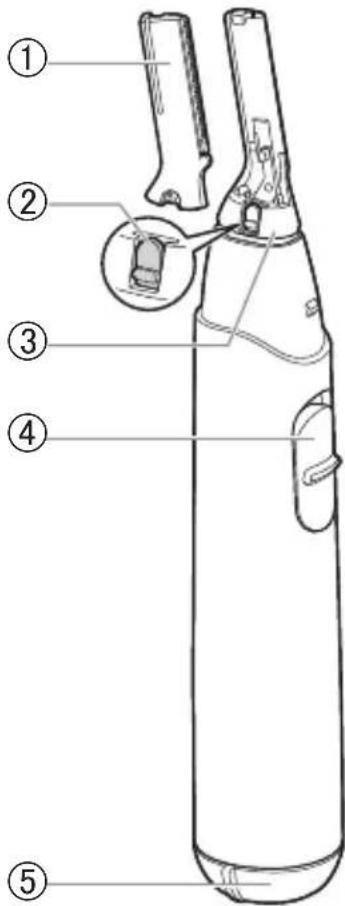
A Protective cover
B Main part
Notes
- Grip the protective cover and pull it outward.
- Switch on the appliance with the main switch and start cutting.
Skin
Disassembly
Remove it straight out.
Disassembly
Slovak
Maintenance
▶ Notes
Blade disassembly
1. Slide the blade lock in the direction of the arrow.
• It can be easily moved with a fingernail.
Blade installation
- Insert the small hook (⑨) on the top of the main unit into the hole (④) on the blade.
2. Slide the blade lock in the direction of the arrow.
• It can be easily moved with a fingernail.
▶ Spare parts
C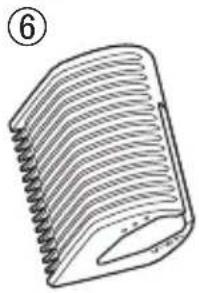
⑦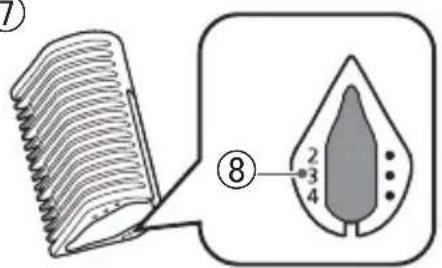
D
E
F
B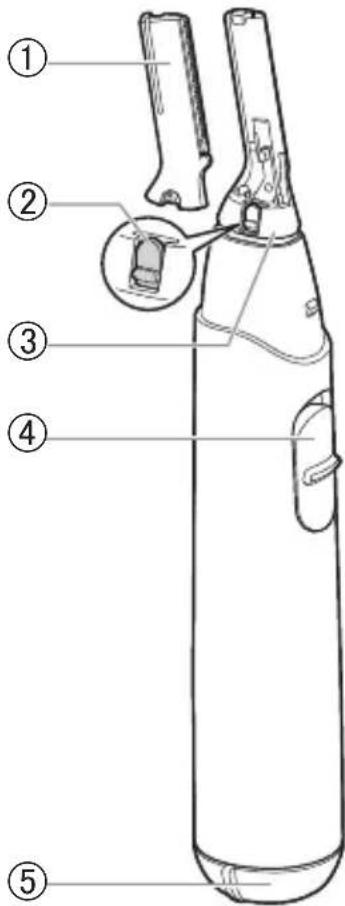
Notes
Skin
Packaging
Pull straight down.
Packaging
Hungarian
Maintenance
▶ Remarks
242
▶ Spare parts
C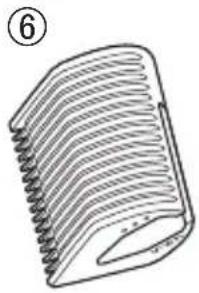
⑦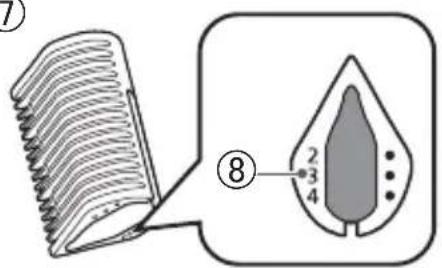
D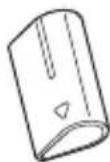
E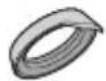
F
B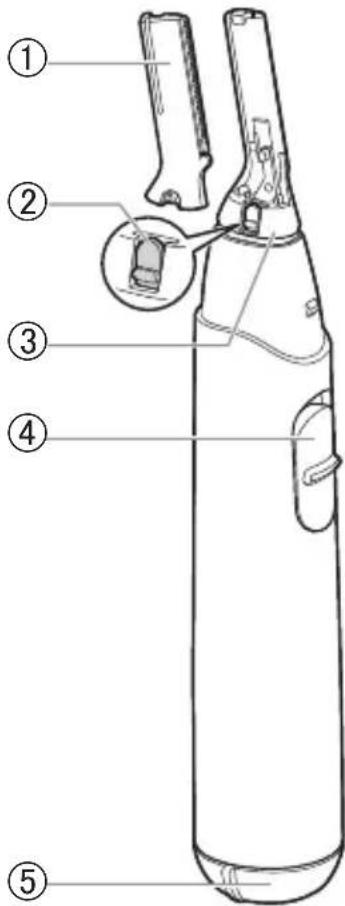
A Protective cap B Main part
Remarks
Leather
Wet hair cutting
How to remove
Romanian
How to remove
Romanian
Maintenance
Removing the blade
Installing the blade
▶ Spare parts
C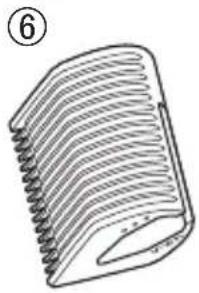
⑦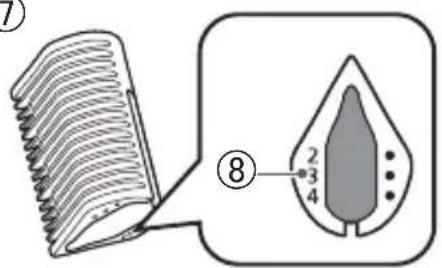
D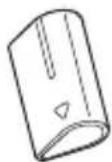
E
F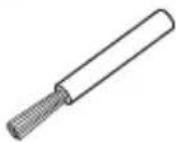
B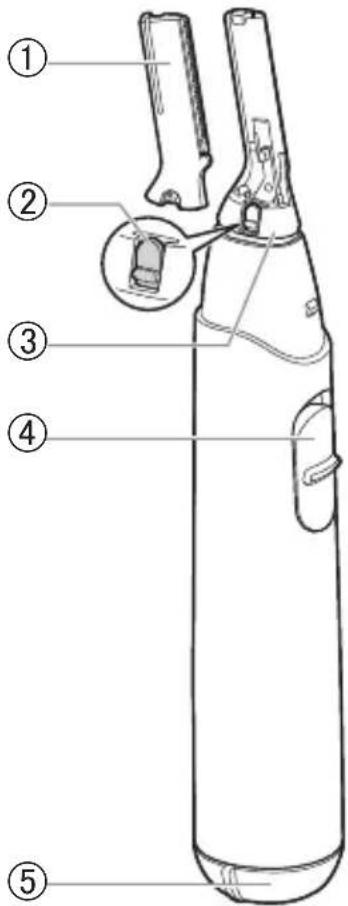
A Protective cover B Main body
Notes
Binding
Removal
Turkish
270
Removal
Detail appendix
Maintenance
Notes
Removing the blade
Installing the blade
▶ Spare parts
33, Wanbao North Street, Wanbao Industry Zone, Zhongcun, Panyu District, Guangzhou City, Guangdong Province, China
AUTHORIZED REPRESENTATIVE
Importer:
Tesan Iletisim A.S.
C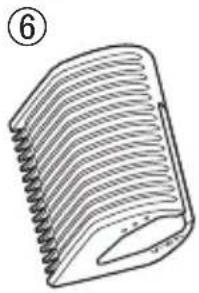
⑦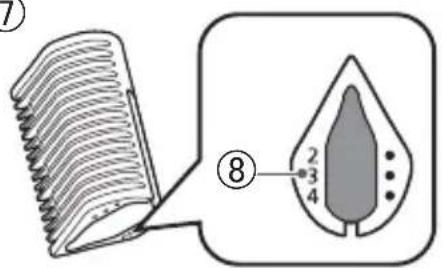
D
E
F
B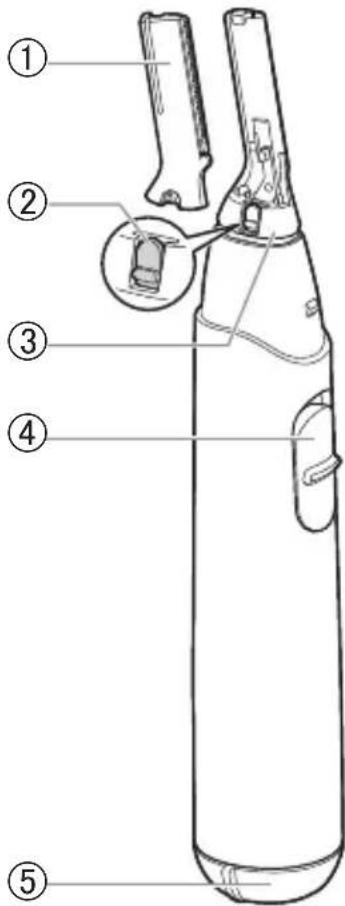
Notes
Leather
2

Removal method
Removal method
Maintenance
▶ Notes
Spare parts
© Panasonic Corporation 2021
⑤ EN, GE, FR, IT, SP, DU, PT, SW, DA,
NW, FI, PL, CZ, SK, HU, RO, TK, GR
Printed in China
ER9700RP401503 S0621-0

- PANASONIC
- CONTENTS
- WARNING
- SAFETY PRECAUTIONS
- EXPLANATION OF SYMBOLS
- CAUTION
- PREVENTING ACCIDENTS
- TO PROTECT SKIN
- THIS APPLIANCE
- THE BATTERY
- PARTS IDENTIFICATION
- INSTALLING THE BATTERY
- REMOVE THE BATTERY COVER
- CHECK THE POLARITY (+ AND -) AND INSTALL THE BATTERY
- ATTACH THE BATTERY COVER
- NOTES
- HOW TO USE
- TRIMMING WET HAIR
- REMOVING AND MOUNTING THE ATTACHMENTS
- EYEBROW COMB AND DETAIL ATTACHMENT
- HOW TO MOUNT
- HOW TO REMOVE
- SWING LOCK ATTACHMENT
- HOW TO USE WITH ATTACHMENT
- EYEBROW COMB
- DETAIL ATTACHMENT
- MAINTENANCE
- WET CLEANING
- DRY CLEANING
- REMOVING AND MOUNTING THE BLADE
- REMOVING THE BLADE
- SLIDE THE BLADE LOCKER AS INDICATED BY THE ARROW
- REMOVE IT IN THE ARROW DIRECTION
- MOUNTING THE BLADE
- REPLACEMENT PART
- TROUBLESHOOTING
- PROBLEM ACTION
- SPECIFICATIONS
- DISPOSAL OF OLD EQUIPMENT
- ONLY FOR EUROPEAN UNION AND COUNTRIES WITH RECYCLING SYSTEMS
- CUTTING WET HAIR
- REMOVING
- PIVOT LOCK
- PRECISION ATTACHMENT
- ACCIDENT PREVENTION
- LOCK SYSTEM
- BLADE ASSEMBLY
- NOTE
- MOUNT THE BLADE
- SPARE PARTS
- HOW TO REMOVE IT
- REMARKS
- ATTACHING THE BLADE
- REPLACEMENT PARTS
- COMMENTS
- DETAIL ACCESSORIES
- REMOVE THE BLADE
- REPLACEABLE PARTS
- PROBLEM HANDLING
- ROTATING LOCK
- INSTALLING THE BLADE
- ROCKING LOCK PART
- PRECISION ACCESSORY
- BLADE ATTACHMENT
- PRECISION TIP
- CHECK THE POLARITY (+ AND -) AND INSERT THE BATTERY
- REMOVAL
- DISASSEMBLY
- BLADE DISASSEMBLY
- SLIDE THE BLADE LOCK IN THE DIRECTION OF THE ARROW
- BLADE INSTALLATION
- PACKAGING
- WET HAIR CUTTING
- DETAIL APPENDIX
- AUTHORIZED REPRESENTATIVE
- REMOVAL METHOD
Brand : PANASONIC
Model : ERRP40
Category : Beard trimmer