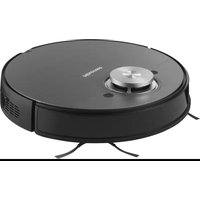
Hi Move V - Vacuum Cleaner HISENSE - Free user manual and instructions
Find the device manual for free Hi Move V HISENSE in PDF.
| Product type | Cordless vacuum cleaner |
| Brand | Hisense |
| Model | Hi Move V |
| Power source | Rechargeable lithium-ion battery |
| Runtime | Up to 108 min (min mode), 36 min (medium mode), 10 min (max mode) |
| Power levels | 3 levels: min, med, max |
| Automatic mode | Yes, with floor type detection |
| Display | OLED digital screen |
| Filtration system | Washable filter (replacement recommended every 6 months) |
| Dustbin capacity | Not specified |
| Included accessories | Motorized floor brush, motorized textile nozzle, 2-in-1 crevice tool, narrow crevice tool, wall mount with adapter |
| Battery type | Lithium-ion, removable |
| Dustbin cleaning | Empty by bottom opening, washable with warm water |
| Filter maintenance | Shake or rinse with warm water, dry thoroughly before reinstalling |
| Safety | Automatic shutdown in case of overheating, protection against overvoltage and overcurrent |
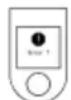
| Error codes | Display of error codes for diagnosis (e.g., error 1 low battery, error 104 high charging current) |
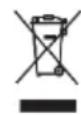
| Disposal | Remove the battery before disposal, selective collection of WEEE |
| Use | Domestic use, dry dust vacuuming only |
| Weight | Not specified |
| Dimensions | Not specified |
Frequently Asked Questions - Hi Move V HISENSE
User questions about Hi Move V HISENSE
0 question about this device. Answer the ones you know or ask your own.
Ask a new question about this device
Download the instructions for your Vacuum Cleaner in PDF format for free! Find your manual Hi Move V - HISENSE and take your electronic device back in hand. On this page are published all the documents necessary for the use of your device. Hi Move V by HISENSE.
USER MANUAL Hi Move V HISENSE
When using the vacuum cleaner always observe the following basic safety precautions: Carefully read this instruction manual and only use the appliance in accordance with the instructions herein. Before using the appliance for the first time, remove all protective film or plastics. // Never leave the appliance unattended during use. // Before using the appliance, carefully assemble all of its parts. // Only use the appliance indoors and in dry areas. // Only use the appliance with the parts recommended by the manufacturer. // Do not use the appliance if it has been dropped, if it is damaged, if it has been kept outdoors, or if it has been dropped or immersed in a liquid. // Regular cleaning can extend the appliance's useful life. // Make sure your hair, loose parts of your garments, fingers or other parts of the body do not come into contact with the vents or moving parts of the appliance. // The appliance complies with all required standards regarding electricity, and radio interference regulations. // The appliance is not intended to be used by children and persons with impaired physical or mental abilities. This appliance may be used by children aged 8 years and more, and by persons with reduced physical, sensory or mental capabilities or lack of experience and knowledge, if they are supervised during the use of the appliance or if they have been provided relevant instructions regarding the use of the appliance in a safe way, and they understand the hazards involved. Keep children under supervision while they are using the appliance and make sure they do not play with it. // Children should not perform any cleaning or maintenance tasks on the appliance, unless they are older than 8 years, and they do so under supervision. // Switch off the appliance after use.
Danger
Do not immerse the main unit/appliance housing or the charging base in water or any other liquid and do not rinse them under running water.
Special warnings
Before connecting the appliance or the charging base with the power cord to the power mains, make sure the indicated voltage matches the voltage of the power mains in your home. // Do not used a damaged vacuum cleaner or a damaged charging base (or adapter - depending on your vacuum cleaner model). // If the charging base (or adapter) is damaged, replace it only with an original spare part in order to avoid danger. // A transformer is integrated into the adapter. Removal and replacement of adapter with another one are not allowed as this may lead to a dangerous situation. // Only charge the vacuum cleaner with the supplied adapter and charging base. The adapter may heat up during charging. This is a normal occurrence. (Depending on your model, if it has an adapter.) // Switch off the appliance during charging. // Never use the vacuum cleaner without filters or filtering unit in place. // The exhaust vents may not be blocked during vacuum cleaning. // Only use the appliance for household purposes and indoors. // Keep the suction vents clean and free in order to ensure optimum and unimpeded suction power of the appliance. It is highly recommended to regularly clean the open parts of the suction hose, and to remove dust, hair, or anything else that may block the airflow. // Before cleaning the support or the charging base, unplug it from the power socket. // Never use the vacuum cleaner to clean up embers or filings, cigarette butts, matches, liquids (e.g. water, carpet cleaning foam), or sharp or pointed objects (broken glass
etc.). // Keep the suction tube or the open part of the appliance away from your face and body. // Never use the appliance to vacuum construction material (such as fine sand, lime, cement powder, toner dust etc.). This can cause damage to the appliance.
Problems and solution
| Problem | Possible reason | Solution |
| Not working. | The battery is dead. The handy VC is not assembled correctly. | Charge. Assemble the handy VC correctly. |
| Suction power has decreased. | The dust cup is full. Block in filter. Block in the air inlet tunnel or on the roller of electrical brush. | Pour out the dust. Clean or change filter. Clean the electrical brush. |
| The VC is not charging. | The charger is not connected on socket. The connector of charger is not connected to the hole of base body. The handy VC is not assembled to the body. | Connect the charger on socket. Connect the charger with base body of VC. Assemble the handy VC on body. |
| Use very short time after charging. | Not enough charging time. The battery is aging. | Charge according to instruction. Change the battery. |
Environment
not throw away the appliance with the normal household waste at the end of its life. Hand it in at an official collection point for recycling. By doing this, you help to preserve the environment.
This appliance is marked according to the European directive 2012/19/EU on Waste Electrical and Electronic Equipment (WEEE). This guideline is the frame of a European-wide validity of return and recycling on Waste Electrical and Electronic Equipment.
Guarantee & service
If you need information or if you have a problem, please contact the Hisense Customer Care Centre in your country (the phone number is in the worldwide guarantee leaflet). If there is no Customer Care Centre in your country, go to your local Hisense dealer or contact the Service department of Hisense domestic appliances.
Note: The warranty on the battery of vacuum cleaner is 12 months.
For personal use only!
For easier transport, some appliance parts are packed separately and safely placed in the main packaging unit. // Before first use, read and follow the instructions for assembly and safe use. // The appliance is intended for dry vacuuming in a domestic environment.

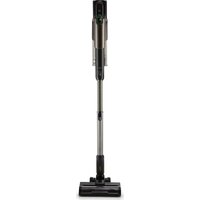
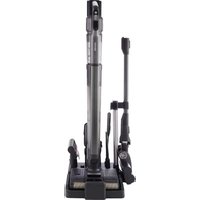
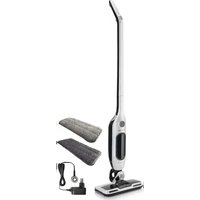
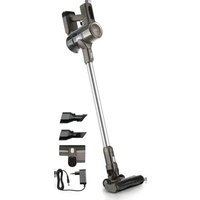
PARTS
1 Housing with the motor, battery and dust container
2 Suction hose
3 Motorised floor brush
4 Motorised nozzle for vacuuming textile surfaces
5 2-in-1 nozzle
6 Long narrow nozzle
7 Wall bracket with adapter

INSTALLATION
Insert the battery into the motor housing. //Connect the upper part of the hose to the motor unit and the lower part to the floor brush. The installation is correct when the appliance is firmly fixed all the way to the grooves (you hear a slight click at all settings).
There is a charging station in the kit, on which you can install two smaller nozzles. Follow the assembly instructions shown in the figure. //Keep the charging station at least 1 m away from any heating bodies. // Due to its shape, the appliance is not self-standing.

USE
Brushes and nozzles fit both the hose and the motor unit. // By pressing the button on the brushes and nozzles, you can freely switch between them, as they are intended for various uses:
The floor brush is used to vacuum all floor surfaces (vacuuming dry floor surfaces). Do not try to vacuum high fibre carpets as they may become entangled in the roller brushes and damage the vacuum cleaner.
The textile surface nozzle comes in handy when vacuuming pet hair, sofas, beds, etc.
The narrow nozzle is intended for vacuuming narrow hard-to-reach parts (corners, sofas, cobwebs, behind radiators...).
Nozzle with bristles (for frames, drawers...).
CHARGING
Charge the vacuum cleaner at least 1 m away from any heating surfaces. // The appliance cannot be switched on while charging.
The adapter with the vacuum cleaner charging cable is already mounted in the charging station. If you do not want to charge the vacuum cleaner at the charging station despite the warnings, follow the instructions for safely removing the adapter with the cable (figure). // By pressing the button on the vacuum cleaner battery, you can safely remove the battery, which can also be charged separately from the vacuum cleaner.
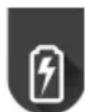
// During charging, the battery percentage will appear on the display unit.

OPERATION
1 On/off button.
2 Speed control knob to adjust the suction power // the vacuum cleaner has three suction speeds.
3 The digital display shows several different functions of use:
AUTO The vacuum cleaner has a floor brush with a sensor that detects what kind of floor you are vacuuming. It adjusts the vacuuming speed and power accordingly. This keeps the battery life intact.
Min-max When selecting the speed, the display shows you how much time you have left to vacuum before the battery runs out // You can choose between three different speeds (max (up to 10 min), med (up to 36 min), min (up to 108 min))
Roller Symbol that lights up if a foreign object gets stuck in the brush. When this symbol is lit, remove stuck the foreign object.
Air flow This symbol is displayed when the vacuum cleaner detects a blocked air intake. Turn off the vacuum cleaner and check if there are any foreign objects in the vacuum cleaner. // Empty the container, check if the filter is clogged. // Regularly replacing the filter preserves the battery and extends the life of the vacuum cleaner.
Error Check the Error code list. For each error code, it also shows you the solution to the problem.
DUST CONTAINER AND FILTERS
1 Dust container and filters
Remove the hose from the motor unit. // To clean the dust container, push the button on the bottom of the container // The bottom of the dust container opens, and dust can be removed from the container. // To remove the filter rim, rotate the rim and pull it out of the container. // To remove the filter, press the button on the bottom part of the container (above the battery) // To remove the container from the motor unit, carefully lift the dust container at an angle, as shown in the figure, so as not to damage the circuit. // Remove the filter from the container and empty it. // The container, sleeve and filter can be wiped, shaken or rinsed with lukewarm water, but be careful, as improper handling can damage parts of the vacuum cleaner. // Before reinstalling the container back into the appliance, make sure that all parts are completely dry. // To install the inner parts of the container, reassemble the vacuum cleaner correctly. // Never vacuum without the dust filter inserted.
2 Replacing the filter
If you notice that the filter is damaged, replace it immediately. With regular use, we recommend replacing the filter every 6 months to ensure the longest life of the vacuum cleaner.

DISPOSAL OF THE APPLIANCE
If you want to replace the appliance or no longer need it, you should also think about protecting the environment.
The battery must be removed before disposing of the vacuum cleaner. // To safely remove the battery, make sure that the battery is completely discharged. If the appliance does not have a removable battery, follow the instructions given in the booklet with figures.
ERROR CODES
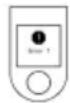
| Error 1 | The battery is running low and needs to be replaced. |
| Error 2 | The NTC sensor has malfunctioned and requires either battery replacement or professional repair. |
| Error 10 | The suction motor signal wire is defective and needs to be repaired by a professional. |
| Error 11 | The appliance is malfunctioning and requires professional repair. |
| Error 12 | The operating current is too high or the bed brush and floor brushes are defective and need to be repaired by a professional. |
| Error 13 | The battery pack is not installed correctly, so it needs to be reinstalled - see quick guide for battery installation. When the battery is installed, the OLED still displays an error and needs to be repaired by a professional. |
| Error 14 | The floor brush roller does not work when it is installed on the floor brush, and the floor brush has a power-on fault and needs to be taken to a professional for repair. |
| Error 104 | The charging current is too high, causing the charger to fail. The charger needs to be replaced. |
| Error 105 | The charging voltage is too high, causing the charger to fail. The charger needs to be replaced. |
| Error 106 | If the charging temperature is too high, wait 60 minutes before charging. If the error is still showing, replace the charger. |
| Error 107 | When operating the appliance at a high speed, if the temperature of the appliance or the environment is too high, it is advisable to wait 60 minutes before resuming use. |
| Roller stuck | Check to see if any debris is blocking the airflow into the hose. Consult the quick guide for proper removal of the roller. Detach the roller from the brush and clean the brush. Check that there is no more debris in the hose. |
| Error 109 | The charging time of the charger exceeds 6 hours, indicating a failure, and replacement of the charger is required. |
| Error 110 | Suction motor overvoltage protection. Must be sent to qualified professionals for repair. |
| Error 111 | Suction motor overcurrent protection. Must be sent to qualified professionals for repair. |
| Error 112 | Suction motor overheat protection, resulting in automatic shutdown of the appliance. Must be sent to qualified professionals for repair. |
| Air flow blocked | When operating the appliance at a high speed, the motor has exceeded its optimal speed. The hose is blocked. // The filter is blocked. // Note: ensure that the filter screen, filter and dust container are dry-assembled before use. |
| Error 120 | If the filter and dust container are removed, the vacuum cleaner will not operate. |
Allgemeine hinweise
He notanayte Kopnyca Ha ypea nn 3apekdaata OCHOBA BbB BOa nn npyra TeuhoCT n He rnn PnakheTe noD BOa.
CneuaHn npdyppeXdeHna
IpeDi CBp3BaHe Ha yPeDa IIN 3apeKdaaTa OCHOBA CbC 3axpaHbAaTa MpeKa, Ce yBepTe, Ye yka3aHnT BONTaX CbOTBeCTBa Ha To3N Ha 3axpaHbAaTa MpeKa. // He n3PON3BaIte NOBpeDeHa npaxOCMykaUka, IIN NOBpeDeHa 3apeKdaa OCHOBA (IIN aADanTe - B 3abcIMocT OT MoEJa). // Ako 3axpaHbAaTa OCHOBA (IIN aADanTe) IMA NOBpeDa, NODMeHnIe EInHCTBeHO C opINHaJIHa pe3epBHa YacT, 3a Da NpeDoTBpaTITe OnaHocT. // B aAdanTepe e INTErpHAn TpaHcΦopMaTOp. PpeMaxBaHeTo, IIN NODMaHATA Ha aAdanTepe c Dpyr He e IIO3BOJeHO, Tb Kato MOKe Da IOBeJe DO ONaCHA CHTyaUcaJy. // 3apeKdaiTe npaxOCMykaKata eDInHCTBeHO C aAdanTepe IIN 3axpaHbAaTa OCHOBA OT OKOMIIeKTOBkata. AAdanTept MoKe Da 3arpee NO BpeMe Ha yNoTpe6a. TOBa e HopMaJIHo. (B 3abcIMocT OT MoEJa, Ako Ima aAdanTeP). // N3KlHuOte yPeDa No BpeMe Ha 3apeXdane. // Hnkora He IOn3BaIte npaxOCMykaUata AKO e 6e3 QnItpn IIN QnIITbPHOTO TAYIO He e HA MRCTo. // BcmYkATEJIHnTE OTBOPn He Tp8Ba Da 6bDat 6Ioknpani NO BpeMe Ha paBoTa CypeDa. // N3PON3BaIte yPeDa eDInHCTBeHO 3a DomaknHckn HxJDN I B 3ATBOpeHn IPOCTpAHCTBa. // IOnDbpxKaIte BCMYkATEJIHnTE OTBOPn UcCTN, 3a Da rapaHTnpate ONTMaJIHo I 6e3PpenTCTBeHO BCMYkBaHe. CInHO ppeOpbUHTeJIHO e da NOuNCtBaTe peIOBHO OTBOpENHe Tactn Ha Mapkyua I da ppeMaxBaTe npax, Koca I dpyro, Koeto 6n
MOrIIO Da 6bOKnpa Bb3dUxONOToka. // IpeDi Da NouchBate CToiKaTa NIN 3apeKdaUaTAt OCHOBa, INTeTne Te OT KOHTa. // Hnkora He IN3noJ3BaIte npaxocMykaUkata 3a Cb6npaHe HA BbIeHn, yrapKn, KnbPnteHN KJIeUKN, TeuHOCTN (BODa, PnaHa OT npenapat 3a NOcHtBAHe), INN OCTpN ppeMeTN (CChyEnH CTbKNa n dp.). // DpbXTe Tpb6aTnOtKpNTata Yact OT UpeDa DAJIeY OT BaWInTE JInCe I TIANo. // He IN3noJ3BaIte UpeDa 3a Cb6npaHe Ha CToPteJIHH MaTePnAII (PcBk, ZIMeHT, npax OT ToHep n dp.). TOBa MoKe Da NobpeDn UpeDa.
PpO6JIeMn nppeSeHnA
| ПюбLEM | Възможна ручина | Реценье |
| He paBOTи. | БаTERЯТа e ИЗTOUSЕнa. РьЧАТа прахOCуКачka He e сгЛоб�а правино. | Зареде. Сглобete рьчнATERа прахOCуКачka правино. |
| СиJPATA Na ВсмУКВанe e habаляп. | ТорбИКATA 3a пax e nbЛнa. ФиNTьрьT e БлOKИран. БлOKИран e kaHальТ 3a BxOДЯшь 3dДух илп рОелрьT ha eLEKТрическATA YETKA. | Отстpanепрах. Почистete по Смение ФиNTьр. Почистete eLEKТрическATA ЧETКa. |
| ПрахOCуКачКATA He ce 3apexдa. | Зарадноу устpoістBO He e CBbP3aHO С кONDТа Ha eLEKТрическATA Мржа. КонECHТOPьТ Ha 3apяДНOTO устpoістBO He e CBbP3aH c ИЗВODa Ha 6a3aTa 3a 3apexДанe. РьЧАТа прахOCуКачka He e Глобенa с Корпуca. | Свьржete зарадноу устpoістBO c КонECHТа Ha eLEKТрическATA Мржа. Свьржete зарадноу устpoістBO c БаЗATA 3a 3apexДанe Ha прахOCуКачКATA. Сглобete рьчнATERа прахOCуКачka с Корпуca. |
| РавOTи 3a MNoTo КраТКо Врeme с前列腺 3apexДaнeTo. | Времeto 3a 3apexДанe He e octaTbUHO. Врeme. БаTERЯТa OCTapЯВa. | Сmeneteя с鞘ед ИнструКцinte. Зареде 6baterya. |
OkoJHa cpeJa
He n3XbPnIte ypea c obuayHnTe domaknckn OTnaDbun B kpa H a Kn3HeHn My cnKbI. PpeaTe ro B cb6npaTeJen nyHKT 3a pezuknpahe. ItoTo3n NaHH ue nomorHeTe 3a ona3BaHe Ha OKoNHaTa Cpea.
To3n ypei nma MapknpoBka cblracho Ebponeecka dnpkeTbBa 2012/19/EU oTHoCHO n3XbPrlJeTO Ha n3NoTBAHO eJektpnuecko n eJektpoHBO obOpudBaHe (WEEE). Ta3n MapknpoBka npdctabna BA o6o3NaueHne 3a BaJIuHocB U pJa EbponaHa Bb3MOxHocTta 3a BpIaHe n peuzKnpaHe Ha n3NoJ3BaHO eJektpnuecko n eJektpoHBO obOpudBaHe.
TapaHua n cepBn3
Ako mate hyka ot donbHnTeHa HOpMaun nn Bb3HnKHe npoIe npuOTpebaHa ypea, moJ, obpheCe KbM ceHTbpa 3a obcnykBaHe Ha KIneHTn Ha Hisense BbB Baata cTpHa (TeJefoHHnT Home p E B rapaHOnHATA KNXKA 3a MeKdyHapOHa rapaHua Ha ypea). Ako BbB Baata cTpHa Hma nEHTbp 3a obcnykBaHe Ha KIneHTn, OTndete npu MeCTnna Ppectabnten Ha Hisense nn Ce CbpxKeTe Cbc CneuaHn3npaHna cepBN3 Ha DomaknHckn ypei Hisense.
3a6eJekka: IapauHcIyTa 3a 6aTePnIa Ha npaxocMyKaKata e 12 Mececa.
Camo 3a JnUHa ynoTppe6a!
3a no-neecho TpaHcnpTupane HkON qactn Ha ypeDa ca onakobAHN OTdeHNO i ce nocTaBeHN NO 6e3onaceH naH B OCHOBnI pAKet. // PpeDN PbPBA ynoTpe6a npoTeTe u cneDbAte INCTpyKunTe 3a crJIO6raBaHe i 6e3onacHO nJ3BaHe. // YpeBt e npedHa3NaueH 3a cyxo N3CMyKbaHe Ha npax B DomaHa cpeDa.

YACTN
1 Kopnyc c motop, 6aTePnI KoHTeHep 3a npax
2 CmykaTeHa Tpb6a
3 MoTOpn3npaHaYeTa 3aNoD
4 MoToPn3IpaHa npucTbKa 3a n3cMyKBaHe Ha TeKCTnHn noBbpxHOCTn
5 IpnCTaBka 2B1
6 丁bIra npicTabka 3a npoceenn
7 CToIka 3a cTeHa c aadantep

MOHTAX
IocTaBete 6aTePnYtA B Kopnyca Ha Motopa. // CbBypKeTe rOpHata Yact Ha Tpb6aTa KbM MOTOpHna 6JOK mdoJIHaT aYacT KbM YeTKaT3a NOD. CrNo6BaHeTo e npabNJHO, KOraTO ypeDbTe 3dpaBO npNKpeHn DOKpaB BKNe6oBeTe (UyBa ce UpaKaBaHe BB BCNUHn HAcTpoNk).
KOMNKeTbT BKNIOUHa 3apdHa CTaHcH, Ha KOrTo MoXeTe Da INHCTaHnPaTe DBe NO-MaIK NpNC TaBKn. CJeDbAte TpaФuHnTe INHCTpyKcHm 3a CrNo6BaHe. // DpbXTe 3apdHaTa CTaHcHnHa pa3cTOHne nohe 1 m ot BCraKaBn HArpeBaTeHNypeDn. // Iopadn CBOr dIz3aHn ypeDbT He e CBO6OHDocToH.

yNOTPE6A
YeKNTe I npCTaBKeIe nacBat KaKTo Ha Tpb6aTa, TaKa I Ha MOTOpHna 6JIOK. // Ype3 HATnCKaHe Ha 6yTOHa Ha YeKNTe I npCTaBKeIe MoXeTe CBO6OJHO da I Na CMeHЯTe NO JxEJaHne, Tb Kato Ca IpeDHa3HaueHn 3a pa3JIuHn ZeJI:
- YeTKaTa 3a nOe c N3NOJ3Ba 3a N3CMYKBAHe Ha BCNUKn NIOOB NIOBbpxHocTN (N3CMYKBAHe Ha cyXn NIOOBN NOBbpxHocTN). N36raBte KINIMM C nbIbT KOCbM, TbN KATO TE MORAT da ce 3aNNETAT B pONKaTa Ha YETkA Ta I da NOBpejT npaxOCMyKaYkata.
- IpnctabKaTa 3a TeKCTnHn NOBbpxHOCTn e ydoHa 3a n3cMyKBaHe Ha KOCMn OT dOmaun Hn HIObUMn, DnBaHN, JERNa n dp.
- PnuctabKaTc TeceH NaKpaHKe npedHa3NaueHa 3a N3cMyKBaHe Ha TcHn, TpydnoocbHMeCT (bTIN, DnBaHn, naXHH, 3ad paDnAtopnte n dp.).
- PnuctabKa cyeTna (pamKn, YekMeJKeTa...
3APEXDAHE
3apeKdaIte npaxocmykaKaTHa noHe 1 m ot BcraKaBn ropeu nOBbpXHOCTn. // YpeDbT He Moxe da CE BKIOUyBa No BpeMe Ha 3apeKdaHe.
AaantepbT c6c 3apnHnKa6en Ha npaxocmykaKATA e BrpaDeH B 3apnHa TcAnu. AKe He XeJaTe da 3apeXdTe npaxocmykaKATA B 3apnHaTcTaHnBbIpeKn IpeDynpexDeHnra, Cna3BaTe HNCTpyKmnte 3a 6e3oNaCHO CBaJIHe Ha aanTePA n 3axpaHbauNn Ka6en (BX. NIOCTpauNtA). // Upe3 HATnCKaHe Ha 6yToHa Ha 6atePnTA MoKeTe 6e3oNaCHO Da n3BaNTe. BatePnTA MoKe Da ce 3apeJda n OTdeHNO OT npaxocmykaKATA. // P0 BpeMe Ha 3apeJdaNeDCnIeT noka3Ba pOceHTa Ha 3apd Ha 6atePnTA.

PABOTA
1 ByTOH 3a BKNIIOUBAHe/U3KNIIOUBAHe.
2 ByToH 3a KOHTpOHa cKOpocTtA, KoITo perynipa CInata Ha 3acMyKBaHe // IpaXOCMyKaKata HMa TpN cKOpocTn Ha 3acMyKBaHe.
3 UnpoBnT DnCnIe NokaBa HkoKo pa3NHyH cyHKu 3a n3no3BaHe:
AUTO IpaxocMykaKaTa pa3nOla c yeTka 3a noC cbc ceH3Op, KOIto pa3no3HaBa Bnda Ha nooBata HactnJa. Toi perynipa ckopocTt ha MoUHOCTTt Ha 3acMyKbaHe NO CbOTBeH NaHH. TOBa noDlbpXa ONTImaJIe EKCNIOaTuHOHe JKBOT Ha 6atePnra.
Min-max Korato ckopocTt a n36pana, dinnneT noka3Ba octabaUTo BpeMe 3a n3cmykbaHe Ha npax, npedn 6atepyra Ta da ce n3tou. // MokeTe Da n3bnpate Mejdy Tpr pa3JnHn ckopocTu: (max (do 10 MNHT), med (do 36 MNHT) n min (do 108 MNHT).
3aceHaJa CmBOJ, KOITo CBETBa, aKO yXkDo TJIIO 3aceDHe B YeTKaTa. Korato To3n CmBOJ CBETHe YeTKa OTCTpaHete UyXdoTTO TJIIO.
Блokиран To3n CmBON ce noBBA, KOrato npaxOCMykaKaTa OTkpne 6lOKiPah BxO3 aBb3dyX. V3knHcTe npaxOCMykaKaTa npoBepe TaIIN B He NHa YJxo TIAIO. // N3npa3HeT NOtOK KOHTeHepa I npOBepe TaIIN FpTbPt He e 3anyeH. // PeDobHaTa CMHa Ha FpTTpa 3ana3Ba 6aTepyTA uYdbJIkAba XINBOTa HA npaxOCMykaKaTa.
KoI 3a IpoBepTe cncbKa c KoIOBe 3a rpeuKn. 3a BCEKN KOd 3a rpeuKa ce noka3Ba peueHne Ha rpeuKa npo6Jema.
KOHTENHEP 3A INPAX NΦNJTPN
1 KonmeuHep 3a npax u pfunmpu
CbaTe Tpb6aTa OT MToOp3nHaHb 6NoK. // 3a da Noocntte KOHeHepa 3a npax, HATncHe 6yToHa Ha DbHOTo HA KOHeHepa ce OTBapra n npaxbt MOxpe da 6bde otCTpaHen. // 3a da OTcpanHe npcteHa ha fntbpa, 3abpTepe npcteHa ng n3dppnaite OT KOHeHepa. // 3a da OTcpanHe fntbpa, HATncHe 6yToHa Ha DbHOTo HA KOHeHepa (HaD 6atepnaT). // 3a da n3BaNTe KOHeHepa OT MOTOPHNA BnMATEHNO rno NOBmHete noB bI, KaTO e NOKa3HO Ha NIOCTpauNtA, 3a da He NobpeHne enektpueckata Bepura. // N3dbpnaTe fntbpa OT KOHeHepa n n3npa3Hete. // KOHeHepbT, OTDeJeHNEto fNtbpT MoRat Da ce 3abpcBaT, N3tpcbBat IIN N3PnKaBcT C XnAdka BODa, HO 6bDete BHIMATEHN, Tb KATO HEPaBnHToO 6opabeHe MoXe Da nobpeu Yactnte Ha npaxocMykauKata. // PpeDu DA HHCTaInpate o6paTHo KOHeHepa B ypeDa, YBepTe ce, Ye BCWKn Yactn ca HAnbLHo cyxN. // Crtnobete OTHBO npaxocMykaKaTApabnHO, KATO BbPhe TBpeuHIne Yactn Ha KOHeHepa. // Hnkora He noocTbaTe c npaxocMykaKa 6e3 NoctabEn fNtbp 3a npax.
2 CmHaHaΦunmbpa
Ako 3a6eKnTe, Ye fHNTbpt e NOBpeH, CMeHete ro He3a6abHo. Ipn peDobHa ynoTpe6a npenopbYBaMe CmHa Ha fHNTbpa Ha BceKn 6 Meeca, 3a Da oCnpynte Hau-DbIbr KINBOT Ha npaxocMykaKaTa.

N3XBbPJIHE HA YPeDA
Ako nckate da cmeHnte ypeda nn Bue He HMaTe Hxka ot Hero, Tp6Ba da nomcInTe n 3a ona3BaHe OKoJIHaTa CpeDa.
Ipei Da n3Xbplnte npaxocmykaKata, baTePnraT Tp6Ba da 6bJe n3BaDeHa. // C cen 6e3oNaCHO n3BaJdaHe ce yBepTe, ye e HanbJIHO pa3peDHa. Ako ypeBt Hma cMeHReMa baTePnra, cJeDaBte NHCtpyKUnTe, daEHN B KHNKKATA C NIOCTpaU.
KOIOBE 3A TPEWKA
| Г的整体 1 | Баерияа e почтп разendeи и травьда се сmedи. |
| Г的整体 2 | NTC сенист e неизниразовен i Изиска сма на habаерияа улп пожесноален ремоNT. |
| Г的整体 10 | СигнаннояпRobODнК ha motopa e почеден и травьда вбдуpe ремоHTИран OTпожесноалICT. |
| Г的整体 11 | Урелы e неизниразовен i Изисьда пожесноален ремоNT. |
| Г的整体 12 | РавOTиЯТ TOK e ТВьрde BUCOK iИчЕТКATA 3a ЛгпОичЕТКITE 3a поса DeфeKTнIи Травьда вьдат ремоHTИран OTпожесноалICT. |
| Г的整体 13 | Баерияа He e ИсталлараHa павилно i Травьда вьдуpe Исталлара OTHOBО - ВИжTeКраТКОТ рьковodCTBO 3a Исталларе Ha batepyra. Ако сдд Исталларе Ha batepyra.TLED пожькава дупокASTBA Гrelka, e NeobxOДМ пожесноален ремоNT. |
| Г的整体 14 | Korato ce мontира вьрху чеката 3a поd, polkata Ha chekkata He paBOTи N Chekkata 3a поДпokAZBA Гrelka пу ВКЛЮЧАн; Травьда вьдуpe ЗANECHA NaHpOFECSNOHALNT 3a ремоNT. |
| Г的整体 104 | ЗардияТ TOK e ТВьрde BUCOK iПрочINЯВа НИЗправьНСТ Ha zapdHOTO uCTpoiCTBO.Зардиоту yctpoiCTBO. |
| Г的整体 105 | ЗардиOTO Habрженье e ТВьрde BUCOK iПрочINЯВа НИЗправьНСТ Ha zapdHOTO uCTpoiCTBO.Зардиоту yctpoiCTBO. |
| Г的整体 106 | Ако TemпepаТура пriп зарждане e ТВьрde BUCOK, ИЗчakайte 60 MInHyTNпрди заржданe.Ако ГrelkaТа пordьлжава дуce РадуDEТСТВ. |
| Г的整体 107 | Korato ИзюлбATE урета c BUCOKа SCOPOST i Temпература му e Твьрde BUCOKIи ИОКIHATa Temпература e ТВьрde BUCOKA, спрорьчава дуИЗчAKATE 60 MInHyTN,прди ДупюлжпЕду ot ИЗюлбATE. |
| 3acednANAЧETКа | Проверete дani Някаво 3ambrcBaHene He bokura пріTKA Na Bv3dUx B Trb6bata. 3a daotcpanite роглуКа пріTKA Na Bv3dUx B Trb6bata.просте роглуКа otЧETКАппocmstTу nachsteteчETKATA. Проверete дani B Trb6bata HЯma оше 3ambrcBaHЯ. |
| Г的整体 109 | Вретето за зарждане Ha zapdHOTO uCTpoiCTBO NaBvIIaBA 6чac, Koeto O3NaUvAbeHIN3PpABHOCITNHeO6XIDMOCTOTсмЯнуHa zapdHOTO uCTpoiCTBO. |
| Г的整体 110 | ЗашITO ot пөнанрженье Ha motopa. Римонтт Trрбвда се ИЗbByPsIot KMaФицрarihncSneuJaNCTN. |
| Г的整体 111 | ЗашITO ot CBpbTxTOK Ha motopa. Римontt Trрбвда се ИЗbByPsIot KMaФицрarihncSneuJaNCTN. |
| Г的整体 112 | ЗашITO Na Motopa ot прряВан,В pezuntat Ha Koeto UpeDbT se I3KlIOUVA abTomatMuHO.Pemontt Trрбвда се ИЗbByPsIot KMaФицрarihncSneuJaNCTN. |
| БлokиранВьздушENOTOK | Korato уреты tradebivск skopocst, моторь превшава ontmalnHATA сс skopocst.Trьбатe e Блokиранa. // Флntьрьт e Блokиран. // Белжka: Yeberete, Que ФлntьрьтИ КОТeHepbT 3a npax ca crNoBeHc cyxnnpdiy nTopeba.Флntьрьт И КОТeHepbT 3a npax 3a OTcTpaHEn, прахoxMуkaчkaTa HЯma da paBOTи. |
| Г的整体 120 | Ако Флntьрьт И КОтейнерьт 3a npax 3a OTcTpaHEn, прахoxMуkaчkaTa HЯma da paBOTи. |
3araJIbHi npaBnla 6e3neKn
Пд час корисьань плосом 3авжддOTримуITEся HabeDEнх Нжче паВип 6e3neк:Увaxно рочиайт ecи побнк i ВИКорисьуITE прлад BiДNOВIDNo do BИКладенx y HbOMy inhtrpykui. // Перед першIM ВИКорисьаньгм прладу 3HIMITb yci 3axnchI pIIIBK a60 noiietunelohbe ynaKyaBaHnry. // HikOLn He 3aIIuwaite прлад, zuO npaIoC, 6e3Harlya. // Перед ВИКорисьуITE прлад ВИКлIOUHO BпрIMiSeHHI Ta B cyXnx MlCzAx. // ВИКорисьуITE прлад TiIbKn 3 peKOMeHDoBaHmN BInpO6HnKOM DeTalЯMn. // He BИKORISCTOBYte прлад,якsoВIH yIaB, NOsKODINBCR, 36epirABcR Ha ByLIuCi abo kkuO B HbOrO Notpanila piDHa. // Perynaphe OChIeHNr DOnomOKe NOOBxHTN TepMin PpndATHOCTI прладy. // He DonyckaiTe KOtAKTu BOLOCCR, BiNbHx ChactNH OJary, NaIbCiB Ta IHsIX YAcTHN TiJa 3 OTBopAMn abo pyxOMmN qactHAmn прладy. // Прлад BiDIOBIdae BCIM HeobxdiHm cTahdaptam 9oDo eNeKTprkn Ta padionepeShKOd. // Прлad He PpN3HauEHN ДЯ ВИKOPISCTAHNr DiTbMn Ta OC6aMn 3 ObMeXeHmN φi3UnHmN a60 PO3ymOBmN 3Di6HOCTaMn. Zei прлad MoxHa BИKORISCTOBYBaTn DiTm BiD 8 PokiB i CTapSe, a TAKoK OC6aM 3 ObMeXeHmN φi3UnHmN, CEHCOPHMM a60 PO3ymOBmN 3Di6HOCTaMn Yu 3 HeCTaueIo DoCBiDy Ta 3HaHb,Якso BOH Npe6ByBaIbT niD HarIaDM a60 OTPMaJI N BiDIOBIDHi Bka3IBKn 9oDo 6e3NeuHOrO BИKOPISCTAHNr Ppnlady N yCBiDOMIIOUTb NO'B'3aHy 3 ZIM He6e3neKy. DiTI MoKytb KORISCTOBATncr Ppnladom LiIse NiD HarIaDM DOpocnX. He Do3BOJnTE im rpatncr 3 Hm. // He DopyuaTe dITram ChIeHnA a60 OBCnyROvBaHnR pPnAyd,Якso IM He BInOBHInOcR 8 PokiB i BOH npe6ByBaIOTb 6e3 HarIay. // ВИmkaite прлad nicra ВИKOPISCTAHNry.
He6e3neuHo!
He 3aHypioTe roIOBnI 6Iok / Kopnyc npuJaMy a6o NiIDCTaBky Ira 3apJkaHHy y BODy iHsw pIDHy Ta B XODHomy pa3i He MmIte ix NiD npOTOHOIO BOIOU.
CneuJIbHi 3aCTepExeHHa
Ipeed niknueHnmpnaNy abo ndabKn dny 3apxKaHHdo MepeX jNBLenHnpeKohntec, zo Hnpyra, 3a3nueHa ha npnadi abo ndabci dny 3apxKaHH, BIDNObIac Hnpy3i y BaSi eJektpomepexi. // He BnKOpNCToBvIte nnococ i ndTbky dny 3apxKaHH (a6o aanTpep - 3aneXHO bID moJIePi nnococ), kUO BOHn noXkOJeHi. // Ypa3i noXkOKeHH naCTABKn dny 3apxKaHH a6o aanTpep, u6b yHnKHytn He6e3neKN, ix Heobxidno 3amHHTn Iuwe Ha opnIHbHI Bnp6n. // B aanTpep B6yDObaHo TpaHcΦopMatop. 3abOpHeNo BndaIaTn Ta 3amHrtn aadantep, ockIbKn ce Moxe npn3BeCtN do He6e3NeHoi ciTyauCi. // 3apxJaTe nnococ Inuwe 3a donOMoTOo aadantepa Ta niCTABKn dny 3apxKaHH 3 KOMPLeKty noctaunHry. Pid yac 3apxKaHH aadantep moke HarpBaTnc. Lc HopMaIbHe JbUe. (3aneXHO bID moJIeI, kUO BOHa Mae aadantep.) // Pid yac 3apxKaHH npnlaad notpi6Ho BmMkATn. // HikOnn He BnKOpNCToBvIte nnococ 6e3 φilbtpib a6o φilbtpyBaIbHoro 6loka. // BnYCKHi OTBOPn MOxyTB cyTN He3abokOBaHI niD yac p60tN nnococ. // Pnlnad npn3NaHeyHO BnHrTKOBO dny Nobytoboro BnKOpNCtaHH B npimiiEHHx. // CniKyute, zu6 BCMOKTyBaIbHi OTBOPn 6yIn qNCTIM Ta B HIX He 6yIoo JODHnx nepeHKoD, u6b 3ae3neHTn ONImaIbHy NOTyKHiCTb UCMOKTuBaHH npinaday. Perynpho ouHsuyte BiKpNTi diJnHNK ShnAHy BCMOKTyBaHH Ta
BVDaJIyTe NII, BOLOcC a6o IHsI 3a6pydHeHnry, kI MOxUyTb 3a6LOKyBaTn NOTIK NOBITpR. // IpeD yHsEHNm ONOpN a6o NiDCTaBKn DnA 3apJXaHnR BID'EDHaIe PnpIaN BID eIeKtpomepexi. // HikOnn He BVkOpNCTOByte NlOcOC DnA OUYSeHn R NOBepXOHb BID nOJeNy, MetaJIeBOI CTpyKKn, HeONaIKB, CIPHKIB, pIDIN (HApNKJaD, BODN, NiHN dJIy YHsEHN KINIMIB), ROCpx NpeDMETIB (HApNKJaD, UlamKiB Ckna TToO). // TpImaHTe BCMOKTyBaJIbHy Tpy6Ky Ta BiDKPNTi ChtINH PnpIaNy NpaIi BiD oBNIuYr TINA. // He 3ACTOCOBYte PnpIaN DnA PnpBpaHHy BydIbeNbHx MaTePiAniB (AK-OT NicOK, BaHNO, ZemEHn A60 ToHEPHN NopOswok ToIO). Lc MoKe PpN3BeCTN Do NOWKOJKeHHr PnpIaNdy.
Hecnpabhocti ta ix ycyHeHHa
Ecnn BbXOTNE 3aMeHnB pnp6op nIOn OH Bam 60JIbwe He HnyKeH, NOMHnTE O 3aunTE OkpykaUoJe cpebl.
Ipeep ytniuraeepnnpbopa Heo6xOIMO cHrtb aKKymyIaTOP. //ДЯ 6e3onachoro ChrTna aKKymyIaTopa y6eintecb, YTO OH NOnHocTbIO pa3pJxKeH. Ecnn np6op He oChauen CbeMHbIM aKKymyIaTOPOM, cNe dyuTe HNCTpyKcIaM, pInBedeHHbIM B 6yKJIte C puncHKaMn.
KoDbIOwBOK
| Ошибka 1 | Аккуларов раразяжени оtcлuyжни сбовсрок. Заменite akкумларов. |
| Ошибka 2 | Датчник NTC несправен. Трешиется замена Akкуларов по лимларовпьн的眼ону восток. Пусятся пофессноалы的眼он. �имont. |
| Ошибka 10 | Сигнавны пювор motopа васьваши несправен. Трешиется пофессноалы的眼он. �имont. |
| Ошибka 11 | Пробор несправен. Трешиется пофессноалы的眼он. �имont. |
| Ошибka 12 | Равочий ток симшков Виславinski по лимларовпь的眼он. �имправны и трешиется пофессноалы的眼он. �имontа. |
| Ошибka 13 | Аккуларов неrelавиро установени. Сноа установпес Akкумларов (см. кракове руховдостvo по установке Akкумларов). ECSли Akкушларов поrelавиро установени, по дослел的眼ор. �имправл的眼ор. �имont. �им; �им; �им; �им; �им; �им; �им; �им; �им; �им; �им; �им; �им; �им; �им; �им; �им; �им; �им; �им; �им; �им; �им; �им; �им; �им; �им; �им; �им; �им; �им; �им; �им; �им; 受静止的 �им; �им; �им; �им; �им; �им; �им; �им; �им; �им; �им; �им; �им; �им; �им; �им; �им; �им; �им; �им; �им; �им; �им; �им; �им; �им; �им; �им; �им; �им; �им; �им; �им; ─. �им; ─. �im; ─. �im; ─. �im; ─. �im; ─. �im; ─. �im; ─. �im; ─. �im; ─. �im; ─. �im; ─. �im; ─. �im; ─. �im; ─. �im; ─. �im; ─. �im; ─. �im; ─. �im; ─. �im; ─. �im; ─. �IM; ─. �IM; ─. �IM; ─. �IM; ─. �IM; ─. �IM; ─. �IM; ─. �IM; ─. �IM; ─. �IM; ─. �IM; ─. �IM; ─. �IM; ─. �IM; ─. �IM; ─. �IM; ─. �IM; ─. �IM; ─. �IM; ─. �IM; ─. �im; ─. �im; ─. �im; ─. �im; ─. �im; ─. �im; ─. �im; ─. �im; ─. �im; ─. �im; ─. �im; ─. �im; ─. �im; ─. �im; ─. �im; ─. �im; ─. �im; ─. �im; ─. �im; ─. �in; ─. �in; ─. �in; ─. �in; ─. �in; ─. �in; ─. �in; ─. �in; ─. �in; ─. �in; ─. �in; ─. �in; ─. �in; ─. �in; ─. �in; ─. �in; ─. �in; ─. �in; ─. �in; ─. �in; ─. �im; ─. �im; ─. �im; ─. �im; ─. �im; ─. �im; ─. �im; ─. �im; ─. �im; ─. �im; ─. �im; ─. �im; ─. �im; ─. �im; ─. �im; ─. �im; ─. �im; ─. �im; ─. �im; ─. � im; ─. �im; ─. �im; ─. �im; ─. �im; ─. �im; ─. �im; ─. �im; ─. �im; ─. �im; ─. �im; ─. �im; ─. �im; ─. �im; ─. �im; ─. �im; ─. �im; ─. �im; ─. �im; ─. �im; ─. �m; ─. �m; ─. �m; ─. �m; ─. �m; ─. �m; ─. �m; ─. �m; ─. �m; ─. �m; ─. �m; ─. �m; ─. �m; ─. �m; ─. �m; ─. �m; ─. �m; ─. �m; ─. �m; ─. �m; ─. �im; ─. �im; ─. �im; ─. �im; ─. �im; ─. �im; ─. �im; ─. �im; ─. �im; ─. �im; ─. �im; ─. �im; ─. �im; ─. �im; ─. �im; ─. �im; ─. �im; ─. �im; ─. �im; ─. �. ─. �im; ─. �im; ─. �im; ─. �im; ─. �im; ─. �im; ─. �im; ─. �im; ─. �im; ─. �im; ─. �im; ─. �im; ─. �im; ─. �im; ─. �im; ─. �im; ─. �im; ─. �im; ─. �im; ─. �im ─ �im; ─ �im; ─ �im; ─ �im; ─ �im; ─ �im; ─ �im; ─ �im; ─ �im; ─ �im; ─ �im; ─ �im; ─ �im; ─ �im; ─ �im; ─ �im; ─ �im; ─ �im; ─ �im; ─ �im; ─ �im ─ �im; ─ �im; ─ �im; ─ �im; ─ �im; ─ �im; ─ �im; ─ �im; ─ �im; ─ �im; ─ �im; ─ �im; ─ �im; ─ �im; ─ �im; ─ �im; ─ �im; ─ �im; ─ �im; ─. �im; ─ �im; ─ �im; ─ �im; ─ �im; ─ �im; ─ �im; ─ �im; ─ �im; ─ �im; ─ �im; ─ �im; ─ �im; ─ �im; ─ �im; ─ �im; ─ �im; ─ �im; ─ �im; ─ �im; ─. �im ─ �im; ─ �im; ─ �im; ─ �im; ─ �im; ─ �im; ─ �im; ─ �im; ─ �im; ─ �im; ─ �im; ─ �im; ─ �im; ─ �im; ─ �im; ─ �im; ─ �im; ─ �im; ─. �im; ─ �im ─ �im; ─ �im; ─ �im; ─ �im; ─ �im; ─ �im; ─ �im; ─ �im; ─ �im; ─ �im; ─ �im; ─ �im; ─ �im; ─ �im; ─ �im; ─ �im; ─ �im; ─ �im; ─. �im; ─. �im; ─ �im; ─ �im; ─ �im; ─ �im; ─ �im; ─ �im; ─ �im; ─ �im; ─ �im; ─ �im; ─ �im; ─ �im; ─ �im; ─ �im; ─ �im; ─ �im; ─ �im; ─ �im; ─. �im; ─. �im ─ �im; ─ �im; ─ �im; ─ �im; ─ �im; ─ �im; ─ �im; ─ �im; ─ �im; ─ �im; ─ �im; ─ �im; ─ �im; ─ �im; ─ �im; ─ �im; ─ �im; ─. �im; ─ �im; ─ �im ─ �im; ─ �im; ─ �im; ─ �im; ─ �im; ─ �im; ─ �im; ─ �im; ─ �im; ─ �im; ─ �im; ─ �im; ─ �im; ─ �im; ─ �im; ─ �im; ─ �im; ─. �im; ─ �im; ─. �im; ─ �im; ─ �im; ─ �im; ─ �im; ─ �im; ─ �im; ─ �im; ─ �im; ─ �im; ─ �im; ─ �im; ─ �im; ─ �im; ─ �im; ─ �im; ─ �im; ─ �im; ─. �im; ─ �im; ─. �im; � �im; ─ �im; ─ �im; ─ �im; ─ �im; ─ �im; ─ �im; ─ �im; ─ �im; ─ �im; ─ �im; ─ �im; ─ �im; ─ �im; ─ �im; ─ �im; ─ �im; ─ �im; ─ �im; ─ �im; —— �im; ─ �im; ─ �im; ─ �im; ─ �im; ─ �im; ─ �im; ─ �im; ─ �im; ─ �im; ─ �im; ─ �im; ─ �im; ─ �im; ─ �im; ─ �im; ─ �im; ─ �im; ─ �im; ─ �im; --- �im; ─ �im; ─ �im; ─ �im; ─ �im; ─ �im; ─ �im; ─ �im; ─ �im; ─ �im; ─ �im; ─ �im; ─ �im; ─ �im; ─ �im; ─ �im; ─ �im; ─ �im; ─ �im; ─ �im; — �im; ─ �im; ─ �im; ─ �im; ─ �im; ─ �im; ─ �im; ─ �im; ─ �im; ─ �im; ─ �im; ─ �im; ─ �im; ─ �im; ─ �im; ─ �im; ─ �im; ─ �im; ─ �im; ─ �im; = �im; ─ �im; ─ �im; ─ �im; ─ �im; ─ �im; ─ �im; ─ �im; ─ �im; ─ �im; ─ �im; ─ �im; ─ �im; ─ �im; ─ �im; ─ �im; ─ �im; ─ �im; ─ �im; ─ �im; ── �im; ─ �im; ─ �im; ─ �im; ─ �im; ─ �im; ─ �im; ─ �im; ─ �im; ─ �im; ─ �im; ─ �im; ─ �im; ─ �im; ─ �im; ─ �im; ─ �im; ─ �im; ─ �im; ─ �im; ― �im; ─ �im; ─ �im; ─ �im; ─ �im; ─ �im; ─ �im; ─ �im; ─ �im; ─ �im; ─ �im; ─ �im; ─ �im; ─ �im; ─ �im; ─ �im; ─ �im; ─ �im; ─ �im; ─ �im; -- �im; ─ �im; ─ �im; ─ �im; ─ �im; ─ �im; ─ �im; ─ �im; ─ �im; ─ �im; ─ �im; ─ �im; ─ �im; ─ �im; ─ �im; ─ �im; ─ �im; ─ �im; ─ �im; ─ �im; − �im; ─ �im; ─ �im; ─ �im; ─ �im; ─ �im; ─ �im; ─ �im; ─ �im; ─ �im; ─ �im; ─ �im; ─ �im; ─ �im; ─ �im; ─ �im; ─ �im; ─ �im; ─ �im; ─ �im; 〉 �im; ─ �im; ─ �im; ─ �im; ─ �im; ─ �im; ─ �im; ─ �im; ─ �im; ─ �im; ─ �im; ─ �im; ─ �im; ─ �im; ─ �im; ─ �im; ─ �im; ─ �im; ─ �im; ─ �im; ~. �im; ─ �im; ─ �im; ─ �im; ─ �im; ─ �im; ─ �im; ─ �im; ─ �im; ─ �im; ─ �im; ─ �im; ─ �im; ─ �im; ─ �im; ─ �im; ─ �im; ─ �im; ─ �im; ─ �im; ~ �im; ─ �im; ─ �im; ─ �im; ─ �im; ─ �im; ─ �im; ─ �im; ─ �im; ─ �im; ─ �im; ─ �im; ─ �im; ─ �im; ─ �im; ─ �im; ─ �im; ─ �im; ─ �im; ─ �im; ~ �im; ─ �im; ─ �im; ─ �im; ─ �im; ─ �im; ─ �im; ─ �im; ─ �im; ─ �im; ─ �im; ─ �im; ─ �im; ─ �im; ─ �im; ─ �im; ─ �im; ─ �im; ─ �im; ─ �im; ─ |
EckepTynep
AcnantbI KOndaHy Ke3iHne 6epiInre H Kayinc3dik XeHiHderi HycaynapbI opbHdaHb3: PnaDAnhy XeHiHderi HcKaylbkTbI MyKJrT Okblb3 XHe acnantbI HcckaybIKKa Caikec KOndaHbHb3. // Anfaw KOndaHap aIdbIHda acnantbI, TaCbIMaHday KaITamacbIH, KopraTbH pIeHKacbH Xe He XancbipMaHapbIH aIbIN TactaHb3. // XyMbIC Xacan TypFah acnantbI KapaycbI3 KaIdbipMaHbI. // KOndaHap aIdbIHda acn an 6eJIeKTePih XHaHa Hekitih. // AcnantbI Kypfak XabIK FImapaTTapda FaHa KOndaHbHb3. // AcnantbI eHdpuyi YcBHaH 6eJIeKTePmeH fHa KOndaHyFA pyKcat etineDi. // Erep acn an KylaFah, 3aKbIMDaIHa, aMbIK ayada CaTaIFAH Hemece cyfa KylaFah 6oNca, OHbl KOndaHbHa3. // AcnantbI XyJeTI TypDe Ta3aIaN TpybHb3. Byl OHbl, KbIMET ety Mep3imH y3apTaDbI. // ShaTbH, y3bH KNIMHH, CaycaKtBHN, XHe DeHeHH, Baca Da MyWelepiHH, acnantbIH, caHbIaybi MeH XblXbIMaBl6eIKTePihe TNI TypMAYbIH KaJaFalaHbI3. // Acn an paNo KepeprinePi, pyKcat etinTIN DeHeRNePiR peTTEHTIN 3eKTPOMarHHTI epictep MeH HopMaIap XeHiHderi bApNbIK, cTAHDAPTTapFa Caikec KeJedi. // Acn an BaIIaIapDbIH, XHe Qn3NKaIBK, Hemece NcXnKAJB, KaBileTepi WeKteYJI aAdMaDAPDbIH, KOndaHyBaHa apHaIMaFah. AcnantbI ceriz XactAH aCkan H balaapFa XHe Qm3NKaIBK, Ko3fany XHe NcXnKAblk KaBineTepi WeKteTREh aAdMaDFA, CoHBMeH KaTAP OHbl KOndaHy WsiH XetKinKiTi Taxipnbeci MeH Binimi JOK aAdMaDFA TeK TzXipnbeci Bap aAdMaBHI KaJaFalaYMeH Hemece erep OIap acnantbI KOndaHyFA yIPeTIInre B0Nca XHe acnantbI Dypbc NaIdaHa6ayfa BaimaHbICTbl TybIHdAbybl kKTImaN Kayinti TycIHReH XaFdaJaHa OcbI acnantbI KOndaHyFA pyKcat etineDi. Acnan XyMbICbl Ke3iHne 6aIIaIapDbI KaJaFalaHaB13. BanaIapFa acnannen OiHayFa pyKcat etneHiz. // BanaIap ceriz Xacka XeTKeH XeHE YJKeH KiciH, KapaybHaDA BoIFaN ZaJaDA fHa aCnantbI Ta3aIayDbI XHe OFaH KbIsMet KepeTydi opbHdai anaDbI. // KOndaHbIN BoIFaN coN, acnantbI ceHidiphi3.
Kayintinik
AcnantbI XaHe 3apTay 6a3acbH (Hemece aanTepdi) cyfa XaHe 6acka da cybIKtbIKKa 6aTbIPMaHbI3, aFbIH CydbIH, actbIHda KymaHbI3.
MaHbI3dIeCKeptyneP
Jenik hnpb6ap acnntbHemece 3apdTay 6a3acbin 3neKtp JekicHe JaFap anDbHda HOMHaIdbI KepHeYdIH, 3neKtp JekicH, KepHeYIne CaiKec KeletiHHe Ke3 JeTki3iH3. // Acnan XaHe 3apdTay 6a3acbl (Hemece aanTep - acnaBbIb3dbH, moJIiHe baNaHbICTbl) 6yInreH 6oNcA, OApDbl KOJaHbAHL3. // 3apdTay 6a3acbl (Hemece aanTep) 6yInHReH XaFaIda acnTbI Kayinci NaIaIaNHybl KaMTamAcbl 3 ety yuH IN TynHcKa 6yBIMdApdbI rHa KOJaHbIb3. // AanTepre TpaHcΦopMaTOp KipictipinrEh. AanTepdi aftbIn anyfXaHe aybICTbpyfa TbIM CaNbHaDbI, eHTKeHi 6yJ kAYiT I KaFaIaIaBnIKenyi MymKiH. // AkMyJTopbl acnAn XbIHbIFbHa KipeIH aanTepdH, XaHE 3apdTay 6a3acblH, KemerimEn fana 3apdTayfa 6oIaBl. 3apdTay npocciHde aanTepH, Kbi3yBaHa KonBepinei (erep aanTep XeTKi3y XnbHTbIfbHa Kipetih 6oNca, MoJIiHe baNaHbICTbl). // 3apdTay Ke3iHDe acnTbI CenDipin KoBbHbI3. // AcnTbI cy3ripeCi3 Hemece cy3rIep 6bnorbC13 KOJaHyta bIM caNbHaDbI. // Aya Ibyrapyfa apHaJFaH cAhbIaynapdbIn, acnAn XyMbICbl Ke3IHe 6iteJmeyih KaDaFanaHbI3. // ShaHcopfbl 6eIme iWInde xHHay MaKcTaBHda Ynde KOJaHyfa apHaIHa. // Copy
KyaTbIH XaHe XnHay TImdInirH caKtay yuH copaTbIH cAnbIaynapdbIH Ta3aJIbIbIH KaIaFanaHbI3. TypbAH, cAnbIaynapbIH uHaHaH, uWtAH xHe aY aFBiHBiH 6iteyi MyMKiH bAcKa da NaCTapdaH xNl Ta3aIaN TpybIHbI3. // TyfbIPdbI Hemece 3aprTay 6a3acBtH Ta3aIAP aIbIHDa OHbI 3JeKTp XeJicHeh axbipTaIBbI3. // AcnantbI aJI de cybIMFaH KynDi, KOHkApaDbI, TykbIJaPdbI, ciPiKeJIepdi, CyibIKTBtApDbI (MbICaJIbI, KINEMdepre apHaIFAH Ke6IK), eTKip 3aTTapDbI (XapbIKwakTapdbI XHe T.6.) XnHAY YuH IN KOJaHyFa TbIM CaNbHaDbI. // CopaTbIH cAnbIaydbI e3iH3re XaKbIHdaTnaHbI3. // AcnantbI Kypblc KOKbcBtIH (yCaK Kym, i36ec, ZemEHT) XaHE npINTEpre apHaIFAH TOHe pDi XnHAY YuH IN KOJaHaBbI3, eYTKehi 6yI acnantbIH, CbHybHa aMbIN KeNyI MyMKiH.
AkaaybikTapdbi i3dey XaHe XoIO
| Акayльк | ыктумал себб | Жою |
| Аспал жуMbIC жасамады. | Аккулайтор толыктый разрдтанган. | Аккулайторды зардтань3. |
| Кол copfbicbl дрвic ophaылmaфан. | Кол copfbicblн дрвic калганы3. | |
| Сору куаты төмeh. | Шан жинаftыш толын калган. | Шан, жинаftышытla тазаланы3. |
| сузrici 6iteлген. | сузriciн тазаланы3н Нemece усытырны3. | |
| Aya Беретин ТУТК Hemece aiHaNBIn Тураын үүтka 6iteлген. | Турбоштканы тазаланы3. | |
| Аспал зараздталмады. | Аккулайтор розекага КOCылмafan. | Аккулайторды розекага калганы3. |
| Аккулайтор shaцсорfbiш устышындаftы afbITпafа жалганбafan. | Аккулайторды shaцсорfbiш устышындахлган. жалганы3. | |
| Кол copfbicbl opHaылмafan. | Кол copfbicblн opHaыны3. | |
| Заядтаганнakий шансорfbiш оte кыдka уakыт жуMbIC жасады. | Шансорfbiш кеткліkti узak заядталмafan. | Аккулайторды hyckayлбка саиkeс Заядтаны3. |
| Аккулайтор озihin, pecypсin тayысkan. | Аккулайторды aybICTырны3. |
KopwaftnOpTa
BybIM TypMbICTbIK KaIdbIK petHne XoobImaybl Tnic.Ohbl Oanah apbl Kdere Xapaty ysiH OHbl 3NeKtpOnDbI XaHE 3NeKtpnIK Xa6DbIKTapdbIH Tniicti opbIHapbHa tancbipraH XeH. BybIMdbI KaDepe JapaTy epExeJIepiH caTay apkblbl KopwaFAnOpTaFA XHe aadMdpBIn, DeHCaylbfbHa 3nH
KeTtpydiH andbH ana anacbI3.
ByI acnI an 3neKtpnik JxHe 3neKtpOnDbI JxabkbkTapdbH KaIbkbkTapbH KOJaHy TpyaIbI 2012/19/EU eypona
depeKtemeciHe caikec TaH6banaHfAH (WEEE). OcbI depeKteme EO bapbIK eJepiHde KOJaHbIaTbIH 3neKtpnik
XHe 3neKtpOnDbI JxabkbkTapdbH KaIbkbkTapbH XInHay XHe Kdere Xapaty BoBHHa taIaanTpdbI
aHbIKTaIdbI.
KeniДik JxHe cepBnC
Akaynap TybHdaFah Ke3de aBTopbIK KyKbIfbl 6ap cepBnC opTaIbIFbHa xa6apnaCbHb13. ABTopbIK cepBnC opTaIbIKTapbIH, Ti3iIMH «Kenildi MiHdTeMeJep» KITaIwacbIHan XHe www. Hisense.com caTbIHan Ta6a anacbl3.
Eckertne: Akkymyntop kenildiri 12 a.
Tek mypmbicma konda hyfa aphanfah!
Kayinciik MaKcaTbHda acnantbH, Keibip beniktepi Xeke KaTaNfah XaHe Herizri KaTAmara caNbIHraH. // Anrau KOnDaHap anDbHda Kypactbipy XaHe Kayinci3 naDanahy XeHiHderi HcckayIbIKneH MyKnRT TaHbcIn 乌fbHbI3. // Acnan yJXaFdaBbHda Kypfak Ta3aNaayfa apHaNFAH.

KOMNOHEHTTEP
1 K03faNTKbIbbl, aKKMyJITOpbl kHe WAn, XnHaftblb6ap Kopnyc
2 CopaTbH WnHaH
3 EdeHre apHaHanfah 3JNEKtp KTeTeri 6ap tKa
4 MaTa 6eTepi Ta3aJayFa apHaJfA h3neKtp KTeeri 6ap KOHdbipMa
5 1-ri2 KOHdbipMaCbI
6 ¥3bIH XiHiiuke KOHdbipMa
7 AanTepi 6ap Ka6bipFa KpOHTeHi

K¥PACTbIPY
AkkmyIopbl Ko3faNTkbI W KOpNcBHa cAbHb3. // UNaHrTbH, Kofapfb6eNirH Ko3fAnTKbI W 6nOrbHa, an ToMeHri 6eNirih eEHe r aHaJIaH uTeTKara XaIraHb3. Erep KypbInFb caHbIaynapra TbIfb3 cAbHfAH 6onca (CaJFaHa CbIP TtKEH DbObICTb ecTnci), Kypactby Dpy OpIHdANfAH.
XnbHbTkTa eIWeMi KIIKeHe eKoHdbIpMaHbI opHaTyfa 60NaTbIH 3aprTay cTaHcNcbl XeTKi3iNei. CypeTe KepCetinreHde KypacTbipy KeHHderi HcKaynapblOpbHdaHbI. // WaHcOpFbIwbl Xbiny Ke3depiHem KEMIHDe 1M KaBbIKbIKKa opHaTbHbI3. // Acnan NiimHe 6aJnAhbICTbl TpaKtbl 60bn Ta6bImaNbbl.

KoJDAHy
M Me H KOHdbipMaIap WHaHka Da, K03fantKbIi 6NOrbHa da cai KeNedi. // UeTKaIap Me H KOHdbipMaIapdaFbI 6aTbipMaIapdpbI 6acy apkbIbI OJApDbI TyPi KOnDaHbICTap yWIn TE3 e3repte anacbl3:
EeHre apHaIanf an 6apbIbK 6eTepdi (eH eH 6tH wAHCOPFBiwnen KypFak ta3aay) ta3anay yuH KOJaHbIaB. uHcOpfbIbTb Tyr KaIbH KInmepdi Ta3anay yuH KOJaHbA bI3, aHTnece tyK UeTKaHbIH, IbIbIPbIKTapBaHa opabn KaIybl MyMKH, 6yI WAnCOPFBiWbIH 6y3blYbHa anbIn KeJeI.
MaTa 6eTepre apHaIraH KOHbIpMa 6eTepi yx KaHyapApdbH xHydePiHe Ta3aJlay, coHdaI-aK DnBaHdApbl, KepeyeTepi KAne T.6. Ta3aJay yuH Jkapambl.
- KIniIiKe KOHdbIpMa tap KaTbIHay KnbIH Xepnepdi (6ypbIHTap, DnBaHnap, ePMeKwI, paHaTOpDbH, apTbIH ... Ta3aJIayFa apHaIIHaH.
KbIJaPbI 6ap KOHdbIpMa (KneEKeTEmepe, KbiNkbImaJI bKaawIkTepe aHaHanfah...
3APRITAY
WahcopfbIbI Xblny Ke3epiHc KEMHde 1M KaBbIKbIKTa 3apraTahbi. // KypblIFbIHbI 3apraTay Ke3iHcKocy MymkiH emec.
WanCOPfBtka apHaIaH 3apraTay Ka6eni 6ap aanaTep 3apraTay cTaHcNcBHa opHaTbIbIN KOblfAepeKepTynepre Kapamactah, WAnCOPfBtbl 3apraTay cTaHcNcBHa 3apraTbFbIHb3 KeJImece, Ka6eni 6ap aanaTepdi Kayinci3 any XeHiJderi HcyKaaynapdbOpbHdaHb3 (cypeTI KapaHb3).// WAnCOPfBtbln AKKMyJrTop 6atapeRcBHaftb 6atbIpMaHb 6acy apKbIbIb 6atapeRbHb1 Kayinci3 ana anacb3, coHdai-Ak OHbl WAnCOPfBtAH 6eJIek Te 3apraTayfa 6oJaDb. // 3apraTay Ke3InDe dncnneJe 6atape R 3apraBtHbN naBl3bi KepcTeinei.

DAIADAHY
1 Kocy/ewipy 6aTbIpMaCbI
2 Copy kyaTbH peTeyre apHaIraH XbIaMdbIKtbi 6aKbInay TyTKacbi // WaHcOpFbIuTbIH yW copy XbIaMdbIbIbIbIbap.
3 CaHdbik dncnneJe KOndaHydbiH, 6ipHeWe Typni cyHKuncBi Kepcertinei:
AUTO 1aHc0pfbix XbIbIbIbIHda 6eTepdi, TyPi aHbIKTaIbIH daTnri 6ap eHeRe apHaIraH 8etka 6ap. DaTnK caikeciHwe copy XbldAmdbIbI MeH KyaTbIH peTeiDi. ByI 6atapeAHbIH, KbI3MeT ety Mep3imH y3apTaIbI.
MnH.-MaKc. KbldAmdbkTb Taay Ke3iHe dncnneJe 6aTapeyHbH 3apdBiHbH 6ityiHe deHH KaHa yaKbI KepceTIJIeDi // Yw Typni XbldAmdbkTbH, bipeyH taH da anacbi (max (10 MNH-Ka DeHH), med (36 MNH-Ka DeHH), min (108 MNH-Ka DeHH))
BvI CNMBON 1eTKaFa 6eIe 3aTTap TypbIN KaIFaH Ke3e XaHaDbI. BvJ XaFdaJa da 6erDe H, TypbIN Kanybl 3aTbI aNbIn TactaFaH KeH.
Aya afbihb Byn CmBON aya xHafbi 6iteni KAnfah Ke3ne naJa 60ana. WaHcOpfbIuTBe uipiH3
6NOKTaNFAH XaHe 6erde 3aTTapdbH XoKtBiFbIH TeKcepH3. // KoHTeHepdi 6ocatbHb3, cy3riH
6iteMereHH TeKcepH3. // Cy3rHi JxHyEnJI Type aByIcTbPbIN Typy akMyJrTop 6aTapercbl
MeH WauHcOpFBIUtBih, KbIMET eTy Mep3imH caKTan KaIaNbl.
Kate KoDbI Kate KoTapbIHbIH T3iMH TeKcepH3. 3p KATE KObl yWih MaceHHeH bIKTMaJI WeWIMi KepcetinreH.
JAH XINHAfbIU INEH CY3TINEP
1 WaaH xuHaBbiu neh cy3inep
WJHHTb Ko3rFTbIb6n0rBHaH axbipatbHb3. // WAn XnHaftbTa3aJaYwIH KOHTHeP Ty6iHderi 6aTbIPMaHb 6acbHb3 // WAnFa apHaHaf KOHeHep Ty6i aUbIaNb, eHdi wAnDb Kaftbn anyra 6oIaBb. // Cy3riH, dEHTeJIek YCTaftbHbA fBTbIn any ywiH OHb 6ypabH3 XaHE WAn XnHaftbHTan bIfapbIn anBbI3. // Cy3riH 6uFapbIn any ywiH WaHcOpftbTHIn TEmHI 6enirHderi (6ataper aCtbn daFb) 6aTbIPMaHb 6acblb3 // WAn XnHaftbTI Ko3rFTbIb 6n0rBaH aBTbIn any ywiH TyicnepePi 3aKbIMdAn AnMa, WaHcOpftbTb CypTe KepcetireHde BnRin6ip 6ypuHN AKBpBn KeTepiH3. // Cy3riH WAn XnHaftbHTAN bIFapBn anBn, 6ocatbHb3. // WAn XnHaftbITb MyfTAH JxHe cy3riH cyptYe, ciKyre Hemece XblbCyMeH WaHOFa 6oIaBb, 6pak cak 6oNbHb3, eHTkeHi Dpybc KOnDaH6ay WaHcOpftbIK KomNoHeHTepiH, 6yliHyHe anBn Kenyi Mymki. // WAn XnHaftbITb OPhBa HOPHaNAC 6ypBn 6eJIWeKTEpH, 6apBfiHBn TOblkTaN KeKeHHe Ke3 XeTKl3iH3. // WAn XnHaftbITb IwKi KomNoHeHTepi H OPhATy yiwH Kypactbpydb Kei TaPTINNE H opBHaHa. // WAn cy3rici OPhaTbIMaHaf WaHCopftbTb KOnDaHaBb3.
2 Cy3eHiaaybcmbipy
Erep cy3riH, 6y1iHReHH 6aKacahb3, OHbTe3 apada aybICTpbHb3. AcnantbI KyyenI Type KeonDaHy Ke3iHde WaHcOpfbTbIK, Kb3MeT eTy Mep3iMH y3apTy yuHin Cy3riH ap 6 a ai caiH aybICTpydbY cbHaMbI3.

ACNTbI KəDEE KAPATY
ErepacnantbaybcIbpydbKaIacahb3Hemeceacnan6ydaH6blaKaXeT6oImaca,KopwaFAnOpTaHbKopfayTypaJIbOnlaHaHxH.
WanCOPfbltBkAderE JapaTnac 6bpH aKKMyJrTop 6ataperecbH aftbIn any KaKet. // AKKMyJrTop 6ataperecbH kayinc3 any yuiH OHbH, TOnbIKTaN pa3pIaTHFaHbHa Ke3 XeTKi3Hj3. Erep acnanta anMaJIbIcAImJIbI aKKMyJrTop 6ataperecbH 6oMaca, cypETMeNepi 6ap XaDbHAmada 6epinre HycKaynapdbOpblHaHbI3.
KATE KOДТAPы
| 1-кate | Баразраразданган, abyстыру кожет. |
| 2-кate | NTC Datчни 6уьллган,баразаяны овьстыру, he 6олмаса 6илікті кжн'dey кожет 6олады. |
| 10-кate | Сору щелісін'deri 6озfasл'tьш'tьн, синhal'dы сыmbi 6улін'ren, 6ilikti кжн'dey kжот 6олады. |
| 11-кate | Acnan 6уьллган,біліkti щжн'dey кожет 6олады. |
| 12-кate | Icke кosity тordi ete joхогары, he 6олмаса мата beteptre hemece edenhrе aphaflanu 6улін'ren, 6ilikti щжн'dey kжot 6олады. |
| 13-кate | АKKумлітор 6разаясы дурьс opнатыл'mafан,баразаяны ka'tа opнату кожет 6олады, aKKумлітordы орnatу щжн'deri 6ыckаша bacшыл'tь karapаньз.Баразаяны орnatkaHHANK eIN OCД-dinспійre 6урьн'tьша kate 6уьл'tbɪn Tpyadny, 6ilikti щжн'dey kжot 6олады. |
| 14-кate | Erep 6ap 6oNca, edeHre aphaflanu 6teTka 6уьfipshlfbj fby JyMbIC JxacamaiDb, edeHre aphaflanu 6teTka rfa Kopek 6epy 6уьл'taN, 6ilikti щжн'dey kжot 6oladny. |
| 104-кate | Зapor'tay tordi ete joхогары, byl 6apdtyay Kypblfbcih 6bylnblya 6y3blybHa 6e6b6onfaH.Зapor'tay KypblfcibH aybictby p Kajet. |
| 105-кate | Зapor'tay kerneyi ete joхогары, byl 6apdtyay Kypblfbcih 6bylnblya 6y3blybHa 6e6b6onfaH.Зapor'tay KypblfcibH aybictby p Kajet. |
| 106-кate | Erep 6разаяtemператypacbi 3apdtyay yuHIn ete joхогары 6oNca, acnantbts 3apdtyayfa Kolmác 6byblybHa 3apdtyay Kypblfbcih 6y3blybHa 6e6b6onfaH.Зapor'tay 60 mHyr kytiniz. Erep 6tayabla xabapama JozfaMaca, 3apdtyay Kypblfbcih aybictbHbI3. |
| 107-кate | Acnan joxогары щьлдам'dikpen JyMbIC Jxacan Tpyarh Ke3de erep acnantbts Hemece KopshaFah optnahbI, Tempeparatypacbi 6e6tay 6oNca, acnantbts 6OJDAhydBi JxanFactbIMac 6ybyH onbI 60 mHyr 6oNb caJbHdaTbI any yCbHbIaI. |
| 108-кate | Aya afblbHbI, shanHgka Tpybll Kaftan KaHdai da 6ip Kokbicpen 6iteJIi n KalmaFaHbI IN Tekepiiz. ShblfblbYbIKbI dpyblic abytbIbn any yuHn KblcKaa 6acBbIbIKbI karapanbI. ShblfblpShbIKbI 6eTkaDah axbipTaHbI3 XeHe 6eTKaHbI Ta3anaHbI3. ShJAHITa KOKbICTbH, KalmaFaHbHa Ke3 XeTki3iHiz. |
| 109-кate | Зapor'tay Курьлfbcih 3apdtyay yakbIbI 6 carattan acadby, byL akaydu 6bilipedezi, zapor'tay Kypblfbcih aybictbpy Kajet 6oNadbl. |
| 110-кate | Copy jeniciHderi 3leKtp KozfaTknBltbI Shamaan TbIC Kepheyden Kopfay. BiliKTi jexHdey kaxket 6oNadbl. |
| 111-кate | Copy jeniciHderi 6ozfaTknBltbI Tordi 6obbHbIa Shamaan TbIC JyKTeMeDEH Kopfay. BiliKTi JexHdey kaxket 6oNadbl. |
| 112-кate | AcnanbI abTomaTbI Tpyde ewipyre anbI kelenTin copy jeniciHderi KozfaTknBltbI Kbl3bln Ketydhen KoprFay. BiliKTi jexHdey kaxket 6oNadbl. |
| Aya arblbI 6noKtanfaH | Acnan joxogarly JBllamdbIkymbic JxMBC JxacaarH Ke3de KozfaTknBltbI IN OHTaIIbI JxblmDaMlbKtbl acbypbl. // ShnaHttbH 6iteny. // Cy3riHIn 6iteny. // EckepTne: KolndaH y anlbHda cy3ri TopbHbI, cy3riHIn JxHe 6aH, JxHaHbIbHtBn KypFAK eKeHiNE Ke3 JxETki3iHiz. |
| 120-кate | UHaCupfbl 6ztri MeH 6aH, JxHaHbI aIbHFAH Ke3de JxMBC JxacamaiDbI. |