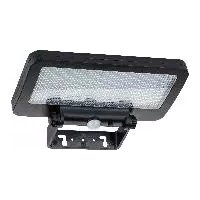
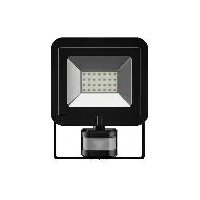
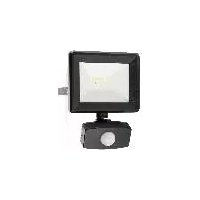
USER MANUAL HG09583B Livarno Lux
LED-STRAHLER 22W/LED FLOODLIGHT 22W/ PROJECTEUR LED 22 W
DE AT CH
LED-STRAHLER22W
Assembly, operating and safety instructions
NL BE
LED-SCHIJNWERPER22W
Montage-, bedienings- en veiligheidsinstrumenties
CZ
LED REFLEktor 22 W
GB/IE Assembly, operating and safety instructions Page 17
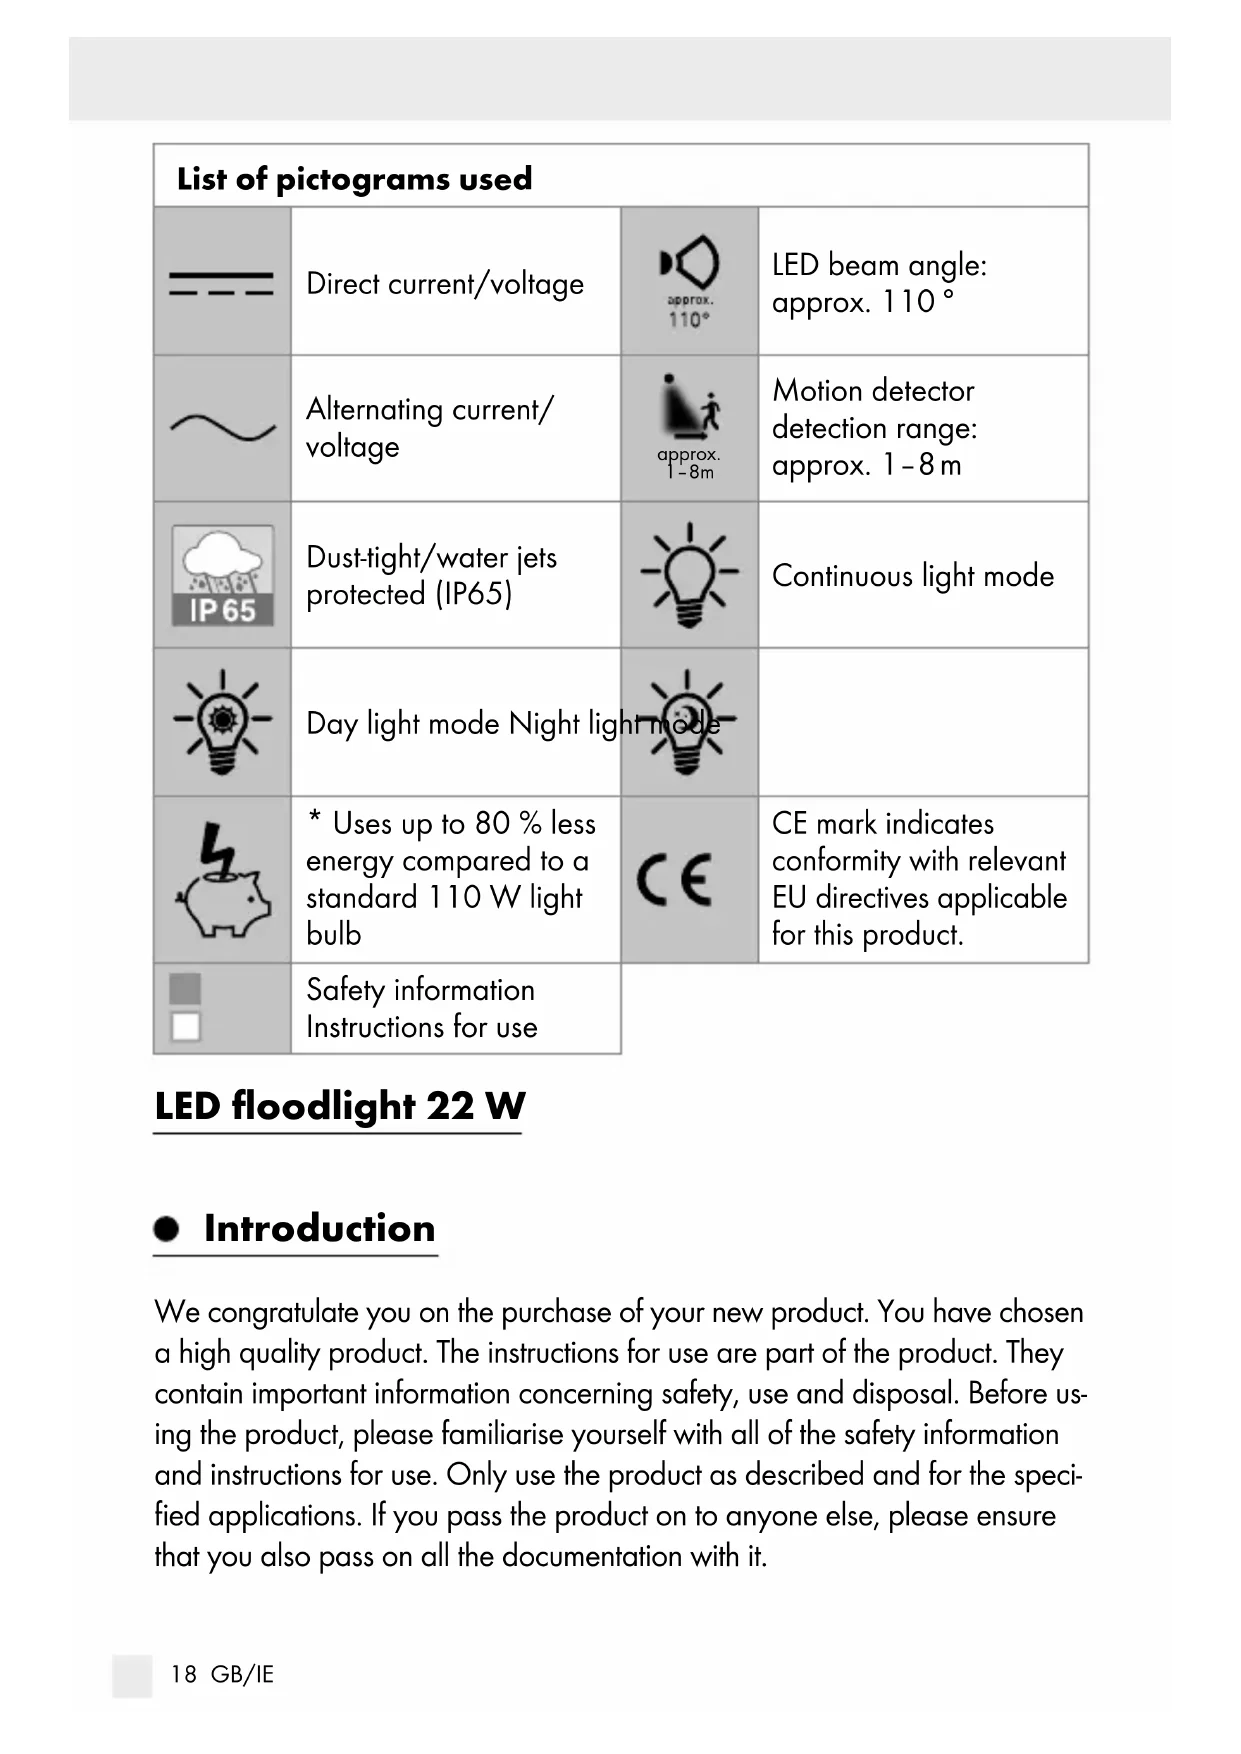
List of pictograms used
Introduction
Intended use. Page 19
Parts description.. Page 19
Technical data.. Page 19
Scope of delivery.. Page 20
General safety instructions.. Page 20
Before installation.. Page 21
Installation
Operation . Page 23
Mode knob.. Page 23
Sensitivity knob.. Page 24
Time knob . Page 24
Cleaning and care.. Page 25
Simplified EU declaration of conformity......Page 25
Disposal
Warranty
Warranty claim procedure.. Page 27
Service . Page 27
| List of pictograms used |
| --- | Direct current/voltage | approx.
110° | LED beam angle: approx. 110° |
| ~ | Alternating current/ voltage | approx.
1-8m | Motion detector detection range: approx. 1-8 m |
| IP65 | Dust-tight/water jets protected (IP65) | | Continuous light mode |
| Day light mode Night light mode | | |
| * Uses up to 80% less energy compared to a standard 110 W light bulb | CE | CE mark indicates conformity with relevant EU directives applicable for this product. |
| Safety information Instructions for use | |
LED floodlight 22 W
Introduction
We congratulate you on the purchase of your new product. You have chosen a high quality product. The instructions for use are part of the product. They contain important information concerning safety, use and disposal. Before using the product, please familiarise yourself with all of the safety information and instructions for use. Only use the product as described and for the specified applications. If you pass the product on to anyone else, please ensure that you also pass on all the documentation with it.
Intendeduse
The product is intended to illuminate outdoor areas only. This product is only intended for private use and is not suitable for commercial use or for use in other applications.
- Partsdescription
1 Motion sensor
2 LED spotlight
3 Locking screw
4 Bracket
5 Screwless connection terminal
6 Terminal cover
7 Cable gland
8 Mode knob
Time knob
10 Sensitivity knob
11 Screws 5× 50mm
12 Wall plug 8 mm
13 Tooth lock washer
14 Flat washer
Spring washer
-Technicaldata
Operatingvoltage:230V~50Hz
Total power consumption: 22 W
Motion sensor: Range: max. 8 m (adjustable), detection
angle: approx. 160^ horizontal
Protection class: I
Degree of protection: IP65 (dust-tight/water jets protected)
Weight: 670 g
Overall dimension: 18 × 12.5 × 8 cm
Projected area: max. 18× 12.5cm
Mounting height: approx. 1.8 - 2.5m
Frequency band: 5858 MHz-5873 MHz
Max. Transmitted power: -10 dBm
GS certified
This product contains a light source of energy efficiency class "F".
- Scope of delivery
Check immediately after unpacking that the parts are complete and that the product is in proper condition.
1 LED spotlight
1 Terminal cover
2 Wall plugs (0 8 mm)
1 Cable gland
2 Screws ( 5× 50mm)
1 Instructions for use

General safety instructions
BEFORE USING THE PRODUCT, PLEASE FAMILIARISE YOURSELF WITH ALL OF THE SAFETY INFORMATION AND INSTRUCTIONS FOR USE! WHEN PASSING THIS PRODUCT ON TO OTHERS, PLEASE ALSO INCLUDE ALL THE DOCUMENTS!

R TO LIFE AND ACCIDENT HAZARD FOR
TODDLERS AND SMALL CHILDREN! Never leave
children unattended with the packaging material. The
packaging material represents a danger of suffocation. Children frequently underestimate the dangers. Please keep the product out of the reach of children at all times.
This product may be used by children age 8 years and up, as well as by persons with reduced physical, sensory or mental capacities, or lacking experience and/or knowledge, so long as they are supervised or instructed in the safe use of the product and understand the associated risks. Children should not be allowed to play with the product. Cleaning and user maintenance should not be performed by children without supervision.
DANGER OF SUFFOCATION! Children could swallow on small included parts (e.g. screws). Keep children away from the work area during assembly.
LED and LED driver cannot be replaced.
If the illuminants fail at the end of their lives, the entire product must be replaced.
Only to be installed outside arm reach.
Danger to life by electric shock
Always check the product for damage before connecting it to the mains. Never use the product if it shows any signs of damage.
Prior to installation, verify that the mains voltage on site corresponds with the operating voltage required for the product (230 V~50 Hz). Otherwise do not install the product.
CAUTION! DANGER OF BURN INJURIES! To prevent burns, verify the product is switched off and has cooled down for at least 15 min before touching it. The product can become very hot.
■ FIRE HAZARD! Fit the product so that it is at least 1.0 m away from the material to be illuminated. Excessive heat can result in a fire.
CAUTION! RISK OF INJURY! Broken lamp glass must be replaced before any further use is made of the product.
The spot light is only suited for use with the built in LED control gear.
- Before installation
Note: Remove all packaging materials from the product.
Important: The electrical connection must be established by a qualified electrician or a person trained to perform electrical installations. This person must be familiar with the properties of the product and the connection regulations.
Before installation ensure that the circuit, to which the product will be connected, is not energised. To do so, remove the fuse or switch off the circuit breaker in the fuse box (0 position).
Use a voltage tester to verify the de-energised status.
The included mounting material is suitable for ordinary solid concrete or masonry construction. Check which mounting material is suitable for your chosen mounting surface. If necessary, seek expert advice.
- Installation
Make sure you will not be drilling into electrical, gas or water lines inside the wall. Use a power drill to drill the holes into the brick wall. Always observe all safety instructions for the power drill in the manual for the power drill. Death or injury due to electric shock may otherwise result.
When selecting the mounting location, pay attention to the following:
Select a sturdy and vibration-free wall.
Keep a minimum distance of approx. 20~cm to other objects to ensure a good ventilation.
Only mount the product in one direction. The "UP" label on the product resp. the arrow should be pointed upwards (see Fig. D).
Make sure that the LED spotlight illuminates the desired area. You can move the product vertically to adjust the angle.
Make sure the motion sensor covers the desired area. The motion sensor has a maximum coverage range of 8m , with a coverage angle of about 160^ (depending on the mounting height - a height of 1.80 - 2.50m is ideal).
Make sure the motion sensor is not illuminated at night by street lighting. This can influence its functioning.
Don't adjust the motion sensdr onto trees, bushes or locations where animals could be easily detected. Do not adjust the motion sensor 1 to fan heaters, air conditioners, pools or other objects with fast-changing temperatures.
Use the bracket as a pattern to mark the drilling holes onto the wall. Ensure that there are no cables or wires in this area in the wall. Drill two holes (Ø 8 mm) and insert the wall plugs [12]. Screw the bracket [4] with the help of the screws [11] and check the tight fit.
Loosen the cable gland and terminal cover 6, then run the connection cable (not include in the product), type H05RN-F 3G 1.0 mm², through the cable gland 7 and terminal cover 6 to the screwless connection terminal 5. The suitable length for the connecting wires please refer to Fig. C.
Insert the connection cable into the holes of the screwless connection terminal 5. Pay attention to the markings on the screwless connection terminal 5 (L for live, N for neutral and 豆 for the earth wire) (Fig. C).
Make sure each wire of the connection cable is completely insert into the end of the holes of the terminal and further check the security fixed.
Then lock the terminal cover and cable gland again.
Now attach the LED spotlight to the bracket using the included locking screws, spring washers, flat washers and tooth lock washers (Fig. D).
Adjust the product into the desired direction. For this, you may need to slacken the locking screws 3 between the bracket 4 and the LED spotlight 2. After adjustment, tighten the locking screws 3 again, to ensure a secure hold.
After the fuse has been inserted or the fuse panel is switched on again, your product is ready for use.
Operation
Mode knob
You can use the mode knob 8 to
-switch the product on,
- select the lighting type,
- set, at which light intensity the product is being activated,
- switch the product off.
Turn the mode knob to the position activate the DAY mode. The motion sensor 1 detects movements in daylight as well as in the dark. The LED spotlight 2 turns automatically on as soon as motion is detected.
Turn the mode knob to position to activate the NIGHT mode. The motion sensor 1 detects movements only in the dark. The LED spotlight 2 turns automatically on as soon as motion is detected.
Turn the mode knob to position ON. The LED spotlight 2 is permanently on.
Turn the mode kn to position OFF to switch of the product.
Note: The product confirms the mode change by a short flashing of the LED spotlight 2. The light mode is now set.
Sensitivityknob
Use the sensitivity knob to adjust the sensitivity of the motion sensor 1. The detection angle expands or decreases automatically with the selected sensitivity.
Turn the mode knob 8 to position DAY mode)/ (NIGHT mode) to activate the motion sensor 1.
Note: The product confirms the mode change by a short flashing of the LED spotlight 2. The light mode is now set.
Turn the sensitivity kno from 25% to 100% for the sensitivity of the sensor.
| Sensitivity level (sensitivity knob [10]) | The LED spotlight 2 responds to movements within a radius of |
| 25% up to 1 meter | |
| 100% up to 8 meters | |
Timeknob
Use the time knob to set the length of time that the product will light up after being triggered by the motion sensor 1.
urnthemode knob 8 to position DAY mode)/ (NIGHT mode) to activate the motion sensor 1.
Note: The product confirms the mode change by a short flashing of the LED spotlight [2]. The light mode is now set.
Turn the time knob clockwise to increase the duration of the illumination. The lighting duration can be adjusted within a time of approx. 5 seconds (= 5S) to 10 minutes (= 10M) .
- Cleaning and care
CAUTION! The product becomes hot when it is switched on.
Allow the product to cool down completely before cleaning.
Before cleaning, remove the fuse or switch off the circuit breaker at the fuse box.
Never immerse the product in water or other liquids. Otherwise the product can be damaged.
Clean the product with a lint-free, slightly moist cloth and mild cleaning agent.
After cleaning, replace the fuse or switch on the circuit breaker.
Hereby, OWIM GmbH & Co. KG, Stiftsbergstraße 1, 74167 Neckarsulm, GERMANY, declares that the product LED Floodlight 22 W HG09583A, is in compliance with Directives 2014/53/EU, 2011/65/EU and 2009/125/EC.
The full text of the EU declaration of conformity is available at the following internet address: www.owim.com
Disposal
The packaging is made entirely of recyclable materials, which you may dispose of at local recycling facilities.

Observe the marking of the packaging materials for waste separation, which are marked with abbreviations (a) and numbers (b) with following meaning: 1-7: plastics/20-22: paper and fibreboard/80-98: composite materials.

Contact your local refuse disposal authority for more details of how to dispose of your worn-out product.
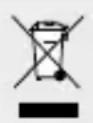
To help protect the environment, please dispose of the product properly when it has reached the end of its useful life and not in the household waste. Information on collection points and their opening hours can be obtained from your local authority.


The product and packaging materials are recyclable, subject to extended manufacturer responsibility. Dispose it separately, following the illustrated packaging symbols, for better waste treatment. The Triman logo is valid in France only.

Warranty
The product has been manufactured to strict quality guidelines and meticulously examined before delivery. In the event of product defects you have legal rights against the retailer of this product. Your legal rights are not limited in any way by our warranty detailed below.
The warranty for this product is 3 years from the date of purchase. The warranty period begins on the date of purchase. Please keep the original sales receipt in a safe location. This document is required as your proof of purchase.
Should this product show any fault in materials or manufacture within 3 years from the date of purchase, we will repair or replace it - at our choice
- free of charge to you. This warranty becomes void if the product has been damaged, or used or maintained improperly.
The warranty applies to defects in material or manufacture. This warranty does not cover product parts subject to normal wear, thus possibly considered consumables (e.g. batteries) or for damage to fragile parts, e.g. switches, rechargeable batteries or glass parts.
Warranty claim procedure
To ensure quick processing of your case, please observe the following instructions:
Please have the till receipt and the item number (IAN 390363_2201) available as proof of purchase.
You will find the item number on the rating plate, an engraving on the front page of the instructions for use (bottom left), or as a sticker on the rear or bottom of the product.
If functional or other defects occur, please contact the service department listed either by telephone or by e-mail.
You can return a defective product to us free of charge to the service address that will be provided to you. Ensure that you enclose the proof of purchase (till receipt) and information about what the defect is and when it occurred.
Service
GB Service Great Britain
Tel.: 0800 0569216
E-Mail: owim@lidl.co.uk
IE Service Ireland
Tel.:1800200736
E-Mail: owim@lidl.ie
CE IP65
Puisance absorbee:22W
Puisance max. transferee: -10 dBm
Certificé GS
Regulator Mode. Strona 61
Regulator Sensitivity. 61
Regulator Time Strona 62
Pooblaščeni serviser:
OWIM GmbH & Co. KG
Stiftsbergstraße 1
74167 Neckarsulm
NEMCIJA
Servisna telefonska stevilk: 00386 (0) 80 70 60
Garancijski list