WX623.1 - Plane WORX - Free user manual and instructions
Find the device manual for free WX623.1 WORX in PDF.
| Product Type | Electric Planer |
| Brand | Worx |
| Model | WX623.1 |
| Rated Voltage | 220-240 V ~ 50/60 Hz |
| Rated Power | 950 W |
| No-Load Speed | 14 500 min⁻¹ |
| Double Insulation | Yes (Class II) |
| Max Cutting Depth | 3 mm |
| Max Rebate Depth | 20 mm |
| Max Cutting Width | 82 mm |
| Weight | 3.5 kg |
| Sound Pressure Level (LPA) | 91 dB(A) |
| Sound Power Level (LWA) | 102 dB(A) |
| Acoustic Uncertainty (KPA & KWA) | 3.0 dB(A) |
| Vibration Emission Value (ah) | 5.6 m/s² |
| Vibration Uncertainty (K) | 1.5 m/s² |
| Included Accessories | Spare TCT blade, socket wrench, rebate depth gauge, rebate parallel guide, dust bag |
| Safety | Safety on/off switch with lock, base plate support, kickback protection |
| Maintenance and Cleaning | Clean with a dry cloth, keep ventilation slots clean, do not lubricate, replace drive belt if worn |
Frequently Asked Questions - WX623.1 WORX
User questions about WX623.1 WORX
0 question about this device. Answer the ones you know or ask your own.
Ask a new question about this device
Download the instructions for your Plane in PDF format for free! Find your manual WX623.1 - WORX and take your electronic device back in hand. On this page are published all the documents necessary for the use of your device. WX623.1 by WORX.
USER MANUAL WX623.1 WORX
Not all the accessories illustrated or described are included in standard delivery.
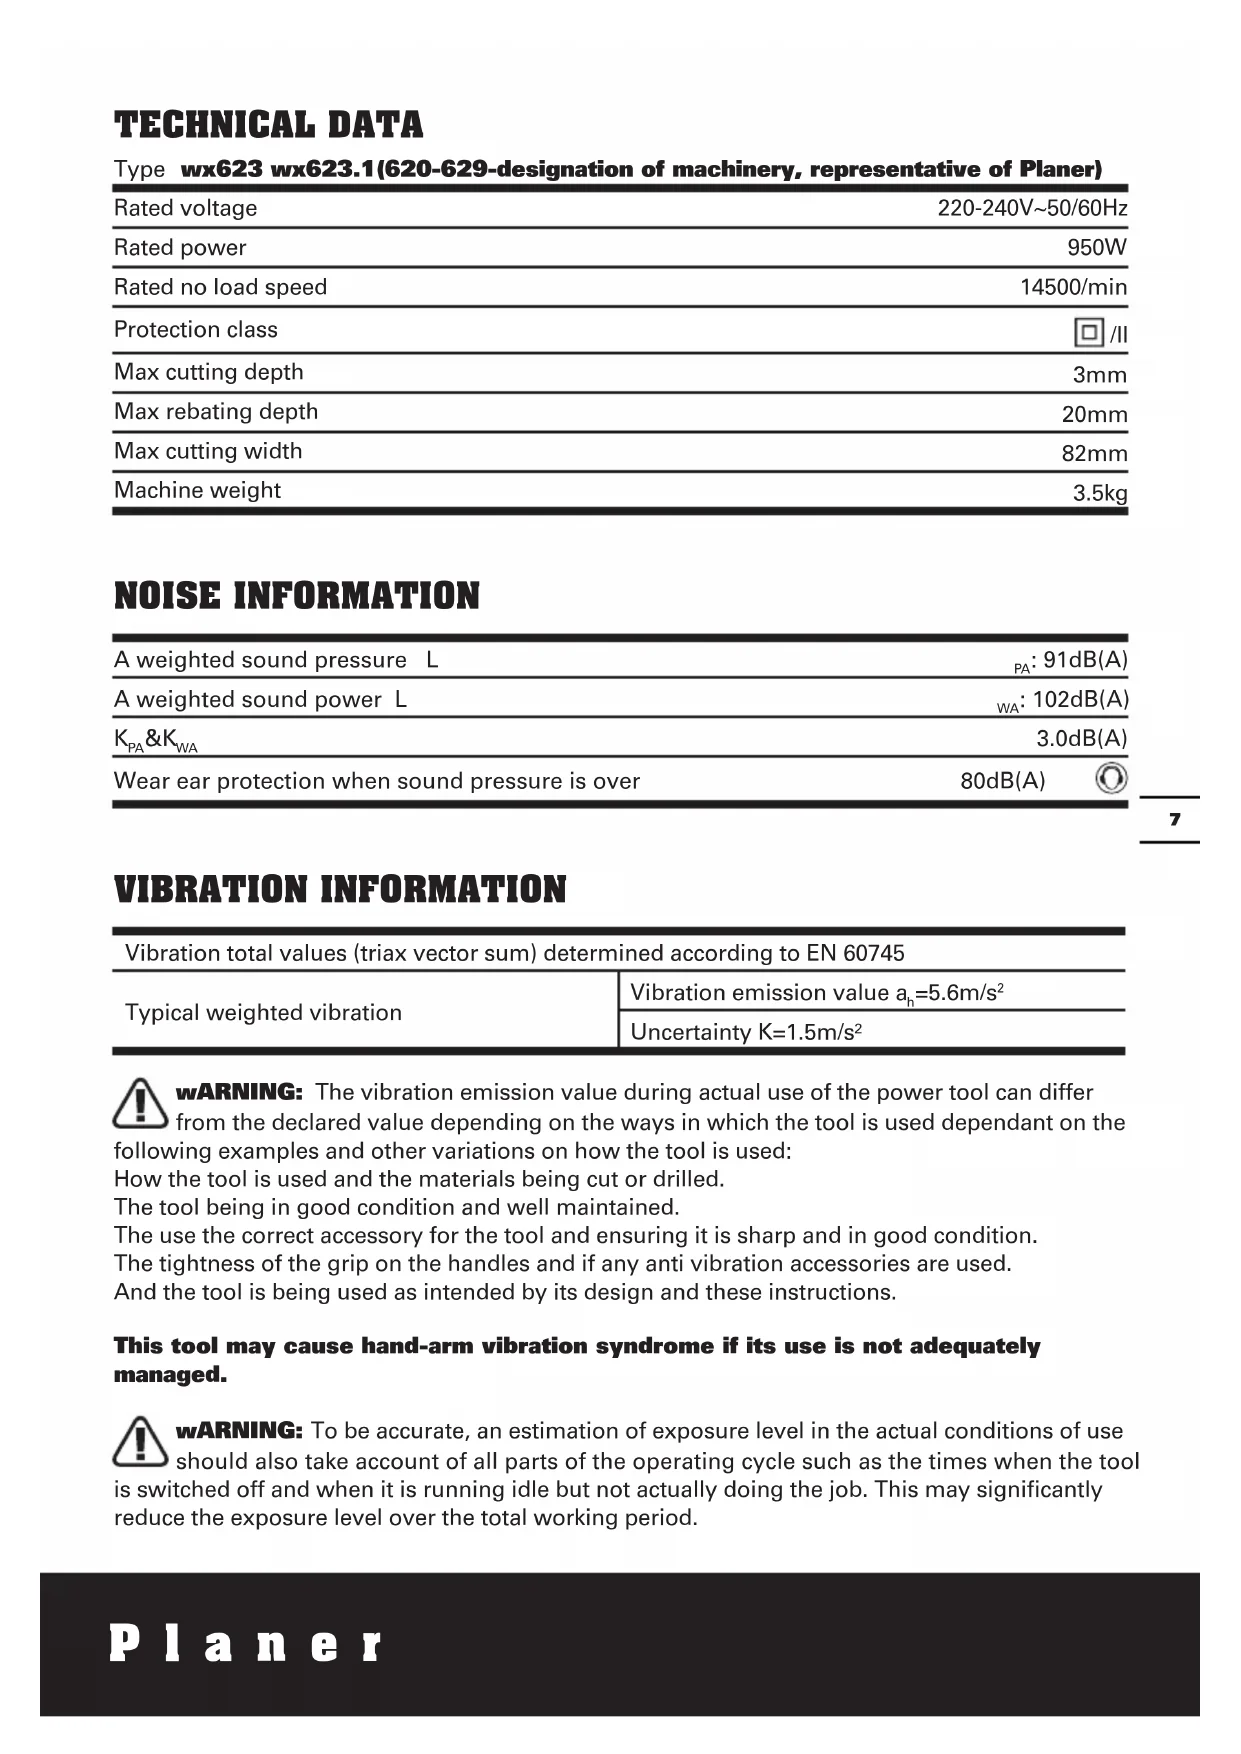
TECHNICAL DATA
Type wx623 wx623.1(620-629-designation of machinery, representative of Planer)
| Rated voltage | 220-240V~50/60Hz |
| Rated power | 950W |
| Rated no load speed | 14500/min |
| Protection class | ☐ /II |
| Max cutting depth | 3mm |
| Max rebating depth | 20mm |
| Max cutting width | 82mm |
| Machine weight | 3.5kg |
NOISE INFORMATION
| A weighted sound pressure L | PA: 91dB(A) |
| A weighted sound power L | WA: 102dB(A) |
| KPA&KWA | 3.0dB(A) |
| Wear ear protection when sound pressure is over | 80dB(A) |
VIBRATION INFORMATION
| Vibration total values (triax vector sum) determined according to EN 60745 | |
| Typical weighted vibration | Vibration emission value ah=5.6m/s2 |
| Uncertainty K=1.5m/s2 | |

WARNING: The vibration emission value during actual use of the power tool can differ
from the declared value depending on the ways in which the tool is used dependant on the
following examples and other variations on how the tool is used:
How the tool is used and the materials being cut or drilled.
The tool being in good condition and well maintained.
The use the correct accessory for the tool and ensuring it is sharp and in good condition.
The tightness of the grip on the handles and if any anti vibration accessories are used.
And the tool is being used as intended by its design and these instructions.
This tool may cause hand-arm vibration syndrome if its use is not adequately managed.

WARNING: To be accurate, an estimation of exposure level in the actual conditions of use
should also take account of all parts of the operating cycle such as the times when the tool
is switched off and when it is running idle but not actually doing the job. This may significantly reduce the exposure level over the total working period.
Helping to minimise your vibration exposure risk.
ALWAYS use sharp chisels, drills and blades.
Maintain this tool in accordance with these instructions and keep well lubricated (where appropriate).
If the tool is to be used regularly then invest in anti vibration accessories.
Avoid using tools in temperatures of 10^ or less.
Plan your work schedule to spread any high vibration tool use across a number of days.
ACCESSIONS
Parallel guide 1
TCT Blades (on machine) 2
Rebate guide 1
Spanner 1
Dust bag 1
Spare belt 1
We recommend that you purchase your accessories from the same store that sold you the tool. Use good quality accessories marked with a well-known brand name. Choose the type according to the work you intend to undertake. Refer to the accessory packaging for further details. Store personnel can assist you and offer advice.
ADDITIONAL SAFETY POINTS FOR YOUR PLANER
- Wait for the cutter to stop before setting the tool down. An exposed rotating cutter may engage the surface leading to possible loss of control and serious injury.
NOTE: The above warning applies only to planers without an automatic closing guard.
- Use clamps or another practical way to secure and the workpiece to a stable platform. Holding the work by hand or against your body leaves it unstable and may lead to loss of control.
- Hold tool by insulated gripping surfaces when performing an operation where the cutting tool may contact hidden wiring. Contact with a 'live' wire with also make exposed metal parts of the tool 'live' and shock the operator condition.
- Always wear a dust mask.
SYMBOLS

To reduce the risk of injury, user must read instruction manual

Warning

Double insulation

Wear eye protection

Wear ear protection

Wear dust mask

Waste electrical products must not be disposed of with household waste. Please recycle where facilities exist. Check with your local authorities or retailer for recycling advice.
OPERATING INSTRUCTIONS

NOTE: Before using the tool, read the instruction book carefully.
INTENDED USE
The machine is intended for planning of firmly supported wooden materials, such as beams and boards. It is also suitable for beveling edges and rebating.
1. SAFETY ON/OFF SWITCH
The switch is locked off to prevent accidental starting. Depress the lock off button (1) then on/off switch (3) and release lock off button (1). The machine is working now. To switch off just release the on/off switch.(See A)
2. CUTTING DEPTH ADJUSTMENT
Smaller cutting depth of 0-3mm is best for most surface planing or rebating. Rotate the depth adjustment knob (13) to set the required cutting depth on the scale, Scale graduation = 0.1mm . The clockwise rotation increases the planing depth; the anti-clockwise rotation reduces the planing depth. (See B)
3. ADJUST DUST EXTRACTION TUBE AND CHIP EJECTION
Dust extraction tube can be adjusted to the right or left side by manually. Rotating one end of the dust extraction tube(5) until it stops (See C). The arrowhead on the dust extraction tube indicates the dust extraction direction.
NOTE: Due to the size and material of some wood shavings e.g. wet or hard wood it is possible for the dust extraction tube to become blocked. Remove the plug from the mains power supply, then using a wooden stick clear the blocked dust extraction.
4. BASEPLATE STAND (See Fig. D)
Uplift the rear of the planer, the baseplate stand (15) can make the machine to be set down directly and protect the cutting blades from any damage and the blades from damaging the surface. When planing, the stand will be pushed away by the end of the wood. Always check the stand is free to move on the base plate.
5. BLADE FITTING AND CHANGING (See Fig. E, F, G)
WARNING: Remove power cord from the socket before carrying out any adjustments or changing blades.
The blade has two cutting edges, which can be reversed. When replacing or reversing the plane blades, the guide groove guarantees constant height adjustment.
NOTE: Dull and worn blade cannot be reground and must be replaced.
Remove the plug from the mains socket.
Using the spanner (4) provided loosen the 3 bolts approximately 1/2 rotation counterclockwise (See E). Holding the blade clamp in position, using a piece of wood slides the blade (16) out of the blade clamp to remove the blade from the blade clamp (See F).
NOTE: There is no need to remove the blade clamp as this can change the factory settings for cutting blade height control.
Before reinserting a new or reverse blade, always clean both the blade and the blade seat if dirty. Slide the blade into the blade clamp in the correct orientation. Check the blade is equal with the clamp. (See G) When tightening the screws ensure the correct tightening sequence(Left right middle). Before starting, rotate by hand to check the roller is free to rotate.
Rotate the blade head by a further 180^ and repeat the procedure disassembling the second plane blade.
6. REPLACING A DRIVE BELT
WARNING: 1. Remove the plug from the socket before carrying out any adjustment, servicing or maintenance.
- The cutting blades will be turning and may cause injury.
Loosen screw and remove belt cover (6), remove worn drive belt from large pulley (a) and pinion (b) and clean them (See H).Lace the new drive belt on the top of pinion and turning it manually, press it on the large pulley (a).Make sure the drive belt runs exactly along the length grooves of the pinion and the pulley.
NOTE: Place the belt cover (6) back on
top and tighten it with screw.
7. FITTING A DUST BAG
This accessory can be fitted by sliding the dust bag inlet over the planer dust extraction tube(5) as far as possible. The dust bag will reduce the efficiency of the exhaust system and the bag must be emptied frequently to maintain the efficiency. To empty, open the zip on the rear of the dust bag.
NOTE: This accessory can be used for smaller jobs.
8. EXTERNAL DUST EXTRACTION
The dust extraction tube is best connected to a suitable external dust extraction machine e.g. vacuum cleaner.
WORKING HINTS FOR YOUR PLANER
WARNING: Danger of kickback! Apply the machine to the work piece only when switched on.
1. STANDARD SURFACE PLANING
Set the desired cutting depth. Position the front part of the base plate flat onto the work surface. Switch the machine on and push your planer forward and it will start cutting, always maintain all of the base plate flat on the work surface to prevent the cutting blade jumping. Move the plane evenly over the work surface. For most applications 0-3mm max cutting depth will produce a good surface finish. It is best to use small depths of cut and repeat the planing process.
2. EDGE CHAMFERING
Using the V-groove in the base plate (9) you can make a chamfer on the work piece edge (See I). Guide the planer along the edge and maintain a constant angle and force to produce a good finish. You can control the angle of the chamfer with your hands. Make a test chamfer on a scrap piece of wood. Ensure your work piece is clamped and supported near the edge.
3. REBATING
You use the rebate guide (12) and the parallel guide (8) accessories (supplied with your tool). Fit these accessories to your planer. Set the required rebate depth using the scale and the mark on the planer housing next to the scale (See J)Loosen locking screw(7) and adjust the required rebating width(max 82 mm). (See K)Tighten locking screw (7). Adjust the desired rebating depth with the rebate guide (12) accordingly (max 20mm) (See L).Plane as often as necessary to achieve the desired rebating depth. Make sure the plane is guided with a lateral supporting pressure.
MAINTENANCE
Remove the plug from the socket before carrying out any adjustment, servicing or maintenance.
There are no user serviceable parts in your power tool. Never use water or chemical cleaners to clean your power tool. Wipe clean with a dry cloth. Always store your power tool in a dry place. Keep the motor ventilation slots clean. Keep all working controls free of dust.
Occasionally you may see sparks through the ventilation slots. This is normal and will not damage your power tool.
If the supply cord is damaged, it must be replaced by the manufacturer, its service agent or similarly qualified persons in order to avoid a hazard.
ENVIRONMENTAL PROTECTION

Waste electrical products should not be disposed of with household waste. Please recycle where facilities exist.
Check with your local authorities or retailer for recycling advice.
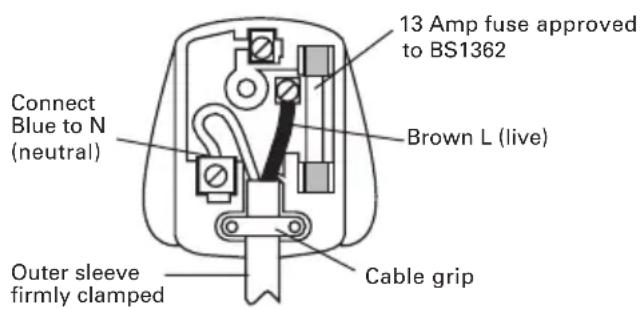
PLUG REPLACEMENT (UK & IRELAND ONLY)
If you need to replace the fitted plug then follow the instructions below.
IMPORTANT
The wires in the mains lead are colored in accordance with the following code:
BLUE = NEUTRAL
BROWN = LIVE
As the colors of the wires in the mains lead of this appliance may not correspond with the colored markings identifying the terminals in your plug, proceed as follows. The wire which is colored blue must be connected to the terminal which is marked with N. The wire which is colored brown must be connected to the terminal which is marked with L.

WARNING: Never connect live or
neutral wires to the earth terminal of the
plug. Only fit an approved 13A BS1363/A plug and the correct rated fuse.
NOTE: If a moulded plug is fitted and has to be removed take great care in disposing of the plug and severed cable, it must be destroyed to prevent engaging into a socket.
DECLARATION OF CONFORMITY
We,
POSITEC Germany GmbH
Declare that the product,
Description WORX Planer
Type WX623 WX623.1(620-629-designation of machinery, representative of Planer)
Function Removing surface material with a rotating cutter
Complies with the following directives, Machinery Directive
2006/42/EC
Electromagnetic Compatibility Directive
2004/108/EC
RoHS Directive 2011/65/EU
Standards conform to
EN 55014-1
EN 55014-2
EN 61000-3-2
EN 61000-3-3
EN 60745-1
EN 60745-2-14
The person authorized to compile the technical file,
Name Russell Nicholson
Address Positec Power Tools (Europe)
Ltd, PO Box 152,Leeds,LS10 9DS,UK


2012/09/27
Leo Yue
POSITEC Quality Manager
Schraubenschlüssel 1
Staubbeutel 1
Ersatzriemen 1
Typ WX623 WX623.1(620-629-
INFORMATIONS RELATIVE AUX VIBRATIONS
It is possible to differentiate the value of the sum of the two values. For example, suppose that x = 1 and y = 2 . Then x + y is a sum of x + y and x - y , so that x + y = 3 .
Codice WX623 WX623.1(620-
Type wx623wx623.1(620-629-udpegning af maskiner, representant for Hovl)
6. UDSKIFTNING AF DRIVREM
Typ WX623 WX623.1(620-629-udpegning af maskiner, repraesentant for Hovl)
POSITEC Quality Manager
- LUKITUKSEN VAPAUTUSNUPPI
- KÄDENSIJAT
- VIRTAKYTKIN
- HYLSYAVAIN
- POLYNPOISTO
- HIHNANSUOJUS
- LUKITUSRUUVI
- RINNAKKAISOHJAIN
- POHJALEVY
- V-URA
- HÖYLÄVSSYVYYYSASTEKKKO
- SYVYYYSOHJAIN
- LASTUAMISSYVYYDEN SÄÄTO
- RUUVI
- POHJALEVYN TUKI
- TERÄ (Katso Kuva F)
Rebate parallel rayi 1
Toz torbasi 1
Tipi WX623 WX623.1(620-629- makine
aciclamasi, Düzleyici gosterimi )
Túntoç WX623 WX623.1(620-629-
Xapaktnpiooos hnXavnpaTos,
avtnpoown. nlambda)
Agiua Apaipoeon Tou enipavaleakou
UAIKOU ME NEPIOTpepóevo KOMTN
Zuupopwvetai e TITAPAKATOW Onyies,
MnxavoLoayikn Odyia
2006/42/EC
O8nyia HAEKtpoayvntIKns atotnta
2004/108/EC
RoHS Oδnyia
2011/65/EU
PóTuTa Oμμópφωης:
EN 55014-1
EN 55014-2
EN 61000-3-2
EN 61000-3-3
EN 60745-1
EN 60745-2-14
To To TEVVIKO apXeio,
Ovopa Russell Nicholson
He BCE npHnHaJIeJXHOCTN, nJIIOCTpnpOBaHHbI e NN ONNCaHHbI B KJIIOUeHbI B cTaHdapTHyIO NOCTabKy.
TEXHNUECKNE XAPAKTEPNUCTNKN
Mодente Wx623 Wx623.1(620-629-обознauthе Инструмента, Злектуеский py6aнok)
| Hominaelb Hoe Naiprjekne | 220-240B~ 50/60T |
| ПOTpe6laemaj MoiHocT | 950BT |
| Скорость бeз нагузки | 14500/MnH |
| Двийнай ИЗоляця | ☐/II |
| Глобина стrogаня | 3MM |
| Равочаяши риha | 20MM |
| Равочаяши риha | 82MM |
| Вес | 3.5Kg |
XAPAKTEPNUCTNKN LNYMA
BHUMAHNE: Bn6paun, npoun3BODmam npn pa6oTe mexaHn3npOBaHHOro nHCTpyMeHTa, MOKET OTJNUATbcr OT 3aRbLeHHbIX 3HaueHn B 3aBNCIMOCTN OT cNoCobOB NcNoJIb3OBaHHr
yctpoiCTBa. Hnke nepeuNCJIeHbI HeKOTOpBie ycIOBua, OT KOtOpbIX 3aBNCNT INHTehCINBHOCTb Bn6paun: Cnocob nCnoJb3OBAHn IHCtpyMeHTa n CBOIcTba o6pa6aTBiBaEMo MATEpnaJa.
CoctoHHe IHcTpymEnTa n ypoBeHb Texo6cnyKuBaHHa.
TINNCIOJIb3yEmbIX pInHaIeXHOCTeN INxTexHNueCKoe COCTOHNHe.
Cnla ydepkaHn pykOaTOK n HaNmUne npOTNB0Bn6paunONhBix cpeDCTB.
IcnoJIb3yemblpe pa6OuHne INHCTpyMeHTbl, COOTBETCTBnE pIpMHeHnI INHCTpyMeHTOB nX Ha3HaueHnIO.
- Bcerda haedeBaIte pececnpaTOp.
YCIOBhbIE O603HauEHHa

IOCTaBHeB I MeCTbI ΚeHTp yTnIn3aun IJn HaJIeXaUe nepepa60TK.
DEKJIAPAUHCOOTBETCTBNA
you've got the power
Copyright © 2012, Positec. All Rights Reserved.
2SPL017PK11001A0