VSZ7A400 - Vacuum Cleaner SIEMENS - Free user manual and instructions
Find the device manual for free VSZ7A400 SIEMENS in PDF.

User questions about VSZ7A400 SIEMENS
0 question about this device. Answer the ones you know or ask your own.
Ask a new question about this device
Download the instructions for your Vacuum Cleaner in PDF format for free! Find your manual VSZ7A400 - SIEMENS and take your electronic device back in hand. On this page are published all the documents necessary for the use of your device. VSZ7A400 by SIEMENS.
USER MANUAL VSZ7A400 SIEMENS
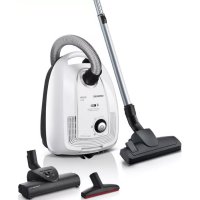
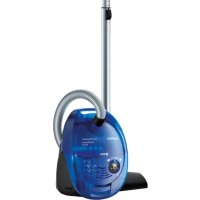
Bagged vacuum cleaner
VSQ8/VSZ7I
VSC7
Register your product on My Siemens and discover exclusive services and offers.
siemens-home.bsh-group.com/welcome
The future moving in.
A
B
C
D
G
H
J
K
L
M
3
4
5
6
7
8
9
10
11
12
13
14
15
16
17
18
19
20
21
23
Inhaltsverzeichnis
Sicherheit 8
powerSensor Technology
Restriction on user group. 20
Safety instructions 20
Preventing material damage 21
Environmental protection and saving energy 22
Disposing of packaging 22
Unpacking and checking 22
Included with the appliance: 22
Familiarising yourself with your appliance. 22
Appliance 22
Overview of the controls 23
powerSensor Technology 23
Accessories 23
Before using for the first time 24
Installing the appliance 24
Basic operation 24
Setting the telescopic tube. 24
Switching on the appliance. 24
Switching off the appliance 24
Transporting the appliance 24
Controlling the power 24
Setting the floor tool. 25
Overview of the floor nozzle settings. 25
Vacuuming with accessory 25
Stopping and parking the appliance. 25
Dismantling the appliance. 25
Cleaning and servicing. 25
Motor protection. 25
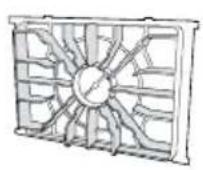
Cleaning the motor protection filter 25
Cleaning the Micro-Hygiene exhaust filter 1 26
Cleaning the HEPA hygiene filter1 26
Changing the dust bag 27
Troubleshooting 28
Malfunctions 28
Transportation, storage and disposal 29
Disposing of old appliance 29
Customer Service 29
Product number (E-Nr.) and production number (FD) 29
Warranty conditions. 29

Safety
Please read the safety information to ensure that you use the appliance safely.
General information
You can find general information about this instruction manual here.
- Read this instruction manual carefully. Only this will ensure you use the appliance safely and efficiently.
This manual is intended for the user of the appliance. - Follow the safety instructions and warnings.
- Check the appliance after unpacking it. Do not connect the appliance if it has been damaged in transit.
Intended use
Please read the information on intended use to ensure that you use the appliance correctly and safely.
Only use this appliance:
As specified in this instruction manual.
- Up to an altitude of max. 2000m above sea level.
Restriction on user group
Avoid risks to children and vulnerable persons. Children must not play with the appliance.
Safety instructions
Follow these safety instructions when using the appliance.
WARNING - Risk of electric shock!
If the appliance or the power cord is damaged, this is dangerous.
- Never operate a damaged appliance.
- Call Customer Service. Page 29
- Repairs to the appliance should only be carried out by trained specialist staff.
An ingress of moisture can cause an electric shock.
- Only use the appliance in enclosed spaces.
- Never expose the appliance to intense heat or humidity.
If the insulation of the power cord is damaged, this is dangerous.
- Never let the power cord come into contact with hot appliance parts or heat sources.
- Never let the power cord come into contact with sharp points or edges.
-
Never kink, crush or modify the power cord.
-
Improper installation is dangerous.
WARNING - Risk of burns!
The filter systems may become warm during operation and may catch fire when used in conjunction with flammable substances or substances that contain alcohol.
- Do not apply flammable substances or substances containing alcohol to the dust bag or filter.
- When cleaning the appliance, do not use flammable substances or substances that contain alcohol.
WARNING - Risk of suffocation!
Children may put packaging material over their heads or wrap themselves up in it and suffocate.
- Keep packaging material away from children.
Do not let children play with packaging material.
Preventing material damage
To prevent material damage to your appliance, accessories or any other objects, follow these instructions.
ATTENTION!
Dirt in the motor may damage the motor.
- Never operate the appliance without a dust bag.
Environmental protection and saving energy
Help protect the environment by using your appliance in a way that conserves resources and by disposing of reusable materials properly.
Disposing of packaging
The packaging materials are environmentally compatible and can be recycled.
- Sort the individual components by type and dispose of them separately.
Information about current disposal methods are available from your specialist dealer or local authority.
Unpacking and checking
Find out here what you need to note when unpacking the appliance.
Included with the appliance:
After unpacking all parts, check for any damage in transit and completeness of the delivery.
Note: The appliance comes with additional accessories depending on its features.
Fig. 1
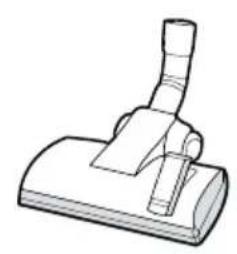
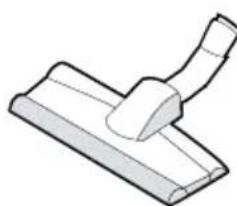
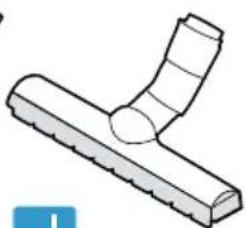
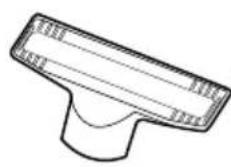
| A | Adjustable floor tool1 |
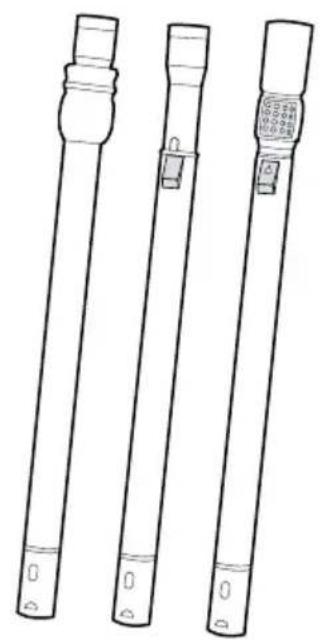
| B | Telescopic pipes1 |
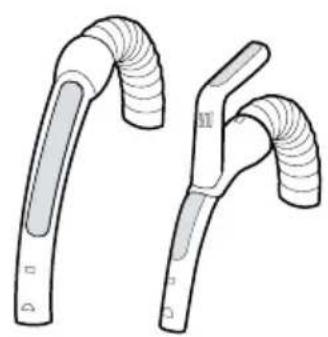
| C | Handles with hose1 |
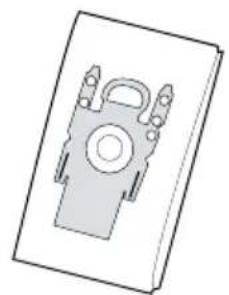
| D | Dust bags |
| E | Motor protection filter |
1 Depending on the appliance specifications
| F | HEPA hygiene filter1 |
| G | Accessory support1 |
| H | Drilling nozzle1 |
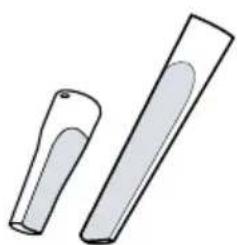
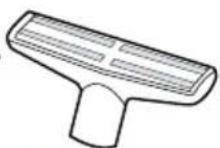
| I | Crevice nozzles1 |
| J | Hard floor nozzles1 |
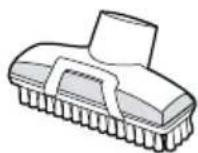
| K | Upholstery nozzles1 |
| L | Upholstery nozzle with clip-on brush ring1 |
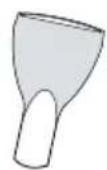
| M | Mattress nozzle1 |
1 Depending on the appliance specifications
Familiarising yourself with your appliance
Familiarise yourself with the parts of your appliance.
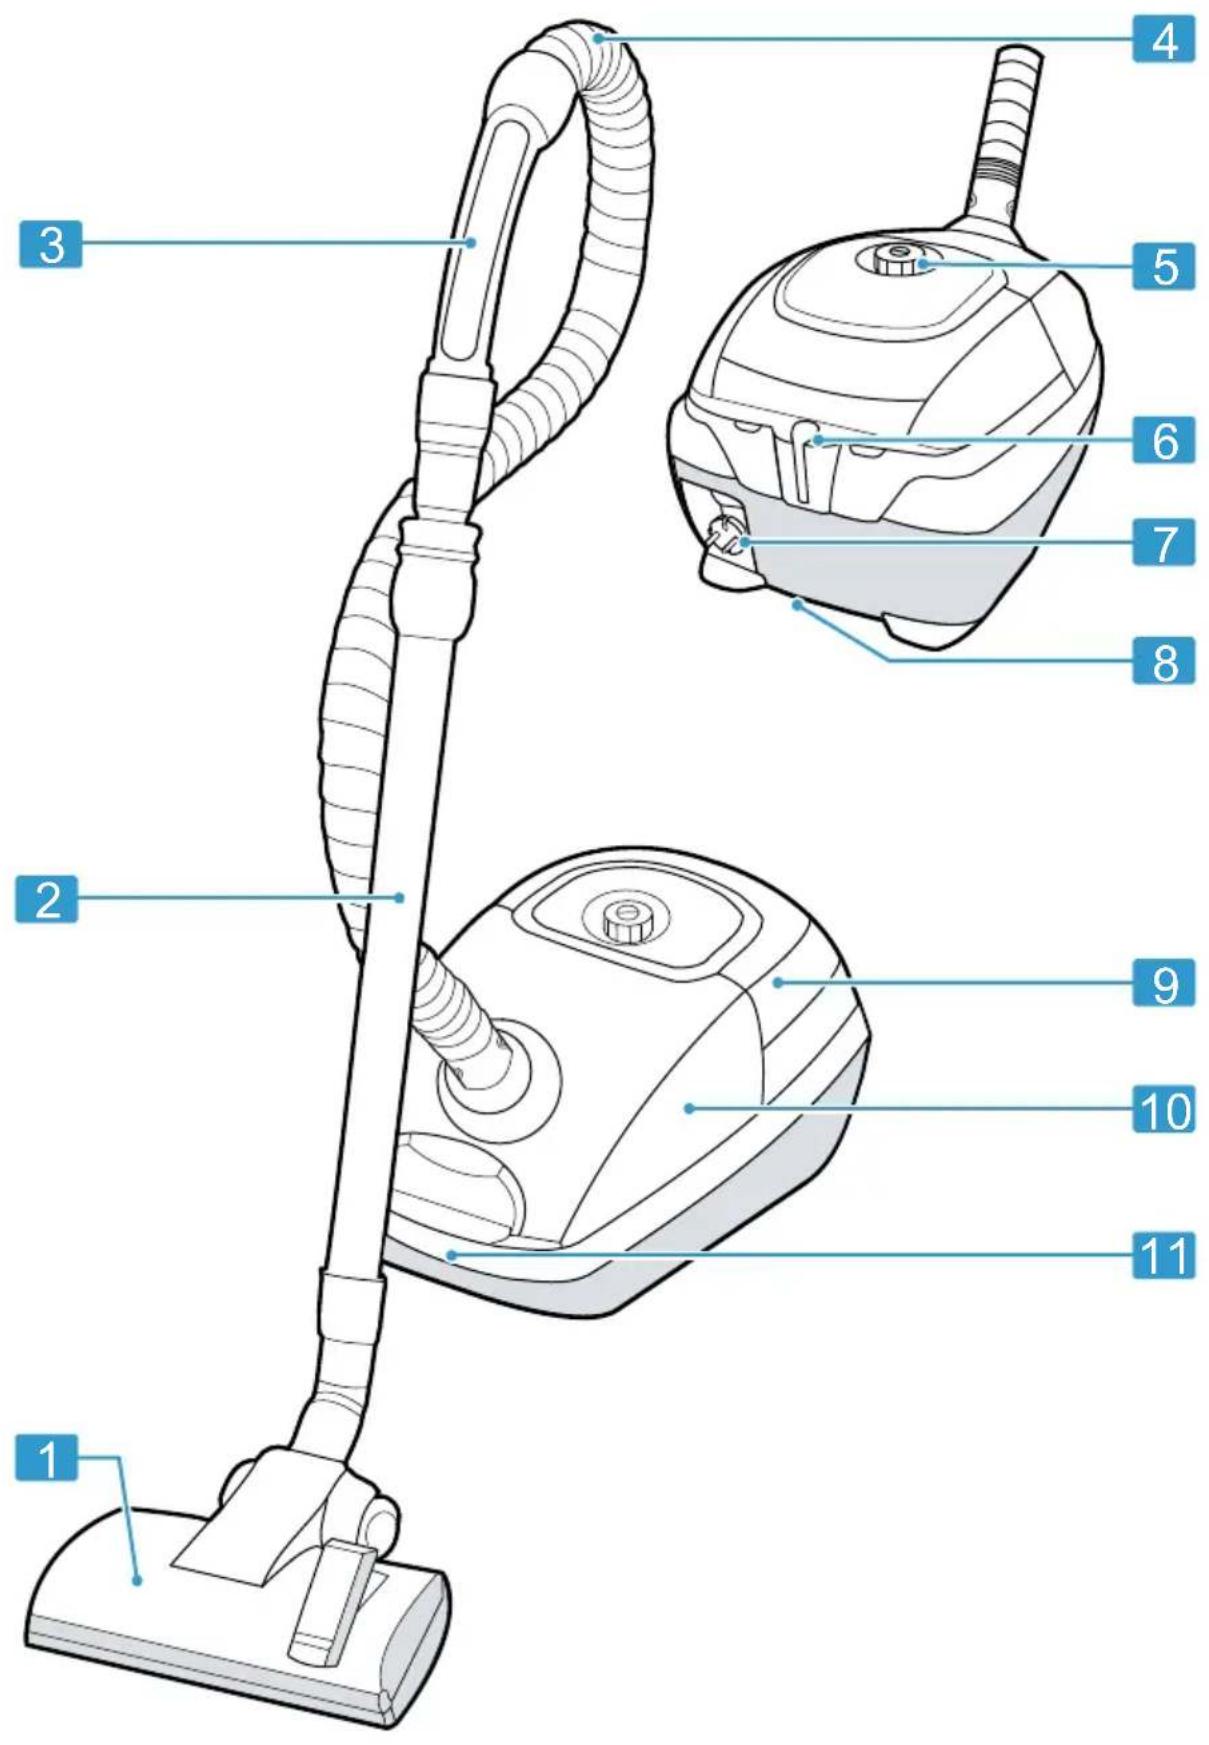
Appliance
You can find an overview of the parts of your appliance here.
Note: Individual details and colours may differ, depending on the appliance model.
Fig. 2
| 1 | Adjustable floor tool1 |
| 2 | Telescopic tube with adjusting sleeve1 |
| 3 | Handle1 |
| 4 | Hose |
| 5 | Power control and on/off switch |
| 6 | Parking aid |
| 7 | Power cord |
| 8 | Storage aid |
1 Depending on the appliance specifications
| 9 | Rear flap |
| 10 | Lid |
| 11 | Handle |
1 Depending on the appliance specifications
Overview of the controls1
You can find an overview of the controls for your appliance here.
| Symbol Use | |
| ① | Switch on the appliance. |
| Switch off the appliance. | |
| Control the power. | |
| min | Vacuum curtains and delicate fabrics. |
| Vacuum upholstered furniture and cushions. | |
| Symbol Use | |
| ○ | ■ Vacuum delicate rugs. ■ Vacuum small amounts of dirt. |
| Vacuum robust floor coverings. | |
| max | Vacuum hard floors, heavily soiled rugs and carpets. |
| auto Control | Vacuum all surfaces. |
| Change the dust bag. | |
powerSensor Technology
You can find out the essentials of how it works here. With powerSensor Technology, the appliance works at its optimum performance level. The function is automatically activated.
Tip: Use the indicated dust bag to save energy at the same time.
Accessories
Only use original accessories. These have been made especially for your appliance. Here you can find an overview of your appliance's accessories and how to use them.
Accessories Accessory number Use
| Replacement filter pack VZ41FGALL Remove vacuumed material. | |
| Motor protection filter VZ02MSF Protect the motor against con- tamination. | |
| HEPA hygiene filter VZ154HFB Clean the exhaust air. | |
| Hard floor nozzle with brush VZ123HD Vacuum hard floors. ring | |
| Hard floor nozzle VZ124HD Vacuum hard floors and car- pets. |
Before using for the first time
Configure the basic settings. Clean the appliance and accessories.
Installing the appliance
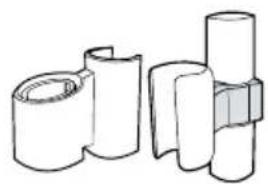
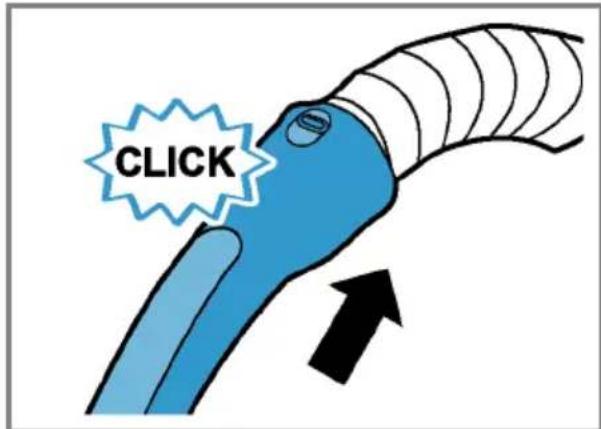
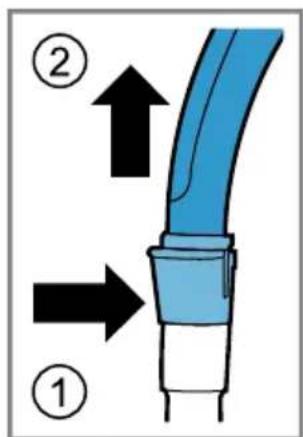
- Place the handle onto the the hose and lock it in place. Fig. 3
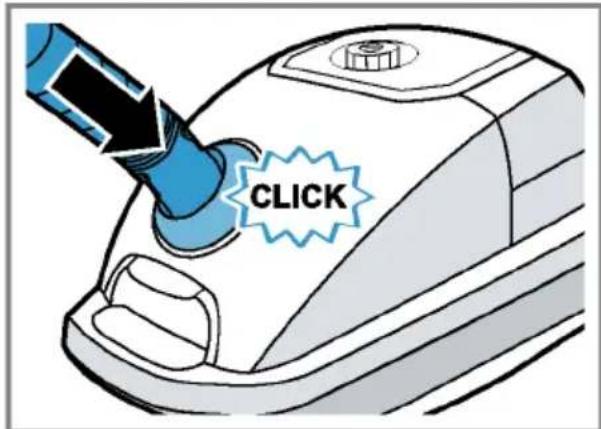
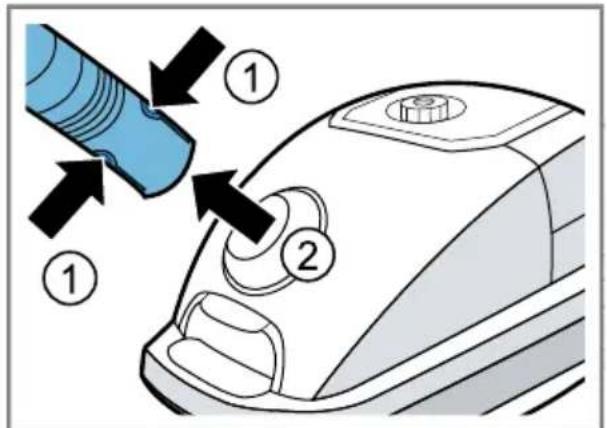
- Engage the hose adapter into the air-intake opening in the lid. Fig. 4
- Connect the handle to the telescopic tube.
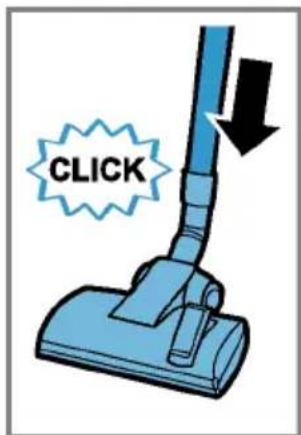
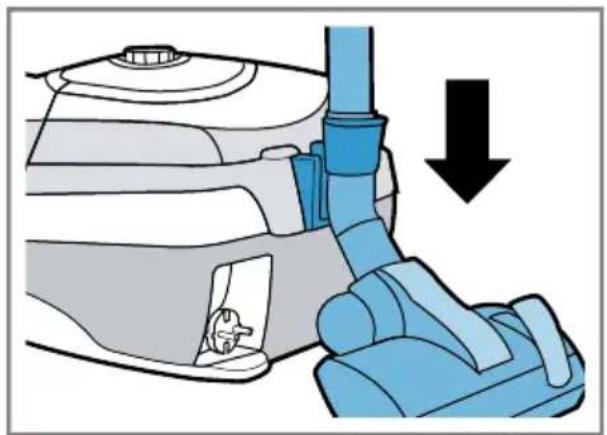
- Connect the telescopic tube to the floor nozzle. Fig. 5
- Place the accessory support 1 onto the telescopic tube. Fig. 6
- Place the crevice nozzle from the bottom onto the accessory support Fig. 6
- Place the brush ring 1 onto the upholstery nozzle 1. Fig. 7
- Place the upholstery nozzle with the brush ring from above onto the accessory holder ^1 Fig. 6
Basic operation
You can find out everything you need to know about operating your appliance here.
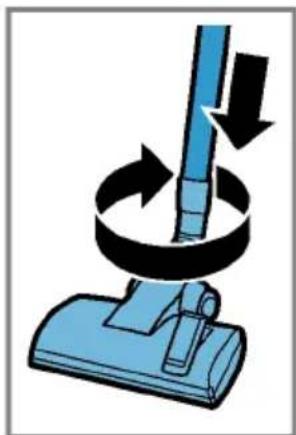
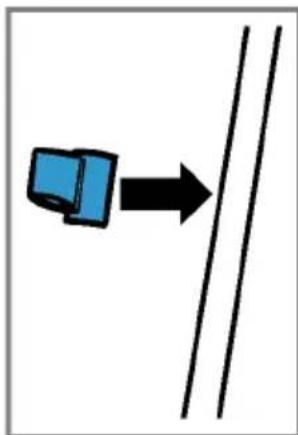
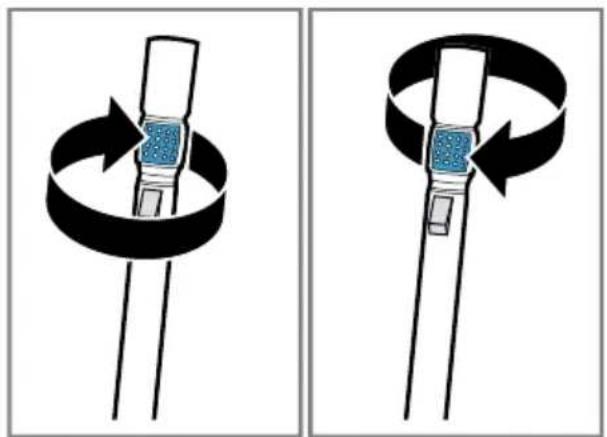
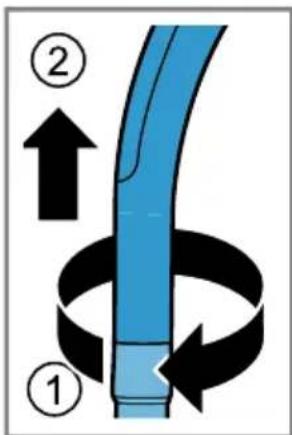
Setting the telescopic tube
-
Unlock the telescopic tube.
-
Set the required length of the telescopic tube. Fig. 8
Switching on the appliance
- Hold the mains plug and pull it out to the required length.
- Insert the mains plug into the socket.
- Press ① → Fig. 9
Switching off the appliance
- Press ①
- Unplug the mains plug.
-
Briefly pull on the mains cable and then let go.
-
The power cord retracts automatically.
Transporting the appliance
- Switch off the appliance.
- Stand the appliance upright on its end.
- Slide the catch on the floor tool into the groove on the underside of the vacuum cleaner. Fig. 10
- To overcome obstacles, transport the appliance by the handle.
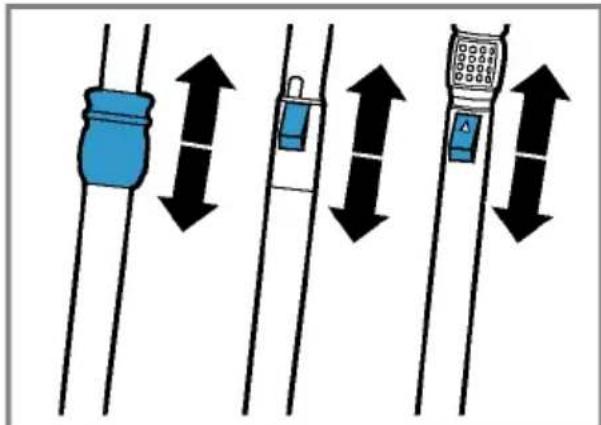
Controlling the power
You can control the setting continuously.
- Turn the power control to the required setting. "Overview of the controls", Page 23
- Turn the telescopic tube with air flow regulator to the required position. Fig. 11
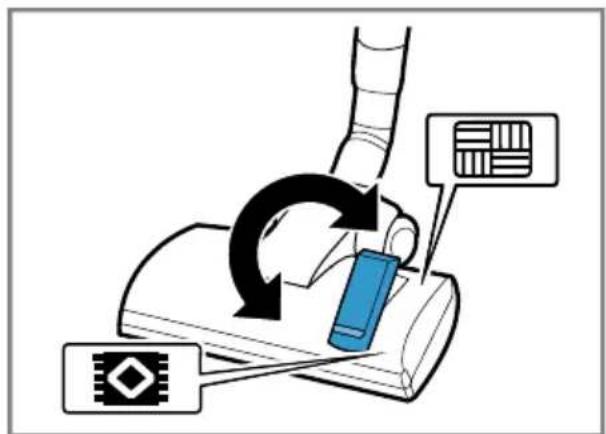
Setting the floor tool
Use the switch to set the floor nozzle to the required base. Fig. 12
Overview of the floor nozzle settings
Here, you can find an overview of the floor nozzle settings.
| Symbol | Use |
| ○ | Vacuum rugs and carpets. |
| ◎ | Vaccum parquet and hard floors. |
Vacuuming with accessory
- Place the required nozzle onto the telescopic tube or the handle.
- After use, take the nozzle that is used from the telescopic tube or remove from the handle.
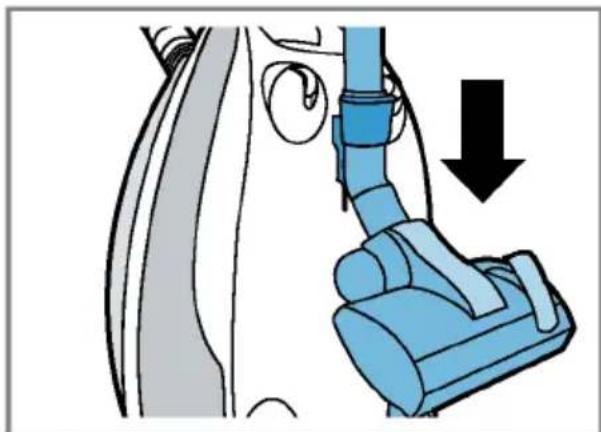
Stopping and parking the appliance
- Switch off the appliance.
- If you want to stop vacuuming for longer use periods, use the storage aid on the underside of the appliance. Fig. 10
- Use the parking aid for shorter programme pauses. Fig. 13
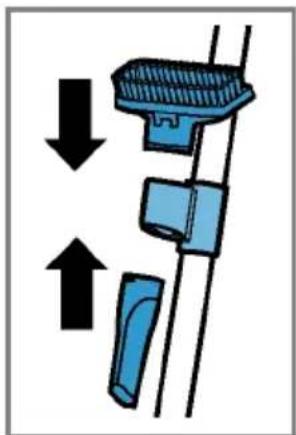
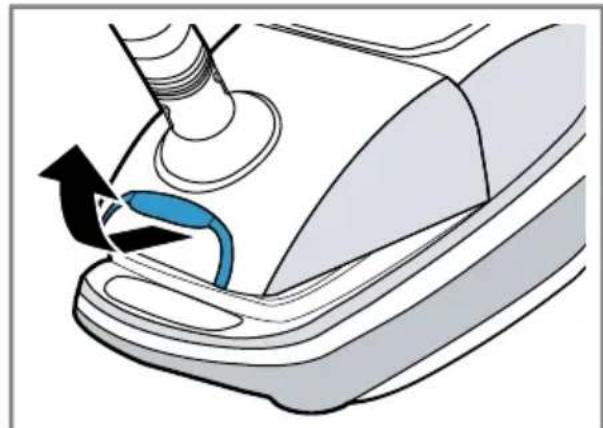
Dismantling the appliance
- Disconnect the connection between the telescopic tube and the handle. Fig. 14
- Push the two locking catches together.
3.Pull the tube out of the appliance. Fig.15
Cleaning and servicing
Motor protection
Pay attention to dirt in the motor.
ATTENTION!
Dirt in the motor may damage the motor.
- Never operate the appliance without a dust bag.
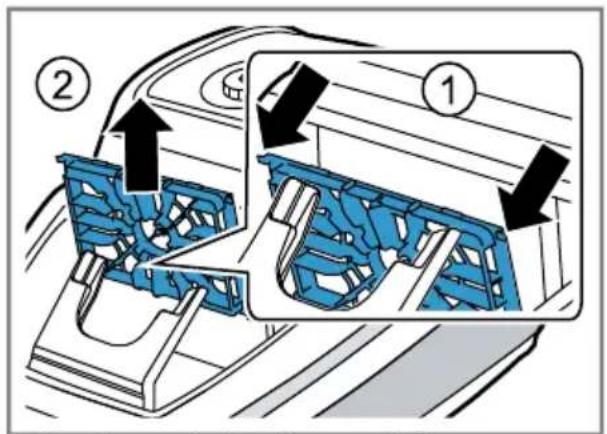
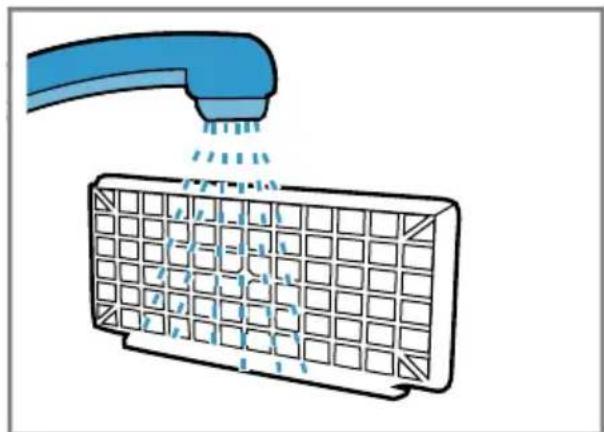
Cleaning the motor protection filter
Tip: To achieve the best possible vacuuming results, tap out or wash the motor protection filter at regular intervals. After vacuuming fine dust particles, clean or replace the motor protection filter in order to guarantee the appliance's suction.
- Switch off the appliance.
- Unplug the mains plug.
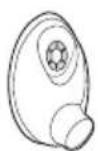
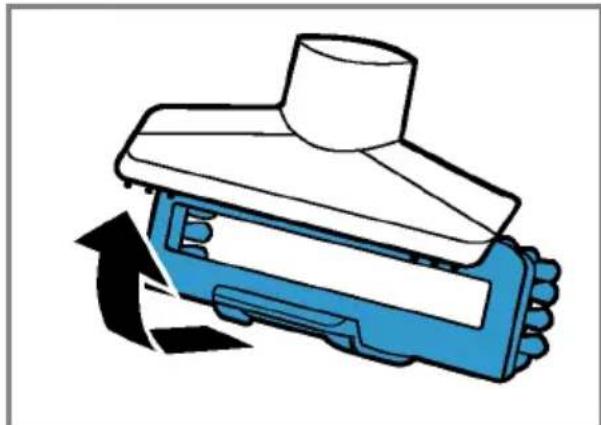
- Open the lid. Fig. 16
- In order to release the motor protection filter from the catch mechanism, pull on the side tabs. Fig. 17
- Remove the motor protection filter in the direction of the arrow.
- Tap out the motor protection filter.
- If the motor protection filter is very dirty, rinse it. Fig. 18
- The filter must then be left to dry for at least 24 hours.
- Care for the appliance and the accessory parts with a standard commercially available plastic cleaner.
10.If required, vacuum the dust compartment using a second appliance or clean it with a dry duster or dusting brush.
en Cleaning and servicing
- After cleaning, refit the motor protection filter into the appliance.
12.Lock the motor protection filter into place at the top.
13.Close the lid.
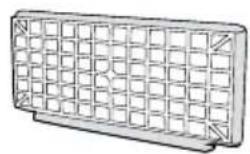
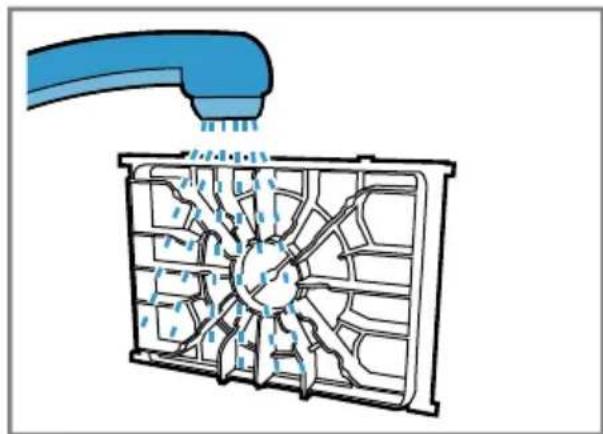
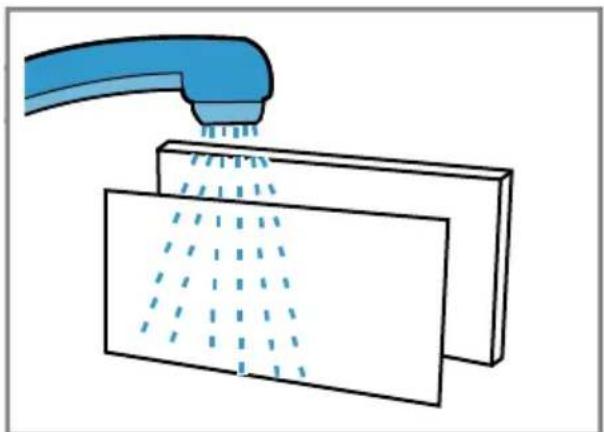
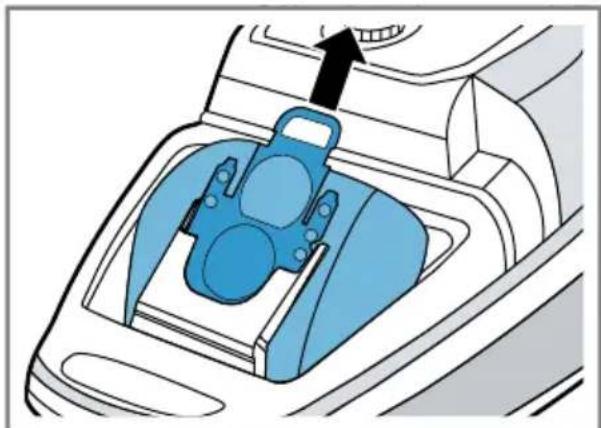
Cleaning the Micro-Hygiene exhaust filter
Tip: To achieve the best possible vacuuming results, clean or replace the Micro-Hygiene exhaust filter 1 once a year. After vacuuming fine dust particles, clean or replace the Micro-Hygiene exhaust filter 1 in order to guarantee the appliance's suction.
- Switch off the appliance.
- Unplug the mains plug.
- Open the rear flap.
- Push the locking tab in the direction of the arrow.
Fig. 19
- Unlock the filter holder.
- Remove the foam filter ^1 and the Micro-Hygiene exhaust filter ^1 from the filter holder.
Fig. 20
- Tap out the foam filter ^1 and the Micro-Hygiene exhaust filter ^1 .
- If it is very dirty, wash the foam filter and the Micro-Hygiene exhaust filter.
Fig. 21
- Leave the foam filter ^1 and the Micro-Hygiene exhaust filter ^1 to dry for at least 24 hours.
10.Insert the foam filter and the Micro-Hygiene exhaust filter into the filter holder.
11.Insert the filter holder into the appliance.
12.Close the rear flap.
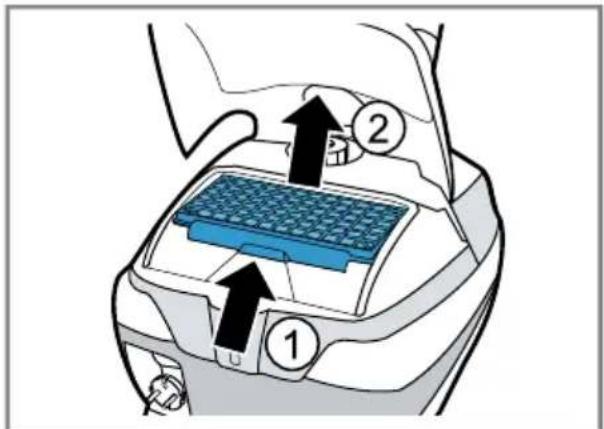
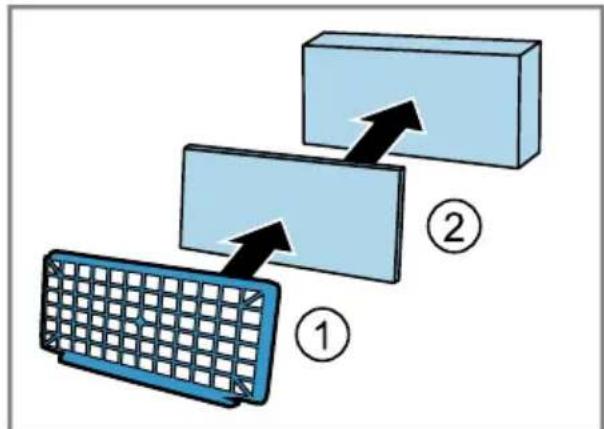
Cleaning the HEPA hygiene filter1
Note: The filtering action of the filter remains intact, even if the filter surface becomes discoloured.
Tips
- For optimum performance level, clean the HEPA hygiene filter once a year. After vacuuming fine dust particles, clean the HEPA hygiene filter in order to guarantee the appliance's suction performance.
-
To clean the filter unit thoroughly, you can clean the filter unit in the washing machine. To protect the rest of the laundry, put the filter unit into a laundry bag. Wash the filter unit at 30^ using a gentle programme and the lowest spin speed.
-
Switch off the appliance.
- Unplug the mains plug.
- Open the rear flap.
- Push the locking tab in the direction of the arrow.
- Release the HEPA hygiene filter ^1 .
- Remove the HEPA hygiene filter 1 from the appliance.
Fig. 19
- Tap out the filter unit.
- Wash out the filter unit under running water.
Fig. 22
- Leave the HEPA hygiene filter ^1 to dry for at least 24 hours.
10.Insert the HEPA hygiene filter into the appliance.
11.Close the rear flap.
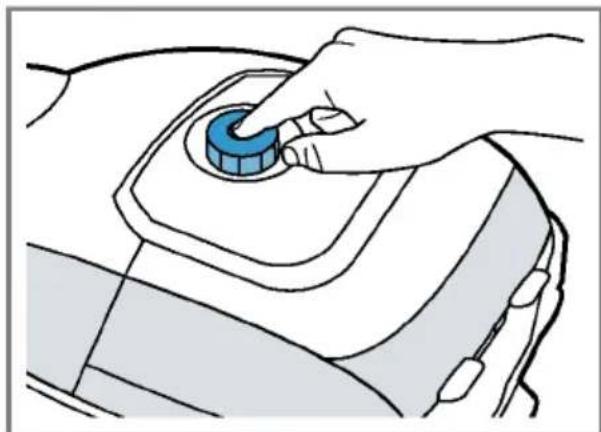
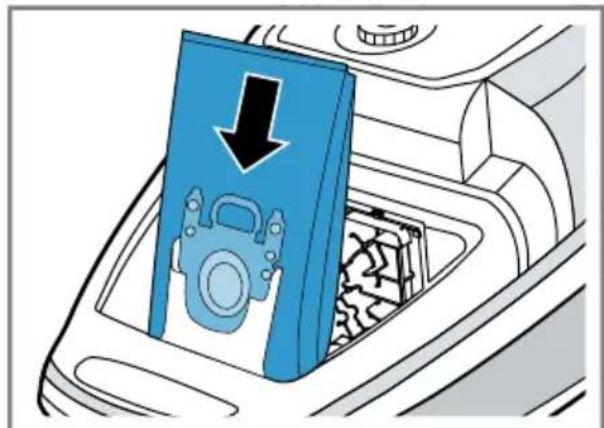
Changing the dust bag
If the dust bag change indicator lights up continuously when the nozzle is raised and at the highest performance level, change the dust bag.
- Switch off the appliance.
- Unplug the mains plug.
- To open the lid, press the locking lever.
- To close the dust bag, pull the locking tab.
- Remove the full dust bag from the holder. Fig. 23
- Dispose of the full dust bag.
- Push the new dust bag into the holder until it clicks into place. Fig. 24 Do not kink the dust bag.
- Close the lid.
Make sure that the dust bag is not pinched when the lid is closed. The lid only closes if a dust bag has been inserted.
Troubleshooting
You can rectify minor faults on your appliance yourself. Read the troubleshooting information before contacting after-sales service. This will avoid unnecessary costs.
Malfunctions
| Errors Cause Troubleshooting | ||
| The appliance is not work-ing. | The dust bag change indicator lights up. | Change the dust bag. → "Changing the dust bag", Page 27 |
| The household fuse trips when the appliance is switched on. | Several appliances are operated simultaneously at an electrical mains supply. | 1. Switch on the household fuse. 2. Set the lowest performance level. → "Controlling the power", Page 24 3. Switch the appliance on. → "Switching on the appliance", Page 24 |
| Suction is reduced. Nozzle, telescopic tube or hose are blocked. | 1. Dismantle the appliance. → "Dismantling the appliance", Page 25 2. Remove the blockage. | |
| The dust bag is full. | Change the dust bag. → "Changing the dust bag", Page 27 | |
| The HEPA hygiene filter is blocked.1 | Clean the HEPA hygiene filter1. → "Cleaning the HEPA hygiene filter", Page 26 | |
| The Micro-Hygiene exhaust filter is blocked.1 | Clean the Micro-Hygiene exhaust filter1. → "Cleaning the Micro-Hygiene exhaust filter", Page 26 | |
Transportation, storage and disposal
Disposing of old appliance
Valuable raw materials can be reclaimed by recycling.
- Dispose of the appliance in an environmentally friendly manner.
This appliance is labelled in accordance with European Directive 2012/19/EU concerning used electrical and electronic appliances (waste electrical and electronic equipment - WEEE). The guideline determines the framework for the return and recycling of used appliances as applicable throughout the EU.
Customer Service
You can solve many problems yourself by consulting the information on eliminating faults in this instruction manual or on our website. If this is not the case, contact our Customer Service.
With any warranty claims we will make sure that your appliance is repaired by trained Customer Service technicians using original spare parts, including after the manufacturer's warranty has expired.
Detailed information on the warranty period and terms of warranty in your country is available from our Customer Service, your retailer or on our website.
If you contact Customer Service, you will require the product number (ENr.) and the production number (FD) of your appliance.
Product number (E-Nr.) and production number (FD)
You can find the product number (ENr.) and the production number (FD) on the appliance's rating plate. Make a note of your appliance's details and the Customer Service telephone number to find them again quickly.
Warranty conditions
You can make warranty claims for your appliance under the following conditions.
The guarantee conditions for this appliance are as defined by our representative in the country in which it is sold. Details regarding these conditions can be obtained from the dealer from whom the appliance was purchased. The bill of sale or receipt must be produced when making any claim under the terms of this guarantee.
fr
Table des matieres
Sécurité 31
Indications generales 31
ADVARSEL-Fare for forbranding!
powerSensor Technology
Transport of apparatus
- Sluk for apparatet.
- Stil apparatuset lodret.
- Skyd hagen på gulvmundstykket ind i udsparingen på stovsugerens underside. Fig. 10
- Transporter apparatet odom for hindringer ved at holde det i handgrebet.
Indstille effekt1
Effekten kan indstilles trinløst.
powerSensor Technology
1 Allt after apparatens utrusting
1 Allt after apparatusens utrusting
Lär kenna
powerSensor Technology
powerSensor Technology
www.siemens-home.bsh-group.com/tr www.yetkiliservis.siemens-home.bsh-group.com
Central Service Contacts
AE United Arab Emirates,
BSH Home Appliances FZE
Round About 13,Plot Nr MO-0532A
Jebel Ali Free Zone -Dubai
Tel.:048814401*
mailto:service.uae@bshg.com
www.siemens-home.bsh-group.com/me
*Sun-Thu:8.00am to 5.00 pm (exclude
public holidays)
AT Osterreich, Austria BSH Hausgeräte Gesellschaft mbH Werkskundendienst für Hausgeräe Quellenstrasse 2a 1100 Wien Online Reparaturannahme, Ersatzteile und Zubehör und weitere_infos unter: www.siemens-home.bsh-group.at Reparaturservice, Ersatzteile & Zubehör, Produktinformationen Tel.: 0810 550 522 mailto:vie-stoerungsannahme@bshg.com Wir sind an 365 Tagen von 07:00 bis 22:00 Uhr für Sie erreichenbar.
AU Australia
BSH Home Appliances Pty. Ltd.
Gate 1, 1555 Centre Road
Clayton, Victoria 3168
Tel.: 1300 167 425
mailto: aftersales.au@bshg.com
www.siemens-home.bsh-group.com/au
Mo-Fr: 24 hours
BE Belgique, Belgium BSH Home Appliances S.A.-N.V. Avenue du Laerbeek 74 Laarbeeklaan 74 1090 Bruxelles-Brussel Tel.:024757002 mailto:bru-repairs@bshg.com www.siemens-home.bsh-group.com/be
BH Bahrain, bairn Gas WLL Bldg 725/ Road 117/ Block 701, Sheikh Salman Highway, Tubli-701; Bahrain Manama Tel.:01753111* mailto:info@bahringas.bh Sun-Thu:8.00am to 6.00 pm (exclude public holidays)
BY Belarus,Беларсь 000"BCXБитоваяТекиа" Tel.:4957372962 mailto:mok-kdhl@bshg.com
CH Schweiz, Suisse, Svizzera, Switzerland
BSH Hausgeräte AG
Siemens Hausgeräte Service
Fahrweidstrasse 80
8954 Geroldswil
Reparaturservice, Ersatzteile & Zubehör, Produktinformationen Tel.: 0848 888 500
mailto:ch-service@bshg.com
mailto:ch-spareparts@bshg.com
www.siemens-home.bsh-group.com/ch
CY Cyprus, Kūnpoc
BSH Ikiakes Syskeves-Service
39, Arh. Makaariou III Str.
2407 Egomi/Nikosia (Lefkosia)
Tel.: 777 78 007
mailto:EGO-CYCustomerService@bshg.com
CZ Ceska republka, Czech Republic
Vice informaci (napr. zaručni podmíky, prodloužena zaruka aj.) nazeznete na webovych strankach www.siemens-home.bsh-group.com/cz/ nebo nás kontaktujte na +420 251 095 511 BSH domáci spotřebrane s.r.o. Radlická 350/107c 158 00 Praha 5 Prijem oprav Tel: +420 251 095 042 mailto:opravy@bshg.com
DE Deutschland, Germany
BSH Hausgeräte Service GmbH
Zentralwerkstatt für keine Hausgeräte
Trautskirchener Strasse 6-8
90431 Nürnberg
Online Auftragsstatus, Filterbeutel-Konfigurator und weitere_infos unter: www.siemens-home.bsh-group.de
Reparaturservice, Ersatzteile & Zubehor, Produkt-Informationen: Tel.: 0911 70 440 044
mailto:cp-servicecenter@bshg.com
DK Danmark, Denmark
BSH Hvidevarer A/S
Telegrafvej 4
2750 Ballerup
Tel.: 44 89 80 28
mailt: BSH-Service.dk@bshg.com
www.siemens-home.bsh-group.com/dk
ES
Espana, Spain
BSH Electrodomesticos Espana S.A.
Servicio Oficial del Fabricante
Parque Empresarial PLAZA, C/ Manfredo
nia,6
50197 Zaragoza
Tel.: 976 305 714
mailto:CAU-Siemens@bshg.com
www.siemens-home.bsh-group.es
GB Great Britain
BSH Home Appliances Ltd.
Grand Union House, Old Wolverton Road, Wolverton
Milton Keynes MK12 5PT
To arrange an engineer visit, to order spare parts and accessories or for product advice please visit www.siemens-home.bsh-group.com/uk Or call Tel.: 0344 892 8999
Calls are charged at the basic rate, please check with your telephone service provider for exact charges
GR Greece,EMaç
BSH Ikiakes Siskeves A.B.E.
Central Branch Service
17 km E.O. Athinon-Lamias & Potamou
20
14564 Kifisia
TnAeΦwvo:210 4277 600
TnAeΦwvo:210 4277 701
mailto:nkf-CustomerService@bshg.com
www.siemens-home.bsh-group.com/gr
HK Hong Kong,香港
BSH Home Appliances Limited
香港新界荃灣青山公路388號中染
大厦23樓07室Unit 07,23/F,CDW
Building,388Castle Peak Road,
Tsuen Wan,New Territories,Hong Kong
Tel.:25656151(HK)
Toll free 0800030(Macao)
mailto:siemens.hk.service@bshg.com
www.siemens-home.bsh-group.com.hk
IE Republic of Ireland BSH Home Appliances Ltd. M50 Business Park, Ballymount Road Upper, Walkinstown Dublin 12 To arrange an engineer visit, to order spare parts and accessories or for product advice please call Tel.: 01450 2655^ www.siemens-home.bsh-group.com/ie *Calls are charged at the basic rate, please check with your telephone service provider for exact charges
IL Israel
C/S/B/ Home Appliance Ltd.
1, Hamasger St., North Industrial Park
Lod, 7129801
Tel.: 08 9777 222
mailto:csb-serv@csb-ltd.co.il
www.siemens-home.bsh-group.com/il
IN India, Bharat, जिर्ति BSH Household Appliances Mfg. Pvt. Ltd. Arena House, Main Bldg, 2nd Floor, Plot No. 103, Road No. 12, MIDC, Andheri East Mumbai 400093 Toll Free 1800 209 1850 www.siemens-home.bsh-group.com/in *Mo-Sa: 8.00am to 8.00pm (exclude public holidays)
IS Iceland Smith & Norland Noatuni 4 105 Reykjavik Tel.:05203000 www.sminor.is
IT Italia, Italy BSH Elettrodomestici S.p.A. Via.M.Nizzoli 1 20147 Milano (MI) Tel.02412678200 mailto:info.it@siemens-home.bsh-group.com www.siemens-home.bsh-group.com/it
LB Lebanon,
Teheni, Hana & Co.
Boulevard Dora 4043 Beyrouth, P.O.Box
90449
Jdeideh 1202 2040
Tel.:01255211
mailto:Info@Teheni-Hana.com
LU Luxembourg
BSH élémenténagers S.A.
13-15, ZI Breedeweues
1259 Senningerberg
Tel.: 26349 821
Repairatun: lux-repair@bshg.com
Ersatzteile: lux-spare@bshg.com
www.siemens-home.bsh-group.com/lu
MT Malta
Aplan Limited The Atrium
The Atrium
Mriehel by Pass
BKR3000 Birkirkara
Tel.: 025 495 122
mailto:lapap@aplan.com.mt
NL Nederland, Netherlands BSH Huishoudapparaten B.V. Taurusavenue 36 2132 LS Hoofddorp Storingsmeling:Tel.:0884244020 Onderdelenverkoop:Tel.:088424 4020 mailto:siemens-contactcenter@bshg.com mailto:siemens-onderdelen@bshg.com www.siemens-home.bsh-group.nl
NO Norge, Norway
BSH Husholdningsapparater A/S
Grensesvingen 9
0661 Oslo
Tel.: 22 66 05 73
Tel.: 22 66 06 00
mailto: Siemens-Service-NO@bshg.com
www.siemens-home.bsh-group.com/no
PL Polska, Poland
BSH Sprzet Gospodarstwa Domowego Sp. z o.o.
Al. Jerozolimskie 183
02-222 Warszawa
Tel.: 801 191 534
mailto:Serwis.Fabryczny@bshg.com
www.siemens-home.bsh-group.pl
PT Portugal BSHP Electrodomesticos, Sociedade Unipessoal Lda. Rua Alto do Montijo, n° 15 2790-012 Carnaxide Tel.: 214 250 720 mailto: siemens.electrodomesticos.pt@bshg.com www.siemens-home.bsh-group.com/pt Sos. Bucuresti-Ploiesti, nr. 19-21, sect.1
RU Russia, Pocca
OOO BCX BbTOBbIe Pn6Opb
CepBaC ot npOn3BoUTeJIa
Mana KaJycka, 15
119071 MockBa
Tel.:8 (800)2002962
mailto:hotlineru@bshg.com
www.siemens-home.bsh-group.ru
SE Sverige, Sweden
BSH Home Appliances AB
Landsvagen 32
169 29 Solna
Tel.: 0771 195 500
Tel.: 0771 112 277
mailto: Siemens-Service-SE@bshg.com
www.siemens-home.bsh-group.com/se
SK Slovensko, Slovakia
Viac informáci (napr. záručné podmi-eny, predlžená záruka a i.) najdete na webovych stránkach www.siemens-home.bsh-group.com/sk/ alebo nás kon-taktujte na +420 251 095 511 BSH domác spotřebrice s.r.o. organizačné zložka Bratislava Trnavska cesta 50 821 02 Bratislava Prijem oprav Tel: +421 238 111 139 mailto:opravy@bshg.com
TR Türkiye, Turkey
BSH Ev Aletleri Sanayi ve Ticaret A.S.
Fatih Sultan Mehmet Mahallesi, Balkan
Caddesi No: 51
34771 Ümraniye, Istanbul
Tel.: 0 216 444 6688
mailto:careline.turkey@bshg.com
www.siemens-home.bsh-group.com/tr
Cagri merkezini sabit hatlardan aramanin bedeli sehir ici ücretendirme, Cep
telefonlarindan isel kullananan tarifeye
gore degiskenlik gostermektedir
UA Ukraine, YkpaHa TOB "5CX NObytBa TexHika" ten.: 044 490 2095 mailto:bsh-service.ua@bshg.com www.siemens-home.bsh-group.com/ua БezkoTuBHa iHfo-niHia IHHIT3 09:00 no 19:00
KK Kosovo
Service-General SH.P.K.
rr.Magjistralja Ferizaj Prishtine
70000 Ferizaj
Tel: 00381 (0) 290 330 723
Tel.: 00377 44 172 309
mailto:servicegeneral527@gmail.com
ZA South Africa
BSH Home Appliances (Pty) Ltd.
15th Road Randjespark, Private Bag X36, Randjespark
1685 Midrand-Johannesburg
Tel.:086 002 6724
mailto:bsh@iopen.co.za
mailto:applianceserviceza@bshg.com
www.siemens-home.bsh-group.com/za
BSH Hausgeräte GmbH
Carl-Wery-StraBe 34
81739 München
GERMANY
www.siemens-home.bsh-group.com