
PLR 15 - Rangefinder BOSCH - Free user manual and instructions
Find the device manual for free PLR 15 BOSCH in PDF.
| Product type | Laser distance measurer |
| Brand | Bosch |
| Model | PLR 15 |
| Category | Distance measurer |
| Range (typical) | 0.15 – 15 m |
| Measurement accuracy (typical) | ±3.0 mm |
| Smallest display unit | 1 mm |
| Measurement duration (typical) | 0.5 s |
| Measurement duration (maximum) | 4 s |
| Operating temperature | -10 °C … +40 °C |
| Storage temperature | -20 °C … +70 °C |
| Max. relative humidity | 90 % |
| Laser class | 2 |
| Laser type | 635 nm, <1 mW |
| Laser beam diameter (at 10 m) | approx. 9 mm |
| Power supply | 2 batteries 1.5 V LR03 (AAA) |
| Battery life (measurement mode) | approx. 5 h |
| Weight (according to EPTA 01/2003) | 0.1 kg |
| Dimensions (L x W x H) | 100 x 36 x 23 mm |
| Laser safety | Do not point the beam at people or animals |
| Maintenance | Clean with a soft, damp cloth, without solvents |
| After-sales service (France) | Bosch Power Tools – tel. 0811 36 01 22 |
Frequently Asked Questions - PLR 15 BOSCH
Keep the safety instructions.
User questions about PLR 15 BOSCH
0 question about this device. Answer the ones you know or ask your own.
Ask a new question about this device
Download the instructions for your Rangefinder in PDF format for free! Find your manual PLR 15 - BOSCH and take your electronic device back in hand. On this page are published all the documents necessary for the use of your device. PLR 15 by BOSCH.
USER MANUAL PLR 15 BOSCH
OBJ_BUCH-1900-001.book Page 5 Monday, May 13, 2013 11:40 AM
Deutsch|5

Deutsch
Sicherheitshinweise

OBJ_BUCH-1900-001.book Page 6 Monday, May 13, 2013 11:40 AM

6 | Deutsch
OBJ_BUCH-1900-001.book Page 7 Monday, May 13, 2013 11:40 AM
Deutsch|7
Technische Daten
OBJ_BUCH-1900-001.book Page 8 Monday, May 13, 2013 11:40 AM

8 | Deutsch
Montage
OBJ_BUCH-1900-001.book Page 9 Monday, May 13, 2013 11:40 AM
Deutsch 9
Ein-/Ausschalten
OBJ_BUCH-1900-001.book Page 10 Monday, May 13, 2013 11:40 AM


10 |Deutsch

OBJ_BUCH-1900-001.book Page 11 Monday, May 13, 2013 11:40 AM
Deutsch|11
OBJ_BUCH-1900-001.book Page 12 Monday, May 13, 2013 11:40 AM

12 |Deutsch
OBJ_BUCH-1900-001.book Page 13 Monday, May 13, 2013 11:40 AM
Deutsch|13
OBJ_BUCH-1900-001.book Page 14 Monday, May 13, 2013 11:40 AM


14|English
Nur fur EU-Länder:

Working safely with the measuring tool is possible only when the operating and safety information are read completely and the instructions contained therein are strictly followed. Never make warning labels on the measuring tool unrecognisable. SAVE THESE INSTRUCTIONS.
Caution - The use of other operating or adjusting equipment or the application of other processing methods than those mentioned here, can lead to dangerous radiation exposure.

2609140991(13.5.13) Bosch Power Tools


OBJ_BUCH-1900-001.book Page 15 Monday, May 13, 2013 11:40 AM
English | 15
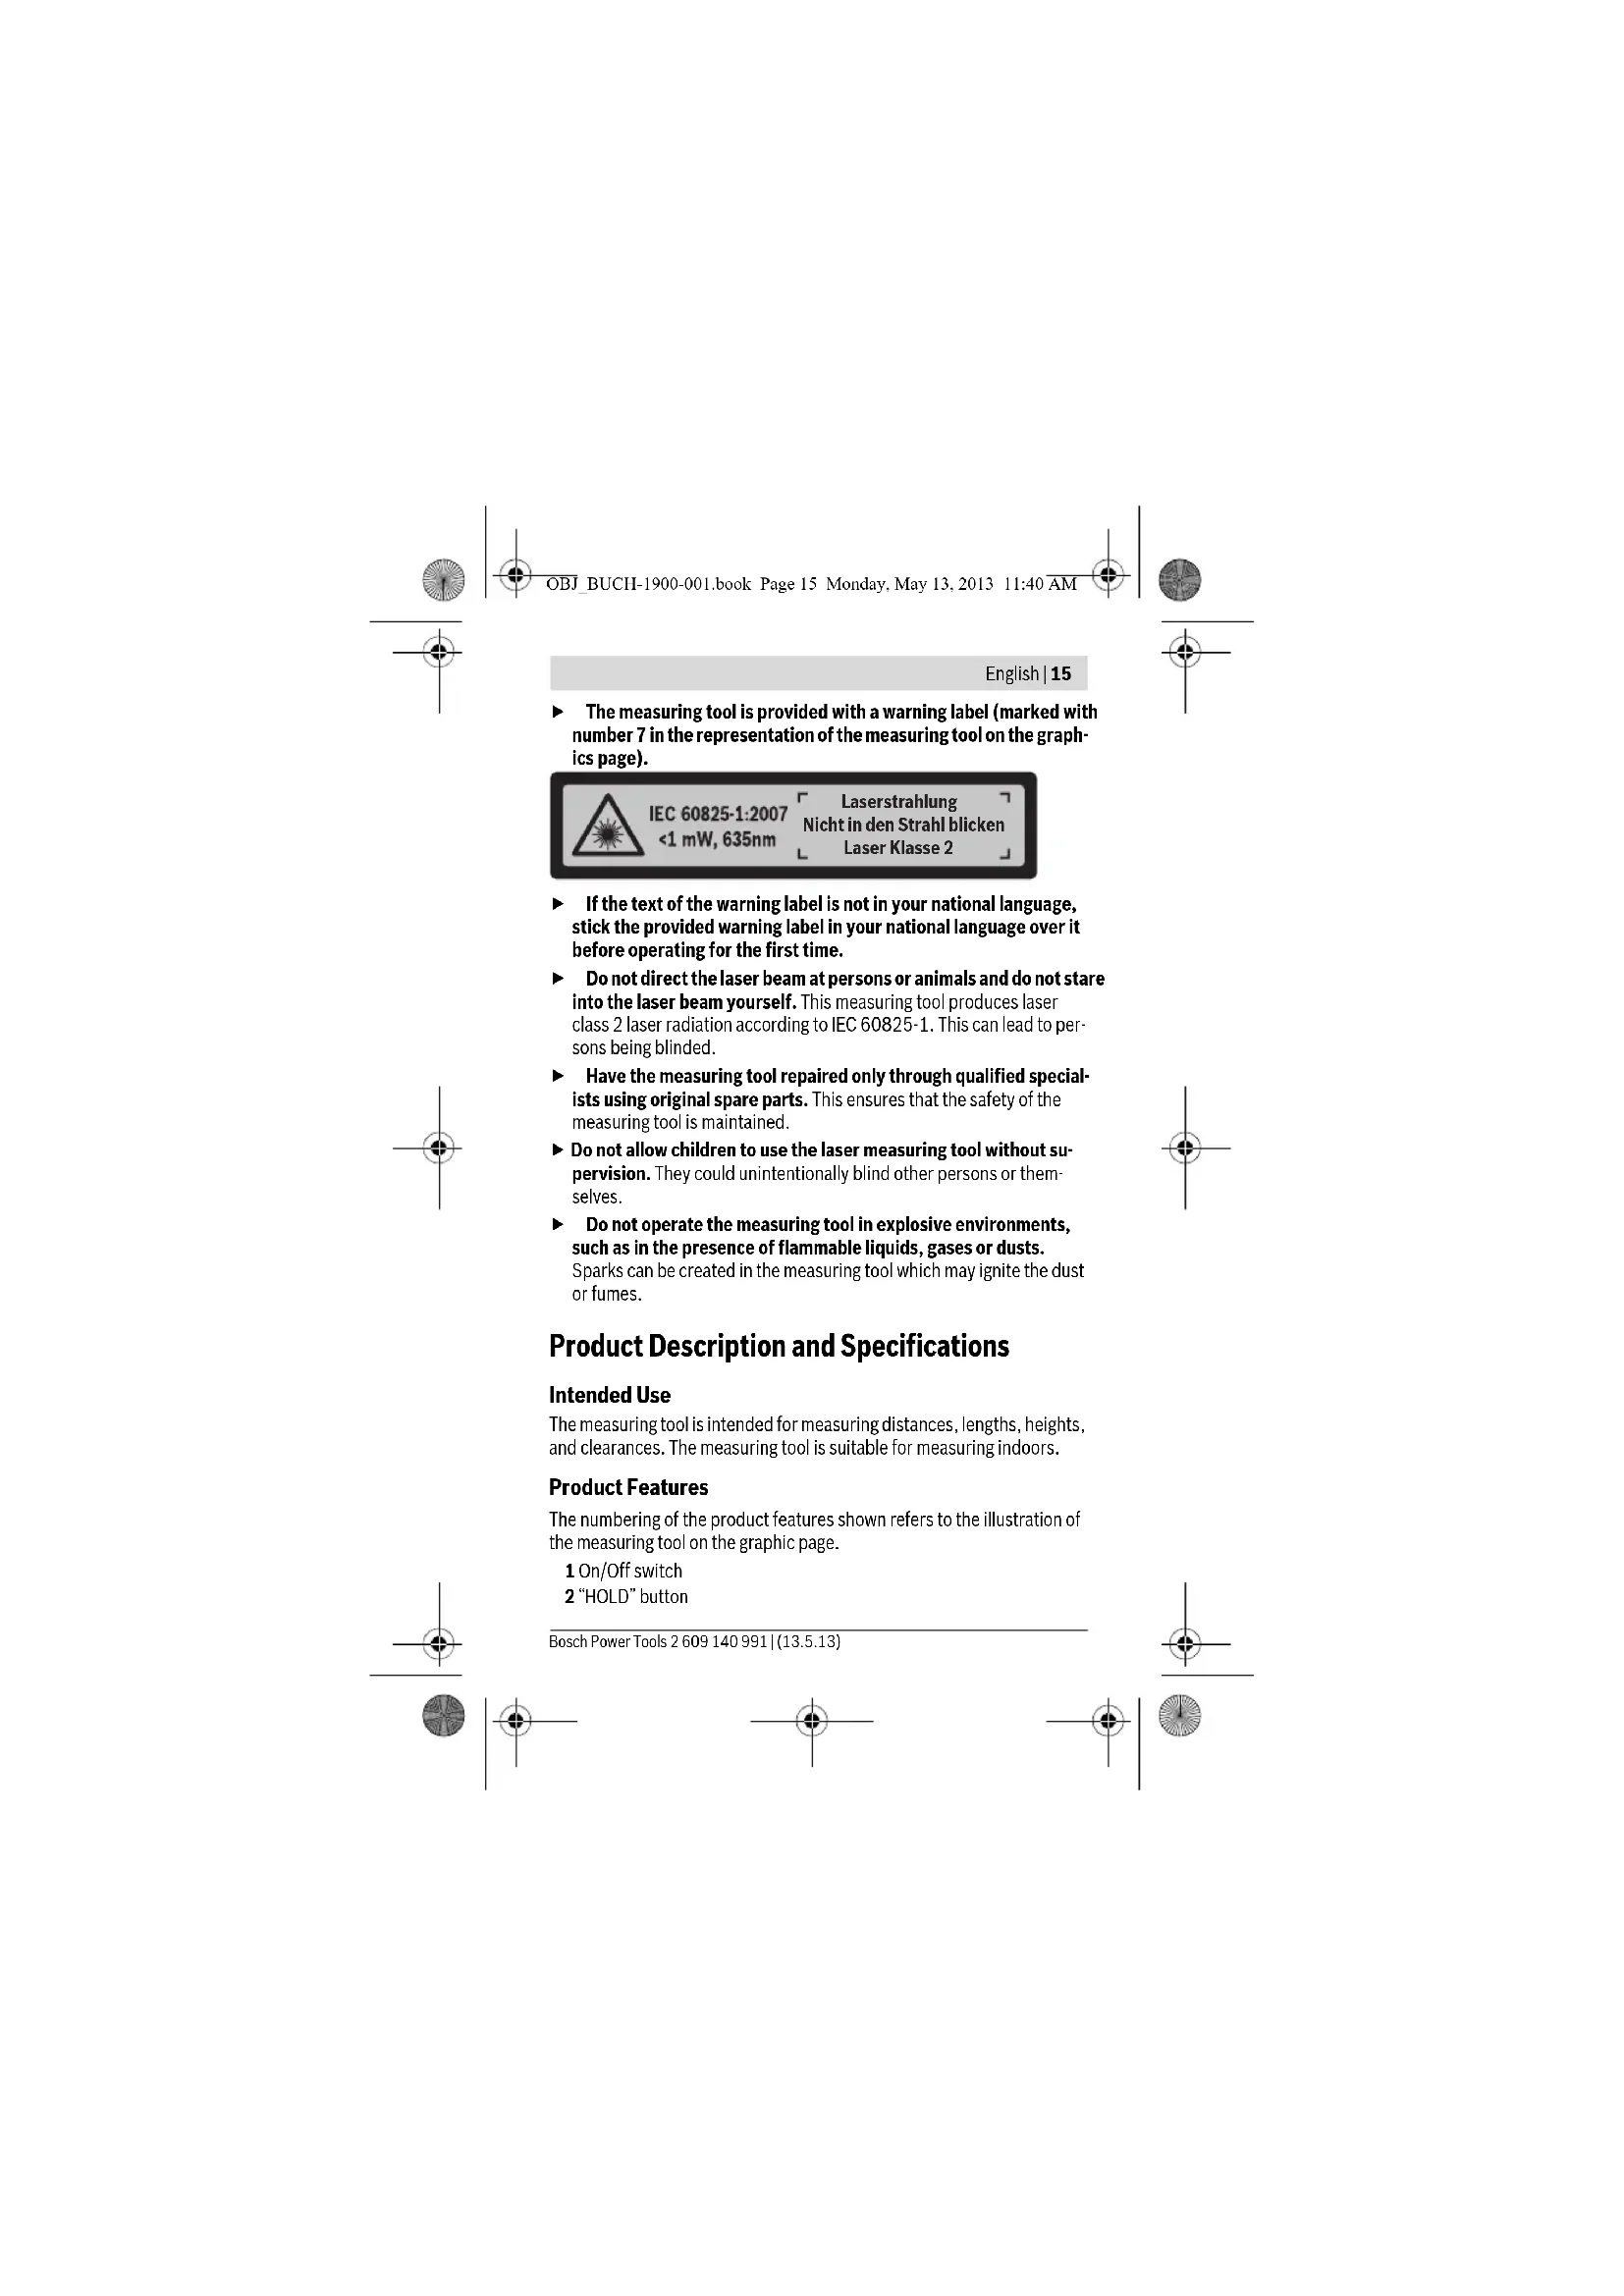
The measuring tool is provided with a warning label (marked with number 7 in the representation of the measuring tool on the graphics page).

IEC 60825-1:2007
<1mW,635nm
Laserstrahlung
If the text of the warning label is not in your national language, stick the provided warning label in your national language over it before operating for the first time.
Do not direct the laser beam at persons or animals and do not stare into the laser beam yourself. This measuring tool produces laser class 2 laser radiation according to IEC 60825-1. This can lead to persons being blinded.
Have the measuring tool repaired only through qualified specialists using original spare parts. This ensures that the safety of the measuring tool is maintained.
- Do not allow children to use the laser measuring tool without supervision. They could unintentionally blind other persons or themselves.
Do not operate the measuring tool in explosive environments, such as in the presence of flammable liquids, gases or dusts. Sparks can be created in the measuring tool which may ignite the dust or fumes.
Product Description and Specifications
Intended Use
The measuring tool is intended for measuring distances, lengths, heights, and clearances. The measuring tool is suitable for measuring indoors.
Product Features
The numbering of the product features shown refers to the illustration of the measuring tool on the graphic page.
1 On/Off switch
2"HOLD" button
Bosch Power Tools 2609140991| (13.5.13)


OBJ_BUCH-1900-001.book Page 16 Monday, May 13, 2013 11:40 AM

16|English
3 Display
4 Battery lid
5 Latch of battery lid
6 Serial number
7 Laser warning label
8 Reception lens
9 Laser beam outlet
*The accessories illustrated or described are not included as standard delivery.
Display Elements
a Battery low indicator
b Temperature warning
c Laser switched on
d Measurement hold
e Previous measuring value
f Unit of measure
g Current measuring value
Technical Data
| Digital Laser Rangefinder PLR 15 | |
| Article number | 3603 F72 000 |
| Measuring range (typical) | 0.15-15 mAI |
| Measuring accuracy (typical) ±3.0 mm | BI |
| Lowest indication unit 1 m m | |
| Measuring duration | |
| - t y p i c a l | 0.5s |
| - m a x i m a l | 4s |
| Operating temperature - 10℃ ... +40℃ | |
| Storage temperature | -20℃ ... +70℃ |
| Relative air humidity, max. | 90% |
| Laser class | 2 |
| Laser type | 635 nm, <1 mW |
| Laser beam diameter (at 25℃) and at 10 m distance, approx. | 9 m m |
2609140991(13.5.13) Bosch Power Tools


OBJ_BUCH-1900-001.book Page 17 Monday, May 13, 2013 11:40 AM
English | 17
Digital Laser Rangefinder PLR 15
| Batteries | 2 x 1.5 VLR03 (AAA) |
| Battery service life in measuring operation, ap- prox. | 5 h |
| Weight according to EPTA-Procedure 01/2003 | 0.1 kg |
| Dimensions | 100x36x23mm |
A) The working range increases depending on how well the laser light is reflected from the surface of the target (scattered, not reflective) and with increased brightness of the laser point to the ambient light intensity (interior spaces, twilight). In unfavourable conditions, e.g., with extreme interior illumination or a badly reflecting surface, the measuring range may be limited.
B) In unfavourable conditions, e. g., with extreme interior illumination, badly reflecting surface or the room temperature deviating heavily from 25^ , the maximum deviation can be up to ± 7mm per 15m . In favourable conditions, a deviation influence of ± 0.05mm / m must be taken into account.
The measuring tool can be clearly identified with the serial number 6 on the type plate.
Assembly
Inserting/Replacing the Batteries
Alkali-manganese batteries are recommended for the measuring tool. To open the battery lid 4, press the latch 5 in the direction of the arrow and remove the battery lid. Insert the batteries. When inserting, pay attention to the correct polarity according to the representation on the inside of the battery compartment.
When the battery symbol appears for the first time on the display, measurements are still possible for approx. 15 minutes. When the battery symbol flashes, the batteries must be replaced; measurements are no longer possible.
Replace all batteries at the same time. Only use same-brand batteries with the identical battery capacity.
Bosch Power Tools 2609140991| (13.5.13)


OBJ_BUCH-1900-001.book Page 18 Monday, May 13, 2013 11:40 AM

18|English
- Remove the batteries from the measuring tool when not using it for extended periods. When storing for extended periods, the batteries can corrode and discharge themselves.
Operation
Initial Operation
Do not leave the switched on measuring tool unattended and switch the measuring tool off after use. Other persons could be blinded by the laser beam.
Protect the measuring tool against moisture and direct sun light.
Do not subject the measuring tool to extreme temperatures or variations in temperature. As an example, do not leave it in vehicles for long time. In case of large variations in temperature, allow the measuring tool to adjust to the ambient temperature before putting it into operation. In case of extreme temperatures or variations in temperature, the accuracy of the measuring tool can be impaired.
- Avoid heavy impact to or falling down of the measuring tool. After severe exterior effects to the measuring tool, it is recommended to carry out a check (see "Checking the Measuring Tool", page 21) each time before continuing to work.
Switching On and Off
To switch on the measuring tool, push the On/Off switch 1 toward the rear. When switching on the measuring tool, the laser beam is switched on. The LASER indicator flashes on the display.
To switch off the measuring tool, push the On/Off switch 1 toward the front.
Measuring Procedure
After the measuring tool is switched on, continuous measurement takes place. Aim the laser beam at the target surface. The current measuring value g is displayed in the bottom line of the display (see figure A). During continuous measurement, the measuring tool can be moved relative to the target, whereby the current measuring value g is updated approx. every 0.5 seconds in the bottom line of the display (see figure B). In this manner, as an example, you can move a certain distance away from a wall, while the actual distance can always be read. The LASER indicator flashes on the display.
2609140991(13.5.13) Bosch Power Tools


OBJ_BUCH-1900-001.book Page 20 Monday, May 13, 2013 11:40 AM

20|English
Working Advice
General Information
The reception lens 8 and the laser beam outlet 9 must not be covered when taking a measurement.
Measurement takes place at the centre of the laser beam, even when target surfaces are sighted at an incline.
Influence Effects on the Measuring Range
The measuring range depends on the light conditions and the reflection properties of the target surface.
Influence Effects on the Measuring Result
Due to physical effects, faulty measurements cannot be excluded when measuring on different surfaces. Included here are:
- Transparent surfaces (e.g., glass, water),
- Reflecting surfaces (e.g., polished metal, glass),
Porous surfaces (e.g. insulation materials), - Structured surfaces (e.g., roughcast, natural stone).
Also, air layers with varying temperatures or indirectly received reflections can affect the measured value.
Troubleshooting - Causes and Corrective Measures
Cause Corrective Measure
Temperature warning indicator (b) flashing; measurement not possible
Measuring tool not within the operating temperature range between -10^ and +40^ .
Wait until the measuring tool has reached the operating temperature
Battery low indicator (a) appears
Battery voltage decreasing (measure- Replace batteries. ment still possible).
Battery low indicator (a) flashing; measurement not possible
Battery voltage too low Replace batteries
All indicators on the display flash
The measuring tool is defective. Contact the Customer Service
2609140991(13.5.13) Bosch Power Tools


OBJ_BUCH-1900-001.book Page 21 Monday, May 13, 2013 11:40 AM
English | 21
Cause Corrective Measure
The laser beam outlet 9 or the reception lens 8 are misted up (e.g. due to a rapid temperature change). Wipe the laser beam outlet 9 and/or the reception lens 8 dry using a soft cloth
The "Err" indication is displayed after pressing the "HOLD" button
Unreliable measuring result
The target surface does not reflect cor- Cover off the target surface rectly (e.g. water, glass).
The laser beam outlet 9 or the recep- Make sure that the laser beam tion lens 8 are covered. outlet 9 or the reception lens 8 are unobstructed
Measuring result not plausible
Obstruction in path of laser beam Laser point must be completely on target surface.
The measuring tool monitors the proper function for each measurement. When a defect is detected, all indicators on the display flash. In this case, or when the corrective measures listed above cannot correct the error, have your dealer forward the measuring tool to an authorised Bosch after-sales service.
Checking the Measuring Tool
The accuracy of the measuring tool can be checked as follows:
- Select a permanently unchangeable measuring section with a length of approx. 3 to 10 metres; its length must be precisely known (e.g. the width of a room or a door opening). The measurement should be carried out under favourable conditions, meaning, the measuring distance must be indoors and the target surface for the measurement must be smooth and reflect well.
- Measure the distance 10 times after another.
Under favourable conditions, the deviation of the individual measurements from the mean value must not exceed ± 3.5mm (max.) over the complete measuring distance. Log the measurements, so that you can compare their accuracy at a later point of time.

Bosch Power Tools 2609140991| (13.5.13)


OBJ_BUCH-1900-001.book Page 22 Monday, May 13, 2013 11:40 AM

22|English
Maintenance and Service
Maintenance and Cleaning
Keep the measuring tool clean at all times.
Do not immerse the measuring tool in water or other fluids.
Wipe off debris using a moist and soft cloth. Do not use any cleaning agents or solvents.
Maintain the reception lens 8 in particular, with the same care as required for eye glasses or the lens of a camera.
If the measuring tool should fail despite the care taken in manufacturing and testing procedures, repair should be carried out by an authorised after-sales service centre for Bosch power tools. Do not open the measuring tool yourself.
For repairs, send in the measuring tool in.
After-sales Service and Application Service
Our after-sales service responds to your questions concerning maintenance and repair of your product as well as spare parts. Exploded views and information on spare parts can also be found under:
www.bosch-pt.com
Bosch's application service team will gladly answer questions concerning our products and their accessories.
In all correspondence and spare parts orders, please always include the 10-digit article number given on the type plate of the measuring tool.
Great Britain
Robert Bosch Ltd. (B.S.C.)
P.O.Box 98
Broadwater Park
North Orbital Road
Denham
Uxbridge
UB95HJ
Tel. Service: (0844) 7360109
Fax: (0844) 7360146
E-Mail: boschservicecentre@bosch.com
2609140991(13.5.13) Bosch Power Tools


OBJ_BUCH-1900-001.book Page 23 Monday, May 13, 2013 11:40 AM
English 23
Ireland
Origo Ltd.
Unit 23 Magna Drive
Magna Business Park
City West
Dublin 24
Tel. Service: (01) 4666700
Fax: (01) 4666888
Australia, New Zealand and Pacific Islands
Robert Bosch Australia Pty. Ltd.
Power Tools
Locked Bag 66
Clayton South VIC 3169
Customer Contact Center
Inside Australia
Phone: (01300) 307044
Fax: (01300) 307045
Inside New Zealand:
Phone: (0800) 543353
Fax: (0800) 428570
Outside AU and NZ:
Phone:+61395415555
www.bosch.com.au
Republic of South Africa
Customer service
Hotline: (011) 6519600
Gauteng - BSC Service Centre
35 Roper Street, New Centre
Johannesburg
Tel.: (011) 4939375
Fax: (011) 4930126
E-Mail: bsctools@icon.co.za

Bosch Power Tools 2609140991| (13.5.13)


OBJ_BUCH-1900-001.book Page 24 Monday, May 13, 2013 11:40 AM

24 | English
KZN - BSC Service Centre
Unit E, Almar Centre
143 Crompton Street
Pinetown
Tel.: (031) 701
Fax: (031) 7012446
E-Mail: bsc.dur@za.bosch.com
Western Cape - BSC Service Centre
Democracy Way, Prosperity Park
Milnerton
Tel.: (021) 5512577
Fax: (021) 5513223
E-Mail: bsc@zsd.co.za
Bosch Headquarters
Midrand, Gauteng
Tel.: (011) 6519600
Fax: (011) 6519880
E-Mail: rbsa-hq.pts@za.bosch.com
Disposal
Measuring tools, accessories and packaging should be sorted for environmental-friendly recycling.
Do not dispose of measuring tools and batteries/rechargeable batteries into household waste!
Only for EC countries:

According to the European Guideline 2012/19/EU, measuring tools that are no longer usable, and according to the European Guideline 2006/66/EC, defective or used battery packs/batteries, must be collected separately and disposed of in an environmentally correct manner.

2609140991(13.5.13) Bosch Power Tools


OBJ_BUCH-1900-001.book Page 25 Monday, May 13, 2013 11:40 AM

Francais | 25
Batteries no longer suitable for use can be directly returned at:
Great Britain
Robert Bosch Ltd. (B.S.C.)
P.O.Box 98
Broadwater Park
North Orbital Road
Denham
Uxbridge
UB95HJ
Tel. Service: (0844) 7360109
Fax: (0844) 7360146
E-Mail: boschservicecentre@bosch.com
Subject to change without notice.

Français
OBJ_BUCH-1900-001.book Page 26 Monday, May 13, 2013 11:40 AM

26 | Français
OBJ_BUCH-1900-001.book Page 27 Monday, May 13, 2013 11:40 AM
Francais 27
3 Ecran
OBJ_BUCH-1900-001.book Page 28 Monday, May 13, 2013 11:40 AM


28 | Français
OBJ_BUCH-1900-001.book Page 29 Monday, May 13, 2013 11:40 AM
Francais | 29
OBJ_BUCH-1900-001.book Page 30 Monday, May 13, 2013 11:40 AM

30 | Français
OBJ_BUCH-1900-001.book Page 31 Monday, May 13, 2013 11:40 AM
Francais | 31
OBJ_BUCH-1900-001.book Page 32 Monday, May 13, 2013 11:40 AM

32 | Français
Cause Remede
OBJ_BUCH-1900-001.book Page 33 Monday, May 13, 2013 11:40 AM
Francais | 33
OBJ_BUCH-1900-001.book Page 34 Monday, May 13, 2013 11:40 AM

34 | Français
France
Robert Bosch (France) S.A.S.
OBJ_BUCH-1900-001.book Page 35 Monday, May 13, 2013 11:40 AM
Espanol | 35
Sousreservedemodifications.
Espanol
OBJ_BUCH-1900-001.book Page 36 Monday, May 13, 2013 11:40 AM

36 | Espanol
OBJ_BUCH-1900-001.book Page 37 Monday, May 13, 2013 11:40 AM
Espanol 37
OBJ_BUCH-1900-001.book Page 38 Monday, May 13, 2013 11:40 AM


38 | Espanol
OBJ_BUCH-1900-001.book Page 39 Monday, May 13, 2013 11:40 AM
Espanol | 39
Operación
Puesta en marcha
OBJ_BUCH-1900-001.book Page 41 Monday, May 13, 2013 11:40 AM
Espanol | 41
OBJ_BUCH-1900-001.book Page 42 Monday, May 13, 2013 11:40 AM

42|Espanol
Cause Solucn
OBJ_BUCH-1900-001.book Page 43 Monday, May 13, 2013 11:40 AM
Espanol 43
OBJ_BUCH-1900-001.book Page 44 Monday, May 13, 2013 11:40 AM

44 | Espanol
Venezuela
Robert Bosch S.A.
Final Calle Vargas. Edf. Centro Berimer P.B.
Boleita Norte
Caracas 107
Tel.: (0212) 2074511
Mexico
Robert Bosch S. de R.L. de C.V.
Circuito G. Gonzales Camarena 333
Centro de Ciudad Santa Fe - 01210 - Mexico DF
Tel. Interior: (01) 800 6271286
Tel.D.F.:52843062
E-Mail: arturo.fernandez@mx.bosch.com
Argentina
Robert Bosch Argentina S.A.
Av. Cordoba 5160
OBJ_BUCH-1900-001.book Page 45 Monday, May 13, 2013 11:40 AM
Portugues|45
OBJ_BUCH-1900-001.book Page 46 Monday, May 13, 2013 11:40 AM

46 | Português
OBJ_BUCH-1900-001.book Page 47 Monday, May 13, 2013 11:40 AM
Portugues|47
OBJ_BUCH-1900-001.book Page 48 Monday, May 13, 2013 11:40 AM

48 | Português
OBJ_BUCH-1900-001.book Page 49 Monday, May 13, 2013 11:40 AM
Portugues|49
OBJ_BUCH-1900-001.book Page 50 Monday, May 13, 2013 11:40 AM

50 | Português
OBJ_BUCH-1900-001.book Page 51 Monday, May 13, 2013 11:40 AM
Portugues|51
OBJ_BUCH-1900-001.book Page 52 Monday, May 13, 2013 11:40 AM

52|Portugues
Causa Solutao
OBJ_BUCH-1900-001.book Page 53 Monday, May 13, 2013 11:40 AM
Portugues | 53
OBJ_BUCH-1900-001.book Page 54 Monday, May 13, 2013 11:40 AM

54 | Portugues
Portugal
Robert Bosch LDA
OBJ_BUCH-1900-001.book Page 55 Monday, May 13, 2013 11:40 AM
Italiano | 55
Italiano
Normedisicurezza

OBJ_BUCH-1900-001.book Page 56 Monday, May 13, 2013 11:40 AM


56 Italiano
OBJ_BUCH-1900-001.book Page 57 Monday, May 13, 2013 11:40 AM
Italiano | 57
Dati tecnici
OBJ_BUCH-1900-001.book Page 58 Monday, May 13, 2013 11:40 AM

58 Italiano
Montaggio
OBJ_BUCH-1900-001.book Page 59 Monday, May 13, 2013 11:40 AM
Italiano | 59
OBJ_BUCH-1900-001.book Page 60 Monday, May 13, 2013 11:40 AM

60 Italiano

OBJ_BUCH-1900-001.book Page 61 Monday, May 13, 2013 11:40 AM
Italiano | 61
OBJ_BUCH-1900-001.book Page 62 Monday, May 13, 2013 11:40 AM

62 Italiano
Causa RImedi
OBJ_BUCH-1900-001.book Page 63 Monday, May 13, 2013 11:40 AM
Italiano | 63
OBJ_BUCH-1900-001.book Page 64 Monday, May 13, 2013 11:40 AM

64|Nederlandds
Smaltimento
OBJ_BUCH-1900-001.book Page 65 Monday, May 13, 2013 11:40 AM
Nederlands | 65
OBJ_BUCH-1900-001.book Page 66 Monday, May 13, 2013 11:40 AM

66|Nederlands
OBJ_BUCH-1900-001.book Page 67 Monday, May 13, 2013 11:40 AM
Nederlands 67
OBJ_BUCH-1900-001.book Page 68 Monday, May 13, 2013 11:40 AM

68|Nederlandds
OBJ_BUCH-1900-001.book Page 69 Monday, May 13, 2013 11:40 AM
Nederlands | 69
OBJ_BUCH-1900-001.book Page 70 Monday, May 13, 2013 11:40 AM

70|Nederland
OBJ_BUCH-1900-001.book Page 71 Monday, May 13, 2013 11:40 AM
Nederlands | 71
Oorzaak Oplossing
OBJ_BUCH-1900-001.book Page 72 Monday, May 13, 2013 11:40 AM


72|Nederlands
OBJ_BUCH-1900-001.book Page 73 Monday, May 13, 2013 11:40 AM
Dansk|73
Belgie
Tel.: (02) 588 0589
Fax: (02) 588 0595
E-mail: outillage.gereedschap@be.bosch.com
Afvalverwijdering
OBJ_BUCH-1900-001.book Page 74 Monday, May 13, 2013 11:40 AM

74|Dansk
OBJ_BUCH-1900-001.book Page 75 Monday, May 13, 2013 11:40 AM
Dansk|75
6 Serienummer
OBJ_BUCH-1900-001.book Page 76 Monday, May 13, 2013 11:40 AM


76|Dansk
Digital laser-afstandsmaler PLR 15
Vagt svarer til EPTA-Procedure 01/2003 0,1kg
Māl 100 x 36 x 23 mm
OBJ_BUCH-1900-001.book Page 77 Monday, May 13, 2013 11:40 AM
Dansk 77
Brug
Ibrugtagning
Ret社会各界 are working to make a difference in the way that people live and work. The new technology will allow people to get more information about their health, to be able to take care of themselves, and to get more information about their relationships with friends and family.
Bosch Power Tools 2609140991| (13.5.13)


OBJ_BUCH-1900-001.book Page 78 Monday, May 13, 2013 11:40 AM

78|Dansk
"HOLD-funktion (se figur B)

LASER HOLD
0.500m
18.888m
LASER HOLD
0.500m
8.000m
Tryk pa, HOLD"-tasten 2 igen for at aktivere laseren igen. Visingen LASER blinker pa displayet. Pa den overste linje vises den forrige mAleveardi. Pa den nederste linje vises den konstant opdaterede/akttuelle mAleveardi.
OBJ_BUCH-1900-001.book Page 79 Monday, May 13, 2013 11:40 AM
Dansk|79
OBJ_BUCH-1900-001.book Page 80 Monday, May 13, 2013 11:40 AM

80|Dansk
OBJ_BUCH-1900-001.book Page 81 Monday, May 13, 2013 11:40 AM


Svenska|81
Bosch Service Center
Telegrafvej 3
2750 Ballerup
Tlf. Service Center: 44898855
Fax:44898755
E-Mail: vaerktoej@dk.bosch.com
Bortskaffelse
OBJ_BUCH-1900-001.book Page 82 Monday, May 13, 2013 11:40 AM

82 | Svenska
1 Omkopplare Till/Frān
2"HOLD"-knappen
2609140991(13.5.13) Bosch Power Tools


OBJ_BUCH-1900-001.book Page 83 Monday, May 13, 2013 11:40 AM
Svenska|83
3 Display
4 Batterifackets lock
5 Sparr pa batterifackets lock
6 Serienummer
7 Laservarningsskylt
8 Mottagarlins
9 Laserstrålens utgang
OBJ_BUCH-1900-001.book Page 84 Monday, May 13, 2013 11:40 AM


84 | Svenska
Digital laseravstandsmatare PLR 15
OBJ_BUCH-1900-001.book Page 85 Monday, May 13, 2013 11:40 AM


Svenska|85
Drift
Driftstart
OBJ_BUCH-1900-001.book Page 86 Monday, May 13, 2013 11:40 AM

86 | Svenska
OBJ_BUCH-1900-001.book Page 87 Monday, May 13, 2013 11:40 AM

Svenska 87
Inverkan pa matresultatet
OBJ_BUCH-1900-001.book Page 88 Monday, May 13, 2013 11:40 AM

88 | Svenska
Orsak Atgard
Orimlgt matresultat
OBJ_BUCH-1900-001.book Page 89 Monday, May 13, 2013 11:40 AM


Svenska|89
Bosch Service Center
Telegrafvej 3
2750 Ballerup
Danmark
Tel.: (020) 414455 (inom Sverige)
Fax: (011) 187691

Avfallshantering
OBJ_BUCH-1900-001.book Page 90 Monday, May 13, 2013 11:40 AM

90|Norsk
Norsk
OBJ_BUCH-1900-001.book Page 91 Monday, May 13, 2013 11:40 AM
Norsk|91
OBJ_BUCH-1900-001.book Page 92 Monday, May 13, 2013 11:40 AM

92|Norsk
| Digital laser-avstandsmålter PLR 15 | |
| Måletid | |
| - Vän l i g | 0,5 s |
| - Maks. | 4 s |
| Driftstemperatur - 10 °C ... +40 °C | |
| Lagertemperatur | - 20 °C ... +70 °C |
| Relativ luftfuktighem max. | 90 % |
| Laserklasse | 2 |
| Lasertype | 635 nm, <1 mW |
| Diameter laserstråle (bei 25 °C) på 10 m av-stand ca. | 9 mm |
| Batterier | 2 x 1,5 VLR03 (AAA) |
| Batterilevetid ved målging ca. | 5 h |
| Vekt tilsvarende EPTA-Procedure 01/2003 | 0,1 kg |
| Mål | 100 x 36 x 23 mm |
OBJ_BUCH-1900-001.book Page 93 Monday, May 13, 2013 11:40 AM
Norsk|93
När batterisymbolet vises Först pa displayet, kan du malé i ca.
15 minutter til. Nár batterisymbolet blinker, má du skifte ut batteriene.
OBJ_BUCH-1900-001.book Page 94 Monday, May 13, 2013 11:40 AM

94|Norsk
ønsket avstand. Den aktuelle avstanden kan—hele tiden avleses. LASER blinker på display.
OBJ_BUCH-1900-001.book Page 95 Monday, May 13, 2013 11:40 AM
Norsk|95
Arbeidshenvisninger
OBJ_BUCH-1900-001.book Page 96 Monday, May 13, 2013 11:40 AM

96|Norsk
Arsak Utbedring
OBJ_BUCH-1900-001.book Page 97 Monday, May 13, 2013 11:40 AM
Norsk|97
OBJ_BUCH-1900-001.book Page 98 Monday, May 13, 2013 11:40 AM

98 | Suomi
Suomi
Turvallisuusohjeita

OBJ_BUCH-1900-001.book Page 99 Monday, May 13, 2013 11:40 AM
Suomi 99
Tuotekuvaus
OBJ_BUCH-1900-001.book Page 100 Monday, May 13, 2013 11:40 AM


100 | Suomi
Digitalinen Laseretalsysymittalaite PLR 15
OBJ_BUCH-1900-001.book Page 101 Monday, May 13, 2013 11:40AM
Suomi | 101
OBJ_BUCH-1900-001.book Page 102 Monday, May 13, 2013 11:40 AM

102 | Suomi
Mittaustapahtuma
OBJ_BUCH-1900-001.book Page 103 Monday, May 13, 2013 11:40 AM
Suomi | 103
OBJ_BUCH-1900-001.book Page 104 Monday, May 13, 2013 11:40 AM

104 | Suomi
Syy Korjaus
OBJ_BUCH-1900-001.book Page 105 Monday, May 13, 2013 11:40 AM
Suomi | 105
Hoito ja houlto
Huolto ja puhdistus
OBJ_BUCH-1900-001.book Page 106 Monday, May 13, 2013 11:40 AM


106|EAAVikd
Vain EU-maita varten:

OBJ_BUCH-1900-001.book Page 107 Monday, May 13, 2013 11:40AM
EAAVikd 107
Mny kateuovte nay akriva alecp enaw o npoowna h cka kuykotae e iiojc/ihia kateuclav onkyakira.Auto to epya- Aieo pmpnacnpayacvi aktroboia alecp kaanc alecp 2 katie IEC 60825-1. Eto mnpoe vaupaoe dAma npouwa.
NaBiveTo epyaleio meponc yua emakeun onoognote oe KaTaalaaekoeue npooawko kai mv oye vnaavlaAakTuMaurov topono Eaqapalicietai ndiatnpan tnc aopaoaouc Aetoupieac toe pyaleluotepnonc.
Mny apnve naiuva xnoaonoiob aventnpra to epyaleo metpnc. Mnpel, xupic va to thelouv, va tupkaowov dla npoana.
Na unv epyaceote mc to epyaleo mepnonc o nepiBaaov oto onolo umapxeikkvduvoc ekpnnc, n to onolo pblakovtaeepknta vya aepia hokovec. STo eouteripko tou epyaleou mepnonc mopei va dnouoynei amivnpiouc k toi va avaphexov n kovn n ova- umuaoec.
Teplypaaph Tou npoiovtoc kaltnc toxoc Tou
XpohoumuwvaeTOVnpooipuo
To opyavo metpnanc npoopicetaia yia tneptpon anooataewu, hkuoc, uouc kal diaotmaw. To opyavo metpnanc cival katalanlo yia ptnoeic otov eowtepiokxopo.
OBJ_BUCH-1900-001.book Page 108 Monday, May 13, 2013 11:40 AM

108|EAAVikd
Touxiéia evseic
aPioeioonqunatapias
bEvdeEnGepoKpaia
cAeizepae lamoupyia
dSigmaKpTnnc Hetpon
ePponyouoeuyn tuiu metpnong
f Movadaaetponans
gTpexouoanmu npnnc

Texvika xaapaktipotika
OBJ_BUCH-1900-001.book Page 109 Monday, May 13, 2013 11:40 AM
EAAVikd 109
OBJ_BUCH-1900-001.book Page 110 Monday, May 13, 2013 11:40AM

110|EAAVikd
Aetoupyia
Oeon eLetroupyia
Mny apyivete to evpyonounevo epyaleo pertponc aventinnpto aa va to tete e meta tn xhoan tou cktoc aeitoupylac. Mnpel va tuawov aa atoma ano nty akiva aeizep.
PpOaTeUeTo epyaleio mepnnc ano upaia K ano apceon nA-akn akTvoBolia.
Na nyn ekbetete to epyaleo metpncs ae akpalec thepokpaocakai/oe ixupce biakukvaec thepokpaoiac. Ia napadeiyua, va ty aphiyote via noAwa pco autoklvto. 2e nepimwoei oxupwbiakupavewvnc thepokpaoiaac npenei va nepiyeve vta otheponoihe npota n thepokpaoiaou ypeaiou metnpanc npov xpanoianotet. H akipbeia tou epyaleiou metnpanc mopel va aaiooibei umakpaic thepokpaoic /kai ixupcc biakupavoic ts thepokpaoiac.
Anopuyetateduvataxunmuata nvy mao ton opoyavou metpon. Meta ando anupce eewotepke cemipoeacnawro opyavo metpon onc npcnipn niv tn ouevian tnc cyapia v npayatioronic ncvto evan Eexyxo (BleeneEeYcoTou opyavou metponc), oAIIa 113
Oeon e aeitoupyia kEKTc aeitoupyiac
Tnvepyoonn Tou opoyouin TnpotOne Toaokonn On/Off 1 npoc ta niow. KaTn veeyponoiu Tou opoyou mepnoncepeyonoetra n aktiva Aiecp. H evoeiLASER avaoohnei otny oovnn.
Tia Tny anevepyoioiou opoydvou mepponc onpocre to biakomn On/Off 1 npoc ta eumoc.
Aia6kaia 1
Metv cypnoiOnn Tou opavou pctponnc npaypatonoicraia ouve xic metpnan. Toxueote me tvn akiva letzep tn enipaveia otoou. H tpeouaa tiuH metponc g eapavilzai otny katw oipa tnc obovnc (Bene ekoA).Kata n diapkeia tnc ouveoxo,etponcn unopei to oyavo metponc va tetaikvneoi wnpoc to ortoxo, onou n tpexouao tuih metponc g cvnpawcvtncpinou k0e 0,5 dcutepoea taonv katw ocip a tnc obovnc (Bene ekoVB).Mnpelte n.x.va anopakpvbeite and evav tolvo pexu Tny entuunnt anototaan knt pexouao anototaen elva nadvote epaphvnc. H evetn LASER avaaooabevi anoyobvnn.

2609140991(13.5.13) Bosch Power Tools


OBJ_BUCH-1900-001.book Page 111 Monday, May 13, 2013 11:40AM
EAAJWkda 111
To enineo avapopac yia n t npon eivn niow akun tou opyavou np onc.
Iaiaeponyia napadeyua ano toixo ce toixo,tonoetntote to opyavo eptanncpe nvi niowakn otov apxko toxio.
Mny kateuovete nvy akiva aeip enavw oe npoogna n cwa ka mny koiatae o liooc/tnia stny akiva aeicep,akojn kn ano peydaan anotaaon.
Aetroupyia HOLD ( B)

Tnntto nntktoo HOLD 2 yta n ouykpattn Tn cdeltaiaoc metponc. H akritiva leep aneeypvnoitea kai neevdoHOLD eepavi zetai atny oboyn. Htpexouaa tniun metponc ouvyezi va eupaviciat aenr ktwoeipacn ooo-vnc, alla dev enpeewotauovxuc.

Tnateekveou tonktooHOLD2vya ve evyponoaneEaVaoToAeep.HEvseEn LASERavooBneovotnyoovn.ETNVendaw oepuavicetannpoyovneunmuptonnc.ETNVKATOWepaupvceetauwewcn euvncmuevn/tpexouaunpctpnnc

TnneE Kevou To nAiktro AHOLO2, yia va oukykpatnaete Aokua ma popa Tdiabikaada uptponc. Hakiva Lecep Anvepyonoiei Ka n evdeIHN HOEL epaavilctai otny oobv. Tnvy enawoeip aepaivctai nponyoumeu Tnup tptonpontnc. Tny katao eip aepaivctai ntpexooa TuH mptponc, aaaa deev nemupewetai naovcxwc.
Oraivia 5 min nepinou dcv natnei kanoio naKtpo tou epyaleiou perton, to epyaleio metponc diakomte autouata ngrouyia tou npoatauovtac etoi nmuatapie.
Sc nepimwn nou ouykpatnncjiau tui nptponc nceowtnc Acioupyiac HOLD), biatpetai kata tnu autoatn anevpeynoinon. Meta nve naAeoupyla tou opayov ptonc, natwraoc tnaktro 《HOLD》2 eepaviZetai n nponyouevn tiun ptonc e onny endv woeip a tnc obovnc.
Bosch Power Tools 2609140991| (13.5.13)


OBJ_BUCH-1900-001.book Page 112 Monday, May 13, 2013 11:40 AM

112|EAAVikd
YnodelEicepyaolac
Fevikec umodelleic
Kata n diapkcaia nnc metpangc dev enirptentai va civai kaumuevoc oute o paokoc hwn8 oute n eocogoc nacaktivae 9.
HepnondeltaayetaiotokevtpoTnacaktivaacAeep,akounkaiavewaiaoE nemipadeva oToxueanc.
Empaoeoc otny nepoxn meptnonc
H nepioxH metponc eapatai ano tic ouvtheke c wtiiaou kai tic iotnte avaklaonnc emapeveic otxou.
Empaoeic oto anotaleqa eptpon
O Tavpate endiapopetikw vtnapeivov dev anokleetai, diapaqpa oika paivoeva va onyioouv oe oepaivec pertnoic. MetaTu wv alawnpoketai yia:
-iaapaveic emipaveiec (π.x.yuaλi, vepo),
avakaaotikec emipaveic (n.x. otAβwévaetaa, yua),
- npopoeic enipaveiec (n.x. movotikuaik)
-tpaxic emipavcic (n.x.ooBabc,puoka nctpwata).
Hneptnnc nnpoei enianc va empeaei kai ano otpuata aepa me 61 apopetik hepokpaia h/kai ano emuoeacavatakaoic.
OBJ_BUCH-1900-001.book Page 113 Monday, May 13, 2013 11:40AM
EAAWkA 113
Arla Ospanela
OBJ_BUCH-1900-001.book Page 114 Monday, May 13, 2013 11:40 AM

114|EAAVikd
H anokaiion twv Exwipotov tepnoeov ano tn eoon tnn emtpenetai va avexetai to nolu sta ± 3,5 mm otouvoikn nepioxtn cnc aodataoc me tonponc me cuuvoikecs ouvohkcs. Ipawtokoalntc ic tcpnoicvi va va unopci- te oia apoyote np xovikn otiyun va oukyklve Te akipbeta.
Euvrponon kal Service
SuvtnponkkaKaapiaoc
Na diatnpieTe to epyaleo meptnonnc nataKaabo.
Mn BuIgloTeToepyaleo metpOnc evepo n daAuaypa.
KaagapieteTuxybPouockaiBpuuicEvcEvuypo,paalaknoavi.Mn xpanpoaieTepeaaKaagapiaou n diautec.
Na nepinoieite ibaietepa to paoko Aynnc 8 ie ny iia npooekotn ta nou nepinoieite Ta yuaia oac kaih n th wtoypapikn aq mnxavh.
Av,nap'0eC tnc emaneuenevec meoobouc kataaekue nkaeoyou, to epyaleo metpnoanoc oatauatneoi kanoote va aleioupeyel, to n eniakoeun tou npeneia va aaveoic o eva eouaoobotnevo auvepyeo ia naektpka epayela nBosch. Mny avoliee o ilio/c/ n iia to epyaleo metpnonc.
TeIe de neepinwn enaakeunc to dpyavo mtpnnc.
Service kalnapoxn oupuouaw xpnns
To Service anavta otic epwthaeic oac oxetikae TnV eniokuekai n ouvtn pnon Tou npioivoc aac kaowc yia ta kalaaan aa attakka:
www.bosch-pt.com
HopaBapaoxnc oupouovn Bosch anavtaeuxapiotocepohtoeic oac oxetikpe ta npoiovtmaKa t aavtaaaktk Touc.
Iapakaaloume,dtavkaveTe diaaaqanTkec epwnthoeicKaowc kai kata Tny npaycia avtaaakntkwv,va aovapepcte nvtote to 10nphi apio ucpentpiou nou pkioketai ony nivakida kataaekuaon tou epyaleiou etpnonc.


2609140991(13.5.13) Bosch Power Tools


OBJ_BUCH-1900-001.book Page 115 Monday, May 13, 2013 11:40AM
Türkce|115
EAAa
Robert Bosch A.E.
Epcia37
19400Kopwnl-Athya
Tel.: 2105701270
Fax: 2105701283
www.bosch.com
www.bosch-pt.gr
ABZ Service A.E.
Tel.: 2105701380
Fax: 2105701607
Anoupon
Taepyaleiaetponnc,taEapntmuatakoioukeuaolenpeneivaavuk Kauovotai pe tropo piko npoc topeiaaov.
Mny piEe Ta epyaleia meponnc kai nic unatapiec ora anoppipmuata rou omioo aoc!
Móvo yua xópec tnc EE:

OBJ_BUCH-1900-001.book Page 116 Monday, May 13, 2013 11:40 AM


116|Türkce
OBJ_BUCH-1900-001.book Page 117 Monday, May 13, 2013 11:40 AM
Türkce|117
Sekli gosterilen elemanlar
OBJ_BUCH-1900-001.book Page 118 Monday, May 13, 2013 11:40 AM


118|Türkce
| Dijitlal lazerli uzaklikolçer PLR 15 | |
| Saklamaaticaki | -20°C ... +70°C |
| Maksimum nisi hava nemi | %90 |
| Lazer sinifi | 2 |
| Lazer tipi | 635 nm, <1 mW |
| Lazer,isini capi (25°C'de) 10 m uzaklikta yakalık | 9 mm |
| Bataryalar | 2 x 1,5 VLR03 (AAA) |
| Ölcme,isletmesinde bataryalarin yakalık kullanim ömrü 5 h | |
| Ağırkı EPTA-Procedure 01/2003'e,gore | 0,1 kg |
| Ölcüleri | 100 x 36 x 23 mm |

OBJ_BUCH-1900-001.book Page 119 Monday, May 13, 2013 11:40 AM
Türkce | 119
Ekranda(Display)bataryasembolukkezgorundugunde yaklasik 15 dakika dahaojcme yapilabilir. Bataryasemboluyanipsonmeyebajadin da bataryalardjestirmineniz gerekir,artikojemayapamazasnizn.
Butunbataryalaridaima eszamanlolarak degistirin.Daimaayn ureticinin ayni kapasitedekibataryalarini kullanin.
OBJ BUCH-1900-001.book Page 120 Monday, May 13, 2013 11:40 AM


120|Türkce
OBJ BUCH-1900-001.book Page 12 Monday, May 13, 2013 11:40AM
Türkce|121
OBJ_BUCH-1900-001.book Page 122 Monday, May 13, 2013 11:40 AM


122|Türkce
Nedeni Giderilmesi
OBJ_BUCH-1900-001.book Page 123 Monday, May 13, 2013 11:40 AM
Türkce|123
Bakim ve servis
Bakim ve temizlik
Ölcme cihazinci daima temiz tutun.
Bosch San. ve Tic. A.S.
Ahi Evran Cad. No:1 Kat:22
Polaris Plaza
80670 Maslak/Istanbul
Bosch Uzman Ekibi +90 (0212) 367 18 88
Isiklar LTD. STI.
Kizilay Cad. No: 16/C Seyhan
Adana
Tel.: 0322 3599710
Tel.: 0322 3591379


Bosch Power Tools 2609140991| (13.5.13)


OBJ_BUCH-1900-001.book Page 124 Monday, May 13, 2013 11:40AM


124 | Türkiye
OBJ_BUCH-1900-001.book Page 125 Monday, May 13, 2013 11:40 AM
Türkce|125
Czum Bobinaj
Ismetpasa Mah. Eski Sahinbey Belediyesi alti Cad. No: 3/C
Gaziantep
Tel.: 0342 2319500
Onarim Bobinaj
Raifpasa Cad. No: 67 Iskenderun
Hatay
Tel.:03266137546
Gunsah Otomotiv
Beylikduzu Sanayi Sit. No: 210 Beylikduzu
Istanbul
Tel.: 02128720066
Aygem
10021 Sok. No: 11 AOSB Cigli
Izmir
Tel.: 0232 3768074
Sezmen Bobinaj
Ege Is Merkezi 1201/4 Sok. No: 4/B Yenisehir
Izm
Tel.: 0232 4571465
Ankarali Elektrik
Eski Sanayi Bolgesi 3. Cad. No: 43
Kayseri
Tel.: 0352 3364216
Asal Bobinaj
Eski Sanayi Sitesi Barbaros Cad. No:24
Samsun
Tel.:03622289090
Ustundag Elektrikli Aletler
Nusretiye Mah. Boyacilar Araligi No: 9
Tekirdag
Tel.: 02826512884
Tasfiye
OBJ_BUCH-1900-001.book Page 126 Monday, May 13, 2013 11:40 AM


126|Türkce
:JLLS WUaI I aQ S uO
10 3 jgj gglg Jwlaa Jlal
aag, aegjll jc uall (lc) ddu yd g
g k j 1 y b u s l a o g r p g j wuJl |j| b.(U
g 1000
.0d d 1000000000000000000
-ddgloo Uj
3,5 ± aIaI I I I I I I I I I I I I I I I I I I I I I I I I I I I I I I I I I I I I I I I I I I I I I I I I I I I I I I
.
ddJg dU
#
.
.1gWJ JU 10uG 10aI U 1wUaI Osc uub2
Jgooiui 2. aBjg aBaaa aBq abwIg Iwgl
.
ylll llll 8 1111
.
aLi bJi d Jg jn no pjy uJl o 1s i g sic aLg ao jko Jg Jg yd c Jlaal jlaIg aaIg
. 1
2L 11 11 11 11 11 11 11
pIddwXl oJgog nIbjjdo
ailliluoggulsspsilwI JlJlldo jSjpo
g o g w j j 1
gagjulzba jc UloglaJI
www.bosch-pt.com
Ug aJg 0jgoo gJgJgJgJg
gig laiiio n c alw w gssb sclw
jIb a2 1111111111111111111
.1jIg b 1uIb JwJ sic g oJwW2I sic wLqll osc
wIaJl osc Jn JI bui IuWll oJd aJL
dgljgJUGLO 29IyJUJUJUJU J. +40^ g-10°C
(a) UUULJU
UJbU|UdW
Jllo) jy aJbU J. (uoo wuaJI
Joo (a) UU
Ugall no 1d Aylal lll
Jg
UaIooBcLiooJdo
JjU 8 Juaawx1 awscg9
aWg9JJU|EwI aJyU bCwS18UaW2I 0JUcJUsuW) .(Lio aJyJW
"HOLD" jll lIe "Err" 1
aJy jg wIJI
#
JbW WsXgDgBw (aJI1:laJ:)g
a a b c d e f g h i j k l m n o p q r s t
aWg9jJullEawla 8UkaWxI
aogosu c uulai a
jU1gUJUwUgUgUgUgUgUgU
.
aLac 150 g y i jg 150 aLw aI y I y I y 150 o gai
o d g i JnJnJnJnJnJnJnJnJnJnJnJnJnJnJnJnJnJnJnJnJnJnJnJnJnJnJnJnJnJnJnJnJnJnJnJnJnJnJnJnJnJnJnJnJnJnJnJnJnJnJn
130|
2"HOLD" jll 1s d s
E 1000000000000000000000000000000000000000000000000000000000000000000000000000000

0scn5oosuall 1slo 10n .tulal ail s uon no y ksswau all oHOLD" aagg gug ncc ssuall aag ctttaa f Jus wdscl. bsslogggl aalggoaaal 2"HOLD" jll lgcbslal 10n 0wuuu 0e aaiu
Jw Ua
aole Udo
9 juill 8 uaiwXl aW sc aubj pui jg y .uall alac Jp jll dA gbw lgc juill 1eaw jkpo wll aloc po Ulo ksw lgwi
wIJI JIgOJolgc aobial wksjI sIaag oIgI gIgI IwIaII gIbI .
wlaal aai yle jgo lolgc
sic auijull uilw wawlgl aubu wgu iww n kys 8
:lgaao .aolisa gbw wlu
-(loJl,gJ1:)
(g)
(dujlglgai
-()
I 1wLg oJrAaIaaIagll JgJgLoK .WlqIaaQIcPjUJwLoJcUkawU
labg
1/
jull yog. jull elw w w pi w al osc w sic
LASER
1 1/12000000000000000000000000000000000
wJJI aJoc
y
g aaii wiaaia aag jj jj
wlll aloc wI. (A oJgall jbl) 0000000000000000000000000000000000000000000000
J 0,5 g aalll
Jc JJIJIJI JIJI (B oJgJl j)
g gao aaiiaagwai jloai yagjol agwai jdoa
.0Jg (jU) LASER UU Uoog .u
.1uI 10dAaI aIg uIuI I gIuI I
Ue wuaii oed aiai iagai gao jia bila no wui
.aoaow 1Jl
< d2g>g
J 1
(Böjgul) (LäI) “HOLD” àb g
aLac 2"HOLD"jjllc
JUJI JIg jIJI EJW Iab! P. WJJIH AaJI JJJ .JJI JIJI OJg (JLI) HOLD
JwI JwI g o ggo a I I w Jaiwly Lg D y d jd Jy Jd Jd
LASER HOLD
18.888m
8.900m
山HOLD
LASER JJUJ.
JU 1 J.00000000000000000000000000000000000000
g.aaIwI wIaI aQ gIJI
U/laI IwlaIaOg IawI JbW
JJaWuLguiSjpa
LASER
HOLD
0.588m
18.888m
U
JUJIJI JI JIJI/
. 5 5 5 5 5 5 5 5 5 5 5 5 5 5 5 5 5 5 5 5 5 5 5 5 5 5 5 5 5 5 5 5 5 5 5 5 5 5 5 5 5 5 5 5 5 5 5 5 5 5 4 .
gaiagb jiaLgjSic UjIbUJ Sd.ugb .guai
山
(a) UUULJU
UJbU|UdW Jllo) jy aJbU J. (uoo wuaJIJoo (a) UU
Ugall no 1d Aylal lllJg
UaIooBcLiooJdo JjU 8 Juaawx1 awscg9 aWg9JJU|EwI aJyU bCwS18UaW2I 0JUcJUsuW) .(Lio aJyJW"HOLD" jll lIe "Err" 1
aJy jg wIJI
# JbW WsXgDgBw (aJI1:laJ:)g a a b c d e f g h i j k l m n o p q r s t aWg9jJullEawla 8UkaWxIaogosu c uulai a
jU1gUJUwUgUgUgUgUgUgU.
aLac 150 g y i jg 150 aLw aI y I y I y 150 o gai o d g i JnJnJnJnJnJnJnJnJnJnJnJnJnJnJnJnJnJnJnJnJnJnJnJnJnJnJnJnJnJnJnJnJnJnJnJnJnJnJnJnJnJnJnJnJnJnJnJnJnJnJn130|
2"HOLD" jll 1s d s E 1000000000000000000000000000000000000000000000000000000000000000000000000000000  0scn5oosuall 1slo 10n .tulal ail s uon no y ksswau all oHOLD" aagg gug ncc ssuall aag ctttaa f Jus wdscl. bsslogggl aalggoaaal 2"HOLD" jll lgcbslal 10n 0wuuu 0e aaiuJw Ua
aole Udo
9 juill 8 uaiwXl aW sc aubj pui jg y .uall alac Jp jll dA gbw lgc juill 1eaw jkpo wll aloc po Ulo ksw lgwi wIJI JIgOJolgc aobial wksjI sIaag oIgI gIgI IwIaII gIbI . wlaal aai yle jgo lolgc sic auijull uilw wawlgl aubu wgu iww n kys 8 :lgaao .aolisa gbw wlu -(loJl,gJ1:) (g) (dujlglgai -() I 1wLg oJrAaIaaIagll JgJgLoK .WlqIaaQIcPjUJwLoJcUkawU labg 1/ jull yog. jull elw w w pi w al osc w sic LASER 1 1/12000000000000000000000000000000000 wJJI aJoc y g aaii wiaaia aag jj jj wlll aloc wI. (A oJgall jbl) 0000000000000000000000000000000000000000000000 J 0,5 g aalll Jc JJIJIJI JIJI (B oJgJl j) g gao aaiiaagwai jloai yagjol agwai jdoa .0Jg (jU) LASER UU Uoog .u .1uI 10dAaI aIg uIuI I gIuI I Ue wuaii oed aiai iagai gao jia bila no wui .aoaow 1Jl < d2g>g J 1 (Böjgul) (LäI) “HOLD” àb g aLac 2"HOLD"jjllc JUJI JIg jIJI EJW Iab! P. WJJIH AaJI JJJ .JJI JIJI OJg (JLI) HOLD JwI JwI g o ggo a I I w Jaiwly Lg D y d jd Jy Jd Jd LASER HOLD 18.888m 8.900m 山HOLD LASER JJUJ. JU 1 J.00000000000000000000000000000000000000 g.aaIwI wIaI aQ gIJI U/laI IwlaIaOg IawI JbW JJaWuLguiSjpa LASER HOLD 0.588m 18.888mU
JUJIJI JI JIJI/
. 5 5 5 5 5 5 5 5 5 5 5 5 5 5 5 5 5 5 5 5 5 5 5 5 5 5 5 5 5 5 5 5 5 5 5 5 5 5 5 5 5 5 5 5 5 5 5 5 5 5 4 . gaiagb jiaLgjSic UjIbUJ Sd.ugb .guai山
a
Eaawuunn uawwulacl pui d.uaai wu Jjll
A. l uua
<1
o o a 100000000000000000000000000000000000000000000000000000000000000000000000000000000
yj jjLw wL
J3603F72000
(A) 15-0,15
(baj)wlaIgIbj
B 3,0±
(g)wlaI a
joc oag jao 1
wIJ
U0,5
-
U4
-
J10+40C
jJ-20...+70°C
190%
jjU1 a2
j山1jbbg1o 1>,
aag (25°C sic) jjU I eaw
109
U(AAA)LR03
aJg aJbU JjX
Ugpaaswlaclw5
EPTA-Procedure 01/2003 一 j 日 日 日 ≤ 0 , 1
23x36x
d 10000000000000000000000000000000000000000000000000000000000000000000000000
UaJIgbiJaa
g aall nkslo kdydsuill oolk lioaawll jc gglalla (B 10 11n kall ojra gial g ojgsaasll jc baw . 15 7+oglaill sss 25°C .p/00 0,05 +gai all
jIJI 6 JUULI JI JI JI JI JI JI JI JI JI JI
sJg aaiJl oog
Jaaai Jlss
IcIgUgBgSsUaLaaaUaIoo. aolal jsluauuuaaiao uauo ooc. IgU
jgaoJl j
J 1
.ububuI gwJl d
1 1
"HOLD"jj12
awuJl 3
UJUBJI 4
5
JUWUJI 6
j山-aa 7
JauwX1 awsc 8
jU|E|a9
JglllIgolgsswllgaggogaggglgll
L
aLuljlic
aJbUu a
0jJUJnO JdA b
山
gio wuJd
aIwI wIg e
wlaolosagf
aJUUwUaI aQg g
#
JU

Jg Jn o n 10000000000000000000000000000000000000000000000000000000000000000000
A
LJ
J 1 J 1 1
(7 pJy aubbsll gwll dao 1c wlaill oocg

IEC 60825-1:2007 <1 mW, 635nm


- Deutsch
- Sicherheitshinweise
- Montage
- Ein-/Ausschalten
- |Deutsch
- |Deutsch
- Deutsch|13
- 14|English
- Nur fur EU-Länder:
- Product Description and Specifications
- Intended Use
- Product Features
- 16|English
- Display Elements
- Technical Data
- Assembly
- Inserting/Replacing the Batteries
- 18|English
- Operation
- Initial Operation
- Switching On and Off
- Measuring Procedure
- Working Advice
- General Information
- Influence Effects on the Measuring Range
- Influence Effects on the Measuring Result
- Troubleshooting - Causes and Corrective Measures
- Cause Corrective Measure
- Temperature warning indicator (b) flashing; measurement not possible
- Battery low indicator (a) appears
- Battery low indicator (a) flashing; measurement not possible
- All indicators on the display flash
- Unreliable measuring result
- Measuring result not plausible
- Checking the Measuring Tool
- Maintenance and Service
- Maintenance and Cleaning
- After-sales Service and Application Service
- www.bosch-pt.com
- Great Britain
- Ireland
- Australia, New Zealand and Pacific Islands
- Republic of South Africa
- Customer service
- Gauteng - BSC Service Centre
- | English
- KZN - BSC Service Centre
- Western Cape - BSC Service Centre
- Bosch Headquarters
- Disposal
- Only for EC countries:
- Français
- | Français
- Ecran
- | Français
- Francais | 31
- | Français
- Cause Remede
- | Français
- France
- Espanol
- | Espanol
- | Espanol
- Operación
- Puesta en marcha
- 42|Espanol
- Cause Solucn
- | Espanol
- Venezuela
- Mexico
- Argentina
- | Português
- | Português
- Portugues|51
- 52|Portugues
- Causa Solutao
- | Portugues
- Portugal
- Italiano
- Normedisicurezza
- Italiano
- Montaggio
- Italiano
- Causa RImedi
- 64|Nederlandds
- Smaltimento
- Nederlands | 65
- 68|Nederlandds
- Nederlands | 69
- 70|Nederland
- Oorzaak Oplossing
- 72|Nederlands
- Belgie
- Afvalverwijdering
- 74|Dansk
- Serienummer
- 76|Dansk
- Digital laser-afstandsmaler PLR 15
- Brug
- Ibrugtagning
- "HOLD-funktion (se figur B)
- 80|Dansk
- Svenska|81
- Bortskaffelse
- | Svenska
- | Svenska
- Digital laseravstandsmatare PLR 15
- Drift
- Driftstart
- Inverkan pa matresultatet
- Orsak Atgard
- Orimlgt matresultat
- Avfallshantering
- Norsk
- 94|Norsk
- Arbeidshenvisninger
- Arsak Utbedring
- Suomi
- Turvallisuusohjeita
- Tuotekuvaus
- Mittaustapahtuma
- Syy Korjaus
- Hoito ja houlto
- Huolto ja puhdistus
- Teplypaaph Tou npoiovtoc kaltnc toxoc Tou
- XpohoumuwvaeTOVnpooipuo
- Touxiéia evseic
- Aetoupyia
- Oeon eLetroupyia
- Oeon e aeitoupyia kEKTc aeitoupyiac
- Aia6kaia 1
- Aetroupyia HOLD ( B)
- YnodelEicepyaolac
- Fevikec umodelleic
- Empaoeoc otny nepoxn meptnonc
- Empaoeic oto anotaleqa eptpon
- Arla Ospanela
- 114|EAAVikd
- Euvrponon kal Service
- SuvtnponkkaKaapiaoc
- Service kalnapoxn oupuouaw xpnns
- EAAa
- Anoupon
- Móvo yua xópec tnc EE:
- 116|Türkce
- Sekli gosterilen elemanlar
- 120|Türkce
- Nedeni Giderilmesi
- Bakim ve servis
- Bakim ve temizlik
- | Türkiye
- Tasfiye
- ddJg dU
- #
- pIddwXl oJgog nIbjjdo
- Joo (a) UU
- Jg
- "HOLD" jll lIe "Err" 1
- aJy jg wIJI
- aogosu c uulai a
- .
- 130|
- Jw Ua
- aole Udo
- U
- JUJIJI JI JIJI/
- 山
- yj jjLw wL
- sJg aaiJl oog
- Jaaai Jlss
- jgaoJl j
- aLuljlic
- JU
Brand : BOSCH
Model : PLR 15
Category : Rangefinder