
FC 24 - Steam cleaner Kärcher - Free user manual and instructions
Find the device manual for free FC 24 Kärcher in PDF.
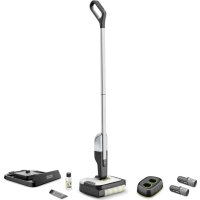


| Brand | Kärcher |
| Model | FC 24 |
| Product type | Cordless steam floor cleaner |
| Dimensions (L x W x H) | 220 x 240 x 1220 mm |
| Weight (without accessories) | 2.2 kg |
| Power supply | Lithium-ion battery 3.6–3.7 V (KÄRCHER Battery Power 4V) |
| Clean water tank capacity | 200 ml |
| Dirty water tank capacity | 100 ml |
| Maximum runtime | Approximately 20 minutes (2.5 Ah battery) |
| Rated power | 28 W |
| Protection rating | IPX4 |
| Protection class | III |
| Compatible floor types | PVC, linoleum, tile, stone, oiled/waxed parquet, water-resistant laminate |
| Cleaning roller | Machine washable at 60 °C (no fabric softener, do not tumble dry) |
| Hair filter | Removable, cleanable under running water |
| Parking station | Included for roller drying |
| Recommended cleaning products | Kärcher RM 536, RM 537 |
| Included accessories | 2 rollers (universal and stone), cleaning brush, parking station, RM 536 cleaner (30 ml) |
| Warranty | According to country conditions (see manual) |
| Intended use | Only on water-resistant hard floors. Do not use on carpet/rugs. |
Frequently Asked Questions - FC 24 Kärcher
User questions about FC 24 Kärcher
0 question about this device. Answer the ones you know or ask your own.
Ask a new question about this device
Download the instructions for your Steam cleaner in PDF format for free! Find your manual FC 24 - Kärcher and take your electronic device back in hand. On this page are published all the documents necessary for the use of your device. FC 24 by Kärcher.
USER MANUAL FC 24 Kärcher
Environmental protection 11
Accessories and spare parts 11
Scope of delivery 11
Warranty 11
Safety instructions 11
Symbols on the device 12
Description of the unit 12
Installation 12
Initial startup 13
Operation 13
Care and service 14
Disassembly 15
Troubleshooting guide 15
Technical data 16
Intended use
Use the device exclusively with battery packs and chargers from the KÄRCHER Battery Power 4 V system.
BP 4V
Suitable battery packs are marked with the BP 4 V symbol.
Only charge the battery pack with the chargers approved for charging.
Use the floor cleaner exclusively for hard floor cleaning in your private household and only on waterproof hard floors.
Do not clean water-sensitive floor coverings such as e.g. untreated cork floors, since the moisture can penetrate and damage the floor.
The device is suitable for cleaning PVC, linoleum, tiled, stone, oiled and waxed parquet, laminate and all water-resistant floor coverings.
Environmental protection

The packing materials can be recycled. Please dispose of packaging in accordance with the environmental regulations.

Electrical and electronic devices contain valuable, recyclable materials and often components such as batteries, rechargeable batteries or oil, which - if handled or disposed of incorrectly - can
pose a potential danger to human health and the environment. However, these components are required for the correct operation of the device. Devices marked by this symbol are not allowed to be disposed of together with the household rubbish.
Notes on the content materials (REACH)
Current information on content materials can be found at: www.kaercher.de/REACH
Accessories and spare parts
Only use original accessories and original spare parts. They ensure that the appliance will run fault-free and safely.
Information on accessories and spare parts can be found at www.kaercher.com.
Scope of delivery
The scope of delivery for the appliance is shown on the packaging. Check the contents for completeness when unpacking. If any accessories are missing or in the event of any shipping damage, please notify your dealer.
Warranty
The warranty conditions issued by our sales company responsible apply in all countries. We shall remedy possible malfunctions on your device within the warranty period free of cost, provided that a material or manufacturing defect is the cause. In a warranty case, please contact your dealer (with the purchase receipt) or the next authorised customer service site.
(See overleaf for the address)
Safety instructions
Read these safety instructions, these original instructions, the safety instructions provided with the battery pack and the original instructions for the battery pack/ standard charger supplied before using the device for the first time. Act in accordance with them. Keep the booklets for future reference or for future owners.
In addition to the notes in the operating instructions, you also need to take into consideration the general safety regulations and accident prevention guidelines applicable by law.
Hazard levels
DANGER
- Indication of an imminent threat of danger that will lead to severe injuries or even death.
WARNING
- Indication of a potentially dangerous situation that may lead to severe injuries or even death.
CAUTION
- Indication of a potentially dangerous situation that may lead to minor injuries.
ATTENTION
- Indication of a potentially dangerous situation that may lead to damage to property.
Electrical components
DANGER: Do not immerse the device in water. Never touch contacts or lines. Do not expose the device with the battery pack to strong sunlight, heat or fire. WARNING: Switch off the device before all care and maintenance work. The appliance contains electrical components - do not clean the appliance under running water. CAUTION: Have repair work carried out by the authorized customer service only. Check the device and accessories for proper condition and operational safety before each use. Do not use the device if it is damaged.
ATTENTION: Do not insert any objects into the battery mount except for battery packs of the KARCHER Battery Power 4V system.
Safe handling
DANGER: Risk of asphyxiation. Keep packaging film out of the reach of children.
WARNING: Only use the device for its proper use. Take into account the local conditions and beware of third parties, in particular children, when working with the device. Adhere to the respective safety regulations in hazard zones (e.g. service stations). Never operate the device in explosive spaces. Children and persons unfamiliar with these instructions are not allowed to operate the device. The age of the operator may be limited by local restrictions. The device is not intended for use by children, persons with restricted physical, sensory or mental abilities or persons unfamiliar with these instructions. Persons with reduced physical, sensory or mental capabilities and persons lacking experience and knowledge may only use the appliance if they are properly supervised, have been instructed on use of the appliance safely by a person responsible for their safety, and understand the resultant hazards involved. Children must not play with the appliance. Children must be supervised to prevent them from playing with the appliance. Keep the device out of the reach of children when it cools down. Children may only perform cleaning work and user maintenance under supervision. Keep all parts of your body (e.g. fingers, hair) away from the rotating cleaning roller. - Risk of injury from sharp objects (e.g. splinters). Protect your hands while cleaning the floor head.
CAUTION: Do not use the appliance if it has been dropped beforehand, is visibly damaged or if it is leaking. Only operate or store the device in accordance with the description or figure. Accidents or damage due to the device falling over. Before all actions with or on the device, you must make sure that it is stable. - Never leave the device unsupervised while it is in operation.
ATTENTION: Device damage. Never fill the water reservoir with solvents, liquids containing solvents or undiluted acids (e.g. detergents, petrol, paint thinners and acetone). Only switch on the device when the fresh water tank and waste water tank are installed.
- Do not pick up sharp or larger objects with the device, such as glass shards, gravel, or toy parts. Do not fill the fresh water container with vinegar, descaling agents, essential oils, or similar substances. Avoid picking up these substances with the device. Use the device only on hard floors with a watertight coating, such as varnished parquet, enamelled tiles, or linoleum.
- Do not use the device for cleaning carpets or carpeted floors. Do not guide the device over the floor grilles of convection heating systems. The device cannot vacuum up the escaping water when it is guided over a floor grille. Switch off the device at the main switch/power switch during longer breaks and after use. Do not operate the device at temperatures below 0°C. Protect the device from rain. Do not store the device outdoors.
Symbols on the device
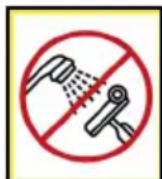
DANGER
Risk of electric shock
The device contains electrical components.
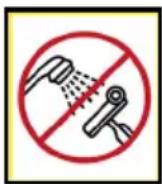
Never clean the device under running water. Do not immerse the device in water.
Description of the unit
The maximum amount of equipment is described in these operating instructions. Depending on the model used, there are differences in the scope of delivery (see packaging).
For the illustrations, refer to the graphics page. Illustration A
1 Handle 2 Fresh water tank 3 Unlocking button for hair filter 4 Removable hair filter 5 Unlocking button for device handle 6 Floor head 7 Battery pack holder 8 Battery run time LED display 9 Battery Pack (KÄRCHER Battery Power 4 V) 10 Charger (KARCHER Battery Power 4 V) 11 Quick charger Duo (KÄRCHER Battery Power 4 V) 12 Cleaning brush 13 Universal cleaning roller 14 Cleaning roller for stone floors 15 Parking station 16 Detergent RM 536 (30 ml) 17 Detergent RM 536 (500 ml) 18 Detergent RM 537 (30 ml) 19 Raised element for storing the cleaning roller 20 Waste water tank 21 Side cover for removing the cleaning roller
- optional
Installation
Installing the device handle
- Fit the upper part of the device handle into the lower part of the device handle until it audibly latches into place.
- Hold the basic device firmly.
- Fit the device handle all the way to the end stop into the basic device until it audibly latches into place. The device handle must sit tightly in the device. Illustration B
Initial startup
Battery pack charging
- Charge the battery pack (see operating instructions and safety instructions for the battery pack and the charger).
Fitting the battery pack
- Press the battery pack into the battery pack holder on the device until it you feel it latch into place. Illustration C
Fitting the waste water tank
- Place the device on the floor.
- Grasp the waste water tank by the recessed grip and insert it into the rail of the floor head. Illustration D
Installing the roller
- Press the unlocking button for the side cover and remove the cover.
- Pay attention to the colour coding on the inner side of the roller and on the roller holder on the device (e.g. purple to purple).
- Fit the cleaning roller onto the roller holder all the way to the end stop. Illustration E
- Install the side cover on the device.
Filling the fresh water tank
- Grasp the fresh water tank by the recessed grips at the side and remove it from the device at a 45° angle.
- Open the tank cap and turn it to the side. See Illustration F.
- Fill the fresh water tank with cold or lukewarm fresh water.
- Add KARCHER detergent or care agent to the fresh water tank as required.
ATTENTION
Overdosing or underdosing of the detergent or care agent
Can result in poor cleaning results. Follow the dosage recommendations for the detergent or care agent. 5. Close the tank cap. 6. Fit the fresh water tank into the device.
See Illustration G. The fresh water tank must sit tightly in the device.
Operation
General instructions on operation
ATTENTION
Moisture
Material damage to sensitive floors
Check the surface to be cleaned for water sensitivity at an inconspicuous location before using the device. Do not clean water-sensitive floor coverings such as e.g. untreated cork floors, since the moisture can penetrate and damage the floor.
ATTENTION
Material damage
Damage to the device from pointed, large and/or bulky objects.
The device must not be stored and used on hard coarse dirt and objects, as the parts can get stuck under the waste water tank and cause scratches on the floor and tank.
Before starting work and storing the device, remove objects such as shards, pebbles, screws or toy parts from the floor.
Illustration W
Note
- To avoid striped patterns, test the device on an inconspicuous area before using on sensitive surfaces, e.g. wood or fine stone.
- Do not allow it to remain in one area, but keep it in motion.
- Observe the instructions for the floor covering manufacturer.
Note
Work backwards towards the door so that no footprints are generated on the freshly washed floor.
Illustration X
- Floor cleaning is performed using a to and fro movement at the same speed as when vacuuming.
Note
For an optimum cleaning result, wash the roller in the washing machine at 60°C before initial use.
ATTENTION
Material damage due to loose roller
This may damage the washing machine.
Place the roller in a laundry net and load the washing machine with extra laundry.
ATTENTION
Damage caused by washing the cleaning roller with fabric softener or using a tumble dryer
Damage to the microfibres
Do not use fabric softener when cleaning in a washing machine.
Do not dry the roller in a tumble dryer.
Starting work
ATTENTION
Uncontrolled motion
Damage to the device and material damage
The cleaning roller starts rotating as soon as the device is switched on.
Hold the handle tight to prevent the device from moving away independently.
ATTENTION
Fresh water tank or waste water tank not installed
Material damage
Before starting cleaning work, ensure that the fresh water tank is filled with water and the waste water tank is fitted in the device.
- Pull the handle backwards.
Illustration H
The device switches on.
- Move the device back and forth until the roller is sufficiently moistened.
Battery run time
The LED on the floor head indicates the battery run time:
LED lights up when the battery is fully charged and up to a remaining battery run time of 20%. - Approx. 4 minutes before the battery is depleted (20% battery life), the LED flashes and the rollers rotate three times in the form of a quick start-stop motion.
Illustration I
Emptying the waste water tank
- Bring the device handle into a vertical position. The device switches off.
- Press the waste water tank unlocking button and remove the waste water tank by the recessed grip. Illustration J
- Empty the waste water tank through the opening. In the case of stubborn dirt, open and remove the lid of the waste water tank via the side tab and rinse out the waste water tank with fresh water. Illustration K
- Fit the waste water tank (see chapter Fitting the waste water tank).
Refilling with cleaning fluid
- Fill the fresh water tank (see chapter Filling the fresh water tank).
ATTENTION
Danger from escaping water
Risk of damage
Empty the waste water tank every time the fresh water tank is empty and before filling the fresh water tank to prevent the waste water tank from overflowing.
Interrupting operation
ATTENTION
Damp roller
Moisture damage to sensitive floors
Place the device in the parking station during longer work breaks to prevent damage to sensitive floors through a wet roller.
- Bring the device handle into a vertical position. The device switches off.
- Place the device in the parking station. Illustration R
Finishing operation
- Bring the device handle into a vertical position. The device switches off.
- Place the device in the parking station.
Illustration R
ATTENTION
Adhering dirt deposits
Adhering dirt deposits can damage the device in the long term.
It is recommended to clean the device completely after each application.
- Clean the device (see chapter Cleaning the device).
Storing the device
ATTENTION
Liquids/moist dirt
Unpleasant odours can develop if the device contains liquids or moist dirt when stored. Completely empty the fresh water tank and waste water tank before storing the device. Use the cleaning brush to remove hair and dirt particles from the hair filter in the floor head cover. Allow the cleaned roller to dry in the air, e.g. on the floor head pedestal. Do not place the wet roller in a closed cupboard to dry. 1. Allow the empty waste water tank to dry before fitting it into the device. 2. Place the device in the parking station. Illustration R 3. Remove the roller and clean if necessary (see chapter Cleaning the roller).
- Place the wet roller to dry on the floor head pedestal. Illustration S
- Remove the battery pack (see chapter Removing the battery pack).
- Charge the battery pack, see operating instructions and safety instructions for the battery pack and the charger.
- Store the device in a dry room. Illustration U
Removing the battery pack
Note
During longer work breaks, remove the battery pack from the device and secure it against unauthorised use.
- Bring the device handle into a vertical position. The device switches off.
- Press the battery pack unlocking button, and pull the battery pack out of the battery pack holder. Illustration V
Care and service
General instructions
WARNING
Danger due to the device inadvertently starting up. Risk of injury.
Remove the battery pack prior to all work on the device.
Cleaning the device
ATTENTION
Dirt or detergent residues
The waste water tank and hair filter must be cleaned regularly to ensure that dirt does not accumulate in the tank and hair filter. Dirt particles can clog the hair filter and slot if the device is not cleaned after finishing operation. The accumulation of dirt and bacteria can also result in the development of unpleasant odours in the device.
Do not hold the underside of the floor head under water.
- Bring the device handle into a vertical position. The device switches off.
- Empty and clean the waste water tank (see chapter Cleaning the waste water tank).
- Press the hair filter unlocking button. The hair filter releases.
- Remove and clean the hair filter (see chapter Cleaning the hair filter).
Illustration L
- Remove and clean the roller (see chapter Cleaning the roller).
Illustration M
- If water is still present in the fresh water tank, remove and empty the fresh water tank.
- Wipe off dirt and detergent residues on the housing with a damp cloth.
Cleaning the waste water tank
ATTENTION
Adhering dirt deposits
Adhering dirt deposits can damage the device in the long term. Clean the waste water tank regularly. For information on the waste water tank removal procedure, see chapter Emptying the waste water tank. 1. Open the lid of the waste water tank via the side tab and remove it.
- Clean the waste water tank and cap with fresh water.
Illustration N
- Alternatively, the waste water tank can be cleaned in a dishwasher.
Cleaning the roller
ATTENTION
Detergent residue in the roller
Foaming
Wash the roller under running water or clean the roller in a washing machine each time after using the device.
ATTENTION
Damage caused by washing the cleaning roller with fabric softener or using a tumble dryer
Damage to the microfibres
Do not use fabric softener when cleaning in a washing machine.
Do not dry the roller in a tumble dryer.
ATTENTION
Material damage due to loose roller
This may damage the washing machine.
Place the roller in a laundry net and load the washing machine with extra laundry.
- Bring the device handle into a vertical position. The device switches off.
- Place the device in the parking station. Illustration R
- Press the unlocking button for the side cover and remove the cover.
- Pull the cleaning roller out via the recessed grip. Illustration M
- Clean the cleaning roller under running water or wash it in the washing machine at max. 60°C. Illustration O
- Clean the roller drive with a moist cloth.
- To dry, place the wet roller on the pedestal of the floor head.
Illustration S
- Store the device in a dry room. Illustration U
Cleaning the hair filter
ATTENTION
Adhering dirt deposits
Adhering dirt deposits can damage the device in the long term.
It is recommended to clean the device completely after each application.
ATTENTION
Adhering dirt deposits
Adhering dirt deposits can damage the device in the long term.
Clean hair filter regularly with the cleaning brush.
ATTENTION
Damage due to cleaning the hair filter in a dishwasher
The washing process can distort the scraper edge and it will no longer press on the roller correctly. This worsens the cleaning result.
Do not clean the hair filter in a dishwasher but rather under running water.
- Bring the device handle into a vertical position. The device switches off.
- Place the device in the parking station. Illustration R
- Press the hair filter unlocking button. Illustration L
The hair filter is released and can be removed.
- Clean the hair filter under running water.
- Remove adhering dirt deposits, e.g. in the filter comb, using the cleaning brush.
Illustration P Illustration Q
- Fit the hair filter into the floor head at a 45° angle and then press it down until it audibly latches into place. The hair filter must sit tightly in the device. Illustration T
Cleaning and care agents
ATTENTION
Use of unsuitable detergents and care agents
The use of unsuitable detergents and care agents can damage the device and result in loss of eligibility for warranty claims.
Use only KÄRCHER detergents.
Take care to ensure the correct dosage.
Note
Use KARCHER detergent or care agents for floor cleaning as necessary.
- Observe the manufacturer's dosing quantity recommendations when dosing with detergent or care agents.
- To prevent foaming, fill the fresh water tank with water first and then add the detergent or care agent.
- To prevent the tank from overflowing, be sure to leave enough space for the detergent or care agent when filling with water. To do this, observe the Max marking on the fresh water tank.
Disassembly
Removing the device handle
ATTENTION
Frequent removal of the handle
The handle components can be damaged by repeated removal.
Do not remove the handle from the basic device after assembly.
The handle may only be removed from the basic device when the device is sent out for service purposes.
CAUTION
Risk of injury
Using a screwdriver on a lock poses the danger of slipping and causing an incision injury.
Use the screwdriver carefully on the lock.
- Removing the fresh water tank.
- Using a screwdriver at a 90° angle, press the unlocking button on the upper part of the device handle and remove the upper part of the device handle. Note: When pressing the unlocking button with the screwdriver, only apply pressure carefully to avoid damage to the device.
Illustration Y
- Using a screwdriver at a 90° angle, press the unlocking button on the lower part of the device handle and remove the lower part of the device handle.
Troubleshooting guide
Malfunctions often have simple causes that you can remedy yourself using the following overview. When in doubt, or in the case of malfunctions not mentioned here, please contact your authorised Customer Service.
The LED flashes quickly for 30s
The battery pack is overheated.
- Stop operation and allow the device and battery pack to cool down.
The LED flashes five times in quick succession
The battery pack is not recognised.
- Remove the battery pack and press it back into the battery pack holder on the device. The battery pack must be charged.
- Charge the battery pack (see operating instructions and safety instructions for the battery pack and the charger).
The device does not work
The battery pack is not sitting properly in the device.
- Push the battery pack into the battery pack holder on the device until it latches into place. The charging state of the battery pack is too low.
- Charge the battery pack, see chapter Battery pack charging. The battery pack or charger is defective.
- Replace the battery pack or charger, see chapter Intended use.
The device does not absorb dirt
There is no water in the fresh water tank. - Refill water in the fresh water tank, see chapter Refilling with cleaning fluid. The fresh water tank is not sitting properly in the device. - Insert the fresh water tank so that it is firmly seated in the device.
The waste water tank is missing, cannot be fitted into the device or is jammed.
- Place the device on the floor. Grasp the waste water tank by the recessed grip and insert it into the rail of the floor head. The hair filter is missing or not sitting properly in the device.
- Fit the hair filter correctly in the device. The roller is dirty or worn out.
- Clean the roller, see chapter Cleaning the roller, or replace it.
The roller is too dry
The roller is not being sufficiently moistened. - Moisten the roller, see chapter Starting work.
Poor cleaning result
The roller was not washed before initial use. - Wash the roller in a washing machine at 60°C. The roller is dirty. - Clean the roller, see chapter Cleaning the roller. The roller is not being sufficiently moistened. - Moisten the roller, see chapter Starting work. Incorrect detergent or incorrect dosage. - Use only KÄRCHER detergent and be sure to use the correct dosage. Foreign detergent residues are present on the floor. - Thoroughly remove all detergent residues from the roller using water. - Clean the floor several times using the device and a clean roller, without using detergent.
This removes all detergent residues from the floor.
The water absorption is not optimal
The hair filter is not sitting correctly in the device.
- Fit the hair filter correctly in the device.
The roller is worn out.
- Replace the roller.
The device is losing waste water
The waste water tank is full. - Empty the waste water tank immediately, see chapter Emptying the waste water tank.
The waste water tank is not sitting properly in the device.
- Insert the waste water tank into the device correctly. The waste water tank must sit tightly in the device. The hair filter is not sitting correctly in the device.
- Fit the hair filter correctly in the device. The waste water tank is damaged.
- Contact the authorised Customer Service.
The device engages in joints when used
The knobs on the underside of the waste water tank are damaged or worn. - Contact the authorised Customer Service.
Technical data
FC2-4
Electrical connection
Voltage V 3.6-3.7
Degree of protection IPX4
Device protection class III
Nominal power of device W 28
Nominal voltage of battery V 3.6 - 3.7
Max. operating duration with fully min 20 charged battery (2.5 Ah)
Filling quantity
Fresh water tank capacity ml 200
Waste water tank capacity ml 100
Dimensions and weights
Weight (without accessories and kg 2.2 cleaning fluids)
Length mm 220
Width mm 240
Height mm 1220
Subject to technical modifications.
Contents
Installing the battery pack
Troubleshooting
Most malfunctions have simple causes, so you can fix them yourself using the following overview. If in doubt or if malfunctions not described here occur, contact an authorized service center.
The LED flashes quickly for 30 seconds. The battery pack is overheating.
- Interrupt work and let the device and battery pack cool down.
The LED flashes quickly.
The battery pack is not recognized. Remove the battery pack and insert it again into the holder on the device. The battery pack needs to be charged. Charge the battery pack (see instructions for use and safety instructions for the battery pack and charger).
The device does not work
The battery pack is inserted correctly in the device.
Insert the battery pack into the holder for the battery pack on the device as described. The charge level of the battery pack is too low. Charge the battery pack, see chapter on charging the battery pack. The battery pack or charger is defective. Replace the battery pack or charger, see chapter on intended use.
The device does not pick up dirt
The dirty water tank is full. - Empty the dirty water tank, see chapter on emptying the dirty water tank. The dirty water tank is not inserted correctly in the device. Insert the dirty water tank so that it clicks into place on the device. The dirty water tank is missing, it cannot be inserted into the device or it is stuck.
- Place the device on the floor. Take the dirty water tank by the handle and insert it into the ejection opening.
The filter is missing or incorrectly installed in the device.
- Correctly insert the hair filter into the device. The roller is dirty or worn. Clean the roller, see the chapter Cleaning the roller, or replace it.
The roller is too dry.
The roller is not sufficiently moistened. - Moisten the roller, see the chapter Before starting work.
Unsatisfactory cleaning result. The roller was not washed before first use.
- Wash the roller in the washing machine at 60 °C. The roller is dirty. Clean the roller, see the chapter Cleaning the roller. The roller is not sufficiently moistened.
- Moisten the roller, see the chapter Before starting work. The wrong cleaning agent is used or the dosage is incorrect.
- Use only KARCHER cleaning agents and ensure correct dosage. There are residues of other cleaning agents on the floor. Thoroughly clean the device of cleaning agent residues. Rinse the floor several times with the device and a clean roller without using cleaning agent. Residues of cleaning agent on the floor are removed.
Optimal water hardness.
The filter is installed in the device incorrectly.
- Correctly insert the hair filter into the device.
The roller is worn. Replace the roller.
The device is leaking dirty water.
The dirty water tank is full.
Empty the dirty water tank immediately, see the chapter Emptying the dirty water tank.
The tank is installed in the device incorrectly.
- Correctly install the dirty water tank into the device. The dirty water tank must be securely fixed in the device.
The hair filter is installed in the device incorrectly.
- Correctly install the hair filter into the device.
Dirty water tank is damaged.
- Contact authorized service.
The device is leaking during use.
Protrusions on the lower side of the dirty water tank are worn. - Contact authorized service.
Technical specifications
FC2-4
| Зелекtrочкоe подкlioчени | ||
| Наръжени | V | |
| Стени 3ашисты IPX4 | ||
| КлASS 3ашисты устрийства | III | |
| Homonhalьнай мошноctь устрийства | W | 28 |
| Homonhalьhoe наръжени akкумлаятора | V | 3 |
| Мамс. врема пботы с погиостыю заръжени makкумлаятором (2,5 A·ч) | min 20 | |
| Запавочный объem | ||
| О[bem baka дя чисто Воры] | ml | 200 |
| О[bem baka дя граязноь Воры] | ml | 100 |
| Размерbli Вес | ||
| Масca (бez prинадлесноctей и моюцх жundковостei) | kg 2,2 | |
| Длина | mm | 220 |
| ШирINA | mm | 240 |
| В[bicota] | mm | 1220 |
We reserve the right to make technical changes.
Contents
Intended use 153
Environmental protection 153
Spare parts 153
Supply set 153
Accessories 153
Safety instructions 153
Symbols on the device 154
Description of the device 155
Installation 155
Commissioning 155
Operation 155
Maintenance and technical service 157
Dismantling 158
Troubleshooting 158
Technical specifications 159
Intended use
Use the device only with battery packs and charging devices from the KARCHER Battery Power 4 system.
BP4V
BidiobiDiHakyMylTOpHi 6nokn no3haeHcIMBOIOM BP4B.

BC4V
3apdxkataaKymyTAOPHNI6JOK TINbKn 3a DOnOMOrOIO DOnyuCEHNX Do 3apxKaHHa3apdHnx npncTPOIB.
IOnomnHa MaunHa npn3HaYeHa BnKlNoHO dna OUniueHHe TInbKn BOOcTIkNtBepnX NiDnOrOBnx NOKpTTIB y DomaHbOMy roCnoapCTBi.
He ouhiybaTn cyTnnBIO BOIN NOKPNTRAK, HapnPKnaI, Heo6pOJIeHI KOPKOII niDnOR, OCKINKMOKe npocOHTNCB Bonora i NowKOHTNIdNory.
Pnncpii nixoHnt bIry Ounuenny PBX, nihoneMy, nnTKn, kam'HNx NOBepxoHb, BOseHoro i o6pObeHoro ONBOHO napKeTy, lamHaTy, a TAKOX ycix He yUTnBuNX Do BOU NiDnOROBHX NOKpTTIB.
3.6 OxopoHaIOBkInn
Nakybalhi MaTepiAni npuaTHi Do BToPnHoi nepepo6Kn. YnaKOBky Heo6XiIdHO yTuNi3yBaTn 6e3 uKOdi DOBkInJr.
EneKtpuHi Ta eNeKtpoHHI npucTpoMiCtTaB iHHi MaTePiAn, kKi npuaTHIO BTOpHHOI nepepo6kn, iacTo KOMNoHEHTN, kOT 6batae i, akymyJrTopn uMactno, kY y pa3i
HnnpabNboro NOBxKeHHa 3 Hmna60 HnpabNbHOI yTNl3aui Moxyb CTBOpHTn NoteHuiHy He6e3neky dny 3doPo8' nOuHN Ta DOBkiJIy. Ondak U KOMnoHEHTn Heo6XiHi dny HaJeKHOI eKnJyataui PnncpTO. PnncpOI, No3HaueHi cIM CmBONOM, 3a6opOHReTBcYTNi3yBatn pa3om i3 NObyTOBUM CMITAM.
Bka3iBkn 0do kOmnoHeHTIB (REACH)
AkyaJIbHI BiIDOMOCTI npo KOMnoHEnTu HabeJeHi Ha caTti: www.kaercher.de/REACH
Ppniladra Ta 3anachi deTani
CniD BnKOpNCToBvBaTn JIWe opRiHaJIbHe npNJaJaTa Ta opRiHaJIbHi 3aNaCi YacTnH, TOMy IIO came BOHN rapaHTYIOb 6e3neHy Ta 6e3nepe6iHy ekcnIpyataio npNCTpOIO.
InΦopmauiy IIOIO npnlaIaIra Ta 3anaChnx YactH MICTNTbC H a caiT www.kaercher.com.
Delivery set
The delivery set is intended for packaging. Before unpacking the device, check the completeness. In case of incomplete delivery or damage received during transportation, please inform the trade organization that sold the device.
Warranty
All countries where the device is sold have warranty conditions established by the authorized organization for our products. Possible malfunctions of the device during the warranty period are eliminated free of charge if the malfunction is caused by material defects or manufacturing defects. In case of malfunctions during the warranty period, please contact the trade organization that sold the product or the nearest authorized service center.
(See addresses on the back)
Safety instructions
Before first use of the device, read the safety instructions, the original operating instructions, the safety instructions for the battery block, as well as the original operating instructions for the battery block and the standard charger. Follow them. Keep the documents for future use by the next owner.
Along with the instructions in this operating manual, general legal provisions must be taken into account.
Electrical safety and prevention of accidents.
Safety levels
DANGER
Indicates a danger that directly threatens and can lead to serious injuries or death.
WARNING
Indicates a potentially dangerous situation that can lead to serious injuries or death.
CAUTION
In case of an emergency, it can cause negative consequences.
ATTENTION
In case of a possible emergency, it can cause material damage.
Electrical components
DANGER: Do not immerse the device in water. It is forbidden to touch contacts and plugs. Do not expose the device with the battery pack to strong solar radiation, heat, or water. WARNING: Before carrying out any work with the device and technical maintenance, switch off the device. The device has electrical components, so it must not be cleaned under running water.
CAUTION: Repair work must only be carried out by authorized service centers.
- Before each use, check the condition and safety of the device and its accessories. Do not use the device if it is damaged.
ATTENTION: Do not place objects on the battery pack, except for battery packs from the KARCHER Battery Power 4 B system.
Safety
DANGER: Risk of suffocation. Keep packaging film out of the reach of children. WARNING: Use the device only as intended. Consider the environment; when working with the device, pay attention to third parties, especially children. In hazardous areas (e.g., at gas stations), observe the relevant safety regulations. It is forbidden to operate the device in potentially explosive atmospheres. - It is forbidden for children or persons who are not familiar with the instructions to use the device. Children must be supervised to ensure they do not play with the device. The device is not intended for use by persons with reduced physical, sensory, or mental capabilities, or lack of experience and knowledge, unless they have been given supervision or instruction concerning use of the appliance in a safe way and understand the hazards involved. Children must not play with the device. Keep the device out of reach of children when it is cooling down. Children are only allowed to perform cleaning and maintenance of the device under supervision. Keep body parts (e.g., fingers, hair) away from the rotating brush. Risk of injury from sharp objects (e.g., splinters). Protect hands when cleaning the brush roller.
Supervision or instruction by a competent person regarding safe use of the device is required. Do not allow children to play with the device. Ensure that children do not play with the device. Keep the device out of reach of children during cooling. Children are only allowed to perform cleaning and maintenance under supervision. Keep body parts (e.g., fingers, hair) away from the rotating brush. Risk of injury from sharp objects (e.g., splinters). Protect hands when cleaning the brush roller.
CAUTION: Do not use the device if it has previously fallen, shows signs of damage, or leaks. - Operate and store the device only in accordance with the description and the manual. - Risk of accident and damage due to improper use of the device. Before carrying out work with the device, take a stable position. - Do not leave the device unattended during operation.
ATTENTION: Damaged device.
Do not use the device for cleaning surfaces that have been treated with acids, solvents, or other chemicals (e.g., acidic cleaners, benzene, paint thinners, or solvents for dissolving paint). Use the device only for its intended purpose, as described in the instructions for use. Do not insert sharp or pointed objects into the device, such as knives, drills, or parts of tools. Do not pour acidic liquids, cleaning agents, solvents, or other reactive chemicals into the device. Also, ensure that these chemicals do not come into contact with the device.
Use the device only on hard surfaces with a water-repellent coating, such as varnished parquet, tiled floors, or linoleum. Do not use the device for cleaning carpets or carpeted floors. Do not move the device over the power cord of other electrical appliances. The device must not be used if it is damaged or if its power cord is damaged. Turn off the device during breaks and after use, and unplug it. Do not operate the device at temperatures below 0°C; protect the device from moisture. Do not store the device outdoors.
Symbols on the device
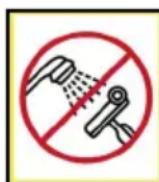
SAFETY
Safety regarding electric shock
The device contains electrical components.
Do not rinse the device under running water. Do not immerse the device in water.
Description of the device
These operating instructions describe the maximum equipment. The scope of delivery varies depending on the model (see packaging).
Figures are shown on the pages with illustrations. Figure A
1 Handle 2 Water tank 3 Button for releasing the brush for hair 4 Removable filter for hair 5 Button for releasing the handle of the device 6 Rotating head 7 Battery pack release button 8 Charge level indicator for the battery 9 Battery pack (KARCHER Battery Power 4 B) 10 Charger for the device (KARCHER Battery Power 4 B) 11 *Charging cable for the device Duo (KÄRCHER Battery Power 4 B) 12 Soft roller 13 Universal roller 14 *Roller for hard floors 15 Parking station 16 Mini hose RM 536 (30 m) 17 *Mini hose RM 536 (500 m) 18 *Mini hose RM 537 (30 m) 19 Protrusion for storing the roller 20 Water tank for dirty water 21 Cover for removing the roller
*optional
Assembly
Assembling the handle of the device
- Insert the upper part of the handle into the lower part of the handle until it clicks into place.
- Type of gas device.
- Insert the base device handle into the base device until it clicks into place. The device handle must be fully fixed in the device.
Figure B
Commissioning
Charging the battery pack
- Charge the battery pack (see the operating instructions and the safety instructions for the battery pack and the charging device).
Installing the battery pack
- Insert the battery pack into the battery pack slot on the device and lock it into place.
Figure C
Installing the water tank
- Place the device on a flat surface.
- Take the water tank by the recessed handle and insert it into the selected head opening. Figure D
Installing the roller
- Press the release button for the roller cover and remove the cover.
- Align the color markings on the inside of the roller and the holder on the device (e.g., purple to purple).
- Handle the tank with care. Filling E
- Install the lid on the device.
Filling with clean water
- Take the clean water tank from the side of the handle and tilt it out of the device (45°).
- Open the tank lock and turn the handle. Filling F
- Fill the tank with clean cold or lukewarm tap water.
- If necessary, add a cleaning agent or care product to the clean water tank.
CAUTION
Improper use of cleaning agents or care products
may lead to unsatisfactory cleaning results.
Follow the recommendations for the cleaning agent or care product.
- Close the tank lid.
- Insert the clean water tank into the device. Filling G
The clean water tank must be securely locked in the device.
Operation
Instructions for use and maintenance
Attention
Safety
Damage to the floor when using on unsuitable surfaces
Before using, check the floor for water resistance in an inconspicuous place. Do not use the device on floors with damaged coating, for example, with a loose cork layer, as it may absorb moisture and damage the floor.
Attention
Material damage
Damage to the device by sharp, large, or heavy objects.
Do not store or use the device on frozen ground or objects, as parts may freeze to the bottom of the water tank and cause damage to the bottom of the tank.
Before starting work and storing the device, remove such items as slippers, shoes, or ceramic tile fragments from the floor.
Figure 1
Instructions
To avoid leaving marks on sensitive surfaces, for example, wood or fiberboard, it is necessary to test the device in an inconspicuous place. Do not stay in one place, but keep moving. - Follow the instructions of the floor covering manufacturer.
Instructions
Work in reverse gear towards the door so that no traces remain on the cleaned floor.
The device is designed to be moved forward and backward smoothly, when using the plow.
Insertion
To achieve optimal results, insert the roller into the right machine at a temperature of 60°C before first use.
WARNING
Damage through unclosed valve
The right machine can be damaged.
Place the roller close to the right machine and insert it into the right machine close to it.
WARNING
Damage from the right roller with capacitor d7 close or after using the dryer
Damage to the microswitch
Do not use the capacitor for drying during operation of the right machine.
Do not put the roller in the dryer.
Before operation
WARNING
Changing the variable
Lower the device
After use, the device should be returned.
Hold the handle so that the device does not move by itself.
Attention
If the tank is not installed correctly
Material damage
Before starting the device, make sure that the tank for clean water is filled, and the tank for
dirty water is installed in the device.
- Pull the handle back.
Small H
It is being adjusted.
2. Turn the switch on and off until the roller is sufficiently moistened.
Battery charge level
The indicator on the control panel shows the battery charge level:
- The battery charge level is displayed and corresponds to a charge level of 20%.
- Approximately 4 minutes before the battery is fully discharged (20% charge level), the
lamp flashes and the rollers begin to vibrate during fast movement in START-STOP mode.
Figure
Draining the dirty water tank
- Place the device in a vertical position.
The filter is removed.
- Press the release button for the dirty water tank and pull it out by the handle. Figure J
- Pour the dirty water out through the opening. If the dirt is stuck, open and remove the lid of the dirty water tank by the handle and rinse the tank with clean water.
Figure K
- Insert the dirty water tank (see chapter Installing the dirty water tank).
Filling the detergent
- Fill the fresh water tank (see chapter Filling the fresh water tank).
WARNING
Risk of injury from hot water
Rinse the tank for dirty water each time the tank for dirty water is full, and before filling the tank for clean water, to avoid transferring the tank for dirty water.
Interruption of work
ATTENTION
Large debris
To avoid damage to the device from large debris, before starting work, place the device on the parking station to prevent damage to the device from large debris.
- Set the device handle to the vertical position.
The device switches off.
- Place the device on the parking station. Mark R
End of work
- Set the device handle to the vertical position.
The device switches off.
- Place the device on the parking station. Mark R
ATTENTION
Dirty water
The device can be used for its intended purpose.
It is recommended to use the device only for its intended purpose.
- Clean the device (see the chapter on cleaning the device).
Storing the device
WARNING
Batteries / battery pack
If the device is stored with batteries / battery pack inside, it may cause an unpleasant odor.
Before storing the device, completely remove the batteries from the battery pack and the device.
Using the brush, clean the battery contacts and the parts of the device with the brush from the battery compartment. Let the cleaned parts dry in the air, for example, on the protrusion of the brush head. Do not place the brush in the charger while it is wet.
1. Let the battery pack for the device dry before inserting it into the device. 2. Place the device on the charging station. Figure R 3. If necessary, clean the roller (see the chapter on cleaning the roller). 4. For drying, insert the wet roller onto the protrusion of the brush head. Figure S 5. Remove the battery pack (see the chapter on removing the battery pack). 6. Charge the battery pack, see the instructions for use and safety instructions for the battery pack and the charger. 7. Store the device in a dry place. Figure U
Removing the battery pack
Instructions
During breaks in work, remove the battery from the device and protect it from unintended use.
- Set the device handle in a vertical position. The device switches off.
- Press the battery pack release button and pull the battery pack out of the device. Figure V
Dorna Ta texhiue 06cnyroByBaHHa
3araJIbHi Bka3iBKn
△NONEPEDXKEHH
He6e3neka 8unaadkooeo 3anycky npucmpoio He6e3neka mpa8myeaHn HImaume akymyamopHu bnoK neped buKohannm 6yob-kuux po6im Ha npucmpoi.
OuHnEHH npncTpoU
YBAGA
3aunu6pydy a6o MuuHux 3ac06ie
Bak dny bpydnoi bodu i fimbmp dny bocccn Heobxidho pezynapno ouuamu, uo6 bpyd He 3bupaec e 6aky afo fimbpi dny bocccn. Raio npucmpiu He ouuamu nicna 3aeepuhenpobomu, yacmuku bpydy mojymb 3acmumu fimbnp dny bocccn i uinhu.Kpim m02o, hakonuueHHy bpydy i bakmepiu MOKe cmamu npuunHO HnpuemHOzanaxye npucmpoi. He mpumamu HuxHIO yacmuhy ibpauiHOi zolOBku nID bodo.
- YcTaHOBnT pyKy npCtpo y BepTKKaIbHe noJoxKeHHa. PpNCTpiBnMnKaeTbcra.
- Cnpoxhntn ouhctntn 6ak Jla 6pyho Boi (INB. rnaBy OuuueHHa Ka dpa 6pyHOI bou).
- Hatncnyk HONky po36nkyBaHHa pinbtpa nBolocra. Φinbtpdna BOLOCBAIDHyETbcra.
- 3Hrtn OuNCTnTn fInbTp dIra BONOCa (INB. IaBy OuyueHHa fInbmpa dIra BONOCa). MaJIOHOK L
- 3HATN OCHNTN BANK (INB. rnaBy OUuueHHaUNka). MaJIOHOK M
- Fill the tank with clean water only, and use only clean water.
- Wipe the outside of the appliance with a damp cloth.
Cleaning the dirty water tank
ATTENTION
Rinse the dirty water tank
Rinse the dirty water tank may need to be cleaned regularly.
Regularly clean the tank for dirty water. For information on the correct use of the dirty water tank, see the section on using the dirty water tank.
- Open and remove the lid of the dirty water tank by the handle.
- Then rinse the dirty water tank and lid with clean water. Note:
- In addition, the dirty water tank can be washed in a dishwasher.
Cleaning the filter
ATTENTION
Clean the filter of the appliance in the sink
Cleaning
Rinse the filter under running water after each use or when necessary.
Damage through the use of a copier for business or personal use of the sum
Damage to the microswitch. Do not use the copier for business purposes without the right machine. Do not put the roller in the sump.
Damage through an unclosed roller
The right machine may be damaged. Place the roller under the right side of the business and close the right machine in the business.
- Set the handle device to vertical position. The device switches off.
- Set the device to the parking stand. Figure R
- Press the release button of the white handle and remove the handle.
- Pull the roller by the rear handle. Figure M
- Put the roller under the current door. Wash in the washing machine at a temperature of max. 60°C. Figure O
- Clean the wire with a cloth. For drying, place the wire roller on the protrusion of the rotating head. Figure S
- Store the device dry and clean. Figure U
Cleaning the wire
The device can be used for the intended purpose.
It is recommended to clean the device after each use.
ATTENTION
The device
The device can be used for the intended purpose.
Regularly clean the filter with a dry cloth.
ATTENTION
The accessory filter must be washed before first use.
During washing, the edge may deform and not fit properly to the base. This will affect the filtering result.
The filter for hair is not intended for the machine, but for the hair dryer.
- Set the device handle in a vertical position. The device turns on.
- Place the device on the parking stand. Figure A
- Press the filter release button.
Figure B
The hair filter can be removed and emptied.
4. Insert the hair filter into the water inlet. 5. Remove the brush, nozzle, and comb from the filter.
Figure P
Figure Q
- Insert the hair filter into the selected head at an angle of 45° and then press it until it clicks. The hair filter must be initially locked in the device.
Figure T
Detergents and cleaning agents
CAUTION
Using unsuitable detergents and cleaning agents
Using unsuitable detergents and cleaning agents can damage the device and lead to malfunction.
Use only suitable KARCHER detergents.
Pay attention to correct dosing.
Dosing
If necessary, use KARCHER cleaning agents or detergents for cleaning.
Battery pack not included.
Install the battery block into the device.
The battery block needs to be charged.
Charging the battery block (see instructions for operation and safety instructions for the battery block and charging device).
The device does not work.
The battery block is installed in the device incorrectly.
Install the battery block into the battery block slot on the device until it clicks. Check the battery charge level. Charge the battery block, see the charging chapter.
The battery block or charging device is faulty.
Replace the battery block or charging device, see the chapter on intended use. The device does not collect dust if there is no dust. - Dust in the dust container, see the chapter on emptying the container.
Installing the battery pack
- Press the battery pack into the device until it clicks into place.
Installing the water tank
- Install the water tank.
- Hold the water tank for cleaning and insert it into the opening of the main body.
Figure D
Installing the roller
- Remove the cap from the detergent drawer and empty the drawer. 2. Check the effect of the detergent on the outside of the drawer and wipe it off with a cloth (e.g., with water).
- The detergents may damage the surface of the drawer. Figure E
- Place the drawer back into the device.
Filling the fresh water reservoir
- Hold the fresh water reservoir for the drawer by the handle and pull it out at an angle of 45 degrees.
- Open the cap of the reservoir and fill it. Figure F
- Fill the fresh water reservoir with cold or lukewarm fresh water.
- If necessary, add a cleaning or descaling agent for KARCHER to the reservoir for pre-cleaning.
CAUTION
Over 20 minutes of use with cleaning or descaling agents may lead to poor cleaning results.
Pay attention to the manufacturer's instructions for the cleaning or descaling agents. 5. Close the cap of the reservoir. 6. Place the reservoir for pre-cleaning into the device. Figure G The reservoir for pre-cleaning must stand stable in the device.
Operation
Maintenance instructions
CAUTION
Humidity
Material damage due to improper use. Before using the device, check the water supply for leaks. Do not use the device without water, as this may cause damage. Improper use may allow water to penetrate and cause damage.
WARNING
Material damage
Material damage due to sharp, pointed, or sharp-edged objects.
The device must not be stored or used on hard surfaces or objects, as parts may be damaged by hot water and cause burns or damage.
Before starting work and before storing the device, remove
objects such as sharp stones, nails, glass, or parts that could cause damage from water.
Figure W
Note
To avoid damage to the device, use the device on a non-flammable surface, e.g., wood or plywood. Do not stand on one spot, but move. Follow the manufacturer's instructions and the device's instructions.
Note
Work backwards in the direction of the brush, so as not to leave marks from the bristles on the freshly cleaned floor.
Figure X
The cleaning of the floor is carried out by moving the device back and forth at a speed similar to that of a vacuum cleaner.
Note
Shake the bottle well before use at 60°C.
WARNING
Materials and tools for cleaning, if necessary
The device may be damaged.
Place the bottle in the holder for cleaning, adding additional cleaning agent to the container.
WARNING
Check the bottle for leaks before using with the device.
Cleaning the microorganism containers
Do not use the device when cleaning the container.
Do not place the bottle in the device.
Starting the work
WARNING
Uncontrolled operation
Cleaning the device and materials
After cleaning, place the device back in its place.
Ipbkme 3dpabo pukama maka, ye ypebmd ae ce deuxcu camocmormno.
BHIMAHNE
Henocmaen pe3ep6oap 3a npca unu omnaobyha boda
MamepuanHu zemu
Ipedu da 3anoHeme deuHocmme no noucmeahe, yepeme ce, ye pe3epoapb m 3a npca h oda e nben, a pe3epoapb m 3a omnaBHa oda e nocmaen e ypda.
1.ДрнHeTe pBkoXbATkataHa3aI.ФИграH YpeTcE BKNHOyBa.
2.ПиДВИЖBAIteуpeДHaNpeДиНА3aД,ДOKATO BAJIЯКТCEHABJAXHINDOCTaTbYHO.
PpOdbJxNtEnHocT Ha pa60Ta Ha akymyIaTopa
CBeToIOIObT Ha NODOBaTa rIaBa NOKa3Ba npOdbJnxNtENHOCCTTa Ha pa6ota Ha akymylnpaata 6aTePn:
- CbeToIIOoBt CBETn npn nbJHa npOdbJIxHTeNHOCT Ha pa60ta Ha akMyuPapaTa 6aTepe n npn octabaHa npOdbJIxHTeJHOCT Ha pa60ta ot 20%
- Ok. 4 MInHyTN npEiN 6aTepeRyTa da ce n3ToUzIN (20% JxNBOr Ha 6aTepeRyTa), CBeTOnIOJbT Mnra IN BaJIaIcHTe Ce 3aBbPtAT TpIKpaTHO B 6bp30 DBrXKeHne CbC CTapTInpaH e N cIIpaH e. Fnrypa I
I3npa3BaHe Ha pe3epBoapa 3a OTnabYHa BOda
- NocTaBete npbXkata Ha ypea BbB BeptnKaHa nO3nua. YpeBt ce n3KJIIOuBa.
- To drain the reservoir for dirty water: Remove the reservoir by holding it by the handle for gripping. Figure J. 3. Drain the reservoir for dirty water through the opening. For stubborn blockages, open the reservoir's dirty water cap from the side plate and empty it. Rinse the reservoir for dirty water with clean water. Figure K
- Install the reservoir for dirty water (see figure). Installation of the reservoir for dirty water.
Connecting to power supply
- Insert the plug into the socket in a vertical position. It will click into place.
- Place the device on the parking station. Figure R
WARNING
Dirty water tank
The dirty water tank may damage the device over time. It is recommended to clean the device thoroughly after each use. 3. Clean the device (see chapter Cleaning the device).
Cleaning the device
WARNING
Liquids, wet dirt
Charging the battery
Note
For prolonged periods of non-use, remove the battery from the device and store it in a dry place.
- Insert the plug into the socket in a vertical position. The device will click into place.
- Press the button to unlock the battery and remove the battery from the compartment. Figure V
Maintenance
General instructions
APPENDIX MAINTENANCE
Danger of improper storage of the device
Danger of starting
Before any work on the device, remove the battery.
Cleaning the device
WARNING
Residues from grass or cleaning agents
The grass container and the filter for dust must be cleaned regularly so that no grass remains in them. If the device is not cleaned after use, the grass residues can clog the dust filter and the openings. In addition, due to the accumulation of
grass and bacteria, an unpleasant odor can develop in the device.
Do not immerse the device in water.
- Place the device handle in a vertical position. The device switches off. 2. Empty and clean the grass container (see chapter Emptying the grass container).
- Press the button to unlock the filter for dust. The dust filter is released. 4. Remove and clean the dust filter (see chapter Cleaning the dust filter). Figure L 5. Remove and clean the roller (see chapter Cleaning the roller). Figure M
- If the waste water tank is full, empty and rinse the waste water tank. 7. Perform the required cleaning procedure on the body with a damp cloth.
Cleaning the waste water tank
WARNING
The cleaning agent can damage the device over time.
The cleaning agent can damage the device over time.
Clean the waste water tank.
Normal cleaning of the waste water tank: 1. Open the drain valve of the waste water tank through the side flap and empty it. 2. Rinse the waste water tank and the drain valve with clean water.
- Open the drain valve of the waste water tank through the side flap and empty it. 2. Rinse the waste water tank and the drain valve with clean water.
Figure N
- As an alternative, the waste water tank can be cleaned in the dishwasher.
Cleaning the roller
WARNING
Residues of cleaning agents can remain in the roller.
Formation of limescale
Remove the roller under running water after each use or clean it in the washing machine.
Do not place the tank with the heater during use.
Securing the microbiological tank
Do not use the heater when placing the tank.
Do not put the tank in the dryer.
WARNING
Material and technical data of the tank
The tank may be placed.
Place the tank in the washing machine, adding extra washing to the tank.
- Place the lid of the device in a vertical position.
The device is switched off.
- Place the device on the parking stand. Figure R
- Press the button for locking the tank cover.
- Develop the handle, lifting it for the grip for carrying. M
- Place the tank in the washing machine at max. temperature 60°C Figure O
- Clean the filter housing on the washing machine.
- Place the damp cloth on the top of the appliance head to dry. Figure 5
- Store the device in a dry place.
Cleaning the coffee filter
WARNING
The coffee grounds container
The draining is not optimal
The coffee filter is not correctly placed in the device.
- Place the coffee filter correctly in the device. Check the outlet. Replace the seal.
The water tank for draining
The reservoir for draining water is full. Empty the reservoir for dirty water, see Chapter Emptying the reservoir for dirty water.
The reservoir for draining water is not correctly placed in the device.
- Place the reservoir for dirty water correctly in the device. The reservoir for draining water must stand stably in the device. The coffee filter is not correctly placed in the device.
- Place the coffee filter correctly in the device. The reservoir for draining water is damaged. Contact the authorized service for customer service.
The safety switch during use has been activated. The parts on the back side of the reservoir for draining water are damaged or worn.
This service book is for customer service.
Technical data
| FC 2-4 | |
| Еléktriческо CBьрзванe | |
| Наржени | V |
| Тип зацита IPX4 | |
| Зацитен Клас на урEDA | III |
| Hоминална моцност на урEDA | W 28 |
| Hоминално наржени на akumулирашиа batepresa | V 3,6 - 3,7 |
| Мамс. Врееме на paбota при нально зараздени akumулирашиа batepresa (2,5 Ah) | min 20 |
Quantity of dust
| Обем на peзервоара за чиста | ml 200 |
| Ворадa | |
| Обем на peзервоара за мрьсна | ml 100 |
| Ворадa |
Body dimensions
Casing 167
Dryer 168
Dryer capacity 168
Form 168
Installation diagram 168
Diagram 169
Maintenance schedule 170
Operation 171
Troubleshooting 172
Technical specifications 172
Maximum load 173
Kärcher Battery Power 4 B — cordless battery charger. Charging instructions.
BP4V
The battery charger BP4V is intended for charging the battery.

BC4V
The battery is charged with the charging device intended for this purpose. Charge only with the specified charger.
Use the device only for cleaning surfaces that are resistant to water and cleaning agents. Do not clean surfaces that are sensitive to water, such as wood, textiles, or leather. Improper use may cause damage. Do not use the device on surfaces that are sensitive to water, such as wood, textiles, or leather.
3.6
Protect the charger

Do not immerse the device in water. Do not operate the charger in a damp environment.

Electrical and electronic devices must be disposed of separately from household waste, in accordance with local regulations.
Do not dispose of the device, batteries, or rechargeable batteries in household waste. Dispose of them properly.
The device must not be disposed of with household waste. It can be handed over to a collection point for recycling.
Directives on waste electrical and electronic equipment (WEEE)
Information on the disposal of electrical and electronic devices can be found at: www.kaercher.de/REACH
Accessories and spare parts
Technical safety instructions for the device are provided in the operating instructions. Follow them carefully to ensure safe and proper use of the device.
For information about accessories and spare parts, visit our website www.kaercher.com.
Safety instructions
Read the safety instructions before using the device. Follow the safety instructions to avoid danger. Keep the instructions for future reference.
If the device is damaged or not working properly, contact your dealer.
Accessories
Only use original accessories and spare parts supplied by the manufacturer. If the material or workmanship is found to be defective, the accessories will be repaired or replaced free of charge. If you have any questions about accessories, contact our customer service department.
Follow the instructions for use.
The following spare parts are available:
Example: 30190
3 pcs. of filter 1, 0 pcs. of filter 2, 9 pcs. of filter 3, 0 pcs. of filter 4, 0 pcs. of filter 5
The example 30190 means: 3 pcs. of filter 1, 0 pcs. of filter 2, 1 pcs. of filter 3, 9 pcs. of filter 4, 0 pcs. of filter 5.
Safety instructions for the device
Before starting the device, read the safety instructions in this manual. Follow the safety instructions for the device, the battery, and the charger. Do not use the device if it is damaged. Do not open the device or the battery. Do not charge the battery in a damp environment.
When using the device, keep it away from water and other liquids. Do not immerse the device in water. Use only the recommended accessories and spare parts.
- WARNING: Before using the device, read the operating instructions carefully and keep them for future reference.
WARNING
WARNING: Before using the device, read the operating instructions carefully and keep them for future reference.
CAUTION
- Before using the device, read the operating instructions carefully and keep them for future reference.
ATTENTION
- Material damage hazard: read the operating instructions carefully and keep them for future reference.
Electrical components
WARNING: Do not immerse the device in water.
Avoid contact with moving parts and sharp edges. If the device has a battery, keep it away from heat, fire, or direct sunlight.
WARNING: Keep the device away from children and people with reduced physical, sensory, or mental capabilities. The device contains electrical components, so do not use it near water.
CAUTION: Do not use the device for purposes other than those intended. When using the device, follow all safety instructions and warnings. If the device is damaged, do not use it.
ATTENTION: When using the KARCHER Battery Power 4 V, ensure that the battery is inserted correctly and that the contacts are clean.
Do not allow children to play with the device. Keep children away from the device and do not let them use it without supervision. Do not allow children to play with the device. Keep children away from the device and do not let them use it without supervision.
Do not use the device if it is damaged or has any defects. Check the device regularly and do not use it if it is damaged, especially if there are children or pets around. Do not use the device if it has any defects (such as cracks, chips, or broken parts). Do not use the device near water. Do not allow children or pets to use the device. It is possible that the device may be damaged if not used properly.
Do not use the device if you are under the influence of alcohol, drugs, or medication that may affect your ability to operate it, or if you are not familiar with the device.
- If you are physically, mentally, or otherwise impaired, or if you lack the knowledge and experience to use the device safely, do not use it. Keep the device out of reach of children and do not allow them to use it. Do not allow children to play with the device. Keep children away from the device and do not let them use it.
When the device is in use, keep children's hands away from it. Children should only use the device under the direct supervision of an adult. Do not use the device with wet hands or in damp conditions. Do not use the device near flammable materials (such as gasoline, solvents, or paint). Do not use the device in the presence of explosive gases.
Do not use the device if it has a damaged cord or plug, or if it is not working properly. Only use the device for its intended purpose and do not modify it. If the device is not working properly, there is a risk of electric shock or fire. If the device is used for other purposes, it may be damaged.
Do not use the device while it is in operation.
Keep the device away from water. Do not immerse it in water or any other liquid.
Do not immerse the device in water or other liquids. Do not use it near bathtubs, washbasins, or other containers filled with water. If the device falls into water, unplug it immediately and do not reach for it. Do not use the device with wet hands. Do not leave the device exposed to rain or moisture. Do not use the device in rooms with high humidity, such as bathrooms or saunas. Do not use the device to heat water or other liquids. Do not use the device with a damaged cord or plug. If the cord is damaged, have it replaced by the manufacturer or a qualified person. Do not operate the device if it has been dropped or damaged. Do not use the device at temperatures below 0°C. Do not store the device outdoors.
Safety instructions
CAUTION
Hot surface
The device has electrical parts.
Do not immerse the device in water
Do not use the device near water
Kurylyshyn Sipattamasy
Os hyckaynyk ta maksymalny komplektatsiyalayy krupnofasovannoy. Ynire kapan dektiim komplektatsiyinshysynda anyrmaldyktar 60 bala (Kantapany karap).
Sypetteri graddalyk betteren karanyz. Sypet A
1 Tyutka ② Taza su bagy ③ Wauka arnalgan suzgin bosatuy tupesi ④ Wauka arnalgan alnyatyn suzgi ⑤ Kural ttykasybny kyny alyu tupesi 6 Benze arnalgan bastpek ⑦ Akkumulyator khanatybny khabdasy 8 Akkumulyator kyzmet etu merzimindik DIOITY kersetkishi ⑨ Akkumulyator khanaby (KÄRCHER Battery Power 4 B) zaryad kurylysy (KARCHER Battery Power 4B) 11 * Duo khyldam zaryadtay kurylysy (KARCHER Battery Power 4 B) ⑫ Tazalau shetkesi
13 Embe ban tazartkysh bikke tazenerge arnalgan tazartkysh bikke 15 Turak tatu stantsiyasy 16 RM 536 tazalaytyn kuraly (30 m) 17*RM536 tazalaytyn kuraly (500 m) 18*RM537 tazalaytyn kuraly (30 m) 19 Tazartkysh bikkeshin saytauga arnalgan biktik 20 Tas suga arnalgan bak 21 Tazartkysh bikkeshin aluga arnalgan buryk kakpak
- kanau boyynsha
Ornatu
KypbInfbHbH TyTkacbH 6ekiriH3
- KypbInfby TyTKacbHbH XOFapfb6enirih cbipt etin OPHbHa TYCKeHWe KypaT TyTKacbHbH TemeHri XaftbHa caJIbHbI3.
- Heri3ri kypbnfblh6eKiTiH3.
- KypbInfb TyTkacbH Heri3r KypbInfbfa cbipt etin TipenreHwe caIbHb3. KypbInfb TyTKacbl KypbInfbfa 6epik 6ekiriny Kepek. Cypet B
Paindanahyra eHri3y
AkkymyTop JnHaftbH 3apdTay
- AkkymynapTop KINHaBbH 3apraTaNbI3 (akKymynapTop KINHaBbMeH 3apraTAY KypblfbcIHbN naJaAnaHy HcayJIbIKapbIH KHe Kayinci3ik HcckayIapbIH KapaHbI3).
AkkymyTop XnHaBbH caNbHbI3
- AkkyMnyTOp KInHaBih KpybIINbIaFbI aKkyMnyTOp KInHaBihYCTaBbIbHa opHbHa TYcKeHiH ce3reHWe 6acblb3. Cypet C
JaCy 6arH caIbHbI3
- KypbInfbHbXepeKoBbHb3.
- JIac cy 6aIH tyTKaHbIH ONbIFbIHAN yCTan, OHbeJeHRe apHaJIFaH bactNeKTiH 6aFBITTaFbIWBHaCaJIbIHbI3. Cypet D
Bilikweni 6ekity
- Byiipnik KaNaKTBH KyNtBn AH ay TyMecin 6acbIn, KaKaNaKTBaIbIHbI3.
- Binikwehi iwi KaftbHaftjXHe Kypblfdafti 6inikwe yctafbltih Tyc TaFahbHaaybHa (Mbicanbl, KyriHHen KyrnIHre) Ha3ap aydapbHb3.
- Install the device on a flat, stable surface. Figure
- The drain hose must be installed correctly.
Fill the water tank with water.
- Remove the water tank from the device and fill it with water up to the mark (45°).
- Open the drain valve and let the water drain out completely. Figure F
- If the water tank is not filled with water, fill it with water.
- If necessary, clean the water tank and the drain hose with a KARCHER cleaning agent.
CAUTION
Use only clean water or a mild cleaning agent for the drain hose.
It is possible to use a cleaning agent for the water tank. Pay attention to the instructions for the cleaning agent used for the drain hose.
- Close the drain valve.
- Install the water tank correctly.
Figure G
Safety instructions
Safety instructions for the device
ATTENTION
General
When installing the device, make sure that it is not placed in a place where it can be exposed to water.
Do not install the device near water, in a damp place, or where it may be splashed with water. Do not touch the device with wet hands.
ATTENTION
Safety instructions
Do not use the device in an explosive atmosphere.
The device must not be installed or used in places where it can be exposed to dripping or splashing water, and no objects filled with liquids should be placed on the device.
Do not place the device near heat sources, such as radiators, stoves, or other appliances that produce heat.
Figure 1
Cleaning
To clean the device, unplug it from the power source and wipe it with a dry cloth. Do not use liquid cleaners or aerosol sprays. Use a soft cloth to clean the device.
Hycay
KaHadaH cypminaeh eedehe i3ep KaMaybi yuiH ecikke kapau Kepi 6aBimma Kymbic XacaHbI3.
Cyper X
- EdeHdi Ta3apTy KpyblfblHb waHCOPfbuTaftbdaa KbldAmDbIkneH aJFa XKeHe apTKa XbIbXbIty apKbIbI kypri3inei.
Hycay
Tasaayobih OHmaJIb Hemuxecine KOJ KEMki3y ywiH, Kip Jyfbu MauuHada biikwehi anfaw kondaHap aIbHa 60°C memepamypada JybiHb3.
HA3AP AYdAPbIHbI
EbnikweHH 6ocaybHa 6aunahbcmbI MynikmiH 3aKbIMdaNybl
Kip Kjyfbu MauuHa 3aKbIMdaNybl MyMknH.
Einikuehi Kip mopbHa caNbIHb3 XHe Kip KxybIu MaunHara KocbIMwa Kip caNbIHb3.
HA3AP AYdAPbIHbI
Bilikwehi Mama Kymcapmkiwneh ma3aaydaH Hemece Kip Kenmpaiu KoandahydaH 3aKbIMdap Mukpofo6paHbIH 3aKbIMdaHybl
Kip Kfblu MaunuHa da maanraH Ke3de mama Kymcapkkiwmbi naaanaHb13.
Eiikuehi Kip Keinmpaiuke canMaHb3.
Xymbictbi 6acTay
ATTENTION
Batterie de secours
Instructions de sécurité importantes pour l'installation de la batterie de secours.
Installez la batterie conformément aux instructions pour éviter tout risque d'explosion.
ATTENTION
Risque d'explosion si la batterie est remplacée par un type incorrect.
Avant de jeter les piles usagées, vérifiez si elles sont de type alcalin ou si elles doivent être remplacées par un type spécifique.
- Tirez la languette. Figure 1
Batterie de secours.
- Après avoir retiré la languette, la batterie est activée et la languette peut être retirée.
Indicateurs de charge de la batterie
Les voyants LED indiquent le niveau de charge de la batterie :
- Lorsque la batterie est complètement chargée et que la batterie est déchargée à 20 %, les voyants LED s'allument. La batterie doit être rechargée pendant au moins 4 minutes (20 % de la batterie) lorsque les voyants LED s'allument et que l'alarme sonore retentit.
Figure 1
Bouton de réinitialisation
- Kypblfbl TyTkacbIH TIK KyIre KObIHbI3. Kypblfbl eWedi.
- lac cy 6ariHH KyynnbH awy TyImeCin 6acbin, TTKaHbIH OBIbIHHaH yCTan lac cy 6ariH taptbin WbifapblHb13. Cypet J
- JIac cy 6ariH caHbInay apKbInbI 6ocatbHbI3.KaTbI nactahynap 6oFAn KaFaDJa, 6yipnIK bCbIpMaHbI naDaBaBn IAC cy 6ariH KAKnaFBIn aWbHbI3 da, Iac cy 6ariH Ta3a Cymen WauBbHbI3.
Cyper K
- JIac cy 6ariH caJIbIHb3 (JIac cy 6a2iH caJIbIHb3 TaPaybIH KapaHb3).
Ta3apTy cybIKTBIFbIH TOITbIPbIB13
- Ta3a cy 6arih ToTbipbHb3 (Ta3a cy 6aizH monmbipbHb3 Tapayih KapaHb3).
HA3AP AYdAPbIHbI
Cydbih afbin kemyihe 6aunahbcmbI Mynikmin 3aKbIMdaHybl
3aKbIMday mayeKeJI
Jac cy 6aizin mazc cy 6aiz6oc 6onraH caubn khe nac cy 6aizin monbIn kemyine kon 6epmey yuih mazc cy 6aizin monmbipmac 6ypbH 6ocambn mypbHb3.
XymbictbI TOKTaTy
HA3AP AYdAPbIHbI
blrnan 6inikue
Ceimman edeHepdeh bInran 3anaandapbl Y3ak yMbic y3inicmepi ke3iHde bInran 6nikwemeH ceimman edeH xabihdapbHa 3aKbIM KenmipMey ywiH KypbInrBhlb mypaK cmaHuaRcBHa KOubHbI3.
- Kypblfbl TyTkacbiH TIK KYIre KOBIHbI3. Kypblfbl eWeDi.
- KypbIINfbHbI TypaK CtaHcNcBHa KObIHbI3. Cypet R
Xmbictbih aarkanybi
- Kypblfbl TyTkacbIH TIK KYIre KOHbHb3. Kypblfbl eWedeJI.
- KypbIINfbHbI TypaK CtaHcNcBHa KObIHbI3. Cypet R
HA3AP AYdAPbIHbI
Kambin KaJraH Kip
Kambl Kanrah Kip KypbInfbira 60eH HcycaH Kenmipyi MymkiH. p KOndaRaHaHHaH KeuiH KypbIrfbIHbI monbIFImeH ma3anay ycbihbinaobbl. 3. KypbInrblHbI Ta3aHaHbI3 (KypbInrblHbIma3aHaHbI3 TapaybiH KapaHbI3).
KypbIiFbIhblYcTay
HA3AP AYdAPbIHbI
Cyubikmbikmap/obimkbin kip
Eeep caikmay keiHde kypbIrfbida aI de cyubikmbik/ dbIMkbil kip bonca, 6yn uicmi nauda bonyiba anekenyi myMKIH.
KypbIINfblHbCaKmaHaN Ke3de myuCy MeH nac cy 6aizmOnbIrBImeH 6ocamblb3.
Tazapmy zemkacbIH kondaHbIn, meMeH2i bac KaKnArbHdaFbI wawka apHaHraH cy3eH waw neH nacmaHraH bennweKeMepdi anbHbI3.
Tazapmbunfah biniikwehi ayada, mbicanbl edehze aphanrah bacmuekemin 6uikmizihde kennmpiH3. blnran biikwehi keimipy ywiin xabik wkaqKa KoumhaB3.
- Boc nac cy 6aH Kypblfba caImac 6ypbH KeTIpiHi3.
- KypbIJIbIbHI TpyaK CTAHcIyCbIHa KOJIbIHbI3. Cypet R
- Binikwehi anbih3xhe kaxet 6oNca taanaHbi3 ( Binikwehi ma3anaHbi3 tapaybiH kappaHbi3).
- blnfan 6nikwehi kentipy yuih ehe re aphaflan 6actnektih 6niKTiriHe KoibIbI3. Cypet S
- AkkymyIaTOp KInHaBbIH KpybIJIbIaH WbIrApbIHbI3 (AkkymyIaMop KUHaBbIH WbIrApbIHbI3 TapaybIH kapaHbI3).
- AkkyMylTOp JNHaBbH 3apraTaHbI3, akKMyJrTOp JNHaBbMeH 3apraTay KypblfbcIbHbI NaJaDaNaHy HcKayJIbIKapbIH XeHe Kayinci3dik HcckaynapbH KapaHbI3.
- KypblfblHbI KypraK 6eJImepepe caKaHbI3. Cypet U
AkkymyIaTOp XHaftbH WbIfapbHbI3
Hycay
Y3aK ymbic yinicmepi yiwih akmynnapo Kuharbin Kypbnfbaah anbim macmaHbI3 XeHe OHbl pyKcamcbI3 naDanahydaH KopraHbI3. 1. Kypblfbl TyTkacbiH TIK KYIre KOJIbIbI3. Kypblfbl eWeDi.
- AkKMyJrTop JNHaftIaIaftI KJInbH aUy TyImeci H 6acbl, akKMyJrTop JNHaftIaH akKMyJrTop JNHaftIbH IYCTaftIbIHahTapTbI NbIFapbIHbI3. Cypet V
Kytim XaHe TexHnKaJIbIK KbI3MeT Kepcety
Xannbl Hcykaynap
△ECKEPTY
KypbIrfbHbI 6aukaycbI3da icKe KocbinybHa 6aunahbcmbKayin
We have purchased the koumiss accumulator battery.
Do not open the casing.
ATTENTION
If the device is not used for a long time, the batteries may leak.
If the device is not used for a long time, remove the batteries to prevent leakage. If the koumiss has been spilled, the device may be damaged by the spilled liquid. Therefore, it is necessary to clean the device and the batteries immediately.
Do not install the battery in the wrong polarity.
- Keep the device away from fire. Do not burn.
- Do not open the battery compartment (see instructions for opening the battery compartment).
- Press the button to open the battery compartment. Dispose of the battery compartment.
- Take out the battery and open it (see instructions for opening the battery). See figure M. If there is water in the battery, do not use it.
- Take out the batteries and open them (see instructions for opening the batteries). See figure M. If there is water in the battery, do not use it.
- Clean the contacts of the batteries with a dry cloth.
Open the battery compartment.
ATTENTION
Kambin Kanrah Kip KypbInfbira 66eH HkycaH Kenmipyi MYMKIH.
JaCy 6aizn yHemimazapmbin mypbihb3.
JaCy6arimeHxMbcicIteyTciniTypaJIbaknapaTTbl JaCy6a2H6ocambHb3TapaybHaHKapaHb3.
- Byiipnik bicbipmaHbI naiaJahbIn lac cy 6aHH KaKnafbIH aWbHb3 XHe aNbIHb3.
- JIac cy 6ari MeH KaKnaFbIH Ta3a CyMeH Ta3aJaHaB13. Cypert N
- Hemece, nac cy 6ariH bIDbc JyRbIa MaunHaJa Kyyf a 60anaB1.
Bijikwehi Ta3aJahbI3
HA3AP AYdAPbIHbI
Ebnikwedea m3anarbiu 3ammbiH KaandbikmapbI Keibkmehy
p KOJdaRaHaHHaH Keuih 6iikweHi arbHdbI cyMeH KyibHb3 HeMece 6iikweHi Kip KyfbuMawuhaada ma3anaHb3.
HA3AP AYdAPbIHbI
Bilikwehi Mama xymcapmkiuwen ma3anaydaHemece kip kenmipeiu KOndahydaH 3aKbIMdap
Mukpofo6paHbIH 3aKbIMdaHybl
Kip Kfblu Mauhada ma3aJraH Ke3de mama KymCapmkiUmbi naDanaH6aHbI3.
ATTENTION
The product must be used with the specified battery.
Use only the specified machine.
Use the product with the specified power and the specified machine.
- Do not use the device for any other purpose. The device is not a toy.
- Do not use the device near a staircase. See figure R
- Before cleaning the device, turn it off and remove the battery.
- Remove the battery from the device before cleaning. See figure M
- Clean the device with a damp cloth or use the device at a maximum temperature of 60°C. See figure O
- Clean the device with a soft, dry cloth.
- To store the device, place it in its original packaging. See figure S
- Do not expose the device to rain. See figure U
Cleaning the device
ATTENTION
Remaining oil
Remaining oil may contain harmful substances.
It is possible to clean the remaining oil with a cloth.
CAUTION
Remaining oil
Remaining oil may contain harmful substances.
Clean with a cloth dampened with detergent.
CAUTION
Before starting the machine, close the oil filler cap.
During the process, oil may splash out, so it is possible to get burned. This cleaning process should not be performed.
Before starting the machine, close the oil filler cap and clean with a dry cloth.
- Turn the oil cap to the right. The oil will drain.
- Move the oil drain hose to the right. See figure R
- The pump has been switched on. Figure L: The pump has been switched on and it is ready for operation.
- The pump has been switched on and the water is being drained from the bottom.
- The pump has been switched on, the water is being drained, and the pump is being cleaned together with the cleaning brush.
Figure P Figure Q
- The pump has been switched on and the water is being drained at a 45° angle, and then the pump is being turned off. The pump has been switched on and the water is being drained properly.
Figure T
Cleaning and maintenance tools
ATTENTION
Cleaning and maintenance tools for the pump
Cleaning and maintenance tools for the pump must be used correctly and must be kept in good condition.
Use only KARCHER cleaning tools. Other tools may damage the pump.
Cleaning
For cleaning, use only KARCHER cleaning tools or maintenance tools.
Before cleaning and maintenance, disconnect the pump from the power supply. To avoid damage, rinse the pump with clean water, then clean it with the cleaning or maintenance tools. To rinse, pour water into the pump and let it run. To do this, follow the instructions in the manual.
Maintenance
Pipe fittings
Nazar Audaryny
Possible to release the pipe
It is possible to close the pipe with the plug.
Do not release the pipe from the fitting while it is hot.
The pipe can be released from the fitting only after it has cooled down, in order to avoid damage to the fitting.
WARNING
Removal of the plug
In the fitting, the plug is secured with a locking ring and a sealing ring.
Use the plug carefully.
- Take clean water.
- Turn the plug 90° and remove the locking ring from the fitting.
Remove the plug from the fitting.
Note: When removing the plug, be careful not to damage the fitting.
Figure Y
- Bypass the 90° bend, press the button for the pump's operating mode, and set the pump's operating mode to the desired setting.
Accessories for the pump
The pump's accessories must be protected from falling into the hands of children. If the pump is not used or is not visible in this area, contact the service center.
Close the valve for 30 seconds and check the pressure.
The accumulator is empty.
Empty the accumulator and the pump.
Close the valve and check the pressure five times.
The accumulator is not filled.
- Fill the accumulator and connect it to the pump's accumulator connection.
The accumulator must be filled.
- Fill the accumulator (see the instructions for filling the accumulator and the safety instructions).
The pump is ready for operation.
The accumulator is not installed correctly.
- Install the accumulator correctly.
- Check the connection.
Accumulator charging time is complete.
- The accumulator is not charged, check the accumulator charging procedure.
The accumulator is not charging or the charging circuit is faulty.
- The accumulator is not charging or the charging circuit is faulty, check the maximum current consumption.
Faulty circuit
There is water in the water tank.
Fill the water tank with water, check the water level sensor.
The water tank is not properly installed.
Install the water tank correctly.
The water tank is leaking, the circuit is not possible or is damaged.
Check the circuit. The water tank is blocked by dirt, place it on a flat surface.
The water tank is not properly installed or the circuit is not possible.
- Install the water tank correctly.
Higher or lower.
- Lower it, lower it.
- Turn off the tap and disconnect the device.
Remove the filter
Remove the water tank.
- Remove the tank and check the suction hose.
Accessories and spare parts
Remove the first filter from the device.
Rinse the device with clean water at a maximum temperature of 60°C. Rinse the device. - Clean the device, check the device. Rinse the device with clean water, check the suction hose. Do not use cleaning agents or detergents. Only use KÄRCHER cleaning agents and care products. There are cleaning agents and care products for the device. Clean the device with clean water and cleaning agents. When using cleaning agents and care products, follow the instructions and safety data sheets.
Remove the cleaning agents and care products from the device.
Water filter maintenance
Do not operate the device without water.
- Fill the device with water.
Device switched off.
Switch off the device.
The device heats water
Water tank full. - Do not fill the water tank, check the water tank. Do not operate the device without water. - Fill the device with water. The water tank must be securely attached. Do not operate the device without water. - Fill the device with water. The water tank is closed. - Contact customer service if the device is damaged.
The pressure gauges are sealed or damaged.
- Notify the service center.
Technical specifications
FC2-4
Electric heater power
Voltage 3.6-3.7
Protection class IPX4
Protection class of the device III
Nominal power of the device 28 W
Nominal voltage of the battery 3.7 V
Maximum operating time with battery (2.5 hours)
| FC 2-4 | ||
| СынбIMьЛьК | ||
| Туши CBы CBы CBы CBы CBы CBы CBы CBы CBы CBы CBы CBы CBы CBы CBы CBы CBы CBы CBы CBы CBы CBы CBы CBы CBы CBы CBы CBы CBы CBы CBы CBы CBы CBы CBы CBы CBы CBы CBы CBы CBы CBы CBы CBы CBы CBы CBы CBы CBы CBы CB Ки CBы CBы CBы CBы CBы CBы CBы CBы CBы CBы CBы CBы CBы CBы CBы CBы CBы CBы CBы CBы CBы CBы CBы CBы CBы CBы CBы CBы CBы CBы CBы CBы CBы CBы CBы CBы CBы CBы CBы CBы CBы CBы CBы CBы CBы CBы CBы CBы CBы CB�CBы CBы CBы CBы CBы CBы CBы CBы CBы CBы CB Флшемеріmen等着имер | ||
| Салмавы (kepeк-жарakтарсыз Же He Ta3aJIaMbI KypaIncbI3) | kg | 2,2 |
| YЗыДыБы | mm | 220 |
| Ени | mm | 240 |
| Биikтiri | mm | 1220 |
Technical changes reserved.
| a. | a. | a. |
| a. | a. | a. |
| a. | a. | a. |
| a. | a. | a. |
| a. | a. | a. |
| a. | a. | a. |
| a. | a. | a. |
| a. | a. | a. |
| a. | a. | a. |
| a. | a. | a. |
Therefore, |x'| = 1/|x| * |r1^2 + r2^2 + r3^2| ≤ 3/4 |x|^2
__SUPPIMER__
ai = 1( 2π + 1) !( i = 0,1,2,... )
Therefore, the area of triangle OBC equals the area of triangle BOC, which equals the area of triangle COD plus the area of triangle BOC minus the area of triangle COD.
a2 > (a1 + 2) a0 + 2
(°45)
a. g. j 2
a>la|0gF
1 ② aolal ③ 4gLJ ⑤ 6auiU
a.b.c. ⑦
aJbll JxLED 8
(KARCHER Battery Power 4 V) a J I b t
(KARCHER Battery Power 4 V)
a ② aolal 0 aJU 4
J
gswll kwh gai jll aalll bghw alg d s s w jcb jil ll uul U 1u w jn .w aull aauoall 0d wngk ldoic Jlaon ng dn aalll ojf JUc jge aac giaodsswll slgall c n e pJllacUl aaaedn no gni laaill glaxwl all .gui all .aoe ellac ao xj gro gj gj jl alswll (aalll aadll le nglqll)
aollw|d|
JLg.0a aulllll aas Jgge Lg Jg Jg Jg Jg Jg Jg Jg Jg Jg Jg Jg Jg Jg Jg Jg Jg Jg Jg Jg Jg Jg Jg Jg Jg Jg Jg Jg Jg Jg Jg Jg Jg Jg Jg Jg Jg Jg Jg Jg Jg Jg Jg Jg Jg Jg Jg Jg Jg Jg Jg
{1,2,3} ∪ {2,3,4}
Register your product and benefit from many advantages.
www.kaercher.com/welcome


Rate your product and tell us your opinion.
www.kaercher.com/dealersearch

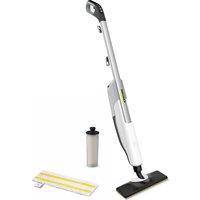
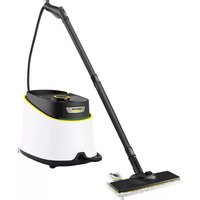
- INTENDED USE
- ENVIRONMENTAL PROTECTION
- NOTES ON THE CONTENT MATERIALS (REACH)
- ACCESSORIES AND SPARE PARTS
- SCOPE OF DELIVERY
- WARRANTY
- SAFETY INSTRUCTIONS
- HAZARD LEVELS
- DANGER
- WARNING
- CAUTION
- ATTENTION
- ELECTRICAL COMPONENTS
- SAFE HANDLING
- SYMBOLS ON THE DEVICE
- RISK OF ELECTRIC SHOCK
- DESCRIPTION OF THE UNIT
- FOR THE ILLUSTRATIONS, REFER TO THE GRAPHICS PAGE. ILLUSTRATION A
- INSTALLATION
- INSTALLING THE DEVICE HANDLE
- INITIAL STARTUP
- BATTERY PACK CHARGING
- FITTING THE BATTERY PACK
- FITTING THE WASTE WATER TANK
- INSTALLING THE ROLLER
- FILLING THE FRESH WATER TANK
- OPERATION
- GENERAL INSTRUCTIONS ON OPERATION
- MOISTURE
- MATERIAL DAMAGE
- ILLUSTRATION W
- NOTE
- ILLUSTRATION X
- STARTING WORK
- UNCONTROLLED MOTION
- BATTERY RUN TIME
- ILLUSTRATION I
- EMPTYING THE WASTE WATER TANK
- REFILLING WITH CLEANING FLUID
- INTERRUPTING OPERATION
- FINISHING OPERATION
- ILLUSTRATION R
- STORING THE DEVICE
- REMOVING THE BATTERY PACK
- CARE AND SERVICE
- GENERAL INSTRUCTIONS
- CLEANING THE DEVICE
- ILLUSTRATION L
- ILLUSTRATION M
- CLEANING THE WASTE WATER TANK
- ILLUSTRATION N
- CLEANING THE ROLLER
- ILLUSTRATION S
- CLEANING THE HAIR FILTER
- ILLUSTRATION P ILLUSTRATION Q
- CLEANING AND CARE AGENTS
- DISASSEMBLY
- REMOVING THE DEVICE HANDLE
- ILLUSTRATION Y
- TROUBLESHOOTING GUIDE
- THE LED FLASHES QUICKLY FOR 30S
- THE LED FLASHES FIVE TIMES IN QUICK SUCCESSION
- THE DEVICE DOES NOT WORK
- THE DEVICE DOES NOT ABSORB DIRT
- THE ROLLER IS TOO DRY
- POOR CLEANING RESULT
- THE WATER ABSORPTION IS NOT OPTIMAL
- THE DEVICE IS LOSING WASTE WATER
- THE DEVICE ENGAGES IN JOINTS WHEN USED
- TECHNICAL DATA
- FC
- ELECTRICAL CONNECTION
- FILLING QUANTITY
- DIMENSIONS AND WEIGHTS
- CONTENTS
- INSTALLING THE BATTERY PACK
- TROUBLESHOOTING
- THE LED FLASHES QUICKLY
- THE DEVICE DOES NOT PICK UP DIRT
- OPTIMAL WATER HARDNESS
- THE DEVICE IS LEAKING DIRTY WATER
- THE DEVICE IS LEAKING DURING USE
- TECHNICAL SPECIFICATIONS
- OXOPOHAIOBKINN
- BKA3IBKN 0DO KOMNOHEHTIB (REACH)
- PPNILADRA TA 3ANACHI DETANI
- DELIVERY SET
- SAFETY LEVELS
- SAFETY
- ATTENTION: DAMAGED DEVICE
- SAFETY REGARDING ELECTRIC SHOCK
- DESCRIPTION OF THE DEVICE
- FIGURES ARE SHOWN ON THE PAGES WITH ILLUSTRATIONS. FIGURE A
- ASSEMBLY
- ASSEMBLING THE HANDLE OF THE DEVICE
- COMMISSIONING
- CHARGING THE BATTERY PACK
- INSTALLING THE WATER TANK
- FILLING WITH CLEAN WATER
- INSTRUCTIONS FOR USE AND MAINTENANCE
- FIGURE
- INSTRUCTIONS
- INSERTION
- BEFORE OPERATION
- CHANGING THE VARIABLE
- IF THE TANK IS NOT INSTALLED CORRECTLY
- SMALL H
- BATTERY CHARGE LEVEL
- DRAINING THE DIRTY WATER TANK
- FIGURE K
- FILLING THE DETERGENT
- INTERRUPTION OF WORK
- LARGE DEBRIS
- END OF WORK
- DIRTY WATER
- BATTERIES / BATTERY PACK
- DORNA TA TEXHIUE 06CNYROBYBAHHA
- ARAJIBHI BKA3IBKN
- △NONEPEDXKEHH
- OUHNEHH NPNCTPOU
- YBAGA
- CLEANING THE DIRTY WATER TANK
- CLEANING THE FILTER
- CLEANING THE WIRE
- FIGURE B
- FIGURE P
- FIGURE Q
- FIGURE T
- DETERGENTS AND CLEANING AGENTS
- DOSING
- FIGURE D
- FILLING THE FRESH WATER RESERVOIR
- MAINTENANCE INSTRUCTIONS
- HUMIDITY
- FIGURE W
- FIGURE X
- STARTING THE WORK
- UNCONTROLLED OPERATION
- BHIMAHNE
- HENOCMAEN PE3EP6OAP 3A NPCA UNU OMNAOBYHA BODA
- PPODBJXNTENHOCT HA PA60TA HA AKYMYIATOPA
- I3NPA3BAHE HA PE3EPBOAPA 3A OTNABYHA BODA
- CONNECTING TO POWER SUPPLY
- DIRTY WATER TANK
- LIQUIDS, WET DIRT
- CHARGING THE BATTERY
- MAINTENANCE
- APPENDIX MAINTENANCE
- THE CLEANING AGENT CAN DAMAGE THE DEVICE OVER TIME
- FIGURE N
- CLEANING THE COFFEE FILTER
- THE COFFEE GROUNDS CONTAINER
- THE DRAINING IS NOT OPTIMAL
- THE WATER TANK FOR DRAINING
- MAXIMUM LOAD
- PROTECT THE CHARGER
- DIRECTIVES ON WASTE ELECTRICAL AND ELECTRONIC EQUIPMENT (WEEE)
- ACCESSORIES
- SAFETY INSTRUCTIONS FOR THE DEVICE
- KURYLYSHYN SIPATTAMASY
- ORNATU
- KYPBINFBHBH TYTKACBH 6EKIRIH
- PAINDANAHYRA EHRI3Y
- AKKYMYTOP JNHAFTBH 3APDTAY
- AKKYMYTOP XNHABBH CANBHBI
- JACY 6ARH CAIBHBI
- BILIKWENI 6EKITY
- FILL THE WATER TANK WITH WATER
- HYCAY
- CYPER X
- HA3AP AYDAPBIHBI
- XYMBICTBI 6ACTAY
- INDICATEURS DE CHARGE DE LA BATTERIE
- BOUTON DE RÉINITIALISATION
- TA3APTY CYBIKTBIFBIH TOITBIPBIB
- XYMBICTBI TOKTATY
- BLRNAN 6INIKUE
- XMBICTBIH AARKANYBI
- KAMBIN KAJRAH KIP
- KYPBIIFBIHBLYCTAY
- CYUBIKMBIKMAP/OBIMKBIN KIP
- AKKYMYIATOP XHAFTBH WBIFAPBHBI
- KYTIM XAHE TEXHNKAJIBIK KBI3MET KEPCETY
- XANNBL HCYKAYNAP
- △ECKEPTY
- KYPBIRFBHBI 6AUKAYCBI3DA ICKE KOCBINYBHA 6AUNAHBCMBKAYIN
- DO NOT OPEN THE CASING
- IF THE DEVICE IS NOT USED FOR A LONG TIME, THE BATTERIES MAY LEAK
- OPEN THE BATTERY COMPARTMENT
- BIJIKWEHI TA3AJAHBI
- FIGURE P FIGURE Q
- CLEANING AND MAINTENANCE TOOLS
- CLEANING
- PIPE FITTINGS
- NAZAR AUDARYNY
- REMOVAL OF THE PLUG
- FIGURE Y
- ACCESSORIES FOR THE PUMP
- CLOSE THE VALVE FOR 30 SECONDS AND CHECK THE PRESSURE
- CLOSE THE VALVE AND CHECK THE PRESSURE FIVE TIMES
- THE PUMP IS READY FOR OPERATION
- FAULTY CIRCUIT
- REMOVE THE FILTER
- WATER FILTER MAINTENANCE
- THE DEVICE HEATS WATER
- ELECTRIC HEATER POWER
- THEREFORE, |X'| = 1/|X| * |R1^2 + R2^2 + R3^2| ≤ 3/4 |X
- J
- AOLLW|D
- {1,2,3} ∪ {2,3,4}
Brand : Kärcher
Model : FC 24
Category : Steam cleaner