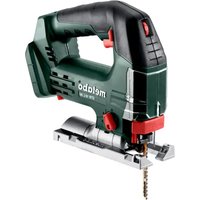
STB 18 LT 130 BL - Saw METABO - Free user manual and instructions
Find the device manual for free STB 18 LT 130 BL METABO in PDF.
| Technical features | METABO STB 18 LT 130 BL cordless circular saw, brushless motor, 18V voltage, 130 mm blade diameter, no-load speed 5000 rpm. |
|---|---|
| Usage | Ideal for cutting wood, panels, and similar materials, with a cutting capacity of 45 mm at 90° and 30 mm at 45°. |
| Maintenance and repair | Regularly check the condition of the blade and clean it. Replace the blade if it is worn. Check the protection system and battery operation. |
| Safety | Use safety glasses and gloves. Ensure the blade is properly installed and the safety device is in place before use. |
| General information | Lightweight for easy handling, compatible with METABO 18V range batteries. Manufacturer's warranty of 3 years. |
Frequently Asked Questions - STB 18 LT 130 BL METABO
User questions about STB 18 LT 130 BL METABO
0 question about this device. Answer the ones you know or ask your own.
Ask a new question about this device
Download the instructions for your Saw in PDF format for free! Find your manual STB 18 LT 130 BL - METABO and take your electronic device back in hand. On this page are published all the documents necessary for the use of your device. STB 18 LT 130 BL by METABO.
USER MANUAL STB 18 LT 130 BL METABO
Original instructions
1. Declaration of Conformity
We, being solely responsible, hereby declare that these jig saws, identified by type and serial number 1), meet all relevant requirements of directives 2) and standards 3). Technical documents for 4) - see page 3.
For UK only:
UK We as manufacturer and authorized person to CA compile the technical file, see *4) on page 3, hereby declare under sole responsibility that these jig saws, identified by type and serial number *1) on page 3, fulfill all relevant provisions of following UK Regulations S.I. 2016/1091, S.I. 2008/1597, S.I. 2012/3032 and Designated Standards see *3) on page 3.
2. Specified Conditions of Use
The machine is suitable for sawing non-ferrous metals and sheet steel, wood and similar materials, plastics and similar materials. Any other use is not permitted.
The user bears sole responsibility for any damage caused by inappropriate use.
Generally accepted accident prevention regulations and the enclosed safety information must be observed.
3. General Safety Information

For your own protection and for the protection of your power tool, pay attention to all parts of the text that are marked with this symbol!

WARNING - Read the operating instructions to reduce the risk of injury.

WARNING - Read all safety warnings, instructions, illustrations and
specifications provided with this power tool. Failure to follow all instructions listed below may result in electric shock, fire and/or serious injury.
Save all warnings and instructions for future reference.
Always include these documents when passing on your power tool.
4. Special Safety Instructions
Hold the power tool by insulated gripping surfaces, when performing an operation where the cutting accessory may contact hidden wiring. Cutting accessory contacting a "live" wire may make exposed metal parts of the power tool "live" and could give the operator an electric shock.
Use clamps or another practical way to secure and support the workpiece to a stable platform. Holding the work by your hand or against the body leaves it unstable and may lead to loss of control.
Ensure that the place where you wish to work is free of power cables, gas lines or water pipes (e.g. check using a metal detector).
Do not try to saw extremely small workpieces.
When sawing, the footplate must make secure contact with the workpiece.
When interrupting a cut for any reason, release the trigger and hold the saw motionless in the material until the saw blade comes to a complete stop. Never attempt to remove the saw from the workpiece while the saw blade is in motion or kickback may occur.
Do not switch the machine on while the saw blade is touching the workpiece. Let the saw blade reach full speed before making a cut.
When restarting a saw in the workpiece, centre the saw blade in the kerf so that the saw teeth are not engaged into the material. If the saw blade seizes, it may kickback from the workpiece when the saw is restarted.
Keep hands well away from the sawing area and the saw blade. Do not reach underneath the workpiece.
Remove chips and similar material only with the machine at a standstill.
Danger of injury due to the sharp jigsaw blade. After stopping work, the jigsaw blade may still be hot. Wear protective gloves.
Remove the battery pack from the machine before making any adjustments, changing tools, maintaining or cleaning.
Before fitting the battery pack, make sure that the machine is switched off.
Remove the battery pack from the machine when not in use.
LED light: do not observe the LED radiation directly with optical instruments.
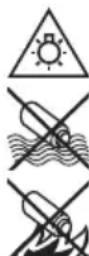
CAUTION Do not stare at operating lamp.
Protect battery packs from water and moisture!
Do not expose battery packs to fire!
Do not use faulty or deformed battery packs! Do not open battery packs!
Do not touch or short circuit battery pack contacts!
A slightly acidic, flammable fluid may leak from defective Li-lon battery packs!

If battery fluid leaks out and comes into contact with your skin, rinse immediately with plenty of water. If battery fluid leaks out comes into contact with your eyes, wash them clean water and seek medical attention.
If the machine is defective, remove the battery pack from the machine.
Reducing dust exposure:
WARNING - Some dust created by power sanding, sawing, grinding, drilling, and other construction activities contains chemicals known to cause cancer, birth defects or other reproductive harm. Some examples of these chemicals are:
- Lead from lead-based paints,
- crystalline silica from bricks and cement and other masonry products, and
- arsenic and chromium from chemically treated lumber.
Your risk from these exposures varies, depending on how often you do this type of work. To reduce your exposure to these chemicals, work in a well-ventilated area, and work with approved safety equipment, such as those dust masks that are specially designed to filter out microscopic particles.
This also applies to dust from other materials, such as some timber types (like oak or beech dust), metals, asbestos. Other known diseases are e.g. allergic reactions, respiratory diseases. Do not let dust enter the body.
Observe the relevant guidelines and national regulations for your material, staff, application and place of application (e.g. occupational health and safety regulations, disposal).
Collect the particles generated at the source, avoid deposits in the surrounding area.
Use suitable accessories for special work. In this way, fewer particles enter the environment in an uncontrolled manner.
Use a suitable extraction unit.
Reduce dust exposure with the following measures:
- do not direct the escaping particles and the exhaust air stream towards yourself or nearby persons or towards dust deposits,
- use an extraction unit and/or an air purifier,
- ensure good ventilation of the workplace and keep it clean using a vacuum cleaner. Sweeping or blowing stirs up dust.
- Vacuum or wash protective clothing. Do not blow, beat or brush protective gear.
Transport of Li-ion battery packs:
The shipping of Li-lon battery packs is subject to laws related to the carriage of hazardous goods (UN 3480 and UN 3481). Inform yourself of the currently valid specifications when shipping Li-lon battery packs. If necessary, consult your freight forwarder. Certified packaging is available from Metabo.
- Only send the battery pack if the housing is intact and no fluid is leaking. Remove the battery pack from the machine for sending. Prevent the contacts from short-circuiting (e.g. by protecting them with adhesive tape).
5. Overview
See page 2. The illustrations are regarded as exemplary for all devices.
1 Clamping lever for securing the saw blade
2 Saw blade clamping fixture
3 Saw blade support roller
4 Saw blade
5 Footplate
6 Anti-splintering footplate insert*
7 Protective rod for preventing unintentional contact with the saw blade
8 Protective cap
9 Adjustment lever for pendulum motion
10 Button for switching the automatically activated LED light off and on *
11 Setting wheel for speed adjustment
12 Lock button (continuous operation)
13 Trigger switch *
14 Slide switch
15 Handle
16 Battery pack release button
17 Capacity indicator button *
18 Capacity and signal indicator *
19 Battery pack *
20 Extractor connection piece *
21 Wrench depot
22 Hexagon spanner
23 Curved support plate indicating preset cutting angle
24 Screw for adjusting the footplate
depending on equipment/not in scope of delivery / depending on the model
6. Initial Operation
6.1 Battery pack
Charge the battery pack (19) before use.
Recharge the battery pack if performance diminishes.
Instructions on charging the battery pack can be found in the operating instructions of the Metabo charger.
Battery packs have a capacity and signal indicator (18) (depends on design variant):
- Press the button (17), the LEDs indicate the charge level.
- The battery pack is almost empty and must be recharged if one LED is flashing.
6.2 Removing and inserting the battery pack Removing:
Press the battery pack release (16) button and remove the battery pack (19).
Inserting:
Slide in the battery pack (19) until it engages.
6.3 Fitting the anti-splintering footplate insert
Danger of injury due to the sharp jigsaw blade. Remove the saw blade before fitting the anti-splintering footplate insert (6).
Turn the machine over so that the footplate faces upwards. Insert the anti-splintering footplate from the front, while noting the following 2 items:
- The smooth side of the footplate points upward.
- The slot is facing to the rear (towards the battery pack).
ENGLISHen
If you wish to work with the protective plate attached (see chapter Accessories 9.), insert the anti-splintering footplate insert in the protective plate.
6.4 Inserting the saw blade
Danger of injury due to the sharp jigsaw blade. After stopping work, the jigsaw blade may still be hot. Wear protective gloves.
Use a saw blade that is suitable for the material being sawn.
- Turn the clamping lever (1) forwards to the stop and hold in place.
- Insert the saw blade (4) up to the stop. Ensure that the saw teeth are facing forwards and the blade is seated correctly in the groove on the saw blade support roller (3).
- Release the clamping lever (1). (It returns to its initial position by itself. The saw blade is now securely tightened).
6.5 Removing the saw blade

Caution: Be careful not to point the jigsaw at anyone when removing it.
- Turn the clamping lever (1) forward until the stop; the saw blade is ejected as a result of spring force.
6.6 Sawing with dust extraction
- Fit the extractor connection piece (20). Connect a suitable extraction device.
- For optimum dust extraction performance, push the protective cap (8) downward.
6.7 Sawing without dust extraction
- Work with the protective cap (8) pushed up.
6.8 Diagonal cuts
Push the protective cap (8) upwards, remove the anti-splintering footplate (6). These parts cannot be used for diagonal cuts.
- Slacken the screw (24).
- Slid the footplate (5) forwards slightly and turn.
- Subsequently, push the footplate (5) back again to the back and turn until it stops at one of the 45^ stops.
Adjust to different angles using an angle gage.
- Tighten the screw (24) again.
7.Use
7.1 Adjusting the pendulum motion
Set the required pendulum motion using the adjustment lever (9).
Position "0" = pendulum motion is switched off
Position "III" = maximum pendulum motion See page 3 for recommend setting values.
The best way to determine the ideal setting is through a practical trial.
7.2 Setting maximum speed
Set the machine to maximum speed using the setting wheel (11). This can also be done during operation.
See page 3 for recommend setting values.
The best way to determine the ideal setting is through a practical trial.
7.3 Switching On/Off, continuous operation (ST 18 L 90)
Avoid inadvertent starts: always switch the tool off when the plug is removed from the mains socket or if there has been a power cut.
In continuous operation, the machine continues running if it is forced out of your hands. Therefore, always hold the machine with both hands using the handle provided, stand securely and concentrate.
Switching on: push the slide switch (14) forwards. For continuous operation, tilt it downwards until it engages.
Switching off: press the rear end of the slide switch (14) and release it.
7.4 Switching On/Off, continuous operation (STB 18 L 90)
Switching on: Press the trigger switch (13).
Switching off: Release trigger switch (13).
Continuous activation: With the trigger (13) pressed, push in the locking button (12) and release the trigger (13). Press and release the trigger (13) again to switch off.
In continuous operation, the machine continues running if it is forced out of your hands. Therefore, always hold the machine with both hands using the handles provided, stand securely and concentrate.
8. Cleaning, Maintenance
Remove the battery pack from the machine before making any adjustments, changing tools, maintaining or cleaning.
Clean the machine regularly. This includes vacuum cleaning the ventilation louvres on the motor.
Clean the saw blade clamping fixture (2) regularly and thoroughly by blowing with compressed air. If required, clean the openings behind the saw blade support roller (3) and the extraction nozzles (16).
Apply a drop of oil to the saw blade support roller (3) from time to time.
9. Accessories
Use only original Metabo or CAS (Cordless Alliance System) battery packs and accessories.
Use only accessories that fulfil the requirements and specifications listed in these operating instructions.
Fit accessories securely. If the machine is operated in a holder: secure the machine well. Loss of control can cause personal injury.
See page 4.
A Circular-cutting and parallel guide
B Protective plate (prevents workpieces with sensitive surfaces from becoming scratched)
C Chargers
D Battery packs with different capacities. Buy battery packs only with voltage suitable for your power tool.
9.1 Attaching the circular-cutting and parallel guide
For sawing circles (dia. 100 - 360 mm) and making cuts parallel with edges (max. 210 mm).
Attach circular guide (see Fig. 1)
- Slide the rod on the circular-cutting and parallel guide sideways into the footplate (centre point (c) faces downwards).
- Set the desired radius (d).
- Tighten screw (b).
- Turn the button in such a way that the rear centre point (c) in direction of sawing is extended. Insert it into the centre of the circle.
Attach parallel guide (see Fig. II)
- Slide the rod on the circular cutting and parallel guide sideways into the footplate (the centre point (c) faces upwards).
- Set the dimension (e)
- Tighten screw (b).
In order to minimise saw blade drifting, we recommend using extra-thick saw blades: 623694000, 623679000, 623685000
See www.metabo.com or the catalogue for a complete range of accessories.
10. Repairs

Repairs to electrical tools must only be carried out by qualified electricians!
Contact your local Metabo representative if you have Metabo power tools requiring repairs. For addresses see www.metabo.com.
You can download a list of spare parts from www.metabo.com.
11. Environmental Protection
Observe national regulations on environmentally compatible disposal and on the recycling of disused machines, packaging and accessories.
Packaging materials must be disposed of according to their labelling in accordance with municipal guidelines. Further information can be found at www.metabo.com in the "Service" section.
Battery packs may not be disposed of with regular waste. Return faulty or used battery packs to your Metabo dealer!
Do not allow battery packs to come into contact with water!
Only for EU countries: never dispose of power tools in your household waste! According to European Directive 2012/19/EU on Waste from Electric and Electronic Equipment and implementation in national law, used power tools must be collected separately and recycled in an environmentally-friendly manner.
Discharge the battery pack in the power tool before disposal. Prevent the contacts from short-circuiting (e.g. by protecting them with adhesive tape).
12. Technical Specifications
Explanatory notes regarding the specifications on page 3.
Subject to change in accordance with technical progress.
U = Voltage of battery pack
T1 =Maximum material thickness in wood T2 =Maximum material thickness in nonferrous metals
T_3 =Maximum material thickness in sheet steel
n0 =Stroke rate at idle speed
P1 =Rated input power
P2 =Power output
m = Weight with smallest battery pack
Measured values determined in conformity with EN 62841.
Permitted ambient temperature during operation: -20°C to 50°C (limited performance with temperatures below 0°C). Permitted ambient temperature for storage: 0°C to 30°C
--- direct current
The technical specifications quoted are subject to tolerances (in compliance with relevant valid standards).
A Emission values
These values make it possible to assess the emissions from the power tool and to compare different power tools. The actual load may be higher or lower depending on operating conditions, the condition of the power tool or the accessories used. Please allow for breaks and periods when the load is lower for assessment purposes. Arrange protective measures for the user, such as organisational measures based on the adjusted estimates.
Vibration total value (vector sum of three directions) determined in accordance with EN 62841:
a_h,CM = Vibration emission value (Sawing sheet metal)
a_h,CW = Vibration emission value (Sawing wood)
K_h, = Uncertainty (vibration)
Typical A-effective perceived sound levels:
LpA =Sound pressure level LWA =Acoustic power level
K_pA , K_WA = Uncertainty
During operation the noise level can exceed 80 dB(A).
! Wear ear protectors!
FRANÇAISfr
Notice originale
Lage III = maximal pending
Transport of Li-ion battery:
14 Suplepevoic diaKoTnc
15 Xερολαβη
He BkIIOuHaTe n He BBIKHOaHTe 3JIeKTPoHnHCTpyMeHT, NOKa NNbHOE NOJOTHO KOHTaKTpyET C 3aROTOBKO. NepeD HauaIOM NNLEHINr DOxKdITecb, NOKa NNbHOE NOJOTHO DOCTnHET paOoye YacTObY XoIDOB.
Pn noBTOpHOM 3anycke nIbI, KOTopa HaxoNDTCB 3aROTOBKe, OTcEHtppyuTe nIbHOe nOLOTHOB IN pONJIe I npOBepbTe, HeT JN 3aueJIeHHy 3y6BeB B 3aROTOBKe. Pn 3aUeMJIeHHN NIIbHOrO NOLOTHA Pn IOBTOPHOM 3anycke 3JeHTPOIo63nKa NIOLOTHO MoJET CTAb PnUnHO OToaHi.
He npnbjnxkaepepykK 30He nHHeNn Hne npnkacaTecb K paobTaIOUeMy nHbHomy noIoTHy. He depKHTe 3arotOBky CHN3y.
YdaJIyTe OnilKn I npRoM MycOp ToIbKO nOcNe PONHO OCTaHOBKn IHCTpyMeHTa.
OnachocTb TpaMbbl OCTpbIM NINlbHbIM NOJOTHM. Pocle pa60Tb IINlbHOe NOJOTHO MOKeT 6bITb OueHb ropqHm. HcnoIb3yIte 3aUHTBHe nepuATKn.
I3BLeKaIe aKHyMylTOpHbI 6LoK I3
INCTpyMeHTa nepeJ KaJDoJ peylnpOBKO,
pepeoHaueHHeM, TeXo6cLyJKNBaHNem nn
OuHCTkoJ.
Y6eINTEcB TOM, YTO npu yCTaHOBKe aKKMyJrTOPHORO 6LOKa INHCTpyMeHT BbIKIOUeH.
EcnBbHe hCnOJIb3yeTe HNCTpyMeHT, n3BJIeKNTe N3 HeRo aKHymyJIaTOpHbI 6JOK.
CBeToOnoHna lamna: He cmOtpnTe npraMo Ha CBeToOnoHbI lyu Chepe3 ONTnueckne npn6Opbl.
BHHMAHNE! He cmoTpnte Ha ropayu noamny.
PnMnte Mepbl no 3aunTe aKMyJrTOpHOro 6Joka OT nonaHaHnBlaI!
He noBepraTe aKkymyIaTophie 6IOKn BO3DeIcTBnIO OTkpblTOrO OrH!
He nCnoJb3yIte DeeKTHbIe nn
DeoPmnpObaHHbIe aKKMyJIaTOpHbIe 6LoKn!
He BcKpbIbAitE aKKMyJIaTOpHbIe 6LoKn!
He KacaIteCb KOHTaKTob aKKMyJIaTOpHOrO 6LoKa
n He 3aMbIkaIte Hx HaKOpOTko!

I3 HeNCnpaBHOrO IHTN-NOHORO
akHyMylTOpHOrO 6L0Ka MoKcET BbITEKaTb
Cna6oknclra Tropouar KndKocTb!

Ecnn 3neKtpoHn npOInc n nonaHa KOxy, HEmeDHeHNO npOMoTe 3TOT yactOK 60JIbWIM KOnIyecTBOM BObl. B cIyuae
nonaHaHna 3JeKtpoJNTa B rIa3a npomOnTe nx YnCTO BODON CPOUHO o6paTNTecb K BpaCy!
B clyuae noIOMK MaunHb n3BneKeTe n3 Hee aKHyMylrTophbl 6Jok.
CHINHEHNEIbIeBOHarpy3KN

PNEyPExHEnE.
606pa3OBaBwAraBpe3yIbTaTe WlnΦOBHn HaKaDaUHO BymarO, paCnINIBaHn, WlnΦOBKn, CBepHeNn I Dpyrnx BnIOB pa6OT, MoKET CODepKaTb XmMueeCKne BeIeCTBa, O KOTOpbIX N3BeCTHO, YTO OHN Bbl3bIbAHT paK, BPOXKeHHbIe DeΦeKTbI INn Dpyrne NOBpeKDeHnR pePnoDyKTHBHO CnCTembl. PnpMepbI TaHX XmMueeCKNX BeIeCTB:
-CBnHeu B KpaChe C CoepKaHnem CBnHua;
-MINHepaBHaNbIbOTCTponTeNbHOroKnpnua, cEmeHTaNdpyRnxBeuecTB KnpnHOnKlaAKn;
-MbIbBnK IN XpOM N3 XmMnueckn Ocbpa6oTaHHOn DpeBeCInHbl.
CTeneHpNcKa3aBnCnTOTTO,KaKcaCTOBbI BbINONHReTe 3OT BnDpa6oT. YTO6bl yMeHbWntb BO3DeiCTBnE XIMNueCKNX BeSeCTB,pa6oTaIe B NOMEuEHnX C DoCTaTOUHOBBeHTnJIaCneN I NCNOJb3OBAHnEM pa3peWeHHbIX CpeIcTB INHbNDyAJIbHOH 3aUNtBl,HaNPmEp,C pecnnpaTopamn,pa3pa6oTaHHbIMN CneuaNbHO DnFInbTpaunM MKNPOCHOnNueCKNX qactNu.
3TO TAKHe KacaetcNbIINOT DpyrHx MaTePnaIOB, HAnpImep, HeKOTOpbX BnO8 DpeBeCnHbI (DpeBeChnMbIb dy6a nn 6yHa), MetaIIa, ac6ecTa. DpyrHe n3BeCThble 3a6oJIeBaHnra — 3TO, HAnpImep, aJIneprnueckne peakuH, 3a6oJIeBaHnra DbIXaTeNbHbIX nyTei. He DonyckaTe nonaDaHnra nbIIN BHyTp bopraHn3Ma.
Heo6xOIMO CO6IIOdaTb Tpe6OBaHnA DnpeKTHB, DeiCTByIOUxN B OTHOWeHN MaTePnaIaOB, nepcoHaJa, BapNaHTOB npImeHnA MeCT npoBeHnpa6OT, a TaKHe HaOnoHaJIbHbIe npedncaHn (HaNPmEp, nIoJKeHnO6 OxpAne Tpyda, npabnla yTnIn3aun).
OBeCneBte ydaJIeHnE o6pa3yUoIcxr qactn, He OOnyCKaIte 6pa3OBAHnR OTIOKeHn B OKpyKaIOUeM npocTpaHCTBe.
IJIa CneuaJIbHbIX pa6OT HcNoJIb3yIte IOxOJaUIO OChAcTKy. 3TO IO3BOJNT COKpaTHTb KOJIueCTBO YaactN, HeKOHrPoJIpyeMo Bbl6paCbIbAemBIX B OKpyKaIOU cyIy.
IcnoJb3yIte nOxOJaue yCTpoiCTBO ydaJIeHn Ibln.
ДяуMeHbSeHЯ nbIeBOH Harpy3KN DeJaNTe CJeDyUoOee:
-HeHaIpaBIAIte BbIbpaCbIBaEMbIe n3 3JIeKTpOINHCTpyMeHTa YAcTnUcBi NOTpa6oTaHHbI BO3dyX Ha Ce6B, HaxOJaUxxCpRAOM IIOJe HJIN Ha CKOpJIeHNIbIIN.
- IcnoIb3yIte BbITaHHOe yCTpoIcTBO H/HIN BO3dyXOOHCTnTeJIb.
-XopoIIO npOBeTpBaNte pa6Ooee MeCTO n COePKeHTe erO B uHCTOTE C NOMOuIO PbIeCOca. POnMeTaHne HnnpOdyBkA TOLbKO NOHNMAOT PbIb B BO3dYx.
- O6pa6aTbIbAitte 3aUHTHyO OeJy NblneCOCOM NIN CTnpaIte. HeJIb3I npOdyBaTb OeJy BO3DyXOM, Bbl6NBAtB NII IN CMeTaTb C HeE Nblb UeTKoI.
TpaHcnpTnPOBbA JNTN-NOHHbIX aKHyMylrTOphBX 6L0HOB
TpaHcnpTnpoBka JNTn-HoHHbIX
aKMyJIoTOpHbIX 6LOkOB NOJaadaeT NOd
DeiCTBVe IpaBnI nepeBO3Kn ONaChbIX rpy3OB
(UN 3480 n UN 3481).Ppi OTnpaBKe INTnHOHHbIX aKHyMJIaTOpHbIX 6LOkOB yTOuHNHe
DeiCTByUOUIne IpeDnncAHn. Ppi
Heo6XoDMocTn IPOKOHcyJbTnPyuTEcb CO CBOeN
TPaHCnOpTHoKOMnHaHne. CeTpNPhiuPoBaHHyo
yNaKOBHy MoKHO npNoobpeCTn BΦnPme Metabo.
- TpaHcnpTnpoBbKa aHHyMylrTOpHbIX 6IIOKOB BO3MOJHa TOJIbKO B TOM Clyuae, ecN KOpNyc He NOBpeKdEHN I3 HrO He BbITEHaet JNIdKoCTb. IINr OTnpaBn aKHyMylrTOpHoro 6IOKa BbIHbTe erO n3 3JIeKTPOHcTpymeHTa. PpIMrTe Mepbl DnI NCKIIUChENr KOpOTKO 3aMbIKAHN KOHTaHTOB (HaNPmEp, n3OJIpynte KJIeHKnJeHTOn).
5.0630p
6.1 AHHymyIaTOpHbI 6JIOK
IpeE INCNoJIb3OBAHHeM 3aprIHTe aKHyMyJIaTOpHbI 6IoK (19).
Pn CHNKeHm MOuHOCTn CHOBa 3aprIte aKHyMylTOpHbI 6JOK.
Yka3aHnno 3apJdKe aKKymyIaTOpHOro 6loKa CM. B pyKOBOcTBe NO 3KcNJIyaTaun 3apJdHOrO yCTpoiCTBa Metabo.
AkkymyIaTOpHbIe 6JIOHN IMeIOT INHdNkATOpbl EMKoCTn n CnHaJIIN3aUu (18) (3aBNCrT OT OCHaSeHn):
- Haxmnte KhoNky (17), n CBeToDnOdbI NOKaKHTCTeNeHb 3apJa aKKMyJrTopa.
- Odn MnraoCBeToaNoyHa3bIaet Ha To, YTO aHHymyTOpHbI 6Lok NoTu pa3pJKeH Tpe6yeT 3apAKn.
6.2ИЗБЛЕЧЕНЕиУСТАНБHA aKKуМЛЯТOPHOrO 6LoKa
CHATNE:
HaKMnTe Ha KhoNky pa36IoKIpOBKn aKHymyIaTOpHoro 6loKa (16) N BBInbTe aKHymyIaTOpHbI 6loK (19).
yctaHOBha
BcTaBTe aKHyMylTOpHbI 6LoK (19) Do ueJyKa.
6.3 YctaHOBHa npOTnBOCHOJbHOro BHLaIbIwa
OnacHOCTb TpaBmbl OCTpbIM NINbHbIM NOJOTHom. Ipepe yctaHOBko npOTnBOcKoJIbHOro BkIaDbIwa (6) ydaJInte NNbHOE NOJOTHO.
NobepHnTe 3JIeKTPoINHCTpyMeHT TaK, YTO6bl HAnpaBIAOua NaHeJIb 6blNa HAnpaBLeHa BBePbX. BCTaBbTe npOTnBOcKOBHLbIb BVlaDbIbIcpeEi, pRn 3TOM cLeyET npHHrTB BO BHImaHne 2 CJeDyUxN xNyHKta:
- Pobha cToPOHa BklaIbIsha DOJIHHa 6bITb o6paueHa HabePx.
-卍丶囀丶日丶翁丶日丶日丶日丶日丶日丶日丶日丶日丶日丶日丶日丶日丶日丶日丶日丶日丶日丶日丶日丶日丶日丶日丶日丶日丶日丶日丶日丶日丶日丶日丶日丶日丶日丶日
Pn pa6oTe C yCTaHOBJIeHHOH 3aHTHOI NaHeJIbIO BCTaBBte NpOTNBOCKOJIbHbI BKJIaDbIbB 3aHTHyIO NaHeJIb (CM. rIaby "PpHaJNeKHOCTn" 9.).
6.4 YctaHOBHa INIbHOro NOJOTHa
OnacHocTb TpaBMbl OCTpbIM NHJbHbIM NOIOTHom. NocJe pa6Obl NHJbHOe NOIOTHO MoKet 6bITb OueHb RopaUM. IcNoJIb3yIte 3aUHTbIe nepaATKn.
IcnoJb3yIte TOLbKO NIIbHbIe NOIoTHa, npedHa3HaueHHbIe IJIr O6pa6OTKn DaHHoro MaTePnAJa.
-ПовернITEзжимногьuar(1)doynopa BnepeN ydeprxHbAte erO BAkOM noLoXeHHN.
- BCTaBbTe nHbHoe noIOTHO (4) do ynpa. PpN 3TOM y6eNTecb B TOM, YTO NOJIOTHO yCTaHOBLHeo 3y6bMaN BnpePei npaBnIbHO paCNOLOKeHO B na3y onOpHOro poJIka nHbHOro noIOTHa (3).
-OTnycTHe 3aKHMHO npIur (1). (OH aBTOMaTHueeCHN NOBepHETcB INCXoHoe nIOJKeHHe. IocLe 3TOrO NIIbHO eNOJToHO 6yJeT HaJeKHO 3aΦHKncpObaHo).
6.5 N3BLeueHne NJIbHOrO NOJToHa
BHHMaHHe: npn n3BLeueHn nIbHoro NOIOTHa He HAnpaBnTe 3JeKTpOIO63NK Ha IIODei.
-3aJHmHoi pIyar (1) nobepHnTe BnepeIdo ynpopa, B pe3yJIbTaTe Yero NIIbHOe NOIOTHO 6yDeT BbITOLKHyTO npJxHoi.
MaKcImaJIbHOI aMnIITyDoI
PeKOMeHdyembIe 3HaueHnYyCTaHOBOK CM. Ha CTP. 3.
OnTnMaJIbHbIe 3NaueHn JyUWe BCero onpeJenOTc ONbITbIM nyTEM.
7.2 YCTaHOBHa MaHcHMaJIbHOJ YaCTOTbIXOIOB
YCTaHOBnTe Ha KOJIecnKe (11) MaKcHMaJIbHyIO YACTOTy XoIOB. 3TO MOHcCJeIaTb TaKHe N BO BpEMpa60Tb INHCTpyMeHTa.
PeKOMeHdyembIe 3HaueHnYyCTaHOBOK CM. Ha CTp. 3.
OnTnMaJIbHbIe 3NaueHn JyUWe BCero onpeJELaOTc ONbITbIM NyTEM.
7.3 BnIOUeHne/BBbIKIOUeHne, npoJOnJIHTeJIbHOe BnIOUeHne (ST 18 L 90)
He donyckatb HenpeHamepeHHoro 3anycka: Bcerda BblKluoyatb IHCTpyMeHT,ecnBulka
6bIa n3BLeueHa n3 pO3eTKn, nIIe cIIN npOn30weJ c6oB B nOdaYe 3JeKtpO3HeprHi.
BpeKHMe HnpepbIBHOpa60tbi HNCTpyMeHT npoDoJHKNT BpaaTaBCr, daKe ecn OH BbIPBeTc n3 pyK. No3ToMy BcerDa KpenKO depKHe 3JIeKTponHCTpyMeHT DByM pyKaMn 3a pyKoATHN, npIMNe yCTOuHBOe NOLOXKeHne n CkOHcEHTpnpyTe BCE BHMaHne Ha pa6Ote.
BKnHbTe nepeKnOaTeIb (14) BnepeI. IJIa HnpepbIBHO pa60tHaKMnte nepeKnOaTeIb BHn3 do Kcaun.
BbIKIIOUeHHe:HaKMnTe Ha 3aHnKoHeCcDvNHOro npeHIOuHaTeJ (14), a 3aTeMOTnyCTHTe.
7.4 BkIIOUeHne/BBKIOUeHne, npoJOnJIHTeJIbHOe BkIOUeHne (STB 18 L 90)
BkIoueHne:HaKMITE HaKMMHOI nepeKIOUaTeIb (13).
BbIKIIOUeHne:OTNcyCTnTe HaKIMHOI nepeKIOuOaTeIb (13).
PpOdoJHnTeBHOe BnIOueHne: npHaKaTOM HaKMHom nepeKIOUaTeJe (13) HaKMnTe KHOIky C fHKcauNe (12) n OTNyCTHe HaKMHOI nepeKIOUaTeJe (13). DJIy BBKIOUeHn HaKMnTe HaKMHOI nepeKIOUaTeJe (13) eue pa3, a 3aTeM OTNyCTHe erO.
BpeKHe HnpepbIBHO pa60tBuHCTpyMeHT npOdoJIkaeT BpaUaTBcA, daKe cEn OH BbIPBeTcN3 pyKn. NToTomy Bcerda CLeNyET KpeNKo DePkaTb IHCTpyMeHT DByMpyKaMn 3a pyKoRTKn, 3aHmAtb yCTOnuHBoe NOLOKeHHe I NOHOCbIO KOHcEHpPoBaTbCnHa BBINOJIHReMoI pa60Te.
8. OuHCTHa, TexHnueChoe 06cIyHHBaHHe
I3BLeKaIeAaKHyMylTOpHbI 6LoK I3
INCTpyMeHTa nepeJ KaJDoJ peylnpOBKOJ,
pepeoChaueHnEM, TexO6cJyJKNBaHNem nn
OuHCTkoJ.
IhctpymeT cIeJyET peryIaHPO ouHuaTb.
Pn3TOM C NOMOuBko NbilecoCa cIeDyET OUHCTNtB BEHTnlaCNOHHbIe UeJIHa KOpnyCe DBNrataTeJIa.
PeryIaRHO N TuaTeJIbHO OuNcaaIte CxHaTbIM BO3dYXOM 3aKImHoe PnIcNocO6JeHne NIIbHOro NOJOTHa (2).
Pn Heo6xOIMOCTH ONUCTHTe OTBepCTH3a ONOpHBIM POJIKOM NINbHOrO NOJOTHa (3) n BbITXHHoN NaTppy60K (16).
PepnoDnueckn Cma3bIbaTe onOpHbI poJIHK nIIbHOrO nIoToHa (3) KaJIeM MacJa.
9. Пинадлесноctn
CneJyET HcNoIb3ObA TbToJIbKO opnHnHaIbHbIe aKHyMylTOpHbIe 6JIOKn I npHaIeXHocTn fnpMbI Metabo nn CAS (Cordless Alliance System).
IcnoJb3yIte TOLBJKO Te npHaJdJIeKHOCTN, KOTOpBIE OTBeUaHT Tpe6OBAHnM nnapaMeTpam, nepeuCJIeHHbIM B DaHHOM pyKOBOdCTBe NO 3KcNlyaTaun.
HaedHNO fNkCnpyTe npnaJdLeHHocTn. EcIn 3JIeKTPoHnHCTpyMeHT 3KcIIyaTnpyETcB B depKaTeJe, HaedHNo 3aKpeNITE 3JIeKTPoHnHCTpyMeHT. Notepra KOHTPOJ MoKeT npNBecTN K TpaBMnPoBaHIO.
CM. cTp. 4.
A KpyroBa n npaIJIeJIbHa HnpaBIAIOUaI
B 3aunTHnaHeNb (npeDoxpaHReT cyBCTBnTeJIbHbIe NOBepXHOCTn 3aROTOBKn OT caapanHH)
C 3apnHbIe ycTpoCTBa
DAKKyMylTOpHbIe 6LOHn pa3JInuHoi eMHoCTn. PnpO6peTaIte ToIbHO TaKHe aKKMyJIaTOpHbIe 6LOHn, HApRJaKeHne KOToPbIX COOTBeTCTByeT BaUeMy 3JeKTpOnHcTpyMeHTy.
9.1 YctaHOBHa KpyROBo N npaJIeJIbHOH HnnpablaIOUeI
Дя Вьилпваня Okрунов ot 0 100 MM do 360 MM n BvIOnHeHЯ npOINIOB napaJIeJIbHO KpOMKe (MaKc. pacCTOHHne OT KpOMKn 210 MM).
YcTaHOBHa KpyROBoH HAnpaBlaIOUeN (CM. Pnc. I)
- BCTaBbTe onOpny KpyroBoH n npaJIeJIbHOH HApBaBIAIOUSeI c6Oky B HApBaBIAIOUyIO naHeIb (cHTpnpyIOUee oCtPne (c) o6paueHO Bn3).
- YctaHOBnTe HUKNbI paDnyc (d).
- 3aTЯнite BnHT (b).
-Повернite ручку тak,чTOбblВыDNHyIOcB ueHTpnpuyIOоe ocTpne (c), haxOДЯшпecя c3aДи
PYCCHNIRu
OTHOCHTeJIbHO HanpaBHeHn paCnHa. BCTaBtEeroB uENTp Kpyra.
YctaHOBHa npaJIeIbHOn HAnpaBIAIOUeN (cm.Pnc. II)
- BCTaBbTe onOpy kpyroBoH n npaJIeIbHOH naPpABJIOUSei c6Oky B hApapBIAIOUyIO naHeIb (cHTpnpyIOUee ocTpne (c) o6paueHo BBepx).
- YCTaHOBNTe HxHHyIO BELINuHHy OTCTyNa OT KpOMKn (e).
- 3aTЯн'te BnHT (b).
ДлЯ MИнHMn3aци OTKLOHeHЯ ПИьHOrO ПОЛOTHa OT OCS peKOMeHdyeM ИСПОЛБ3OBaTb СВерXTBepДые ПИьHьIe ПОЛOTHa: 623694000, 623679000, 623685000
Iohnbl accopTmEHT npHaJeKHOCTe CM. Hc aTe www.metabo.com INN B KaTAlore.
10. PemoHT

PemOH3JIeKTPoHnCTpyMeHTOBdoJIxeh OCyUeCTBJIaTbCraTOJbKO
KBaIINHINPOBAHHbIMN CneuJaINCTaMNI 3JIeKTpNKamn!
CnNcK 3aNaChbIX YacTei MoXHo cKaaTaB C caTa www.metabo.com.
11. 3auntata okpykaioe cpebl
Co6IIOdaIte HaunOHaJIbHbIe IpeDnucHnno 3KoIOnuYeCKN 6e3OnaChOH yTINn3aCnN n nepepa6OTke OTCnyKINBWHx INHCTpyMeHTOB, yNaKOBKn n pInHaJdLeXHOCTeN.
YnakoBouHbI MaTePnaIbI yTnIIN3HpyOTcB COOTBeTCTBnC hX MapKnpoBKOi COrlaCHO KOMMyHaJIbHbIM npaBnIam. DOnoJIHnTeJIbHyIO INΦOpMaUIO MOHNO HaHTN Ha caITe www.metabo.com B pa3dJe «CepBnC»
He yTnIIN3npyIte aKKymJrTopHbIe 6LoKn BmecTe c 6bITOBbIMN OTXoJam! CdaBaJIte HeNCpabHbIe IINOTCJyKMBIe aKKymJrTopHbIe 6LoKn dInlepy fHmBi Metabo!
He BbI6paCbIbAaHTe aKHyMylrTopHbIe 6JOKN BBOIOEMbl.

ToIbKO dIa nCTpaH EC: He yTnIn3npyIte 3JIeKTPoINHCTpyMeHTbI BMeCTe C 6blTOBbIMN OTXoJam! CorlaCHO eBPoneiCKOJ
Дирктibe 2012/19/EC ob oxxodax
элкгчecHOrO n элкгрOHOrO obOpydoBaHnI N COOTBeTCTByUOuIM HaunOHaNbHbIM HopMaM, Otpa6oTabuIe элкгрOHcTpymeHTbl NOdJIeKaT c6opy c ceJIbIO nx NocLeDyUoIe eKOLOrHueChN 6e3OnaChO nepepa6oTkn.
ПпждчЕ m BbINOLHITb yTnJIn3aCnIO aKHymJYTopHOrO 6LOKa, pa3PraDITe erO B 3ЛeKgTPOuHcTpymeHTe. ПрИМTe МрblДЯ ICKJIQUeHnI KOpOTKOrO 3aMbIkaHnI KOHTaKTOB (HaNPmEp, n3OJIpyte KJIeKoIJeHToI).
12. TexHnueeChne xapaKTepeNCTnKN
ПОЯСЕНИКДаннБIM,прИВeDEнHBIMHaCTp.3.
OCTaBЛЯEM3aCO6OINPpABOHaN3MeHENIC
UeJIbTOxEHnueCKOToYcoBepseHcTBOBaHHN.
U=HanpЯЖeHneakKymyIaTOpHoro6bloka
T1=MaKcImaJIbHaN.ToJIuHnHaMaTePnaIa (dpeBeCnHa)
T2=MaKcImaJIbHaN.ToJIuHnHaMaTePnaIa (UBeTHbIeMeTaIbI)
T3=MaKcImaJIbHaN.ToJIuHnHaMaTePnaIa (JIncTOBaA CTaJIb)
n0=YactOTA XoIOB HaXoJOCTOMXoIy
P1=HomInaJIbHaN.NoTppeSJIeMaJMoUHOCTb
P2=OTdaBaEmaJMoUHOCTb
m=Macca C CambIM MaJIbIM aKKymyIaTOpHbIM 6JOKOM
Pe3yJIbTaTbI N3MpeHnNoJIoUeHbIB COOTBeTCTBnN COCTaHApTOM EN62841.
DonyctnmaTEmnepaTypoOKpyKaIOUeRO BO3dyxa npn EKcNlyaTaun: OT-20°C Do 50°C (OgpaHneHHa pa6oTocnoc6HOCTb npn TemnepaType HN 0°C). TemnepaTypo OKpyKaIOUeRO BO3dyxpanenHn:OT 0°C Do 30°C.
NOCTOHHbI TOK
Yka3aHHbIe TexHnueckne XapaKTepnCTnKN NMeOT DOnyCKN (PpeDyCMOTpeHHbIe DeiCTBvOuIMN CTaHdapTaMn).

3HaueHn 3Mnccnn yMa
3TN 3NaueHnI NO3BOJIaOT OceHbAtb N
CpaBHBaTb 3MnCCNIO Wyma pa3NIuHbIX
3JIeKTPoHnCTpyMeHTOB. B 3aBnCmOcTH OT
YcLOBn 3KcNlyaTaun, COCTOAHnI
3JIeKTPoHnCTpyMeHTa HIN NCNoJIb3yEmbIX
pa6OuHX nHCTpyMeHTOB fakTneckHa rHy3Ka
MOKeT 6bITb BBIe HnHKe. JnA OceHN
PpIMepHO rPOBnH 3MnCCn CJeDyET yHTbIBaTB
pepebIBb I Ba6OTE HFa3bl Pa6Otbl C
NoHHKeHHoI WymOBn Harpz3KoJ. OnpeJeHtTe
pepeHb MEP, HapPmEp, oprAnH3aUHOHbIX
MepOpnPaTn, No 3aUnTe POnb3OBeTEn C yYeToM
Tex INN INhX 3NaueHn 3MnCCN Wyma.
06uee 3NaueHne Bn6paunn (BeKTopHaCymmaB Tpex HappaBLeHnx), pauchet corlaacHo EN 62841: ah,CM =3NaueHne Bn6paunn (nIeHne MeTaJIInuecKnx JInCTOB)
ah,CW =3NaueHne Bn6paqnn (NJIeHHe dpeBecnHbl)
Kh,... =Ko3ΦΦnUneHT norpewHocTN (Bn6paun)
TnHbI aMHTyHO-B3BeHHeHbI yPoBeHb
LpA =ypOBeHb 3ByKOBOr DaBHeHnLA WAA =ypOBeHb 3ByKOBOmOuHOCTn
KpA, KWA=HO3ΦHnueHT NOrpeWnOCTN Bo BpMa pa6oTbI ypoBeHb Wyma MoKe npBbIwAtb 80 d5(A).

HcnoIb3yIte cpeICTBa 3aunIbI opraHOB cnlyxa!
EAC EAC-Text
HΦopMaζη dλ nokynatae:
CtpaHa n3rOToBJeHnra: KntaI
Поживодпель: "Metabowerke GmbH",
Metaboallee 1, D-72622 Nuertingen, Германь
HmnpTeB Pocn:
OOO"MeTa6o EBa3n
Pocn,127273,MockBa,
yI. Bepe3oBaA aIleA, 5 a, cTp 7, oΦic 106
TeI.: +7 495 980 78 41
Data npOn3BODCTBa yKa3aHa Ha
HOpMaIOHOHTo Ta6JIuHKe HHCtpyMeHTa BΦopMaTe MM/rrrrl
Cpok cnjck6bl n3delenna coctablanr 7 let. He
peKOMeHdyetcK 3KcNpyatauHnNo nCTeueHn5 JeT XpaHeHnC DaTbI N3rTOBLeHn6e3
IpeBapntelbHOn npOBepKn (aTy n3rTOBHeHn cm. Ha 3tKeTke).
Opnirha hia nctpykci 3 eknpnyatai
1.Дeнлараця npo BiДnobiДиHicTb
3i BCIEIO BIDNOBIDAaHbHcTIO 3aABnEMO: cI IO63nK 3 iDeHTNΦIkaIeIO 3a TINOM I HOMePOM MoJeI *1) BiIOBIAOTb ycIM DIOUHM NIOJHOENHm DNpeKTNB *2) i HopM *3).TexHicHy DOkymeHTaIio dIra *4)- INB. Ha CTOp. 3.
2. BnKOpncTaHnHa npn3HaueHnHaM
IhctpymEn npn3HaueHn IJI nnJHHKoJIbOpOBHX MetaJIIB i CTaJIeBHX JInCTiB, DepeBHHTa JepeBONoDi6Hnx MaTePiaJIIB, NlaCTNKIB iNODi6Hx MaTePiaJIIB. IHwe BnKOpNCtAHN3a6OpOHeHO.
3a noIkoJxHHe, 0BnHKnBHaCniDok EKcNlyaTaui He 3a npn3NaeHHM, Hece BiIObIaJIbHicTb BnKlIOUHO KOpNCyBaY.
Heo6xidno DoTpmyBaTncb 3araIbHOpnHrHTnx npabnil 3anobirahnHa HeuacnM BnnaDkam, a TaKoJ npabnil Texhikn 6e3neKn, HabeDeHNX Bcii IHCTpyKcii.
3. 3araJIbHI npaBnla TexHikn 6e3neKn

3aIra Baoi 6e3neKr Ta 3axncty eIeKTPoIHCTpyMeHTa BiD NOIshKOJHeHb DOTpIMyTEcB BkA3iBOK, N03HaueHnx CmMBOJOM!

NONEPEJHEHHH 3 MToIO 3HNJHHeHHnIHy OTpMaHH TpaBM npoHTaTe cIO IHCTpyKciO 3 ekCnLyataci.

PONEPEDHEHHI - IpoHTaIte Bci Bka3IBHn 3 TexHkN 6e3neHn, IHCTpyKuii, CTpaui Ta cneunphiaui, HadaHI 3 uM XTPOIHCTpymeHtOM. HeBVKOHHaYycix
HabeHeHX HnKHe IHCTpyKuIM MOKe np3BeCTn Do ypaKeHH eJeHTpHuHM CTPyMOM, NOKeHi Ta/a60 TAAKNX TpaBM.
36epiraTe npaBnla Ta Bka3iBn 3 TexhiHn 6e3neHn dI MaI6yTHbOro BnHOpNCtAHH.
IpepeaBaIte BaIeEJIeKTpOIHcTpymENT TIlbKn pa30M 3 cIMN DOkymEnTaMn.
4. CneuaJIbHi npaBnla 3 TexHiKn 6e3neKn
IiD qac po6OTn TpHMaTH npHCTpi3a i3OJbObaHI NOBepXHi, RaHIO E pN3NK 3iTHHeHHI INCTpyMeHTaIbHOHaCAdKN 3 npHXOBaHMM eIeHTponPOBODAMn. Ipn KOHTaKTI 3 eJIeKTpOpBODOM HaPpyra MoKe nepeDaBaTncr TaHOx HA MetaJIeBi YactuHN IHCTpyMeHTa Ta CnpUHHITyypaKeHHeJIeKTpyHIM CTpyMOM.
3aHpiinb 3arotOBky Ha ctiKni NOBepxHi 3a DonomoroIO CTpy6uHH a6o IHsM CNocO6OM.
KuTo TpImaTu 3aROTOBky IInue pykoIO a6o npTnCKaUOu Do Tla, ue npN3BeDe Do II HecTa6iNbHocTi, BHaCNIIDOK YORo MOKINBa BTPaTa KOHTPOJIO.
IpeekohaiTec, 0B Micui npoBeHnHa o6iH npoxOaTb liHii eJeKToP-, BOo-i ra3OnocTaauHH (HaapanKlaD, 3a DonomoroIO MeTaloWka).
He HamaraTeCpa03nIbTaN dyKe MaJI 3aROTOBKN.
OnopHa nlaCTnHa nobHHa pIBHomipHo npHraTn Do 3arOTOBKn iD yac nnJAAHH.
Y pa3i nepepnuBaHH pO60TN BUMKHiTb IHCTpyMeHT i He BnMaIte NOro i3 3aROTOBHN, DOKN INIKOBe IONOTHO NOBHICTU He 3yINHITbcr. Y JKOHDOMy pa3i He HAmaraTeC8 BNTARHyTN INIKy i3 3aROTOBHN, DOKN INIKOBe INOTHO pyXaETbcr — MOKlnBa BiDdaua.
He BMnKaIte iHCTpyMeHT, kHIO nIIKOBe NOIOTHO TopKaETBCa 3aTOrTOBKn. DOneKaITeCra, NOKI nIIKOBe IIOJTHO DOcRHe pOboOoi KIlbKOcTi XoIDIB, nepu HiX NoUATN BnHOHyBaTN po3pi3.
IpeTMM, k3HOBy yBIMKHyTN NnIKy, 0o 3HaxOHTbcR B 3aROTOBci, BiDcHTpyNTe NnIKOBe NnOTHO B po3pi Ta nepeKoHaTEcR, 0o 3y6ci NnKN He 3actprnn y 3arotOBci. 3actprrne NnIKOBe NnOTHO MoKe Pnp3BecrN Do BiDaqi, RkIO NnIKy yBIMKHyTN NOBTOPOHO.
TpmaTe pyKn 0o3a 3oHOIO nnJHnHa, Ha BiDcTaHi BID nnIKOBOrO nIoTHa. He TpMaTe pyKn niD 3aROTOBHOIO.
BudanTe TnpCy Ta iHwe CmTTa TlbKn nicna NOBHOI 3ynnKn IHCTpyMeHTa.
He6e3neKa TpaBMyBaHHraOCTPOIO NIIKOKIO IJIa lo63nka. NIIKOBE NOIOTHO IJI IO63nka MoKe 6yTu rapAunm nICIA NIIJAHN. PpaUOBaTN B 3axNCHX pyKaBNUx.
Ipeed 3diCHeHHa6yDb-RAHX pO6iT 3
peRyIIOBaHH, nepeoChaueHH,TexHIOHO
06cLyROvBaHH a60 YnueHH Heo6xIDHO
BnHrTHn aKMyJIaTOpHH 6Jok i3
eJeKTpoIHCTpyMeHTa.
IpekeKaHTeC, 10 niD yac BCTaHOBJeHHaKMyJIaTOpHOrO 6JIOka eJekTpoiHcTpymeHTBIMKHeHn.
IHKIO IHCTpymENT He BnKOpNCTOByeTbC, HEO6xIDHO BnHrTn aKMyJrTOpHn 6JOK 3 HbOro.
CbitIOiDnHn liXTap: He DnBiTbcra 6e3nocepedHbO Ha CbitIOiO, 10 CbitITbcra, uepe3 onTNHi npnilaDi.

YBA! He duBtbcra Ha dKepeNo cBITla, 10 Cbitntbcra.
BHHBaTH 3axoDn Dnla 3axncty aKymyIaTOPHnx 6JIOHIB BiD BOIOrn!
He donyckaTH BnIbBy BiKpHToro BorHIO Ha akymyIaTOpHi 6loKn!
3a6bOpHeHO BnKOpNCToBvBaTH N0sKOJKeHi a6o DeΦOpMOBaHI akymyIaTOpHi 6loKn!
3a6bOpOHeo po3KpNBAu nAkyMylrTopH6 6loKn! 3a6bOpOHeo TopKaTnC4 N3aKOpOuyBaTu KOHTaKTn aKyMylrTopHoro 6Ioka!

3 HecnpaBHoro liiHIOHHoro
akymyIaTOpHOro 6JIOKa MoKe BNTiKaTHn
cna6OKnCna IerKo3aMnCTa pIDHa!

JaKIO eNekTpoJIT npOLINBCa i NOtpanNB Ha KIKpy, Heo6XiIDHO HeraHNO pOMNTn CIO dIiHaKy BeJIHKOIO KInbKICTHO BODN. Y pa3i
NOTpapanJIaHHNeIeKTpOJItyB Ooyi Heo6xIDHO pOMNTn IX YnCTOIO BDOIO I TepMIHOBO 3BepHyTnCnDo liKapra!
IhIO IHCTpyMeHT N0wKoDKeHn, Heo6xIDHO BnHrTn 3 HbOro aKymyJrTOpHn 6lOK.
3HHKeHHBnNBy nIy:
NONEPEDHEHHI —III, 0yTBOPIOEbCn iJac wlii fybaHH naepoBOIO WlifyBaJIbHOIO uKypKOIO,pO3NIIOBAHH, WlifyBaHH,CBepdINHra Ta IHuNX po6IT,MICTHTb XIMHi peOBHH, 0c CnpNHNrOHTpaK,BPOdKeHi BAIn a60 IHI yHKoDKeHHpeNPoDYKTNBHOICNTEmN.PnKHaDi TaHX xIMiHyx peOBHH:
- CBINHeCb 3 ap6n, IIO MICTNTb CBINHeCb,
-MiHepaJIbHnIIN36yIDBeInbHOIcERn,cEmeHTy TaIHuxpeOBNcERJHOI KnaKn,aTaKoK
-MNJ'K Ta XpOM 3XIMIyHO O6Pb6JeHoi DepeBHN. CtyINb Pn3Nky 3aJIeKHTb BiD TORO, JHK YAcTO Bn BVKOHyete CEi BnD PO6it. LIO6 3MeHUnTHn BnINB XIMIyHN PeOBN: IpaIIOBaTN Heo6XiIDHO B npIMiSeHHx 3 DOCTaTHbOIO BEHTNIaIciEO Ta 3 BnKOpNCtAHNM 3aTBepdKeHnx 3ac06iB iNDiBiYalbHOrO 3axNCTy, TAKNX JHK pecnPapTop, PO3PO6JIeHNI CneiaIbHo DnA FIbTPaCi II MIKPOsCkONiHHX YAcTHNOH.
Ie taKoK CTocyETbcra Nnly BiD iHnIX MaTepiAJIb, HAnpNKnad DeaKnx BnID IB DepeBa (DepeBHHN nn dyba a6o 6yka), MetaLy, a36ecTy. IHsi BiDiomi 3axBOPIOBaHHa — ue, HAnpNKlaD, aIepriHi peakii, 3axBopIOBaHHa DnXaJIbHNx WJIAxIB. He DonyckaIte NotpanIIAHnNn Nnly BCEpeDInHy TiHa.
DToPmMyTecb BkazIBOK Ta HaizioHaIbHOro 3aKoHOdaBCTBa CTOCOBHO BaIoro MaTepiany, nepcoHaLy, cfepn Ta Micza BnKOpncTaHHa (HaipnKaJa, noLoXeHHra npO oxopoHy npaCi, yTNIi3auiTOuO).
3a6e3neuYte yIOBIOBaHHaNly B Micci YTbOpEHn, He dOnyckaTe NOro BiKlaJeHHHa NOBepxHax.
IcneiaJIbHnxpo6ITBnKOpNCToByTe BiIOBIDHe npNlaDJa.3aBAnuCbOMy MoJHa 3MeHNTH KIIbKiCTb NlLy,0 HeKOHrPoJIboBaHO NOTpanJIe B DOBIIJIra.
BnKopncToByte BiDnOBiDiHi npncTpoi dna BnJaJIeHHI nnly.
J3MeHWeHHBnNBy Nny:
- He HanpaBraIte NotIK NobiITpr, 10 BNXOaNTb 3 IHCTpyMeHTa, Ha Ce6e, IIODeI, Aki 3HaxoJaTbcr No6Jn3y, Ta Ha CkyPueHHN Nly;
-BVKOPNCOTOBYTe BNTJXHHN npncTpiTa/a6O ONUyBaH NOBITp;
-Добpe npobitpoite po6ohe Mice Ta 3a6e3neuTe YnCTOTy 3a DOnOMOrOIO NnIoocOca.
IiD yac NiDiMaTahHr Ta BnDyBaHHr NIN 3diMaetbCry NOBITpR.
-3axnchno OJr Heo6xIDHO OUHCTHTN 3a DOnomoroIO nnlococa a6o npaHHra.3a6oponeho npOyBaTH, Bn6NBaTH a6o YnCTHTN UITKIO 3axnchno OJr.
TpaHcnpOpTyBaHHaIITiI-OHNHX aHymyIaTOpHNx 6loHIB:
TpahcnpTyBaHHaLiTi-iOHnHex aKymyIaTOpHnx 6loKIBpeYJIIOeTbC3aHOHOM npo He6e3neuHn BaHTaK (UN 3480 Ta UN 3481).PiJ Yac BiIpaBLeHHa LiTi-iOHHx aKymyIaTOpHnx 6loKIB 3'AcyTe aKTyaJIbHi YINHI HOpM. 3a Notpe6n 3BepHtbc3a iHΦopMaizio do CBOei TpaHCnOpTHoi KOMnaii. CePTnΦikOBaHy ynaKOBHy MoHa npiI6bAtn B Metabo.
-BiDnpaBnIte aKymyJIaTOpHi 6IIOH JInHe, JNIO KOpNyc He NOnKoJHKeHn Ta HEmaC BNTOKy pIDHH. Pn BiDnpaBLeHHi BNI Mt b aKymyJIaTOpHn 6Iok 3 iHCTpyMeHTa. BxHBaTH 3axOAn IpOTn KOpOTKOrO 3aMkAHHaKHTiB (HaPnKlaIad, i3OJIbOBaTH n KIeKIO CTpiKIO).
5.Orna
INB.CTOp.2.MaHONHKMOJyTb CnyKHTN npNKlaDOMIa BCIX MoeJeN.
1 3aTnCKHn BaKijIb DJIa KpiJIeHHN IINIKOBORO NOJIOTHA
2 3aTnCKHm MexaHi3M NIIJKOBOro NOJIOTHa
3 OnopHn poJnk nIKOBOro noJIoTHa
4ПиИКОВЕ ПОЛТНО*
5 OnopHa nlaCTnHa
6ПрOTиСКOLьн ПЛЯСТИнHa
7 3axncha cKo6a nla 3an06iraHHn HeHaBMnCHm KOHTaKTam i3 nnKOBm NOJIoTHOM
83axnchN KOBnaOc
9 BaikilpeyIIOBaHHMaTHNKOBORo pyxy
10 KhoNka DnB BBIMKHeHHBbMKeHHaBtOMaTHHOi aKTNaCii CBIIOIoHOIJaMn
11 PeryIIOBaJIbHn polnK dJa BCTaHOBJeHHa KJIbKOcTi XoDiB
12 KhoNka fikcaTopa (6e3nepepBnH peKm) *
13 HaTnckHn nepemnkau*
14 Перемпау *
15 PyKoTka
16 KhoNka dIpa pO36IoKyBaHHaKMyJIaTOpHOro 6loKa
17 KhoNka iHdNkATopa emHOcti*
18 INdikaTOp EMHOCTi Ta CnHaNbHn iHDkaTOp
19 AkymyIaTOpHn 6JOK
20 BcmoKtYBaJIbHn nATpy6OK
21 BiDJIeHnIa Ia KIOUcIB
22 8ecTnrgpahnn KIOU
23 LOKoJIb 3 Bka3aHIM BCTaHOBJIeHIM KyTOM pi3aHHJ
24ВиHTДЯperyIIOBaHHOnOpHOITnactHn
*3aJIeKHTb BiD KOMnJIeKTAuCi / He BXoIHTb B KOMnJIeKT NOCTaBKn / 3aJIeKHTb BiD MoDeJI
6. BBeDeHnB eKcnLyataciio
6.1 AnymyIaTOPHn 6JIOK
IpeBnKOpNCaHHm 3apJITb akyMyJrTOpHn 6loK (19).
Pn3HnKeHHi notyXHoCTi 3aprIb aKymyTOpHn6loK.
Bka3iBkn 0do 3apRJaHn aKymyIaTOpHoro 6loKa DnB. B iNcTpkyu3 eKcnLyatau3apRdHoro npictpoMu Metabo.
AkymyIaTOpHi 6bOKMaIOMbI INHkaTOp EMHOCTi Ta cnHaNy (18) (3aJIeKHO BiKOMnJIeKTAuii):
- HaTnCiHb KhONKy (17), i CbITIOJIOHi IHdNkAToPn NOKaKHyTb PiBeHb 3apRy aKymIaTopa.
-Якso6лимаeОДИN CBITLOIOD,akymyIaTOpHn 6LOK MaJKe pO3PraINBcR i NOro NotpioHo 3apAHTN.
6.2ПiД'eHaHHa / BiD'eHaHHa akymyIaTOpHoro 6LoKa
BnMaHHa:
HaTnchIb KhoNHy po36IoKyBaHHaKymyIaTOPHO 6loKy (16)i 3HIMITb aKymyIaTOPHn 6loK (19).
BctaHOBJIeHHr:
BcTaBTe aKymyIaTOpHn 6Jok (19) do fikcaqii.
6.3 BctaHOBJIeHHaXnCHOI IJaCTuHb BiD cKoJIb

He6e3neKa TpaBMyBaHHra roCTpoI NIIKOIO IJIIO63Nka. PnBCTaHOBJEHHI 3axNCHOI
Пл actин BiD cKoJIb (6) Heo6xIDHO 3HЯТN ПИЛКOBe PONOTHO.
IpeBepHytn iHCTpyMeHT, OOpHa IJaactnHa Mae 6yTn NOBepHyTa DOrOpn. 3axnchy IJaactnHy BiD CKoJIb BCTaBnTu CnepeDy, BpaxOByuOn HaBeDeHi HnKHe 2 nyHKTu:
- TnaIKOIO CTOpHOIO NlaCTnHa BiD CkOJIIB MaE 6yTN NOBepHyTa DOROpN;
- Na3 NOBepHyTm DoHn3y (y HappMky aKymyIaTOPHO 6loKy).
KuO BV npaioeTe i3 3axnCHOIO nlaactHNO (INB. po3dIn "PpnaIaI"9.), B Hei NOBHHa 6yTH BCTabHeHa 3axnCHA nlaactHa BiD cKOJIb.
6.4 BcTaHOBLeHHI NJIKOBOI NOJIOTHa

He6e3neKa TpaBMyBaHHraocTpoIO NIKIO
ДЯ lo63nka.ПИнkoBE noIOTHOДЯ lo63nka
MOKe 6yTu rapHm nicI nnJIHHn. IpaIIOBaTn B 3axnCHnx pyKaBnJx.
BnKOpNCToByBaTu NIIKOBE NOIOTHO, npN3HaYeHe Dn MaTepiAly, AKN Heo6XiDn PO3nJIaTn
-Повернтул заимкни Важь (1)doynopy Bnepei iYtpmByaTN BcBOMy noLoKeHHI.
- BCTaBnTn nnIkoBe noIoTHo (4) do ynpy. IpekeOnaTncr, 00 3y6ci nnnn nobepHyTi Bnepei, a nnIkoBe noIoTHo npabInbHO BCTaBJeHo B na3 onOpHoro polika (3).
-BiDnyCTnTn 3aTnCKHn BaKijb (1).(Bih camOCTInHO NOBepHeTBcB CBOE NOaTHOBe
NoJKeHHa. Tepe nnkoBe noJIoTHo MiHcHo 3aTnCHyTe).
6.5 3HATTINIKOBORO NOIOTHa

Ybara!PiД yac 3HIMAHNЯ NIKOBORO NOIOTHa He cnpmaMOByTe lo63NK Ha IIODei.
-Поверпь зашистен Вадим (1)do унору впешд,лобзк BiДКИНЕТбСа paxyHOK cnln npyжноcti.
7.1 PerylIOBaHH MaHTHKOBOrO pyxy
BctaHOBNI NOtpi6Hm MaTHNKOBn pyx 3a. donOMoroIO BaXeJIpeRyIIOBaHHr (9).
ПОLOJOHEHЯ «0» = MaTTHIOKOBnpyx BmKHeHO
NoJHHeHH "III" = MaTnHOBn pyx MaKcMaJIbHn
PekomeHdoBaHi HanaTByaHHn DVB. CTOp.3.
OnTnMaJIbHi 3NaueHHpeRyIIOBaHHBn OTPmaeTe i3 npaKTnHOro DoCBiDy.
7.2 BCTaHOBJIeHHMaKcHMaJIbHOI KIIbKOCTi XoIDIB
BCTaHOBTMaKcImMaJIbHy KJIbKICTb XODIB 3a DonomoroIO peryIIOBaIbHoro polnka (11).Lc MoKInBe TaOK NID Yac pOboTn IHCTpyMeHTy.
PekomeHdoBaHi HanaTByaHHaNb.CTOp.3.
OnTnMaJIbHi 3NaueHNe peryIIOBaHHB NOTPnmaeTe i3 npaKTnHOro DoCBiDy.
7.3 BBIMHHHRA/BIMMHHeHH,6e3nepepBHH peHHM (ST 18 L 90)
He donyckaIte HeymncHoro 3anycky: 3aBKnBmNkaIte iHCTpyMeHT, kUIO BnKHy 6yNo BVITrHyTo 3 po3eKn a6o CTaBCr 36i eHepronocTaayHH.
Y peKIMi 6e3nepepBHOi pOoTn iHCTpyMeHT npoDBHyE npaUOBaTH, HABiTb JkUo BIn BnPBtbcr 3 pyK. Tomy 3aBKnDi MiUO TpMaIte IHCTpyMeHT dBOMa pyKaMn 3a pyKOHTky, 3aMIb CTiKe NIOJKeHH I NOBHicTIO CkOHcHTpyTeCra Ha BnKohyBaHi pOoTI.
YbIMKHeHHa: nepecyhTe nepeMnKau (14) ynepei. Iy po6Otu y 6e3nepepBHomy peHMI nepecyhTe nepeMnKau Ha3aD do fikcaii.
BumKHeHHaTnCHiTbHa3aHIn KHeu nepemkaay (14) i BiDnyctitb.
7.4 BBIMKHeHHRA/BIMMKHeHHRA, 6e3nepepBHH peHHM (STB 18 L 90)
YBIMHHH:HaTNCiTb HaTnCKHn nepemHKa(13).
BIMKHeHHa: BiDnyCtiTb HaTnCKHn nepemHKaH (13).
Be3nepepbHn peHm: npHaTncHyToMy nepemkai (13) HATNCHTb KHOKNy fikcaTopa (12) i BiDnyCTITb HATNCHNHNepemkau (13).Iy BIMKHeHH HaTNCHTb HATNCHNHNepemkau (13) ige pa3, a NOTIM BiDnyCTITb Noro.
Y peKIMI 6e3nepepBHOi pOBoTn IHCTpyMeHT npoOBHKe IpaUBOATn, HABiTb JAKIO BIN BnPBtbc3 pyK. Tomy 3aBKnDi MiHcTO TpMaJTe IHCTpyMeHT DbOMa pyKaMn 3a pyKOaTHy, 3aIMiTb CTiKe NOLokEHnI IOBHicTIO CKOHcHTpyNTecHa BNkOHyBaHiip o60ti.
8. OuichiHn, TexHicHe 06cIyroByBaHHa
Ipeed 3diChenHnM 6yDb-ynx pObiT 3 peYIIOBaHH, nepeoChaueHH, texHiNHO 06cIyROvBaHH a60 YuieHH Heo6iDHO BnHrTHn AkymylTopHn 6lOK i3 eJeKTPoiHCTpyMeHTa.
BnKohyBaTH peryIaRpe OunIeHH IInCTpyMeHTy. BeHTnlaIciHi OTbOpN DnIryHa OOnuYBaTH 3a DOONOMOIO NIILOCOca.
PeryIaRHO i peTeJIbHO npOdyBaTH 3aTnCKHm MExaHI3M NIIKOBOro nIoToHa (2) CTnCHeHIM NOBITpM.
3a Heo6xIDHOCTi OUHCTiTb OTBOPn 3a ONOpHM polHKOM (3) pNIOKOBOro NOLOTHa Ta BCMOKTyBaJIbHm NaTpy6Kom (16).
PepioDnHNO 3MaUyBaTHn OnpHn poJHK nnKOBOro nolOTha (3) HeBelenkoIO KJIbKicTIO OJINBn.
9.Приладя
Heo6xioBnKOpNCToByBaTH BnKIOUHO opirihbHi aKymyIaTopHi 6loKn Ta npnilaMetabo a6o CAS (Cordless Alliance System).
BnKOpncToByTe TlkbN Te npHnAdy,Ke BiIObIaec BmOram i napametpam, HabeJeHm y ciinHCTpykui 3 eKcnnyatauii.
HaDiHObiKcYnte npIaJa. PnEcknlyataqii iHCTpyMeHTa 3 TpImaueM: HaDiHOb 3aKpiiTb iHCTpyMeHT. BtpaTkoHTpOIO MOKe npN3BecTn Do TpaBM.
ДиВ.стор. 4.
A HanpMaHa dIa IuRHyIbHOro Ta npaIeIbHoro pi3y
B 3axncha nlaactHa (3anobirae noopnHam Ha yTINBHX NOBepxHx 3arOTOBOK)
C 3apAHi npncTpoi
DAkymyIaTOPHi 6loKn pi3Hoi EMHOCTi. Kynyte IInse Ti akymyIaTOPHi 6loKn, Hanpyra JnX BiINOBiJaE Hanpy3i eNeKTpoIHcTpymeHTa.
9.1 BCTaHOBJIeHHHaHpAMHOI dIa cnPKyIbHorO Ta napaIeIbHoro pi3y
Дя ВИПИЛЮВАнг КИ (Ø 100 — Ø 360 MM) Ta po3pi3B napaJIeNBHO Do крOMК (MaKc. 210 MM).
BcTaHOBJIeHHHaHpMaHoiДЯцИрHuJbHoro pi3y (IINB.MaI.I)
- Bctabntu wToK HanpymHoi dIy cIpykbHoro Ta napaIeIbHoro p3y 360ky B onOpHy IlaCTnHy (cHTpyBaJIbHe BiCTpr (c) nobepHyTe DOHN3y).
- BctaHOBHTn noTpi6Hn paDiyc (d).
-3aTnBnHT(b). - NOBepHitb KhoNky, uo6 BnixaNo 3aHne ceHTpyBaIbHe BicTpr (c) y HapPmKy po3nnIOBaan. BCTaBte Ioro y ueHTpi KOJa.
BctaHOJIeHHI npaJIeJIbHOI HAnpAmHOI (INB. Man. II)
BCTaBHTN IToK HAnpymHOI DnI UnpkyIbHOrO Ta napaneIbHOrO p3y 360ky B OOnOpHy INaCTnHy (CENTpyBaJIbHe BiCTPra (c) MaE 6yt NOBepHyTe DOHN3y).
- HanaiTyBaTn po3mip (e).
- 3aTaryTu rBnHT (b).
ДяMiHIMi3auiB iDxHnIeHb NIIKOBOrO NOJIOTha MNIpeKOMeHnyeMo BnKOpNCTOByBaTHN NIIKOBiNOJIOTha NiDBNVUeHOI TOBUnH: 623694000,623679000,623685000
CnHcN 3aNaChNX YacTINH MOxHa 3aBaHTaKHTN Ha caTI www.metabo.com.
11. 3axnct doBknla
DToPmMyTecaHaioHaBnHex npaBn6e3neHoi yTnIi3aui i nepepo6Kn BnKOpncTaHnx
YKPAIHCbHAcuk
iHCTpyMeHTIB,naKyBaJIbHNx MaTepiJIb i npIaIaI.
IaKyBaIbHi MaTepiAIn Heo6XiIdNo yTuNl3yBaTH BIDIOBIDHO Do IXHbOro MapKyuBaHHra 3rIdHO 3 KOMyHaJIbHnMI npaBnIamN. OdaTkoBy iHΦopMaciIO HabeDeHo Ha caTI www.metabo.com y po3diI «CepBic»
3a6bOpHeHO yTnI3yBaTH aKymJrTopHi 6loKn pa3om 3 no6yTOBIMn BiXoJam! HecnpaBHi cn BiIpaCbObaHI aKymJrTopHi 6loKn Heo6xIDHO 3daBaTH dInlepoBi fipM Metabo!
3a6oHEno BnKnDaTn aKymyIaTOPHi 6JOKn y BOdOIMN!

TilbKn dIa KpaIH EC: 3a6OpOHeHO yTnIi3yBaTN eJIeKTHpoIHCTpyMeHTn pa3OM 3 IIObyTOBmN BiXoDAmN! 3riH0 3
eBponecboIO dnpeKTHBOIO 2012/19/EC npo 36epiraHHa, 36paHHa Ta nepepo6ky BiXoJIB eEeKtpnHoro i eEeKtpoHHoro 6bIaHaHHa Ta BiIOBIDHMn HauioHaJIbHMn HopmAmn BiIpaBoAhHi eEeKtpoiHCTpyMeHTn PdIraTb po3diHhi yTuNl3aui 3 MeTOO ix NOpalbwoi ekoloruHO 6e3neuHoI nepepo6Kn.
Ipeed TmJyTnI3yBaTu aKymyIaTOpHn6Lok, PO3prAdIb NOrO B eJeKtpoiHcTpymeHTi. BxNbaTu 3axoJnpOTn KOpOTKOrO 3aMnKaHHaKOHTaKTIB (HaPnKnlaD, i3OJIIOBAtu KLeNkoO cTpiHKO).
12. Texhichi xapaKtepncTnkn
PONCHENHNO daHnX, HabeDeEHNx Ha cTOp.3.
3aIIIpaMo 3a co6oIO npaBO Ha TexHiHi 3MiHN.
U=Hanpyra akyMnyTopHoro 6Ioka
T1 =HaiblaTaTOBnHaMaTepiany (depeBnHa)
T2 =HaiblaTaTOBuaHaMaTepiany (KoIbOpOBeMeTaII)
T3 =HaiblaTaTOBnHaMaTepiany (CTaJIeBNIJIncT)
n0 =KilbKiCTb XoIDIB NINKOBOrO NOIOTHa npXOIOCTOMy XoDi
P1 =HOMiHaIbHa cNoKnBaHa nOtYkHiCTb
P2 =BiiDaaBaHa nOtYHKHICTb
m=Maca3HaIMMeHlMMaKMyJrTOpHMM 6IOKOM
Pe3yIbTaTn BmMipIOBaHb OTpIMaHI 3riIDHO 3i CTaHdapTom EN 62841.
TemnepaTpa HABKOLINHbOre cepeOBNa nIaceknnyataui:
BID-20°C Do 50°C (npaue3daTHiCt b 6mEKeHa npi TemnepaTypi HnKHe 0°C).Donyctima TemnepaTypa HABKOJINHbOro cepeOBuza nIac 36epirAHn: BID 0°C Do 30°C.
NOCTIHNNCTpyM
Ha Bka3aHi TexHicHi xapaKTepeNCTnKn
noHpiIOIbCra DOnyckn, nepeI6aueHi YHHIMN
CTaHdapTaMn.

3haeHHa emicii ymy
3a donomorOIO uX 3HaueHb MOxHa
ouHOBaTI i nopIBHOBaTI emicIO wMy pi3Hnx eEeKTPoIHCTpyMeHTiB. 3aJeKHO BiD yMOB ekCnIyataii, CTHy eEeKTPoIHCTpyMeHTa a60 IHCTpyMeHTaJIbHx HacaDOK faKTnUHe
HaBaHTaKeHHa MoHe 6bTH BnIe a6o HnXue.ДЯ OuzHKN 3pa3KOBOro pIBH YA EMcii BpaxOBynte nepePBn Bpo60Ti Ta 4a3n po60Tu 3i 3HNKeHM (WymOBm) HaBaHTaKeHHa. Bn3HaYte nepelik OpraHIauiHnx 3axOJB uOdo 3axHCTy KopNCtBuAca 3 ypaxyBaHHaM BiINOBIDHx 3HaueHb EmiciI Wymy.
CymapHe 3HaueHnB Bi6pauii (BeKTopHa cyMa Tpbox Hanpzmki) po3paxOByeTbcra BiDnOBiDHO do cTaHdapTy EN 62841:
ah,CM =3HaueHnH Bi6paquii (NIIaHH MeTaIeBOrO IInCTa)
aH.CW =3HaueHHBippaui
(HJIHHNDEpeBHHN)