RL4363SBAB1 - Freezer SAMSUNG - Free user manual and instructions
Find the device manual for free RL4363SBAB1 SAMSUNG in PDF.

Frequently Asked Questions - RL4363SBAB1 SAMSUNG
Download the instructions for your Freezer in PDF format for free! Find your manual RL4363SBAB1 - SAMSUNG and take your electronic device back in hand. On this page are published all the documents necessary for the use of your device. RL4363SBAB1 by SAMSUNG.
USER MANUAL RL4363SBAB1 SAMSUNG
User servicing manual
- You can check where to buy replacement parts at http://samsung.com
-
Visit the part purchase site and enter the model code of your product to check the parts available for purchase. The model code is labelled on the outer side of your product.
-
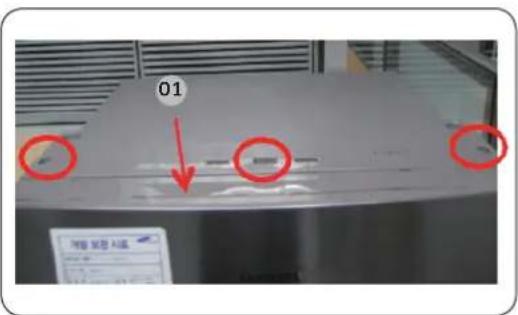
You can check the model code and version on the barcode label at the bottom left of the product.
-
For replacement parts, make sure the part name matches that of the illustration in this manual.
- User-serviceable parts are limited to handles (some models only), gaskets, drawers, and hinges.
NOTE
Following the repair by a non-authorised service provider, self-repair or non-professional repair of the product, Samsung is not liable for any damage to the product, any injury or any other product safety issue caused by any attempt to repair the product which does not carefully follow these repair and maintenance instructions. Any damage to the product caused by an attempt to repair the product by any person other than a Samsung certified service provider will not be covered by the warranty.
CAUTION
- The part name listed on the site may differ from that in this manual. Please make sure you choose the right part name.
- Replacing hinges requires extreme caution because it involves detaching the door.
- Be sure to wear safety gloves while making repairs.
English
The actual image and provided parts of the refrigerator may differ, depending on the model and the country.
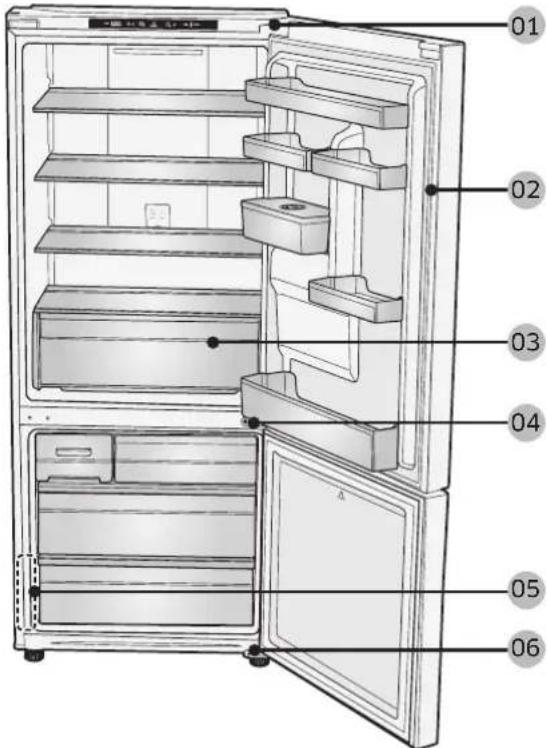
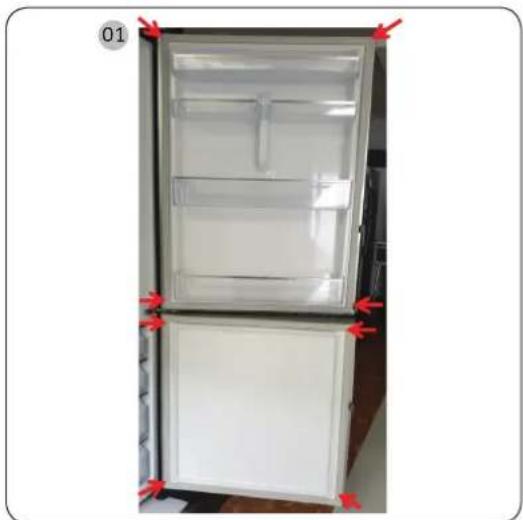
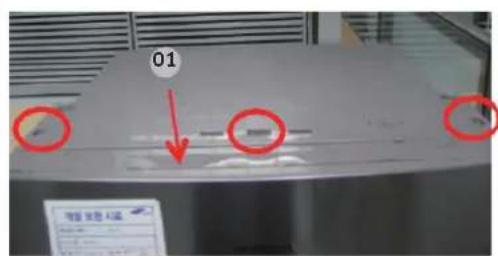
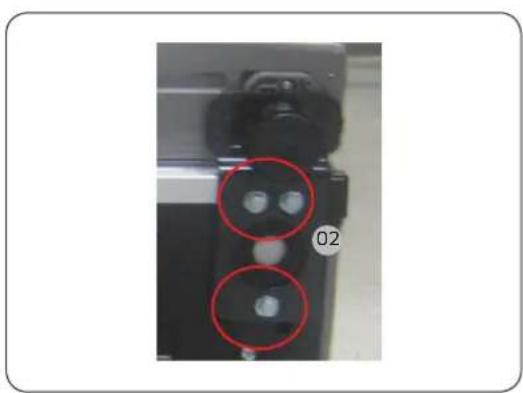
01 Hinge Up 02 Gasket
03Drawer 04 Hinge Middle
05 Barcode label 06 Hinge Low
English
Handle replacement

CAUTION
- When replacing the door handle, take care not to scratch the front of the door.
- Firmly press the handles at the supports. Make sure there is no gap between the supports and the door.
- Tightly fasten the screws when attaching the handle.
- Check that the handle is firmly attached before using the product.
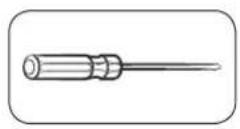
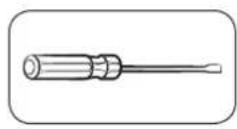
Tools required (not provided)
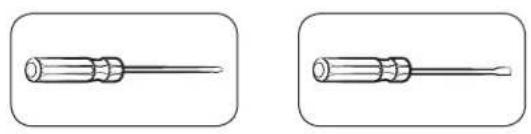
Phillips screwdriver Flat-head
screwdriver
To detach the handles

English
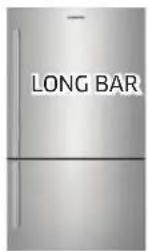
LONG BAR
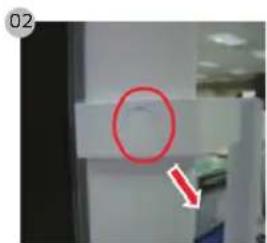
- Unscrewing and removing two set screw by Hexagon wrench disassemble the handle.
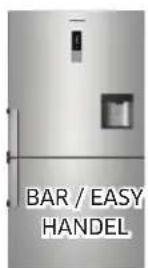
BAR/EASY HANDEL
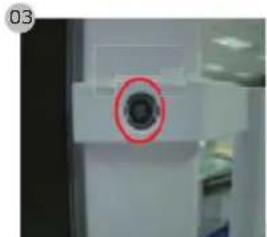
- Remove cap screw
- Unscrewing and removing two set screw by Hexagon wrench disassemble the handle.

CAUTION
- Be careful not to scratch.
- When disassembling, make sure the unit turned off if you want to assembly fellow the reverse order.
- Assemble the new handle in the reverse order of disassembly.
Gasket replacement
CAUTION
Make sure you firmly attach the gasket. Otherwise, cold air from the refrigerator may leak.
To remove the gasket
Open the door and remove the gasket from the door.
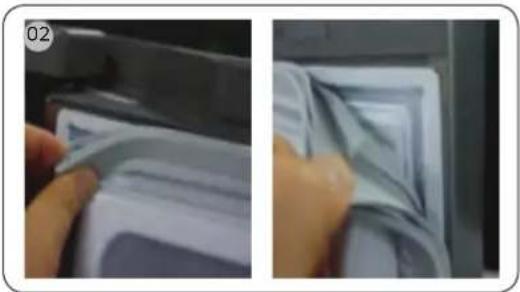
To replace the gasket
Attach a new gasket to the refrigerator door.
Make sure there is no gap between the newgasket and the door.
English
Drawer replacement
CAUTION
Check that the drawer is inserted properly into the rail during assembly.
To remove the drawer
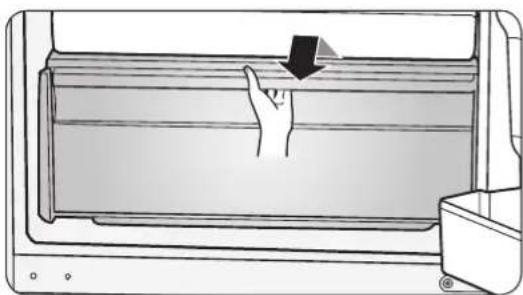
Pull the drawers out fully then slightly lift it up to remove the drawers.
- If the drawers get stuck to door, remove drawer by lifting up after remove shelves.
To reattach the drawers
Reattaching the drawers follows the reverse order of their respective removal steps.
Hinge replacement
To replace the hinges, you must remove the doors first.
CAUTION
- When removing the doors, take extreme caution because the doors are heavy.
- Before replacing the hinges, put a soft pad such as cardboard on the floor to prevent scratches on the door when you place the doors down.
- As the hinges must be handled carefully and replaced by two or more persons, we recommend you to call for professional technical service.
- If you remove the hinge without holding the door, the door may fall and cause injury.
- Ensure that the shaft is firmly tightened on the hinge.
- Check that the hinge is firmly attached to the cabinet.
- Make sure the wire connectors are connected properly.
- Be careful not to damage the wires when fastening the top cover.
WARNING
- Tilting/laying the refrigerator requires a minimum of 2 people.
- Disconnect the power cord before reversing the doors.
English
Tools required (not provided)
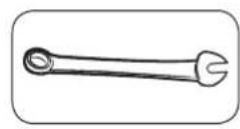
Phillips screwdriver Flat-head screwdriver 11 mm spanner
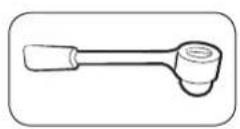

10 mm socket wrench Allen wrench (5 mm)
Reversing the door
Hinge Up
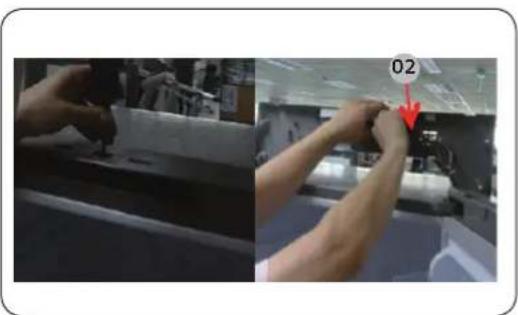
- Remove the Cover wire Door using a flat head screwdriver.
- Remove screw 3 ea Cover hinge with the (+) screwdriver and Disconnect wire.
English

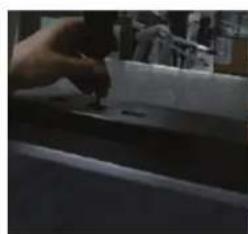
Hinge Mid
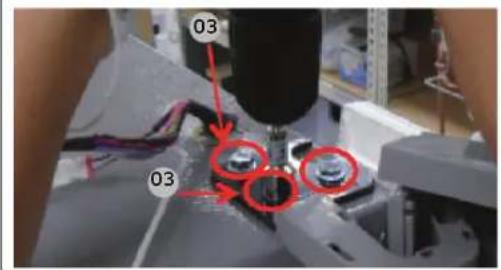
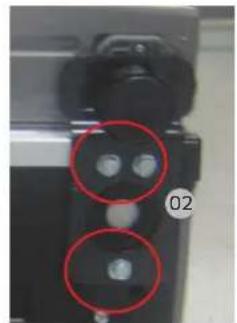
- Remove the 3 hex bolts that hold the hinge on the top of the refrigerator with the 10mm socket wrench.
- Take out cover hinge wire and remove hinge.
CAUTION
- Be sure to unplug the power cord before performing the operation above.
-
Must working more than 2 people.
-
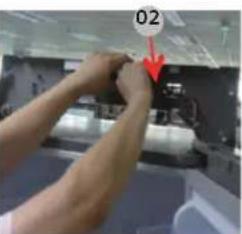
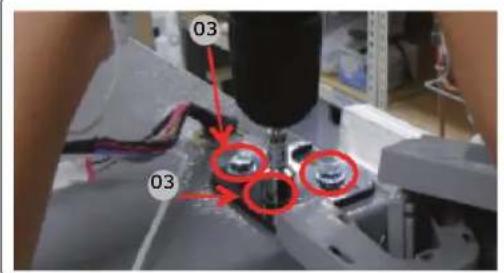
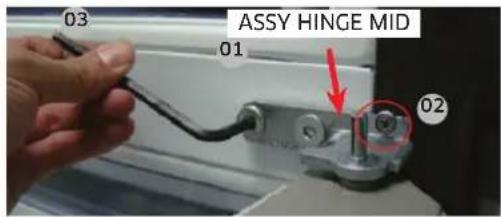
Assembly hinge mid from door ref up.
- Fix the screw 1 ea the hinge With (+) screwdriver.
- Fix the 2 hex bolts that by Hexagon wrench.
CAUTION
- Be sure to unplug the power cord before performing the operation above.
- Must working more than 2 people. One person grab the door to prevent falling door.
English
Hinge Low

- Lay down product (Refer picture).
CAUTION
- Must to a pad underneath to protect the back of the product from being damaged.
- Must working more than 2 people.
-
Be sure to unplug the power cord before performing the operation above.
-
Remove the 3 hex bolts that hold the hinge with the 8 mm socket Wrench or using (+) screwdriver.
- Remove Hinge Low.
- Reassemble in the opposite order of disassembly after replacing the Hinge Up, Hinge Mid, and/or Hinge Low.
CAUTION
- Make sure the wire connectors are connected properly.
- Be careful not to damage the wires when fastening the top cover.
English
Guide de réparation
KpTaHIIocHaT WpaQunreKJyU 11 mm


Kpkaio 10 mm Nm6yc (5 mm)
3aBpTyBaHe Ha BpaTaTa
TogHa wapka
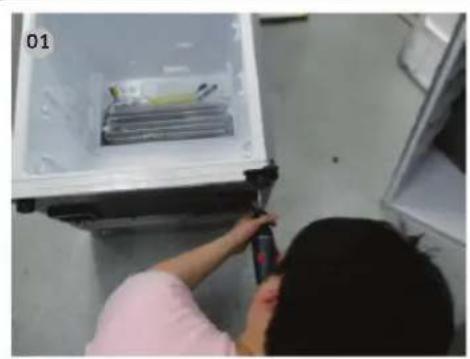
- OTeTpaHete ja XncaTa Ha KanaKoT Hnd BpaTata co NOMOHa paMeH WpaΦuRepe.
- OTCpaHete 3-Te wpaHa Ha kanaKOT Ha shapkaTa co (+) wpaqurrep n OTcpaHete ja XncaTa.
MaKeDoHcKn

CpeHa wapka
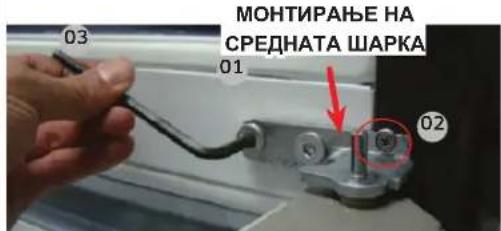
- ⅠЗВадente Г 3-Te WeecToarOJHn 3aBpTKn ⅦTo jaДржat WapKaT ha rOpHnot DeI Od ΦPnxKIDepOT co KpKano 10mm.
4.ИЗваде Ги КалakOT HaшаркATAиHaЖицати OTCTpaHete jaшаркata.
BHIMAHNE
OcnrypeTe ce deKa cTe ro ncknyuHne Ka6eIOT 3a HanojyBaHbe nped da ja n3BpHnte pa6oTata norope.
- Mopa da pa6oTaT nobKe oD 2 nua.
- Cknonete ja cpeHaTa WaPka Hn BpaTata Ha 0pnKndepot.
- 3aucbctete ro 1-nOT wpaq ha wapkata co (+) wpaqunrep.
- 3aucbpcTeTe r2-Te wecToarOHN 3aBpTKn co wecToarOJen m6yc.
BHIMAHNE
OcnrypeTe ce deKa cTe ro ncknyHne Ka6enot 3a HanojyBaHe nped da ja n3BpHnte pa6oTata norope.
Mopa da pa6oTaT noBeKe od 2 nua. EAnho nue ja fapa Ka BpaTata 3a da ja cnpeu da naHe.
MaKeDoHcKn
Donha wapka
- IerHete ro npou3bOodT (IorneHete ja cnKata).
BHIMAHNE
Mopa da noCTaBnTe 3aHTnTa NOI npOn3BOoT 3a da ce cnpeuN OwTeYBaHbe Ha 3aDHNO T DeI Od npOn3BOoT.
- Mopa da pa6oTaT nobKe oD 2 nua.
OcnrypeTe ce deKa cTe ro ncknynke Ka6enot 3a HanojyBaHbe nped da ja n3Bpnte pa6oTata norope.
2. OToTaPaHeTe 3-Te WeecToaGOnHn 3aBpTKn To ja dpKaat wapKaTa co KpuKaNo 8 mm nnn co (+) wpaΦuReP.
3. OTeTaHeTe ja DoJIHaTa WapKa.
4. CoCTaBeTe NOBTOpHO BO o6paTeH peOocneI OTkako CTe rN 3aMeHnJIe TropHaTaN/ NII DOnHATA WapKa.
BHIMAHNE
- PpOBepeTe DaJI Na6eNcKInTe npKInyOuCi ce NOBp3AHn npaBnHIO.
BHHMaBajTe Da He rO OHTeTte KInuTe KOra Ke ro 3aterHyBaTe rOpHnOT kanaK.
MaKeDoHcKn