
DVD EZMaker 7 - Audio/video converter AVERMEDIA - Free user manual and instructions
Find the device manual for free DVD EZMaker 7 AVERMEDIA in PDF.

| Product Type | Analog to Digital Audio/Video Converter |
| Brand | AVerMedia |
| Model | DVD EZMaker 7 |
| Interface | USB 2.0 |
| Video Inputs | Composite (RCA) |
| Audio Inputs | Stereo RCA (Left/Right) |
| Recording Resolution | 720x480 (NTSC) / 720x576 (PAL) |
| Supported Video Formats | MPEG-2, AVI, etc. (via software) |
| Included Software | CyberLink PowerDirector 14 |
| Supported Operating System | Windows 10/11 x64 |
| Minimum System Requirements | 2.4 GHz processor, 512 MB RAM, USB port |
| Power | Via USB (5V) |
| Dimensions (approx.) | 10 x 3 x 1.5 cm |
| Weight (approx.) | 50 g |
| Color | Black |
| Package Contents | Adapter, USB cable, quick installation guide, CyberLink product key card |
| Warranty | 2 years |
| Maintenance and Cleaning | Clean with a dry, soft cloth. Avoid moisture and abrasive products. |
| Safety | Use in a dry environment. Do not expose to water or extreme temperatures. |
| Spare Parts and Repairability | Parts not available. Product not user-repairable. Contact AVerMedia support. |
Frequently Asked Questions - DVD EZMaker 7 AVERMEDIA
User questions about DVD EZMaker 7 AVERMEDIA
0 question about this device. Answer the ones you know or ask your own.
Ask a new question about this device
Download the instructions for your Audio/video converter in PDF format for free! Find your manual DVD EZMaker 7 - AVERMEDIA and take your electronic device back in hand. On this page are published all the documents necessary for the use of your device. DVD EZMaker 7 by AVERMEDIA.
USER MANUAL DVD EZMaker 7 AVERMEDIA
All pictures contained in this documentation are example images only. The images may vary depending on the product and software version. Information presented in this documentation has been carefully checked for reliability; however, no responsibility is assumed for inaccuracies. The information contained in this documentation is subject to change without notice.
Copyright and Trademark Information
© 2025 by AVerMedia Technologies, Inc. All rights reserved. No part of this publication, in whole or in part, may be reproduced, transmitted, transcribed, altered or translated into any language in any form by any means without the written permission of AVerMedia Technologies, Inc. Information and specification contained in this manual are subject to change without notice and do not represent a commitment on the part of AVerMedia.
For more information, please visit www.avermedia.com.
AVerMedia is trademark or registered trademark of AVerMedia Technologies, Inc.
Headquarters
Address No.135, Jian 1st Rd., Zhonghe Dist., New Taipei City 23585, Taiwan
Website www.avermedia.com
Support www.avermedia.com/support
Telephone +886-2-2226-3630
US Office
Address 754 Charcot Avenue, San Jose, CA 95131, United States
Website www.avermedia.com/us
Europe Office
Address An der Strusbek 9, 22926 Ahrensburg, Germany
Federal Communications Commission Statement Class B

This device complies with Part 15 of the FCC Rules. Operation is subject to the following two conditions: (1) this device may not cause harmful interference, and (2) this device must accept any interference received, including interference that may cause undesired operation.
NOTE - This equipment has been tested and found to comply with the limits for a Class B digital device, pursuant to Part 15 of the FCC Rules. These limits are designed to provide reasonable protection
against harmful interference in a residential installation. This equipment generates, uses and can radiate radio frequency energy and, if not installed and used in accordance with the instructions, may cause harmful interference to radio communications. However, there is no guarantee that interference will not occur in a particular installation. If this equipment does cause harmful interference to radio or television reception, which can be determined by tuning the equipment off and on, the user is encouraged to try to correct the interference by one or more of the following measures:
Reorient or relocate the receiving antenna.
- Increase the separation between the equipment and receiver.
- Connect the equipment into an outlet on a circuit different from that to which the receiver is connected.
- Consult the dealer or an experienced radio/television technician for help.
CAUTION ON MODIFICATIONS - To comply with the limits for the Class B digital device, pursuant to Part 15 of the FCC Rules, this device must be installed in computer equipment certified to comply with the Class B limits. All cables used to connect the computer and peripherals must be shielded and grounded. Operation with non-certified computers or non-shielded cables may result in interference to radio or television reception.
Changes and modifications not expressly approved by the manufacturer or registrant of the equipment can void your authority to operate the equipment under Federal Communications Commission rules.
European Community Compliance Statement Class B

This product is herewith confirmed to comply with the requirements set out in the Council Directives on the approximation of the laws of the Member States relating to Electromagnetic Compatibility Directive (EMC) 2014/30/EU.

The mark of crossed-out wheeled bin indicates that this product must not be disposed of with your other household waste. Instead, you need to dispose of the waste equipment by handing it over to a designated collection point for the recycling of waste electrical and electronic equipment. For more information about where to drop off your waste equipment for recycling, please contact your household waste disposal service or the shop where you purchased the product.
CANICES-3(B)/NMB-3(B)
Canada - Canada Industry Canada (IC) Labelling Requirements
Every manufacturer or importer shall ensure import or before offering for sale, as appropriate, that each unit of the type that they offer for sale bears, in allocation convenient for inspection, a permanent label or marking containing (in French and English), the following statement:
ICES-003 (Interference - Causing Equipment Standards)
"This class B digital apparatus complies with Canadian ICES-003.
IMPORTANT SAFETY INSTRUCTIONS
- Retain Instructions - Retain all the safety and operating instructions for future reference.
- HeedWarnings - Adhere to all warnings on the product and the operating instructions.
- Grounding - For continued protection against risk of electric shock and fire, this accessory should be installed/connected only to the products, such as a computer, equipped with a three-wire grounding plug, a plug having a third (grounding) pin. This plug will only fit into a grounding-type power outlet. This is a safety feature. If you are unable to insert the plug into the outlet, contact your electrician to replace the obsolete outlet. Do not defeat the safety purpose of the grounding-type plug.
- Lightning - For added protection and to prevent damage due to lightning and power-line surges, unplug the host system, such as a computer, from the wall power outlet and disconnect the antenna or cable system. Unplug the host system from the wall power outlet when left unattended or unused for long periods of time.
MSIP Class B Statement (Korea)

MSIP-REM-AVM-C039
B如g(a当皂蕴兑(B):i之,自为
Class B (For Home Use Broadcasting & Communication Equipment): This equipment is home use (Class B) electromagnetic wave suitability equipment and to be used mainly at home and it can be used in all areas.
1 Package Contents

AVerMedia DVD EZMaker 7
CyberLink Product Key Card USB Cable
Quick Installation Guide

2 System Requirements
Windows® 10 x64 (Version 2004 or later) / 11 x64 or later
- For basic DVD authoring: Intel® Pentium® 4 2.4 GHz /
AMD Atholon™ XP 2400+ / Intel Pentium M 2.0 GHz
- For HD authoring and direct DV/HDV recording:
Intel Pentium 4 3.0 GHz / AMD Athlon XP 3000+
Mac OS is not supported
512 MB RAM
USB port
Sound card
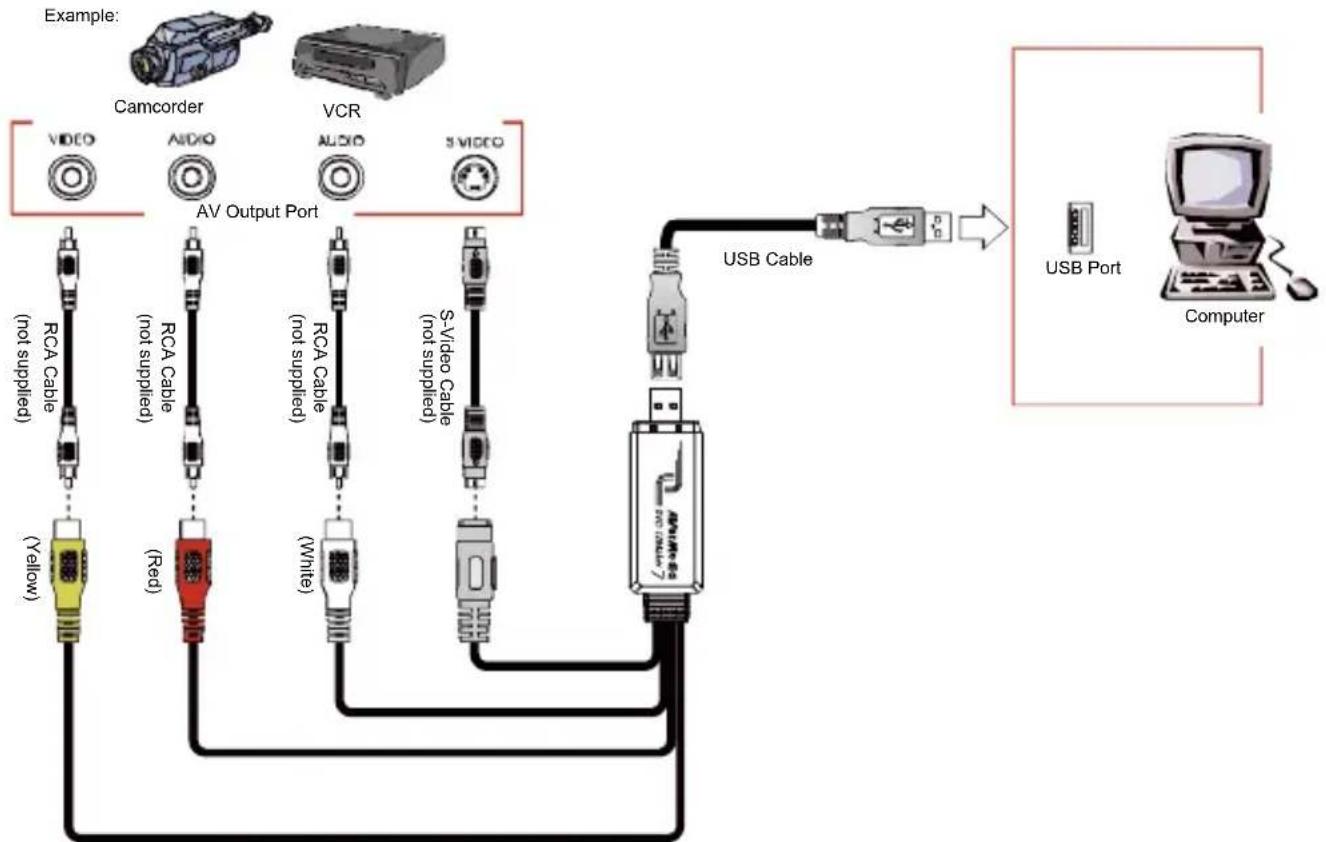
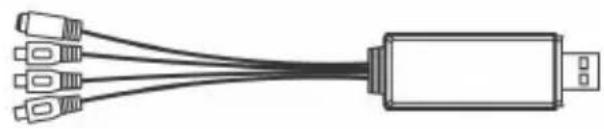
3 Hardware Installation
Connecting AVerMedia DVD EZMaker 7
Use the figure below to connect your AVerMedia DVD EZMaker 7. To record video with sound, you need to specify the audio input source and make sure the sound is NOT muted and have enough volume. To do this, double-click the yellow speaker volume icon on the taskbar or click Start, point to Programs > Accessories > Entertainment and then click Volume Control. Refer to the Volume Control Help Contents and look for "Adjust the recording volume" for more information.
English-2
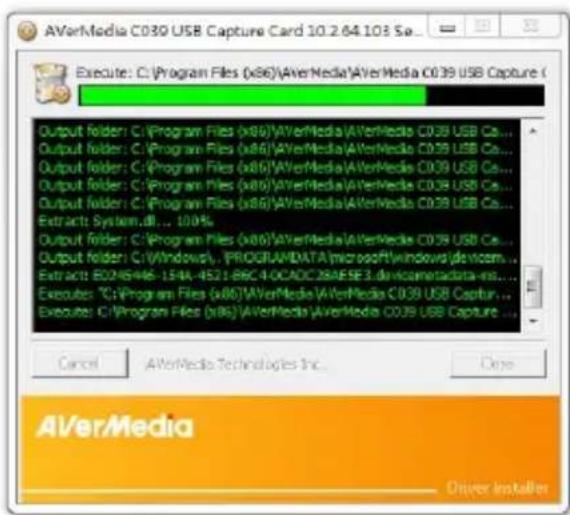
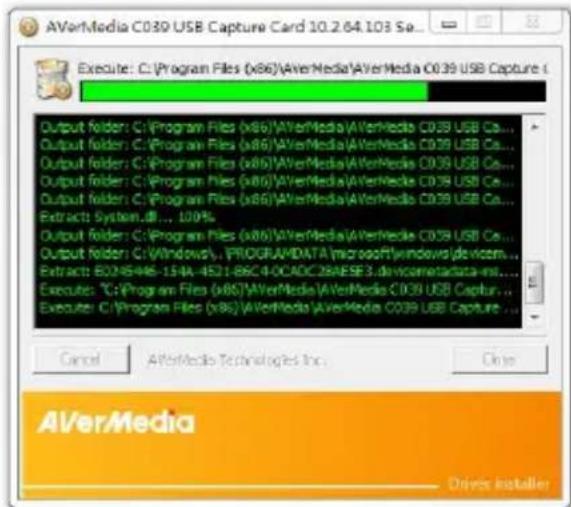
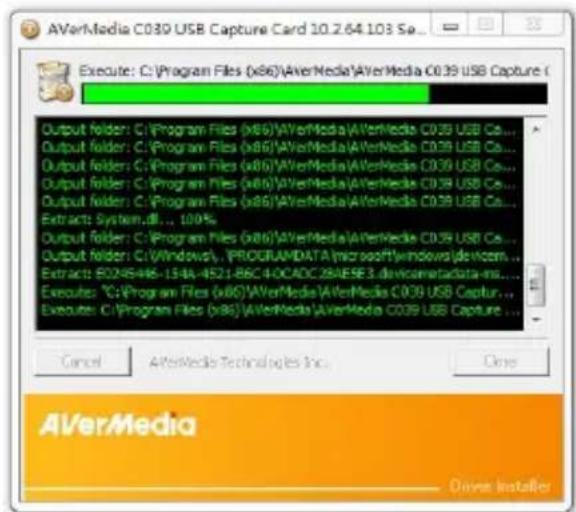
4 | Installing the Driver
After you have properly installed your AVerMedia DVD EZMaker 7, turn on your computer. The system will automatically detect the newly installed device on the first time you reboot your computer. Simply skip the wizard, and download the latest driver from our company website.
Important notice:
The CyberLink Power Director must be installed only AFTER the driver is completely installed.
Windows® 10 / Windows® 11
- Visit the product web page: www.avermedia.com/product-detail/C039
- Go to the Download section to download the latest driver.
- Run the downloaded file.
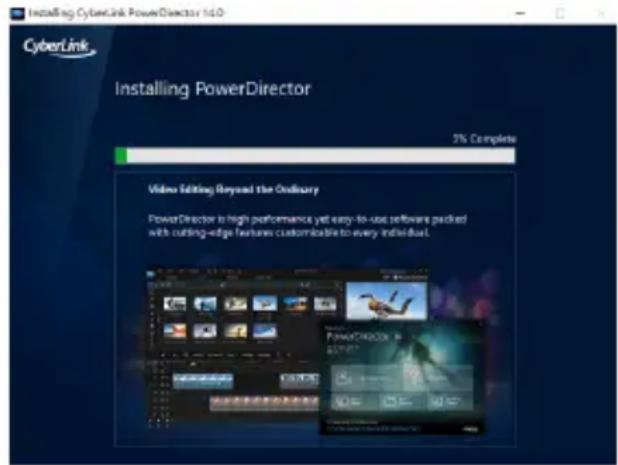
5 | Installing CyberLink PowerDirector14
- After you have completed installing the driver, you can install CyberLink PowerDirector14 to edit the video or to make movie disc.
- Download and install the software from the product web page: www.avermedia.com/product-detail/C039
- Open the AutoRun folder and run AutoRun.exe.
- Click on the Install Now and follow the on screen instruction to install the software.
- For more detailed information regarding editing please refer to the Cyberlink instruction.
Note: To get the Official Product Key, please enter the Virtual Serial Key on the PowerDirector Product Key Card in your gift box. For details on how to use the product key, visit www.avermedia.com/event/cyberlink-global-v
6 Uninstalling the Driver
Windows® 10 / Windows® 11
- Click on the START button and go to Control Panel / Settings.
- Double-click Programs and Features / Apps icon.
- Select AVerMedia C039 USB Capture Card and click on the Uninstall/Change button.
1 Packungsinhalt
3 Instalace hardware
CyberLink Power Director cniB BCTaHOBIOBAtn Iiue PICJIЯ NOBHO R BCTaHOBJIeHNAIpaIBepa.
Windows® 10 / Windows® 11
- BiDbIaIe Be6-CTOpiHky npOdykTy: www.avermedia.com/product-detail/C039
2.пердьdopo3diny3aBaHTaJNTn,uO6 3aBaHTaJNTnHaHOBiMnДpaNBeP. - 3anycitb 3abaHTaXeHn faHJ.
5 BCtahOBJIeHnCyberLinkPowerDirector14
1.Писязавершениинстаяцдраьера в moхerte bctahOBtN CyberLink PowerDirector14 Дп ретарувань Bideo abo CTBOpeHЯ дИСКА 3 Фльмам.
2. 3aBaHTaxTe Ta BCTaHOBiTb nporpaMHe 3a6e3neueHn8 3 Be6-CTopiHKn npOdyKtY: www.avermedia.com/product-detail/C039
3. BiKpnTe npKy AutoRun i 3anyctiTb AutoRun.exe.
4. Hatachitb «BctaHOBuTn 3apa3» (Install Now) Ta doTpmyIeCb noJaIbIuX Bka3iBOK nporpaMn IHCTaJIaIi.
5. Дя докладниои iHфорmaцii zuo peDAryBaHHa BiDeO 3BepTaITeCs Do DOBiDkn I3 Cyberlink.

www.avermedia.com/product-detail/C039
www.avermedia.com/product-detail/C039
www.avermedia.com/product-detail/C039
- 桂云龙口三仙宗从元以元同通者,其神
德拉伊贝将 daonrothahsitiO.
- 桂云龙王曰:「吾子,吾子!」
5 CyberLinkPowerDirector14 14
- 微信社
- 特别提示
- 请勿使用任何广告或其它形式,包括但不限于电子邮件、电话、短信、邮件、邮件链接、电子邮件链接、电子邮件链接、电子邮件链接、电子邮件链接、电子邮件链接、电子邮件链接、电子邮件链接、电子邮件链接、电子邮件链接、电子邮件链接、电子邮件链接、电子邮件链接、电子邮件链接、电子邮件链接、电子邮件链接、电子邮件链接、电子邮件链接、电子邮件链接、电子邮件链接、电子邮件链接、电子邮件链接、电子邮件链接、电子邮件链接、电子邮件链接、电子邮件链接、电子邮件链接、电子邮件链接、电子邮件链接、电子邮件链接、电子邮件链接、电子邮件链接、电子邮件链接、电子邮件链接、电子邮件
- 채류 펵 퍼이지에서 셶트워어를


- Copyright and Trademark Information
- Headquarters
- US Office
- Europe Office
- Federal Communications Commission Statement Class B
- European Community Compliance Statement Class B
- CANICES-3(B)/NMB-3(B)
- IMPORTANT SAFETY INSTRUCTIONS
- MSIP Class B Statement (Korea)
- Package Contents
- System Requirements
- Hardware Installation
- Connecting AVerMedia DVD EZMaker 7
- | Installing the Driver
- Important notice:
- Windows® 10 / Windows® 11
- | Installing CyberLink PowerDirector14
- Uninstalling the Driver
- Packungsinhalt
- Instalace hardware
- BCtahOBJIeHnCyberLinkPowerDirector14
- CyberLinkPowerDirector14 14
Brand : AVERMEDIA
Model : DVD EZMaker 7
Category : Audio/video converter