
VH5000E - Humidifier Vicks - Free user manual and instructions
Find the device manual for free VH5000E Vicks in PDF.

| Brand | Vicks |
| Model | VH5000E |
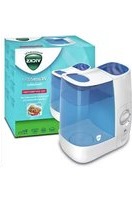
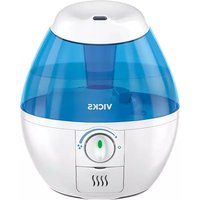
| Product type | Steam humidifier (cool mist) |
| Power supply | 220-240 V ~ 50 Hz, 21 W |
| Tank capacity | Approximately 4 liters (estimated) |
| Mist output | Adjustable (continuous, low to high) |
| Runtime | Up to 24 hours on low mist (estimated) |
| Auto shut-off | Yes, when tank is empty |
| Coverage area | Medium room up to 30 m² (estimated) |
| Special features | Scent pad (menthol), compatible demineralization cartridge (CH5000-DEM) and antibacterial |
| Daily cleaning | Empty and rinse tank with warm water, wipe base with damp cloth |
| Weekly cleaning | Bleach solution (1 teaspoon per 4 liters) – let sit 20 minutes, rinse |
| Descaling | Pure white vinegar or 50% diluted on mineral deposits |
| Safety instructions | On a flat, level surface; out of reach of children; do not use with wet hands; do not immerse base |
| Replacement parts | Demineralization cartridge CH5000-DEM, Vicks scent pad, antibacterial cartridge |
| Repairability | Do not repair yourself – contact manufacturer or authorized service (otherwise warranty void) |
| Warranty | Refer to warranty terms provided with the device |
| Weight | Approximately 2 kg (estimated) |
| Dimensions (W x D x H) | Approximately 25 x 25 x 30 cm (estimated) |
Frequently Asked Questions - VH5000E Vicks
User questions about VH5000E Vicks
0 question about this device. Answer the ones you know or ask your own.
Ask a new question about this device
Download the instructions for your Humidifier in PDF format for free! Find your manual VH5000E - Vicks and take your electronic device back in hand. On this page are published all the documents necessary for the use of your device. VH5000E by Vicks.
USER MANUAL VH5000E Vicks
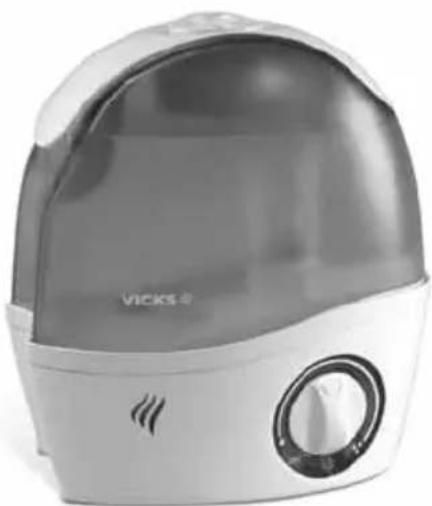
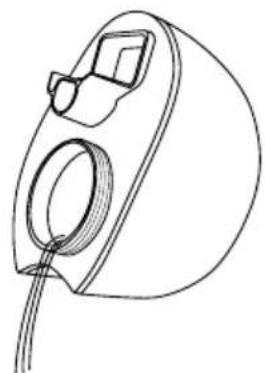
natural_image
Exterior view of a Vicks-branded vacuum cleaner with a circular vent and logo (no text or symbols on the device itself)VH5000E
| ENGLISH | 8 | CONTENTS |
| ČESKY | 12 | OBSAH |
| DEUTSCH | 16 | INHALT |
| ESPAÑOL | 20 | ÍNDICE |
| SUOMI | 24 | SISÄLLYSLUETTELO |
| FRANÇAIS | 28 | CONTENU |
| ΕΛΛΗΝΙΚΑ | 32 | ΠΕΡΙΕΧΟΜΕΝΑ |
| HRVATSKY | 36 | SADRŽAJ |
| MAGYAR | 40 | TARTALOMJEGYZÉK |
| ITALIANO | 44 | INDICE |
| NEDERLANDS | 48 | INHOUD |
| POLSKI | 52 | SPIS TREŚCI |
| PORTUGUÊSE | 56 CONTEÚDO | |
| ROMÂNĂ | 60 | CUPRINS |
| PYССКИЙ | 64 | СОДЕРЖАНИЕ |
| اللغة العربية | 68 | |
| SVENSKA | 72 | INNEHÅLL |
| SLOVENŠČINA | 76 VSEBINA | |
| SLOVENČINA | 80 OBSAH | |
| TÜRKÇE | 84 FÍHÍRST |

A)

③
natural_image
Diagram of a mechanical device with a gear and housing, showing a curved arrow indicating rotation (no text or symbols)Fig 1
④
natural_image
Line drawing of a bathroom sink with faucet and sink (no text or symbols)5
natural_image
Diagram of a mechanical device with a rotating component and a side view showing internal components (no text or symbols)Fig 2
6
natural_image
Line drawing of a hand pressing down on a device with a lid and internal components (no text or symbols)7
B)
natural_image
Diagram of a mechanical device with a cylindrical component and a base, showing a curved arrow indicating rotation (no text or symbols present)4
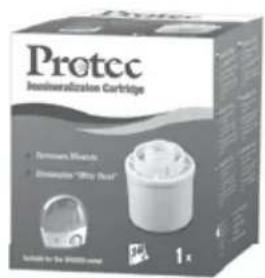
Fig 3
natural_image
Diagram of a cylindrical device with a perforated top and base, showing a circular arrow indicating rotation (no text or symbols)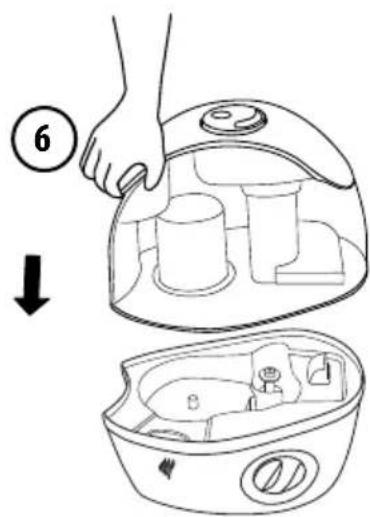
C)
natural_image
Line drawing showing a hand pressing down on a device with a circular head, and a close-up of the interior bowl containing a small appliance (no text or symbols)Fig 4
D)
1
3
natural_image
Line drawing of a small electronic device with ports and a handle, no text or symbols present4
natural_image
Line drawing of a hand placing a circular object into a bowl with a small container nearby (no text or symbols)5
natural_image
Line drawing of a hand placing a component into a basin with a handle (no text or symbols)6
natural_image
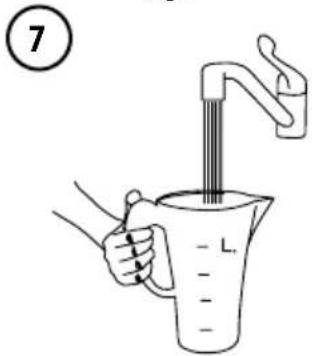
Illustration of a hand using a measuring cup to tap water from a faucet (no text or symbols)Fig 5
7
natural_image
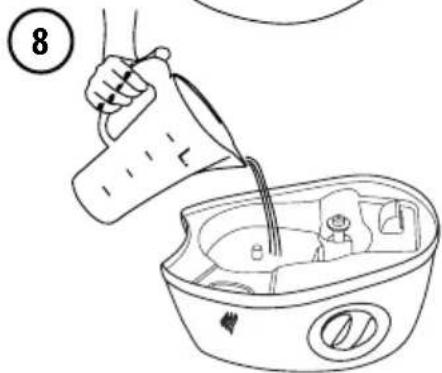
Line drawing of a hand pouring liquid into a bowl (no text or symbols)8
natural_image
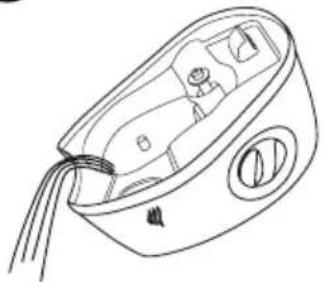
Line drawing of a small electronic device with ports and a handle (no text or symbols)9
10
E)

3
natural_image
Line drawing of a small electronic device with ports and wiring (no text or symbols)
Fig 6
9
natural_image
Line drawing of a device interior with handle, buttons, and ventilation slots (no text or symbols)10111213
natural_image
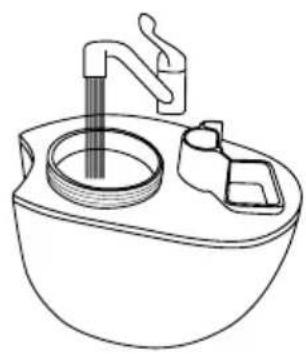
Line drawing of a bathroom sink with faucet and sink (no text or symbols)O
natural_image
Line drawing of a mechanical device with a coiled cable and two ports (no text or symbols)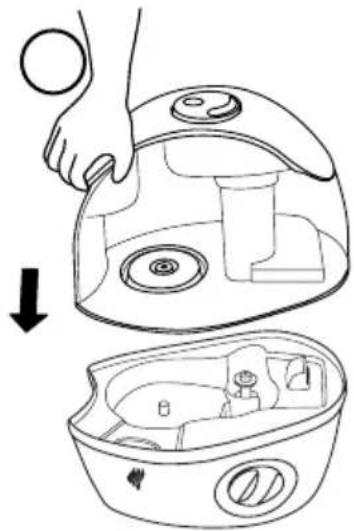
natural_image
Line drawing showing a hand using a tool to open the interior of a water purifier, with an arrow indicating the process (no text or symbols present)O
IMPORTANT SAFETY INSTRUCTIONS
- Read all instructions before using this humidifier.
- Always place this humidifier on a firm, flat and level surface. This humidifier may not work properly on an uneven surface.
- Place this humidifier in an area where it is not accessible to children.
- Do not place the humidifier near any heat sources such as stoves, radiators, and heaters.
- Do not use the humidifier outdoors.
- If the cord is damaged, the replacement must be conducted by the manufacturer, service agent or authorized person to avoid any risk of electrical shock.
- This appliance is not intended for use by persons (including children) with reduced physical, sensory or mental capabilities, or lack of experience and knowledge, unless they have been given supervision or instruction concerning use of the appliance by a person responsible for their safety. Children should be supervised to ensure that they do not play with the appliance.
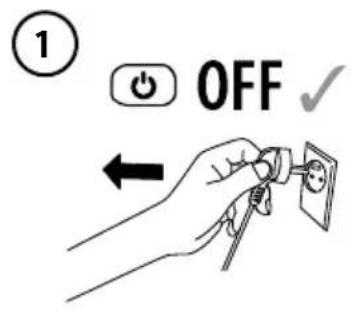
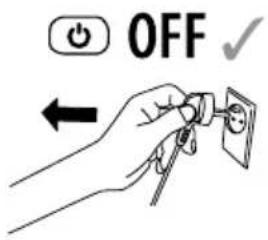
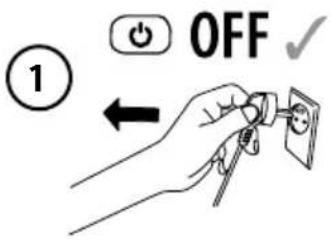
- To disconnect the humidifier, first turn controls to the OFF position, then grip the plug and pull it from the wall outlet. Never pull by the cord.
- A loose fit between the AC outlet (receptacle) and plug may cause overheating and a distortion of the plug. Contact a qualified electrician to replace loose or worn outlet.
- The humidifier should always be unplugged and emptied when not in operation or while being serviced or cleaned.
11 Never tilt or attempt to move the humidifier while it is operating or filled with water. UNPLUG the humidifier before moving. - This humidifier requires regular cleaning. Refer to the CLEANING instructions provided. Never clean the humidifier in any manner other than as instructed in this manual.
- Do not direct moisture flow directly at individuals, walls or furniture.
- When a humidifier is used in a closed room or small rooms, check periodically for proper ventilation, as excessive humidity can cause condensation stains on walls.
- Turn the humidifier OFF if you notice moisture on the inside of your windows. For proper humidity reading use a hygrometer, which is available in many hardware and department stores, or by ordering one from the manufacturer.
- Do not touch the nebulizer while the unit is plugged in as burns could result.
COMPONENTS (See page 3)
- Carrying handle
- Directional mist nozzle
- Water tank
- Tank cap
- Base
- Power switch and intensity control
- Pilot light
-
Scent pad heater
-
Optional Demineralization or Antibacterial cartridge (not included in pack)
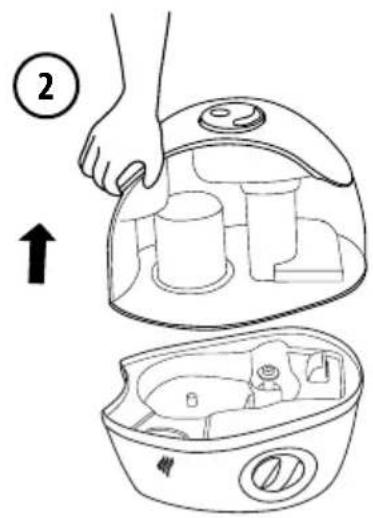
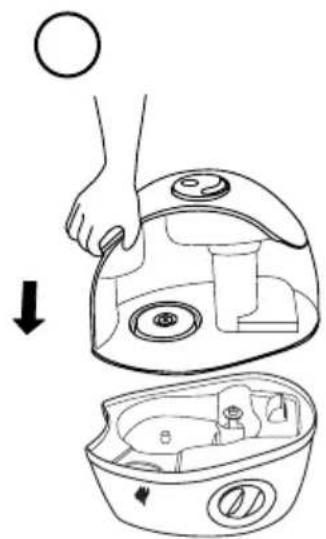
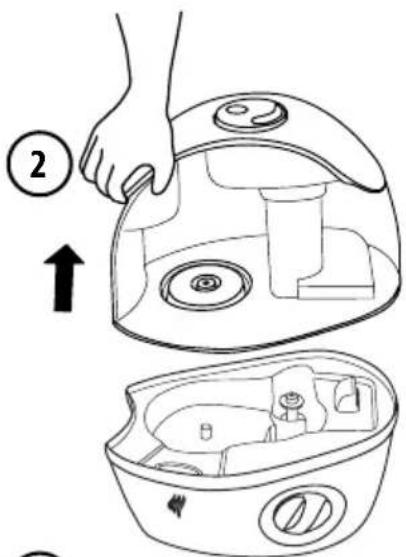
FILLING (See appendix A on page 4)
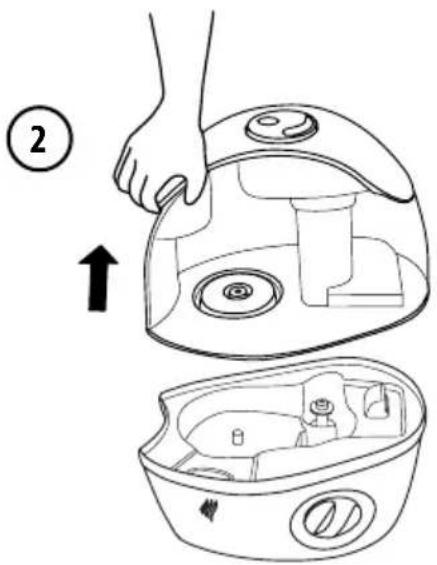
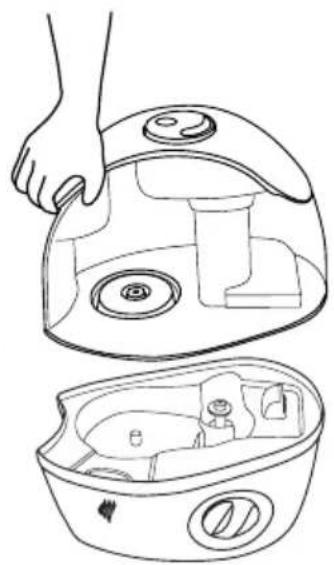
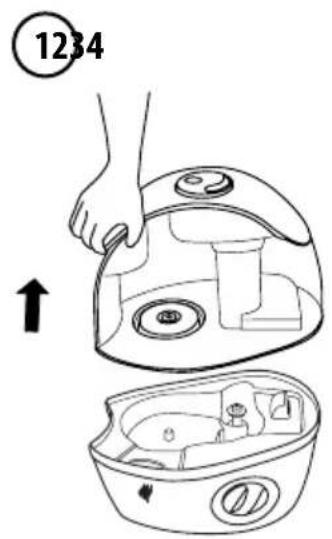
Remove the Water Tank by grasping handle and pulling straight up (Fig. 1). Set aside.
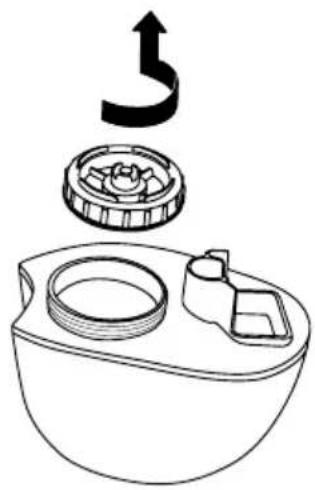
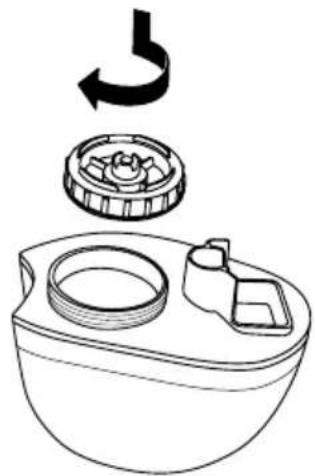
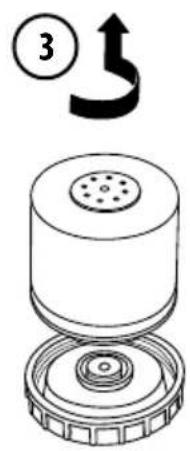
- Turn the Water Tank upside down so that the Tank Cap is facing up; unscrew the Tank Cap by turning it counterclockwise and set aside.
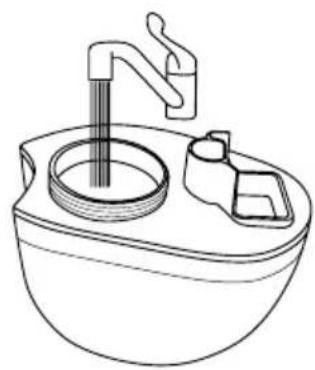
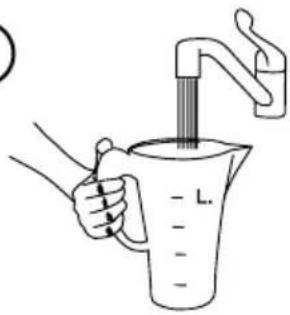
- Fill the Water Tank with clean, cool, tap water (Fig. 2).
- Replace the Tank Cap by firmly turning clockwise. Turn the Water Tank upright and check the Tank Cap for leaks. If any water drips from the Tank Cap, remove it and re-tighten. Use of very cold water may temporarily reduce the mist output. Never fill the humidifier with hot or warm water as this could cause damage and void your warranty.
NOTE: When carrying the filled Water Tank, please use the handle and place your other hand under the tank for additional support.
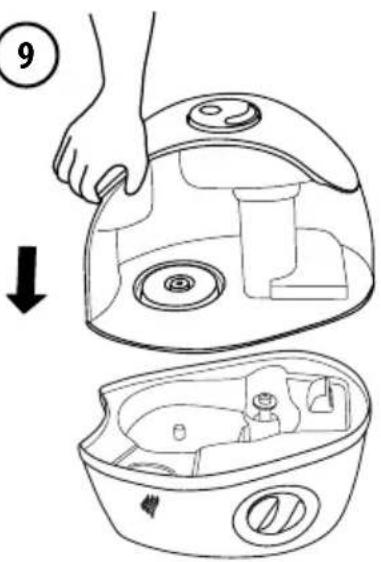
- Position the Water Tank in the humidifier and push into place. Some water will empty into the Base.
- Once the filled tank has been positioned, do not attempt to move the humidifier. If it has to be moved, unplug the humidifier and remove the Water Tank first.
FIRST TIME OF USE
Before using the unit for the first time, you should note the following points:
- Remove all packing material from the unit
- It is recommended that you disinfect your humidifier prior to first use. See cleaning Instructions.
- Select a firm, level location at least 15 cm from any walls for proper airflow.
- Place the humidifier on a water resistant surface.
OPERATING INSTRUCTIONS
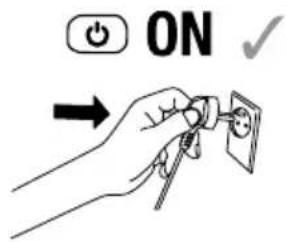
A) POWER
CAUTION: DO NOT PLUG IN THE HUMIDIFIER WITH WET HANDS AS AN ELECTRICAL SHOCK COULD OCCUR.
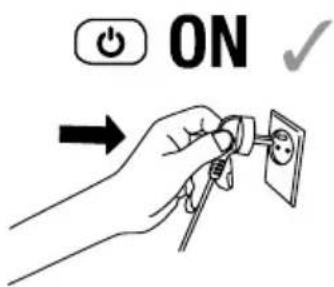
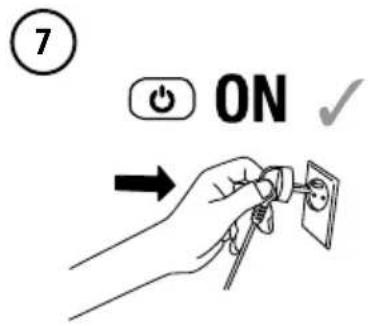
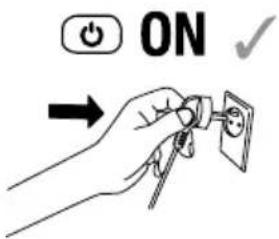
- With the power switch in the OFF position, plug the filled humidifier into an outlet.
- Turn the Power Switch clockwise to the on position. The Water Window will illuminate.
- Set your desired output by turning the knob clockwise. To operate on HIGH, turn the dial to the end.
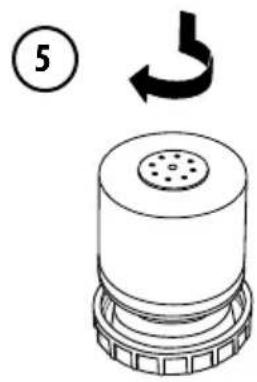
- Mist will not appear immediately; allow a few minutes for the water to fill the reservoir. If you are using the optional Demineralization Cartridge (Fig. 3), it may take up to 15 minutes for the filtering material to become saturated and for mist to appear.
- The unit will shut off when it is out of water.
- Turn the humidifier off before removing and refilling the Water Tank. When the Water Tank is empty the mist will stop although the fan will continue to operate.
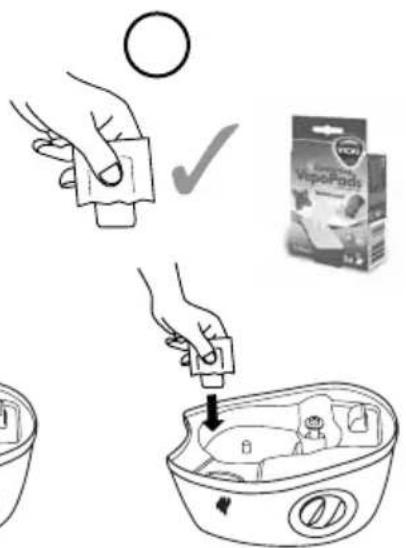
B) SCENT PAD HEATER DIRECTIONS FOR USE
(see appendix C on page 5)
- Turn off and unplug your humidifier.
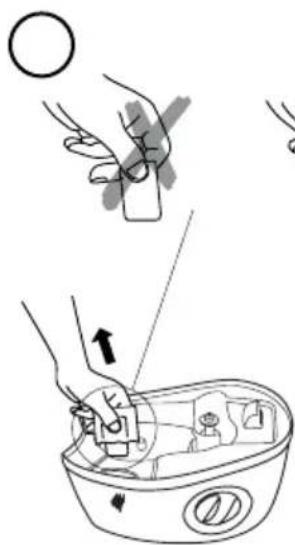
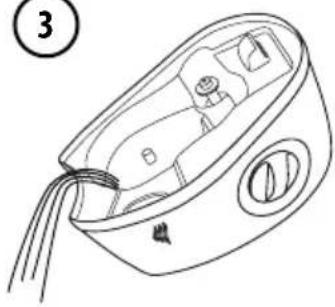
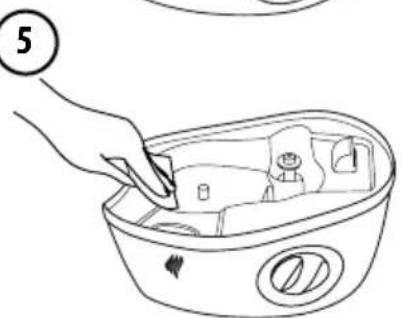
- Remove the water tank and locate the scent pad slot on the base (Fig. 4).
-
Place one scent pad in the slot, being careful not to touch the scent pad with your hands.
If your hands do come in contact with the pad, please wash them thoroughly as the menthol can be an irritant. -
Replace the tank and turn the unit on.
Note: As long as your humidifier is on, the scent pad heater will also be activated. This area can be warm to the touch.
C) ANTIBACTERIAL CARTRIDGE USE
(see appendix B on page 5)
In order to have a pure mist, the pathogens particles of the water must be killed. In the water the following elements can be found:
HOW IT WORKS:
The antibacterial cartridge is a cartridge filled with carbon. The active carbon acts like a filter to treat the water and carriers silver to maximize the effectiveness of water treatment.
One gram of silver nanoparticles is all that is required to give antibacterial proprieties to the cartridge and kill the bacteria, viruses and fungus.
After antibacterial cartridge treatment, bacteria, viruses and Fungus are killed.
Bacteria:
All bacteria use an enzyme as a form of ‘chemical lung’ in order to metabolize oxygen. Silver ions cripple the enzyme and stop the take up of oxygen. This effectively suffocates any bacteria, killing it within 6 minutes and leaving surrounding tissue or material unaffected.
Viruses:
Viruses grow by taking over another living cell and reprogramming the nucleus to replicate the virus rather than the healthy cell. As part of this process, the cell reverts to a more primitive form that relies upon a primitive form of oxygen metabolizing enzyme as a chemical lung. Again the silver ions stop oxygen being brought into the virus-producing cell and it dies by suffocation.
Fungus:
A fungus is composed of a series of single cells. Each cell survives by means of a ‘chemical lung’ much like that seen in bacteria. Just like bacteria, the presence of silver ions disables the chemical lung and the fungus dies
D) DEMINERALIZATION CARTRIDGE USE
(see appendix B on page 5)
In areas where the water is very hard there might be an output of minerals, noticeable as 'white dust'. To limit this effect it is recommended to use a Demineralization Cartridge.
HOW IT WORKS:
The Demineralization Cartridge is filled with Mixed-Bed De-ionizing Beads. Half of the beads have a positive electrical charge while half of the beads have a negative electrical charge. All minerals found in water have an inherent electrical charge (some positive, some negative). Minerals with a positive charge will attached themselves to the negative beads while minerals with a negative charge will attach themselves to the positive beads. In this way, minerals are removed from the water as it passes through the cartridge prior to entering the humidifier or the room being humidified.
E) HOW TO PUT THE CARTRIDGES (See appendix B on page 5)
- Remove the cartridge from the polybag
- Screw firmly onto the humidifier Water Tank Cap using the threads provided on the cap (the cartridge will reside inside the water tank)
-
Fill water tank.
-
Turn on Humidifier.
Cartridge will be effective 60 days depending on local water quality
CARE AND CLEANING INSTRUCTIONS
A) DAILY CLEANING (See appendix D on page 6)
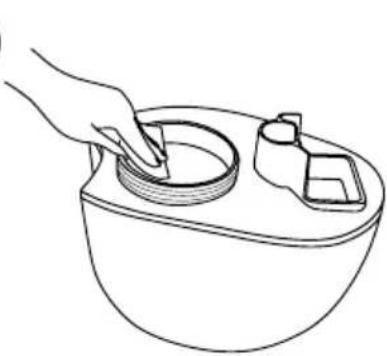
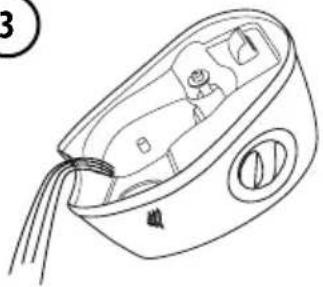
- Pull the power plug before cleaning, Remove the tank cap and Empty the residual water before cleaning.
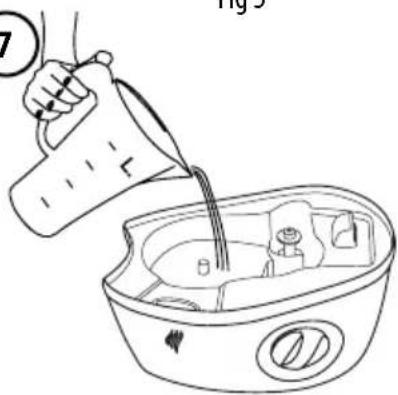
- Lift the Water Tank from the Base and empty all water from the reservoir. Remove the Tank Cap and drain any water from the Water Tank. Wipe it clean with a soft, damp cloth. Rinse the Water Tank with lukewarm water after each use (Fig. 5).
- DO NOT immerse the Base in water. Gently wipe the reservoir with a soft, clean, wet cloth.
- DO NOT use detergent to clean any water-containing parts of the humidifier. Detergents and the film they leave behind can affect the output of the humidifier. DO NOT use abrasive cleansers or brushes.
- DO NOT leave water in the Water Tank or reservoir when the unit is not in use as it may result in the buildup of mineral deposits and bacteria that can inhibit the output efficiency of the humidifier. Please note that if water remains in the Water Tank for more than a day or two, bacteria growth is possible.
B) WEEKLY CLEANING (See appendix E on page 7)
- Pull the power plug before cleaning, Remove the tank cap and Empty the residual water before cleaning.
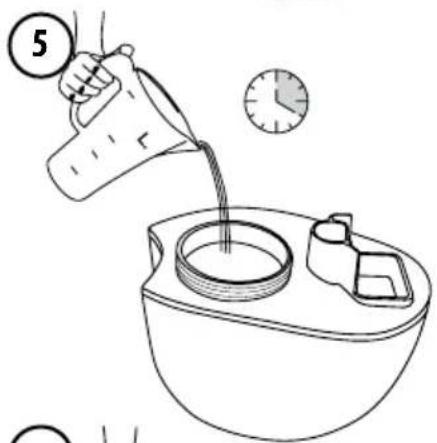
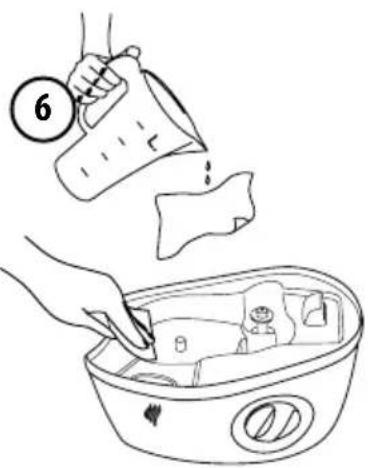
- Thoroughly clean humidifier every week using a solution of bleach and water (one teaspoon of bleach in one gallon of water). Fill the Water Tank partially with this solution, let stand twenty (20) minutes, shaking vigorously every few minutes. Drain and rinse with clean water until the bleach smell is gone (Fig. 6).
- Wipe the reservoir with a soft cloth dampened in the solution. Rinse area thoroughly before proceeding.
- If mineral deposits are evident around the Nebulizer, clean the surface with a soft, clean cloth and a small amount of undiluted white vinegar. If necessary for removal of mineral deposits, mix a solution of 50% white vinegar and 50% water and fill the Base with enough solution to cover the Nebulizer. Rinse out the reservoir and wipe clean.
Do not touch Nebulizer or the Water Sensor with bare fingers as any fingerprints or residue can reduce mist output. Do not immerse the Base in water.
- All surfaces should be thoroughly cleaned with water prior to reuse. Please dry the appliance with another cloth before use.
STORAGE
Follow cleaning instruction, discard cartridge and dry product thoroughly.
DISPOSAL
Please do not dispose of this product in the household waste at the end of its useful life. Disposal can take place at your local retailer or at appropriate collection points provided.
This regulation is valid only in EU member states.
CONDITION OF SALE
As a condition of sale, the purchaser assumes responsibility for the proper use and care of this appliance in accordance with these printed instructions. The purchaser or user must judge himself or herself when to use the appliance and the length or use.
NOTE: IF YOU EXPERIENCE A PROBLEM WITH YOUR HUMIDIFIER PLEASE SEE WARRANTY FOR INSTRUCTIONS. PLEASE DO NOT ATTEMPT TO REPAIR THE HUMIDIFIER YOURSELF. DOING SO WILL VOID THE WARRANTY AND COULD CAUSE DAMAGE OR PERSONAL INJURY.
Technical specifications are subject to change.
VH5000E
220-240V \~ 50HZ
21W
TROUBLE SHOOTING
| PROBLEM | POSSIBLE CAUSE | CORRECTIVE ACTION |
| Power Switch is set to “On” and Power Light is off | 1. Unit not plugged in | Plug unit in. |
| 2. No power at outlet | Check circuits, fuses, try a different outlet. | |
| Little or no mist is produced | 1. No water in tank | Fill Water Tank. |
| 2. Unit is not level | Place on a level surface. | |
| 3. Mineral deposits on Nebulizer | Clean Nebulizer per instructions. | |
| 4. Water Tank was washed with detergent | Rinse thoroughly with clean water.Wipe dry. | |
| 5. Water level too low | Add water to Water Tank. | |
| 6. Demineralization Cartridge is clogged | Remove Cartridge and restart machine.If mist resumes, replace with a new Cartridge (Model CH5000-DEM). | |
| 7. Nebulizer or fan not functioning | See Guarantee. | |
| Condensation forms around humidifier or windows | 1. Mist intensity is set too high for room size or preexisting humidity level | Reduce output level or shut off humidifier. |
| White Dust Accumulation | 1. Hard water used | Use distilled water or a Demineralization Cartridge. |
| 2. Demineralization Cartridge needs replacement | Replace Demineralization Cartridge(Model CH5000-DEM). |
DŮLEŽITÉ BEZPEČNOSTNÍ POKYNY
VAŽNE SIGURNOSNE UPUTE
IMPORTANT SAFETY INSTRUCTIONS
DÔLEŽITÉ BEZPEČNOSTNÉ POKYNY
IMPORTANT SAFETY INSTRUCTIONS
Manufactured by Kaz Europe SA under a license to the Vicks trademark.
Vicks is a registered trademark of the Procter & Gamble Company, Cincinnati, Ohio - USA.
© 2011, Kaz Europe SA

Kaz Europe SA
Place Chauderon18
CH-1003 Lausanne - Switzerland
www.kaz.com
ithalatçı :
Sistem Ltd.
Ortaklar Cad. Bahceler Sok. No:18/7


- IMPORTANT SAFETY INSTRUCTIONS
- COMPONENTS (See page 3)
- FILLING (See appendix A on page 4)
- FIRST TIME OF USE
- OPERATING INSTRUCTIONS
- A) POWER
- CAUTION: DO NOT PLUG IN THE HUMIDIFIER WITH WET HANDS AS AN ELECTRICAL SHOCK COULD OCCUR.
- B) SCENT PAD HEATER DIRECTIONS FOR USE
- C) ANTIBACTERIAL CARTRIDGE USE
- HOW IT WORKS:
- Bacteria:
- Viruses:
- Fungus:
- D) DEMINERALIZATION CARTRIDGE USE
- E) HOW TO PUT THE CARTRIDGES (See appendix B on page 5)
- CARE AND CLEANING INSTRUCTIONS
- STORAGE
- DISPOSAL
- CONDITION OF SALE
- VH5000E
- DŮLEŽITÉ BEZPEČNOSTNÍ POKYNY
- VAŽNE SIGURNOSNE UPUTE
- DÔLEŽITÉ BEZPEČNOSTNÉ POKYNY
Brand : Vicks
Model : VH5000E
Category : Humidifier