AXT 2200 HP - Meat Grinder BOSCH - Free user manual and instructions
Find the device manual for free AXT 2200 HP BOSCH in PDF.
| Product type | Silent garden shredder |
| Brand | Bosch |
| Model | AXT 2200 HP |
| Power input (S6, 4/6 min) | 2200 W |
| Power input (S1, continuous operation) | 2000 W |
| No-load speed | 40 rpm |
| Maximum throughput | 140 kg/h |
| Maximum branch diameter | 38 mm |
| Weight | 25 kg |
| Protection class | II / 1 |
| Power supply | 230 V ~, 10 A minimum |
| Collection bag | Included, hangs on hooks |
| Sound pressure level (LpA) | 78 dB(A) |
| Sound power level (LWA) | 89 dB(A) guaranteed ≤ 92 dB(A) |
| Rotor type | Knife carrier with reversible rotation direction |
| Rotation direction switch | Yes (forward/reverse) |
| Restart protection | Yes (automatic after power cut) |
| Overload protection | Yes (automatic shutdown) |
| Compression plate adjustment | By adjustment button (hex key included) |
| Main spare parts | Compression plate (ref. 1 601 000 001), knife carrier rotor, maintenance spray (ref. 1609 200 399) |
| Included accessories | Collection bag, hexagon socket screw key, transport wedges |
| Intended use | Shredding garden waste (fibers and wood) |
Frequently Asked Questions - AXT 2200 HP BOSCH
User questions about AXT 2200 HP BOSCH
0 question about this device. Answer the ones you know or ask your own.
Ask a new question about this device
Download the instructions for your Meat Grinder in PDF format for free! Find your manual AXT 2200 HP - BOSCH and take your electronic device back in hand. On this page are published all the documents necessary for the use of your device. AXT 2200 HP by BOSCH.
USER MANUAL AXT 2200 HP BOSCH
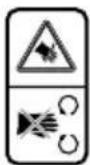
Environmental label "Blue Angel". Awarded for extra quiet operation.
RAL UZ54
Entsorgung
Senior Vice President Head of Product
Engineering Certification
ppa1b1c1 i.v. M1O_2
Robert Bosch GmbH, Power Tools Division
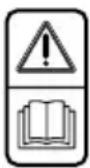
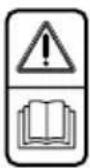
Warning: Read these instructions carefully, be familiar with the controls and proper use of the machine. Please keep the instructions safe for later use. Before using for the first time, ask for a practical demonstration.
Read instruction manual.
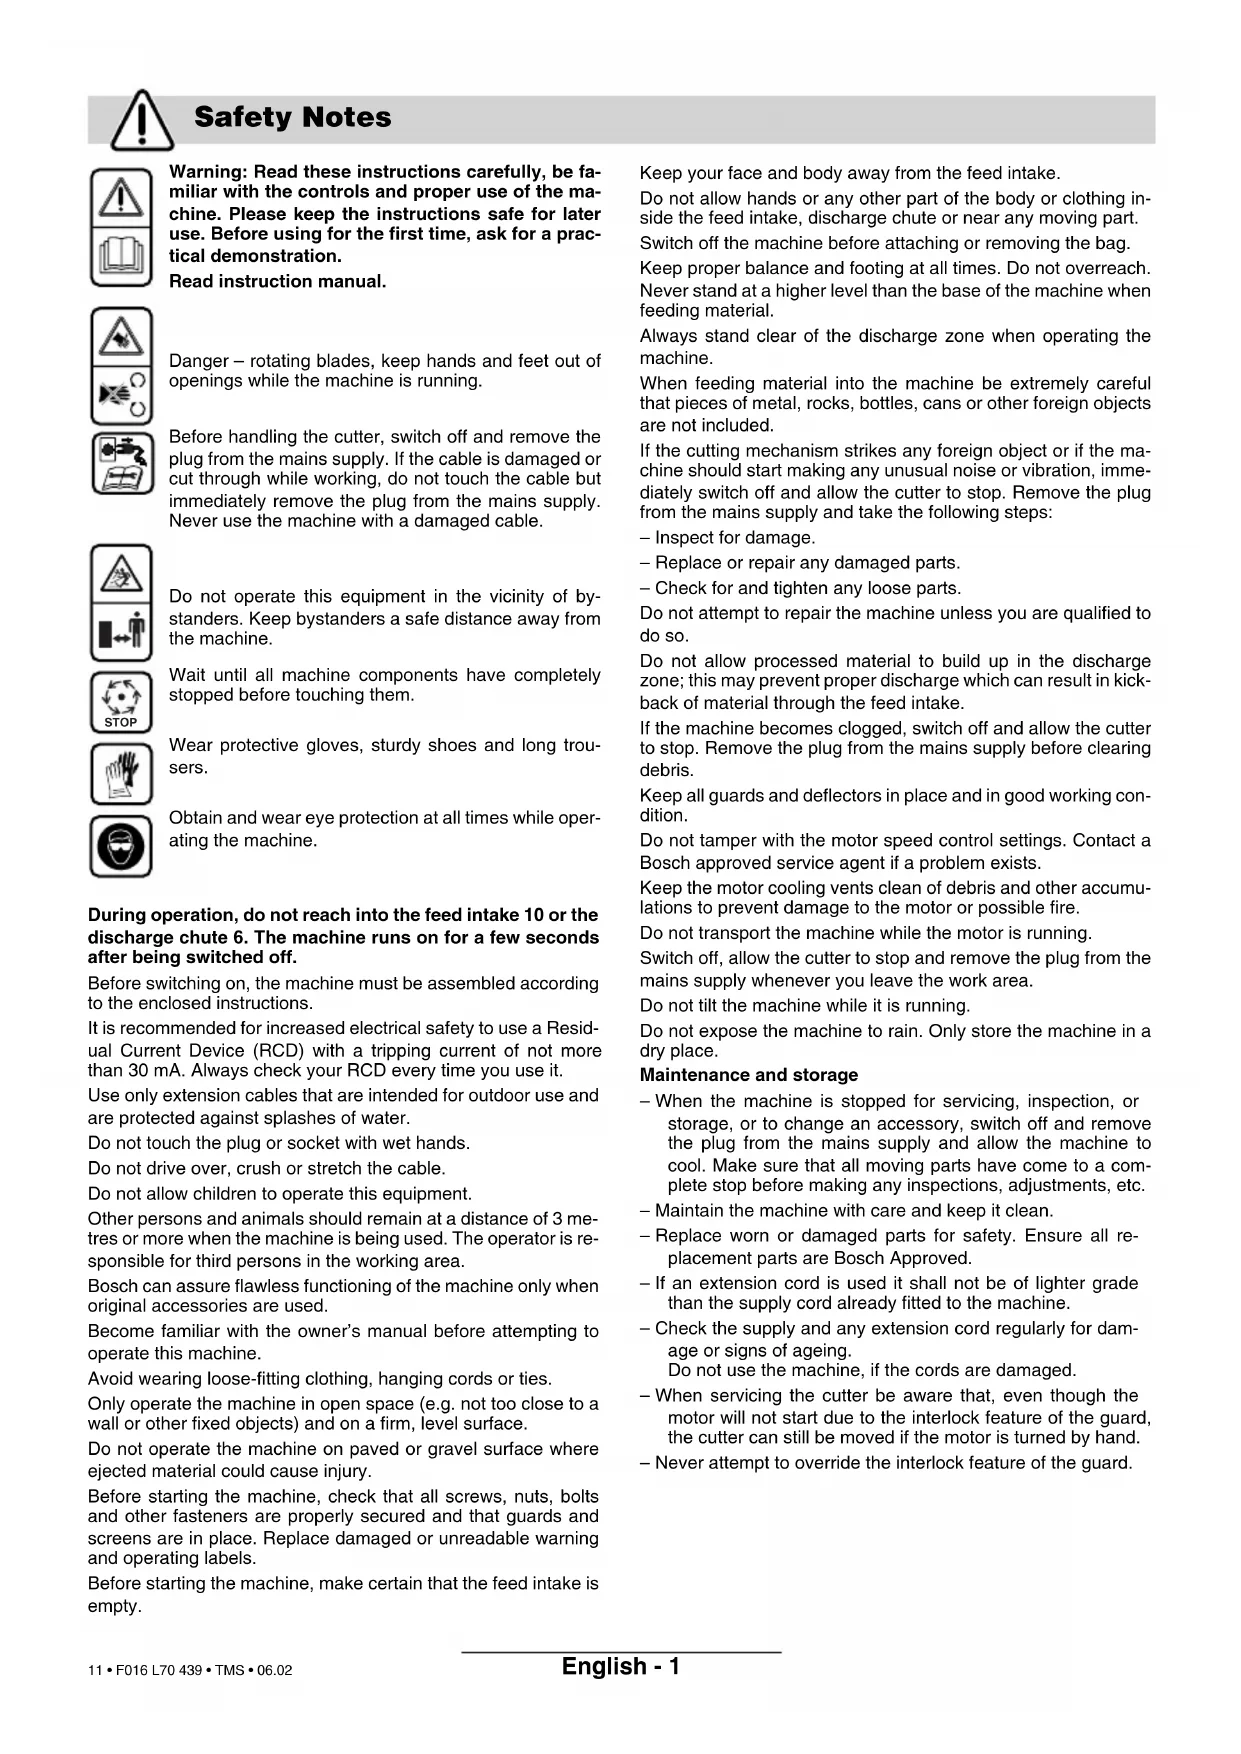
Danger - rotating blades, keep hands and feet out of openings while the machine is running.

Before handling the cutter, switch off and remove the plug from the mains supply. If the cable is damaged or cut through while working, do not touch the cable but immediately remove the plug from the mains supply. Never use the machine with a damaged cable.
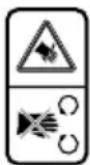
Do not operate this equipment in the vicinity of bystanders. Keep bystanders a safe distance away from the machine.

Wait until all machine components have completely stopped before touching them.

Wear protective gloves, sturdy shoes and long trousers.

Obtain and wear eye protection at all times while operating the machine.
During operation, do not reach into the feed intake 10 or the discharge chute 6. The machine runs on for a few seconds after being switched off.
Before switching on, the machine must be assembled according to the enclosed instructions.
It is recommended for increased electrical safety to use a Residual Current Device (RCD) with a tripping current of not more than 30mA . Always check your RCD every time you use it.
Use only extension cables that are intended for outdoor use and are protected against splashes of water.
Do not touch the plug or socket with wet hands.
Do not drive over, crush or stretch the cable.
Do not allow children to operate this equipment.
Other persons and animals should remain at a distance of 3 metres or more when the machine is being used. The operator is responsible for third persons in the working area.
Bosch can assure flawless functioning of the machine only when original accessories are used.
Become familiar with the owner's manual before attempting to operate this machine.
Avoid wearing loose-fitting clothing, hanging cords or ties.
Only operate the machine in open space (e.g. not too close to a wall or other fixed objects) and on a firm, level surface.
Do not operate the machine on paved or gravel surface where ejected material could cause injury.
Before starting the machine, check that all screws, nuts, bolts and other fasteners are properly secured and that guards and screens are in place. Replace damaged or unreadable warning and operating labels.
Before starting the machine, make certain that the feed intake is empty.
Keep your face and body away from the feed intake.
Do not allow hands or any other part of the body or clothing inside the feed intake, discharge chute or near any moving part.
Switch off the machine before attaching or removing the bag.
Keep proper balance and footing at all times. Do not overreach. Never stand at a higher level than the base of the machine when feeding material.
Always stand clear of the discharge zone when operating the machine.
When feeding material into the machine be extremely careful that pieces of metal, rocks, bottles, cans or other foreign objects are not included.
If the cutting mechanism strikes any foreign object or if the machine should start making any unusual noise or vibration, immediately switch off and allow the cutter to stop. Remove the plug from the mains supply and take the following steps:
-
Inspect for damage.
-
Replace or repair any damaged parts.
-
Check for and tighten any loose parts.
Do not attempt to repair the machine unless you are qualified to do so.
Do not allow processed material to build up in the discharge zone; this may prevent proper discharge which can result in kickback of material through the feed intake.
If the machine becomes clogged, switch off and allow the cutter to stop. Remove the plug from the mains supply before clearing debris.
Keep all guards and deflectors in place and in good working condition.
Do not tamper with the motor speed control settings. Contact a Bosch approved service agent if a problem exists.
Keep the motor cooling vents clean of debris and other accumulations to prevent damage to the motor or possible fire.
Do not transport the machine while the motor is running.
Switch off, allow the cutter to stop and remove the plug from the mains supply whenever you leave the work area.
Do not tilt the machine while it is running.
Do not expose the machine to rain. Only store the machine in a dry place.
Maintenance and storage
- When the machine is stopped for servicing, inspection, or storage, or to change an accessory, switch off and remove the plug from the mains supply and allow the machine to cool. Make sure that all moving parts have come to a complete stop before making any inspections, adjustments, etc.
- Maintain the machine with care and keep it clean.
- Replace worn or damaged parts for safety. Ensure all replacement parts are Bosch Approved.
- If an extension cord is used it shall not be of lighter grade than the supply cord already fitted to the machine.
- Check the supply and any extension cord regularly for damage or signs of ageing.
Do not use the machine, if the cords are damaged. - When servicing the cutter be aware that, even though the motor will not start due to the interlock feature of the guard, the cutter can still be moved if the motor is turned by hand.
- Never attempt to override the interlock feature of the guard.
Product Specification
Quiet shredder AXT 2200 HP AXT 2500 HP
Part number 0 600 852 0.. 0 600 852 1..
Power consumption, S 6 (4/6 min) ^1 [W] 2 200 2 500
Power consumption, S1 [W] 2000 2300
| No-load speed [rpm] 40 | 40 | ||
| Capacity max. | [kg/h] | 1402) | 1502) |
| max. Branch diameter | [mm] | 382) | 402) |
| Collecting bag | included | included | |
| Weight. approx. | [kg] | 25 | 26 |
| Protection class | ±/I | ±/I | |
1) The S 6 operating mode (40%) indicates a load profile of 4 min load and 6 min idle time. For practical application, continuous operation is permitted.
2) Depending on the hardness of the wood.
Operating Controls
1 On/Off switch
2 Rotational direction switch
3 Mains plug**
4 Undercarriage
5 Collecting bag/Cover*
6 Discharge chute
7 Allen Key
8 Adjustment knob
9 Hooks for collecting bag
10 Feed intake
11 Serial Number
*Optional accessory
**Country specific
*Not all of the accessories illustrated or described are included as standard delivery.
Intended Use
The product is intended for cutting of fibrous and woody garden waste for composting.
Assembly
Remove the machine from the package
(see figure A
Remove the wooden pieces (transport protection) (see figure B
Mount the wheels and the undercarriage
(see figuC D
When transporting without the stand, always use the transport safety piece.
Before Use
Always use the correct supply voltage! The voltage of the power source must agree with the value given on the nameplate of the machine. Machines designated for 230V can also be operated with 220V .
The circuit must at least be protected as follows:
AXT 2200 HP = 10 A,
AXT 2500 HP = 16 A.
When being operated with a generator the following power rating is required:
AXT 2200 HP — 3,5 kVA/2800 W
AXT 2500 HP — 4,0 kVA/3300 W.
(e.g. Bosch generator units G-3600-series).
An extension cable with a cross section that is too small causes a distinct reduction in the performance capabilities of the machine. For cables to 25m in length, a cross section of at least 3× 1,5mm^2 is required, for cables more than 25m in length, the cross section must be at least 2,5mm^2 .
Always completely unwind cable reels.

Always place the machine on firm level ground. During operation, do not tilt or move.
Remove earth from roots. Foreign material such as stones, glass, metals, fabrics or plastics must not enter the feed intake. Otherwise this could damage the cutting roller 13.
Starting and Stopping
The rotational direction switch 2 must be turned to the right. The feed intake 10 must be empty (see figure E).
Starting:
Set the on/off switch 1 to "l".
Stopping:
Set the on/off switch 1 to "O".
The motor will coast after switching off!
Restart Protection
A mains failure causes the on/off switch 1 to return to the "0" position. The machine cannot restart on its own when the power returns.
Rotational direction switch 2 (see figure E
Before switching the rotational direction, always switch the machine off and wait until it stops.
Right position: The cutting roller pulls in and shreds the material.
Left position: The cutting roller runs backward and frees jammed material.
Overload Protection
Overloading (e. g. blocking of the cutting roller) causes the machine to stop after a few seconds. The on/off switch 1 springs to the "0" position. Switch the rotational direction switch 2 to the left position (backwards) and after a short period restart the machine.
Working Instructions
Always wear eye protection and wear gloves during use.
To collect the shredded material, hang the carrying straps of the collection sack 5 on the hooks 9 on both sides of the machine.
Insert the material to be shredded. The material will be fed by the cutter roller 13 without further assistance.

Longer material standing out from the machine could lash out when being pulled in by the knives! Please keep at safe distance!
Only insert as much material so that the feed intake 10 will not be blocked up.
Shred withered, moist material and garden waste which has been stored for some days alternately with branches.
This prevents the cutting roller 13 from clogging.
Do not fill soft waste such as kitchen rubbish into the shredder but compost directly.
Take care that the shredded material can fall freely from the discharge chute 6 - danger of backing up! The ventilation slots must not be covered by the collecting bag or the shredded material.
Avoid blocking the discharge chute 6 with shredded material as this could result in kickback of material through the feed intake opening.
Advice on Shredding
Branches become harder to shred depending on the type, age and dryness of the wood.
For best results, shred fresh branches soon after they have been cut.
Soft garden waste should be shredded in smaller loads, particularly when wet. Any blockages can be avoided by intermittently shredding branches.
Pressure Plate Adjustment (see figure
The pressure plate 12 is factory adjusted and does not require adjustment before the first use.
Adjustment of the pressure plate 12 is necessary as a result of wear (shredded material, e. g. branches, hangs together as a chain and is not properly cut through):
Place the rotational direction switch 2 in the position to the right and switch on the machine.
With the motor running, turn the adjustment knob 8 (if necessary, using the Allen key 7) one notch to the right (clockwise direction) until a light grinding sound can be heard (the cutting roller 13 cuts the pressure plate 12 to the proper clearance, and some small aluminium shavings fall out of the ejection chute 6).
Readjust only to the required extent, otherwise the pressure plate 12 could wear unnecessarily.
Malfunctions

Before switching the rotational direction, always switch the machine off and wait until it stops.
The material to be shredded is not pulled in:
The cutting roller 13 is running backward: Switch rotational direction.
The material to be shredded is soft and wet: Push into machine with a piece of wood or change to shredding branches.
The material to be shredded jams in the feed opening 10: Place rotational direction switch 2 in the left position to free the material.
Thick branches are not pulled in:
Check cutting roller 13: If heavily worn, it must be replaced.
Shredded material is not completely separated and hangs together as a chain:
Adjust pressure plate 12 (according to Section "Pressure Plate Adjustment").
If the pressure plate 12 can no longer be adjusted, it must be replaced.
The motor does not run:
The overload protection has tripped: Allow the motor to cool. Place rotational direction switch 2 in the left position (backwards) and switch on the machine again. Allow the blockage clear. Then switch off and switch the rotational direction back to "right".
Check the house fuse. The circuit must be protected with at least the following fuse sizes:
AXT 2200 HP = 10 A, AXT 2500 HP = 16 A.
Direction of rotation switches automatically:
■When the machine is suddenly blocked (e.g. because of a large branch), the direction of rotation of the cutting roller switches automatically. In this case switch the machine off, wait until it stops and switch it on again.
Cutting Roller is blocked
- Place rotational direction switch 2 in the left position, switch machine on. The cutting roller 13 runs backwards and releases the shredded material (or foreign material). A special gear construction with rotational angle play allows the motor to start in the opposite rotational direction even if the cutting roller 13 is blocked. In extreme cases loosen pressure plate 12 (anti clockwise) before switching the machine on backwards.
- When the caught material is free, switch off machine, set rotational direction switch 2 to the right position and switch back on. Readjust the pressure plate if necessary.
- If the blocking cannot be eliminated by actions 1 and 2, the cutting roller 13 must be removed, checked for damage, and cleaned as described in section "Exchanging the Cutting Roller/Pressure Plate".
Maintenance and storage
■Before any work on the machine itself, remove plug from the mains supply.
For safe and proper working, always keep the machine and the ventilation slots clean.
The shredder must not be cleaned with high-pressure cleaners or running water.
The tightness of the fastening screws of the undercarriage should be checked from time to time.
The cutting roller 13 and the pressure plate 12 have a life expectancy of several years under normal usage and when adjustment according to instructions.
Before storing the machine, remove the cutting roller (as described in the Section "Replacing the Cutting Roller/Pressure Plate") and clean. Then treat the cutting roller with preservation spray (Accessory, Order No. 1609 200 399) and grease the bearings.
If the machine should happen to fail despite the care taken in manufacture and testing, repair is to be carried out by an authorised after-sales service agent.
For all correspondence and spare parts orders, always include the 10-digit part number (typ) from the nameplate of the machine!
Removing the Cutting Roller/ Pressure Plate (see figure
■Before any work on the machine itself, remove plug from the mains supply.
- Disassemble the cutting roller 13/pressure plate 12, sequence ① - ⑤
- Clean the cutting roller 13.
- Clean and grease the bearings.
- Reassemble the individual parts in the sequence ⑤ - ①.
- Afterwards turn adjustment knob 8 to the right until a light grinding sound can be heard and some small aluminium shavings fall out of the ejection chute 6. In case of stiffness of the adjustment knob 8, e.g. due to dirt, loosen it with aid of the Allen key 7.
The following exchangeable parts are available:
Pressure plate Part No. 1601000001
Transport Protection (see figure
When transporting without the stand, always use the transport safety 14 piece!
Environmental Protection

Environmental label "Blue Angel". Awarded for extra quiet operation.
RAL UZ54
Disposal
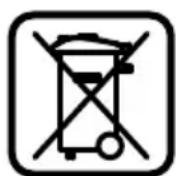
Power tools, accessories and packaging should be sorted for environmental-friendly recycling.
Only for EC countries:
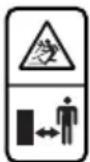
Do not dispose of power tools into household waste!
According to the European Directive 2002/96/EC on waste electrical and electronic equipment and its incorporation into national law, power tools
that are no longer suitable for use must be separately collected and sent for recovery in an environmental-friendly manner.
Service
Exploded views and information on spare parts can be found under: www.bosch-pt.com
Great Britain
Robert Bosch Ltd. (B.S.C.)
P.O.Box 98
Broadwater Park
North Orbital Road
Denham-Uxbridge
Middlesex UB 95HJ
Service. +44 (0) 18 95 / 83 87 82
Fax Service +44 (0) 18 95 / 83 87 89
Advice line. +44 (0) 1895/838791
Fax Advice. +44 (0) 18 95 / 83 87 93
Ireland
Beaver Distribution Ltd.
Greenhills Road
Tallaght-Dublin 24
Service+353 (0)1/4 14 94 00
Fax +353 (0)1/4 5980 30
Australia and New Zealand
Robert Bosch Australia Pty. Ltd.
RBAU/SPT
1555 Centre Road
P.O.Box 66
3168 Clayton/Victoria
C +61(0)1/300307044
Fax +61 (0)1 / 3 00 30 70 45
www.bosch.com.au
Declaration of Conformity
Measured values determined according to 2000/14/EC (1.60 m height, 1 m distance away).
Typically the A-weighted noise level of the product is: sound pressure level 78 dB (A); sound power level 89 dB (A).
We declare under our sole responsibility that this product is in conformity with the following standards or standardization documents: EN 60 pr EN 13683 according to the provisions of the directives 89/336/EEC, 98/37/EC, 2000/14/EC.
2000/14/EC: The guaranteed sound power level L_WA is lower than 92 dB (A). Conformity assessment procedure according to Annex V.
Leinfelden, 09.2003.
Dr. Egbert Schneider Dr. Eckerhard Strotgen Senior Vice President Head of Product
Engineering Certification
ppa1b1c1 i.v. M1O_2
Robert Bosch GmbH, Power Tools Division
Subject to change without notice
Protection de surcharge
Robert Bosch France S.A.
Senior Vice President Head of Product
Engineering Certification
ppa1b1c1 i.v. M1O_2
Robert Bosch GmbH, Power Tools Division
Senior Vice President Head of Product
Engineering Certification
ppa1b1c1 i.v. M1O_2
Robert Bosch GmbH, Power Tools Division
Leia a instrucao de service.
89/336/CEE, 98/37/CE, 2000/14/CE.
Senior Vice President Head of Product
Engineering Certification
ppa1b1c1 i.v. NO2 通
Robert Bosch GmbH, Power Tools Division
Senior Vice President Head of Product
Engineering Certification
ppa. Maee i.v. Nooey
Robert Bosch GmbH, Power Tools Division
Dr. Egbert Schneider Dr. Eckerhard Strötgen Senior Vice President Head of Product Engineering Certification
ppa1b1c1 i.v. N2O_3
Robert Bosch GmbH, Power Tools Division
Derved undgå man, at knivvalsen 13 overbelastes.
Dr. Egbert Schneider Dr. Eckerhard Strötgen Senior Vice President Head of Product Engineering Certification
ppa1b1c1 i.v. NO3
Robert Bosch GmbH, Power Tools Division
Senior Vice President Head of Product
Engineering Certification
ppa.
Robert Bosch GmbH, Power Tools Division
Ändringar forbéhalles
Senior Vice President Head of Product
Engineering Certification


Robert Bosch GmbH, Power Tools Division
Senior Vice President Head of Product
Engineering Certification
ppa1b1c1 i.v. M1O_2
Robert Bosch GmbH, Power Tools Division
Kpatate to npoo no kai to owa aac paekia ano to avoyua nnoons.
Anoklesote nvy thavotnta va mouv ta xepia aac n alaa mepn tou oawatoc aac na pouxa aac otn xoavn npwoons nto opeatio anoppiune vna nlaiaouov kivoumeva eAptnmuata tnc ouokeunc. OTeTe tn oukeun ektoc aeitoupyiac npiv avapntnoete n apaipeetoe to dako auayohc.
Móvo yia xwpecs Tns EE:
Mn pixvETa nAekptika epyaia
Ota anoppimuata Tou ontiou oac!
Sigmaomega Tnv Koivotikn Ondyia
2002/96/EK oxetik aE TIC naalae
nAekptikc KAI nAektpovike
oukeuec kai tnV eTapopa Tc
eViko diKaio, ta aXpnoTa nEeKtpika
epyaia 8ev iival unoxpeewtiko nEvov va
oulambdaoyovtal exomega npiv va avakukawoouv
muTpoio fIikO npoc toepiBaalov.
Senior Vice President Head of Product
Engineering Certification
ppa.
Robert Bosch GmbH, Power Tools Division
Tnpoue to 6ikaiwa aalayawv
Bosch San. ve Tic. A.S.
Ahi Evran Cad. No:1 Kat:22
Polaris Plaza
80670 Maslak/Istanbul
Müsteri Danismani. +90 (0)212 / 335 06 66
Müsteri Servis Hatti +90 (0)212 / 335 07 52
Uygunjuk beyani
Dr. Egbert Schneider Dr. Eckerhard Strötgen Senior Vice President Head of Product Engineering Certification
ppa.
Robert Bosch GmbH, Power Tools Division
Power Tools Division
70745 Leinfelden-Echterdingen
www.bosch-pt.com
F016 L70 439 (06.02) O/71