USER MANUAL MB 2 RT VIKING
97/68/EC, 2000/14/EC, 2004/108/EC, 2006/42/EC
MB 2.2 RC, MB 2.2 RT:
Thank you for choosing a VIKING quality product.
This product has been produced using state-of-the-art production methods and extensive quality assurance procedures, because our goal is only achieved if you, the customer, are satisfied with your machine.
If you have any questions concerning your machine, please contact your dealer or our sales agency directly.
I hope that your VKING machine will give you great enjoyment.

Dr. Peter Pretzsch
Management
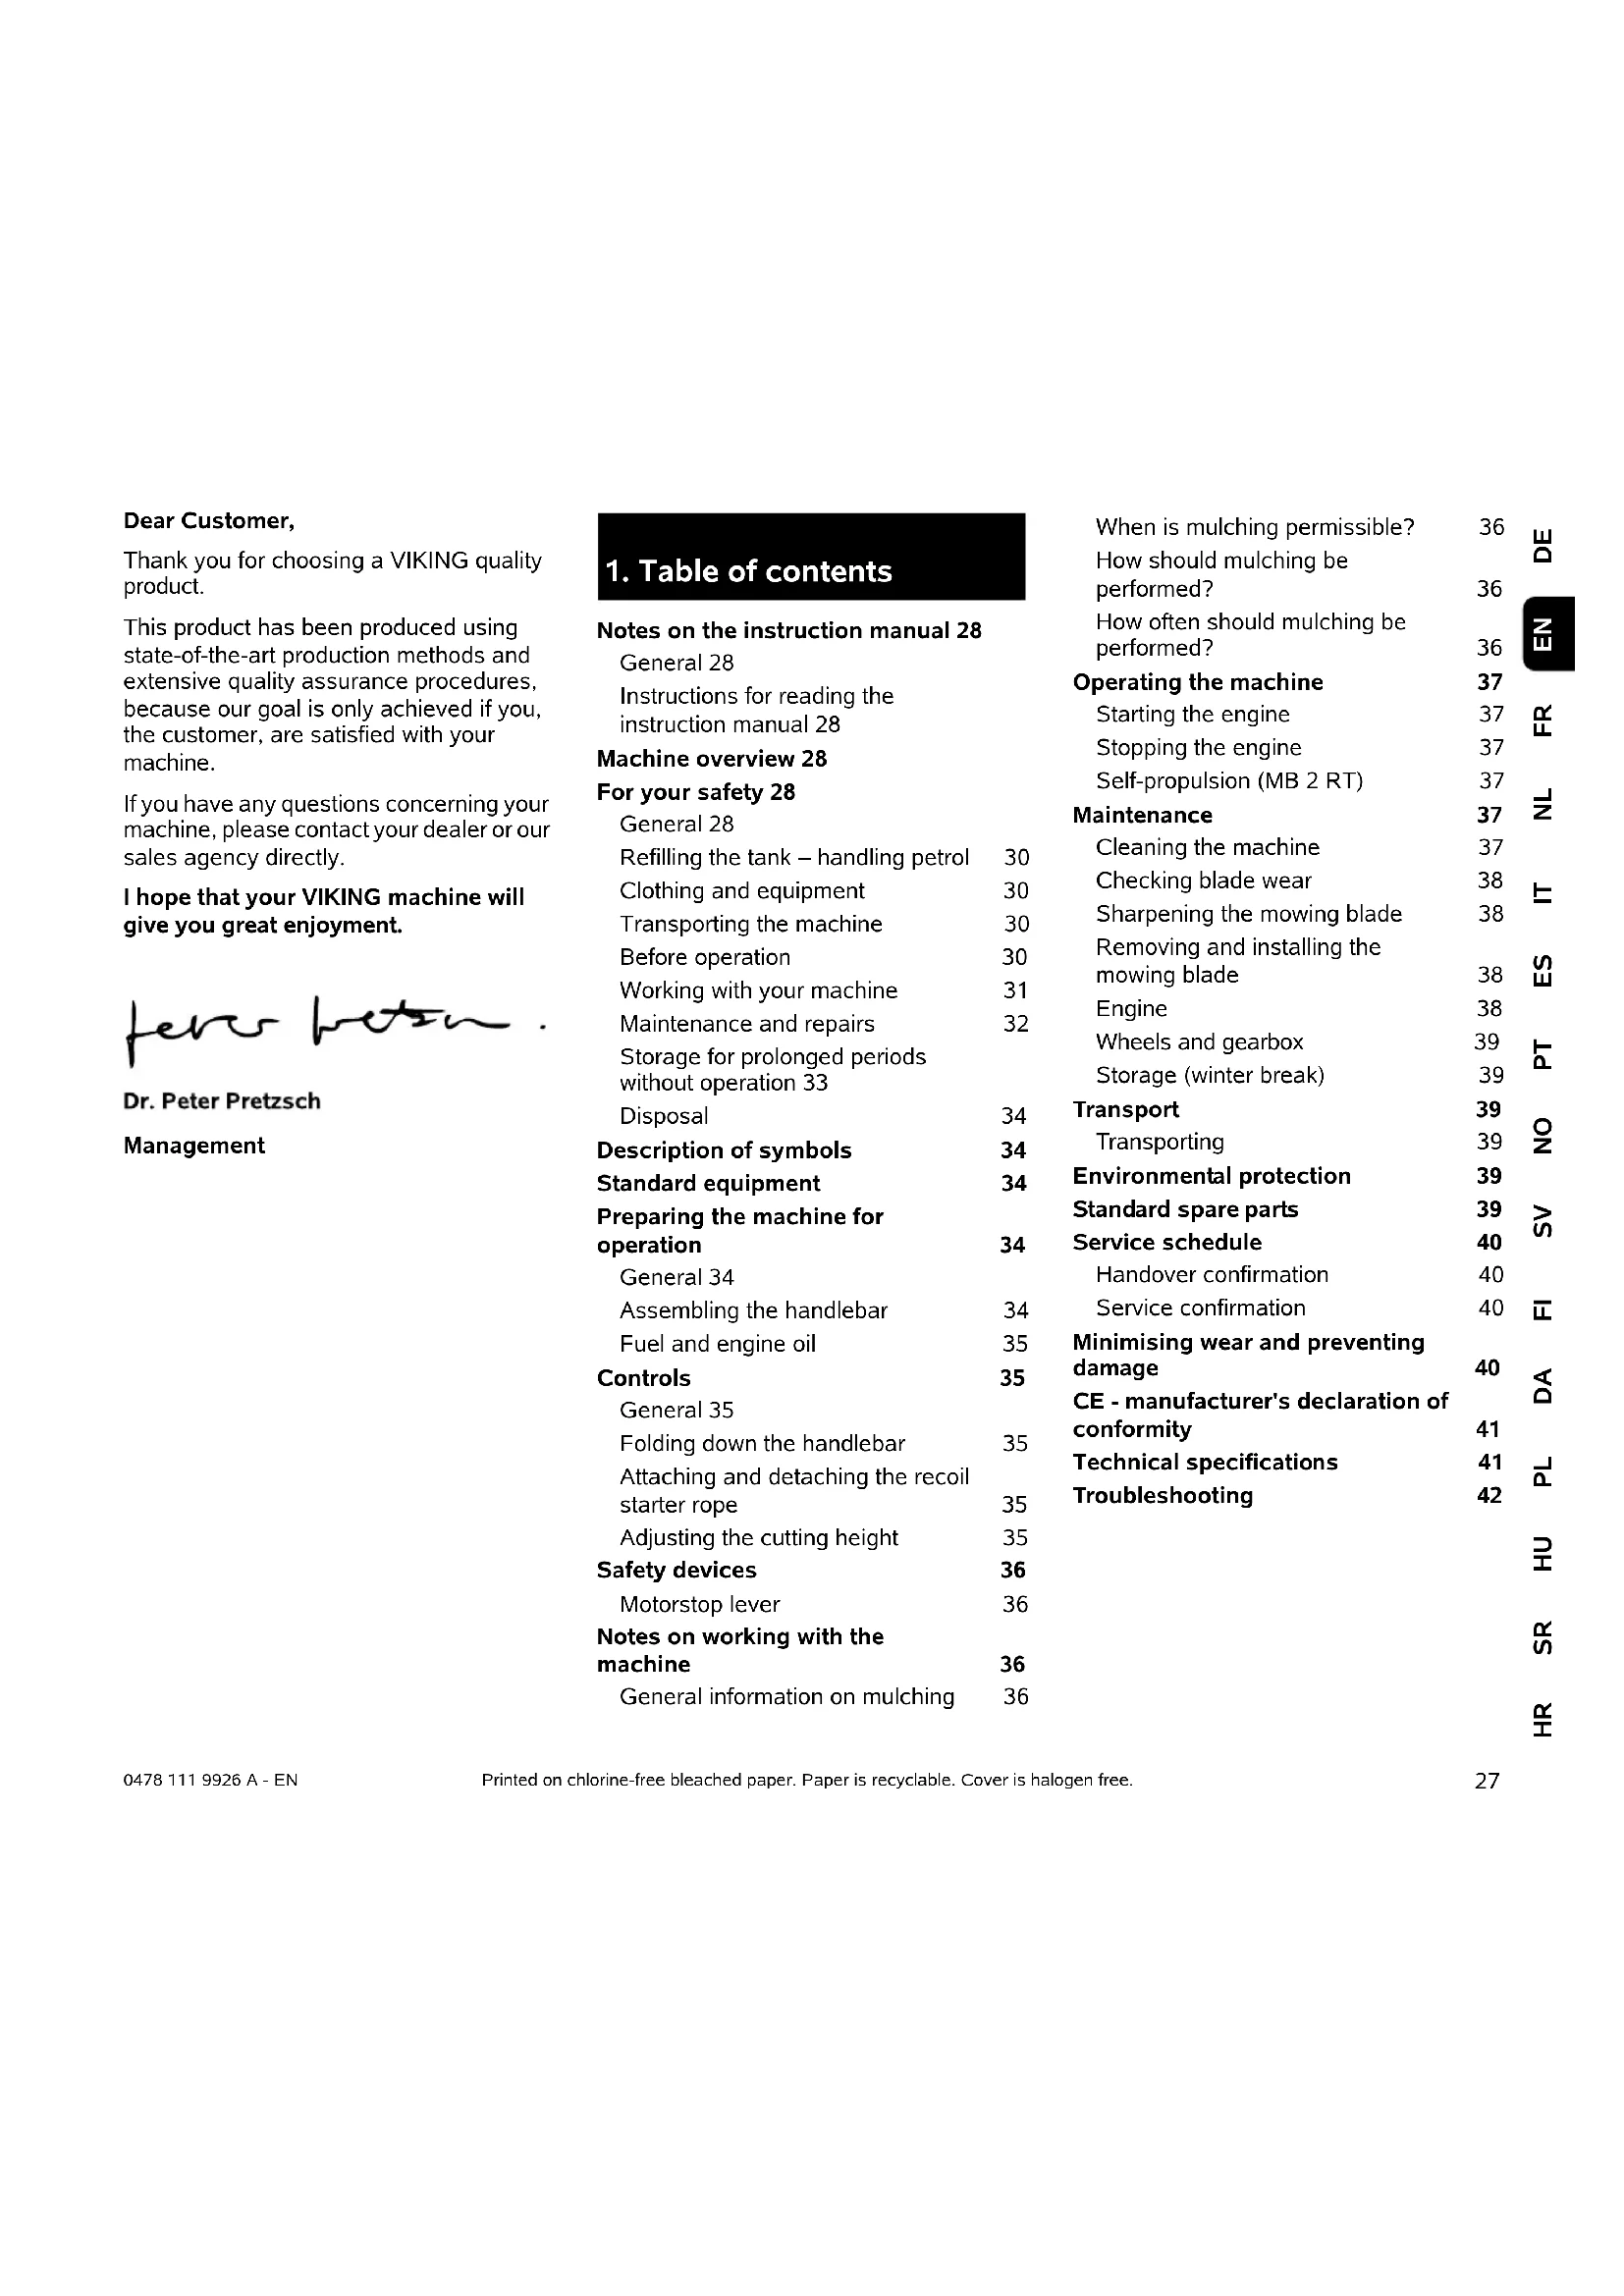
1. Table of contents
Notes on the instruction manual 28
General 28
Instructions for reading the
instruction manual 28
Machine overview 28
For your safety 28
General 28
Refilling the tank - handling petrol 30
Clothing and equipment 30
Transporting the machine 30
Before operation 30
Working with your machine 31
Maintenance and repairs 32
Storage for prolonged periods
without operation 33
Disposal 34
Description of symbols 34
Standard equipment 34
Preparing the machine for operation 34
General 34
Assembling the handlebar 34
Fuel and engine oil 35
Controls 35
General 35
Folding down the handlebar 35
Attaching and detaching the recoil
starter rope 35
Adjusting the cutting height 35
Safety devices 36
Motorstop lever 36
Notes on working with the machine 36
General information on mulching 36
When is mulching permissible? 36
How should mulching be performed? 36
How often should mulching be performed? 36
Operating the machine 37
Starting the engine 37
Stopping the engine 37
Self-propulsion (MB 2 RT) 37
Maintenance 37
Cleaning the machine 37
Checkingblade wear 38
Sharpening the mowing blade 38
Removing and installing the mowing blade 38
Engine 38
Wheels and gearbox 39
Storage (winter break) 39
Transport 39
Transporting 39
Environmental protection 39
Standard spare parts 39
Service schedule 40
Handover confirmation 40
Service confirmation 40
Minimising wear and preventing damage 40
CE - manufacturer's declaration of conformity 41
Technical specifications 41
Troubleshooting 42
2. Notes on the instruction manual
2.1 General
This instruction manual constitutes original manufacturer's instructions in the sense of EC Directive 2006/42/EC.
VIKING is continually striving to further develop its range of products; we therefore reserve the right to make alterations to the form, technical specifications and equipment level of our standard equipment.
For this reason, the information and illustrations in this manual are subject to alterations.
2.2 Instructions for reading the instruction manual
Illustrations and texts describe specific operating steps.
All symbols which are affixed to the machine are explained in this instruction manual.
Viewing direction:
Viewing direction when left and right are used in the instruction manual: the user is standing behind the machine (working position).
Section reference:
References to relevant sections and subsections for further descriptions are made using arrows. The following example shows a reference to a section: ( 4.)
Designation of text passages:
The instructions described can be identified as in the following examples.
Operating steps which require intervention on the part of the user:
- Release screw (1) using a screwdriver, operate lever (2)...
General lists:
- Use of the product for sporting or competitive events
Texts with added significance:
Text passages with added significance are identified using the symbols described below in order to especially emphasise them in the instruction manual:
Dar Risk
Danger
Risk of accident and severe injury to persons. A certain type of behaviour is necessary or must be avoided.
Warning Risk of it
Warning
Risk of injury to persons. A certain type of behaviour prevents possible or probable injuries.
Caution Minor inj
Caution
Minor injuries or material damage can be prevented by a certain type of behaviour.
Note Infor
Information for better use of the machine and in order to avoid possible operating errors.
Texts relating to illustrations:
Illustrations relating to use of the machine can be found in the front of this instruction manual.
The camera symbol serves to link the figures on the illustration pages with the corresponding text passages in the instruction manual.

3. Machine overview
1 Motorstop lever
2 Self-propulsion lever (MB 2 RT)
3 Handlebar
4 Starter rope guide
5 Quick-clamping devices
6 Rope guide
7 Rear cutting height adjustment
8 Front cutting height adjustment
9 Front carrying handle
10 Engine
11 Primer (MB 2 R)
12 Cable clip
MB 2 RC:1 pc
4. For your safety
4.1 General

These safety regulations must be observed when working with the machine.

Read the entire instruction manual before using the machine for the first time. Keep the instruction manual in a safe future reference.
Observe the operating and maintenance instructions contained in the separate engine instruction manual.
These safety precautions are essential for your safety, however the list is not exhaustive. Always use the machine in a reasonable and responsible manner and be aware that the user is responsible for accidents involving third parties or their property.
Make sure that you are familiar with the controls and use of the machine.
The machine must only be used by persons who have read the instruction manual and are familiar with operation of the machine. The user should seek expert and practical instruction prior to initial operation. The user must receive instruction on safe use of the machine from the vendor or another expert.
During this instruction, the user should be made aware that the utmost care and concentration are required for working with the machine.

Risk of death from suffocation!
Packaging material is not a toy - danger of suffocation! Keep packaging material away from children.
Only give or lend the machine, including any accessories, to persons who are familiar with this model and how to operate it. The instruction manual forms part of the machine and must always be provided to persons borrowing it.
The machine must only be operated by persons who are well rested and in good physical and mental condition. If your health is impaired, you should consult your doctor to determine whether working with the machine is possible. The machine
should not be operated after the consumption of alcohol, drugs or medications which impair reactions.
Never allow children under the age of 16 to use the machine. Local regulations may specify a minimum age for users.
This machine is not suitable for use by persons (in particular children) with impaired physical, sensory or mental faculties or those lacking the appropriate experience and/or knowledge, unless supervised by a person responsible for their safety or having received instructions on use of the machine from such person. Children must be supervised, in order to ensure that they do not play with the machine.
The machine is intended for private use.
Caution - risk of accident:
The lawn mower is only intended for mowing lawns. Its use for other purposes is not permitted and may be dangerous or result in damage to the machine.
Due to the physical danger to the user, the lawn mower must not be used for the following applications (incomplete list):
- for trimming bushes, hedges and shrubs,
- for cutting creepers,
- for the care of lawn roofs and balcony boxes,
-for shredding or chopping tree or hedge cuttings,
- for clearing paths (vacuuming, blowing),
for levelling earth mounds, e.g. mole hills.
For safety reasons, any modification to the machine, except the proper installation of accessories approved by VKING, is forbidden and results in voiding of the warranty cover. Information regarding approved accessories can be obtained from your VKING specialist dealer.
In particular, any tampering with the machine which increases the power output or speed of the engine or motor is forbidden.
It is not permitted to transport objects, animals or persons, particularly children, on the machine.
Particular care is required during use in public green spaces, parks, sports fields, along roads and in agricultural and forestry businesses.

Caution: Danger to health due to vibrations!
Excessive exposure to vibrations can result in damage to the cardiovascular or nervous system, particularly in persons with cardiovascular problems. Please consult a physician if you experience symptoms that may have been caused by vibrational loads. Symptoms of this kind principally affect the fingers, hands or wrists and include (incomplete list):
- numbness,
- p a i n ,
-muscular weakness,
- skin discolouration,
- unpleasant tingling sensation.
4.2 Refilling the tank - handling petrol

Danger to life!
Petrol is poisonous and extremely inflammable.
Petrol must only be stored in appropriate, tested containers (canisters). Always screw on the fuel tank and canister caps properly and tightly. Defective caps must be replaced for safety reasons.
Never use beverage bottles or similar for disposal or storage of fuels and lubricants. Persons, particularly children, could be tempted to drink out of them.

Keep petrol away from sparks, naked flames, pilot lights, heat sources, and other ignition sources. Do not smoke!
Refill the tank out-of-doors and do not smoke during refilling.
Before refilling the tank, stop the engine and allow it to cool.
Refilling with petrol must be performed before the engine is started. When the engine is running or is hot, the tank cap must not be removed and the tank must not be refilled with petrol.
Do not fill the fuel tank completely, but fill to approx. 4cm below the edge of the filler neck so that the fuel has room to expand.
If petrol is spilled, the engine must only be started after the petrol-contaminated area has been cleaned. All attempts at starting must be avoided until the petrol fumes have dispersed (wipe dry).
Any spilt fuel must be wiped up immediately.
Clothing must be changed if it comes into contact with petrol.
Never store the machine with petrol in the tank inside a building. The resulting petrol fumes could come into contact with naked flames or sparks and could be ignited.
If it is necessary to drain the tank, this must be done out of doors.
4.3 Clothing and equipment

Always wear sturdy footwear with high-grip soles when working. Never work barefoot
or, for example, in sandals.

Also always wear sturdy gloves and tie up and secure long hair (headscarf, cap, etc.) when performing maintenance and
cleaning work or when transporting the machine.

Wear suitable safety glasses when sharpening the mowing blade.
Always wear long trousers and tight-fitting clothing when operating the machine.
Never wear loose clothes which may become caught on moving parts (control levers) - do not wear jewellery, ties or scarves.
4.4 Transporting the machine
Always wear gloves in order to prevent injuries due to sharp-edged and hot components.
Do not transport the machine with the engine running. Switch off the engine, let the blades come to a standstill and remove the spark plug socket prior to transport.
Only transport the machine once the engine has cooled down and with an empty fuel tank.
Use suitable loading aids (loading ramps, lifters).
Secure the machine on the load floor using adequately dimensioned fastening materials (straps, ropes, etc.).
Avoid contact with the mowing blade when lifting and carrying the machine.
Observe the information in the section "Transport". It describes how to lift and lash the machine. ( 13.)
When transporting the machine, always observe regional legislation, especially regarding load security and the transport of objects on load floors.
4.5 Before operation
Make sure that only persons who are familiar with the instruction manual are permitted to use the machine.
Check the fuel system (particularly visible parts such as e.g. tank, tank cap, hose connections) before operating the machine. In the event of any leaks or damage, do not start the engine - fire hazard!
Have the machine repaired by a specialist dealer prior to operation.
Observe the local regulations regarding permitted operating times for gardening power tools with combustion engines or electric motors.
Carefully inspect the complete area on which the machine is to be used and remove any stones, sticks, wires, bones and other foreign objects which could be
thrown up by the machine. Obstacles (e.g. tree stumps, roots) can be easily overlooked in long grass.
For this reason, mark all foreign objects (obstacles) which are hidden in the lawn and cannot be removed before commencing work with the machine.
Defective and all other worn or damaged parts must be removed before using the machine. Replace any illegible or damaged danger signs and warnings on the machine. Your VKING specialist has a supply of replacement stickers and all the other spare parts.
Check secure seating of the spark plug socket on the spark plug before using the machine.
The machine must only be used in good operating condition. Before each use, check whether:
- The machine is properly assembled.
- The cutting tool and the entire cutting unit (mowing blade, fastening elements, mowing deck housing) are in good condition. In particular check for secure fastening, damage (notches or cracks) and wear. ( 12.2)
- The tank cap is properly attached.
- The tank and fuel-carrying parts as well as the tank cap are in good condition.
- The safety devices (e.g. motorstop lever, housing, handlebar, protective grille) are in good condition and working properly.
- The oil cap is properly attached.
Carry out any necessary work or consult a specialist dealer. VIKING recommends VIKING specialist dealers.
4.6 Working with your machine

Never work when animals or persons, particularly children, are in the danger area.
The switch and safety devices installed in the machine must not be removed or bypassed. In particular, never secure the motorstop lever to the handlebar (e.g. by tying it).

Caution - risk of injury! Never put hands or feet on or underneath rotating parts. Never touch the rotating blade.
Always observe the safety distance provided by the handlebar. The handlebar must always be installed correctly and must not be modified. Never operate the machine with the handlebar folded down.
Never attach any objects to the handlebar (e.g. work clothing).
Only work during the day or with good artificial light.
Do not operate the machine in the rain or during thunder storms, particularly when there is a risk of lightning strike.
The risk of accidents is higher if the ground is damp due to increased danger of slipping.
Particular caution should be exercised during working in order to prevent slipping. If possible, avoid using the machine when the ground is damp.
Exhaust gases:

Danger to life through poisoning! In the case of nausea, headache, impaired vision (e.g. decreasing field of view) hearing disorder, dizziness, decreasing power of concentration, stop working immediately. These symptoms may be caused by excessively high exhaust gas concentrations.

The machine generates poisonous exhaust gases when the engine is running. The gases contain poisonous
carbon monoxide, a colourless and odourless gas, as well as other pollutants. The engine must never be operated in closed or poorly ventilated spaces.
Starting:
Exercise care when starting and observe the instructions contained in the section entitled "Initial operation of machine". ( 11.) Keep your feet a safe distance from the cutting tool.
The machine must not be tilted during start-up.
The self-propulsion lever must not be pressed when starting the engine.
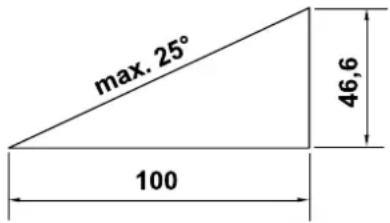
Working on slopes:
Always work across and back on slopes, never up and down. If the user loses control when mowing up and down, there is a risk of being run over by the machine.
Be particularly careful when changing direction on a slope.
Always ensure good stability on slopes and avoid mowing on excessively steep slopes.
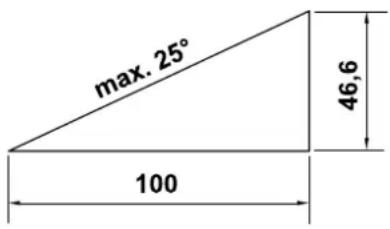
For safety reasons, the machine must not be used on slopes with an inclination of more than 25^ (46.6%) . Risk of injury! A slope inclination of 25^ corresponds to a vertical height increase of 46.6~cm for a 100~cm horizontal distance.
In order to ensure an adequate oil supply for the engine, the information in the accompanying engine instruction manual must be additionally observed when using the machine on slopes.
Working:

Risk of injury!
Never place your hands or feet above, underneath or on rotating parts.

Do not try to examine the blade while the lawn mower is operating. Rotating blades can
cause injury.
Only operate the machine at walking speed - never run when working with the machine. Working quickly with the machine increases the risk of injury due to stumbling, slipping, etc.
Be particularly careful when turning the machine around or pulling it towards you. Risk of stumbling!
Use the machine with great care when working near rubbish dumps, ditches and embankments. In particular, ensure that you maintain sufficient distance to such danger areas.
Objects hidden in the turf (lawn sprinkler systems, posts, water valves, foundations, electrical wires, etc.) must be avoided. Never run over any such foreign objects.

Beware of the cutting tool running on for several seconds before coming to a standstill.
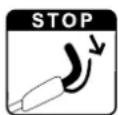
STOP
Switch off the engine, allow the work tool to come to a complete and detach the spark plug socket.
before leaving the machine unattended,
before re-filling the tank. Allow the engine to cool down before filling the tank.
Fire hazard!
- before remedying blockages, including those in the mowing deck housing,
before lifting or carrying the machine,
before transporting the machine,
before carrying out any work on the mowing blade,
before checking or cleaning the machine or before carrying out any other work (e.g. folding down the handlebar) on it,
- after hitting a foreign object or if the lawn mower begins to vibrate excessively. In these cases check the machine, in particular the cutting unit (blade, blade shaft, blade fastening) for damage and carry out the necessary repairs before restarting and working with the machine.

Risk of injury!
Strong vibrations are generally an indication of a fault. In particular, the lawn mower must not be operated with a damaged or bent blade shaft or mowing blade. If you do not have the appropriate expertise, have the necessary repairs carried out by a specialist dealer (VIKING recommends VKING specialist dealers).
Switch off the engine:
- When pushing the machine to and from the area to be worked.
- Before pushing the machine onto an area not covered with grass.
- When the machine has to be tilted for transportation.
- Before adjusting the cutting height.
4.7 Maintenance and repairs

Before beginning cleaning, adjustment, repair and
maintenance operations, park the machine on firm, level
ground, stop the engine, allow it to cool down and detach the spark plug socket.

Risk of injury due to the mowing blade!
Pulling the recoil starter rope starts the work tool rotating. Always ensure sufficient distance between the mowing blade and your body, particularly your hands and feet, when you pull the recoil starter rope.
Allow the machine to cool down before working on or around the engine, exhaust manifold or muffler in particular. Temperatures of 80^ and above can be reached. Danger of burns!
Direct contact with engine oil can be dangerous. Engine oil must not be spilled. VIKING recommends leaving the task of topping up engine oil or performing engine oil changes to a VIKING specialist dealer.
Cleaning:
The complete machine must be cleaned thoroughly following use. ( 12.1)
Remove accumulated clipping deposits using a stick. Clean the underside of the mower with water and a brush.
Never use high-pressure cleaners and do not clean the machine under running water (e.g. using a garden hose).
Do not use aggressive cleaning agents. These can damage plastics and metals, impairing the safe operation of your VIKING machine.
In order to prevent fire hazards, keep the area around the air vents, cooling ribs and the area of the exhaust free from e.g. grass, straw, moss, leaves or escaping grease.
Maintenance operations:
Only maintenance operations described in this instruction manual may be carried out. Have all other work performed by a specialist dealer.
If you do not have the necessary expertise or auxiliary equipment, please always contact a specialist dealer.
VIKING recommends that you have maintenance operations and repairs performed exclusively by a VKING specialist dealer.
VIKING specialist dealers regularly attend training courses and are provided with technical information.
Only use tools, accessories or attachments approved for this machine by VIKING or technically identical parts. Otherwise, there may be a risk of accidents resulting in personal injury or damage to the machine. If you have any questions, please consult a specialist dealer.
The characteristics of original VKING tools, accessories and spare parts are optimally adapted to the machine and the user's requirements. Genuine VKING spare parts can be recognised by the VKING spare parts number, by the VKING lettering and, if present, by the VKING spare parts symbol. On smaller parts, only the symbol may be present.
For safety reasons, fuel-carrying components (fuel line, fuel cock, fuel tank, tank cap, connections, etc.) must be checked regularly for damage and leaks and replaced by a technician if necessary (VIKING recommends VKING specialist dealers).
Always keep warning and information stickers clean and readable. Damaged or missing stickers must be replaced by new, original plates from your VIKING specialist dealer. If a component is replaced with a new component, ensure that the new component is provided with the same stickers.
Only perform work on the cutting unit when wearing thick work gloves and exercising extreme care.
Ensure that all nuts, pins and screws (in particular the blade fastening screw) are securely tightened so that the machine is in a safe operating condition.
Check the entire machine for wear or damage on a regular basis, particularly before extended periods when the machine is not in use (e.g. over winter). For safety reasons, worn or damaged parts must be replaced immediately to ensure that the machine is always in a safe operating condition.
Never alter the basic setting of the engine or run at excessive engine speeds.
Components or guards that are removed for maintenance operations must be properly reinstalled immediately.
4.8 Storage for prolonged periods without operation
Allow the engine to cool before storing the machine in an enclosed space.
Allow the machine to cool down completely before covering it.
Store the machine with empty fuel tank and the fuel reserve in a lockable and well-ventilated room.
Ensure that the machine is protected from unauthorised use (e.g. by children).
If the tank has to be emptied (e.g. to store the machine before the winter break), this should only be done out of doors (e.g. by running the tank empty).
Thoroughly clean the machine before storage (e.g. winter break).
Only store the machine with the spark plug socket disconnected.
Store the machine in good operational condition.
4.9 Disposal
Waste products such as used engine oil or fuel, used lubricants, filters, batteries and similar wearing parts can be harmful to people, animals and the environment, and must consequently be disposed of properly.
Consult your recycling centre or your specialist dealer for information on the proper disposal of waste products. VIKING recommends VIKING specialist dealers.
Ensure that old machines are properly disposed of. Render the machine unusable prior to disposal. In order to prevent accidents, remove the ignition lead, empty the fuel tank and drain the engine oil in particular.
Risk of injury due to the mowing blade! Always store an old lawn mower in a safe place prior to scrapping. Ensure that the machine and particularly the mowing blade are kept out of the reach of children.
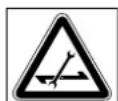
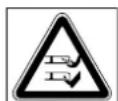
5.Description of symbols


Caution!
Read the instruction manual before initial use.
Risk of injury!
Keep other persons out of the danger area.

STOP
MB2RT:

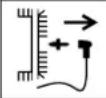
Risk of injury!
Detach the spark plug socket before performing work on the cutting tool or maintenance and cleaning work.
Risk of injury!
Keep your hands and feet away from the blades.
Cutting tool runs on for several seconds after switching off (engine/blade brake).
Start the engine.
Stop the engine.
Switch on self-propulsion.
6. Standard equipment

Item Designation Qty.
A Basic unit with handlebar 1
7. Preparing the machine for operation
7.1 General

Risk of injury!
Observe the safety instructions in the section "For your safety" (4.).
- Place the machine on level and firm ground when performing all the operations described.
7.2 Assembling the handlebar
- Carefully fold up the handlebar (1), ensuring that the cables are not trapped.
- Tighten the pre-installed quick-clamping devices (2) (they should project by about one screw thread turn) and fold upwards.
Check correct assembly
- The quick-clamping devices (1) must be sufficiently tightened so that they are pressed tightly against the handlebar and the upper handlebar is firmly connected to the lower handlebar.
If the handlebar is not firmly installed or the quick-clamping devices are not correctly located, fold open the quick clamping devices and adjust them to the correct position by screwing out and back in again.
- Check that the cables (2, 3) and the cable clip (4, MB 2 RC) are in the correct position.
7.3 Fuel and engine oil

Avoid damage to the machine Top up engine oil before starting for the first time. Use a suitable filling aid when topping up the engine oil and when refuelling (e.g. funnel).
Engine oil:
Please consult the engine instruction manual for the type of engine oil to be used and the oil capacity. Check the oil filling level at regular intervals (see engine instruction manual). Avoid exceeding or falling below the correct oil level.
Screw on the oil tank cap properly before operating the engine.
Fuel:
Recommendation: Fresh good quality fuels, Unleaded petrol.

Please consult the engine instruction manual for details on the fuel quality (octane rating).
8. Controls
8.1 General

Risk of injury!
Observe the safety instructions in the section "For your safety" ( 4) .
- Place the machine on level and firm ground when performing all the operations described.
8.2 Folding down the handlebar
The handlebar can be folded down for space-saving transport and storage of the mower.


Danger of pinching!
The handlebar can fold down uncontrollably when the quick-clamping devices are released.
For this reason, always hold the handlebar with one hand when you release the fastening.
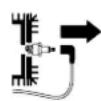
- Stop the engine and remove the spark plug socket. (⇒ 11.2)
- Detach the recoil starter rope. ( 8.3)
- Open the left and right quick-clamping devices (1) and carefully fold the handlebar (2) downwards to the front.
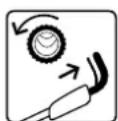
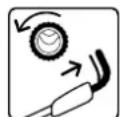
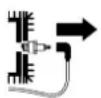
8.3 Attaching and detaching the recoil starter rope

Attaching
- Detach the spark plug socket from the engine.
- Press the motorstop lever (1) to the handlebar and hold.
- Slowly pull out the recoil starter rope (2).
- Release the motorstop lever (1) and attach the recoil starter rope (2) to the rope guide (3).
- Connect the spark plug socket.
Detaching
8.4 Adjusting the cutting height


Risk of injury!
Stop the engine before adjusting the cutting height.
There are 4 different cutting height settings from 28mm to 85mm .
Level 1 = lowest cutting height
Level 4 = highest cutting height

Risk of injury!
The setting on the front and rear axles must be identical.
1 Setting the rear cutting height
- Set the required cutting height at the rear axle (1).
For this purpose, support the machine with one hand and move the rear axle to the desired level on one side first and then on the other.
Ensure that the left and right sides are at the same level (rear axle parallel to the housing).
Setting the front cutting height
MB2RT:
Push the cutting height adjustment lever (2) outwards, move to the desired level and allow it to engage.
- MB 2 RC, MB 2 R:
Set the required cutting height at the front axle (3).
For this purpose, support the machine with one hand and move the front axle to the desired level on one side first and then on the other. Ensure that the left and right sides are at the same level (front axle parallel to the housing).
9. Safety devices
The machine is equipped with several safety devices for safe operation and for the prevention of improper use.

Risk of injury
If a safety device is found to be defective, the machine must not be operated. Consult a specialist dealer; VIKING recommends VIKING specialist dealers.
9.1 Motorstop lever
The lawn mower is equipped with a motorstop device.
The engine stops when the motorstop lever is released during running operation. The engine and blade come to a standstill within 3 seconds.

Risk of injury!
If the run-on time of the blade exceeds this delay, stop using the machine and take it to your specialist dealer.
Measuring the run-on time
Following engine start-up, the blade rotates and a wind noise is audible. The run-on time corresponds to the duration of the wind noise after the engine stops. This can be measured using a stopwatch.
10. Notes on working with the machine
During mulching, the cut grass is chopped up several times through a special air flow guidance system in the mower blade area and then blown back into the turf. The clippings remain on the lawn.
Benefits
The decomposing clippings return organic nutrients to the soil, serving as a natural fertiliser.
Advantages
Emptying the grass catcher box and disposal of the clippings are dispensed with. Weed growth is slowed down and significant amounts of fertilizer are saved.
10.2 When is mulching permissible?
VIKING recommends mulching only when the lawn is dry and the grass is not too high.
If the grass is too high, the lawn should be mowed in two stages. ( 10.3)
Caution If the cut
If the cutting height is too low or the grass is wet, the housing may become clogged, blocking the blade!
Requirements for good mulching results:
- Set the optimal cutting height: A third of the grass height should be cut.
- Use well sharpened blades.
- Vary the mowing direction and ensure that the mowing strips overlap.
Working method in high grass
In high grass, the lawn should be cut in two stages.
First stage:
The lawn is mowed at the maximum cutting height.
Second stage:
12 to 24 hours after the first stage, mulch the lawn to the desired grass height at right angles to the first mowing direction.
To ensure a perfect, thick lawn, mulch regularly and keep the grass short.
Main growth period:
Spring:
mulch at least twice per week.
Summer and autumn:
mulch at least once per week.
11. Operating the machine
11.1 Starting the engine


Avoid damage to the machine.
Do not start the engine in tall grass or at the lowest cutting height. This makes starting difficult.
Thanks to the fixed throttle setting, the engine always operates at the optimum working speed after starting.
Starting procedure when the engine is cold:
Only for MB 2R:
Press the primer (1) three times.
- Press the motorstop lever (2) to the handlebar and hold.
- Slowly pull out the recoil starter rope (3) to the point of compression resistance. Then pull vigorously and quickly to arm's length. Slowly return the recoil starter rope (3) so that it is rolled up again.
Repeat the procedure until the engine starts.
Starting procedure when the engine is warm:

Avoid damage to the machine.
The primer must no longer be pressed when the engine is warm. It should be remembered, however, that the engine can cool down rapidly in very cold weather.
The starting procedure is the same as when the engine is cold.
Only for MB 2 R:
It is not necessary to press the primer (1).
11.2 Stopping the engine
- Release the motorstop lever (1).
The engine and blade come to a standstill within 3 seconds.
11.3 Self-propulsion (MB 2 RT)

Note
The MB 2 RT model features front-wheel drive.
Switching on self-propulsion
- Start the engine. ( 11.1)
Pull the self-propulsion lever (1) to the handlebar and hold.
Self-propulsion is activated and the lawn mower moves forwards.
Switching off self-propulsion
- Release the self-propulsion lever (1).
Self-propulsion is deactivated and the lawn mower comes to a standstill.
The engine and blade continue to run.
12. Maintenance

Risk of injury!
Carefully read the section "For your safety" ( 4.) , particularly the subsection "Maintenance and repairs" ( 4.7) ,and follow all safety instructions exactly before performing any maintenance or cleaning operations on the machine.
Allow the machine too cool and detach the spark plug socket before performing any maintenance or cleaning operations.
Annual service by the specialist dealer:
The lawn mower should be inspected once annually by a specialist dealer. VIKING recommends VIKING specialist dealers.
12.1 Cleaning the machine
Maintenance interval:

After each use.

Risk of injury!
Stop the engine, allow the machine to cool and detach the spark plug socket. Empty the fuel tank (run empty) before placing the machine in the cleaning position.
Place the machine in the cleaning position.
12.2 Checking blade wear
Maintenance interval:

Before each use.

Risk of injury!
Blades are subjected to differing degrees of wear depending on the location and duration of use. If you use the machine on sandy ground or use it frequently under dry conditions, the blade will be subjected to greater loads and will wear more quickly than the average.
A worn blade may break off and cause serious injuries. The instructions for blade maintenance must therefore always be observed.
Checking procedure
- Place the machine in the cleaning position. ( 12.1)
Clean the blade (1) and check it for damage (notches or cracks).
- Use a slide calliper (2) to measure the blade thickness (A) at several points.
- Measure the permissible grinding (B). Place a ruler (3) against the front blade edge as shown for this purpose.
Wear limits
The blade thickness (A) must be at least 2mm at any point. The most important points are marked in the illustration.
The cutting edges must not be ground back by more than 5 mm - distance (B) (permissible grinding) during sharpening.
12.3 Sharpening the mowing blade
If you do not have the necessary expertise or auxiliary equipment, we recommend that you have the blade sharpened by a specialist dealer. Operation of the machine is impaired in the case of an incorrectly sharpened blade (incorrect sharpening angle, imbalance etc.).
Sharpening instructions
- Remove the mowing blade. ( 12.4)
Cool the mowing blade during sharpening, e.g. with water. The blade must not be allowed to display blue colouring, as this would reduce its cutting quality.
- Sharpen blades evenly to prevent vibration due to imbalance.
- Observe a sharpening angle of 30^ .
- Observe the wear limits ( 12.2) .
12.4 Removing and installing the mowing blade


Risk of injury!
Always wear gloves.

The mowing blade must be replaced if notches or cracks are detected or if a wear limit is reached ( 12.2)
Removing
- Hold the mowing blade (1) and loosen the blade fastening screw (2).
- Remove the blade fastening screw (2), retaining washer (3) and mowing blade (1).
Installing
- Clean the blade contact surface and blade bushing (4).
- Secure the blade fastening screw (2) with Loctite 243.
- Place the mowing blade (1) on the blade bushing (4) as shown.
- Position the retaining washer (3) as shown and tighten with the blade fastening screw (2) to 60 - 65 Nm.

Risk of injury!
The prescribed tightening torque for the blade fastening screw must be observed.
The retaining washer (3) must be replaced each time the blade is installed.
The blade fastening screw (2) must be renewed each time the blade is replaced.
12.5 Engine
Maintenance interval:
See engine instruction manual.
Observe the operating and maintenance instructions contained in the attached engine instruction manual.
To achieve a long service life, it is always particularly important to maintain a sufficient level of oil and to change the oil and air filter regularly.
The recommended oil change intervals as well as information on engine oil and oil capacities can also be found in the engine instruction manual.
The cooling ribs must always be kept clean to ensure that the engine is adequately cooled.
12.6 Wheels and gearbox
The wheel bearings are maintenance-free.
The gearbox is maintenance-free.
12.7 Storage (winter break)
Note the following points when storing the machine for long periods (winter break):
- Clean all external parts of the machine with care.
Thoroughly lubricate/grease all moving parts.
- Empty the fuel tank and carburettor (e.g. by running empty).
- Unscrew the spark plug (see engine instruction manual) and pour approx. 3cm^3 of engine oil into the engine via the spark plug hole. Turn the engine several times with the spark plug removed (pull the recoil starter rope).

Fire hazard!
Keep the spark plug socket away from the spark plug hole due to the danger of ignition.
- Screw the spark plug back in (see engine instruction manual).
- Perform an oil change (see engine instruction manual).
- Store the machine in a dry and locked place that is generally free of dust.
Make sure that it is out of the reach of children.
13. Transport
13.1 Transporting

Risk of injury!
Observe the section "For your safety" before transporting. ( 4.4) Carry the machine only with the help of a second person. Always wear suitable safety clothing (safety shoes, thick gloves). Detach the spark plug socket before lifting or transporting.
Lifting or carrying the machine
- Handlebar installed: Hold the machine at the front carrying handle (1) and at the handlebar (2).
- Handlebar folded down: Hold the machine at the front carrying handle (1) and at the lower handlebars (3).
Transporting the machine
Only transport the machine on all four wheels, on a clean, level load floor.
- Secure the machine against slipping using suitable fastening materials. Fasten ropes or straps at the front carrying handle (1) and at the lower handlebars (3).
14. Environmental protection
Lawn clippings should be composted and not disposed of in household waste.
The machine, its packaging and accessories are all produced from recyclable materials and must be disposed of accordingly.
By disposing of materials separately, and in an environmentally friendly manner, valuable resources can be re-used. For this reason, the machine should be disposed of for recycling at the end of its useful life. Pay particular attention to the information in the "Disposal" section during disposal ( 4.9) .
Consult your recycling centre or your specialist dealer for information on the proper disposal of waste products.
15. Standard spare parts
Mowing blade (mulching blade)
6357 702 0101
Blade fastening screw
90083199028
Retaining washer
00007026600

The fastening elements for the mowing blade (e.g. blade fastening screw, retaining washer) must be renewed when replacing the blade, i.e. when installing the blade. Spare parts are available from a VKING specialist dealer.
16. Service schedule
16.1 Handover confirmation
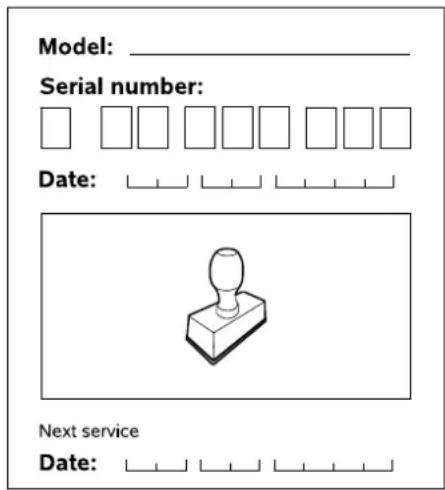
16.2 Service confirmation
Please hand this instruction manual to your VKING specialist dealer in the case of maintenance work. He will confirm the service operations performed in the pre-printed boxes.

Service performed on

Next service date
17. Minimising wear and preventing damage
Important information on maintenance and care of the product group
Petrol lawn mowers
VIKING assumes no liability for material or personal damage caused by the non-observance of information contained in the operating instructions, in particular with regard to safety, operation and maintenance, or which arise through the use of unauthorised attachment or spare parts.
Please always observe the following important information for the prevention of damage or excessive wear to your VIKING machine:
1. Wearing parts
Some parts of the VKING machine are subject to normal wear even when used properly and must be replaced in due time depending on type and duration of use.
These include:
-V-belt (MB 2 RT)
-Tyres
The VIKING machine must be used, maintained and stored with the care described in this instruction manual. Any damage caused by non-compliance with the safety, operating and maintenance instructions is the sole responsibility of the user.
This applies in particular to:
- Product modifications not approved by VKING.
- Use of fuel and lubricants not approved by VIKING (lubricants, petrol and engine oil, see engine manufacturer's specifications).
- The use of tools or accessories which are not approved or suitable for the machine, or are of inferior quality.
- Improper use of the product.
- Use of the product for sporting or competitive events.
- Resultant damage due to continued use of the product with defective components.
3. Maintenance operations
All operations listed in the section "Maintenance" must be performed regularly.
If these maintenance operations cannot be carried out by the user, a specialist dealer must be commissioned to perform them.
VIKING recommends that you have maintenance operations and repairs performed exclusively by a VKING specialist dealer.
VIKING specialist dealers regularly attend training courses and are provided with technical information.
If these operations are neglected, faults may arise which are the responsibility of the user.
These include:
Corrosive and other resultant damage caused by incorrect storage.
- Damage to the machine through the use of inferior-quality spare parts.
- Damage due to untimely or inadequate maintenance or damage due to maintenance or repair work not performed in the workshops of specialist dealers.
We,
VIKING GmbH
Hans Peter Stihl-Strasse 5
declare that the machine,
Manually-operated lawn mower with combustion engine (MB)
Manufacturer's brand:
VIKING
Type: MB 2.2 R
MB 2.2 RC
MB 2.2 RT
Serial number 6357
conforms to the following EC directives: 97/68/EC, 2000/14/EC, 2004/108/EC, 2006/42/EC
The product has been developed in conformance with the following standards: EN ISO 5395-1, EN ISO 5395-2
Applicable conformity assessment procedure:
Appendix VIII (2000/14/EC)
Name and address of relevant, named location:
Compilation and storage of technical documentation: Johann Weiglhofer
VIKING GmbH
The year of manufacture and serial number appear on the identification plate of the machine.
MB 2.2 R:
Measured sound power level: 92.0 dB(A)
Guaranteed sound power level: 94 dB(A)
MB 2.2 RC, MB 2.2 RT:
Measured sound power level: 92.5 dB(A)
Guaranteed sound power level: 94 dB(A)
Langkampfen, 2015-01-02 (YYYY-MM-DD)
VIKING GmbH

Weighlofer
Research and Product Development Manager
19. Technical specifications
MB 2.2 R, MB 2.2 RC, MB 2.2 RT
Serial number 6357
Engine, design
4-stroke combustion engine
MB 2.2 R, MB 2.2 RC, MB 2.2 RT
Cutting utilities Cutter bar
Cutting width 46 cm
Starter Rope start
Safety device Motorstop
Tightening torque for blade fastening screw
Wheel diameter (front)
Wheel diameter (rear)
Cutting height 28 - 85 mm
In accordance with Directive
2000/14/EC: Guaranteed sound power level L_WAd 94 dB(A)
In accordance with Directive
2006/42/EC:
Sound pressure level at workplace L_pA 81 dB(A)
Uncertainty K_pA 2 dB(A)
MB 2.2 R
Engine type B&S 450 Series
Nominal output at 1.6 - 2,900
nominal speed kW - rpm
Displacement 125 ccm
Fuel tank 0.81
Speed of cutting utilities
Specified vibration
characteristic in
accordance with EN 12096:
Measured value a_hw
MB 2.2 R
Uncertainty K_hw 2.80 m/s²
Measurement in
accordance with
EN 20643
L/W/H 124/49/100 cm
Weight: 22kg
MB 2.2 RC
Engine type Kohler XT675
Nominal output at 2.2 - 2,800
nominal speed kW - rpm
Displacement 149 ccm
Fuel tank 1.4 I
Speed of cutting
utilities 2,800 rpm
Specified vibration
characteristic in
accordance with
EN 12096:
Measured value a_hw 5.00 m/s²
Uncertainty Khw 2.50 m/s2
Measurement in
accordance with
EN 20643
L/W/H 124/49/100 cm
Weight: 26kg
MB 2.2 RT
Engine type Kohler XT675
Nominal output at 2.2 - 2,800
nominal speed kW - rpm
Displacement 149 ccm
Fuel tank 1.4 I
Speed of cutting
utilities 2,800 rpm
Specified vibration
characteristic in
accordance with
EN 12096:
Measured value a_hw 5.90 m/s²
MB 2.2 RT
Uncertainty K_hw
Measurement in
accordance with
EN 20643
Drive: Front wheel 1 forward gear
Drive speed 3.5km / h
L/W/H 140/50/105 cm
Weight: 29kg
20. Troubleshooting
If necessary, contact a specialist dealer; VKING recommends VKING specialist dealers.
See engine instruction manual.
Fault:
Engine does not start
Possible cause:
- Motorstop lever not pressed.
- No fuel in tank.
-Fuel line blocked.
- Inferior, dirty or old fuel in tank.
Air filter dirty.
- Spark plug socket detached from spark plug; ignition lead not properly fastened to socket.
- Spark plug dirty or damaged; incorrect electrode gap.
Remedy:
Fault:
Starting problems or deteriorating engine power.
Possible cause:
Lawn mower housing blocked.
- Mowing at an excessively low cutting height or propulsion speed is too high in relation to the cutting height.
Water in fuel tank and carburettor; carburettor blocked.
-Fuel tank contaminated.
Air filter dirty.
- Spark plug dirty.
Remedy:
Clean lawn mower housing (detach spark plug socket!). ( 12.1)
- Select a higher cutting height or reduce the pushing speed. (⇒ 8.4)
- Empty fuel tank, clean fuel line and carburettor.
- Clean fuel tank.
- Clean air filter.
- Clean spark plug.
Fault:
Engine overheating.
Possible cause:
- Oil level in engine too low.
Cooling ribs dirty.
Remedy:
- Change engine oil. (⇒ 12.5)
- Clean cooling ribs. ( 12.1)
Fault:
Excessive vibration during operation.
Possible cause:
- Cutting unit defective.
- Engine mounting loose.
Remedy:
- Check mowing blade, blade shaft and blade fastening (blade fastening screw and retaining washer), and repair if necessary.
- Tighten engine mounting bolts.
Fault:
Poor cut, lawn turning yellow.
Possible cause:
- Mowing blade is blunt or worn.
- Rate of feed is too high in relation to cutting height.
Housing is not parallel to ground.
Remedy:
- Sharpen or replace mowing blade ( 12.3) ( 12.4) .
- Reduce rate of feed and/or select correct cutting height.
- Set front and rear cutting height to same cutting level. ( 8.4)
Fault (MB 2 RT):
No drive when self-propulsion lever is actuated.
Possible cause:
- Self-propulsion cable defective (e.g. kinked).
Remedy:
-Replace cable.
Chere cliente, cher client,
Transport 59
Transport 59
MB 2.2 RC, MB 2.2 RT:
97/68/EC, 2000/14/EC, 2004/108/EC, 2006/42/EC
MB 2.2 RC, MB 2.2 RT:
Trekkabel wielaandrijving defect (b. v. geknikt).
Oplossing:
-Kabel verrangen.
Gentili Clienti,
MB 2.2 RC, MB 2.2 RT:
97/68/EC, 2000/14/EC, 2004/108/EC, 2006/42/EC
MB 2.2 RC, MB 2.2 RT:
regimen nominal kW - rpm
Cilindrada 125 cm3
Deposito de combustible 0,81
Long./Anch./Alt. 124/49/100 cm
Peso: 26 kg
MB 2.2 RT
Tipode motor Kohler XT675
Potencia nominal a 2,2-2800
regimen nominal kW - rpm
Cilindrada 149~cm^3
Depóstito de
combustible 1,4 I
Velocidad del dispo
97/68/CE, 2000/14/CE, 2004/108/CE, 2006/42/CE
MB 2.2 RC, MB 2.2 RT:
Oppbevaring (winterlagring) 153
Transport 153
Transport 153
Miljøvern 153
Vanligereservedeler 153
Serviceplan 154
Fyll不断提高 his speed, but he was still able to run.
Ca. 4 cm under kanten til
pafyllingsstussen, slick at drivstoffet fär nok
plass til ä utvide seg.
Koble inn fremdriften.
Koble inn fremdriften
Start
forbrenningsmotoren.
(⇒ 11.1)
Husk falgende his maskinen skal settes bort i lengre tid (winter):
97/68/EC, 2000/14/EC, 2004/108/EC
2006/42/EC
MB 2.2 RC, MB 2.2 RT:
Malt lydeffektniva:
92,5 dB(A)
Garantert lydeffektniva:
94 dB(A)
Langkampfen,
2015-01-02 (AAAA-MM-DD)
VIKING GmbH

Weighlofer
Feil/problem (MB 2 RT):
Driving (MB 2 RT) 169
Underhäll 169
Gora rent maskinen 169
Kontrollera knivslitage 169
Slipa kniv 170
Varning - risk for olycksfall!
97/68/EC, 2000/14/EC, 2004/108/EC, 2006/42/EC
MB 2.2 RC, MB 2.2 RT:
Uppmatt Ijudniva:
92,5 dB(A)
Garanterad Ijudniva:
94 dB(A)
Langkampfen,
2015-01-02 (AAA-MM-DD)
VIKING GmbH

Weighlofer
97/68/EC, 2000/14/EC, 2004/108/EC, 2006/42/EC
MB 2.2 RC, MB 2.2 RT:
Mitattu aenentehotoso: 92,5 dB(A)
4.4 Transport of maskinen
Risiko for at snuble!
97/68/EC, 2000/14/EC, 2004/108/EC, 2006/42/EC
Anvendt procedure for
overensstemmelsesvurdering:
Tillaeg VIII (2000/14/EC)
Navn og adresse pagaeldende myndighed:
MB 2.2 RC, MB 2.2 RT:
Malt lydeffektniveau: 92,5 dB(A)
Garanteret lydeffektniveau: 94 dB(A)
Langkampfen,
2015-01-02 (AAAA-MM-DD)
VIKING GmbH

maerkheastighed kW-O/min
Slagvolumen 149 ccm
Benzintank 1,4 I
Skaereanordningens
Transport 223 Transport 223
97/68/EC, 2000/14/EC, 2004/108/EC, 2006/42/EC
MB 2.2 RC, MB 2.2 RT:
MB 2.2 RC, MB 2.2 RT:
Uzemanyagartaly 0,81
Vagoszerkezet
fordulatszáma
Uzemanyagartaly 1,4I
Vagoszerkezet
Uzemanyagartaly 1,4I
Vagoszerkezet
fordulatszama
Transport ureeda 250
Pre koriśćenja 250
Tokom rada 251
Održavanje i popravke 253
Skladištenje u slučaju dužeg
nekorišćenja 254
Odlaganje 254
Opisimbola 254
Sadrzaj paketa 254
Pripremanje uredaja za rad 255
Opste napomene 255
4.4 Transport uredaja
Radite iskljucivo sa rukavicama da biste izbegli povrede na ostrim i vrelim delovima uredaja.
Ne transportujte uredaj dok motor sa unutrasnjim sagorevanjem radi. Pre transporte isklučite motor sa unutrasnjim sagorevanjem, sacekajte da se nož zaustavi i izvucite utikač za svečice.
Uredaj transportujte tek kada se motor sa unutrasnjim sagorevanjem ohladi nakin sto ispraznite rezervoor za gorivo.
Koristite odgovarajuce pomoene uredaje za utovar (rampe za utovar, sisteme za podizanje tereta).
Osigurajte uredaj na utovarnoj povrsini sredstvima za pričvršćivanje dovoljnog kapaciteta (kaiševima, sajlama itd).
Prilikom podizanja i noşenja uredaja izbegavajte kontakt sa nozem za kosenje.
Pridržavajte se uputstava iz poglavlja „Transport". U njemu je opisan način na koji možete da podignete, odnosno vucete uredaj. (13.)
Prilikom transporte uredaja vodite raçauna o lokalmim zakonskim propisima, a posebno onima koji se odnose na bezbednost tovara i transport predmeta na utovarnoj povrsini.
4.5 Pre korišćenja
MB 2.2 RC, MB 2.2 RT:
Izmereni nivo zvučne snage: 92,5 dB(A)
Garantovani nivo zvučne snage: 94 dB(A)
Langkampfen, 2015-01-02 (GGGG-MM-DD)
VIKING GmbH

Direktor sekctor za istraživanje i razvoj proizvoda
19. Tehnički podaci
MB 2.2 R, MB 2.2 RC, MB 2.2 RT
Serijski broj 6357
Vrsta motora sa unutrasnjim sagorevanjem
4-taktni motor sa unutrasnjim sagorevanjem
MB 2.2 R, MB 2.2 RC, MB 2.2 RT
Ure'daj za rezanje Standardni ravni nož
Sirina noza 46 cm
Urejdza startovanje Uze za motora startova
Bezbednosni uredaj Zaustavlianje motora
Momentat zatezanja
vijka noza 60 - 65 Nm
Prečnik prednjeg
tocka 200 mm
Prečnik zadnjeg
točka 200 mm
Visina košenja 28 - 85 mm
Prema smernici 2000/14/EC:
Garantovani nivo
zvučne snage LwAd 94 dB(A)
Prema smernici 2006/42/EC:
Transport uredaja 268
Prije rada 268
Zavrijeme rada 269
Odrzavanje i popravci 270
4.4 Transport uredaja
97/68/EC, 2000/14/EC, 2004/108/EC, 2006/42/EC
MB 2.2 RC, MB 2.2 RT:
Patikamu darbu ar VIKING ierici Jums novel

Dr. Peter Pretzsch
Uznemuma vaditajs
1. Satura rādītājs
Par so lietošanas pamacibu 283
97/68/EC, 2000/14/EC, 2004/108/EC, 2006/42/EC.
Razajums izstradats un izgatavots saskaar sado standartu: EN ISO 5395-1,EN ISO 5395-2.
Izmantota atbilstibas novertesanas procedura: VIII pielikums (2000/14/EC).
MB 2.2 RC, MB 2.2 RT:
izmeritais troksnu jaudas limenis: 92,5 dB(A)
garantéais troksnu jaudas limenis: 94 dB(A)
Langkampfene,
2015-01-02 (GGGG-MM-DD)
VIKING GmbH

Weighlofer
Petijumu un produitu attifistibas nodalias vaditajs
19. Tehniskie parametri
MB 2.2 R, MB 2.2 RC, MB 2.2 RT
Serijas numurs
6357
Ileksdedzes motors, konstrukcija
4 taktu
ieksdedzemotors
MB 2.2 R, MB 2.2 RC, MB 2.2 RT
| Griezëjmehanisms Plaušanas platums 46 cm | Naža turëtãjs |
| ledarbinësanas ierîce | Starteris ar troses mehanismu |
| Drośibas apríkojums | Motora apstādinăsana |
| Naža stiprinăjuma skrūves pievilkşanas moments 60 - 65 Nm | |
| Prieksejo ritenu diametrs 200 mm | |
| Aizmugurejo ritenu diametrs 200 mm | |
| Plaušanas augstums | 28 - 85 mm |
| Saskañā ar Direktīvu 2000/14/EC: garantëtais trokñu jaudas limenis LwAd | 94 dB(A) |
| Saskañā ar Direktīvu 2006/42/EC: trokñu spiediena limenis darba viétra | |
| LpA | 81 dB(A) |
| klūda KpA | 2 dB(A) |
MB 2.2 R
MB 2.2 RC, MB 2.2 RT:
Ismatuotas garso galios lygis: 92,5 dB(A)
Stimata clienta, stimate client,
Conducerea executiva
1. Cuprins
Despre aceste instruanti deutilizare 320
Generalità 3
Indicatiqii privind citirea
instructiunilor deutilizare 320
corespunde cu urmatoarele directive CE: 97/68/EC,2000/14/EC,2004/108/EC, 2006/42/EC
Produsul este projetat si fabricat cu respectarea urmatoarelor standarde: EN ISO 5395-1, EN ISO 5395-2
MB 2.2 RC, MB 2.2 RT:
Nivel de putere acustica másurat: 92,5 dB(A)
Nivel maxim al puterii acustice: 94 dB(A)
Langkampfen,
2015-01-02 (AAAA-LL-ZZ)
VIKING GmbH

Şef département cercetare Şi dezmoltare produse
Ybaxaemble nokynateIn!
Bolbwoe cnacn6o 3a To, yTo Bbl Bbl6pann BlicOKokaueCTBeHHoe n3dJeNne KOMNaHNI VIKING.
3To n3dJIne 6bIIO n3rOToBNeHO nO cambIM COBpeMeHHbIM TEXHOJOrnueckm MToDAM IN B COOTBeTCTBUN C MepaM N O obecneHnK aueCTBa npOdyKun, BeDb Ha7a cJIb CnTaeTcra DOCTnHyTOI TOIbKO B CInyae NOJHOrO yDoBJIeTBOpEHnN POKynateJI.
EcynBacIMeIOTCBONPOcblNo BaewemyyctpoiCTBy,TOobpaauTecb, noxayncta,KBaewemyDInepynn HenocepndBeHHo BHauyKOMnaHHO.
Mbl Haneemcra To pa60Ta c yctpoiCTBOM KOMnHmVIKING doCTaBt Bam ydoBOJIbCTBne

Dr. Peter Pretzsch
DinpekTop
1. CodepkaHne
O nonb30BaHm daHHo HnCTpyknei no 3Kcnnyatau 338
O67aIINHFOpMaZn 338
Yka3aHne no npouTeHHIO
HnCTpyKuIN NO EKcnnyataaUN
OncanHe yctpoCTBa 338
TexHnka 6e30nachoctn 339
Obune cBeJeHnA
3anpaBka - 06paueHne c
6eH3nHOM
Paboua odekda n cpeCTBa
3aunTbI
TpaHcnpTnpoBka yctpoiCTBa
Ipeepa6oToi
BoBpepaOtbI
Texnueckoe 06cnyxmbaHne n
peMOHTHbIe pa6oTbi
XpaHHeHne npn dInTeBbHbIX
nepepbibaxBpa6oTe
Ytunn3aun
OncaHne cHMBOIOB 346
KomnneKt noctabkn 346
IpoTobka yctpOcTBa K pa6oTe 346
OmbaHnΦopMaun 346
MOnTaX BeDyUeI pyuKn
TOnJIINBO MOTOPHOE MacNo
347
OmbaHOpMaun 347
OTKnDbIbAHne BeDyue pyuKn
UctahOBka n ChTne Tpoca
CTAPTEPA
PerynipOBKa BbICOTb Cpe3AHn
3aunTHbIe yCTpoiCTBa 348
ByreIb octaHOBKn DBnraTeTn
PekomEndaaun no pa6oTe 348
OmbaHDPoMaunno
MylbUPOBaHnIO
Korda pa3pewaetc
MynbUpoBaHne?
Kak cneyet BbINoHrTa
MylbUpoBaHne?
Kak yacto cneyet BbINONHrTb
MylbUnpoBaHne?
BVeDHeYyCTpoIcTBA Bpa6Ory
3anyck DBnraTeJI BHyTpeHHeRo
cropaHn
BbIKIOUeHne DnurTaTeJIa
BHyTpeHHero CropaHn
PpBbOd DnBxKeHn (MB 2 RT)
TexHueckoe 6cbnyKbHaHne
OuICTKa yCTpoiCTBa
PpOBepka n3HOca HOXa
3aToUka HOXKa KOCNJIKI
DEmoHTaX MoHTaX HOXa
KOCNIKN
BnrrateIb BHyTpeneHero cropaHn
KoIeCa u Kopo6Ka IepeIaU
XpaheHne (B 3mHn nepnoD)
TpaHcnpToPobKa
TpaHcnopTnpOBka
Oxpana Okpykaioe Cpebl
Ctahdaptthbte 3anactn
TpaФИК cepBиCHOrO
06cnykBaHn
IopTBePxKeHne nepeaun 353
IoTBePxKdHHe cepBnCHoro
06cnykubHn 353
CbeHeHne K MmHmMy My n3Hoc a
npedotbpaueHne noBpeXdHn 353
Deklapaunn n3rotobnteJIO
COOTBeTCTBm DnpeKtNBAM EC 354
Texnueckne daHhble
Ponck HncnpaBHOCTe
2. O noIb3OBAHm DaHHoH mHCTpyKcnei no 3Kcnpnyatau
2.1 O6uaHnΦopMaun
UcpoIcTBo pa3pa6oTaHO IJRA NmHOrO nCNoJIb3OBaHnR.
BHHMaHHe - onaCHOctb HecuaCThblx cnlyaeb!
Ta30HOKOcUNKa npedHa3NaYeHa ToJbKO dNn cKaunBaHnra3oHOB. NHOe npImeHHeNe 3aPpeSeHo, TAK KAK MOKeT npINBeCTK ONaChbIM NocneCTBnM UIN NOBpeXdHnU yCTpOiCTBa.
V3-3a onacnoctn noIyehnraTpaBM nOJIb3ObaTeIeM ra3OHOKoNkIy 3anpeuaetc npImeHrtb IJn cNeIyuux pa60T (HeNoIhoe nepeuucnne):
ДЯ NOДрЕЗКВ БЕТOK,3eJIeHbIX OрразжdeHи N KcSTOB,
-ДЯ NOДрсЗКи BьЮшСя paCTeHni,
ДЯухола3a paCTeHnMnHa KpbIaxN BЯикax Ha 6aJIkoHax,
ДЯИЗМЕЛБУЕнЯOBpe3KOBdepeBbeB IN K cytapHnKOB,
- ONUCTKIOPOXEK (BCacbBAHHeM, npOyBko),
ДЯ BBiPaBHNBaHn NOBepXHOCTN NoYBbl, HAnpIMep, npn HAnuyn 3eMJaHbIX XOJMNkOB, CdEJaHHbIX KpoTaMn.
I3coo6paKeHm 6e3oNaChOCTn
3aIpeuaeTcraJIIO6oe n3MeHeHne Ha
yCTpOJCTBE,3aNCKJIIOUeHHeM
KBAJIINΦuIupOBaHHoYCTaHOBKn
npHaJdIXHoCTe NHaBeCHORO
0bOpyDobAHn,doNyUeHHbIX KOMPaHnei
VIKING.KpOME TORO,N3MeHEHn
ycTPOJCTBa npIBoJrT KLIuSeHHIO
rapaHTnHBix npab.CBeDeHHn o
pa3peUeHHbIX KNCNoJb3OBaHHIO
npHaJdIXHoCTax BblNOyUHTe B
CneuaJIIN3InpOBaHHom CepBuCHOM
ZeHTpe VIKING.
3anpeeHbI n3MeHeHHy yCTpOCTBa C
ueJIbIO yBeJIuHcEHn MOUHOCTN ININ
YactOTbI BpaUeHHa DBIRaTeJI
BHyTpEHHero CROPAHN ININ
3JKeTPODBIRaTeJI.
3anpeaaetcNcnoB3ObaHne yctpoiCTBa dIra TpaHCnOpTnpOBKn npedMeTOB, XMBOTbIX INI IIOJeB, BOCo6eHHoCTn DeTei.
Oco6yooctopoxhoctb cneyuET npoBJIaTbpnpn pImMeHn ycTpoiCTBa B30hax 3eJeHbX HacJaHn,napkax,Ha cnOpTnlouaKax,Ha yIucax n npedpnaTnx JecHO rCenbCKoro XO3yCTB.

BhImaHne! Onachocb IJRA 3dopOBBa BCNeCDTBnE Bn6paun! Upe3mepna Harpy3ka, Bbl3BaHHa
Bn6paunM,MOKeT npBeCTN K
HaheceHIO yUep6a IJRA CNTEmbl
KpOo0bpaueHnI HEPBHOINCTEmbl, B
OCo6eHNocnY JnC HApuyeneHnMI
KpOo0bpaueHn.Ipn NOBHeHn
CmNTOMOB,KOTOpBE MOyT NOBtbcra
13-3a Bn6bauOHHOHarpy3Kn,
HeoXoHMo O6paTntbcra K BpaCy.
PiOnoHbIe CmNTOMbl, HAnpIMep,
No8BJIaOTcB OCHOBHom B naJIb4ax, Ha
pykax INI 3aIaCTHBIX CyCTaBax
(HeonlHoe nepeuNCHeHne):
NOTepraCyBCTBnTeJIbHOCTN,
-60n,
-Mnactehn,
-DCXPOMN KOKN,
- HENPNAHbIe ABJIeHn foOpMNkaun.
4.2 3anpaBka -o6paueHne c 6eH3nHOM

Onachoctb dna Xn3Hn!
BeH3nTHTOKcUeHcnJIbHoTropuH.
XpaHnTb 6eH3nH TOnbKO B
npEHa3HaueHHbIX DnA 3TOr EMKoCTx (KaHnCTpax), KOTOpBle npOwJIN COOTBeTcTBHyU OPOBepKy. KpbIuKn 3aPapBOuHbIX EMKOCTe Heo6xoJIMo BCerDa npaBnBHo HkpyuNbTaBn
3aTnBaTb Do OTKa3a. IV3 coo6paXeHn 6e3onacHOCTn NOBpeXdeHHbIe KpbIiKu DOJIKHbI 6blTb 3aMeHeHbl.
IyTIN3aunn XpaHEnn
npON3BOJCTBeHHbIX MaTePnaIOB,
HaNPmep, TOnNBA 3anpeuaeTcra
NCOJIb3OBaTb 6TyBJIKn IJa HAnNTKOB INN
NoIObHbIE EMKOCTn. HeJIb3r NCKIOuHTb,
TOXIKOCbTB 6TyBJIkax MOKeT KTO-TO
BbINITb, 3TO OCO6EHHO ONaCHO dJeTei.

BENHH XpAHNTB BdAINOT NCTOCHNKOB NCKP,OTKpbITORO IJIaMeHNI, NOCTOHHORO RopeHnA, a TaIOKe NCTOCHNKOB
TennnI npynx nCTOCHNKOB B03ropaHn. He kypntb!
3anpaBky npoIN3BOIDnTb TOJbKO Ha BO3dyxe H He Kypntb Bo Bpemr 3anpaBKn.
Ipeep 3a npabkOHaIO BbIKIOUHTb DBnraTeB BHyTpEHHero CropaHnI N IOdoKDaTb, KOrda OH OCTbIHET.
3aJIbBaTb 6eH3nH Heo6xOJIMo nepe3aNyCKOM DBrIgatEny BHyTpHeHrero cropaHn.Bo Bpempa60tB DBrIgatEny BHyTpHeHrero CropaHn nn npHcOCTbIBweM aWnHE 3anpeuaetc0KpbIbTaB KpbIuKy 6eH3o6aKa nNdoJIbBaTb 6eH3nH.
TOnnBb6aKe 3aONHtB NOHcTBaHaNBAToTOnnBO np6J. Do ypOBH4 cm Hxke KpOMKn HaINBHoro NaTPy6ka, YTO6bIMeIOCb MeTo dJa paCunpeHnra TOnnBa.
Ecnn Bbl nepeinn 6eHnH ueep3 kpa, To 3anyckaTb DniratBhHTpeHHero cropaHn MOxHO TOnbKO Nocne OChcTK nOBepxHocTN, 3aInTOB 6eHnHOM. He BKIOuATb 3axrAHNe DO TORO MOMeHTa, noka napbl 6eHnHa He yIeTuHnCb (npotepeb hacyxo).
PpOJIHTOE TOIINBO Heo6xoDmO Bcerda BbITnpaTb.
Ecnn 6eH3nHa nonaHa oJekny,To ee Heo6xoIIMO CMeHHTb.
HeIb3aOCTabJIbTyCToIcTBoC 6eH3INOMB6eH3O6ake B NOMEUeHIn. TaM UMeETCa BO3MOXHOCTb BCTyPnEHHa B KOHTAKT 6eH3INHOBbIX NapOB COTKpbITbIM ORHEMN INCKpAMN,TO MOKeT PnIBeCTN KBOCNJAMEHnIO napOB.
EcH Heo6xOIMo OnpoxKnHb TOINBb6ak,3TO CJeIyET BInIOJHrB BHe NOMEeHn.
4.3 Pa6oya oJexka n cpeIcTba 3aunTbl

6OCHKOM
Ppi pa6oTe BceIa Hocntb npouHy o6yBc HeckOJIb3Koi nooBo. Henb3ra pa6oTaB mN, HanpImep, B caHaJInx.

Kpome TOrO, BO BpeMpa6oT no TexobcnyxuBaaHnIO uOcnTKe, a TaKxe npu TpaHcnpOpTuPoBke yctpoNCTBa CneDyET HaDeBaTb
npohbIe nepaTKn, He Hocntb
pacnyueHHbIMN dnnHbIe BOIOcbl N
nOKpbBaTb IV (NCNOJIb3OBA Tb rONOBHO
y6Op, wanky n T. n.).

Pn3aToUKe HOJa KOCuNkHeo6xOJIMO N0JIb30BaTbCnPOxOJaUMM 3aUHTbIMN OUYKAMN.
Pa6oTaTb c yCTpoIcTBOM pa3peWaaETcra TOJbKO B DInHHbIX 6pKax N B PIOTHO npJIeraIouei OeKeJe.
Helen3a OeBaT Cbo6OHyIOeKdy, KOtopa MoKeT 3aueNtBcra 3a DBnKyuIeecy3JIb (pbUarH ynpabNeHn), TaKke He pa3peWaeTcHocITb yKpaWeHn, raNCTykN uapfbl.
4.4 TpaHcnpTnpoBka yctpOCTBa
InpneotbpaueHn TpBaM OCTpbIMN IropaUMn cTAMN yCTPOINCTBA CNeDyET pa6oTaB B nepuATkax.
HEnb3ra TpaHCnOpTnpoBaTb yCtpoiCTBO npaPabTaOuSeM DBrarTeNe BHyTppeHrero cropanH. Ipeep TpaHCnOpTnpoBkoB bIKIOUHTb DBiratEnb BHyTppeHrero cropanH, DOxKaTaBCrOCTaHOBKn HOJa N BbHyTb WTeKe pnoBoDA CBeu 3axnHaHn.
YcTpoIcBO CnEyET TpaHCnOpTnpoBaTb TOIbKO C OCTbIBWIM DBNrTaTeIeM BHyTppeHrero CropaHnN 6e3 ToNNBa.
Innpy3kn nCnObn30BaT noDxOJaUne CpeiCTBa (norp3oHbI nIaTfOpMb1, NoDbemHbI npncnoc6JeHna).
YcTpoIcTBOnIero TpaHcNopTpmyEmbIe y3NbI DOnJXHbI 6bITb 3aФИKcNpOBaHbI Ha nOrpy3OuHOI pOpMe C NOMOJIbIO NOxOJauxCpeCTB KpenJeHnR (peMHe, TPOCOB I T. d.).
Pn npdbemne npehoce He donyckaTb npNKoCHOBENKHOxy Kocnilkn.
Co6IaTb yka3aHn, coepKaUneCBA rnaBe «TpaHcnpToPobKa». B Hei OncaHO, KaK NOHMaTb INN 3aKpeNJaTB yCTpOInCTBO. ( 13.)
PtpaHcnpTnpoBke yctpoiCTBa HeoXoJIMo co6JIOnaTb MeCThIe 3aKOHoJaTeNbHbIe IpeDnCahN, B Ooc6eHHocTn no 6e3OnaChOCTn Norpy3Kn n TpaHCnOpTnpoBKe npEJMToB Ha norpy3OuHbIX PnAaTΦopMax.
4.5 Ipepe pa6oToi
CneNyETyOCTOBepntbCra, YTO C yCTpOINCTBOM pa60aHOT TOJIbKO Te JIMca, KOtOpBle 3HaKOMbl C INHCTpyKUnei NO 3KcNPyTaUIN.
IpepeBBOOM yCTpoiCtBa B pa60Ty npOBepntb TOnnINBHyO CNTeMy Ha repMeTNUHOCtB,OCo6eHHO BVIMMbIe DeTaJIH,HaNPmEp,TOnnINBHyBbIb6ak, KpbIuKy TOnnINBHO 6aka,UlaHROBbIe coeDInHeH.N.Bcnyae HerepMeTuHocTn UIN NOBpeXJDeHn He 3aynckaTb DBIratEnb BYTpENHero CROPANH - onachoctb noxapa! IpepeBBOOM B pa60Ty cdaTb ycTPOIcTB OHa peMOHT B CNEuaJIIN3NPOBaHNbIcEBNCbHbI CEHTP.
IyctpoCTB no yxOdy 3a caoOBbIMn yuactkamN C DVBraTeJMaN BHyTppeHHeRo cropaHna NIN 3NeKtpoDVBraTeJMaN CneJeYET CO6JIOnDaTb MyHNUnpaJIbHbIe npedncaHnNo npoDoJXnTeJbHoCTn pa60tbl.
TuaTeNbHO OCMOTpeb yUaCTOK,Ha KOTOpOM 6yDeT paBoTaB yCTpoICTBO,N Y6paTB BCE KAHMn, NaKn, npOBONky, KOCTN INHbIe NOCTOPOHHe pEIMTebl, KOTOpBle MOrIN 6bl 6bl T3xBaueHbI BBepx. B BbICOKO TpaBe MoKHO He 3aMeNTb NpEnTCTBnA (HaPmMep, nHn IN KopHNepeBBeB).
TOMy nped pa60tOn C yctpoCTBOM Ha ra3oHHom yactke cneJyET nometntb BCECKpbTbe 06BeKtBI (npenrTcTBn), KOTOpBle HeBO3MOXHO y6paTb.
IpeepnCNoB3OBAHneM yCTpoiCTBa CNeDyeT3aMeHrTB HeNCpAxBHbIe,aTaKKe BCE OCTaJIbHbIe N3HOWeHHbIe N NOBpeXdEHhIE DeTaN. Heo6xoJIMo BOBpeM ObHOBJrTa Ha yCTpoiCTBe HeuNTa6eNbHbIe JIN NOBpeXdEHhIe
HakneiC npdeynpejdeHnMn yka3aHnMn 06 IMeHOxxCn ONaCHOCTX. HObIe HacNeKn N BCE ocTaNbHbIe 3aNaChIbe YacTN IMeIoTCB CneuaJIn3NpOBaHHom CepBnCHOM ueHTpe VIKING.
IpeepncnoJIb3ObaHnem yctpoIcTba npOBepntb npouHoe nHaJeXHoe noIOxKeHne wTeKepa npoBoJa CBeuH 3aJrAHHa HcBee 3aJrAHHa.
YCTPOIcTB OIOJXHO NcNoJIb3OBaTbcra TOJIbKO B TexHnueeCKN 6e3ONaCHOM COCTOAHm. NpeE KaKdbIM NcNoJIb3OBaHnem yCTPOIcTBa CJIeNyET npOBeprTb,
CMOHTIPOBaHO JIN yCTpOYCTBO B COOTBETCTBUN C npeDnncAHnMn.
-6e3ynpeHNO nIcoCToHnpejyUero HNCTpyMeHTa NBCero pexJuero MExaHN3Ma (HOXA KOCNJIK, KpeJnxBix 3JeMeHTOB, Kopnyca KocNIIOuHOro MexaHN3Ma).Oc06oe BHNMaHne CNeDyET oBaPaaTb Ha NaDeXHOCTb NIOJOKeHnHaJIyHe NOBpeKdEHH (HaceyeK INI TpeuH), I3HOca,a TaKke Ha To, ( 12.2)
- npabINbHO JI 3aBnHcHa KpbIIka TOnNINBHO6aka
- coCTOHNrTOJIINBHOrO 6aKa n y3IOB, CB3aHHbIX C NOdaeN ToIINBa, a TaKKe KpbIuKNrToIINBHOrO 6aKa, KOtOpBle DOJXHbI 6bITb 6e3yKOpn3HeHHbIM
-6e3ynpeHNO ncoCToHnne IN npabINbHa IIN paBTo 3aunTHbIX yCTpoIcTB (HanpIMep, 6yreNn OCTaHOBKn DnIRaTeNk, KopnyCa, BeyuSei pyKn, 3aunTHoI peWETK)
- npabnIbHO IIN 3aBnHcHeN KOJINaYOK MacJHaHorO 6aka.
Pn Heo6xOaMOCr BbIIOJIHeHcBcex Tpe6yEmbIX pa60T cNeIyET npCyatb CneuaJIN3NpOBaHHOMy cepBnCHOMy ueHTpy.VIKING peKOMEHNyET CneuaJIN3NpOBaHHbI CEpBnCHbI ueHTP VIKING.
4.6 Bo Bpempa6oTbI

He pa6oTaTb,ecnB onaCHOI 3OHe haoJrTcXJBOTHbIe IJIIOI,OCO6eHHoJeTn.
3anpeaaetcyaJdAraTb mIINpeMbkaTb
yCTaHOBNEHHbIE Ha yCTpoiCTBe
nepeKnIOuaOuIe N 3aUNTHbIe
yCTpOoiCTBa.B YAcTHoCTN, H N B KOEM
Clyuae He qNKcnpoBaTb 6yreIb
OCtaHOBKn DBnRaTeNa H CToKe BeDyUe
pyKn (HaNPmep, NyTem CBraIBaHna).

BHMaHne - onachoctb noJyehnTpaBM! Hn B Koem Cnyae He KnaCTb pykn Nn Horn Ha
BpaauoouneC TaTn nnnoHnx. 3anpeueHo npkaatbcn K BpaauooueMyc HOxy.
Bcerda co6bnoaTb 6e3oNaHoe
pacctoHne ot yctpoNCTBa,
obecneueHHoe Bedyue pyko.
Bedyua pyka BceIda DOJXHa 6blb
CMOHtupoBaHa HndJeKaUIM o6pa3OM.
3anpeaaetcBHeceHne N3MeHEnB eekonctpykunio. 3anpeaaetc HaunHaTb
pa60Tu yctpoNCTBa CO CNOKeHHoH
Bedyue pyko.
HkoIHa He 3aKpeIJIrTe npEIMetbHa BeNyuei pyuKe (HaNPmEp, pa6oyuOeXky).
CneNyety pa6oTaT ToIbKO npi DHeBHOM CBeTe INXOPOwEM NCKyCCTBeHHOM OCBeUeHN.
Helenba paoTaB CyToPcTbOM BO BpemdoJnro3blOc6eHOB Cnyae onachoCTn yapa MoHHN.
Pn HAnuBn BnaXHoN NOBepxHocTn HeCyToUHBOE NIOXeHHe NOb3oBaTeJIyBeJNUBaET ONaCHOCTb HeCuaCTHO Cnya.
CneNyET pa6oTaTb, co6JIOdaa Oc6yIO octopoxhOCTb, yTO6bl He NOCKOJIb3HyTbC. IIO BO3MOXHOCTN 136eRaTb npIMHeHnY cTPOIcTBa Ha BnaXHO NOBepxHOCTN.
Otpa60taBwne ra3bl:

Onachoctb dnia kni3Hn BCJeCDTBne OTPaBneHn!
Pn NOBHeHn ToHOTbI,
roOBHO 60NI, HApUeHn
3peHn (Haipmep, yMeHbSeHne
noJI 3peHn), HApUeHn CnyXa,
roOBOKpyKeHn, yXyDuaHOueiCnOCo6HoCTN KOuEHTpaUIN
Heo6xOIMo CPOHNO PpeKpATITb
pa6Ot. 3TN CmNTOMbl MOrYt,
KpOME pOcero, 6bITb BbI3BaHbl
CNIuKOM BbICOKO KoHcHTpaUeN
OTpa6oTabux ra3OB.

YcTpoIcTBo BblJeIeRr TaIOBNTbIe Otpa6OtabuHne ra3bBo Bpemra6OtblDnuratEnBHyTppeHrero cropanH. B Hx
codepkntcraIOBtaraOKncb yInepoa -ra3,He IMeounn cBeTa n 3anaxa,a TaKke INdpyTne BpeHbIe BeueceTba. 3anpeaaetcpa6ota Dniratela BHTpeHHero CropaHHB 3akpbItbIX INN PINO pOBeTpnaBaembIX NOMEueHHX.
3anyck:
3aynck npo3BODntb c octopoxHoctbIO, co6nIOJdA yka3AHN rnaBBi «BVeJeHne yctpoIcTBa BpaOToY». ( 11.)
HorndoJXhbl HaxoOntbcn Ha
DOCTaTOOH pacctOHHn OT peKyuIero
NHCTpyMeHTa.
Pn3ayncke 3anpeaaeTc8 onpOKnDbBaTb yCTpoiCTBO.
Pn3ayncke 3anpeaaetc npnbOuNTbB DeiCTBue 6yreI npnbOda DnXKeHna.
Pa60t bHa cKnnoHax:
HaKIOHbIe yUaCTKn Bcerda
O6pa6aTbIbAtbB nonepeuHOM
HaNPaBLeHn, HN B KOe Cnyae He B
npoJbHOM HAnpabLeHn.
Ecnn NOnb3OBaTeNb npn Koc6Be B
npoJbHOM HAnpabLeHn nOpTeR
KoHTpObl, 3To MoXeT npNBecrN K TOMy,
TO OH nonaTeT noD pa6oTaiooee
ycTroCTBO.
Будte ocobo octopokhbl, ecn Bbl MeHareTe HanpaBneHne DBNKeHnHa CKNoHe.
Bcerda cneIte 3a Tem, yTo6bl coCTOHaHne CKNoHOB 6bIIO XoPoUHM, n36eRaIte pa60T CyCTPOINCTBOM Ha cnuKOM KpyTbIX CkNoHax.
13 coo6paqhen 6e3onacnoctn 3anpeueHO uCNOB3OBaTb yCTPOINCTBO Ha ckNoHax KpyTu3H0N 6Olee 25^ (46,6%).
Onachoctb noyuene TpaBM! YrOHaKaIHOHa 25° COOTBeCTByeT BePnKaJIbHOMy nOJbEmy 46,6 cm npn 100cm rOpu3oHTaJI.
Дяобсесеня дocatoчнсma3kn DBiRaTeJN BHYtpeHHeRo CropaHn np np pa6oTe yctpoCTBa Ha cKnOax Heo6xOIMo co6JIOnDaTb DOIOJIHNTeJbHbIe CBeJeHnB IMeIoUeCn HcTpkyuNn n 3KcPnyatauIN DBiRaTeJN BHYtpeHHeRo cropaHn.
BoBpempa60tbl:

Onachoctb noJyueHn TpaBM!
HnKoIa He KNaCTb pyKn IIN HOrn Ha BpaUauUneCraTeAIn, a TaKKe He DePkaTb IN HA IN NIOI 3TNMI deTaJIaMn.

He nbitaTbCRA OCMaTpNBaTb HOX BO Bpemra60tblra3OHOKOcNk. Bpaauouiu
HOKMOKeTCTaTbPnUHOnTeNeChbIX NOBpeXdEHN.
IpeBnraTecb c yctpoiCTBOM TOJbKO B Temne Waara - npa6oTe 6bICTpoe nepeDbXKeHne 3anpeuHo. BcNeCTBne 6bICTPOrO nepemueHHN BO3paCTaET OnaCHOCTb HeCCHbIX CNYaEB N3-3a CNOTbKaHn, CKOBxKeHn I T. D.
Eydte oc6o octopoknbl,ecn Bbl NobopaunBaete yctpoiCTBO nlin noDburaete erK ce6e. Onachoctb cnotkhytbca!
PnncnoB3OBAHn yctpoiCTBa B6n3m MycOpHbIX CBaIOK,AMN 3eMJIHBIX BaIOB co6IIOaIte Oco6yO OCToPOXHOCTb. Oco6oe BNImaHne o6paauTe Ha IocTaTOUHOe paCtOHaHE Do NDo6HbIX ONaCHbIX 3OH.
Heo6xOIMMO orn6aTb HeBnIMbIe 06bekTbHa IyROBnHE (6pb3raHbIe yCTaHOBKn IINr Ra3OHOB, 3aBntBie B NooyBy CBAn, BOAHBie BEHTnN, FyHdAmEtBtI, 3JIeKtpueckne Ka6en n T. n.). Hae3d Ha TaKne NOCTOPOHnE 06bekTb 3anpeueH.

Cneintb 3a INHePUNOHbIM DnKHeHempeKyUeero INCTpyMeHTa, KOTOpoe IINTCa HECKoNbKO CeKYH, DO NOnHO OCTaHOBKN.
BbIKIOHTb DmraTeNb BHyTpeHHeRo
crotapnna,doXdaTbcNPOJHO OCTaHOBKn
pa6Oeero opraHa N BbHyTb WTeKepe
npoBoDa CBeu 3axnraHn,
- npexJe yem OCTaBnTb yCTpoiCTBO, IIN, B TOM Cnyuae, eCNIyCTPOICTBO HaxoINTc8e3 npncMOtpa,
- npexdE qem 3anpaBnTB yctpoiCTBO. 3anpaBky npoIN3BOAnTb TOJbKO npn oCTbIBwEM DnBraTeNe BHyTpehHero crotpAHy.
Onachoctb noxapa!
- npexde yem ocbo6oNDt 6nOKnpOBKn JIN CHrTb 3aRJyUKN C KOpNyca KOCNIIOHOro MExAHN3Ma,
- npexJe Yem NODHmAtb nI nepeHocntb yCTpoiCTBO,
- npexJe Yem TpaHcnpTnpoBaTb yCTpOJCTBO,
- npexKeJe yem BblIOJIHNb paOToHa HOKe KOCNIK,
- npexde yem npoBepntb nIn OunCTNTb ycTpoIcTB nIN npoBeCTn Ha HeM INhble pa60tbl (HaNPIMep, CKIaIbIBaHne BeDenyuee pyKN),
ecn3aTeNoCTOpOHnIpeMetuNnyra30HOKOcNIKNIOBbINcBHeHOpMaJIbHbIe CInbHbIe Bn6paUN.B 3TnxClyuayx Heo6XoIMo npOBepNTyycToiCTBO,BOCo6eHHocHTnpexUmMexAHN3M(HOKn,HoKeBOBBAJ,KpenJIeHneHOKa)HaOTcyCTBne NOBpeKdEHn IN CNeJeYET BbINOHNHTb Tpe6yEmbl peMOHT,IpexJe Yem CHOBa HauaTB paBoTy c yctpoiCTBOM.

Onachoctb nonyueynra TpaBM!
HaJIyue CnJIbHOB Bn6paCm, Ka npabIno, CBnTeIbCTByeT O HeNCnpaBHOCTN. 3anpeaaetc npBODntb ra3OHOKocNIky B DeIcTBVE, HAnpIMep, C NOBpeKDeHHbIM NIN NORHyTBIM HOKeBbIM BaIOM NIN C NOBpeKDeHHbIM NIN NORHyTBIM HOKOM KOCNIk. EcIn Bam He Xbataet HyXbIX 3HaHn, nopuyTe Heo6xOumbl peMOHT CneuAInCTy - KOMNaHn VIKING peKomeHnyet o6paatbcB B CneuAIn3nPoBaHHbI cepBnchbI ceHTp VIKING.
HeoXoAnMo BbIKIOHTb DnraTeIb BHyTpeHrero cropaHna,
ecn ycTpoNCTBO nepemeMaetc co ckaunBaemOro ra3OHNO yuactKa nn Ha Hero,
- npeTcK KAp NpeMeCTb yCtpoiCTBO Ha yAcToK, He nopocu TpaBoi,
ecn yctpojCTBO Heo6xOIMOn onpOKHyTb Ira TpaHcnpTnpOBKn,
- npeed Tem KaK yCTaHOBnTb BbICOTy cpe3aHn.
4.7 TexHnueckoe 06cIyXnBaHne n peMOHTbIe pa6oTbI
Ipeed Haanom pa6oT no OuICTke, yCTaHOBKe, pemOHTy I TexHHeCKOMy 6cJIyKmbAHIO yCTpOJCTBO He06xOdmo
IOCTaBnTb Ha TBepdoe,poBHoe OCHOBaHHe,BbIKHOHTb DBrIaTeJIb BHyTppeHrero CrotapHn I DoXdTaBcra OCTbBaHn,3aTeM BblHyTb WTeKeP npoBoda CBeyn 3axnraHn.

Onachoctb noluyehn TpaBM
H3-3a HOXA KOcNIK!
BbITraIBaHHe TPOCA CTApTepa
npINBOIDNT K BPAUeHHo pa6Oero
opraHa. Bcerda HaxODNTbcr Ha
IOCTaTOHOM PACCTOHN OT HOXA
KOcNIK,OCO6eHHO CNeIITb 3a
NOJoxKeHnEM pyK HOr, BO BpEm
BbITraIBaHry TPOCa CTApTepa.
Ipeen BbINONHeHem pa6oT, npexde BCero,BOBnactn DBInatena BHyTpneHero cropaHna, BByNcKHO KOnNeKTopa n IJyWnteN CJIeDyET DoXdTaBCa OCTbHaHHa YCTpoiCTBa.TemepaTypb MoYr DOCTnRaTb 80° C N Bblie.
Onachoctb oxorob!
HenocpeCTBeHHbIKoHTaKT C MOTOpHbIM
MACJOM MOKET 6bITb ONaCHbIM.KpOme
TORO,HeOnyCKaETcnpOIINBaHne
MOTOPHOro MacJa.
KomnaHnVIKING peKomeHnyeT
IPOUN3BOIDtB 3aINBky INN CMeHy
MOTOPHOro MacJa B
CNEUaJIIN3IOPOBaHHom ueHTpe VIKING.
OuInCTka:
Pocne pa6oTb BCE yCTpoNCTBO Heo6xOJMo TuaTeNbHO OuNCTNTb. ( 12.1)
YdaNTb OCTaKn TpaBbI DepeBHHoH naIOUkO. OcNCTNb 8eTKoN BOOn HxKHOIO NOBepXHOCTb KOCNIKN.
3anpeaetc nCnoJIb3OBAb aannapat
IIN OHCNTB BbICOKO DAJIbENH, a TaKKe
PpOMbIBaT yCTPOINCTBO CTPyAMN BObl
(HaIPmep, pni NMOU CaIOBOrO
ShaHa).
Helen3nOJb30BaTb arpeccNBhie 电CTAue CpeCTBa.3TNcpeCTBaMoryT NOBpeNTbPiactMaCCy IMTaII, YTO MOKeT Bbl3BaTb HapyuWeHne 6e3oNaCHO JKcnNyatauyn yCtpoiCTBaVIKING.
CzelbIO NCKJIOUeHn BO3ropaHn
OTBepCTN OXnaJdeHn,pe6pa
OxJaXdHn I o6NaCTb BbIXIOna DOJIKNbl
6bITb UcTbIMn, HApPImep, OT TpaBbl,
COJOMbl, Mxa, JINCTbeB INN BbITEKWei
CMA3Kn.
Pa60tblnoTexHnueckomy 06cIyXnBaHHo:
Pa3peaaeTcBbINOHNrTbTOIbKO Te pa6oTbIO TexHnueckomy 06cIyKnBaHnIO,KOTOpbIE OINCaHbIB DaHHO INCTpyKuIN NO 3KcNlYaTaUIN. Bce dpyrne pa6oTb DOJIxHbI npON3BOAnTBcB CneuaJIn3nPOBaHHom ceHTpe. I7n noNyEHHN Heo6XoDMbIX CBeDeHn n OKa3aHn NOMOu N o6paauTeCb BCerDa B CneuaJIn3nPOBaHbI cEHTp. KomnaHn VIKING peKomeHdyET BblONHrTb pa6oTb IO TexHnueckomy 06cIyKnBaHnIO pEMOH TToIbKO B cNeuaJIn3nPOBaHHom cepBnCHOM ceHTpe VIKING.
CneuHaIN3HPOBaHHbIe cepBcHbIe UIKING peryIaRHO npEJaRaHT KypCb I npEIOCTaBIAOT TexHueCKyo HOpMaUIO.
CneNyET NcNoB30BaTb TOnbKO
HnCTpyMeHTbl, npHaNdIeXHoCTn INn
HaBeChoe o6OpyDoBaHne, DOnyuSeHHbIE
VIKING nJa daHnro yCTpoiCTBa INn
TexHnueckn aHaJOruHbIe y3JIb. B INHom
Clyuae BO3MOxHbI HeCuaCThBiE CnyuAn,
pNBoDMyue K NoJyUeHNTO TaBM INn
NOBpeXeHNo yCTpoiCTBa. Pn
BO3HNKHOBeHN BONpOCOB CneDeYet
O6paTaBCaB CneuaNIm3InPOBaHHbI
ZeHTp.
OpunnaHbHbIe HNCTpyMeHTbl, npnHaJnxHoCTn 3aunactu VIKING no CBOUM CBOICTBaOM ONTmAlbHO COOTBETCTBYOT yCTpOiCTBy u yDobJIeTBOPraOT Tpe6oBaHnA M
noIb3oBaTeJn. OpunHaJIbHbIe 3aIacHbIe
actn VIKING ono3HaIOCTc no Homepy
3aIacHO JAcTn VIKING, no HauNcN
VIKING n B cIyae Heo6xOIMocTn no
3haky 3aIacHbIX qAcTeY VIKING.Ha
MaJeHbKnX DeTaJnx 3HaK MoKeT cToarTb
TakKe OTdJIbHo.
I3 coo6paqehn 6e30naCHocTn
Heo6xOIMO peRyIaRHO npOBepr8y3Nbl,
CBraHHbIe C noDAueY ToPJIIBa
(TOnPiBONpOBOd,ToPNIIBHbIK paH,
ToPNIIBHbIK 6ak, KpbIiKy ToPNIIBHORO
6aka, nOcEOHNHeHry I T. n.) Ha
OTcyTCTBne NOBpeXJdeHn I
HeRepeMTeuHOCtN, pRn Heo6xOIMOCtN
COOTBeTCTByIOUne y3NbI DoJHXbI
3aMeHЯTBcA cNeuaNlncTOM (KOMNaHnRA
VIKING peKOMeHnyET
cNeuaJIIN3npOBaHHbI cepBnChbI ceHTp
VIKING).
HaKeiC npEynpeKdHnMn
yKa3aHnMn CneJyET BcerJa COepeKaTbB
YCTOM XOPOoO YoTa6eNbHOM
coCToHm. NOBpeKdHbIe nn
yTepeHHbIe HaKeiKn Heo6xOIMo
3aMeHtB HObIM OpuHaNbHBIM,
KOTOpblc MOxHO NOnyHTb B
CneuNIm3npOBAHHom cHrTp eVIKING.
Ppi 3aMeHe y3Na NN DeTaN HOBbIM
y3nOM NN DeTaNbIO, CNeINb, YTObbl
HOBbIe qACTN NOnyUIn TAKNe JKe
HaKeiKn, KaN i PexHne y3bI n DeTaN.
Ppi pa6oTe cpejxim MexaHn3MOM Heo6xoDMo Bcerda HocuTb npouHbIe pa6oOHe nepuaTkn co6JIOaTb npedeBHyO OCTopoXHOCTb.
ДяТOROуTO6bIyCTpoIcTBOpa60TANO HAdexHNO,ClEHyET3aTARnBaTbBCEraKn, 6oJIbIи BnHTbIdo yNopa,BOCO6eHNHOuNT BnHT HOxa.
CneNyET peryIaHPO npOBepaTb BCE yCTpOJCTBO,OCo6eHH OpeyUcTaHOBko HA dIITeJIbHOe XpaHeHne (HaNPIMep,B 3UMHn nepIO), HaOTCyTCTBue N3HOcaN NOBpeKdHn. IV3 COo6paKeHn 6e3OnacHocTN Heo6XoDmO cpa3y 3aMeHrTb I3HOWeHHbIe INI IOBpeKdHhIe DeTaII, oBeCeuHBa TEM CaMbIM HAdEeKHyO pa6Oly yCTpOJCTBa.
HeIb3a MeHrTb OCHOBHOe NOLOKeHne DnurTaTeN BHyTpEHHero CropaHn I nepeBopaNaBaTb erO.
B cnyuae cHnTna kakx-Jin6o deTaJe nJIN 3aunTHbIX npncnocObeHn BO BpeM npOBeHn pa60nt no TEXNHueckOMy o6cnykBaHHIO nx Heo6xoIMo HemeIeHHo CHOBa yCTaHOBHTb Ha MeCtO B COOTBeTCTBn C npedNcAHnMn.
4.8 XpaHHeH npn dInTeJbHbIX nepepbIbax B pa6oTe
Ipeen TEM KAK CTaBnTb yCTpoNCTBO B 3aKpbIToE NOMEuEHeN, CJIeNyET DaTb BO3MOxHOCb TB DBrAraTeJIO BHyTpEHHero CropaHnOCTbITb.
Ipeen Tem KAK HApbItb ycTpoiCTBO,doXdaTbcraeroNHOrO OCTbIBaHn.
YcTpoIcTB CneNyEt XpaHnTb C ONyCTOWeHHbIM TOJIINBbIM 6aKOM IN 3aNaCOM TOJIINBa B 3aKpbIbaEMOM XopoIo BEHTNIINPyEMOM NOMEueHN.
Heo6xoJIMO NCKIIOHTB BepoTHOCTb NOJIb3OBAHnY yCTpoIcTBa NOCTOpOHHMN IINaMn (HaNPmEp, DeTbMn).
Ecni Tpe6yeTcOnyctoWntb 6ak, HapnpMep, npn PnekpaueHn pa60tB B 3mHn nepoD, onopoxKHeHne
TOnNnBHO6aKa DOnJXHO npOn3BOAnTbCn
ToNbKO Ha OTkpHOM Bo3DyXe (nyTeM
BbIpa60Kn TOnNnBa Ha XONoCTOM XoDy).
Ipepe yctahOBKOHa xpaHHe HAnpImep,B 3mHn nepnoD) ycTpoCTBO CneNyet TuaTeJbHO OuNtB.
YcTpoIcTO CJIeJeTy XpaHITb TOnIbKO C BbIHyTbIM IITeKePOM IpOBoJa CBeuN 3aXnraHna.
XpaHbYcTpoCTBO B COCTOBHN ITOBHOCTN K EKnnyatauN.
4.9yttnn3aun
Takne OTXOdbi, KaK OTPa6oTaHHoe MaCIOI INI TOINIBO, CMA3OuHbIe CpeICTBa, FNITbTpbi, AkkymyIaTOPhIE 6aTapen I NIOOBHbIe IN3HaUNBaEMbIe y3JIbI MORYT PnUHNrTB BPeI JIOdAM, XJNBOTbIM I 3KOJIoTN, NO3OMY OHI DOnJXHbI b6Itb YTNl3NIPOBaHbI HaNDexKaUIM o6pa3OM.
06paauTecbB Baw ceHtp no ytnn3aunnnn BnHO nCneuaJn3npoBaHHbIeHTp, YTO6bl NOyUHTb INHOpMaUNO npaBnBHOYtnn3aunn OTxOIOB. KomnaHnVIKING peKomeHnyet CneuaJn3npoBaHHbI ueHTp VIKING.
CneNyET oecneHT npabnblhyo ytnn3aunO TcnykWBero yctpoiCTBa. Ipeed ytnnn3aune npBedeNTe ycTPOIcBO B HnpriroDHOe COCTOHNHe. Bo n36exhaHne Hecacthbx CNYaEB HaO cneuaJIbHO ydaJIb TpOBoB BbICOKOr HanpJxHn, ONyCTOuHTb TOINHBHbI 6ak n CInTB MOTOPHO MacNo.
Onachoctb noJyueHn TpaBM n3-3a HOKA KOCNJK!
Kpome Toro, HNKOrda He octaBnIte OTCnykBHyTO ra3OHOKOJIky 6e3
npncmotpa. yOcOToBepbTeCb, YTO yCTpoIcTBO N OcOBeHNO HOX KocNJIKx XpaHrTCB HHeIOCTyINOM DnA DeTeMecTe.
5. OnncaHne cIMBOJIOB

BHHMaHHe!
Ipeed nepBbIM npmehenem npoHTaHnHCTpykuuNo 3Kcnpyatau.

Onachoctb noJyehn TaPbM!
3anpeueHNO npucytBne NOCTOPOHNX NUC B pa6oey 3OHe.
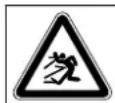

Onachoctb noJyehn TaPbM!
Ipeep paobotamn c
pekyuim IHCTpymehTOM,a
takke peep paobotamn no
TexobcnykubHIO
OuICTKe CLeJeYET BbIHMaTb
UTekep npoBaCBeu
3axiragHra.
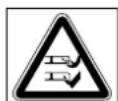

STOP
Onachoctb noJyehnra TpaBM!
Pykn Hn HnpaTb Ha pacctoarHn OTHoKei!
Pexyunn HCTpymEnT npoDOnJxaeBpaaTaBcra no INhepun B TeueHIN HECKOJIbKnx CekyHn NocNe BbIKNoeHnA (TopMo3 DBNrataTeN BHyTpHeHero CropaHn/Hoxa).
MB 2 RT:
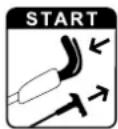
3anyctntb DnBraTeJIb BHyTppeHrero cropaHna.
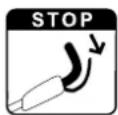
BbiknouHt dBiratelb BByTppeHrero cropaHra.
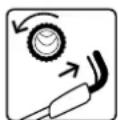
BKNIOUHTb npuBOD DnueKeHH.
6. Komплеск постбки

P03.HaMHeOBaHne 1T.
A Ba3oBOe yCTPOIcTBO c 1 BeDyue pyKoN
He donyckaTb nobpeKdHn yctpoiCTBa!
He 3anyckatb DnBURAteNBByTpeHHeRo CrotapHn B BVICOKOITpabe NIN Pn MNIMMaIbHOBBICOTcpe3aHn.3TO MOKeTNOBNeYb 3a c6oB np6nembl np3anycke.BlaoradapereyITopy noaHTonNBAcΦNKCuPOBaHHbIMnoIOXeHMe DBrAteNBByTpeHHeRo CrotapHn NOCtE3nyCa Bcerda pa60TaETcONTMAmhHo pa60ey qactotoBbpaueHn.
Ppoecc 3anycka npx xoloHOM DBratene BHytpenHero cropaHn:
ToIbKO JnM 2R: HaxaTb npucno6JIeHne nJra3aNycka xoIOHO rBiratela (1) Tpu p3a.
ByreIb octaHOBKn DnBirateJI (2) npKataB K BeDyue pyuKe n ydepXnBaTb B 3TOM NOJoxeHN.
Tpoc cnapTepa (3) MeIeHBOBITaHyb Do NOBJIeHnCOnpoTINBHeHnHaTJKeHnO. 3aTempe3KO Depyb 3a Tpoc,6bICTpO BbITaHyB erO Ha dInHy pyKn.MeIeHHOBepyb Tpoc CnapTepa (3) Ha MeTo, YTO6bl NyCKOBm MexAHn3M Mor npON3BecTu HAOTky Tpoca. IIOBTopaTb IpoueeC Do Tex nop, noka DnBraTeNb BHyTpehHero CropaHn He 3aNcyCTNTcR.
Ppoecc 3anycka npa pa3orpeTom Dniratene BHyTpeHrero CropaHn:

He donyckaTb noBpeKdHn yctpoiCTBa!
Ppna pa3orpeTOM dBiratene BByTppeHrero cropaHnHaKIMaTb npncnocobneHne dnycka xoNoHOrO dBiratena 60nbwe He Tpe6yetc.
Ondako CnEnyet yuHTbIbAtb, YTO npn OueHb XoONdHbIX NOrOHBIX ycNOBnx BO3MOxHO 6bICTpoe OxJaXdHeNe DmRatEn BHyTpeHrero CropaHn.
- Ppoecc 3anycka no aHaIOnn C XOIOHbIM DBNrAteIeM BHyTppeHHero CROPaHIA.
Tolbko dIa MB 2R:
Hakatne npncnoc6nene nna 3anycka xoJOnHO rBirataTe (1) He tpe6yetc.
11.2 BbiknoucheHne Dbratena BHytpenHro cropaHna

OTnyCTnB 6yreIb octaHOBKn Dnuratela (1).
BnraTeIb BHyTpHeHrero CropaHn Hox NOHOCbIO OCTaHaBnBaIOTCB TeeHne 3cekyHd.
11.3ПивовдБижени (MB2RT)


Yka3aHne
MoeBb MB 2 RT ochaueHa npuBoDM nepeHnX KOneC.

BknoueHne npuBoda DnKHeHna
3a n y c t n t b D BV BHyTpeHrero CropaHn. (11.1)
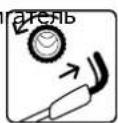
Notaryb 6yreB npBoda ABnKeHn (1) K Bedyue pyke n ydepKnBaT b ero B 3TOM NOIOXeHN.
PnBOD DnBKeHnA kTNBnpyETc, n Ra3OHOKOCnIka HauHHaet DnRaTbCn Bnepe.

BbIKIOueHne npuBOda DnIXeHna
-OTnyCTnTB 6yreB npNBOda DBNXKeHn (1).
PnBOD DnBxKeHn DaekTNBnpyeTcN,na30HOKOcJka OCTaHaBnBaetc.
Bniratelb BHytpenHero cropaHn Hox npoJkaot paOtaTb.
12. TexHnueckoe o6cnyxnbAHne

Onachoctb noJyueHn TpaBM!
IpeaBcEMpa6oTaMn no TexobcykuaBaHIO uNOnOCHTKe yctpoiCTBa Heo6xOJIMOB BHMaTeNbHO npOuHTaTb rnaBy Texhka 6e30NaChOCTn ( 4.) BOCo6eHHocTn pa3dE TexobcykuaBaHne n peMOHT ( 4.7) ,TOUHO BbINOJIHrTB BCE npueDeHHble TaM npEJaNCaHnNo TExhke 6e30NaChOCTn.
IpeB BCempa6oTaMn noTexO6cnyKuBaHmIO uOYCTKe He06XoDIMO doXaTbCoxNaXdEHHy cTpoCTBa N BbHyTb Wt npOBda CBeH 3axrHaH

ExeroDHOeTexHueeckoe 06cIyXnBaHne B cneuaJIn3npoBaHHom ceHTpe:
Fa3oHokocnky cneIyETexeroIHO npOepeTb CneuaJIIN3npOBaHHOM ueHTpe. KomnaHry VIKING peKomeHdyET cneuaJIIN3npOBaHHbI ueHTp VIKING.
12.1 OuicTka yctpoiCTBa
PepnoDnHOCbTexHueeckoo 06cnyKBAHNA:
NocJIe KaXdOro npImeHEnHa.

Onachoctb noJyehnra TpaBm! BblIOuHTdbIuratEnb
BHTpeHHeroCropaHn,doXdaTbcOxnaJeHnYCTpoiCTBa n3BneHb WTeKeP npoBa CBeu 3axirahan.
Ipeed yctaHOBKO uCTPOINCTBA B NOIOXeHne IIN OYNCK CNEyET ONOPOXHTb TOnNHBn 6ak (BbipabOTaTb TOnNBO Ha XOIOCTOM XOdy).
YcTaHOBka yCtpoiCTBa B nONoXeHne DnA OChTkn
OTKpbTb6bICTpOeIcTByUuNeΦHKcnpyUoUne pBHaUN(1)NOTBeCTnBeDyuOpykY(2)Ha3a.
- PpnoJnHb yCtpoCTBO CnepeN uYctaHOBntb eR B NIOJOKeHNE DnO OuNCTKN B COOTBeTCTBN C pncyHKOM.
peed KaKdbim npimeHeHnEM.


Onachoctb nonyuhenra TpaBm! B 3aBnCnMoCTn OT MeTa n npdoJnxTeJIbHOCTn 3KcNpyatauHn HOxN NOBepKeHbI n3HOCy B pa3nUHoi CTeneHn. Pn 3KcNpyatauHn yCTpoiCTBa Ha neCyaHoi NOBepXHoCTn IIN npn qactoN 3KcNpyatauHn B yCNOBnX NONIKeHHo BNaxHOCTn Harpy3Ka Ha HOX NOBblaAetc, n OH n3HaunBaETc 6bICTpee.
N3HOWeHHbHoxMOXeT CImoTaBcN CTaTb PnUHNHO NOnyHeHn cepBe3HbIX TpaBM. IOnToMy CneDyET BcerDa CO6NIOdaTb INHCTpyKmI NO TexO6CnyKuBaHIO HOxa.
Ppoecc npoBepkn
- YctaHOBtBuYCTpoIcTBBO NIOJKeHne JIA OHCTKN. ( 12.1)
OuHCTnTB HOX (1) npoBepuTb ero Ha HAIyue NoBpeKdeHn (HaceyeK nn TpeunH).
- IV3mepntb TOnuHny Hoxa (A) B HeCKoNbKnx MeCtax C NOMOuBHO WTaHReHcNpKyJ (2).
- IV3MepuTb CTeneHb IN3HOca HOxa (B).ДЯ 3TORO npINoXnTb JInHeNky (3) KpepeDHeN KpOMKe HOxa, KaK IOKa3aHoHa pncyHke.
PpeIeJIbI n3HocA
ToIuHa HoKa (A) B IIO6oTouKe
DOJIxHa COCTaBnTb He MeHee 2 MM.
BaxHeiUne TOcKn OTMeueHb Ha pucyHke.
DonyckaetcctaunbaHne ne3Bn He 60lee yem Ha 5 MM:cm. pacctoHne (B) (CTeneh u3HOca).
12.3 3aToUka HoxKa KocuKn
Ecni Bam He xbaatae 3HaHn nJIN BCNOMOraTeIbHbIX CpeDCTB, Mbl peKomeHnyem NopyaTb 3aToCy HOJa cneuaHncty. HenpaBnBHO 3aToyeHHbI HOX (HenpaBnBbHbI yroI 3aToCKI, Inc6BaJahc n T. d.) Hapyaet HopMaJIbHbI XoJ pa6Otbl yCtpoiCTBa.
PykoOIOCTBO IO 3aTOUKe
CHaTb HOx KocuJIK. ( 12.4)
Bo Bpem 3aTockn CneDyeTe OXlaKaDaTb HOK KOCINK, HApnpMep, BOIOH. HeIb3a DOnyckaTa NOBHeHnCnHEBaTO rBETA, Ta KAK B 3TOM Clyuae yMeHbShaetc DOJROBeHuOCTb HOXa.
Hoxkocuncnpeyetountb paBHomepHo,tyo6bln36exaTb B6paun 13-3a nuc6anaHa.
- YrOJI 3aToUckn IOnJKeH CoCTaBnTb 30^
- YuHTbIbTaB npedeJIbI uHoca ( 12.2).
12.4 DeMoHTaX N MOHTaX HOXa KOCNJIKN

Onachoctb noJyehn TpaBM!
Pa6oTaTb TOnIbKO B nepHaTkax.

HoxkocnIKe Heo6xOaMo 3aMeHNtB,ecnBnHbHaCeKu nIN TpeunHb,a TaKke ecn IOCTnHyT npedeNn3HoCa ( 12.2).
Демонох
-
YdepxkBaHoxKocuIkn (1), ocnaBntb BnHT HOXa (2).
-
CHaTb BnHT HOxA (2), CTOnOpHyU
- Wai6y (3) u HOx KocuNkn (1).
MOHTAX
OuHCTnTb NOBepxHOCTb KOHTaKTa HOXa N BTyIky HOXA (4).
3aФнсюВьиHTHOJka(2) COCTaBOMLoctite243.
- YctaHOBtB HOK KOCINKN (1) Ha BTyIKy HOKA (4), KaK NOKa3aHO Ha pncyHke.
- YctaHOBt b CTOnOpHyU 7aM6y (3), KaK NOKa3aHO Ha pNCyHKe, N 3aTAYb BMECTe C BnHTOM HOXa (2) C MOMEHTOM 60 - 65 Hm.

Onachoctb noJyueHnra TpaBM! Heo6xoDIMO co6IIOaTb npEiNcaHHbM MoMeHT 3aTAAKKB HNTa HOka.
PnKaKdoynyCTaHOBKe HOKa CneNyET 3AmEHrTB CTOnOpHyIO Wai6y (3).
PnKaJDo3aMeHe HOxBAHT HOxA2TAKKe NOJNEXKNT 3aMeHe.
12.5 Dbratel BHytpenHero cropaHn
INHTepBaJI TexHnueckoro 06cIyKnBaHHa:
CM. «Инстукшино NO Зкплуаташи DBNIFATEJI BHYTPENHERO CROPAHIA»
06une yka3aHnA:
Co6nOdaTb yka3aHnno ynpabIeHnIO nTexo6cIyXuXBaNHO, KOtOpBie npBBeDeHbB pnilaraemoi «NHTpyKuINn 03Kcnnyataunn DnIraTeJI BHyTpEHHero cropaHnra»
I npoDOnJXnTeJIbHOrO Cpoka CnyKbI Oc06eHH BoaXhBIM Bcerda ABJIaETCA IOCTaTOUHbI yPOBeHb MaCna, a TaKke peYyIphra 3aMeHa MaCIAHbIX I BO3dyuHbIX PnIBTpOB.
PekomeHdyemble INTepeBaIbI 3aMeHbI Macna, a TAKKe INHOpMaunO MOTOPHom Macne IN KONUeCTBe Macna IINBKM npBedeHb I «INCTpyKUnn NO 3KcNpyataun Dnuratela BByTpeneHero cropaHra.
YTo6bI o6ecneHTb DoCTaTOHoe OXJaXdHeHne DniratEn BHyTpHenrO cropan,pe6pa OXJaXdHeHn DOJKNbI BCerda OCTaBaTbCnCTbIMN.
12.6 Koneca n Kopo6ka nepedau
IoiuHnHKn KOJe He Tpe6yHcTexHueckOrO 06CnyKaBaHa.
Kopo6ka nepedau He Tpe6yet TexHmueckoro 06cIyKbAHn.
12.7 XpaHHeHne (B 3mHn nepnoi)
PnDInTeBbHom npocToe ycTpoiCTBa(B nepno3MmHero xpaHeHna) co6IIOaTb cNeDuOuNne NyHKtbl:
TtateJIbHO ONUCTNb BCE HApyHbIe. qactn yctpoiCTBa.
Bce DnKyuuecnaTeaHxopoOo Cma3aTb.
OnycToWntb TOnnBbHbI 6ak n Kap6kpatop (Bbpa6oTaTb TOnnBO Ha XOIOCTOM XOy).
BbIBNHTnTb CBEuy 3aKunraHna (CM. «INHCtpyKuHIO NO 3KcNlyatauNO DnIRaTeJI BHyTppeHrero CropaHnra») IN 3aInIb npIn6n.3cm3MOtphoro Macna B DnIRaTeJI BHyTppeHrero CropaHnra
Yepe3 OTBepCTne Dnna CBeu n 3aKunraHn. PpokpyTntb DnuratTeNb BHyTppeHrero CropaHn HeckoNko pa3 6e3 CBeu 3aKunraHn (NOTaHyTb 3a Tpoc CTapTepa).
A
Onachoctb noxapa!
山Teke npoBoda cBeyn 3axiranaHn n3-3a onaCHOCTN BOCNJamaHeHn depKaTb BdAnI OTOTBepCTn PoD CBevy 3axiranaHn.
BHOBB BBNHTNbCEBy 3aKnraHna (CM. «NHCtpyKuHNo NO 3KcPiNyatauIN DnBraTeJI BHyTpneHero cropaHna»).
CMeHnTbMaCNo(CM.《NHTpyKuHNO nO 3KcNpyataunDBBraTeaBHyTppeHHero CropaHnR>>)
- UcTpoIcTBo Heo6xOJIMo XpaHHTb BCyXOM, 3aKpbITOM HEnbJIbHOM NOMeUeHN. YIOCTOBepbTeCb, yTO yCTPOIcTBo HAXOJITCB HeIOCTYINHom DnA DeTeMecTe.
13. TpaHcnpOpTnpoBka
13.1 TpaHcnpTupOBka

A
Onachoctb noJyueHnraTpaBM! Ppeed TpaHCnpTupOBko
co6nqdaT tpe6oBaHnraabbl
.(4.4)
Pepenocntb yctpoiCTBO cneyet
ToIbKO BdBOeM.Pn3TOM BCerda
HOcNTb NDOXODaUyO 3aunTHyIO
OdeJy (3aunTHbIe 6OTnHKn,
npouhIe nepuATKn).
Peped nOdbemom nn
TpaHCnOpTIpOBKo BBHyTb
WTekep npoBOna CBeuN
3axnHaHn.
IopbemnnnepehocyctpoNCTBa
A Beyuza pyka yctaHOBneHa: ydepKnBaTb ycTpoiCTBO 3a nepeDHIOp pyky dIy npeHocA (1) n3a BeNyUyO pyky (2).
B Bényua pyka cnoxeta: ydepKnBaTb yctpoiCTBO 3a nepeDHHO pyky dIy npeHoca (1) n 3a HxKHe qactn Beyuue pykn (3).
TpaHcnpToPbKa yctpoiCTBa
TpaHcnpTnpOBka yctpoiCTBa pa3pe7aetcHa YnCTOINPOBHO nOrpy3oHoi nIaTΦopMe,ecnYcTpoiCTBO CTOn HA BCex 4 Konecax.
- YcTpoIcTB Heo6xOaIMMo 3aKpeINrTa
Pn NOMOuN NOxOJaux CpeCTB
KpeIIeHnraTak, YTObI NCKInouHtB
BO3MOXHOCTb eO CoKaJIb3bIBaHn.
3aKpeINrTaPoCbI INI peMHn Ha
nepeHne pyKe IJna nepeHoCa (1) nHa
HHKNX qactx BeDuIe pyKn (3).
14. OxpaHa okpykaioeI cpeIbI
CkoueHHa TpaBa He OTHOCNTcK OTXoJam, ee CJeNyEt NcNoJb30BaTb DnnpuROTOBHeHn KOMNocTa.
YCTPOINCTBO, pInHaIeXHOCTN K Hemy INx yNakOBKa I3rOToBJIeHbI IN3 MaTePnAIOB, pNFOJHbIX DnRA BTOpUHOrO NcNoIb3OBAHnR, INoDNeKaT COOTBeTCTByUoSeYtINnN3aCnn.
Pa3dHbHa yTINn3aunO octaKOB MaTePnaNoB, yIOBJeTbOpraUcaI 3KoIOnueckm Tpe60BaHnM, CnOCo6CTByET BO3MOXHOCTN MHOrOkpaTHoro npIMHeHnMaTePnaNoB. Po 3ToI npuHne noc HCTeHnO obbHoro cpoKa cnJxkb
yctpoiCTBO CJIeNyET OTnpabIaTb Ha nyHK Tynn3aun. Pn ytnn3aun CJIeNyET COBIOaTb DaHbIe B rnaBe «Ytnn3aunra ( 4.9)
06paaTecb B Baa nyHKT npnemaytncbcbpbraN B CneuaJIN3npoBaHHBmceHTp, T06bl noJyUHTb HOpMauO O npabunbHOYTNn3aUNOTXoDOb.
15. CtaHdapThbIe 3aNuaactn
Hok kocunkn (HOK nn MylbnypoBaHn)
6357 702 0101
BnHT HOXa
90083199028
Ctoonopnhaa#6a
00007026600

Kpenekhble 3nementb HOka KocuKN (Hanpumep, BnHT HOka, CTOnOpnaa6a) Heo6xOJMo MeHrKa KaKdI pa3 npi 3aMeHe IIN MOHTaxe HOka. 3anaChbie YactN MoXHO pno6peCTN B CneuaHn3npoBaHHOM cEpBnCHOM ueHTpe VIKING.
COOTBeTCTByET CJIeIyUOuMM DnIpeKtNBam
Ebponeckoro Coo6ueCTBa (EC): 97/68/EC, 2000/14/EC, 2004/108/EC, 2006/42/EC
I3JeJIne 6bINO pa3pa6oTaHO B COOTBeTCTBUN CO CNeDyHouMIM HOpMaMIM: EN ISO 5395-1, EN ISO 5395-2
Прмнень MeToI OUeHKn COOTBeTCTBnI DnpeKtNBaM: Прлжкн eVII (2000/14/EC)
Ha3BaHne n aDpec npnHmAbweyuactne HCTaHcN:
MB 2.2 RC, MB 2.2 RT:
IImpeHHbI ypoBeHb IyMa: 92,5D(A)
TapaHTnPOBaHHbI yPOBeHb 乌Ma:94 n6(A)
JaHrkamnpheh, 2015-01-02 (TTTT-MM-ⅡD)
VIKING GmbH

PykoBOnTeJIb OToJa HayHbIX UCCneObaHH n pa3pa60TK npOdyKcHH
YCTaHOBHeHHbI cPcK cIyX6bl
IOnHbI yCTaHOBNeHHbI cPOK cnYk6bl -do 20 neT. YcTaHOBHeHHbI cPOK cnYk6bl npeDnolaraet COOTBeTCTByIOUne IN CBOEbpemEHbIe OBCnykBaHne I yXoD corNaCHO pyKOBoIDCTBy no EKnnyatauIN.
19. TexHHueckne daHHbIe
MB 2.2 R, MB 2.2 RC, MB 2.2 RT
CepnHbH Homep 6357
MB 2.2 R, MB 2.2 RC, MB 2.2 RT
BnirateJIb
BHyTppeHHero
CropaHnKoHCTp. nCNoI.
PexyuMEXaHn3M
4-TaKTHbI DBC
Umpina pe3a
Nycboe
yctpOCTBO
IpeoxpaHntbHoe yctpoiCTBO
3anyck TPOCOM
yctpoiCTBO OCTaHOBKn DnIraTeJI
Momet 3aTJKKBnHTa HOKa
IiAmetp nepeHnx KOJIec
ДиametрЗаднх KOneC
BbICota cpe3aHn
B COOTBeTCTBUN C
DynekeTnBOI
2000/14/EC:
RapaHTnpoBaHHbI ypoBeHb Wyma LwAd
B COOTBECTBUN C
ДиpeKТИВОВ
2006/42/EC:
YpOBeHb 3ByKa Ha pa6ooyem MecTe L
Norpewhoctb KpA
60-65HM
94 έB(A)
MB 2.2 R
Tn Dniratien
HOMNH. MoUH. npH HOMHH. YactOTe BpaU.
Paobouo
ToPnBbIb6aK
B&S cepn 450
1.6-2900
KBT-06/MNH
125 ky6. cm
0.8π
MB 2.2 R
CkopoocbBbpaueHn
pekuyero
MexaHn3Ma
2900 06/MINH
3aahHoe 3haeHne
Bn6pauncoIaCHO EN 12096:
3aMepeHHoe
3haueHne ahw
IorpeuHoctb Khw 3aemp cornacho
EN 20643
Дπ./Шир./Выс.
Bec:
7,00 m/c²
2,80 m/c²
1
124/49/100 cm
22K
MB 2.2 RC
TnDnuraTeNa
HOMNH. MoUH. npH
HOMIN. YACTOTE
Bpau.
Pa6oyn o6bem 149 ky6. cm
TOnJIINBHyb6aK
CkopocTb BpaueHnpexyuero
MexAHIM3Ma
3aandaHnoe 3naueHne
Bn6pauncoIaCHO EN 12096:
3aMepeHHoe
3haueHne ahw
IorpeuHoctb Khw 3aemp cornacho
EN 20643
Jn./Wnp./BbIC.
Bec:
2800 06/MNH
5,00 m/c²
2.50 m/c²
26K
MB 2.2 RT
Tun Dnuratena
Hom. MoH. npH
HOMIN. YACTOTE
Bpa.
Kohler XT675
2,2-2800
KBT-06/MNH
HencpaBHOCTb (MB 2 RT):
OcTyCTByET TaI npn npBedeHn B deiCTBne 6yreI npBODa DnIXeHna.
Bo3MOxHa npuHnHa:
Tpoc npBODa DnBKeHnnoBpeKdEh (HaNPmep, neperHyT).
YcTaPaHeHne:
-3ameHHTb Tpoc.
YbaxaemKnneHTN,
Бларпь Мь,Че Зakунхte син OT BucokokacyeceTbeHnTe npodyKtn HaФирma VIKING.
To3 npOdykTe npOn3BeDeH Ha 6a3aTaHa
Ha-MoepHn npOn3BODCTBHeH
TexHONOrn H pN Cna3BaHe Ha CTpNKTHn
MepKn 3a rapaHTnpaH He KaueCTBOTo,
3aTOTo Haaata ZeI Ze 6bJe
noCTnHaT, cmo aKo Bne Cte DoBOnHn
OT ypeA.
Ako nMaTe Bbnpocn BbB Bpb3ka Cypeda, MoJr o6bpHeTe Ce KbM TbProBeua, OT KOIToCTeTO 3aKyNINJIN, INI INapeKTHO KbM Haunr OTDen ,PiacMeHT".
PnraTHo n3noJ3BaHe Ha Bauny ypeI VIKING!

Dr. Peter Pretzsch
YnpabuTeN
1. CbДьрЖанHe
3a Ta3n INHCTpykucna 3a ekcnloataa 360
O6n yka3aHn 360
Yka3aHna 3aYeTeHe Ha
HnCTpykunraTa3aekcnnoataua 360
OncanHeHa ypeDa 360
3a BawaTa 6e30nacHocT 361
O6uynka3aHn 361
3apekdahe npa6oTa c 6eH3nH 362
O6neKIO n eKINIpOBka 362
TpaHcnpTupaHe Ha ypeJa 362
Ppeu pa6ota 363
IIO Bpeme Ha pa60Ta 363
PpBkna npemOnTu 365
CbxpaHeHne npn npoDbJnxTeJIHO
Hn3non3BaHeHa ypea 366
I3xBbprnHe 367
OncanHe Ha cmbolnte 367
OkomnneKToBka 367
IoproToBkaHa ypeDa 3a npckane Beknnoatauia 367
O6uynka3aHn 367
MOnTnpaHHe Ha Nocta 3a ynpabIeHne 368
TOpuBO MToTopHo MaCNo 368
Komahdne enemeHTn 368
O6uynka3aHn 368
Crbbahe Ha locta 3a ynpabneHne 368
3aKaUaHe n OTKaUaHe Ha
CTapTePHoTO BbKe 369
Hactpoika BucouHaTa Ha KocHe 369
3aunTHn npncno6neHn 369
JIoCT3aCnIpaHeHaDnIraTeTn 369
yka3aHna 3pa6oTa 370
Obza nHΦopMaζηa 3a peKyπTbUpaHeTo 370
Kora moke da ce pekyntbupa? 370
Kak Tp86Ba da ce pekyTnBupa? 370
KoIko YecTo Tp86Ba Da ce peKynTnBupa? 370
IyckaHe Ha ypeDa B eknploataun 370
CtaptnpaHe Ha DnBraTeIa C BbTpewHo ropeHe 370
N3KnHouBaHe Ha DnBraTeJc BbTpewHo ropeHe 371
3aBnKBaHe Ha XoObaTa YaCT (MB 2 RT) 371
Pa60THN CTbIKN, KOUTO N3NCKBAT DeIcTBnE OT CtpaHa Ha NOTpe6nteJIa
Pa3BnTe 60TtA (1) COTBepTKa, 3aJeCTBaIte IocTa (2) ...
O6u n36poBaHnA:
- N3no3BaHe Ha npOdykTa npn cnOpTn nn CbCTe3aTeJIH MeponpIyTn
TekctoBe C DonbHnTeJHo 3NaueHne:
Te3n nacaxn ca 063haeHc eHN O T ONICAHNTe NO-DOJy CUMBOJN, 3a Da 6b.4at No-dO6pe OTKPOEH N HNCTpykunra Ta 3a EKCnnoatauia.

Onachoct!
OnachocOT 3IIOJyka N TeKko
ФИЗЧЕСКО HAPAHBAHe.
Heo6xOДIMо e IJIIN Tp6Ba Da ce
U36ЯRa ONpeDeNeHo NOBeDeHne.

PpeynpexdneH!
OnachocT on3nuecko HapaHbAhe. OnpeJeIeHO NOBeHeHne npEpa3Ba oT Bb3MOxHn NIn BePOrTHN HapaHbAHn.

BhimaHne!
Jekn HapaHbAHnN mnt MaepnAHH nTeMorat da 6bDat npedOTBpateHn Ype3 N3BbPwBaHe Ha onpeJeHn DeiCTBn.

Yka3aHne
HhopMaun3a no-do6po nIIOBHe Ha ypea 3a n36raBaHe Ha BbMOxHo HnpaBnHO o6cnykBahe.
Tekctobe, OTHacauu ce KbM fHyprn:
Hnpynte,Ha KOnTo e NOKa3aH NaHHbT Ha yNoTppe6a Ha ypeda,ce HAMnpat B HaayanoTo Ha INCTpyKcIyra 3a ekCnloatau.
To3n CmB0J NOKa3Ba Bpb3KaTa
Mexdy fHpyPnte B HauaNoTo n
CbOTBeTHNr TEKCT B INHCTpyKuYra
3a ekCNlOaTaUy.

3.ОписанneHaурда

1Ioc3a cnpaHn DaBraTeJna
2Ioc3a3aDbXbAHeHaXoOBaTa 即CT(MB2RT)
3Ioc3aynpaBneHne
4BoaHnBaBxKeTo
5Бbp30aTeaTeJIHO npncno6neHnE
6BoaHnBaBxKeTo
7IocT3a HacToiKa BnCoUHATAHa KOceHe O3aD
8 loct 3a hactpoKa BncouHaTa Ha KOceHe OTnped
9 PpeHa npbXka 3a HocHe
10 DnBraTeC BbTpseHOropeHe
11 PookaBauna nomna (MB 2 R)
12 KaBeJHa cKo6a MB 2 RC: 1 6p.
4.3a BaWata 6e3oNaChOcT
4.1 06u yka3aHna

HenpemeHHo cna3BaIte Te3n npabuHa 3a Texnka Ha 6e3onacHOCT npa60Ta Cypeda.

Ppei nIpbBTO npckane Ha ypea B DeIcTBne Tp6Ba da npOeTeBHNMaTeHIO qraIaTa HNCTpyKUma 3a EcKnloaTaun.
CbxaHraBte cTapaTeNo HNCTpyKuYTa 3a ekCnloatau,3a da r noJI3BaTe n B6bJe.
Cn3BaIte yka3aHnraTa 3a o6cIyKbaHe nOIOIpbXkKa, KOITo Ie HamepuTe BOTJeJIHaTAt NHTpyKuN 3a EKCIIOaTaun Ha DBIrATeN C BbTpEwHO ropeHe.
Te3 npedna3Hm MepK (CnncbkbT He e nIbne) ca 3aDbJnxTeJIHn 3a BaWata 6e3oNaCHOCT. BnHarn n3NoJ3BaIte ypeDa pa3ymHO n OTROBOPHO n He 3abpaBAYe, ye NOTpe6nteJrT HOCN OTROBOPHOt np3JIOJNYKa C TpeTn Nua aMATEpHaJIHn 8ETn NO TxAHATA Co6CTBeHOCT.
3aio3HaTe ce c eIeMeHTnte 3a ynpabHeHc cynoTpe6ata Ha ypeda.
UpeBt Da ce n3noJIbBa cMo OT Iuca, KOIto Ca npOeJn HNCTpyKcIyTa 3a ekCIIIOaTauJn Ca 3aNO3HaTn C HAuHa pa6oTa C Hero. Ppei NpBBoTo nyCKaHe Ha ypeDa B ekCIIIOaTauJn BCEk noTppeBnten Tpr6Ba Da ce NoCTapae Da noJyN KOMNeTeHTHa n ppaKTNUecka noIroTOBka 3a pa6oTa C Hero.
Iotppe6nteT Tp6Ba Da noJyU yka3aHnO TnpdaBau NnO T pyroKbAinDnupaHO nue 3a 6eOnacHaTa ynotpe6Ha ype.
Te Tp6Ba IpeDn BCNUKO da Hakapat
noTpeBteIa Ocb3Hae, Ye ca
HeoXoIMN N3KIOUHTeIHO BHMMaHne IN
KOnHeHTpaIaIry OT HerOBA cTpaHa, DOKaTO
pa60Tu Cypda.

Onachoc3aXHBota npaHn 3adywaBaHe!
CbueCTBya onachoc3 3a Deuata, KOITo CN IrgpaT C onakOBKITE. 3aIbJTKTeHNO dpXkTe onakOBKITE N3BbH O6cera Ha Deua.
UpeT, BKNIOHTeHOB CNUKIN
Pnncno6bHeN3a DOnbJNHITeH0
MOHTpaHe, MoT a Ce IpeOCTABRT
IIN OTdABaT NOd Haem CaMo Ha JInuca,
PnIHcUNHO 3aNo3HaTN C To3N MoJeN
pa6oTa c Hero. NHCtpyKunra 3a
EkCnloatauN e qact OT ypeDa n BuHaR
Trp6Ba Da 6bJe ppeDaBaHa 3aeHNO c Hero.
Излбайураимкогатост
OTПОИнаниВДБбрФИЗИССКО
NCSIXUHcKO CBCTOHRNE.АкIMATE
3ДРавOCIOBNI ПОБЛEMN,ТРБа Да ce
KONCYPITAPe C BaUNA Nekap DAni
MOKTe Da pa6OTte C ypeDA. He
pa6OTe C ypeDA cNeYyNoTpe6a Ha
aJIkoXoI, HApKOTuINuIN 3a6abAun
CnocO6HocTTa 3a pearupane JekapCTBa.
Hnkora He pa3pewabaiTe Ha deua nIIN noDpaCTBaun no16 roHNn da n3noJI3BAt ypeJa. B MeCTn pa3npoe6n MOKe Da e onpeJeHa pa3NnHa MNHMaHa Bb3pact Ha notpe6nteJia.
To3n ypeI He e npedHa3NaeH 3a
n3noJI3BaHe ot Xopa (oco6eHO ot deua) C
OrpaHueHn fN3NuYeCKn, CeTNBn IJIN
ymCTBeHH CNOC6HoCTn IJIN OT JInca C
HeIOCTaTBueH ONIT N/INn PO3HaHnI,
OCBeH aKO He ca nOd HaI3Opa Ha IInce,
OTROBOPHO 3a TExHaTa 6e3OnacHOCT, INn
He ca NOnyUHn INHCTpyKuIN OTHOCHO
no3BaHTo Ha ypea O T TakOba IInue. Deata Tp6Ba Da 6bDat KOHTPOINpaHn, 3a da ce rapaHTnpa, ye Hma da nIprant Cypea.
YpeBt e npdeBnDcH 3a NmUHO non3BaHe.
BHHMaHHe - onaCHOcT O T 3nononyka!
Kocaykatae npedHa3HaeHa cmo 3a Kocene Ha TpeBa. N3noN3BaHeTo 3a Dpyn CeIi He e No3BOJeHo, TbK KaTO MoKe Da 6bDe onacHO nn da NobpeDu ypeDa.
Iopapn onacnoct OT Teleche na nobpea 3a onepaTopa He ce pa3pewaBa n3no13BaHeTo Ha KocauKaTa 3a CneHnTe DeHIOCT (CNNCbKbT He e NbJeH):
- noopra3BaHe Ha 7y6paun, JnB nIeT I xpactn;
- p3aHe Ha nb3aH paTeHHa;
IIOJIbpxaHe Ha TpeBHN IIOUIN B IOKpNBHn rpaDNHN n 6aJIKOHcN cakCnn;
pa3p06BaHe nHaDpo6BaHe Ha OTPraHn KIOHn OT bPBeTa nXNB nIeT;
- nouchtahe Ha anen (n3cmykbahe, n3nyxbahe);
- ɪnʒaBbHЯBaHe Ha noʊBeHn HepaBbOcTn, Happ. KþptɪuHn.
OTcbo6paxhen3a cnryphocct ce 3abpaHbBa n3BbpWbAhe Ha KaKaBaTO n Da 6nlo npomHa no ypeDa C N3KKnOyeHne Ha KBAInΦnUpaHn DOnbLnHTeNe H MoTAX Ha oDobpeHn ot VIKING npnaIaeXhoCTN.OCBeH TOBa TakaBa npomHa 6n DoBena n do OTMaHa Ha rapaHnraTa. INhOpmaun 3a Odo6peHnTe npnaIaeXhoCTN MOKeTe Da nOJyHte OT Baunn CneuaIaN3npaH TbproBeu Ha VIKING.
N3pHNO ce 3a6paHbBA BcKaKBa MaHnIynaqno ypeJa, KOrTo NOBuHaBa MoHocTt NaY cheTota Ha BbPteHe Ha DBuratela C BbTpewHO ropeHe, CbOTB. H eNEktpoDburatela.
C ypeHa He 6nBa Da ce TpaHcnpTnpaT xopa, oObeHo Deua, XNBOTHn nIIN npEmdTeN.
Pn n3no3BaHe Na ypeDa B o6uceTBeHn o6eKn, NapKoBe, Na cnpTn NIOuaKn, NO yNIuN B CeNCKOCTOnaHcN I TROPKn pEaepnTnCe N3NCKa NOBUSeHO BHMaHne.

BHHMaHHe! OnaCHOCT3a 3dpaBeTo npaDu Bn6paun!
Ipekomephoto n3lahe Ha Bn6paun MOKe Da Vbpeu
KpbBoo6paueHneTo HnHepBnTe Ha rohpnte KpaHnCn,OCo6eNo npxOpa C npo6Jemn B KpbBoo6paueHneTo.
O6bphTe ce KbM Iekap npn noBaTa Ha CmNTOMN, KOINTo 6nxA MoIIN Da Ca pe3yIITAT OT n3naIaHe Ha Bn6paun.
TaknBa CmNTOMN, KOnTO Ce nOBBAt OCHOBNO NO pBCTNTe, PbueTe NIN KNTKNTe, Ca HApPIMep (CnnckbT He e nbHeH):
-ⅡNcHaHcyBCTBNTENHOCT;
-6OJIKN;
- Myckylnha cna6ocT;
- DnCxpOMHa KOxTa;
-He npTeHcbp6ek.
4.2 3apekdahe npa6oTa c 6eH3nH

Onachoct 3a XHBOTA!
BcH3nHbTe oTPOBeH n neCHO Bb3nJaMeHm.
CbxpaHbAte 6eH3nHa camoB npeduene H3a Ta3n ceJn npoBepeHc bDoBE (Ty6n).KanayKeTe Ha Ty6nte 3a ropBO Tpr6Ba BnHar npaBnHO da ca 3aBnHTeHN 3aTeHnatN.OT Cbo6paxeHn3a CnpyhOCT DeEckTHnte KanayKn Tpr6Ba Da Ce NOpMeHr.
HnKora He n3noJI3BaIte 6yTnIKu 3a HAnITKn nnNoIO6HN CbDOBe 3a n3XBpIYe nnCbXpaHeHne Ha TOpNBO. TpeTnIua, n no-CneuaJHo Deca, Morat no NorpeWka Da NnT OT Tx.

ДрькTe 6eH3InHa ДaJIeCh O T NCKPn, OTKpNTIПaMbci, OfBn, I3TOUHnCi Ha TOJIINHa I dpym I3TOUHnCi Ha 3anaIbAHe. He
nywete!
3apeKdaiTe C roPbO cAmo Ha OTkpnto Hne NyweTe,doKaTo 3apeKdaTe.
Ppeu3apejdahe n3KIOHcTe Dnuratena C BbTpueHOr opeHe n ro octaBeTe da u3CTUHe.
3apekdaheTo c 6eH3nH Tp86Ba da ce
n3BbPwBa npdei CTapTnpaHe Ha
dBnraTeJc BbTpewHo ropeHe. IIO BpeMe
Ha pa6ota Ha DnRaTeJc C BbTpewHo
ropeHe nn pni 3arpTa MaunHa
KanaykaTata Ha pe3epBoapa He 6nBa da ce
OTbapra nn da ce 3apekda ropBO.
He nbIhete pe3epBoapao dorope, a camo do OK. 4 cm noi pb6a Ha hakpaHnka 3a nbIhHe, 3a da ocTahe MCTO 3a pa3uipraBaHe Ha rOpBOTO.
B cnyaay e e n3TeKbI 6eH3nH, 3anaJIeTe DInraTeJc BbTpEwHO ropeHe eBa CneJ KaTO NOUcHTe 3AmbpceHaTc 6eH3IN NOBbpxHOCT. N36aRbAte BCRAKaKB OINT 3a 3anaJIbaHe, DOkato 6eHNOBITE napHe ca ce n3napn (noCyuTe ype3 3a6bpcBaHe).
Bednara n36bpwe pa3nTTo rOpBO.
Ako no dpexnte e nonaHaJI 6eH3nH, Te Tp8Ba Da ce CMeHrT.
HnKora He CbXpaHbAaTe ypeHa Ha 3akpnto C 6eH3nB pe3epBoapa. O6pa3yBaunte Ce 6eH3nHOBN npuMoraT Da Bnra3at B Docer C OTkpNTn PnAmbUu INNCKPN N Da CE Bb3PnameHrT.
B cnyuaye pe3epBoapbT hMa Hxkda ot n3npa3BaHe,TOBa Tp86Ba Da ce n3BbpwBa Ha OTKpntO.
4.3 06JeKJIO n eknnpOBka

IbpeHa pa6oTa BnHaHnOcTe 3aTbOpEHn ObykncrpaHcpHn NODmETKn.HKOra
He pa6oTe 6ocn nnn c neKn o6yBkn, Hapnpmep caHdann.

Ppi DeHocTn No NODpBxka nNouchTahe, KaKTo n npTrpaHCnopTpapae BnHaHnHocTe nnbTHn ppeNa3HN
pbkabu npnbupaTe Dope bIraToka (Kbpna 3a rnaBa, wankn np.).

Pn3aToUbaHe Ha Hoxa 3a Kocene Tpr6Ba Da ce HocT NOxOJaI NpeJNa3Hn OuHa.
Hocete bnnn nHaHTaONHm
TcHOp npnIeHAno 6JIeKIO, KOraTo pa6OHTe cypeHa.
HnKora He Hocete CBO6OAnHO 06NeKIO,
BnKyTa, BpaTOBp3KN uANoBE, KOnTo
MOraT Da Ce 3aKaHaT 3a NDoBnXnTe
YactN (KOMaHDeH NoCT).
4.4 TpaHcnpTnpaHeHaypeda
Pa6oTe CaMo CpbKaBnU,3a Da n36eHHe TapaHaBaHnO T YaCTn Ha ypeDa,KoITo Ca TopeuNnC OCTpnp6oBe.
He TpaHcnpTupaIte ypea c pa6oTeU dBiratEn C BbTpEshO ropehe. Ppei TOBa N3KIOUHTe DBriratEn C BbTpEshO ropehe, N3UkaaIte HOXOBeTe Da cnpaT u N3BaTe KOHTAOKTHNHa HApaiHnK Ha 3anaJIInTeHHaTa CBeu.
TpaHcnpTnpaIte ypea cAmO C n3CTnHaJ DnBraTeC BbTpENo RopeHe N C npa3eH pe3epBoap 3a rOpuBO.
3a TOBapeHe n3nON3BaIte NOxOJaUH NOMOuHN CbOpJKeHn (TOBAPH paMn, NODEMHN MEXAHN3MN).
Obeonacete ypea Bbpxy TobapHaT a nataopma Cbc CpecCTBa 3a 3akpenBaHe c noxoadu npa3mepn (BbxTea, pembui n dp.)
N36yBaTe KOHTaKT CHOxA 3a KOCHe npBnHaHe HocHe Ha ypea.
Ipooyete n cna3BaIte yka3aHnIa T
rIaBa ,TpaHCnOpTpIpaHe". Ta m e onncHo
kak da BnIraTe n 3aKpeBate ypeJa.
(⇒ 13.)
Pn TpaHcnpTnpaHe Ha ypeDa
Cna3BaIte MeCTHnTe 3aKoHOBn
pa3nopeD6n I NO-CneuHaHo
OTHacraUHTe Ce Do 6eOanachocTTa npn
TOBapHe n TpaHCnOpT Ha n3dEIny Bbpxy
TOBAPHn PnAToFOpMn.
4.5Ппеди pa60а
YBepete ce, ye c ypeda pa6oTc camo Nnua, KOnTO ca 3aNo3HaTu C HNCTpyKUraTa 3a ekCnIooTaunr.
Ppei nyckaHe Ha ypea B Ecknloataun npobepete yntbTHeHOCTTa Ha TropNBHata cnTeMa, OocbeHo Ha BUnmTe YaCTN, KaTo HAp. pe3epBoap, Kanayka Ha pe3epBoapa, Cbbp3BaHnHa MapkyuHte. B CnyauHa HeynblTheHOCT Nn Nobpea He CTapTnpaIte DBNrAteJIc BbTpneHNO
ropehe - onachocT ot n3rapaHe! 3aeneTe ype,da Ha peMOHT npn cneuaan3npaH TbproBeu.
Cna3BaIte onpeJeIeHITe B MeCTHITe pa3nope6u lacObe 3a pa6oTa C rpaINHcN ypeNi,OBOpyDbAHn C DBrAten C BbTpEwHO ropeHe IIn eNeKtpoDbIrataTe.
PpOBepTe BnMaTeJHo TepeHa, Bbpxy KOIto ue n3no3BaTe ypeJa, n OTCTpaHete BCNUKn KAMbHN, npbUKN, TEIOBe, KOCTn INpyrN UyXKn TEa, KOITOMorat Da 6bDat n3XBpNeHn OT Hero. PpenTCTBnTA (Hanp. NbHObe, KopeH) JeCHO MORAT Da OCTaHaT He3a6eJIra3aH N Bb BnCOKA TpeBa.
3a Ta3n cen npdei Da 3anooyhepe pa6oTa Cype, o6o3naueTe BCNUKn CKPNTB TpeBaT a yKm TeJa (npenrTcBn), KOnTO He MoRat Da 6bDat OTCTpaHeH.
IpeynynoTpe6aHa ypeTaTp8Ba Da ce 3aMeHrT DepeKTHnTe, KaKTo N BCuKn DpyrN n3HOceHN NOBpeDeHN qactN. CtaHaNITE HeeTnBn nn NobpeDeHN npDynpenNTeHN CTKeepn NO ypeA Tp8Ba Da ce NoMeHrT. BaWnT cneuaJIn3npan TaProBeue Ha VIKING NoDlbpxKa HAnuHOCt OT pe3epBHN CTKeepn N BCuKn Dpyr npeEBHN qactN.
Ipeyn ynoTpe6a Ha ypea npoBepete DaJIIN KOHTAKTHNt HAkpaHnK e NocTaBeH PJIbTHO IN CNyPHO KbM 3anaJInteJHaTa CBeu.
UpeT MoKe Da ce n3no3Ba cMo B cbToHHe 3a 6e3oNaCha ekCnNoaTaun. Ipeu BCaKo nuCKaHe Ha yPeDa B ekCnNoaTaun npOBepTe:
JaINypeIbTeMOHTnpaH B CboTBeTCTBneC yka3aHnraTa;
- daJIN pexeunrT nHcTpymEn T ueJnT pexeU 6IOK (HOK 3a KOceHe, eIemEnT 3a 3akpenBaHe, KopNyc Ha KocayHm MEXAHM3bM) Ca B IN3npabHo CbCTOHN. O6bpHete BHImaHne HauBeue daJIn caIObpe 3akpenHu I daJIn He ca NOBpeHn (pe3Kn UIn nyKHaTHnH) UIn U3HOceHn; ( 12.2)
JaJI KanaaKaTa Ha pe3epBoapa e 3aBnHTeHa npaBnHIO;
- daJIpe3epBoapbT, KanaUkata Ha pe3epBoapa n ropBONpOBOHnTe Yactn Ca B N3npaBHO CbCToHHe;
-Даиnpпeдпа3нITE npicnoc6нен
(Hanp. loCT 3a cnpaHe Ha DBuRaTeJn,
KOpNyc, loCT 3a ynpabNeHne,
npedna3Ha peWeTka) ca B n3npabHo
cBcSTOJHne nФункUOnHpaT
IpaBUNHO;
JaN KanaykaTa Ha pe3epBoapa 3a MacNo e 3aBnHTeHa npaBnHO;
Pn Hxjda n3BbpuTe camn BCNUKn Heo6xoJIMn DeHocTN INn ce 06bpHeTe KbM CneuaJIN3pan TbproBeu. VIKING npenopbUa CBouTe CneuaJIN3npaHn TbproBuN.
4.6 NpBpeMeHa pa6oTa
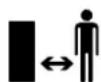
Hikora He paBOTete cypeda, ako B paOHa, KbTeTo ue paBOTnte C Hero, Ima Xopa, Oc06eHO Deca, INN JXIBOTHN.
MoHTnpaHnTe Ha ypeDa npeKcbauN 3aunTHn pncnoc6JIeHn He 6bNa da 6bDat OCTpaHbAHn Nn npnOKpBaHn. Hnkora He qNKcnpaIte JIOCTa 3a CnnpaHe Ha DnRaTeN KbM pbKOxBaTkata (HaNP. 4pe3 npNBp3BaHe).

BHHMaHHe - onaCHOCT OTHapaHaBaHe!
Hnkora He noctabraTe pbcTe UIN KpaKaTa Cn Do Nn NoD
BbPTaU Ce yactu. Hnkora He ninnate BbPTaUcCe HOK.
Binarn cna3BaIte onpeJeHeHaTa OT IocTa 3a ynpabLeHne 6e3onacHa DnCTaHn. NocTb 3a ynpabLeHne
Tp6Ba BnHaI Na e MoHTnpaH npaBnHOn n Da He Ce npomeH. Hkora He nyckaIte ypeDa B EKcNlOaTaun CbC CrbHaT NoCT 3a ynpaBJIeHne.
HnKora He 3aKaayTe NpeDMeTNo Nocta 3a ynpaBHeHne (HaNP. pa6oTHo 6bKeNo).
Pa6oTe cAmo Ha dHeBHa CBETnHa nI npu Do6po N3KycTBeHO OCBetneHne.
He pa6oTe c ypeJa npn DbXd, 6py n oco6eHO KOrato mma onaCHOCT OT ynap Ha MbIHHA.
Ako TepehBt e BnaxKeH, onaCHOCTTa OT 3IIOJNYka ce yBeJIuYaba nOpaIN HamaJIeHa CTaBUNHOCT Ha OnepaTopa. Pa6oTe Me MHO RO BHIMATENo, 3a Da n36eHTe NDoXIIb3BaHe. IIO Bb3MOxHOCT n36raBte N3NOJ3BaHe Ha ypeDa Bbpxy BnaxHn TepeHn.
I3ropenra3oBe:

Onachoc3a kUBota npaOn OTPaBHe!
Ppi npnloaabahe, rnaoboonne, npoBneMn CbC 3peHneTo (HaNP. cTeChEno 3pntenHO none), HapuweHn Ha cnlyxa, CBETOBbpTeK, HamaIeHa cnOCo6HocT 3a KOHcHTpaunr BeiHaRa CnpTe paOta. Tez n CmNTOM MoKe Da ca npedn3BnKaHn OT npekaneHo BnCOka KOHcHTpaunHa n3rope nn ra30Be.

YpeBt 3anoBa da npoun3Bexka OTOPBn H3ropen ra3OBe Oue CbC 3anaJBaHe Ha DBruratena CBtpeHOropehe.
Te3n ra3oBe cbIbpxkT OTPOBE BByIpeOeH OKNC, Ra3 6e3 cB8rN MUPNC, KaKTo n dpym BpeHN BeuecCTBa. Hnkora He naIeTe DnurTaTeN C BvTpseHOr opeHe B 3aTBOpEH NIn HeNo6pe npOBetpNB NOMEuEHHJ.
CtapTupahe:
CTapTnpaIte ypeDa BHIMateHIO B CbOTBeTCTBnE Cyka3aHnTa B INaBa "Iyckane Ha ypeDa B EKcNloataunr. ( 11.)
OcunpyBaIte DoCTaTbUHO pa3ctoHne Mekdy KpaKaTa CN n peKeuN HnCTpyMeHT.
PnCTapTnpaHe ypeBbT He 6nBa da e HAKNOHE.
PnCstaptnpaHeNoCTbT3a3aDbNxBaHe HaXoOBaTaYacTe He6uBaJa6bDe 3aJeCTBAH.
Pa6ota no cknoHObe:
Pa6oTe BnHaHn HnpeHo, a He NaIbXHO Ha cKnOHa.
AKnKocHeHaNtBxHoHaCKnOHa onepaToB3ary6n KOHTpO,MOKe Da 6bnde npera3eHOT Koczuiype.
Бьдete ocobeho BHIMATEHNI, KOraTo npomehrTe Nocokata Ha DnBxkeHne no CKJHOHa.
BnHaN ocInypaBaiTe Do6pa Cta6nHIOCT Ha ypea npu pa6oTa no CKNoHOBe n 136aBaiTe da pa6oTne No npeKaJIeHO CTpbMHNCKNOHOBe.
OTcbo6paKeHn3a cnIpyHocTypeBtHe 6nBa Da ce n3non3Ba no CKIOHOBe C NaKIOH HaD 25^ (46,6%).OnachOCT O HapAHBAhe!
25^ NaKIOH Ha CKIOHa OTROBAPr HA BepTnKaIHO HapactBaHe O46,6 CM Ha 100cmXOpN3OHTaJIHaDbJxHa.
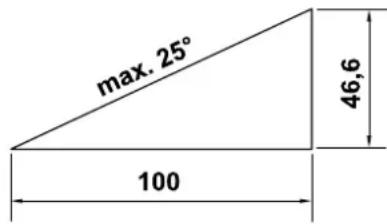
3a ocInpyBaHe Ha DoctTaBvHo Cma3BaHe Ha DnBnTaTeNc BvTpeWHO ropeH npu N3no13BaHe Ha ypeHa NO CKIOHOBE BnKte OSe HnHOpMaunra Ta BoCTaBeHata 3aeDnO C HeRo INHCTpyKunr 3a ekCnIooTaunr Ha DnBnTaTeNc BvTpeWHO ropeH.
No Bpeme Ha pa6oTa:

Onachoct ot HapaHraBaHe!
Hnkora He noctabryte pbcete nn KpaKaTa Cn HAd, NoD nn Do BbptaIHTe ce Yactn.

He ce onntbaite da
npoBepBaTe Hoxa,doKaTo
Kocaykata pa60tn. BbptraunrT
ce HOK MOKe Da npuHnH HapaHaBaHe.
BnHaynypaBnaTe ypeDa C neXeOJa cKOpocT n B HnKaKBcIyau He TuaHe,doKaTo pa60nte C Hero. YnpabJeHneTo Ha ypeDa C no-RoJMa CKOpocYBeJIuYaba ONaCHOCTTa OT HapaHbAbe B pe3yIITat Ha npenbBaHe, NOxNb3BaHe n T.H.
Бьдete ocobeHOn ppeNa3nNB, KOrato 3aBbATE cypeHa NIn rnpNbPbBaTe KbM ce6e cn.
OnachocOT npenbbahe!
N3noJ3BaIte ypea c o6o6eHo BHIMAHHe, KORAto Ce HAMnPateB 6JIn3OCT Do CMeTnua, n3KoNn N 6NaTa. Oco6eHo BHIMABaiTe Da CE HAMnPate Ha DOCTaTbUHO pa3CTO8HHe OE NT NOo6Hn ONaCHN MeCTa.
Ckpntte B TpeBHTne nIOuN o6eKn (IbXIOBaJIHn INCTaNaU, KOJOBe, BOHN KNAHn, cyHdAmEHTn, eNEKtpueckn npoBDHnU nT.H.) 3aDblNXTeJIHO Tp8Ba da ce 3ao6knaJr. Hnkora He npemHaBaIte C ypea npe3 TaKNaBa yxKn o6eKn.

BnmaBaTe 3aDnKeHneTo nHepuNaHa pexeunu
nHCTpyMeHT, KoETO npOblkaba OSe HrKoIko
cekyHnPipeN INCHPTyMeHTbT
da cnpe HnblnHO.
I3KIOUeTe DBIRATEn C BBTpeWHO ropeHe, N3aKaIte pa60THN INHCTpyMeHT Da cnpE IN3BaTe KOHTaKTHN HAkpaHHK Ha 3anaNTenHa T CBeu:
- npeDn Da ocTabIte ypeDa 6e3 Hau3Op;
- npeДЯ 3apeDITe C rOpINBO. 3apeJDAIte ypeJa C rOpINBO cAmO npn INCTInHaI DBrIaTeJ C BbTpEshHO ropeHe.
Onachoct ot noxkap!
- npedn da ocbo6nnte 6nokpaHnraT a nn OTnyuTe Kopnyca Ha KocnHna anapat;
- npedeIa BdIratae I npehacraTe ypeIa;
- npeДи ДТа TpaHcnpTIpaTe ypeДa;
- npedn da pa6oTnte no Hoxa 3a KocHe;
- npedes npobepka nnn noocBahe Ha ypeda nnnpedes n3BbpuBaHe Ha dpyrn pa60tn no Hero (Ha np. crbahe Ha nocta 3a ynpaBneHne);
aKo INHCTpymEnTbTe cpeuHaI yXdo TnIO uNn AKO KocauKaTa 3anOue He BAIBpnpa HeoBuaHcNHO. B Te3n CnyaH npOBepe Yepea n noCneuaHPO pexeun6Jok (HOxa, HOKOBNA BAN, 3akpenBaHeTo Ha HOxa) 3a NOBpeuN uN3Bbpwe HeoBXoDMITE peMOHTn, PpeuN OTHBO Da CTapTnpate Ypea N da pa6oTnte C Hero.

Onachoct ot HapaHbahe!
CnHnHO Bn6pnpaHe no npHHuN e HnDnKaun 3a NOpea.
KocaykaTa He 6nBa HkOra Da ce nYcKa B EKcnIaTuaC NOBpeDeH IIN IN3BNT HOXOB BaJI INI C NOBpeDeH INI IN3BNT HOX 3a KOceHe.
Ako HamaTe Heo6xOaMnTe
no3HaHna, ce o6bPheTe KbM
CneuaJIaNT (VIKING npenopbYBa
CBOnTE CneuaJIn3npaHn
TbProBUn), KoiTo Da n3BbpUH
Heo6xOaMnTe peMOHTn.
I3racete DnBraTeN C BtpeHOr opeHe:
KOraTo MeCTInTe ypeDa OT INIIN KbM TpeBHaTa NIOU, KOrTo Ue 6pa6oTbATE C Hero;
IpeDn Da npemecnte ypeDa Bbpxy Heo6paCbl C TpeBa TepeH;
Korato Ce HaIaraya ypeDbT da ce HakoHc C cen TpaHcnpToPahe;
IpeDn Da HacTpOnTe BnCOnHaTa Ha KocceHe.
4.7 PndpBkKa npemOHn

Ipei Da 3anoyHeTe da
n3BbPwBaTe KaBATO n da e
deHIOCT, CBp3aHa C
noHcTBAHe, HAcTpoKa,
peMOHT N NOIDpbjXka, OCTaBeTe ypeDaBbpxy TBbpI, paBeH TepeH, n3racTeDbNraTeJI C BbTpseHNO rOpHe I rOocTaBeTe Da n3CTnHe N n3BaJeTeKOHTaKTHna HApKaHHKa 3anaJNTeJIHaTcBEu.

OnachocT OT HapaHraBaHe C HOXa 3a KOceHe!
Upe3 n3bPnBaHe Ha CTapTePHOTo Bxke pa60THnT INCTpyMeHT 3aONyBa Da n3BbPwBa BbPteNBO DnHexHe. BuHaRn KOrato N3DbPnBaTe CTapTEHOTo Bxke, BHIMaBaTe Da mMa DOCTaTbYHO pa3CTOHNMeMekdy TAnOTO Bn (HaI-Beue pbcTe n KpaKaTa) HOKa 3a KOceHe.
OCTaBeTe ypeDa n3CTnHe,OC6eHo npEn Da 3anOHTe DeHocTn no DnraTeNa C BbTpEuHO ropeHe, KOJHOTo Ha n3nyckatEnHa Tp6a N Shymo3arLywnTe. TemnepaTypaTa IM MOKe Da doCTnHe Hd 80^ C.Onachoct ot n3rapAne!
Hnkora He npomeHnTe OCHOBHaTa HacToPka Ha DnBraTeJc BbTpEHo ropeHe n He ro fOpCuPaIte.
B clyaaye 3a n3BbPwBaHe Ha deHocTn no NOdpbXkata ca 6uIN oCTpaHeHN KOMNOHEHTN INI 3auNTHn npncnoc6neHna, Te Tp8Ba da ce NOCTABRT OTHOBO CneD TOBA CbrNaCHO yka3AHNA.
4.8 Cbxpahene npn npoBjnxTeHNO Hen3no3BaHe Ha ypeda
Octabete Dniratena C BbtpseHNO ropeHe da n3ctnne, npdi Da OCTaBNTe ypea B 3aTBOpeHO NOMESEHNE.
OCTaBeTe ypeDa da n3ctnHe HantbJHo, nped Da ro nokpneTe.
UpeIbT C n3npa3HeH pe3epBoap I pe3epBHOTo rOpNBO Da ce cbxpaHraBaT B 3aknOuBaIo Ce nDobpe npoBeTpnuBO nomeueHne.
YBepTe ce, ye ypeTBe 3aunTeH cpeUy Hepa3peuHa ynoTppe6a (Ha np. ot deua).
Ako ce Hana ra da 6bJe n3npa3Hepe3epBoapbT 3a ropBn, Hanp. npaInpekbcBaHe Ha pa6oTa Ta npe3 3mMaTa, HoHanpaBete Ha OTKpnto (Hanp. KaTO OCTaBtte DnIgATEJI da pa6OTn, DOkato CBbpN rOpNBOTO).
IounCTe Te ypea OCHOBHO, npedn da ro npnbepete 3a cxbpaHene (hnp. ppez 3mata).
CbxpaHbAaTe ypeJa cMo Cn3BaJeH KOHTaKeH HaKpaHnK Ha 3anaJInTeJIHaTa CBeU.
CbxpaaBte ypea B cbctoHne 3a be3onacha ekcnnoatauia.
4.9 N3xBbPnAHe
OtnaHn npOyKTu Kato Otpa6oTeHO MacNo HnI rOpBIO, N3NOJ3BaHn CMa3OCHN MaTePnAIn, QnITpn, AkyMnyaTOpHn 6aTeepnN nDpyrnoOobHn N3HocBaunCe yactn MoRat Da OKaxaT BpeHNO Bb3dEeCTBne Bbpxy Xopata, JKNBOTHTe N OKoHNATA CpeDa N 3aTOBA Tp86Ba da Ce nXbBpIANTcopeD N3NCKaHnraTa.
ObpheTe ce KbMa Baunr cENTbp 3a peuKnnpaHe nn KbMa Baunr cneuaan3npaH TbproBce, 3a da Haynte KaK da nXbPnTe npabnHO OTnndHnTe npOkyTn. VIkING npenopbUaT cbOnTe cneuaan3npaH TbproCu.
YBepete ce, ye n3Jne3nIaT OT ynoTppe6a
ypeJe 6bJe ppeAden 3a Cbo6pa3eHo
C n3NCKBaHnra Tn3XBbPnIe. Ppei Da
6bJe n3XBbPnE, ypeBt Tp86Ba da Ce
npNBede B HerodHO 3a ynoTppe6a
cbCToRHe. 3a npDoTbPaTaBAhe Ha
3JIOJNYKoOTcPaHete Ka6eJa 3a
3aNaIbAe, n3Pp3HeTe pe3epBoapa N
n3TOUeTe MOTOPHO MaCNo.
OnachocT OT HapaHraBe c HOxa 3a Kocene!
Hnkora He octabnTe n3n3na ot ynoTpe6a kocauka 6e3 hnd3op. YBepeTe ce, yeypeTnOCo6eHO HOKbT 3a KocHe ce CbxpaHbAT Ha MRCTo, HeOCTbNHO 3a deca.
5. Onicahne Ha cIMBOJIte

BhimaHne!
IpoqTeTe INHCTpyKuTAta3a eKcNIOaTaUIN, npEn Da n3NoN3BaTe ypeia.

OnachOCT OT HapaHbAhe!
He donyckaTe ctpaHnHn JIua B ONaChaTa 3OHa.

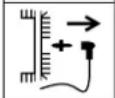
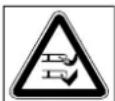

OnachocT OHT HapaHbAhe!
Ipei pa6oTa no pexeU
HnCTpyMeHT N DeHOCTH NO
NoDpBkKa N NoCHCTBaHe
N3BaXJaTe KOHTaKTHna
HaKpaHnK Ha
3anaNTeHaTa CBeu.
OnachoctOTHapaHbAhe! DpbkTe pbcTe n KpaKaTa cn daJeOT HOXOBete!
CneI n3KnIOBaHe
peKeuT 6nok
npOdbJnxaba da pa6oTn
HkoNc CekyHnNo
Hepu (CnpaKa Ha
DburaTe n C BbTpEHo
ropeHe/cnpaKa Ha Hoxa).
MB2RT:
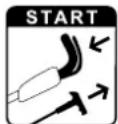
CTapTnpaHe HaDburTaTeNa C BbTpseHNO ropeHe.
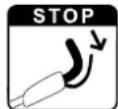
N3KnHoyBaHe Ha DnBraTeTc C BbTpewHO ropeHe.
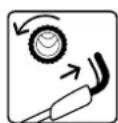
BkIIOUbaHe Ha 3aDnBxaHetoHaXoIOBaTa Yact.
6. OKOMNJIeKTOBka

P03. HanmehoBae He Bp.
A OchOBen ypei c noct 3a npabneHne
- HNCTpykun3a 1 eknloataa
- IHcTpyKzna 3a ekCnloataaHa n DBrTaTeJc BbTpEsho ropeHe
3a n3BbPwBaHe Ha BCnKu ONnCaHn DeHOCTH NoCTaBeTe ypeJa Bbpxy XOpN3OHTaHa, paBHa N TBbPda OCHOBa.
7.2 MoThIpaHe Ha IIOCTa 3a ynpabJIeHne

BHHMaTeJHo OTBopete loCTa 3a ynpabJIeHne (1), KaTo BHIMBaTeJa He npTnCHe T BxKeTaTa.
3aterhe npedbapntelmoHTnpaHnTe 6bp3o3aTeraTeHNn npncnoc6neHn (2) (tpra6Ba da octaHe da ce nodaBa np6n3ntenHO eHa HABNBka Ha pe36ata Ha 60JTA) n 3aTBopeTe Harope.
Поберка Н мOLTакa

-Бbp3o3aterateHnHTe 4 npncnoc6nHnna (1) Tp86ba da ca 3aTeHaTu Taka, Ye da npunraT pIbTHO KbM IocTa 3a ynpabLeHne n rohpata qacT Ha IocTa 3a ynpabLeHne da e Cbbp3aHa HEnoDbNkHo C donHaTa. Ako NoctbT 3a ynpabLeHne He e MOHTupan HEnoDbNkHO uIN 6bp3o3aterateHNhte npncnoc6nHnHe ca 3actaHaJI npabUNHO, OTBopete 6bp3o3aterateHNhte npncnoc6nHn Hn peryuipaTe npabUNHO, KaTO rpa3BnTe n 3aBnTe OTHBO.
- Поберете павинною поожени.
На Вьжета (2, 3) и Кабелна (
скоа (4, MB 2 RC).
7.3 FopBO MToTopHO MacNo

U36aBaiTe noBpeDn no ypeDa!
Ppei Da cTapntpate ypea 3a
Ibprn IbT, HaneIte MOTOPHO
MaCNo. IVnon3BaIte NOxOJaIO
NOMoUH CpeIcTBO (HAnp. cyHna)
3a IIhHeHa MOTOPHO MaCNo I
3apeKdAhe C rOpBO.
MoTOpHoMaCNo:
IopxOJnT Bn H
Heo6xOIMOTO KOINueCTBO
MOTOPHO MaCNO Ca NOCOeHN B
HnCTpyKunraTa 3a ekCnloaTaunHa
DnurTeN C BtpeuHo ropeHe.
H3BbPwBaIte peoBHO npOBepKa Ha
HNBOTO Ha MacNTo (BnK NHCTpyKunraTa
3a ekCnloataunHa DnurTeN C
BbTpseuHo ropeHe).
H36raBaIte npeKaJIeHO HnCKo N
npekaneHO BnCOKO HnBO Ha MacNTo.
Pipei NyckaHe Ha DnurTeN C
BbTpseuHO ropeHe B ekCnloaTaun
3aTeHHe T npabUNHO kanaVkata Ha
pe3epBoapa 3a MaCNo.
TopuBO:
Ppenopbka: CBexn MapKOBn rOpNb; 6e3oNoBcH3mH. DAnHInTe 3a KaueCTBOTO Ha rOpNBOTO (OKTaHOBO YncN)Ca NocOeyH B INHCTpyKUraTa 3a EKcnnoatauHa DBruratEe C BtpeWHo ropeHe.

8. KomaHdHn eJemeHTN
8.106u yka3aHn

OnachoctOTHapaHbAhe
Cna3BaIte yka3aHnraTa 3a 6e3oNaChocT B rnaBa ,3a BaWata 6e3oNaChocT" ( 4.)
3a n3BbPwBaHe Ha BCWKn ONnCaHn DeHOCTHI NOCTabeTe ypeDa Bbpxy XOpN3OHTaJHa, paBHa N TBbPda OCHOBa.
8.2 CrbBaHe Ha locta 3a ynpabJeHne
3a no-KOMnakTHo TpaHCnpTupaHe n CbXpAHHeHne IocTbT 3a ynpabJIeHne MOKe Da Ce CrbBa.

OnachocT OT npuunBahe!
IocbT 3a ynpabNeHne MOKe Da Ce
cBHe HeKOHTpOIpPyEmo npi
OCBO60JdaBaHe Ha
6bp303aTeRaTeJIHnTe
npncnoc6JeHn.
3aTOBaIpbkTe 3dpabOc eHa
pbKa IIOCTa 3a ynpabHeHne npe3
UrITo BpEmE, DOKaTO
OCB60KdAbate 3akpenBaHeto.
- 13KJIIOHcTeIbBraTeJcBbTpEHHO ropeHe n 13BaJeTe KOHTaKTHnHaHKpaHnK Ha 3anaNTeJIHaTa CBeU. ( 11.2)
- OTKaueTe cTapeHoTo BbJe. ( 8.3)
- OTbOpete 6bp3o3aTeRaTeHnHntepncnOco6NeHn (1)OTJBAIO NTJCHOHNBHMaTeHNOCTaBeTeNoCTa3aynpaBHeHne (2)daJeHneHaPeI.

8.3 3aKaHaHe n OTKaHaHe HaCTapTePHo BbKe

3akaayane
- 13BaTe KOHTaKTHHa HApKaHnK Ha 3aNaJIteJIHaTa CBeU OT DnIraTeJc BbTpseHIO ropeHe.
- Hatnche TocTa 3a cnnpaHe Ha DnurTaTe (1) KbM IocTa 3a ynpabIeHne n rO 3aDpbXTe.
BaBHO n3TeTneTe cTapTePHOTo Bxke (2).
- Iynche Te locta 3a cnipahe Ha Dniratena (1) n3akayete CTapTePHO Bbxke (2) BBB BOdaHa Bbxketo (3).
IocTaBeTe KOHTaKTHHaHKpaHnK Ha 3anaNTeJIHaTcBeeU.
OTkaayane
- IV3BaTe KeTakTHHa HaKpaHnK Ha 3aIaJIteJIHaTa CBeUOT DnIraTeNa C BbTpEHIropeHe.
- OTKaYeTe cTApTePHoTo BbXe (2) ot BOJaHa HbXeTo (3).
8.4 Hacpoika Bucounhata ha Kocene


OnachOCT OT HapaHbAhe!
Ipei Da HactpoBate BnCOuHnHa Ta KaOceHe, N3KJIkuTe. DnRaTeN C BbTpseHn RopeHe.
BncoHnataHaKoCeHeMoKeJa ce NaHacTpoBaHa4pa3NHyCTeNeHmMexy28MMN85MM.
CTeneH 1 = Hai-MaikKaTa BncoUHa Ha KOceHe
CTeEN4=HaN-ROJMaTaBnCOuHnHa Ha KOceHe

Onachoct ot HapaHbaHe!
HaCtpoNkata Ha npEaHata n 3aHaTAtocn Tpa6Ba da e EaHaKaBa.
1 HaTpoiKa Ha BnCOnHaTa Ha KocHe OT3aI
HacptpoTe JeHaHaTa BnOcUnHa Ha KocHe Ha 3aDnHaTa OC (1). 3a ceI Ta npDbpKaIe Te ypeDa c eEdHa pka H NoCTaBeTe 3aDHaTa OC Ha JeHaHaTa CTenEH Hau-HaPeiOT eHaTa CtpHa H CneT ToBa OT pyrata. Pn TOBA BHIMaBaIe OCTa OTJBO N OTJACHO a E NOCTaBeHa Ha eHaKBa BnCOUHa Ha KocHe (3aDHaTa OC e pa3noJoxeHa ycnpoeHn Ho Kaopnyca).
2 Hac trojka Ha BucouHaTa Ha KocHe OTnped
MB2RT:
HaTnCHTe HaBbH NoCTa 3a HAcTPOKaHa BnCOUHaTa Ha KcOeHe (2) nToNoCTaBeTe Ha JeJaHaTa CTeneH, TakaYe da ce nnKcnpa.
- MB 2 RC, MB 2 R:
HacpoTe JekanHaTa BnOcUHa Ha KocHe Ha npedHaTc 03.
3a ceIpa npdbpkaTe ypea c eHa
pbKa nocTabe TpeHata OC Ha
JekanHATA CTenEH HAnHapdOT
EHaTA CtpaHa N CTe TOBA OT
Dpyrata. Pnp TOBa BHIMabaTE OCTa OTJBO NOTdAe NOCTaBeHa Ha
eHakBa BnCOUHa Ha KocHe
(npeHATA oc pa3noJoxKeHa
ycnpoeNo Ha Kopnyca).
9.3aunTHnpncnoo6JeHnA
UpeIbTe o60pyDbA H C MHOxKeCTBO 3aunTHn pncnocO6neHn, KOITcnyKAT 3a HerOBOT 6e3oNaCHO ynpabJeHne n 3a npDoTbPaTaBaHe Ha HnpaBnHTo My n3PON3BaHe.

OnachOCT OT HapaHbAhe!
Ako npn HRAKoe OT 3aunTHHTE npncnocobHeNc ce ycTaHOBn Heu3npabHocT, ypeDbT He 6bBa da ce Nycka B EeKnnoataa. O6bphe Ce KbMa Baun Cneuaan3npaH TbproBeu. VIKING npenopbByat CBONTe Cneuaan3npaH TbproBu.
9.1 Joc3a cnnpahe Ha DnBraTeTna
KocaykaTa e 6obopyBaHa c MexaH3bM 3a cnipaHe Ha DBnraTeIa.
IocpeCTBOMOCBO6OJaBaHeHaIOCTa 3a CnIPAhe Ha DBNATeJI NO BPEMe Ha EKCNIOATAUCA CE N3KNIOUBA DBNATeJIrC BbTpeuHO TOpHe.
BnraTeTc BbTpewHO ropeHe HOKbT cnipat B paMKte Ha 3 cekyHn.

Onachoct OT HapaHbahe!
AkoBpeMeTo 3a pa6oTa no
HnepuHa HoKa e nO-
npDbJxKInTeJHo, ppeyCTaHOBeTe
n3noTBAHeTo Ha ypeJa rO
3aHeCeTe npi CneuaIIN3upaHna
TbproBeU.
I3mepBaHe Ha BpeMeTo 3a pa6oTa no nHepu
CneB KJIIOUbaHe Ha DBnraTeIa C BbTpseHNO ropeHe HOXbT 3AnOuBa Da ce BbpTN Ce CyBa Wym KaTO OT BArTbp.
BpemTo 3a pa6oTa no nHepnna CbOTBeTCTBa Ha npOdbJnxKTeHNocCTTa Ha To3N uYM KaTO OT Btbp CneI N3KnIOuBaHe Ha dBnraTeNa CBbTpEshO ropeHe.To MoKe Da ce n3Mepn c XpoHOmeTbp.
10. Yukazannya pa6ota
10.1 O6ua nHΦopMaun3a pekyIuBnPaHeTo
PnpekyTINBnPaHOpTp3aHaTa TpeBa ce Hapra3Ba MHOROKpaTHO NocpeCTBOM CneuAInHO IpemHHaBaHe Ha Bb3dyuHaTa CTpy B O6IaCTTa Ha HOka, CNeJ KOeTO Ce pa3npbckBa 6paTHo BbpxO OkceHaTa Beue TpeBa. OkceHaTa Maca OCTaba Bbpxy TpeBHAta NIOU.
Pon3a
I3HnBaata OKoceha TpeBa BpbuaB noBaTApraHnHTe XpaHntENH BeueCTBa N Taka CnykN 3a eCTeBeHa Top.
PpeDnMCTBa
OTnada HykdaTOn 3npa3BaHe Ha KOWa 3a TpeBa N3XbPnHa OKOceHaTa Maca.3a6abCe paTeKbT Ha IJIeBeJInTe U MOKe Da Ce CnectuToJIMo KOJIueCTBO Top.
10.2 Kora moxe da ce pekyltnbupa?
VIKING npenopbUba pekyTnBupaHeTo Da ce n3BtpBa cAmo npu CyxN TpeBn pIoou N KORATO TpeBaTa He e TBbpDe BVCOKa.
Ako TpeBaTa e TBbpDe BnCoka, TpeBHaT a nloou 6b Tp8BaNo da ce OKocu Ha dBa xOda ha pa6oTa. ( 10.3)
BHHMaHHe! Prn npekan
Pn npekaIeH NcKa BncoUHa Ha KocHe IIN MOKpa TpeBa KOpnycBt MoKe Da Ce 3anyuN HoxbT da 6nokpa!
10.3 KaK Tp86Ba da ce pekyIITnBnpa?
YcnoBna 3a do6bp pe3yntat npn pekyntbnpahe:
Hactpoite onTImaHa BnCOunHa Ha Kocene: Tp6Ba Da ce Otpexe eHa TpeTa OT BnCOUnHaTa Ha TpeBata.
- 13noJ3BaIte Do6pe 3aToUeH HoxK.
- PpomeHnTe Nocokata Ha KocHe IN BHMaBaIte 3a npINOKpNBaHETo Ha OKOCeHNTe INBnU.
HaMH Ha pa60Ta npn BmCoka TpeBa
Ako TpeBaTa e BucOka, TpeBHaTaNIOU, Tp6Ba Da ce o6pa6oTbHa Na Dba pa6oTHN UKbJa.
Pbpypa6oTeHcKbI: Okocete TpeBaTa npedbapntenHo Ha haI- rOJMaTBAUCOUnHa KOCHe.
Btop npaboteH uKb1: 12 do 24 caca cnei npbwn pa6oTeH uKbI pekyTnBnpaite TpeBaTa noD npab bTbI CNpRAO nPbPaTa nocoka Ha KocHe C XeJHaTa BnCOUHa.
10.4 Konko cheTo Tp8Ba da ce pekyItnBupa?
Xy6aba n TpeBHa nlou Ce noctnra
Upe3 YecTo peKyNTBnPahe n
NoDlbPkaHe Ha Hncka TpeBa.
OchOBen nepnoHa paCTek:
PpOeT:
MnH. 2 PbTu CeMmUHo peKyIITnBnPaHe.
JIaTo n eCen:
MnH. 1 PbT CeMmUHo peKyIITnBnPaHe.
11. Пуск鉴定 на урEDA векл所以我可以
11.1 Ctaptnpahe Ha dBnraTeJc BbTpewho ropeHe

1368BaTe noBpei no ypea! He cTapTnpaTe Dnuratena C BbTpewHo ropee BbB BnCoka TpeBa nn npn Hau-Hnckata BncoHnHa hKocHe. Pe3yntaTbT B TaKnBa cnuyan ue 3aTpydHeo cTapTnpaHe Ha ypea. Cne, cTapTnpaHe Ha ypea DnuratenaC BbTpewHo ropee pa60TN BuHaRn Ha ONTMaJIHn pa60THN o6OpOTn 3apaJn HAcTPOkATA 3a NoCTOAnHHa ra3.
CtaptnpaHe Ha ypea npn cTydeH dBuratcBbTpewho ropehe:
- Camo npM 2 R: HatncheTe nokaBauata nomna (1) Tpu nTn.
HaTnCHete JIOCTa 3a cnipahe Ha DnurTaTeJ (2) KbM IOCTa 3a ynpabJIeHne I rO 3ApbXTe.
I3bpaate6abHO CTapTePHoTo Bxke(3),doKaTO yceTne CbnpOTNBHeHne.CneToba 6bp30n CNHIO TO ONbHeTe DO DbJXnHaTa Ha Pbkata.BaBHO OTNcHete
CTapTePHOTo BbXke (3), 3a da MoKe OTHOBO Da Ce HABHe.
IobTapnTe npoueca,doKaTo DBratJeT C BbTpewHO ropeHe 3anaH.
Ctaptnpahe Ha ypeda npn tonbl DburaTeI C BbTpewho ropehe:

U36raBaiTe noBpeDn no ypea!
Ipi TOnbl DnBraTeN C BbTpewHo ropeHe Beue He e Heo6xOJMo Da HATNCKaTe NOKaUBaUaTa NOMna. ImaiTe npEdbuO obae, ye npMHO rSydeHO Bpeme DnBraTeJIrC BbTpewHo ropeHe MoKe 6bp30 da n3CTInHe.
- CstaptnupaHTo Ha ypeda e KaKTo npn CTydeH DnIraTeN C BbTpewHO ropeHe. Camo npn MB 2R:
OtnadaHaTnCKaHTo Ha noKayBaAata nomna (1).
11.2 N3kNIOUbaHe Ha DbURAteNa C BtpeuHO ropene

- IycheTe locta 3a cnnpaHe Ha DniratEn (1).
BnrgatEnT C BbTpewHO rpeHne HoxkT cnpuT B pamKnte Ha 3 cekyHn.
11.3 3aBnKBaHe Ha XoOBaTa uct (MB 2 RT)


Yka3aHne
MoenbT MB 2 RTnMa MexaHn3bM 3a 3aDbXbaHe Ha npedHnTe KOena.
1 BkIIOUVAHe Ha 3aBnXBaHTo Ha XoIOBaTa Yact
C TaTnIpaHe Ha,dburataTeJc BbTpueHOr opeHe.11.1)
- N3dIbPnaIte IocTa 3a 3aBnKBaHe Ha XoOBAtA 3act (1) KbMIOCTa 3a ynpabNeHne I r0 3aDpBXTe.
3aDnBxBaHTo Ha XoObata Yact Ce aKTNBnpa N Kocaykata 3anoyba Da ce DnBxHnpei.
2 N3KlNoUBaHe Ha 3aDbBnXBaHeTo Ha XoIOBaTa Yact
- NycheTe IIOCTa 3a 3aBnKBaHe Ha xoIobTa Yact (1).
3aDbNxBaHTo Ha XoOBaTa YacTe Ce DeakTNBpu N KocayKaTa Cnpa.
BnraTeJIaT C BbTpewHO ropeHe HoxbT npoJbIJaBaT da pa6oTt.
12. Nopdprbxxka

Onachoct ot HapaHbahe!
PpeBnBCaKBN DeHocTnNo
noDpBkKa HnN NOuCTBaHe Ha
ypeBa BnMaTeHNO pOouTeTe
rnaBa,3a BaWata 6eOnacHoct"
( 4 ).I NO-CneuaHNO pa3deJ
PnpBbKa n peMOHTn" ( 4.7 ).I
CNEBaIte TOUHO BCNUOncAHn
B HeYkazHn.
IpeBn BCaKbBn
HIOCTN NO NODpBxKa
IN ONUCTBaHcOCTaBeTe
ypeDa Da N3CTInHe N
N3BaDeTe KOHTAKTHNa Ha
Ha 3anaNTeJIHaTa CBeU
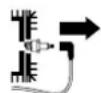
TOnuHaNoDpBkKaOT cneuaJIn3npaH TbproBeu:
KocaykaTatp6BaDa cpe npoBepBa BeHbXrOIMuHOOT CneuaNIm3puH TbproBeU. VIKING npenopbBa CboNTe CneuaNIm3npaH TbproBuN.
Onachoct ot HapaHbahe!
B 3aBnCmOCT OT mACTOTO n npoJbJnxTeJIHOCTTa Ha
n3no3BaHe HOXOBete ce
n3HOCBat B pa3nUHa CTeneH.Ako
n3No3BaTe ypeDa Bbpxy
neCbYIMBa NOBa Nm YecTo npn CyxN KImMaTHNuYcNOBna, HOXbT
Ie Ce HATOBapBa NOBEe N Ie Ce
n3Hoc No-6bp30 OT ObnuHOTo.
N3HOceHNr HOK MOKe Da ce CuyuN Da npuHn TExko HapaHaBaHe. 3aTOba yKa3aHnraTa 3a NOpBxKa Ha HOKOBeTe Tpa6Ba BnHa n Da Ce cna3BaT.
N3BbPwBaHe Ha npOBepkata
- NocTaBete ypeDa B no3nua 3a nouchBaHe. ( 12.1)
- PoiuHCTe Hoxa (1) nro npoBepete 3a noBpeN (pe3Kn nn nyKHAtnH).
- IV3mepete De6eHHata Ha HoKa (A) B HRAKOJIKO TOUKN C NOMOHTa Ha I3MepBaTeJen Wn6bp (2).
- IV3mepete o6paTHOTo 3aTOUbaHe (B). 3a cIeTnIOCTaBeTe IINHnra (3) KbM npEHNr p6b Ha HOka, KaKTo e nOKa3aHO Ha cnHypata.
Гразин И НЗHOCBaHe
Ie6eHnHaTa Ha HOxA (A) BbB CBA Ka ToKa Ha N3MepBaHe Tp6Ba Da 6bJe MNHMym 2 MM. Ha-BaXHnTe TOKn Ha N3MepBaHe ca OBeJn3aHn Ha nHypata.
Pn3aToBaHe Ha pexeUte p6oBe oT TReX MoRat Da ce OTHemat MaKcUmMy 5 MM (pa3cToHne (B) (o6paTHo 3aToBaHe)).
12.3 3aToUBaHe Ha HoXka 3a KoCeHe
Ako Bn JINCBaT HxHnTe 3HaHn NIN NOMOuHN CpeDCTBa, Bn npenOpbVbAME Da daTe HOxa 3a 3aTOUbaHe Ha CneuaanCT. Ppi HnpabUNHO 3aTOueH HOX (rpeWeH bRbN Ha 3aTOUbaHe, De6aHaNC n dp.) cyHKuOnHpaHTo Ha ypeDa MoKe Da ce BNOuN.
Yka3aHn3a3aTOyBaHe
Onachoct OT HapaHbAhe!
CnAsBaIe TpeDbapntEnHO 3aJaEHHM MOMHT Ha 3aTgAHe Ha 6oJTa Ha HOxa.
PnBCEKMOHTaXHaHOxA noMeHnTeNOCnpynteHnTa 16a (3).
PnBCyaCMHaHaHOxNaIOMeHnTeN6oNTaHaHOxKa(2).

Onachoct ot HapaHbahe!
Pa6oTe cmo C npEpa3Hn pbKaBn.
Hoxb3a kocene Tpr6ba da ce noMeHN, aKO CE BuxdaT pe3Kn IIN NyKHaTNH INN aKO e IOCTnHata rpaHncaTa Ha n3HOcBaHe ( 12.2)

12.5ДигатeнсБьтpeшо rapehe
HHTepBaHa noOpdpbKka:
BnHCTpyKUraTa 3a eKnIIOatauHa DnurateJc BbTpueHo ropeHe.
06uynka3aHn:
Cna3BaIte yka3aHnIra 3a o6cnykBaHe n OIOIpbXkKa, KOITo MoKeTe Da HAmepuTe B pNIOKeHaTa IHCTpyKUma 3a EKCNIOaTaun Ha DBIrataJIe C BbTpewHO rapeHe.
Oco6eHO BaxHo 3a yDbJxKaBaHe cPoka My Ha ekCnIIOAtaunca NaocTOHHOTO HAnuue Ha DoCTaB4Ho KOnuYeCTBO MOTOPHO MacNo peDoBHata CMHa Ha MaCJIeHNr N B3dyuHnHnФnITpn.
B INHCTpykunraTa 3a ekcnnoataunna Ha dBnrgatena C BbtpeseHNO ropehe ue Hamepnte Cbto Taka npenopbHTeHInHe IHTEpbAIN 3a CMHa HA MacNTo, KAKTO INHOpMaun 3a BNda n Heo6xOJMMOTOKOJINUcTBO MOTOPHO MACNo.
Oxnaaunepe6pa Tp86ba da ce noIbtpkataBnHaNcTn,3a da cerapaHTnpa DocTaBtuHO oxnaKaHe Ha dBnraTeNa C BbTpseHNO ropeHe.
12.6 Konela n npedabatenHa kytna
Jaere Na koJeIaTa He ce HyKdA rT O TnDpBkKa.
PpeIaBATEJIHaTc KyTnH Ce HxJdae OToNDpBkKa.
12.7 CbxpaheneHa ypea (npe3 3mMaTa)
Pn no-npOaBjKntHo Heu3noJ3BaHe Ha ypeJa (npes 3mMaTa) Cna3BaTe CJeHNHTe yka3aHn:
IOUHCTeBHHMaTeJIHO BCNUKIN BbHUNHaCTN Ha ypea.
CmaxTe C macNo CbOTB. rpec BCNU NO dBUXH N actn.
- N3npa3Hete pe3epBoapa 3a ropnBO n Kap6ypaTopa (Hanp. KaTO OCTaBtE Dniratela da pa6OTn, DOkato Cbbpun ropnBOTo).
- OTBnIte 3anaJIteHnHaTa CBeU (Bnx INCHCTpyKUNrTa 3a EKCNIOaTaN Ha DBnIraTeN C BbTpEwHO ropeHe) n pee3 OTBopa 3a 3anaJIteNHaTa CBeU, HaneIte OK.3 cmMOTOPHO MacNo B DBnIraTeN C BbTpEwHO ropeHe. PpeBbPTe TcBnIteN C BbTpEwHO ropeHe HAKONKO nTn 6e3 3anaJIteHa CBeU (u3DbpNaIte CTapTEpHTo Bxke).
Onachoct ot noxap!
ДрьктКоТаКTHнЯHaKpaHnKHa 3anaNTeJIHATA CBeU DaIeU OT OTbopa 3a CBeU Ta nopadi OnaCHOCT O3anaJIbaHe.
3aBnTe 6oPaTHO 3anaIInTeJHaTa CBeu (BnK INHCTpyKunrTa 3a ekCnNoataaHa Ha DnBaTeJc C BbTpseHo ropeHe).
CmeHeMaNoTo(BNkHCTpyKuYraTa 3aeknloatauaHaDnRaTeNa C BbTpseWHO ropeHe).
CbxaHbAte ypea B cyxo 3aTbOpeHO NOMEeHne 6e3 HauNue Ha MHoro npax. YBepTe ce, ye Toi Ce HAMpa Ha MCTO, HeIOCTbIHO 3a Deua.
13. TpaHcnpTupaHe
13.1 TpaHcnpTnpaHe

OnachOCT OT HapaHbAHe!
Ipei TpAHCnOpTnpaHe npOeTe n Cna3BaIte yka3aHnIa B INaBa 3a BaWata 6e3oNacHocT". ( 4.4) HocTe ypeJa cAmo C nOMoTa Ha dpyr YOBek. IpeHacrTe ro BNHaC nIOxOJauo 3aUHTHO oBleKlIo (IpeDnA3Hn O6yBKn, PJIbTHn PbKaBnU).
IV3BaTe KOHTaKTHHa NaKaPaNHK Ha 3anaNTeNHaTa CBeU, npEn Da BnIrate INI TpaHcnpTnpate ypeJa.
Bdurahe HnHocHe Haypeda
A MoHTnpaH loCT 3a ynpabHeHne: XbaHte UpeJa 3a npEHaTa dpbXka 3a HocHe (1) n 3a JocTa 3a ynpabHeHne (2).
B CbHaT noCT 3a ynpabHeHne: XbaHete ypeDa 3a npedHaTa DpBXka 3a HocHe (1) n3a DOJIHnTe YaCTn Ha loCTa 3a ynpabHeHne (3).
TpaHcnpOpTuPaHe Ha ypeDa
TpaHcnpOpTnpaIte ypeDa cAmo Bbpyx uNCTa n paBHa TOBaHnPaTΦopMa, n3npaBEn Hn Ha 4-Te cn KOnena.
- Obéonacete ypeia cpeu xIb3rahe cnnoxOaun KpeNXn CpeCTBa. 3akpenete BbxKeTaTaNIN pEmbnte Ha npeHaTApBkka 3a Hocene (1) n Ha DoJIHNTe YactN Ha IocTa 3a ynpablenne (3).
14. Ona3BaHe Ha OKoJIHaTa CpeDa
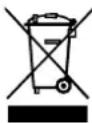
OkceHaTATEpeBaHe6nBa da ceN3XBpnaHa6oknyka,a Tpa6Ba Da CE KOMnOCTnpa.
OnakOBKITE,ypeDbTn
PnHuaJIeXHoCTIte ca
npou3BedeHnOT MaTePnaH, KOITOnOIOJIeXaT Ha peuKInpAne, n Tp6Ba daCe I3XBbPnT NO CbOTBeTHNaHaHH.
Pa3dJeHTo n ekocbO6pa3Ho
n3xBpIHa Ha octaTbYHHTe MaTePnaIi
NoIiomara NoBtOpHata yNtpe6a Ha
BtOpuHN CypOBHN. 3aTOBa CneI
n3TuHaHe Ha oBuAunMy Cpok Ha
n3no13BaHe ypeBbT Tpr6Ba Da ce
nPede Ha BtOpuHN CypOBHN. Ppn
n3xBpIHa O6bpHete BHMAmHe Ha
nHΦopMaunrTa B rna, N3XBpIHa" ( 4.9)
O6bphete ce KbMaBaaNnCeHTbp 3a peuKnpaHe nn KbMaBaaNcneuaaHn3pAn TbproBeu, 3a da Haynte KaKa Da n3XbPJIte npabnHO OTnADHnTe npoDyKTn.
15. 06nuaHn pe3epBn uactn
Hox3aKoceHe (HOx 3a pekyNTnBnpaHe)
6357 702 0101
BoNT Ha Hoxa
90083199028
OcnrypntHa 6a
00007026600
I Ipn CmHa HnMoHTnpaHe Ha HOxKa 3a KocHe eJeMeHNTe 3a 3akpenBaHTo My (HaNP.6oNT Ha HOxKa,OCnHypntenHa Wai6a) Tpa6Ba Da Ce NOpMehr. Pe3epBn Yactn MoT Da ce 3aKynr OT CneuHaN3npaHnTe TbproBcH Na VIkING.
16. CepBn3eH nlaH
16.1 NtBbpxkDeHnE 3a npedeBaHe
MoeI:
CepneH HOMep:

data:
CneBau cepBn3
data:
16.2 NtBbpxDeHne 3a n3BbpeHa cepBn3Ha noDpBxKa
JaTe Ta3n INHCTpyKu7a 3a ekCnIIOaTaunna Ha Ba7ncaeuaJIn3npaH TbproBeuHa VIKING npn n3BbPwBaHe Ha deHocTn noNoDpBxKaT.
ToI ue notBbPn n3nbHHeHneTo Ha cepBn3HnTe DeHOCn B noJeTata H opMynpa.
CepBn3HaTa nOuPbXka e N3BbPseHa Ha
DataHa CneBbAa cepBn3Ha noDpBkka
17.Минимиране на ИЗНOCBAHeToИnpedOTbpaTЯВанe наповеди
Baxn yka3aHna 3a noDpBkKa Ha rpynata npoDyKtn
BeH3nHOBNKocauKn
3a MaTePnaJIHn 5eTn nФm3uYeCKo HapaHЯBaHe Ha Xopa, KOtO ca npUHHHeHn Nopadn HeCnA3BaHe Ha yka3aHnTa BpbKOBoDcTB0To 3a ekCnloataqua, Oco6eHo nO tHOWeHne Ha 6e3OnacHocCTta, o6CnyKbaHeto n noIpbXkKaTaNipnopadynynoTppeBaHa hepazpeSeHN pncnOCO6JIeHn 3a DOnbJIHnTeHNO MOHTnpaHene n pe3epBnHuactn, pmpMa VIKING He Hocn HnkakBa OTROBOPHOCT.
MOna, HenpeMeHHo cna3BaIte CJIeHNITe yka3AHn, 3a da npdeOTbPaTne NOBpeN iIN npekaneHO n3HocBaHe Ha Baunr ypeVIKING:
1.ИЗнOCВаши ceЧастn
HЯкочасн ha ypeDAVIKINGdo npi npuNoTpe6a no npedHa3NaueHne ce n3HOCBaNTB3aBnCmOCTOT BnDa n npoDbJxNtHeHOCTTa Ha n3No3BaHe Tp6Ba Da CE NOMeHrT CBOeBpeMeHNO.
KbM Tx CnadaT:
-Hox3akocehe
KINHOBpeMbK(MB2RT)
-Γymn
2.CnabHe Ha npedncanHraTa, nocouHen B Ta3n HNCTpyKun 3a ekcnloatau
U3noJ3BaHeTo,NoDpBxKkTa u CbXpaHEnHeTo Ha ypeJa VIKING Tpr6Ba Da ce N3BbPbWbT prnKnBO,KaKTo e OINcAHO B TaN INCTpyuqna 3a ekCnNoatau. Iotpe6nteIaT OTROBapr LNHyO 3a BCnKn NobpeDi, npuHHeH nopaH HeCnA3BaHe Ha yKa3AHnra 3a 6e3OnacHOCT,ObCnyKBaHe n NODpBxKa.
Toba B Hau-roJMa CTeneH ce OTHacr 3a:
- Heno3boJeHn ot VIKING npomeHn no npoDykTa;
H3no13BaHe Ha Heoio6peHn ot VIKING rOpNBa/npou3BOJCTBeHN MaTePnaJI (Cma3OCHN MaTePnaJI, 6eH3IN MOTOPHO MaCIO, BIX DaHHnTe OT npou3BOJNTeJI);
I3nON3BaHe Ha IHCTpyMeHTN IINI DOnbJIHInTeJIHn PpIHaNJNeKHOCTN, KOITo He Ca N03BOJIeHN Hc Ca NOxOJaUN 3a ypeDa IIN Ca C NoHNCKO KaueCTBO;
-ynoTpe6aHa npOdykTa He no npedHa3HaueHHe;
I3noJI3BaHe Ha npOdykTa npu CnOpTHNJINCbCTe3aTeHMeponpTNA;
BTopuHIN NOBpeDN BCNEcTBNe Ha H3nON3BaHeTo HA npOyKTa C HEn3npaBHn Yactn.
3. DeiHocTn no nOaBpbKkata
BcHKn n36poeHN B pa3JeI ,PoiDpBxKa" DeHocTn Tpr6Ba Da 6bDaT n3BbPwBaH peoBHO.
Ako Te3n DeHocTn No NOdpbKkata He MORaT da 6bDaT n3NbJIHbAHN OT CAMNAOTpe6nt, ToT Tp8Ba Da ce O6bpne KbM CneuaJIN3npaH TbproBeu.
VIKING npenopbUba deHocHTne no noDpKaTa n peMOHa da ce n3BbPwBaT cmo OT CNEuaJIN3npaH TbproBeu Ha VIKING.
CneuaHn3npaHnte TbproBHa VIKING peoBHO npemHaBaT oByeHne nM Ce npoctabTexHnuecka HOpMaun.
Ako Te3n DeHocTn He 6bDaT n3BbPweH, MoRat Da Bb3HKnKHaT nobpeu, 3a KOnTo e OTROBOpENOTpe6nteJIaT.
KbM TAX CnadaT Hai-Beue:
Kopo3nOHn INpytn NocneBauIN NOBpeIN BCNEIcTBnE Ha HnPaBnHOCbXpaHeHnE;
- noBpeHnHa ypeJa nopadynynoTpe6a Ha pe3epBnH YaCTN C No-HuCKo KaueCTBO;
- NOBpeBn B pe3yIITaHa HeHaBpeMeHHa NIN HeIOCTaTbUHa CepBn3Ha NOIpBxKa, CbOTBeTHO NOBpeN BCJeDCTBHe Ha DeHOCTN PO IOpBxKa n peMOHT, KOnTO He Ca N3BbPseHn B cepBn3HTe Ha CneuJaIN3npaHInTe TbPROBc.
18. EOДекларачnia 3a СъOTВETCTBNE OT ПОНЗВОДИТЕЯ
Hne,
VIKING GmbH
MB 2.2 RC, MB 2.2 RT:
V3mpeHo HnBO Ha UyMa: 92,5 dB(A)
TapaHTnpaHO HnBO Ha UyMa: 94 dB(A)
Jahrkamnpeh,
2015-01-02 (TITIT-MM-ⅡD)
VIKING GmbH
3aBexdaouTdeN.HayHo- n3cneObATEncKa DeHocn pa3pa60ka HaHOBNpOdyKTNa
19. TexHHueckn daHHN
MB 2.2 R, MB 2.2 RC, MB 2.2 RT
CepneH Homep 6357
ДВИRATeJ C 4-TaKTOB BbTpEshO rOpHe, DVBraTeJ BnD BbTpEshO ropeHe
Kocayeh MexaHn3bM HOKOdbpxkaU 46cm
CTapTOBO yCTpoIcTBO CTapTePHO BbXe
3aunTHo cnpaKaHa npncnoc6JIeHne DBrVaTeJra
Moment Ha 3aTaraHe Ha 60tHa Hoxa 60-65Nm
IpeHNO KOJIeNo, 200 MM 3aHNO KOJIeNo, 200 MM
BucouHa Ha KocHe 28-85 MM
Cbrnacho DnpekTnBa 2000/14/E
RapaHTnpaHOn HnBO Ha Wyma LwAd
MB 2.2 R, MB 2.2 RC, MB 2.2 RT
CbIacHo
Директва
2006/42/EC:
HnboHaUymaHa
pa60THOTOMrCTO
LpA 81 dB(A)
KoefnneHT ha
HeonpeJeHoeCT
K_pA 2 dB(A)
MB 2.2 R
Tn DnBnraTeB B&S Series 450
HOMHaJIHa
MOUHOCTIPI
HOMHaJIHa YecToTa 1,6-2900
Ha BbptHe KW-06/MnH
Pa6oTeH 06eM 125ky6.cm
Pe3epBoap 3a
roBO 0,8n
YecToHaBbPTeHe
HaKocayn
MexaHn3bM 2900o6/MnH
3aandaena
XapakTepeNCTnKaHa Bn6paunite
CbIaCHO EN 12096:
U3mepeHa CToHOCCT
ahw 7,00 m/cek
KoeepnueHT Ha 2,80 M/ceK
HeonpeIeIeHocT K
W 13MepBaHe
cbrnacho EN 20643
124/49/100cm
Terno: 22Kr
MB 2.2 RC
Tun Dbraraten Kohler XT675
MB 2.2 RC
HomHaHa
MOUHOCT npN
HOMHaHa YecToTa 2,2-2800
Ha BbptHe KW-06/MnH
Pa6oTeH o6eM 149 ky6. cm
Pe3epBoap 3a
roPBO 1,4
YecToHaBbPteHe HA KocayHn
MexAH3bM 2800 06/MNH
3aandaena
XapaKTepeNCTMkaHa
Bn6paunTe
cbrnacho EN 12096:
U3mepeHa CToHooCT
ahw 5,00 m/cek
KoeepnueHT Ha 2,50 M/ceK²
HeonpeDeneHocT
W
V3MepBaHe
cbirnacho EN 20643
124/49/100cm
Terno: 26 Kr
MB 2.2 RT
TunDburaten Kohler XT675
HomHaHa
MOUHOCT pN
HOMHaJIHa YecToTa 2,2-2800
Ha BbptHe KW-06/MnH
Pa6oTeH o6eM 149 ky6. cm
Pe3epB0ap 3a
ropuBO 1,4n
YecToTaHaBbPteHe
HaKocaynna
MexaHn3bM 2800 06/MNH
MB 2.2 RT
3aandaHa
XapakTeepnCTnKa Ha
Bn6paLmTe
cbrnacno EN 12096:
U3MepeHa CToHOCCT
a_hw 5,90 M/cek²
KoeepnueHt Ha 2,36 M/cek²
Heonpeedeenehoct K
W
V3MepBaHe
cbrnacho EN 20643
3aDbXbaHe:
PpeHNO KOJIeNo
CkopoctHa
ДвЖжehн.
Д/ЛВ 140/50/105 cm
Tero: 29K
20. OTKpNBaHe Ha NOBpeN
B CnyaHa Hxka Ce o6bpeHe KbM cneuaHn3panh Tbprobeu. VIKING npenopbyBa CBOUte CneuaHn3npaHn TbproBu.
BnK INHCTpykunraTa 3a ekCnNoaTaunnaHa DnBnIaTeNc BbTpseHNO ropeHe.
Hem3npabHoct:
BnraTeIaT C BbTpewHo ropeHe He CTapTupa
Bb3MOxHa npnHHa:
IocbT3a cnpaHe Ha DniratEn He e 3aJeCTBaH.
Bpe3epBoapaHama ropuBO.
Tp6oPBOBbT 3a roPbTOe 3anyuen.
-TopnbTOBpe3epBoapae3ambpceHO,CTapoNIMCJIoIOKaueCTBO.
Bb3dyuHnT qnntbp e 3aMbpceH.
KoHTaKTTHnT HaKaPainHnK Ha 3anaIInTeHHata CBeUe n3BaDeH OT He; Ka6eNbT 3a 3anaJIbaHe He e 3aKepeH Do6pe KbM HApainHnka.
3anaNTeHaTa CBeue onyWeHa nnnoBpeHa; HenpaBnHpo pa3cToaHmEmekdy eEnkTpoNTe.
OTCTpaHraBaHe:
- HaTnCHeTe IocTa 3a cnipaHe Ha DBnIraTeJI KbM IocTa 3a ynpabNeHne Iro 3aIpbXKe. ( 11.1)
- DoneiTe ropuBO. ( 7.3)
-NouHCTeTe Tpb6oNpOBOAnTe 3a roPBO.,
BnHaHn 3nOJ3BaIte CBeXo MapKOBO rOpNBO,6e30JOBeH 6eH3IN;NOHCtTeKap6ypaTopa.,
IouncTeTe B3dyuHnA cnntbp.,
IocTaBeTe KOHTaKTHnHaKaPaHnHK Ha 3anaJInteJIHATA CBeU; npOBepTe Bpb3kaTMeJxNy Ka6Ja 3a 3anaJIbHe n HApauHnKa.
IocTe3anaHnTeHaTa CBeu nnno nOmeHe; perynpaTe pa3cToaHnTo MeKdy eJeKtpoDnte.
HEn3npaBHOCT:
3aTpydHeNo CTapTnpaHe NIN OTCna6BaHe MOUHOCTTa Ha DnRaTeJI C BbTpEHHO ropeHe.
Bb3MOxHa npnUHHa:
Kopnycbt Ha KocaykaTa e 3anyeH.
KocHe C npkeJaHnCKaCTeENHa KocHe, CbOTB. C npkeJaHo BnCoka CKoPoCT Ha BOJeHc HA KocaHaTa CnpMo BnCOuHaTa Ha KocHe.
Boda bpe3epBoaapa 3a ropuBO u B ka6ypaTopa;kap6ypaTopbTe 3anyuien.
- Pe3epBoapbT 3a roPnBO e 3aMbpcen.
Bb3nyuHnT qunTp e 3aMbpeH.
Hen3npaBHOCT (MB 2 RT):
Kocaykata He TpbTbA npn 3aJeCTBaHe Ha JIOCTa 3a 3aBnKBaHe Ha XoDOBata Yact.
Bb3MOxHa npuHnHa:
BbkeTo 3a 3aDbNkBaHe Ha XoNoBaTa Yact e depeKTHO (Hap. nperbHaTo).
OTCTpaHbAbe:
-CmeheTe3aBnBbAaTOBbXe.
UaHOBn nokyneb!
IIInpoIaKyEmo3aPiueHHIINpH6aTH OINH 13 BHCOKOAKICHHX IPOyKTIB KOMHaHI VIKING.
Ue npHaa 6yIO BHTOBOHeo 3
BHKOPHCaHHM CyacHHx TEXHOJIORi i
HcNEHHX 3axoIBIOTPMAHHA KOKCTI,
OCKJIbKMH BBaKaEMCBOIO MTeY
DOcHTHyTOIO HIIIE TOJI, KOJI NOKyIeUb
3aIOBOJIeHHN NOKYIKOO.
3IHTAHHMMIOIOIPIH6aHOrO IPIHAny 3BeptaiTeCbIOBAUoroIPOaB4a60 oiciiHHxIIepiB KOMHaII VIKING.
CnoiBaemocBnOTpmaeTe 3aOBOJIeHHBID KOpNCtYBaHnn npnaIaOM KomnaiVIKING
ДиректорКомпанii
PoncheHHa do uboro noci6nka 380
3aJIbHI BiOMOCTI 380
IopadHIOO YoTHHaNHOc6HnKa 3eknnyataui.
Onnc npnady 380
Texhika 6e3neKn 381
3aaraJIbHI BiDOMOCTI 381
3aIpaBka-ⅡpaBnlaIOBeiHKN 3
6eH3HHOM 382
O4aTa 3ac06n 3axncty 382
TpaHcnpTyBaHHHa npHaLy 382
IpeepIIOuATKOMpo60TH 383
IIiI qacpo60TH 383 Texo6cJyROByBaHHI pemOHr 385
36epiraHn npn DObrnx IpepeBax ypo6ori 386
YTHJI3aIa 386
Onnc no3HaueHb 387
KomnneKt noctaahna 387
PiIroTobKa npuJaDo eoKcnnyataaii 387
3araJIbHI BiIOMOCTI 387 MoHTaKpyKNKepyBaHHJ 387
IIaJIbHe Ta MoTOpHe MaCTHJIO 388
PnctpoKepyBaHH 388
3aIbHI BiJOMOCTi 388
CKlaaHn pyKn KepyBaHH 388
HabiyyBaHH Ta 3HIMAHN TpOca
Tn3nyCKy DBHryHa 388
HaJIaHTyBaHH BHCOTNI KOKCY 388
3axnci MexaHImM 389 Puyka 3yHHKn DBHryHa 389
Bka3iBkn 10do po6oTn 389
3araJIbHa iHΦopMaJgIpo MyIbUyBaHH 389
KoIIIIOpti6HO MyIbUyBaTH? 389
JIKIOTPI6HO MybUyBaTH? 390
HaCKJIbKIN YACTO CII, BUNKOHyBaTH
MlybUyBaHHa? 390
BBeHnH npnaNy B 0 eknnyatauio 390
3anyck ABnryHa BHyTpHbHor 3ropaHH 390
3yHHHeHHaDbHyHa BHyTpipHbOro 3rOpAH 390 PyHnHnn npHBiMDB2RT) 390
06cnyroBybaHH 391 HnueHH npHa dy 391
Ipebipka 3Hocy HOKIB 391
3aOtuBaHHoKa KocapKn 391
MOHTak i DEMoHTaK HoKa KocapKn 392
JbHryh BHTpiiHbOTo 30paHH 392
KoIeca I nepeaua 392
PiTBepeKeHHnpoHaDaHHaTexHOrO 6cLyroByBaHH 394
3BeHeHHaHcydoMinHMyTa 3ano6iraHHn NowKoJKeHHaM 394
Deklapaia Bpuo6Hnka npo BiinobiHictb Hopmam EC 395
Texhihi xapaKtepcntnkn 395
UcyHeHH HeCnpaBHOCTe 396
MapkyBaHHB TeKCTOBi YactnHi
Habeeni iHCTpykuii no3nauyeHo, k y npknadax HnKYe.
MaHinyIaIi, kI NOBHeH BnKoHyBaTu KOpncTyBa:
ΓBnHTn(1)noCna6JIbOBaTN BnKpyTKOIO, Baxinb (2) npNBOuNTn B iio
3araJIbHI BkA3iBKn:
BVKOpNCaHHnPnnaDIByCnOPTNBHX 3axoJaxTaIHINX3MaRaHHx
TektN 3doaTkoBm 3HaueHHaM
MaJIeHbKi TeCTn 3doaTkoBIM 3haueHHAM BnIineHO HabeJeHMn HNKYe CmBOJAMN, IO6 doaTkoBO BnIInNTn IX y noci6Hky.

He6e3neka!
IonoepdxkeHH np He6e3neky HeuacHOro BnnaAky a60 BaKnx TpaM. HabeJeHoro npabina Heo6xidno DoTPmMyBaTncra.

PonepeJxehn
PonepeJxHn npo He6e3neky TpaMbYBaHHa. HabeJeH npabNIO da 3MOy 3ano6iTm MOxJIINBIM a60 MoBipHM HeUacHM BnnaKaM.

3acTepeXeHHa
3aTepeXeHH npo MoKJNBIcTB JERKnx TpaBM i NOwKOJKeHb MaHa. HabeHe npaBnO dae 3Mory ix yHKnHyTN.

Yka3iBka
Iopa3 0nTmmaJIbHOrO BIKOPuCTaHHN npuJaTy Ta 3aCTepexeHHB BiD MOKJINBHX NOMIOK B EKcnNyataii.
TeKCTM3MaJIIOHKaM
MaHONK, JKI NOCHIOJBNOKOPCTaHH npuaIIB, MCTaTbcra Ha NoaTKy nocibnka 3 ekcnnyatauii.
CmboJ kaempr cnkyntb dnn BCTaHOBJIeHHra 3B'3Ky MIX MaIOHKAMu Ta BiNObiHNmu nparpaamn TeKcty B NocibHky 3 ekcnnyataui.

3. Onnc npnnaody
1 Pyka aBtOMaTHHOro BUMKHeHHA DnryHa
2Pyuka pyuHoro npnBOy (MB 2 RT)
3Pyuka KepyBaHHa
4 BIOK JIITPOCUNa
5 WbvnKoperynIOuyn BaXJIb
6 HaTJXHm 6JOK dJa Tpocnka
7 3aHm MexaHIm HanaWtYBaHHBnCOTn NOKOCy
8 IpeHm MexaH3M HanaWtBaHHBNCOTn NOKOCy
9IpeDnpykaTpaHCnOpTyBaHHa
10ДВИгнВИТPIИHIBORO3ropaHHa
11 Pnucpii Dna 3aNoBHeHHa Kap6upopopa 6eH3nHOM (MB 2 R)
12 3aTnckau nna Ka6eHMOB2RC:1wT.
4. Texhika 6e3neku
4.1 3a#aJIbHi BiIDOMOCTI

PpauoHou n 3 npnAonom, oob'raKOBo IOTpumyntecn HabeJeHX npaBnI Texhikn 6e3neKn.

IpeepnepmBnKOpNCTaHHM npnay yBaXHo npOuNTaTe yBeCb noci6HKn 3 ekCnnyatauii. D6aJInBO 36epiraTe noci6HKn
3 eknnyatauii nra noaJbwoB BIKOPNCaHH.
IotpmyTecb IHCTpykui 3 ekcnnyatauii I texo6cnyrobyBaHHa, HabeHnx B OKpemomy noci6nky 3 ekcnnyatauii DbnuHa BHytpiunhboro 3ropaHH.
Li 3axoDi o6epexHocti DyXe BaXnBiDnBaWoi 6e3neKn. BkOpncToByntepnlaI d6aHnBO Ta BiNobiDaIbHo, naMaTae, zo BiNobiAaNbHiCTb 3a 6e3neky iHux ocio nn Xhboro MaHa Hece KopncTyBaay.
O3haHOMTeca 3 eIeMeHTaMn KepyBaHH Ta npaBnAmn ekCnnyatai npnAdy.
PpuaD O3BONAEbCBAKOpNCBOByBaTNIuue TmOoc6am, kpi npouNTaIIINOCiHNk 3eknnyataui Ta03Haonmncs 3npabunamaHOBKOpNCtAHN. Koxen KopcctyBaaypeedepnMIm 3anyckom npuaNy nobHeOTpMaTN npakTuHi npaI dxixiB.3BepHITcdo npodabuq y Do iHwOrodxixi3 npNbOy NOrCHENHgIODo6e3neHOro NOBxJehn 3 npuaDM.
Li Bkazibn Oc06a nobHHBa BnClyxatn Dyke yBaxHO Ta po3ymITn, 0oJnpo6OTn 3 cmm npnilamon Notpi6Ha oO6nBa ToHictb Ta KOHcHTpaia.

He6e3neka 3aJnxHyTncs!
Ipaohncb i3 naKyBaJIbHMM MaTePiJOM, DIu MoKyTb 3aIXxHyTuCra. TpImaTe naKyBaJIbHm MaTepiAn noDani BiD dTei.
PpnaIpa30m i3 6yIb-RAKIM npuaIaIaM MoKe 6ytN HauHaH NJI BnKOpNCtAHH TINbKn TiOcObi, kA MaE DocBID pO6OTn 3 UIEo MOeJIHIO. PpnaIaH He MoXHa HaaBaTn B KopNCTyBaHH 6e3 Noci6HnKa 3 ekCIIpyataii.
BnKOpNCbOyIe npnaIb BiINoHbU, KOJIu Bn y rapHomy fI3NHyOMy CTahi Ta rymopi. RaIO Bu MaTe NopyuHenry y 3dOpOBi, nopAaTecb o6OB'3KOBO 3 BaUMIikapem IooDnBnKOpNCtaHHa npnaJy. 3a6OpOHeHO npauOBaTI 3 npnaIaOM nicra BxNBAHH aIKORIo, HApKOTNUHx peOvBN iMeuKaMeHTIB, kI noripuytB 3daTHicTB dopearyBaHH.
He Do3BOJnTe DiTm Qn Oco6aM, MoIOniUM 16 pOKIB,KOpNCTyBaTnCn npIJaOM. MinImaIbHn Bk KopNCTyBaHa MOKe BCTaHOBNIOBaT N MiCeBe 3aKOHODaBCTBO.
Ley npnaI He Do3BOJeHo BnKOpNCTOByBaTn Oc6am (oc6nBIO DITAM) 3 06mxeHmM f3nHUMn, nCXoONiYHMn a6o po3ymOBUMn 3i6HOCTaMn 36paKOM DocBiTy Ta/a60 3HaHb -3a BNHTKOM Tnx BNJaKDIB, KOJN 3aIXhboO 6e3neKO HarnJaAc BNOBHOBaKeHa OC6a a6o BOHn OTPmyOt bI d He Bka3iBKn 1oDo BnKOpNCTaHH npnaIy. 3a dItbMn TpeBa HarnJaTn, 1o6 BOHn He 6abuNncb 3 npnaIaOM.
PpnaD po3paXoBaHo Ha BnKOpNCaHHB DomaHbomy roCnoJaapCTBi.
Ybara - CtepekItbcn HeuaacHoro BnnaKny!
Kocapka npn3HaueHa JnIe dJn KocinHra3oHIB. 3actocybaHHdJnIHoiMeTNHe npuCyTmE mOKe cTaHOBtUNHe63neKy dJa 3doOpOB'AnIOHN TaCTaHy npnAky.
Yepe3 He6e3neky TpaBMyBaHHa KOpncTyBaHa 3a6bOpOHeHO 3acTOcOByBaTN KocapKy (3OKpeMa, aIe He BnKJIIOUHO):
- nI ndpuraHnkyuib, xNBONnoti YarapnkiB;
-ДЯOBpi3aHHN NOB3yHxPOcHnH;
ДЯДоглду3aRa3oHaMuHaДaxax 6yIDBeNb a6O yЯикak Ha 6aJkoHi;
ДЯсчEHЯ Ta noDiPI6HeHHa 06pi3KIB depeB i Kuyiib;
-ДЯчишенипioхixdHnxDopikok (BCMOKtyBaHH6pydy, npodyBaHH);
-ДИВИРIBHOBAHн NOBepxHi (HApnKnaI, npNbupaHH KpOTOBINHH).
3 orny Ha Texhky 6e3neKn 3abOpHeo camocHIO poBHTu 6yIb-ka 3MiH N OcHaueHH npnaLy, BIMaTu 3anactHH, kki 6yN BCTaHOJIeHi KOMNaHIEU. Kpim TOrO ue BeDe Do nepePbBaHHraPaHTii. IHopMaJIO UdoaTkoBoro OcHaueHH Bm MoKeTe OTPMaTu y TopROBO rpeDCTABHnKa VIKING.
Oc6JINBO 3a6bOpOHeH iii 3 npnlaOM, kki 3mIHIOHTb NOTyKHiCTb npnAa y a6o YncNo 0eepTIB DnRHyBa BHyTpIiHbOro 3ropaHHa nn eNeKtpoDnRhya.
3a6b0pHeNo TpaHcnpTyBaTn npnaIpa30M 3 iHwIMN peaMn, TBapHAmN yJIOdbMn, Oo6bNBO dItbmN.
PnBnBnKOpNCTaHHI y rPoMaDcBkNx MiCuaX, napkax, CNOPTNBHX MaJdaHnKax, Ha ByJIuCx, Ha CInbCkoRocNoapcBkNx Ta IICOBNX NiIpNiEMCTbAx Heo6XiHa oOc6JIbBa ObepeXHiCTb.

Ybara! Ctepekitbcn HeratNBHO BnNBy Bi6paui Ha 3doopB'!
HaMipHe HabaHTaKeHHA
Bhaclndok Bbpaui Moke npn3Becnt Do npo6Iem i3 KpOBO6irom i HepBOBO CnCTeMO,OC6NtBO B JIOdei3 nopyuHHeMn KpOBO6iry. Kaio
3'ABJATbCnMMTOMN, KOTpi MOxytb 6yTN cnpuuHeni BiopauiHm HabaHTaKeHHM, 3BepHiTbcrdo CBORO likapra.
Li cunntomn 3'raHbIOTbc npeBaXHO B naIbIax, pykaxicyrno6aPx yK. CepeHnx (30kpeMa, aJe He BnKnIOuHo):
-BtpatayTnBOcTi,
-6inb,
- cna6kiCTb M'raIB,
- 3MiHa KOnIbOpy Ixipn,
- HenpneMHe CBep6iHHa.
4.2 3anpaBka - npabnla nobediHKn 3 6eH3HHOM

Hebe3neuNo dny kntTn! BeH3nH -e TOKcNHa i
JERK03aMMCTa peOBNHa.
36epiraTe 6eHn y cneuaIbHo IaIy boro nepeIbauEHnx Ta nepeBipeHNX EMHOCTx (KaHicTpax).3aBXn Dope 3aKpNbAte KpnKn 6aka i KaHicTpTa
MiUHO iX 3aKpyuYte. 3aMInIOTe
NOUKoJKeHi KpuKn 3 MIPkyBaHb TexHikn
6e3neKn.
Iytni3aui 6036epirAHn naHbA HIKOJI He BnKOpNCTOByTe NIAuBn BiD HanoiB TOIo. MoKe BnHKHyTu CnOKyCa, NaNTN 3 NIAuK, OcOBnBO ce CTOCyETbcra dTei..

TpmaTe 6eH3nHa
6e3neuHi BiCTaHi BiID icKOp,
BiDKpNToro NOyM'
BUNPOMIHOBaiv TeNa Ta
iHux dxkepe3aImaHHa. He nann!
3aIbAitte naIbHe IInIe Ha BiDkPnTOMy nobITpi; npu cBomY He MoXHa nAnTu.
Ipeep3anpaBkoIO cnid 3ynHHnTn DBNyH BHytpiUHbOro 3ropaHHra Ta daTN NOMY oxoJIOHyTN.
BEN3Hn cnid 3aJIbATn nepei 3anyckom DBNByHa BHyTpIHbOrO 3ropaHH.
3abopohreTbC BiKpmbTu Kpuuky baka Ta DOINBATN 6EH3H, KOIN DBUYH BHyTpIiHbOTo 3ropaHH npaue afo npnaad ue rapyni.
He haInBaIte 6ak do camoro Bepxy, 3aJnShaTe 6JN3bKo 4 cm do roPNOBHH, 106 BeH3NH MAB npocTip Jnra po3upeHH.
YBnnaKyAky6eH3nHnepeJINBCyape3 Kpa,TO 3aynckATN DBUYH BHYTpIuHBoro 3ropanHO3BOJAEbCra JInue nicn OunuHn3aHnToi 6eH3nHOM nobepxHi. He BMkaTe 3anaJIIOBaHH,doKn napn 6eH3nHy NOBHCtHo BnuBITpUInCb (BntpiTB nMy hacyxo).
PpOJIte naIbHe cIiD o6oB'ra3KOB0 BnTePTn.
KIO6ENHnnoTpanNBHaOJr, nepeBdIgHiTbcra.
3a6b0pOHaTeBc36epiratn 3anpaBneHn 6eH3HOM npuaad BCEpeuHi 6ydiBeJI. BiB BuNaKOBOro KOHTAKTy 3 icKpAMn a6o BIDKPITUM NOyM'Am napu 6eH3HHy MOKyTB 3aropitncr.
3a noTpe6n BuNTn 6eH3n i3 npuAny po6Itb ue Ha BiKpNtOMy nobITpi.
4.3 OdIra 3ac06n 3axncTy

Ipypo6Ou 3aBxMn B3yBaTte TBepDe B3yTTHa Hecn3bKni niOwBi.He npauoTe 6ocOHx
a6o, Hanpuknaad, y neKnx caHdaJax.
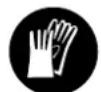
IpyTexHoro
0cbnyrobyBaHHy,nuuehnTa
TpaHCnpTyBaHH npnaDy
Heo6xIDHO 3aBXDN BgraTn
MiCiH3axnChi pykabuTt 36vpatn DOBRE BOLOCCs (iXyCTnHy, WAnKy TOnO).

IIOROCTPIHNOHOKA KOCAPKCNiOJRAATN CneuaJIbHi3axuChi OKyIaRn.
KopucTyBaTnca npunaanom
MOKHa Nlue B IOBnX UToHax I By3bKOMy npJraHcyOMy OJ3i.
y kOHOmy pa3i He MOxHa npaIIOBaTn y BInbHOMO oJ3i, kNIM MOKe 3aYeHTNC3a pyXOMI yacTHNI (BaxJIb KepYBaHH), a TAKoK y npNKpacax, KpaBaTu cH wapphi.
4.4 TpaHcnpTyBaHH npuIaIy
PpauHOBaTn CnIi TIIbKn B pyKaBnUkax,
IO6 He TpaMbYBaTncra RoCTpMn Ta
rapaUMN DeTaJIaMn PpNaNy.
He TpaHcnOpTyIe npnla3 yBIMKHyTm DbNHyOM BHyTpIiHbOro 3ropaHH. IpePeD TpaHCnOpTyBaHHaM BIMKHyTN DbNHy
BHyTpHbOro 3rOpAHn, DaTn HOxAM NOBHCTIO 3yINHHTNC Ta BnHrTn WTeKeP CBiKn 3aNaJIIOBaHH.
PpuaMoxHa TpaHcnpTyBaTu TinbK3 0xOIOJKeHM DnIryHom BHyTpIuHbOro 3ropaHHa Ta npoXHM NaINBHM 6akOM.
BukopncToByTe BiNobiHi BaHTaxHInpncTpoI (BaHTaxHINnATfOpMn, nIDomHi npncTpoI).
3aqiKcyIte npnlaad Ha BaHTaXHi nIaTfOpmi KpInnIbHmM 3acO6aMn (peMeHAM, KaHaTaMn Too) DoCTaTHix po3MpipB.
IiucnHimannTa nepeheceHHnyuKaTe KOHTaKTy 3 HOXEM KocapKn.
IotpmyTecbBkazIBOK,HabeJeHNx y po3iPi «TpaHCnOpTyBaHHa. TaM onucaHO,Як niHimATu KaPInTu npuaA. ( 13.)
Iiuc TpaHcnopTyBaHH npnlaDy DOTpmyntecb periohahnx npnncib, 30kpeMa Tnx, 1O CTocyToBc6e3neKn 3aBaHTaxeHH Ta nepeBe3eHH npedMeTIB Ha BaHTaxHi nlaTfOpmi.
4.5 Npeed noaTkom po6oTu
Oob'3KOBnepekoHaHTeec,IOOCo6n, kI npauBaTmMyb i3 npuJaOM, 03HaonMnnc3PiociBHKom i3 eknnyaataii.
Ipeed BBeDenHn npnaHy B ekCnyatauio nepeBipTe naINBHy cnCTemyHa repMeTnHiCTb,OC6NBO BuIMi Detani, k-OT 6ak, KpiuKy 6aka, 3'EnHaHHaHaHa. Y pa3i HerepMeTnHocTi Nn NOsKOJxehn He 3anyckaTe DBNrH BVHTPiHbOro 3ropaHH. He6e3neka 3aImaHH!
PpeB BBeDeHnM B EKcnnyataio npnaIaD03BoJrEbCpmoHTyBaTu faxiuebi cepbcio cnxy6n.
IotpmytecBCTaHOBHeHX MicceBMn OpraHm BnaBN BMOR 0do yacy eknpyaataui caobnx npunaib i3 DBNYHOM BHytpihbOro 3ropaHH.
IpeepKocHHm yBaXHo ORJHbTe
dInnHKy i BNHeCiTb 3 Hei KaMInHna, naNci,
dpit, KICTKn ta iHsi CTOpOHNI ppeDMeTN,
kni npinad Moke NiKDnATn Bropy.
IpeewKOu (HaNPnKlaD, nehBkn,
kopHH) JERKO He NOMITTu y BnCOKi
tpaBi.
Tomy neped p6oTo0 3 npunaDom
no3NaHTe Ha dInnHui ra3OHy Bci npNXOBaHi
ob'ekTu (pepeWkoD), aKi He MoXHa
npnbpaTn.
Ipeen novatkom p6oTo 3 npnnaDom
0ob'3KOBO 3AMHIn 6ydb-RAKeDEpEKTHi,
NOKdoJei Ta 3HOweHic aCTHH.
3HOweHI a6o NOKdoJei HADnnci 3
nonepdkeHHMa Ha Kopnyci npnAdy
Heo6xIDHO mHaT.N.Yci Heo6xDi
HaKleuKaTa 3aNaChi YactHH MoXHa
npn4bTu B OphiuiHnx DnJIePiB KOMnaiVIKING.
Ipeed noaTkom p60tn i3 npnaDom nepeBipTe, uMiHo Ta HadiHOBCTaHOBHeo WTEkep CBiKN 3anaJIIOBaHHy CBiKy 3anaIOBaHH.
PnnaDMoKHa BnKOpNCbByBaTINiBKnB HaneXHOMy TexHiHOMy CtaHi. Npeed KOKHM BBeDeHHaB Eeknnyataio BnKohyTe OncaHI HxKne nepeBipkn.
IpebipTe, HnHaJIeKHM YHOM 3i6paHO npnna.
- Ppebipte, YN B pO6Omy cTahi pixyuH IHCTpymeHT I Becb pixyH 6Iok (HX KocapKn, KpinIbHi eIemEHn, KOxyKOCUNbHO ro po6oHOr opraHa).Oco6JIbNo yBaXHo cnId nepeBiprTn, Hn HadiiHO ix yCTaHOBHeHO, YN He MaIOTh BOHN O3Hak NOxKOJKeHH a60 3Hocy (Uep6nH a60 TpiuH). ( 12.2)
- IpebeipTe, cn KpnuKa 6aka npnKpyeHa HaneXHM YHOM.
- Ipebeipte, n6 kaicknadobi naHBOponoOdy (3okpema, KpiuKa 6aKy) y6e3dOraHHOMy cTahi.
- Ppebipte, 3axnchi MexaH3Mn (HaPnKlaD, pyka 3ynHKn DnHyHa, Kopnyc, pyka KepyBaHHra, 3axncha citKa) nepebyaIOb y 6e3doarHOMy cTaHi Ta BiNobIDHO yHKIOHyOTb.
- Ipebipte, uKOBnauOK MaCTuHa 3aKpyeHo HaleXHM MHHOM.
3a notpe6n BnKoHaHte Bc iHsi Heo6xdiHPi pOBoTn a60 3BepHiTbc Da cepBicHOi ClyXb6n. KomnaHia VIKING peKoMeHdye 3BepTaTnc4 do ophiuiHnx dUnepib VIKING.
4.6Пдчасpo6otn
He BnKOpncToBnyTe npnaIa, kUo N6bN3y 3haxOaTbcra iHwi IIOu (oc6bNoBo dITn) a60 TBapHH.
3a6b0pOHeHO 3HimaTa 3MiHOBaTH BCTaHOBJIeH HApNJadI BmMKaHi
3axnChi MexAH3Mn. 3OkpeMa, HIKOnn He
phiKcyTe pyKy 3yINHKn DBNrHyHa Ha npNBIDHomy Baxeni
(HanpNklaD, pN8'3yBaHHm).

Ybara! He6e3neka TpaBMyBaHHa!
Hikon He habnkaite Horn pykn do pxyomnx detanei. He
TOPkaTeC Hoxa, KOJIIN BIn ObeptaETbcra.
3aBxDn DToPmMyTecr 6e3neuHOi BiDcTaH, 3aHaHOI pyKoIO kepyBaHH. Pyka kepyBaHHMae 3aBxDn 6yTu npabInbHo BCTaHOBNeHa. II KOHCTpyKUHe MoXHa 3MinIOBaTN. HikoN He npauOte 3 npnaDoM 3i CknaDeHOpykoIO kepyBaHH.
Hikon He 3akpinIIOte CTOpOHNI npEmTe Ha puuKepyBaHHa (HaipnKaad,po6ouy OJr).
PpauoIe Inne npn DeHHOMy CBITni a60 npn do6pOmy wTyHOMy OCBITJIeHHI.
3a6bOpOHeNo npauOBaTn 3 npuIaNOM nIDdoUeM, y rpo3y Ta oO6NBO npMOKJIbOcTi ypaKeHHa6NJCKaBkoI.
Ha BONori noBepxhi 3pocTae 3arpo3a TpaBMyBaHHaYepe3 3MeHweHHa CTiIKoCTi npJnady.
БудTe Oco6blnBO obepexHni npaIouOHy, 06 He nicKOB3HyTncb.Якоц MoKlnBO, He BnKOpNCTOByIte npiJaD Ha BOJorri nobepxHi.
BuxnonHa3n:

OtpyHHe6e3neHn dna KUTT!
PnHydOti,roIOBHX6oJx, nopyuweHHi 3opy (HaepKlaad,38yKeHHa noJIa 3opy), cnIxy, 3anaMOpOeHHax, nocna6neHHi KOHeHTpaii pObOt noTpiHO heraiHo npINHInTu. MIX IHsIM, ci CmNTOMMoKyTB 6ytN BIKNIKAHI BUCOKO KoHeHTpaicEO BUXONHIX ra3IB.

Piuc yciei po60tn DnryHa BHyTpihboro 3ropaHn npnaBnnyckaE OTPnHi BxJlonHI ra3n. Li r3n MicT Ta
OTpyHnOKNCByrIeNo,ra36e3 KOJIbOpy Ta 3aNaxy,a TakoK iHsi uKiDiNBI peOboHN.HikoJHe BnKOpNCTOBMyTe npaUOChn DBuRyH BHyTpiUHbOro 3ropaHH B 3aunHeHomy a6o nOraHO npoBiTPIOBaHOMy npmIiueHi.
3anyck
3anyckaIte npuaI o6epeXHo,
IOTpmyOuNcB npad i3 po3diy
«BVeJeHnI npuaIy B ekcnnyatauio».
( 11.)
PnIbHyTe, 0o6 pixyHInHCTpyMeHT nepe6yBaB Ha doCTaTHi BIDCTaHI BiHr.
3abopohreTbcpeeknataTpnpuaD nIacpo60tnDbinyHa.
Pid qac 3anycky pyky pujiHoro npNbOdy nepecuHyTu HEmoXJNBO.
Po60Ta Ha cxnnax
Cxnnnnotpi6no 3aBxqn o6p06nTn B nonepeyHomy Hanpymky, a He B NOB3IOBxHbOMy.
KOpNCTyBaayiJac KocinHBA NOB3IOBXhBOMy HAnpMky BTPaNTb KOHTpoB, BiH MoKe NOTpaNTn iD npJaI, knn npauoE.
BybTe OcO6nbo 0epeXHi, KOni 3MInHOeTe Haprrmok pyxy Ha cxnIi.
3aMaTe HaJIiHe noJIOKeHH dIpa 1060Tu Ha cxuIax, He KocItb Ha dyXe KpyTnx cxuIax.
3 МіркуВань 6e3neКи 3a6bОpoHeNo
ВИКОРИСТОВУВАТИnpиЛад Ha CxИλax i3
КуTom HaxИŋу noHаД 25° (46,6 %).
He6e3neka TpaBMyBaHHa!
Kyt haxny y 25^ Biinobiae BepTKaIbHomy niIMy Ha 46,6 cm 3a 100 cm ropn3oHTanbHOI NOBepxHi.
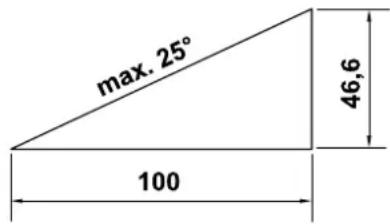
Uo63a6e3neuHTn DoCTaTHc 3MauByBaHH
BbHryHa BHyTpIWbHO 3ropaHH, NiJ vac
BVKOpNCaHH npnaJy Heo6xIHO
DoTPmYBaTNC JdoaTKOBnx Bka3IBOK i3
Pioci6HnKa 3 ekCnnyataui BbHryHa
BHyTpIWbHO 3ropaHH, Io
NoCTaayEbcR b KomnNeKTi.
Ppoec po6oTu

Ctepexitbcra TpaBmyBaHHa!
HikonHe HabnKaIte pyk i HiI do actIn, 0o o6epTaioTbcR.

HamaraTeca He nepeBiprtn Hix Ni d ac eKnnyatau kocapkn. CtepeXitbcra
IopaHeHHHOXem, kNIO6epTaETbcra.
Beditb npnla nobijho. HikoJn He bixitb. Ppi wbnkomy nepemiueneHH npnlaNy 3pocTae He6e3neka nopahenny BnnaKy cNOTnKaHH, KO83aHH TOIO.
BybTe OcO6nBO NnIbHi, NOBepTaUOn npuaad a6o NiTgAIOCh NOrO Do Ce6e. He cnITKHTbcra!
3 oO6nBOo 06epKHcTIO BIKOPNCOTByIe npuJa nO6n3y 3BaNt, KaHab i BaNIB. Oo6nBO CTExTe 3a Tm, 106 He HaTo Ha6nKaTncrdo Ux H6e3neuHx Micb.
Pozmiuhi Bnyobomy depehi o6'ektn (onpnckybui dna ra3oHIB, CTOBnCi, BOJHi KpaHn, fyndAmeHTN, eNEKtpponpoBoky TooO) cIi OMHaTn. HikOnn He nepeixkaiTe Taki CTOpOHHi o6'ektn.

Obepexho!PikyuH iHCTpyMeHT npoobKye o6epTaTnc npotrrom dekiIbKOx cekyHn nicna BUMKHeHHa npiHa.
BmKHiTbDnHyrH BHyTpihhOro 3ropaHHaIte HacaDi NOBHCTHO 3ynHHTNC TaBNTaHIb WTeke CBiKn 3anaJIIOBaHHB OINCAHX HxKHe BNJaKax.
JaKo npnad 3aHuaetbca 6e3 HaJy.
- Ppei3aIbAHnM nIbHoro. 3aIbAte naIbHe TjIbKn ToDi, KOnI DBNrHy BHyTpiHbOrO 3roPAHHx OXOIOB.
He6e3neka 3aropnHn!
- Ppei po3MnKaHHa6 6nOKyBaHb a6o 4uueHHMQKxya KocNtBHOr o60o0rO oprany Bi3acmieHb.
- Nepw hix nizhi matn a6o nepehocntn npna.
- Nepsh HIX TpaHcnpTyBaTn npnna.
- PpeiMaHInyIaIaMn 3 HOKeM KocapKn.
- Nepu Hix KnepeBiprTn, YnCTnTn npnla a6o BnKohyBaTn 3 Hm IHni dii (Hanpknad, CknaDAtn pyky kepyBaHHa).
- 阿KoKocapKa HaWToBxHynacHa CTOpOHnI npEmet a6o noaIa CNbHO Bi6pyBaTn. YcbOMy BnnaKy nepeBipTe npnAd, oc6bnBo pixyui 6NOK (HIX, HoxOBn BAI, KpInneHHA
HOka),Ha HaABHbICTb NnOkoJXeHB.
Iepw HIX 3HOBy 3anyCTuTn npua, i
Noatn po6Ot, 3BepHITbcra do
ΦaxiBuiD nI npoBeJeHHa
Heo6XiDHoro peMOHTy.

He6e3neka TpaMbyaHnHa!
CunbHa Bi6paiz3a3Bnau yka3ye Ha HaeBHicTb N0WkoJKeHb.
3a6bopoHeHO KopncTyBaTnCRA KocapKOIO 3 NOIkoJKeHIM a60 NOrHyTm HOKOBIM BaJIOM UHOKEM KOCAPKNI.
Kaio Bam 6paKyE Heo6xJdHnx 3HaBb, 3BepHiTbcra InpoeJeHHa Heo6xJdHorpo pemOnTy do qaxiBic. Komnia VRKING pekomEnyec cepBiChy cnky6y VIKING.
BmKHiTb DnHyh BHytpiHbOro 3ropaHH BOnncAHnx HmKHe BnnaKax.
- RaIIO npnlaH Heo6xio Hno nepemictntu BID i do noBepxhi,ky notpi6ho 06po6ntu.
- NepuH HIX nepemiuatn npnaad no nOBepxHi, de He poCTe TpaBa.
-JaKuo npinad noptip6Hn nepeBecTn B noloxKeHHn dnn TpaHcnOpTyBaHH.
- PpeeperyyIOBAHHM BnCOTN 3pi3aHH.
4.7 Texo6cnyroByaHHi peMOHT

Ipeid noaTkom p0bi3 4 HUeHHy, yCTaHOBKn, peMOHTy TaTexO6CnyTOByBaHHN
BCTaHOBIb npnlaH Ha naHniPiBHi NOBepxH, NoCTaBTe rAJBMa dNCTOHN, 3yNHITb DBNrHy BHyTpIshBo3ropaHH, daHTe NOMy OxONOHTu, BNIIMtB HAKOHeuHK CBiKN.

He6e3neka TpaBMyBaHHH Hoxem Kocapkn!
Notarytbpocdla3anycky
DByrHa,iHacdaKa noyne
0eptatnc.BnTyrHOn Tpoc dla
3anycky DByrHa,3aBKn
DOTPMMyTEcCdoCTaTHBoi BiCTaHi
MIX HOxEM KocapK Ta TIOM,
3OKPema pykAmn Horamn.
DAtn npnany oxonohytn, kio Bu 36npaTeecb npoBOnTu po60Tu bObnacti DInrhyh BHyTpIuHbOro 3ropaHH, BNyckHoro KOJIeKTopa uN rIyUshnka. Ioro Tempepatya MoKe DoCraTaN 80^ i
Hikon He 3miHoTe 6a3OBnx npaMeTpib HanaTByBaHb DnBryHa BHyTpIuHbOro 3ropaHH Ta He nepeBnuyute HomHaNbHOI WBNKoCTi o6epTaHH.
3HnTi IINI pOBeDEHH TExHiNHO6cNyROByBaHH KOHCTpyKTHBHeJEMENT N 3axNCi MexaHI3MNEo6xIDHO HeaHNO BCTaHOBTINBiDIOBIDHO DO YHHNX BMOR.
4.8 36epiraHn npu doBnx nepepbax y po6ori
DoyekaiTecb oxoJOnJKeHHa BnHyHa BHyTpIiHbOro 3rOpAHHe nepeTd TIm, JaNoCTaBHTn npUad y 3akpTe npMiiueHHa.
DoyekaiTecb nobHOrO oxoJOnKeHH npuJaNy nepeTMM,IK noRo HAKpTuN.
36epiratnpnla3nyctm6akom Ta 3anac nanaBa notpi6Ho y npmiueHHi, zo 3akpnaeTbca Ta do6pe BENTNIIOETbca.
IpekeKaHaTeCe 1oO 3axuHecOti npJaNy BiJ HeKOMTeHTHX oci6 (HaPnKnaI, diTe)
KaHo Heo6xIDHO cnopoKHTn 6ak, 3OKpema dIra 36epirAHn nepeJ 3MmOBOHO nepePBIO,p0biueHa BiDKPITOMy NOBITPI (HAnpIKJaD, MoXHa npaIOBaTn, DOKN He 3aKiHHbCn NaJIbHe).
7.2 MoHTaX pyUk KepyBaHHa
ObepexHo niiHimItb pyky KepyBaHHa (1) Bropy. CTeXte 3a TMM, uO6 He 3aTnCHyTN TpocnKn.
3aTnHb nonepeHb BCTaHOBHeHH WbNkOperyIOUoyu BaxInb (2) (BH MaBvCTyNaTN np6IIN3HO Ha OINH 06opot p36n) i BiKmHbTe Brpy.
Ipebeipre npabunbHictb MOHTaxy.

- WbNdkoperyIIOHoun Baxinb (1) cnid npnBHTNTn Tak, 06 biN ⅢnbHO npnIraB do pyuKn KepyBaHHa, a BepxHa cTInHa pyuKn KepyBaHHa 6yNa MiHcno npneDHaHa do HxKHoJ YAcTINH. RaKuo puyky KepyBaHHa HeoCTaTHb 3aΦikCoBaHO a6o WbNdkoperyIIOUOHN Baxinb yCTaHOBJeHO HeNPaBnLbHO, 3HIMtB WbNdkoperyIIOUOHN Baxinb i npabnIbHO BCTaHOBITb NOrO, pyxaOCH Tyn-CIOH.
-ПepeBipTe npaBnIbHe po3MiueHnTpoCnKIB (2.3) i 3aTnckaHa Ka6eIIO (4, MB 2 RC).
7.3 NaJIbHe Ta MOTOpHe MaCTnIO


YHnKaIe nOuKOxKeHH npnaNy!
Ipeepnepm3anyckom npnlaNy Heo6xioHO 3aunTn MOTOpHe MaCTno. Jna 3aunBaHHa MOTOPHO MaCTnla a6o naJbHoro BIKOPUCTOByTe BiNobiHi Donomixhi 3acO6n (HaPnKnaD, NiKy).
MotopHe MaCTnIO
Bidiomocti npTn i KjIbKiCTb MOTOPHO MaTnla DnB.y Ioc6Hky 3 eknnnyataaii DnB BHytpiHbOro 3ropaHHra.
Perynphno npebipirepiheb MOTOPHOro MaCTnla (INB. NocioHK 3 ekCnnyataui DnRyHa BHyTpiuHboro 3ropanha).
CniyHnKaTn 3aBnCOKOrTa 3aHn3bKOro pIBHaMaCTnJa.
Ipeep6aeha MoXnBicb BcTaHOBHeHH 4BapiaHTIB BUCOTn 3piAHH:Bi28MM do85 MM.
3HaueHHa 1 = HaMeHua BnCoTa 3pHaHHa
3HaueHH4=Haai6iNbwaBnCota 3pi3aHH

He6e3neka TpaBmyBaHHra!
HaanuTyBaHnHa nepeDhi i 3aHiOcx MaOpb 6yTn OHaKoI.
1 yctahOBJIeHHB BNCOTn 3pi3aHHH 33aNy
- YctaHObitb 6aKaHb BnCOTy 3pi3aHHa Ha 3aHi oci (1).
Ipyko npnHIMITb npnai i nepebeit 3aHIO Bicb y notpi6he noJoxeHHcnpw 3 oHoi, a notim 3 iHooCTopoHn.
Pn zubmy cTeKTe, uO6 nOnoKeHHa 3JIba Ta cnpaba byo OndaKOBe (3aHna Bicb Ma e 6yTu npaJeBHa oDo Kopnycy).
UyCTAHOBJIeHHBNCOTN 3pi3aHHcnepepy
MB2RT:
NOTARHITB BAXJIb HanaaHTyBaHHB BWCOTn 3p3aHHN (2) HAZOBHI, YCTAHOBITb y NOTPI6He NONOKeHHN 3aΦikcyIte.
yctahOBt6baxaHbBnCOTy 3piaHHHa nepeHiN OCI (3).
Ipyko npHimitb npnnai I nepebeitb nepehno Bicb y notpihe noIOxehn Cnpuy 3 OHO, a NotIM 3 IHooCTOPOH. Ppu cbomy cTeKte, 06 noIOxehn 3IIBa Ta cnpaba 6yNo oHaKoBe (peepnBicb Ma6byn npaJIeNbHa 0do Kopnycy).
9.3axnchi MexaHi3MN
PpnaD OchaueHo 6aRaTbMa
3anobkHmM MexaHImMaN
6e3neuHoro KopcTyBaHHra 3axncty Bi
HenpaBnblHOrBO BkOpncTaHH.

He6e3neka TpaMbyaHn!
KIO BnBHeH HeCnpaBHicTb 3anobixhoro Mexahi3my, npnaom KopncTyBaTnca He MoXHa.
3BepHbCnDo npaizBnka cepBicHOUeHTpy. KomnaHia VIKING peKomeHdy 3BepTaTncn do cepBicHOi Cnyk6n VIKING.
9.1 Puyka 3ynnHkn DBNrHa
Kocapky ochaheo npnctpoem nЯ abTomatuHoro BmKHeHHa DnryHa.
YpeKMIpoBoTNI BiDnyCkAHnpyKn 3yINHKn DBNHyHa 3ynHRe DBNyH BHyTpIuHbOrO 3ropaHH.
BnHy BHTPiHbOro 3ropaHH Ta HIX NOBHCTU 3yINHJIObCyepe3 3cekyHm.

CrepekeTbca TpaBM!
Kaio o6eptanHn HoXa 3a iHepuieo Tpnbaniue, npnnHiTb ekCnnyatauio npnaNy 3BepHITc8do faxibicB cepbicHOI cnyk6n.
Bmipobanhyacypo60tn3a ihepuie
Nicra 3anycky DnryHa BHyTpihboro 3ropaHn HIX NOHnAe OepeTaTncn BHNkae Wm BiD NobITpHoro NOTOk. PoBota 3a iHepuieo TpNBaC, NOKu yTHO Wym nobITpHoro NOTOk nCn3yUnHeHH
BnryHa BHytriHbOro 3rOpAHHa. Yac po60Tu 3a iHepuieMoKHa Bmiprtu 3a Donomoroo cekyHdOIPA.
10. Bka3iBkn ⅢoDo po6oTn
10.1 3araIbHa iHΦopMaζη npo MyIbIyBaHHa
Iiud MybUbaHH 3pi3aHa TpaBa DoaTkoBO NOpip6HIOECh 3aBJaKn CneiaIbHM NOBITpHMM NOTOKAM y 30Hi HOXIB NOBepTaECh B LyrOBm DepeH. 3pi3aHa Tpaba 3aIIMaAeTbcS Ha ra3OHi.
BukopncTaHH
IpeHHa 3piaHa TpaBa 3a6e3neUye NOBepHHeHraOpAHoro XINBnBHO MaTepiAny B rpyHT i cnyrE npnpoHm Do6pnuBOM.
Ipebaru
CnoopxHHeHH KOuNka-yIOBnHObau Ta BuaJIeHHB BiXoIIB NICRA KocIHHe noTpi6He.Pict 6yp'any CnoBIbHIOETbcra, 3aOuaJxyeTbcra 3HaUHa KInbKICTb do6pNbA.
Ipeep KOxHm BnKOpncTaHHM.

He6e3neKa TpaBMyBaHHa!
3HOC HOKa 6e3nOcepeHb0
3aJIeKNTb BiD Micra Ta TpNBAIOCTI
Ioro EkCnnyatauii. RaKIO npuaD
BVKOPNCTOByETBCr Ha NiUaHOMy
rpyHTi a6o B yMOBaX cyxOCTi,
HaBaHTaKeHHa HOKi
36iNbSyETcR N BOH 3HOWyIOTBcR
Ha6arato WbNDwe.
3HooHeHH HIX MOKe BiJnAmaTncra Ta CnpuHHHTN TAKKITpaBMn. Tomy cnID 3aBxDi NDTpMByBaTncra TexHiHN BIMOr IIOO o6cIyroByBaHHa HOka.
Ppoeepa nepebipkn
- YctaHObit npnada y noIOxHHe nIy HnueHH. ( 12.1)
OuHCTbTe HIX (1) i nepeBipTe Noro Ha HaraBHicTB NoWKoJKeHb (UepBuA6o TpiunH).
-ПepeBipTe TOBUnHy HOxA(A)y KINbKOx MICx3a DOnOMOHO WTaHReHcNpKyJ (2).
BmipnTe cToyBaHHB (B).IaIcBoI npKnlaIbI liHky (3)do nepeHboro KpaIO HOxa,IK NOKa3aHO Ha pncyHky.
Mexa 3Hocy
YKOKHOMYMICIITOBUNHaHOKA(A)MaCCTaHOBHTNIPINHMAHI2MM.HaIBaxJIbIiMicIpaNo3HaueHiHaPNCyHKy.
Iiuiac3aTouyBaHHN DOnyckaeTbcra CTouyBaHHNe3a (Bidpi3ok B) 0HaH6Inbwe Ha5 MM.
12.3 3aToCyBaHHHOxKa KocapKn
KaO BAM 6paKy e Notpi6Hnx 3HaHb i Donomixhnx 3ac06iB, paHMo DopyaTu 3aToyBaHH HxIB qaxiBqM.
HenpaBnIbHO 3aToeHn HIX (HepiBHOMipHO, nID HenpaBnIbHM KyTOM ToO) noripwye fynKcioHaJIbHiCTb npJnay.
Yka3iBKNIooNo 3aToCyBaHHA
3HIMITb HIX KocapKn. ( 12.4)
- Y npoceci 3aToCyBaHHOxONoDxyyTe Hoxki KocapKn (HanpknlaD, BDOHO). He cnI dOnyckatn, uOb nobepxHa Hoxka Habyna CInHOBaTOro KOJbOpy, OckinbKn ce ckopOTntb TepMin Noro Cnyk6n.
Lio63anobirBipauciuepe3 dnc6baanhc,3atoynte HIX Kocapkn pIBHomipHO.
- KyT 3aToUyBaHHaMaC CTaHOBuTIu 30^
CπiδκγιTe 3a Mεχει ΘόCy (⇒ 12.2).
12.4 MoHTaX i demoHTaX HOxa KocapKn


He6e3neka
TpaBMByaHHr!
PpaioTe Inue B pykaBnuaX.
Kaioe BnDnmi uep6nHn, TpiuHn, a6o Docyto Mekx 3Hocy ( 12.2) HIX Heo6xinHO 3amHn.

DemOHTx
MiHOBiBbMtbcra3aHIXKocapKn(1)TaOcna6Te TBnHT KpInnHeHHHOxKa (2).
3HIMITb TBnHT KpInIeHHa HOka (2), 3aNo6ixHy Wai6y (3) Ta HIX Kocapkn (1).
MOHTAX
- NocntbTe NOBepxHIO npnraHHHOXA Ta NOrO BTyIky (4).
ΓBnHT KpInJHHeHHHOxKa(2)CJI,3MaCTNTIIOKTAITOM 243.
- YK noka3aHo Ha pucyHky, HacaIiB HIX Kocapkn (1) Ha NOro BtynKy (4).
- 1K noka3aHO Ha pncyHky, HacaIITb 3anobixkHy wai6y (3) Ta 3atraHHTb rBnHT KpinnHeHH HOxa (2) 3 06epTaIbHM MOMHTOM 60 - 65 HM.

He6e3neKa TpaBMyBaHHa!
ToHOBuTPMMyTe Bka3aHm
MOMeHT 3aTaryBaHHraBnHTa
KpInJeHHra HOxa.
3anobixHy wain6y (3) notpi6Ho
MiHrTuOop3y, KOIN
BCTAHOBNIIOHTbcra HOki.
TbHrT KpInJeHHra HOxa (2)
notpi6HO mHiATuOop3y, KOIN
MIHaTcBcHIX.
12.5 DByrHy BHyTpiwHbOro 3ropaHHa
PepiouHicbTexHOro 06cnyroByBaHHa
IuB. Ioc6HmK 3 ekCnnyataaui DnryHa BHyTpIiHbOro 3ropaHH.
3aaraIhhiHCTpykuii
DToPmMyITeCb IHCTpyKu3 3 ekCnnyatauii TaTexHOrO o6cLyroByBaHHa, HabeJeHnx y Noc6Hky 3 ekCnnyatauii DBNrHa BHyTpuiHbOro 3ropaHHa.
IINIOOBKHeHrTePMHy CnyK6n
BUNyHa OOCNIBO BaxNIBO 3aBXKn
NIiTpMByATNoCTaTHiPiBEh MaCTnla
Ta peryJrpho 3amHOBaTn pInbTp
MaCTnla, a TAKOK NOBITpHn PInbTp.
IhOpMaio Ipo MOTOpHe MaTnIO, Ioro KInbKicTB i nepioDnVHcTb 3aMIHN MOxHa 3HaHTN B Noci6Hky 3 ekCnnyatauii DBnryHa BHyTpIiUHbOro 3ropaHH.
HopMaBHorO OxJIOxKeHHa BnryHa BHyTpiHbOro 3ropaHHpe6pa OXIOJKeHH MaHOt b 3aBXn 6yTu NCTUMN.
12.6 Koneca u nepeeda
PiiuHnHKn KOiC He notpe6yHbTexHiHOrO 0cbnyroByBaHHa
IpeepaHa noTpe6yTexHnHoro 06cnyroByBaHHa.
12.7 36epirahna (3mOBn nepio)
CTabJIpynpiJaHa TpNbAJIe 36epirAHH (IMMOBNI nepio),DToPmUyTeC HabeJeHx HxKYe npaBnJ.
- CṭapaHNO nOuNCTbTe Bci 3OBHIuHi DeTani npnady.
-Добpe 3maKTe pyXomi KOMIOHeHTn npnaIy MaCTINOM a6O JxIpom.
CnpoJxHt6akikap6hopatOp (HaPnKlaI, npaioTe, DOKn HeCKiHvTbca naIbHe).
BnKpyTb Cbiuy 3aIaNHOHHa (NIB. Noci6HNK 3ekCNIyatauii DnVHy a BHyTpIHbOro 3ropAHna) i 3aIITe uepe3 OTBip np6JIm3Ho 3cm3 MOTOPHO MaCTUNa y DnVHy BHyTpIHbOro 3ropAHna. PpOKpyTb DnVHy BHyTpIHbOro 3ropAHna 6e3 CBiYn 3aIaNHOHHa (NOTARHtB 3a TPOC dIy 3anycky DnVHy).

He6e3neka 3aoropnHn!
Yepe3 MoXnBicTb 3aropHHa TpMaIte WTeKeP CbiKIN 3anaIOBaHHa NdaJI BiD OTbOpY dJIra Hei.
BkpytItb cBiKy 3anaJIIOBaHHHa3aI (INB. Noci6HnK 3 ekCnnyatauii,DbNryHa BHyTpIiHbOro 3ropaHH).
3amihitb MaCTnIO (INB. IociHnK 3 ekCnIyataui DBnryHa BHyTpiuHboro 3ropaHHa).
Ppnaad cnid 36epiratn B cyxomy 3akptomy npimiuieHHI 3 MaHIM BMICTOM NIIy. NepekoHaTeC, IO DO npuaHy He MaTmMyTb DoCTyni DiTu.
13. TpaHcnpTyBaHHa
13.1 TpaHcnpTyBaHHa


He6e3neka TpaBMyBaHHa!
Iiuc TpaHcnpTyBaHHn
IDotpmyTecB iDIOBiiHNx
npaBn, HabeJeHnx y po3diJi
. ( 4.4) IpeHocnt npnlaad camOtjKn
He moXHa: Heo6XiHa DOnomora
IHWOI IIOHNH. IpeHocTe
npnlaad 3aBXn y BiIOBiHOMy
3axNCHOMy OJ3i (3axNCHOMy
B3yTT Ta MiUHX pyKaBnCx).
Iepu HIX NiDhimTu a60
TpaHCnpTyBaTu npnlaD,
BHTarHiTb WTekep CBiKn
3anaIOBaHHa.
PiiHimAHnTa IpeHeceHH npIaDy
A3 npMOnTOBaHO pyKoO KepyBaHH: TpMaIte npnad 3a nepeHIO pyky dIra TpaHCnOpTyBaHH (1) Ta pyky KepyBaHH (2).
B3iCKnadeHOpyKoHOkepyBaHHaTpImaTe npIna3a nepeHNO pykyIpnAHCnopTyBaHHa(1)Ta HxKHoactHypyKnKepyBaHHa(3).
TpaHcnOpTyBaHH npuHa
TpaHcnpotyIte npnad Inuwe Ha pIBHI i nJaCKI BaHTaXHi NOBepxHi, NOCTABUNI noRo Ha Bci 4 Koneca.
- 3anobirtcnOB3aHHIO npnnaHy, Ioro cIid 3akpinTu BIDNObIHMMKpinnbHMn 3ac06aMn. 3akpinitb KaHAT a6o pemHb Ha nepeHni pyu iDn TpaHcnpTyBaHH (1) Ta HxHni qactnHi pykN KepyBaHH (3).
14. 3axuct doBknla
3pi3aHy TpaBy cIiD He BUNDaTn Ha CmITTa, a BUKOPCTOByBaTn IJyO6peHHKOMNOCtOM.
YnakOBky, npnila i doataKOBe npilnaBnroTOBneHO 3 MaTepiJIIB, kI niJraTb nepepoCi; ix cIId HaleXho yTuNl3yBaTN.
EkIorHNo npabnBHa po3diBHa ytniiaqir cnpnrnoBTOPHOMy BkOpNCaHHIO BTOPCNPOBHN. Tomy, KOJI MHe TepMH Cnyx6n npuanaHy, 3daTe NOro BnyKt npuHOMy BTOPCNPOBHN. Pid YTuNl3aui DToPmMyTecR Bka3iBok, HabeDeHX y po3diN «YtniiazaJr. ( 4.9)
3BepHITbcnO cHTpy yTNIIBauii a60 cepBicHO rHTpy, uo6 iHaTncra, k npabNbHo yTNIi3yBatn BiXoDn.
15. 3amihobahi 3anyactnH
Hix kocapkn (Hix dny MylbvbaHHa
6357 702 0101
Tbnt KpinJenHn Hoka
90083199028
3an06ixha 7a6a
00007026600

ElenentnI pykinnHnHOxakocapkn (Hanpknad, TBnHTkpInnHn HOx, 3anobixHywai6y) cIi3amHOBaT niCac3amin a6o MoTaxky HOxa.3anachYactHHMmOxHa npndbTuB ophiHoro dJepa VIKING.
16.ПланТexнчного обсCityroByBaHHa
16.1ПiTbEpJxKeHn
MoedJIb:
CepiHmHomep:

Data:

HaCtynHe 06cnyroByBaHHa
Data:

16.2PiTBePdxKeHH npo HadaHHaTexHIO O6cnyroByBaHH

IiudacTexHnHOro 6cnyroBaHHaHaaiTe ue noc6nHK 3ekcnnyatauQiOphiHOMy dInepy kOmnaHii VIKING.Ha 3a3dAneriDb HaPykoBAnx noJnx Bihpo6nb 3annc npoPoeDeHHaTexHnHOro 6cnyroBaHHa.

Data npoBeHoro
06cIyROByBaHHa

Data HacTynHoro 06cnyroByBaHHa
17. 3BedeHnHa 3Hocy do MIhimMy Ta 3anO6iraHHa NOsKOJXeHHaM
BaxnBa inΦopMaia npo doTnai texHne 06cnyroByaHaHna npoodykuii Tnuy
3. Texhichue o6cnyroByaHHa
Yci po60tn, nepepaxoBaHb po3diJi «O6cIyROByBaHHa», nobHHI BnKohyBaTncb peryIapHO.
Ko KopncTyBaH He B 3Mo3i BNKOHaTn He06xDiHPi pO6To n CaMocTiHOb, NMy CnId 3BepHyTNCa DO cNeuaJIi3OBaHOro cepBicHOro ceHTpy.
IaTexHOrO 6cbLyroByBaHH Ta pemOnHT npnlaib KOMnaHia VRKING peKomeHdyE 3BepTaTncra IInue do ophiuiHx dUnepiB VRKING.
Cneuiiicntn cepBichoi cnyk6n kOmnaHii VKING perynpno npoxoJb HauaHH Ta OtpmmyTb TexHHiN IHCTpyKtX.
YBnnaKy HeBNKoHaHH po6it i3 TexO6cnyroByBaHH MoKJIuBi NOkKeHH npJaCy, BiNobIaIbHICTb 3a JHeC KOpNCyBauch.
3okpema,iTebnaP0:
Kopo3io Ta iHsi N0sKOJxehnB pe3yIbTaTi HnpaBnBHoro 36epirAHn;
-NoUKoJKeHnI npuIaNy uepe3 BnKOpNCTaHH HeKaICHX 3aNactH;
- NOUKoJKeHnBHaCNIIOK HECBOeUacHOrO/HeIOCTaTHbOro Texo6cnyroByBaHHa 60 BnKOHaHHa peMOHTy NtTexo6cnyroByBaHHa He MaICTepHi Cneuiian3OBaHORo cepBicHOrO ueHTpy.
Bidiobida TaKIM DnpeKtBam EC: 97/68/EC,2000/14/EC 2004/108/EC, 2006/42/EC
Ppnaad cnpoeKToBaHO BiINoBIDHO Do TAKNX HOpM:
EN ISO 5395-1, EN ISO 5395-2
3aCTOCOBAHmMeTOdOJIHKn BiIDNOBIDHOCTI:
ДоаТOK VIII (2000/14/EC)
Ha3Ba n aDpeca napTHepcbkoi opranizai:
BmipraHH pIBeH 3ByKOBoI NToyKHOCTi: 92,0 dB(A)
TapaHTOBaHm pIBeHb 3ByKOBoI
notyxHOCTi:
94 dB(A)
MB 2.2 RC, MB 2.2 RT
BumipraHn piBeHb 3ByKOBoi NOTyXHOCTI: 92,5 dB(A)
TapaHToBaHm piBHeb 3ByKOBoi
NOTyXHocTi:
94 dB(A) B 2
JaHrKaMnpeH, 2015-01-02 (PPPP-MM-ⅡI)
VIKING GmbH
Weiglhofer
KepiBnHk HaykoBO-DoCNIJHNuBkoRo
BiiDiny Ta BiiDiny po3BnIky npOdykuii
19. TexhiHi
XapakTepeNCTKNI
MB 2.2 R, MB 2.2 RC, MB 2.2 RT
CepiHnI
identnphiKatop
ДВИRGYH
BHyTpiHboro
3ropaHH,
KOHCTpykui
Pikyu npuctripi
巾pina pizaHn
Iyckobni npucrtpi
3axnchi mexaHImN
6357
4-TaKTTHN
ДВИГУH
BHyTpiHboro
3ropaHH
Hoxkoba
TpaBepca
46cm
Tpoc
ABTomatnHe
BUMKHeHHa
ДВИУнA
Momet
3aTayBaHHr TBNHTa KpInnHnHOx
IiAmTp npeHbOro KOJeca
ДiametЗаднboro kOJIeCa
Bucota 3p3aHHN BInnoBINO do
2DpeKTeBn
2000/14/EC:
rapaHTOBaHn
piBeHb 3ByKOBoI
notyxhocti, LwAd
60-65HM
200MM
200MM
28-85MM G
MB 2.2 R, MB 2.2 RC, MB 2.2 RT
BIDIOBIAHOdo
DnpekTNBn
2006/42/EC:
piBeHryHocti
3Byky Ha po6oHOMy
MICUJI, LDA 81 dB(A)
He6e3neKa KpA 2 dB(A)
MB 2.2 R
TnDvryHa B&S cepia 450
HomHaJIbHa
NOTyXHICTb npu
HOMHaJIbHIy YAcTOTI
ObeptaHH
Po6ouy 06'EM
nopH 125cm3
PannBn6ak
WBnDkictb
obepTaHHpiKyuoro
npucpo
Iapametpi Bibpaacii
Bka3aHo BIDNOBIDHO
do EN 12096:
BIMipReHe 3HaueHHa
a_hw 7,00 M/c²
He6e3neka 2,80 m/c²
BmipioBaHHa
BIDNOIBINOHO
ctaHdapTy 20643
124/49/100cm
Bara: 2
MB 2.2 RC
Tun Dnurya Kohler XT675
HomHaJIbHa
NOTyXHICTb npn
HOMHaJIbHIy YacToTI 2,2-2800
06epTaHHa
Po6ouh 06'EM
nopwn 149cm3
MB 2.2 RC
PannBn6ak 1,4
UWBnKtB
0ebpTAnHpiKyUoro
npiuctpo
2800 o6./XB.
Iapametpn Biopauii
BkazHO BIDNOiHO
do EN 12096:
BmipHe 3HaueHn
ahw 5,00 m/c2
He6e3neka Kw
Bumipobahna
BIDNOIBHO DO
CTaHdapTy 20643
Д/Л/B 124/49/100 CM
Bara: 2
MB 2.2 RT
Tun DnBurya Kohler XT675
HomHaJIbHa
notyxhictb npu
HOMHaJIbHIyAcaTOTi 2,2-2800
obepTaHHKBT-06./XB.
Po6oyn o6'EM
nopshn 149cm3
PAnBn6ak
WBndkictb
0eepTAnHpiKyUoro
npctpo
Napametpn Biopaui
Bka3aHObiDnOBiDHO
40 EN 12096: KF
BmipHe 3HaueHH
ahw 5,90 m/c²
He6e3neka Kw
BmipobaHH
BIDIOBIDHO DC
ctaHapTy 20643
PnBvI: nepeHne
KoNEco
2800 o6./XB.
1peepa
149cm3
1.4n
pehbo
xOdy
MB 2.2 RT
UbnKicTb npBOdy 3,5 KM/roJ.
140/50/105cm
Bara: 2
20. YcyHeHH HeCnpaBHOCTeI
YKIO noTpiHa cepBicHa cIyX6a, 3BepHITbcra Do ophiuiHnx dInnepiB VIKING.
11IINB.Noci6HnK3ekcnnyatauii DBNyHa BHyTpiHbOro 3rOpaHH.
6HecnpaBnICTb
K
He 3anyckaTbcra DBNyH BHyTpuiHboro 3ropaHH.
MoxnBa npuHa
ycyhenHH
Pyky aBtOMaTnHOrO BmKHeHHA DnHyHa He 3aJHO.
- y6aky Hemae nalbHoro.
-3a6nBcnaIbONpOBI.
- Porahe, 3a6pydHe a6o cTape naIbHe B 6ky.
-3a6nBcna nobitprnHn pInbTp.
-BNTaHyTo wTekep cBiuKn 3anaHOBaHH, npoBid 3anaHOBaHH noHaHO npKpInHeNo wTekepa.
- O6ropiB i30JrTop cbHKn 3anaIOBaHHa, a6o noWkoJxKeHa cama CBHka; HnepaBnIbHa BiCTaHb MIX eNeKtpoJamn.
Pyky aBTOMaTHHORO BUMKHeHHA DBNyHa NiTAYHtB Do pyKn KepyBaHHa TpMaHTe. ( 11.1)
-ДоинTe nablHe. ( 7.3)
- PpOuInCTbTe nAnBONpoBID.
- 3aBxKnBuKOpNCToBynte CbIXe
φipMOBe NaIbHe, HeeTnIOBaHn
6eH3n; NoNCTbTe
kap6IopaTop. I, X
- PpoNCTbTe NOBITpHn H pInbTp.
BCTaBTe 3wTekep CbiKn 3anaJIIOBaHHn, nepeBiPte 3'EDHaHHN MIX npoBODOM 3anaJIIOBaHHN Ta wTekepOM.
- PpOuNcTbTe a60 3aMihITb CbiKy 3aIaJIIOBaHHra, BiDperyIIOte BiCTaHb MIX eNEKTPoJaMn.
HecnpaBhCtB
BnHy BnTyPiuHbOro 3ropaHHBaKo 3anyckaETbcra, a0o Noro noTyXHiCTbYepe3 DeKn Yac 3MeHwYETbcra.
MoxnBa npuHa
- 3a6nBcKopnyc KocapKn.
BncoTa 3piaHHaama a6o WbNdkictb pyxy 3aBeNka dIBACTaHOBJBCOTn 3piaHHa.
- Y 6akДЯ nānbHoro a6o kaPbOpaTOp noTppanuna BODa; 3a6uBcra kaPbOpaTOp.
-3acmitubc86aknnanbHorO.
-3a6nbca NOBITpHnΦIbTp.
-ObropiB i0JrTOp CbiUKN 3anaIOBaHH.
ycyhenHH
-Почирък корпс коррк (BIMiTb wTeke CBiKN 3anaHOBaHHI). ( 12.1)
- YCTaHOIBiB 6iJIbIy BnCOTy 3pIaHHa 6o3MeHwTe WbNkicTb pyxy. ( 8.4)
CnpoxhItb6aknnaIbnHoro, noNCTbTe naINBONpOBIi kap6Iopatop.
- NocntbTe 6ak dna naIbHoro.
-NoocntbTe nobitprn fipnbtp.
- Nocntbte CBiKy 3anaIIOBaHH.
HecnpaBHCtB
DnHyBHyTpiHbOro3ropaHHdyKe HarpBaCTbcra.
MoxnBa npuHa
Hn3bKm pBeHb MaCTnay DnBnyHi BHyTpihhboro 3ropaHH.
-3a6pydHnInncpe6pa oxoJokKeHHa.
yCyHeHHH
- 3amHItb MOTOpHe MaCTnIO. ( 12.5)
-Nouchtepe6pa oxoJIOxEHH.( 12.1)
HecnpaBnictb
Ppnaad cnIbHO Bi6pye nIac poBoTn.
MoxnBa npuHa
- Pixyni 6nok noWkoJKeHn.
- Ocna6IkoKpInnEnHnDnRyHa BHyTpuiHbOro 3ropaHH.
yCyHeHHa
- Ipepebipte n 3a noTppe6n BiDpemOHryIte HIX KocapKn, HOXOBn BaI i KpinIIeHHHHOxKa (TBNHT KpinIIeHHHOxKa Ta 3axNCHy Wain6y).
-3aTnHtBnHTKnPinnneHHnDnHyHa BHyTpIiHbOrO 3ropaHH.
HecnpabHicTb
HeoxaHn 3pi3,ra3oH nicna cKOuBaHHK KOBKe.
MoxnBa npuHa
HixkocapK Tynn a6o 3HoWeHH.
- WbNdkicTb pyx3aBEnika nBCTaHOBHeoi BUCOTn 3pi3aHH.
Kopnyc ctoitb He npanenbHO do 3emni.
yCyHeHHa
HecnpabHictb (MB 2 RT)
Kocapka He nouHaε pyxaTncb, KOJI 3aɪjHo pyUkPyuɪHOrO npɪBODy.
MoxnBa npuHa
TpocnkpyuHoro npnBOy noKoKeHH (hanpknad, TpiHyB).
ycyhenHH
-3amHItbTpOcNk.

Lugupeetud klien
Tāname teid, et valisite VIKINGi kvaliteettoote.
Hoidke seadet tookorras.
4.9 Jäätmekäitlus
MB 2.2 RC, MB 2.2 RT:
Mödetud muratase: 92,5 dB(A)
Garanteeritud müratase: 94 dB(A)
Langkampfen, 2015-01-02 (AAAA-KK-PP)
VIKING GmbH
Mootori tuup B&S Series 450
Nimivoimsus 1,6-2900