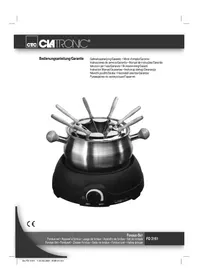
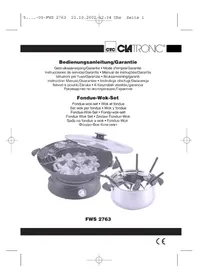
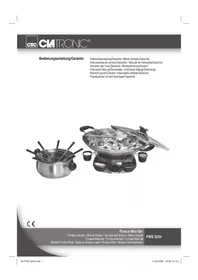
DM 3127 - Fondue, raclette and wok appliance CLATRONIC - Free user manual and instructions
Find the device manual for free DM 3127 CLATRONIC in PDF.
User questions about DM 3127 CLATRONIC
0 question about this device. Answer the ones you know or ask your own.
Ask a new question about this device
Download the instructions for your Fondue, raclette and wok appliance in PDF format for free! Find your manual DM 3127 - CLATRONIC and take your electronic device back in hand. On this page are published all the documents necessary for the use of your device. DM 3127 by CLATRONIC.
USER MANUAL DM 3127 CLATRONIC
natural_image
Exterior view of a modern office building (no signage)CE
DONUT-MAKER
Donutmaker • Donut-Maker • Donut Maker • Donut-Maker • Macchina per fare i donut Donutmaskin • Doughnuts maker • Urządzenie do pieczenia pączków Stroj na výrobu kobiih donut • Amerikai fánk sütő • Устройство для изготовления пончикów
DM 3127
D-47906 Kempen/Germany
General Safety Instructions
Read the operating instructions carefully before putting the appliance into operation and keep the instructions including the warranty, the receipt and, if possible, the box with the internal packing. If you give this device to other people, please also pass on the operating instructions.
- The appliance is designed exclusively for private use and for the envisaged purpose. This appliance is not fit for commercial use. Do not use it outdoors (except if it is designed to be used outdoors). Keep it away from sources of heat, direct sunlight, humidity (never dip it into any liquid) and sharp edges. Do not use the appliance with wet hands. If the appliance is humid or wet, unplug it immediately.
- When cleaning or putting it away, switch off the appliance and always pull out the plug from the socket (pull on the plug, not the cable) if the appliance is not being used and remove the attached accessories.
- Do not operate the machine without supervision. If you should leave the workplace, always switch the machine off or remove the plug from the socket (pull the plug itself, not the lead).
- Check the appliance and the cable for damage on a regular basis. Do not use the appliance if it is damaged.
- Do not try to repair the appliance on your own. Always contact an authorized technician. To avoid the exposure to danger, always have a faulty cable be replaced only by the manufacturer, by our customer service or by a qualified person and with a cable of the same type.
- Use only original spare parts.
- Pay careful attention to the following "Special Safety Instructions".
Children and Frail Individuals
- In order to ensure your children's safety, please keep all packaging (plastic bags, boxes, polystyrene etc.) out of their reach.

WARNING!
Caution! Do not allow small children to play with the foil as there is a danger of suffocation!
- In order to protect children or frail individuals from the hazards of electrical equipment, please ensure that this device is only used under supervision. This device is not a toy. Do not allow small children to play with it.
Symbols in these Instructions for Use
Important information for your safety is specially marked. It is essential to comply with these instructions in order to avoid accidents and prevent damage to the machine:

WARNING:
This warns you of dangers to your health and indicates possible injury risks.

CAUTION:
This refers to possible hazards to the machine or other objects.

NOTE: This highlights tips and information.
Special safety notes
- Do not operate the device with an external timer or separate remote control system.
- Place the device on a non-slip, heat resistant and easy-to-clean surface!
- In order to prevent heat from building up, do not put the unit directly underneath a cupboard. Ensure that there is enough space all around.
- Do not move the device when it is working.
- Beware of any steam coming out of the sides of the device during the baking process and when opening the baking surfaces. Danger of burns!
- For this reason you should never use the device near or below curtains and other combustible materials!
- Please ensure that the mains lead does not come into contact with the hot sections of the device.
- Do not touch the hot parts of the device. If necessary, you should use an oven cloth and hold the device only by the handle or the recessed grip.
- Allow the device to cool down before cleaning it and putting it away.
Before Initial Use

CAUTION:
In order to remove the protective coating on the heating coil you should operate the device approximately three times without any food inside.

NOTE:
Any smoke or smells produced during this procedure are normal. Please ensure sufficient ventilation.
Starting-up the unit
Non-stick coating
- Lightly grease the baking surfaces before the unit is used for the first time.
- Use the appliance for about 10 minutes with the toasting surfaces closed (see „Using the unit“).
- Remove the mains plug from the socket and allow the device to cool down. Then wipe it down with a damp cloth.
• The first doughnuts should not be eaten.
Using the unit
- Please unwind the lead completely.
- Electrical connection
Insert the plug in a duly installed 230 V/50 Hz protective contact socket. The red mains control lamp lights up. - Keep the baking surfaces closed while heating. When the green control lamp lights up the baking temperature has been reached.
- Release the lid catch and fold the lid up until it remains open. Place approx. 1 level tablespoon of mixture into each section of the lower baking surface. Filling should be carried
out quickly as otherwise the doughnuts will not become evenly brown.
i NOTE:
- Do not put in too much mixture or mixture that is too liquid as otherwise excessive steam and possibly also mixture may be expelled in the area of the baking surfaces.
- You should only put in (additional) mixture when the green control lamp is on. This will produce better baking results.
-
The doughnuts will always be browner on the underside than on the top. This is because the mixture is first baked from the bottom and the top is only baked after the mixture has risen.
-
Please ensure that you measure in the quantity of dough correctly, as excess dough runs over the edges and soils the device. Gently close the cover. Close the lid catch.
- The green control lamp switches on and off during baking in order to maintain the baking temperature. Allow the doughnuts to bake for only 3-4 minutes in the device. The baking time depends on your individual taste. The longer the doughnuts remain in the device, the greater the level of browning.
- Open the lid catch carefully and then fold up the lid. The doughnuts can be gently lifted at the sides with suitable wooden or plastic cutlery and then removed with a spatula or similar device. Do not use pointed or sharp objects to avoid damaging the coating of the baking surfaces.
- Lightly grease the baking surfaces again as required after each baking process.
- The baking surfaces must always be kept closed during pauses in the baking.
Switching Off
If you would like to interrupt operation or switch the device off, remove the plug from the socket. The red control lamp goes off.
Cleaning & maintenance
- Pull out the mains plug and allow the unit to cool down.
- Brush off the crumbs or residues from the baking surfaces and the edges.
- The entire device should only be cleaned with a slightly damp cloth.
- Do not use abrasive detergents.
- The machine must never be immersed in water!
Recipe for approx. 10 Portions (10 x 6 Doughnuts)
260g fl our, 1 packet of baking powder, 130g sugar, 1 packet of vanilla sugar, 250ml milk, 3 eggs, 5 tablespoons of oil, 1 pinch of salt, 30g icing sugar
- Stir the fl our, baking powder, sugar, vanilla sugar, milk, eggs, oil and salt to form a smooth mixture.
- Prepare the mixture as described and sprinkle the finished doughnuts with icing sugar.
You can also add ground nuts, cocoa powder, grated chocolate or chopped almonds to the mixture. If the mixture becomes too solid when the above items are added you can also pour in a little milk. The icing sugar can also be made into a glaze with lemon or cherry juice before being coated on to the doughnuts.
Technical Data
Model: DM 3127
Power supply: 230 V, 50 Hz
Power consumption: 800 W
Protection class:....I
Net weight: 1,4 kg
This device has been tested according to all relevant current CE guidelines, such as electromagnetic compatibility and low voltage directives, and has been constructed in accordance with the latest safety regulations.
Subject to technical changes without prior notice!
Guarantee
The device supplied by our Company is covered by a 24 month guarantee starting on the date of purchase (receipt).
During the life of the guarantee any fault of the device or its accessories ascribable to material or manufacturing defects will be eliminated free of charge by repairing or, at our discretion, by replacing it. The guarantee services do not entail an extension of the life of the guarantee nor do they give rise to any right to a new guarantee!
Proof of the guarantee is provided by the proof of purchase. Without proof of purchase no free replacement or repair will be carried out.
If you wish to make a claim under the guarantee please return the entire machine in the original packaging to your dealer together with the receipt.
Defects to consumables or parts subject to wearing as well as cleaning, maintenance or the replacement of said parts are not covered by the guarantee and hence are to be paid!
The guarantee lapses in case of unauthorized tampering.
After the expiry of the guarantee
After the expiry of the guarantee repairs can be carried by the competent dealer or repair service against the payment of the ensuing costs.
Meaning of the "Dustbin" Symbol
Protect our environment: do not dispose of electrical equipment in the domestic waste.
Please return any electrical equipment that you will no longer use to the collection points provided for their disposal.
This helps avoid the potential effects of incorrect disposal on the environment and human health.
This will contribute to the recycling and other forms of reutilisation of electrical and electronic equipment.
Information concerning where the equipment can be disposed of can be obtained from your local authority.